Search the Community
Showing results for tags 'xpenology'.
-
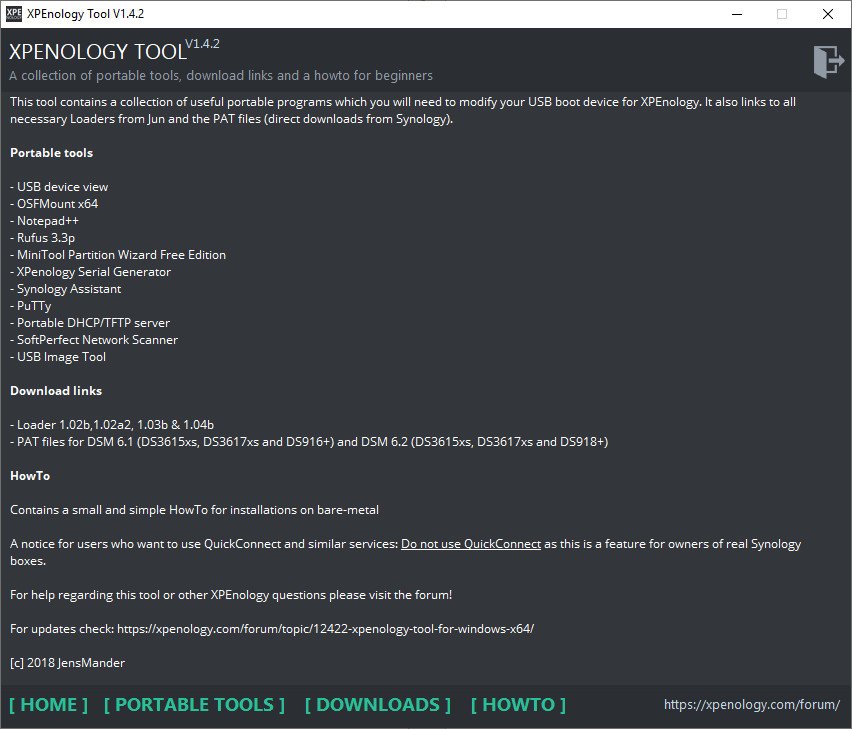
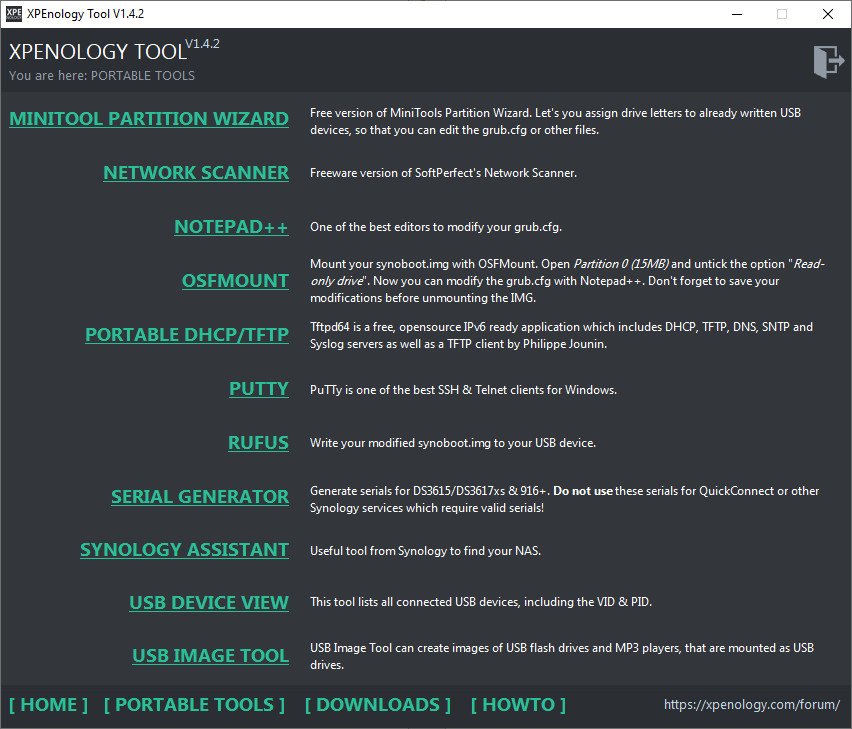
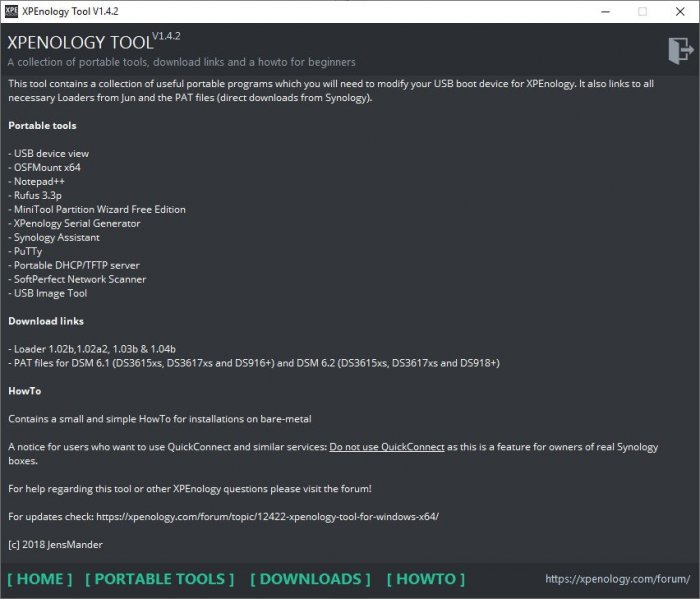
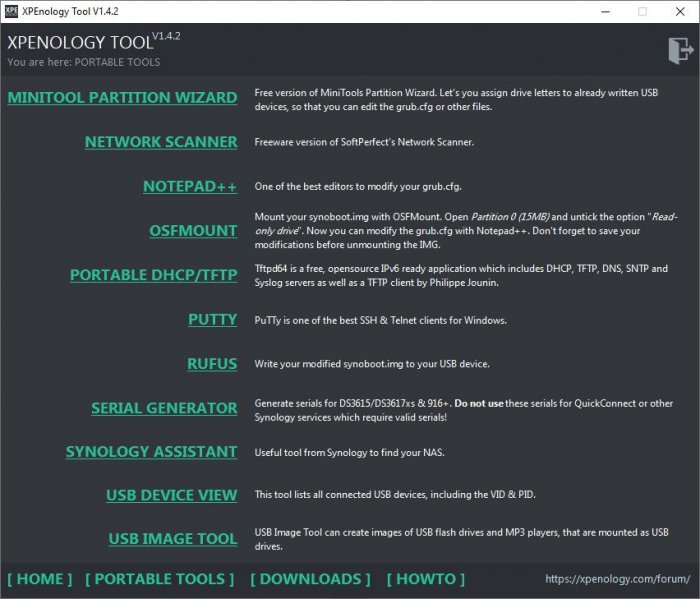
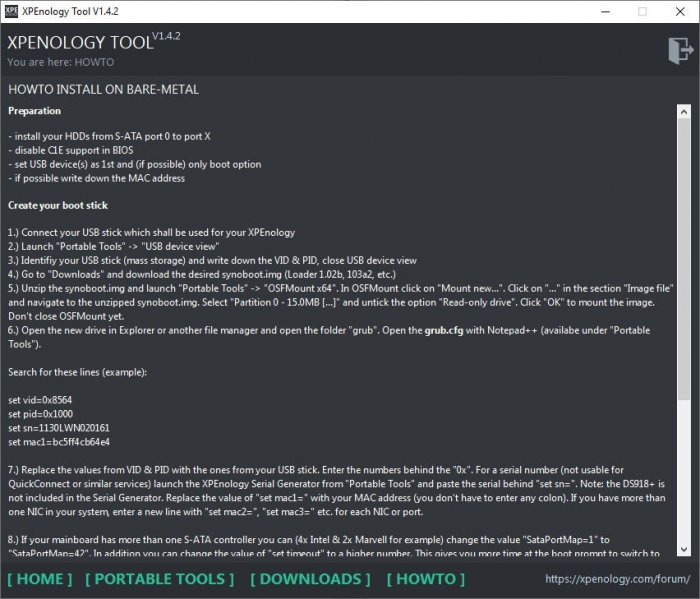
Hi! I made a little tool which can help you to get your XPEnology up & running without installing any software. It contains (as portable versions): - Nirsoft's USB device view (helps to identify the VID & PID of your USB boot media) - V2.76 - XPEnology Serial Generator for DS3615XS, DS3617XS and DS916+ (a converted version of the HTML site) - Win32 DiskImager (to write your modified synoboot.img to your USB boot media) - V1.0 (only available in V1.4.1) - OSFMount x64 (to mount the synoboot.img and modifiy it) - V1.5 - Notepad++ (best editor for changing values inside grub.cfg) - V7.5.3 - Synology Assistant (useful tool from Synology to find your XPEnology and install DSM) - V6.2-23733 - TFTP/DHCP portable (a small TFTP, DHCP and Syslog server by Ph. Jounin) - V4.6.2 - MiniTool Partition Wizard 10 (helps assigning already formatted/written USB devices to modify existing grub.cfg) - V10.3 - SoftPerfect Network Scanner - V6.2.1 - USB Image Tool - V1.75 - New: Rufus - V3.3 In the section "Downloads" all links open corresponding websites to download the files. For beginners I added a small HowTo for bare-metal installation. Update New link for download: https://mega.nz/#F!BtViHIJA!uNXJtEtXIWR0LNYUEpBuiA The download link/folder also contains @IG-88's extra.lzma (V0.6) for the DS918+. You'll have to run it "As Administrator" because some of these tools (like Win32 DiskImager) need to be executed with higher rights. It's possible that the SmartScreen filter will give you a warning, because the EXE isn't signed. Bug reports and comments are welcome Cheers Current version: V1.4.2 (2018-11-19)

- 136 replies
-
- 53
-

-

-
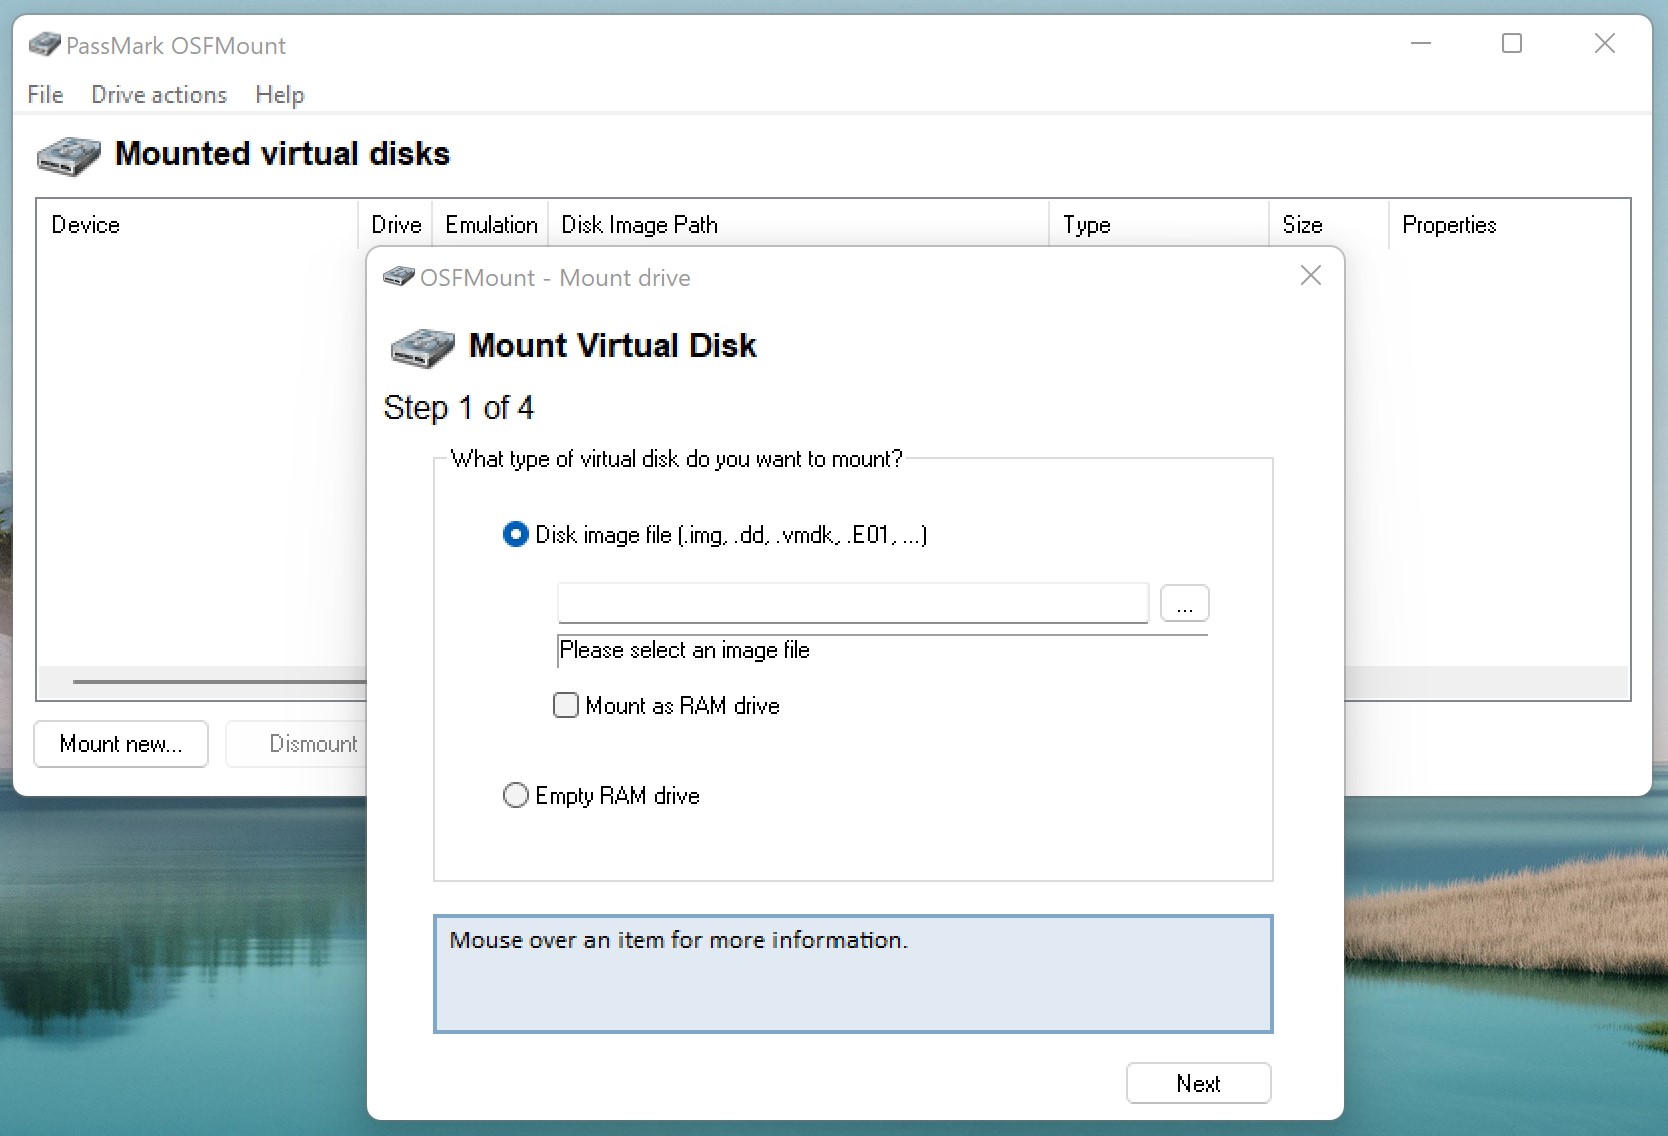
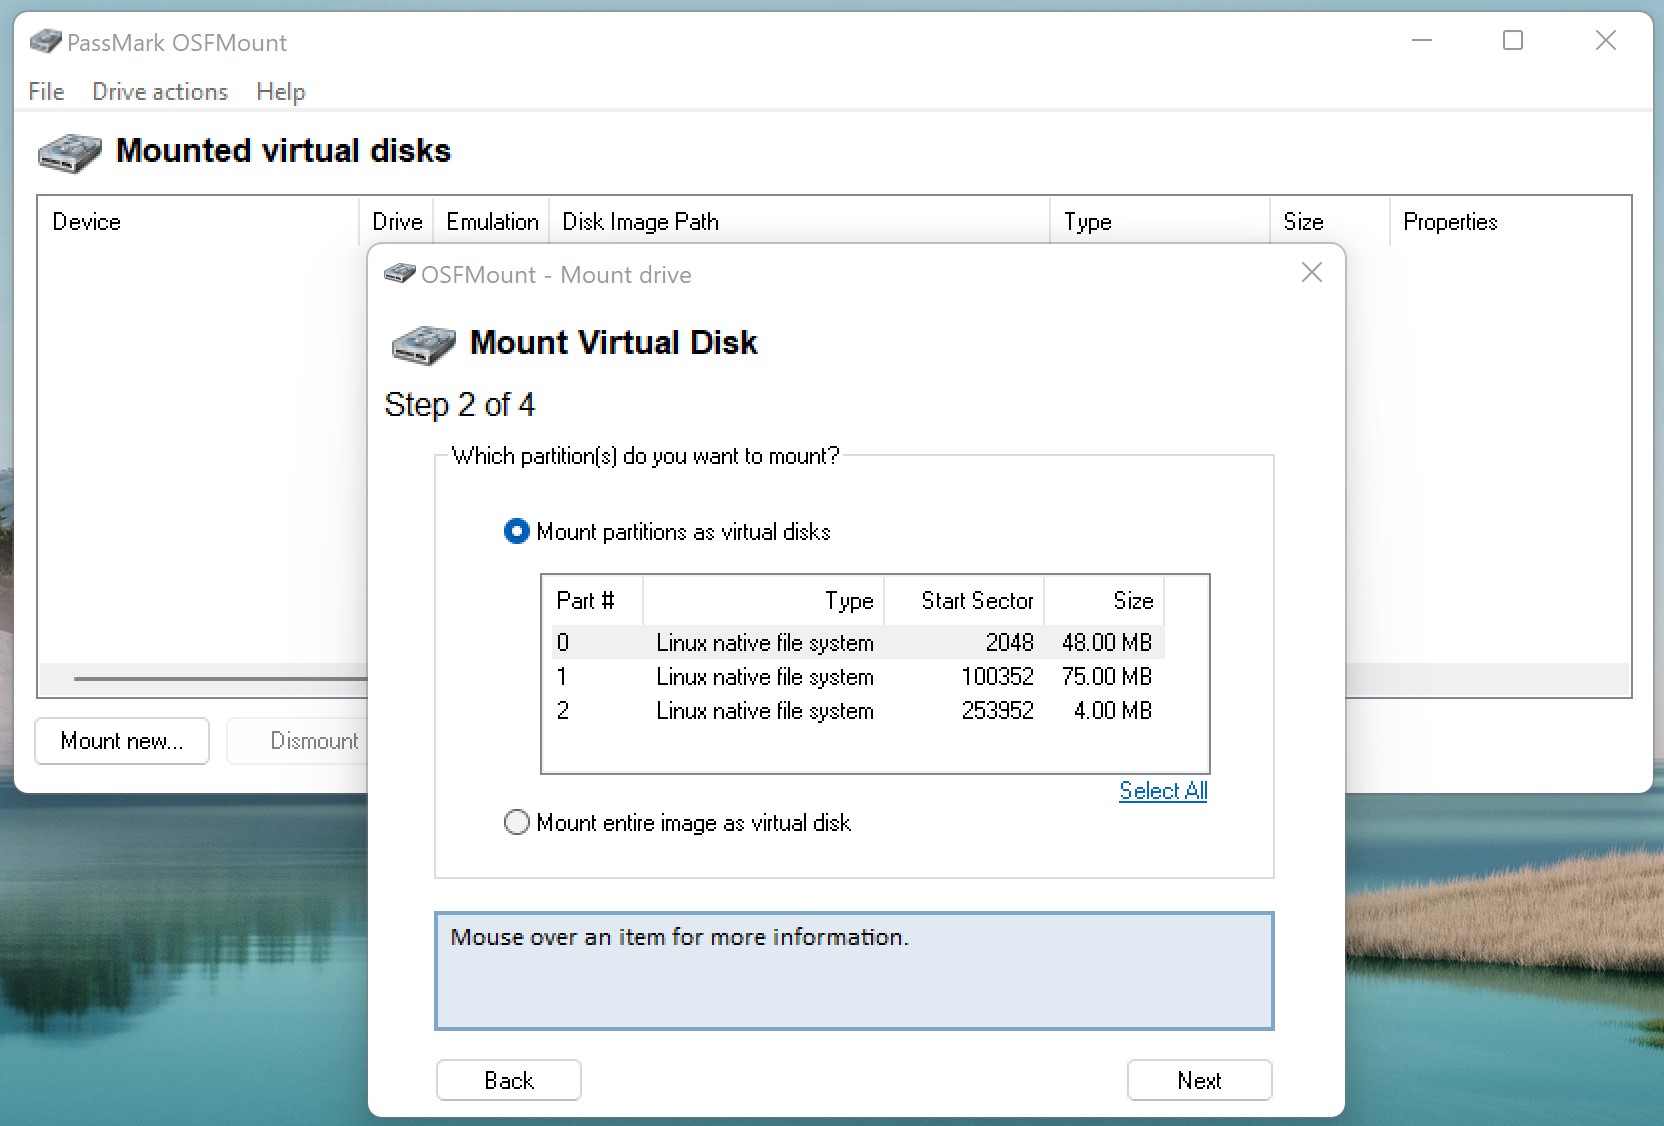
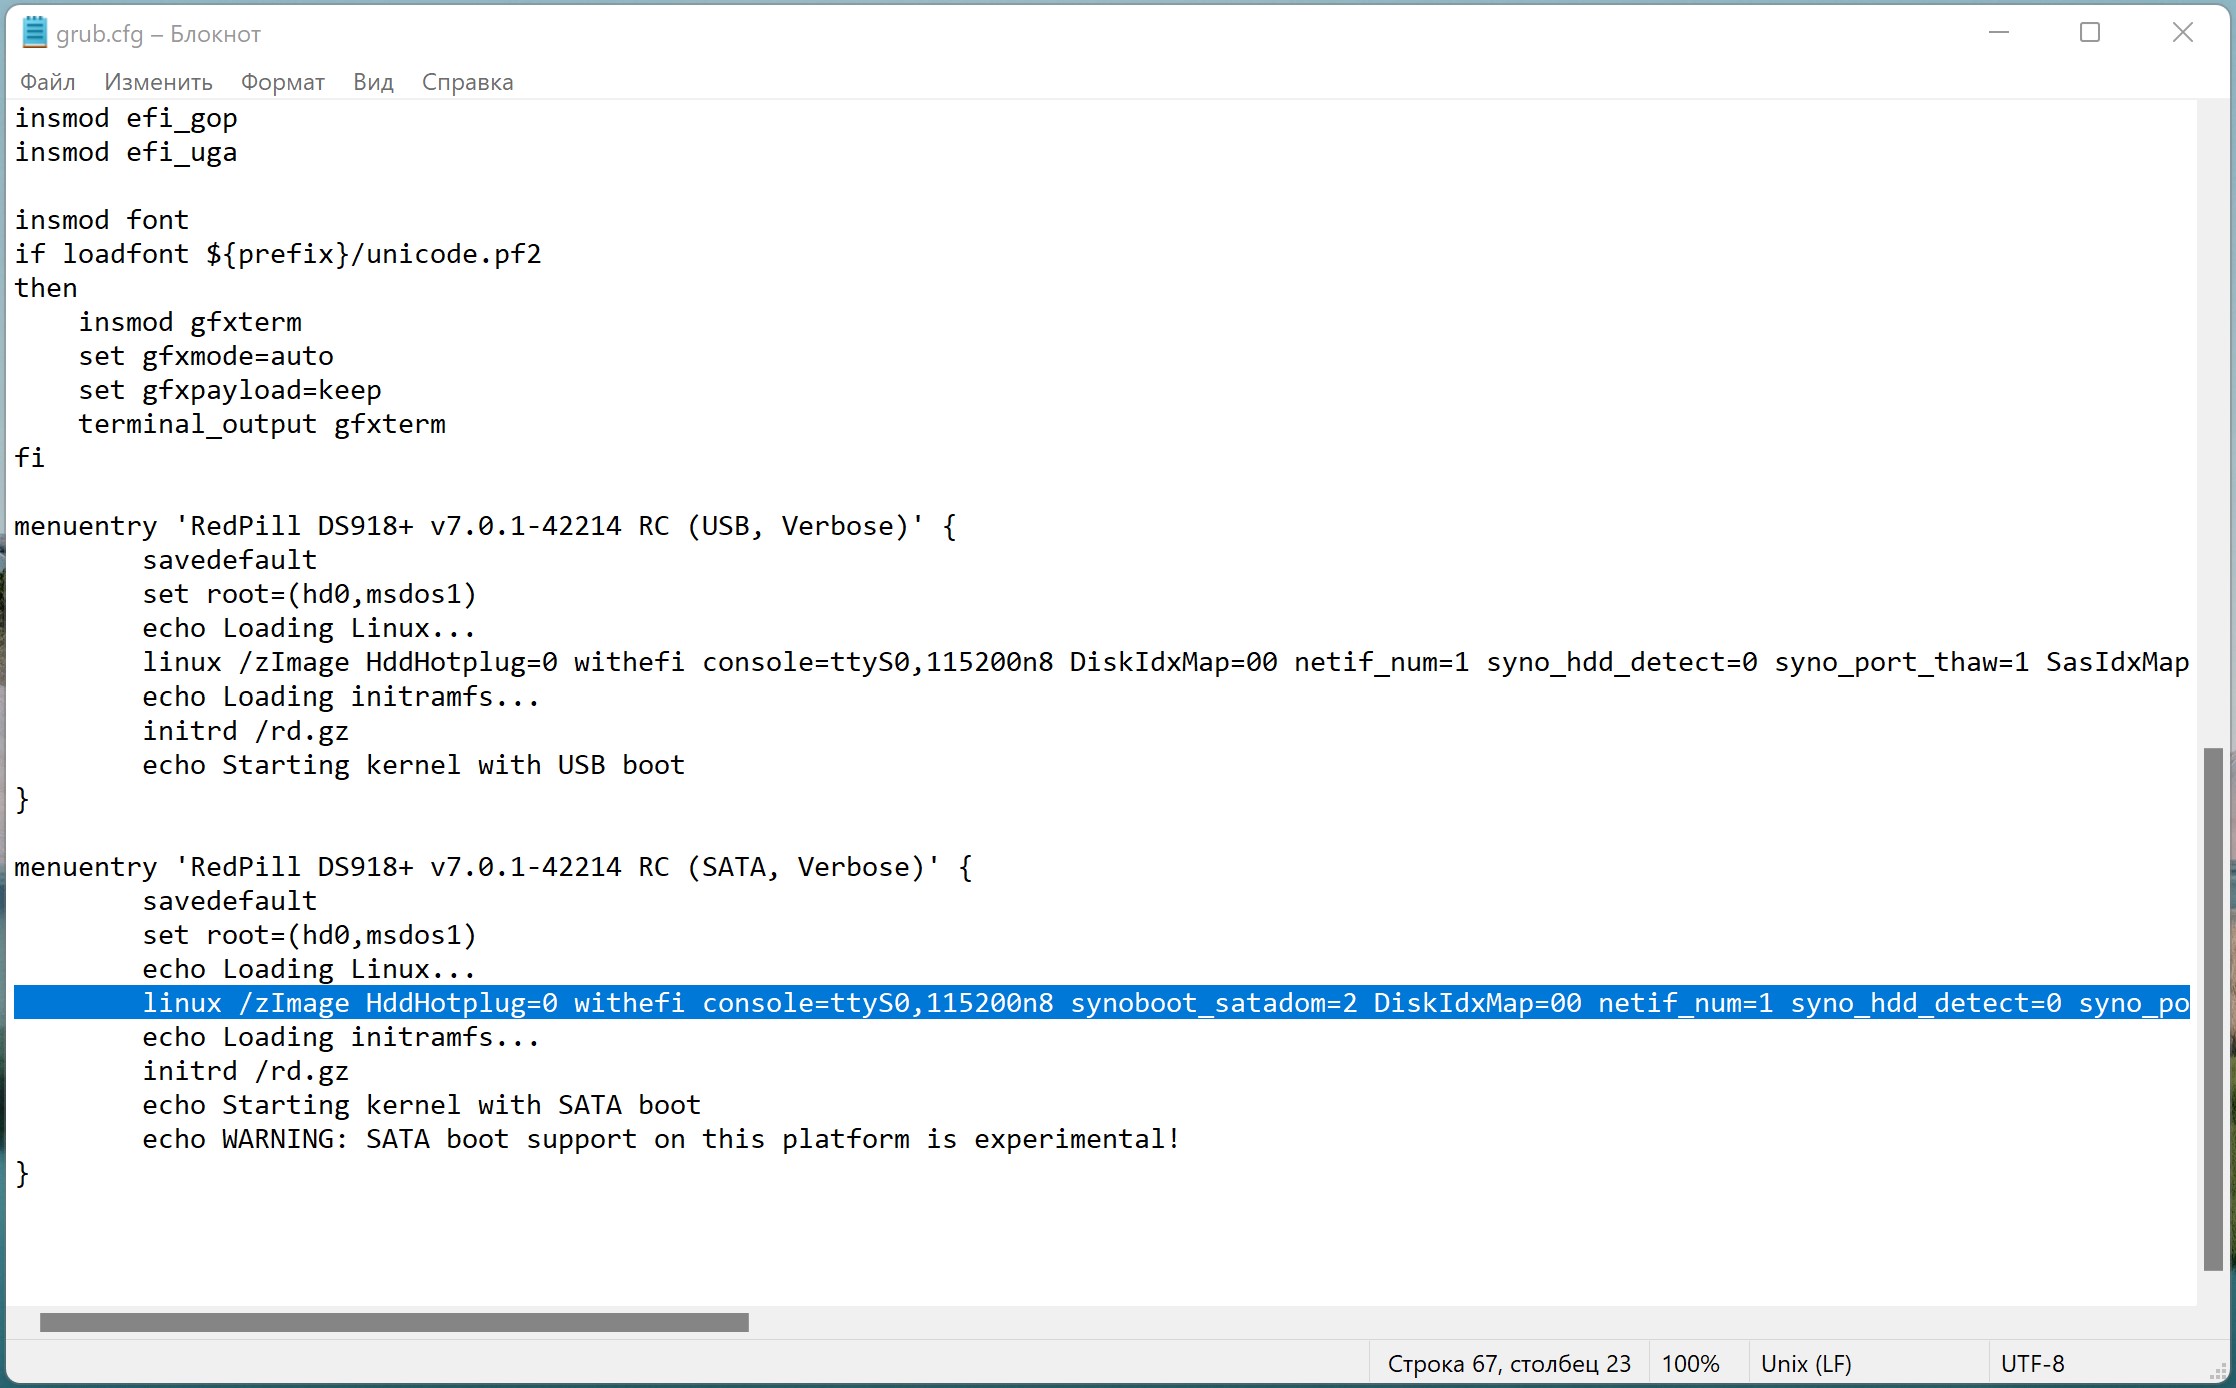
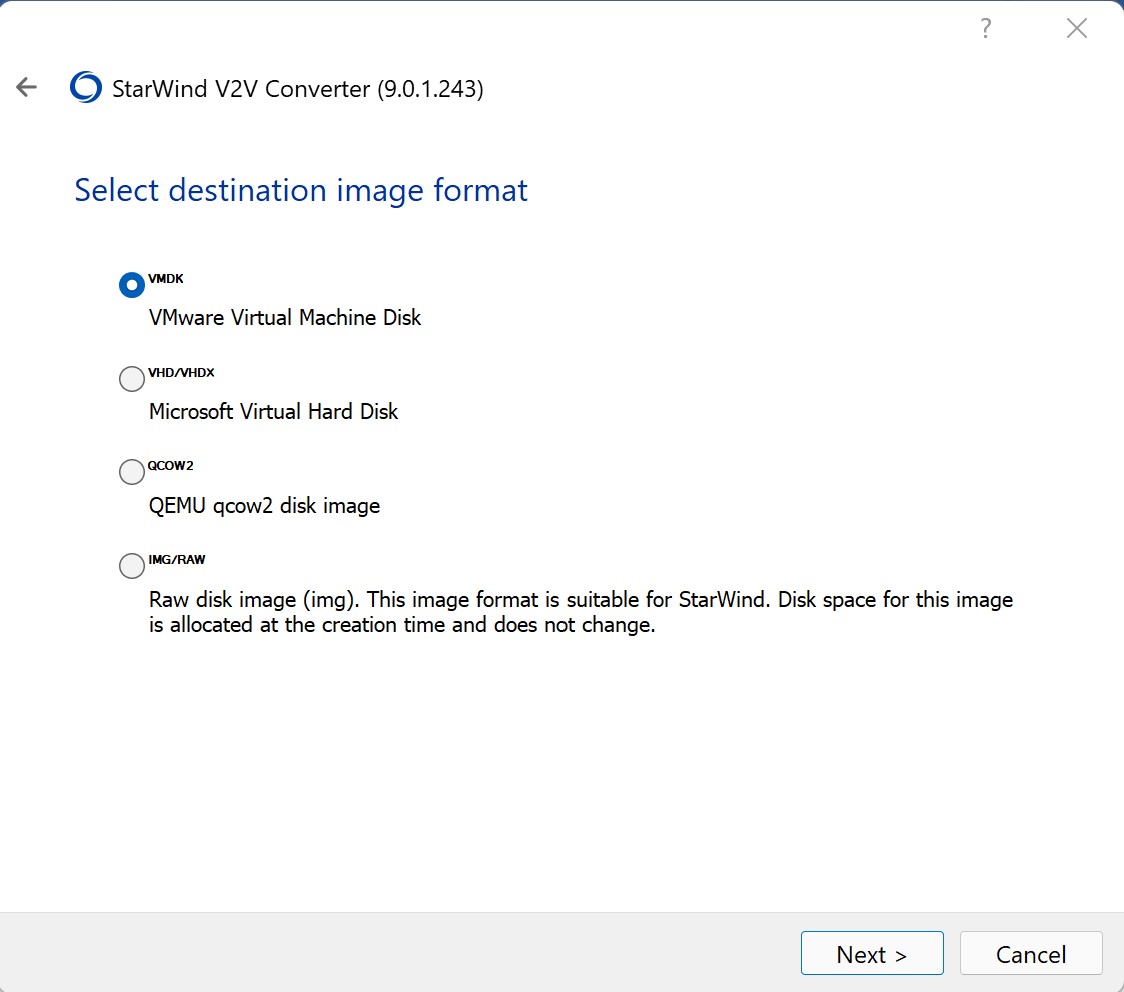
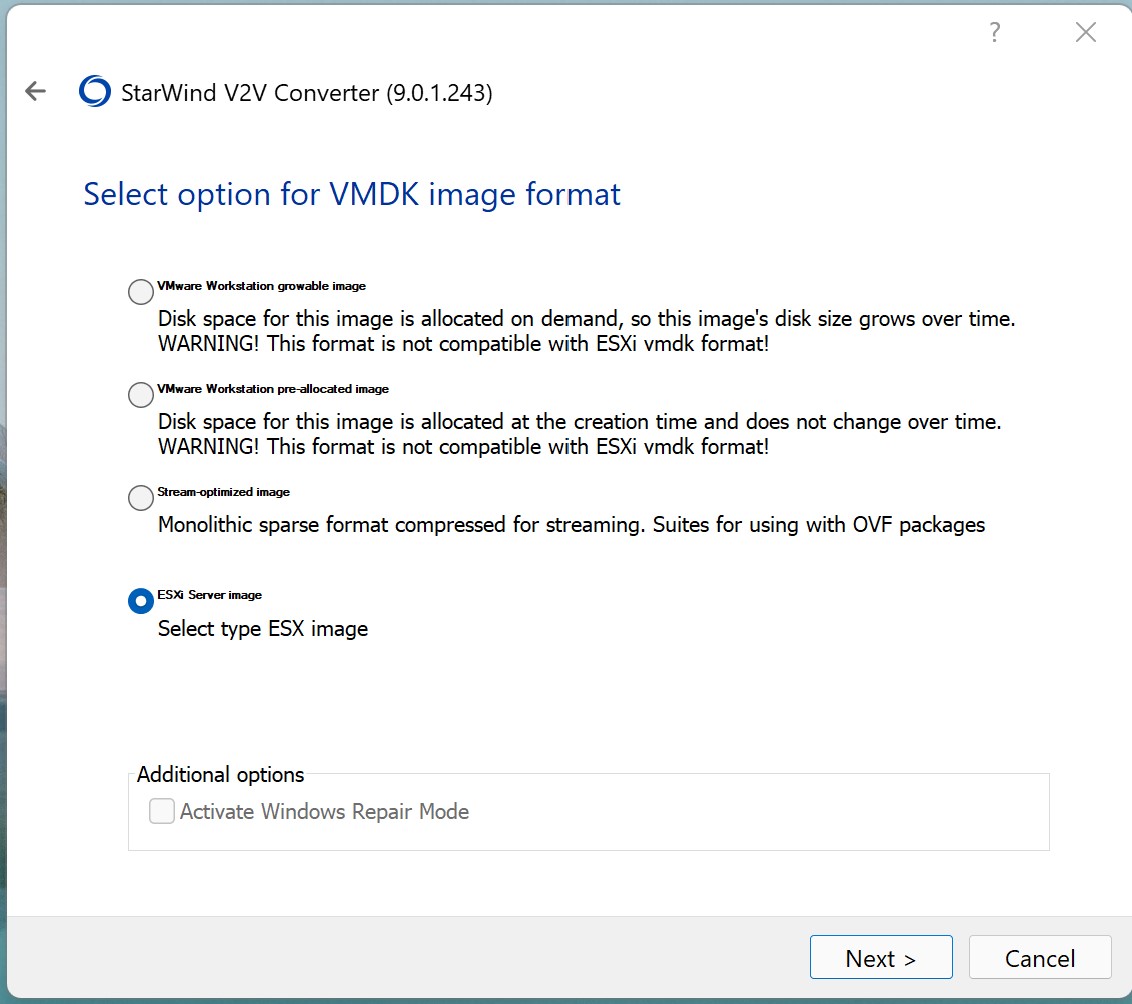
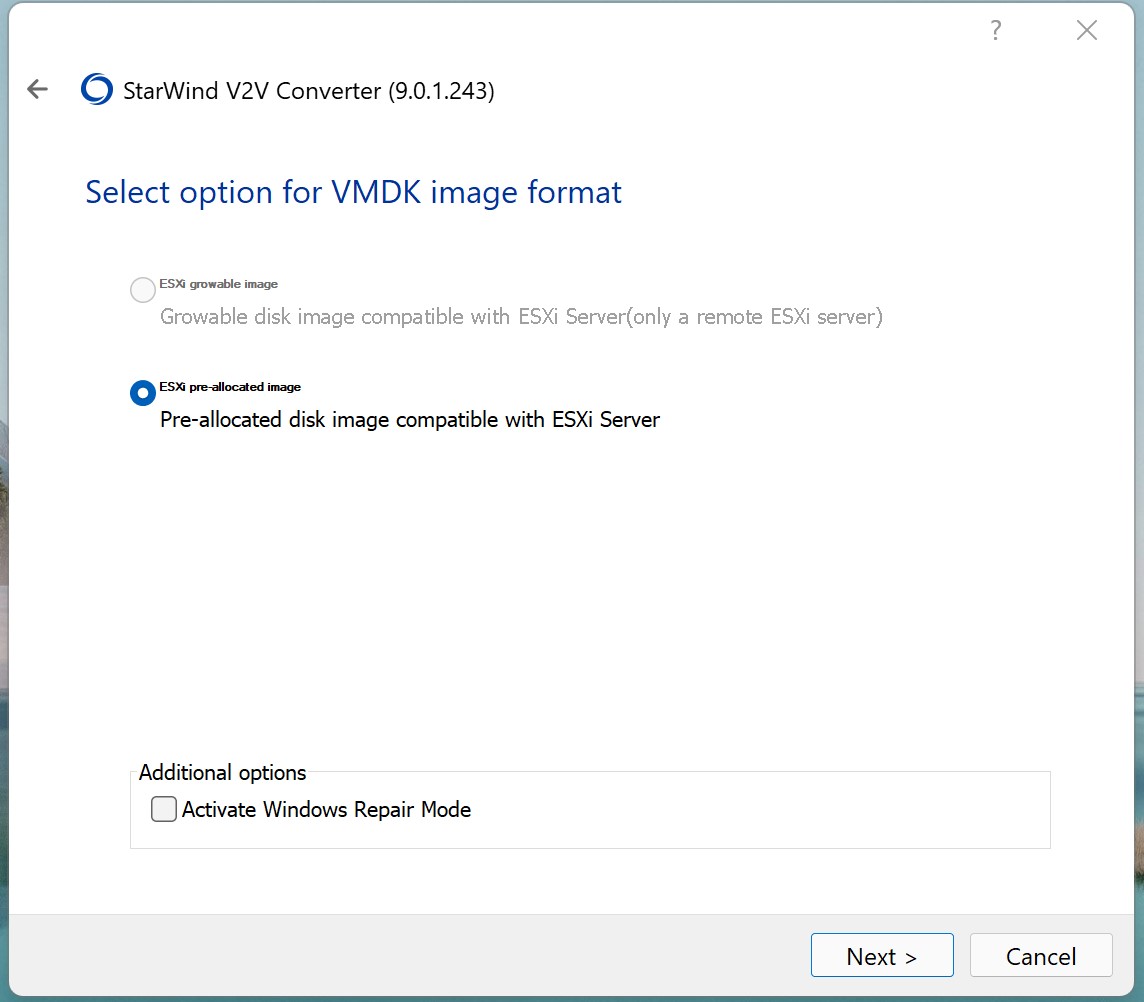
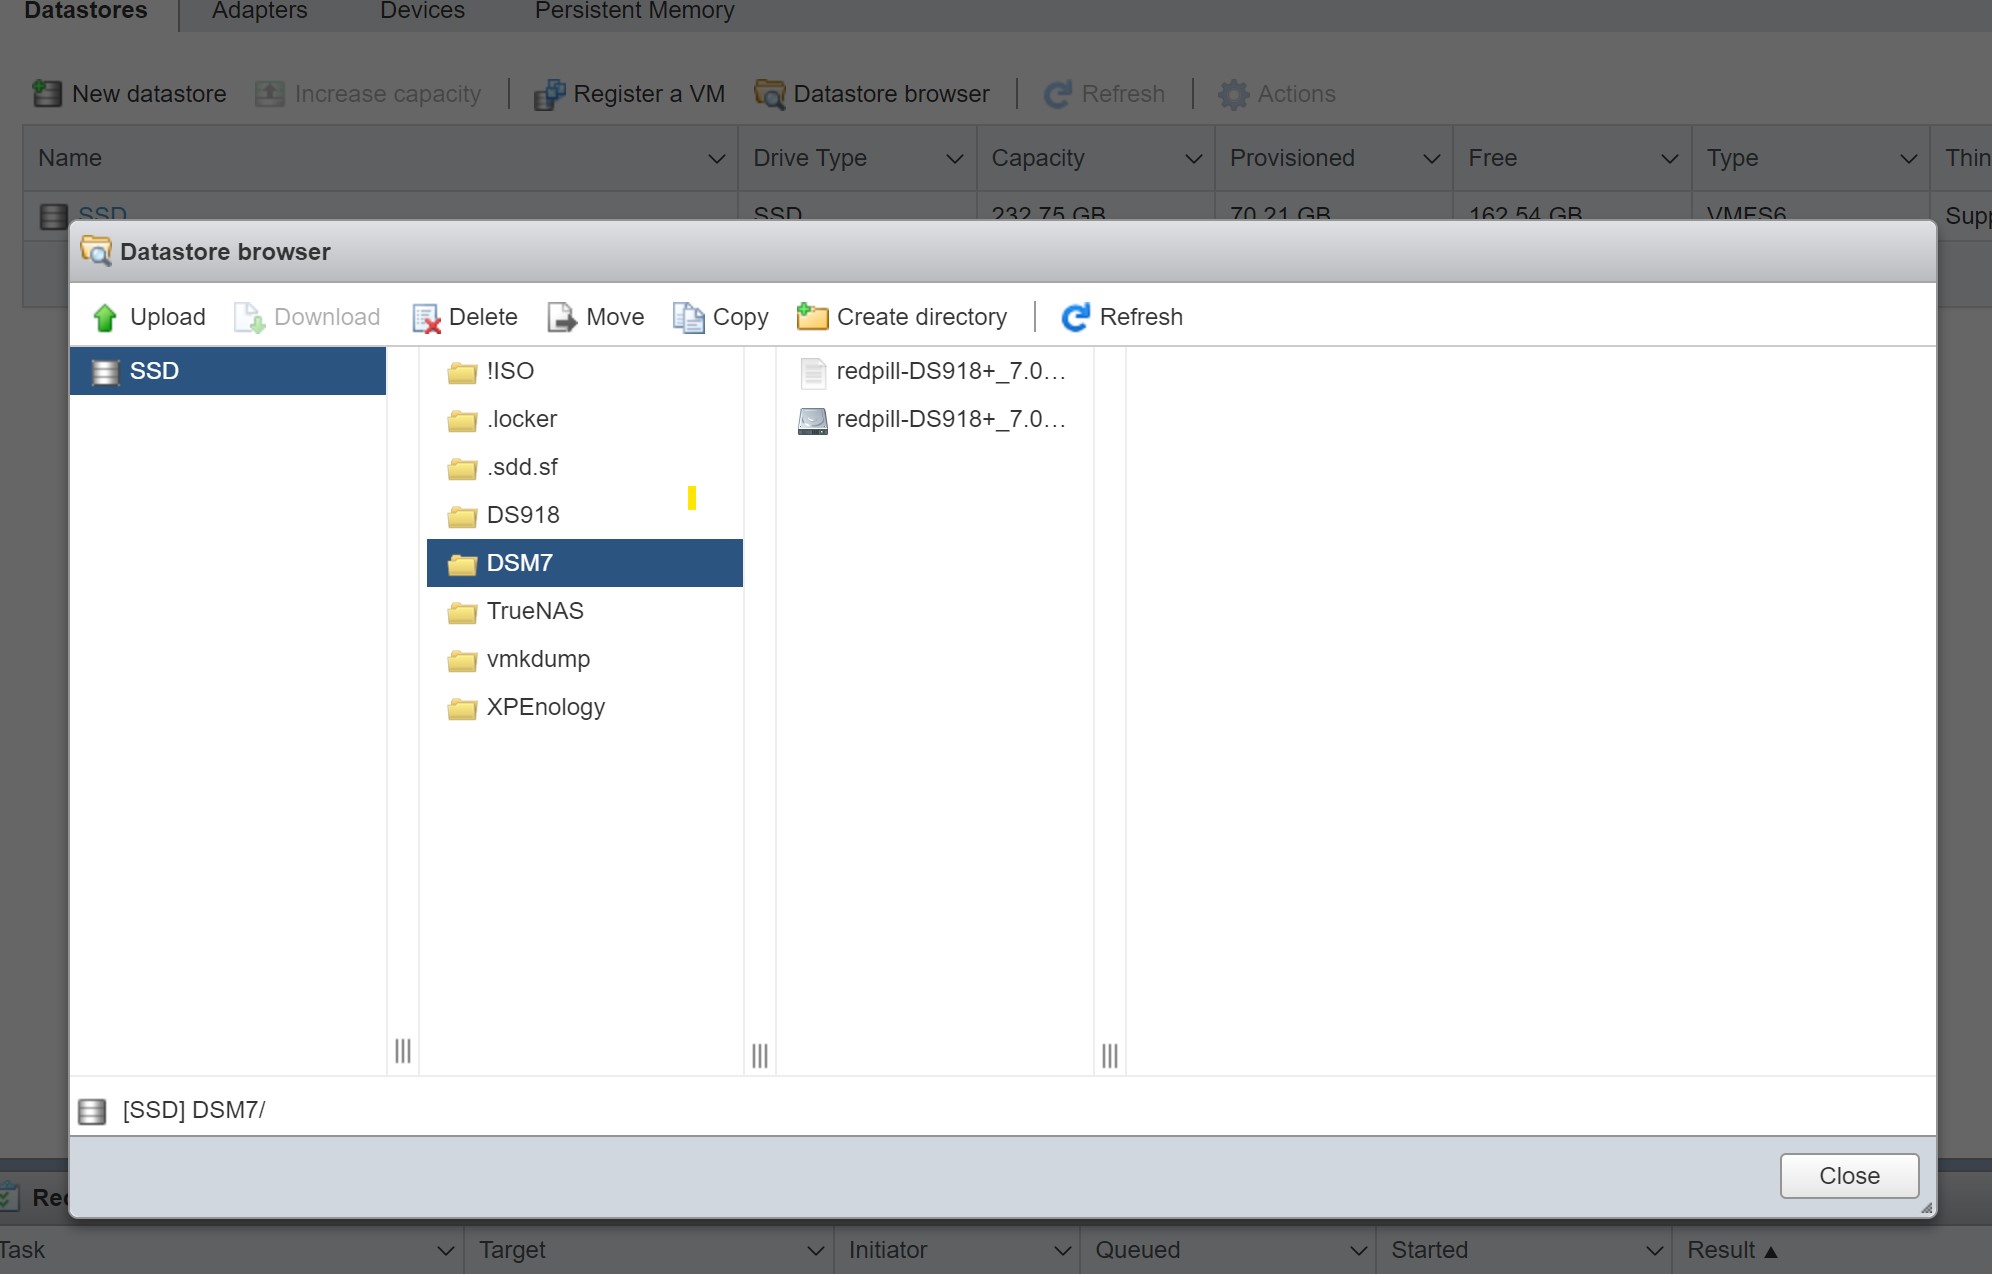
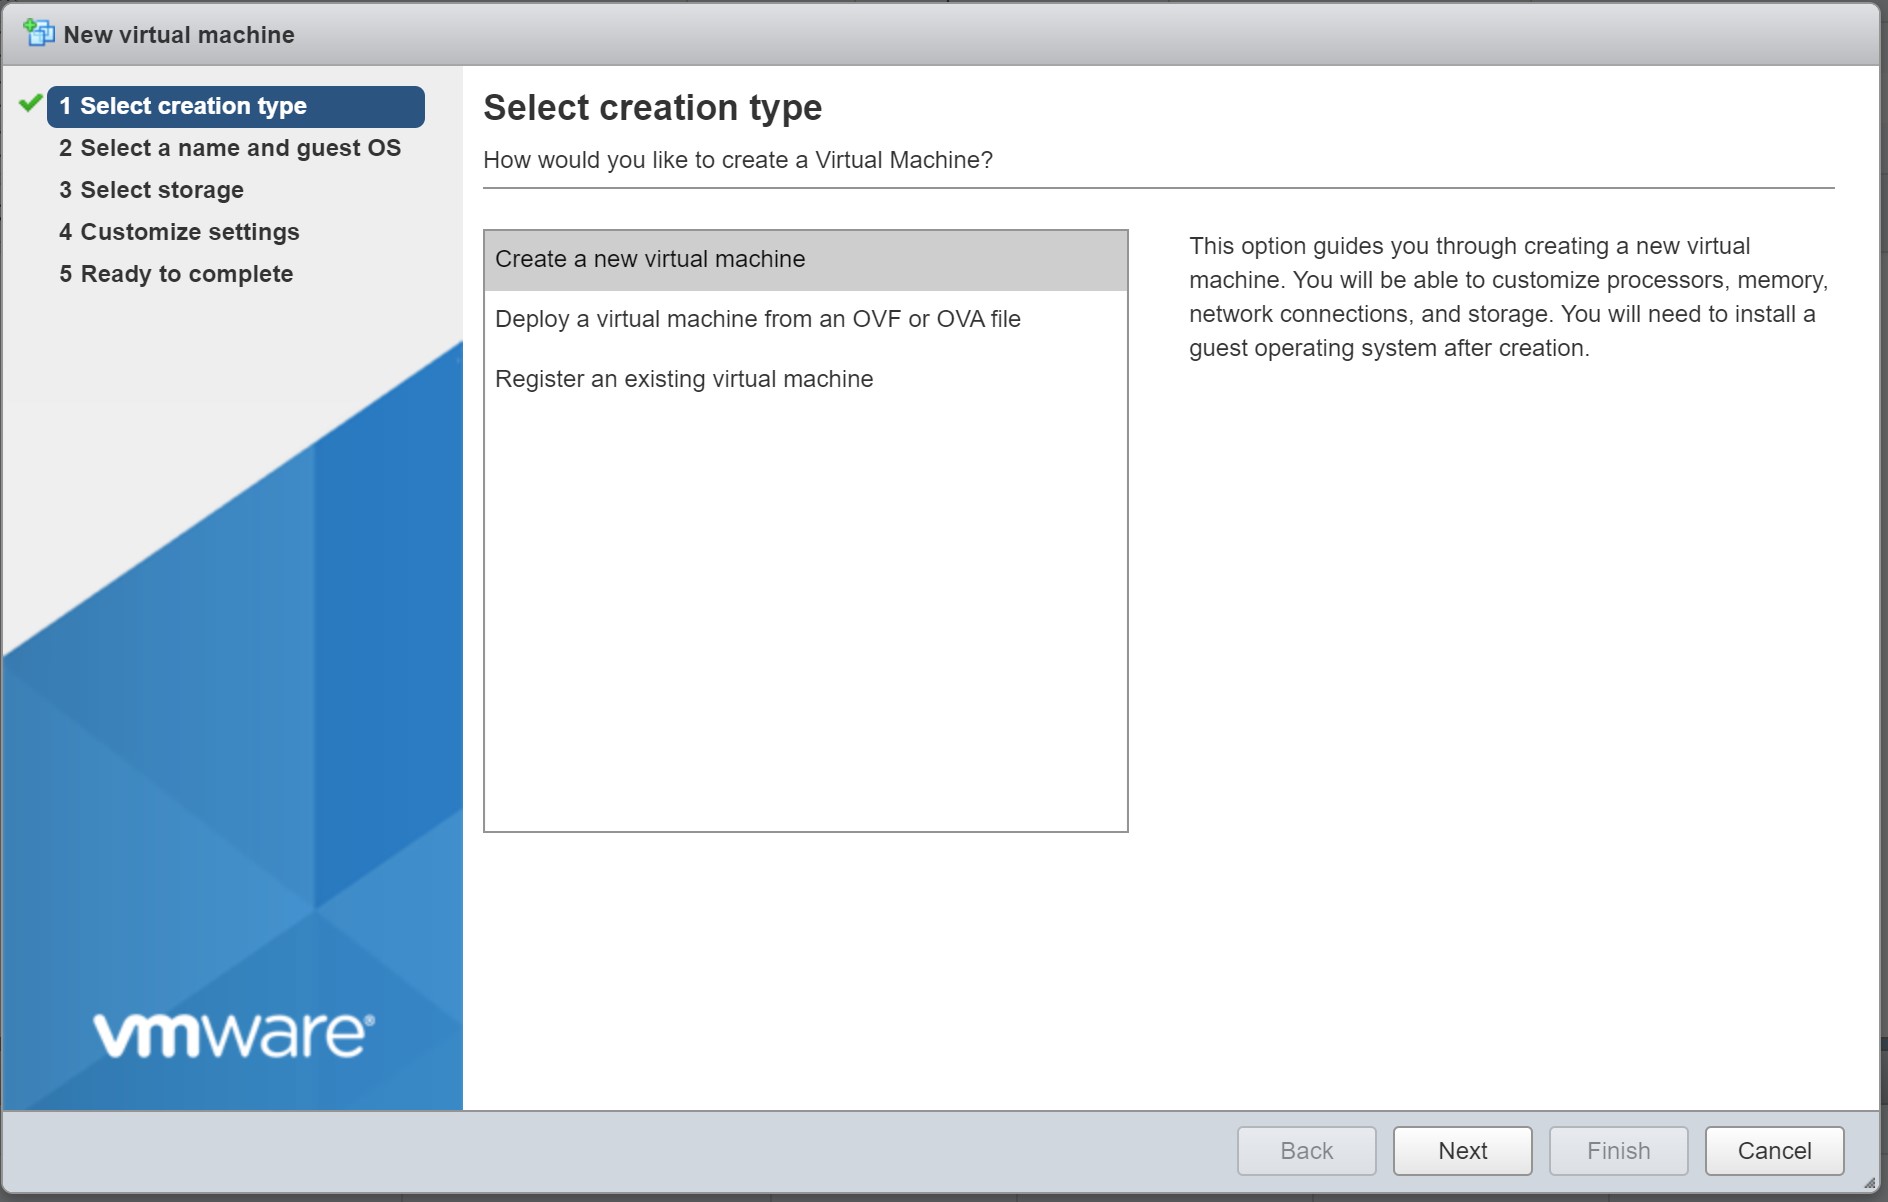
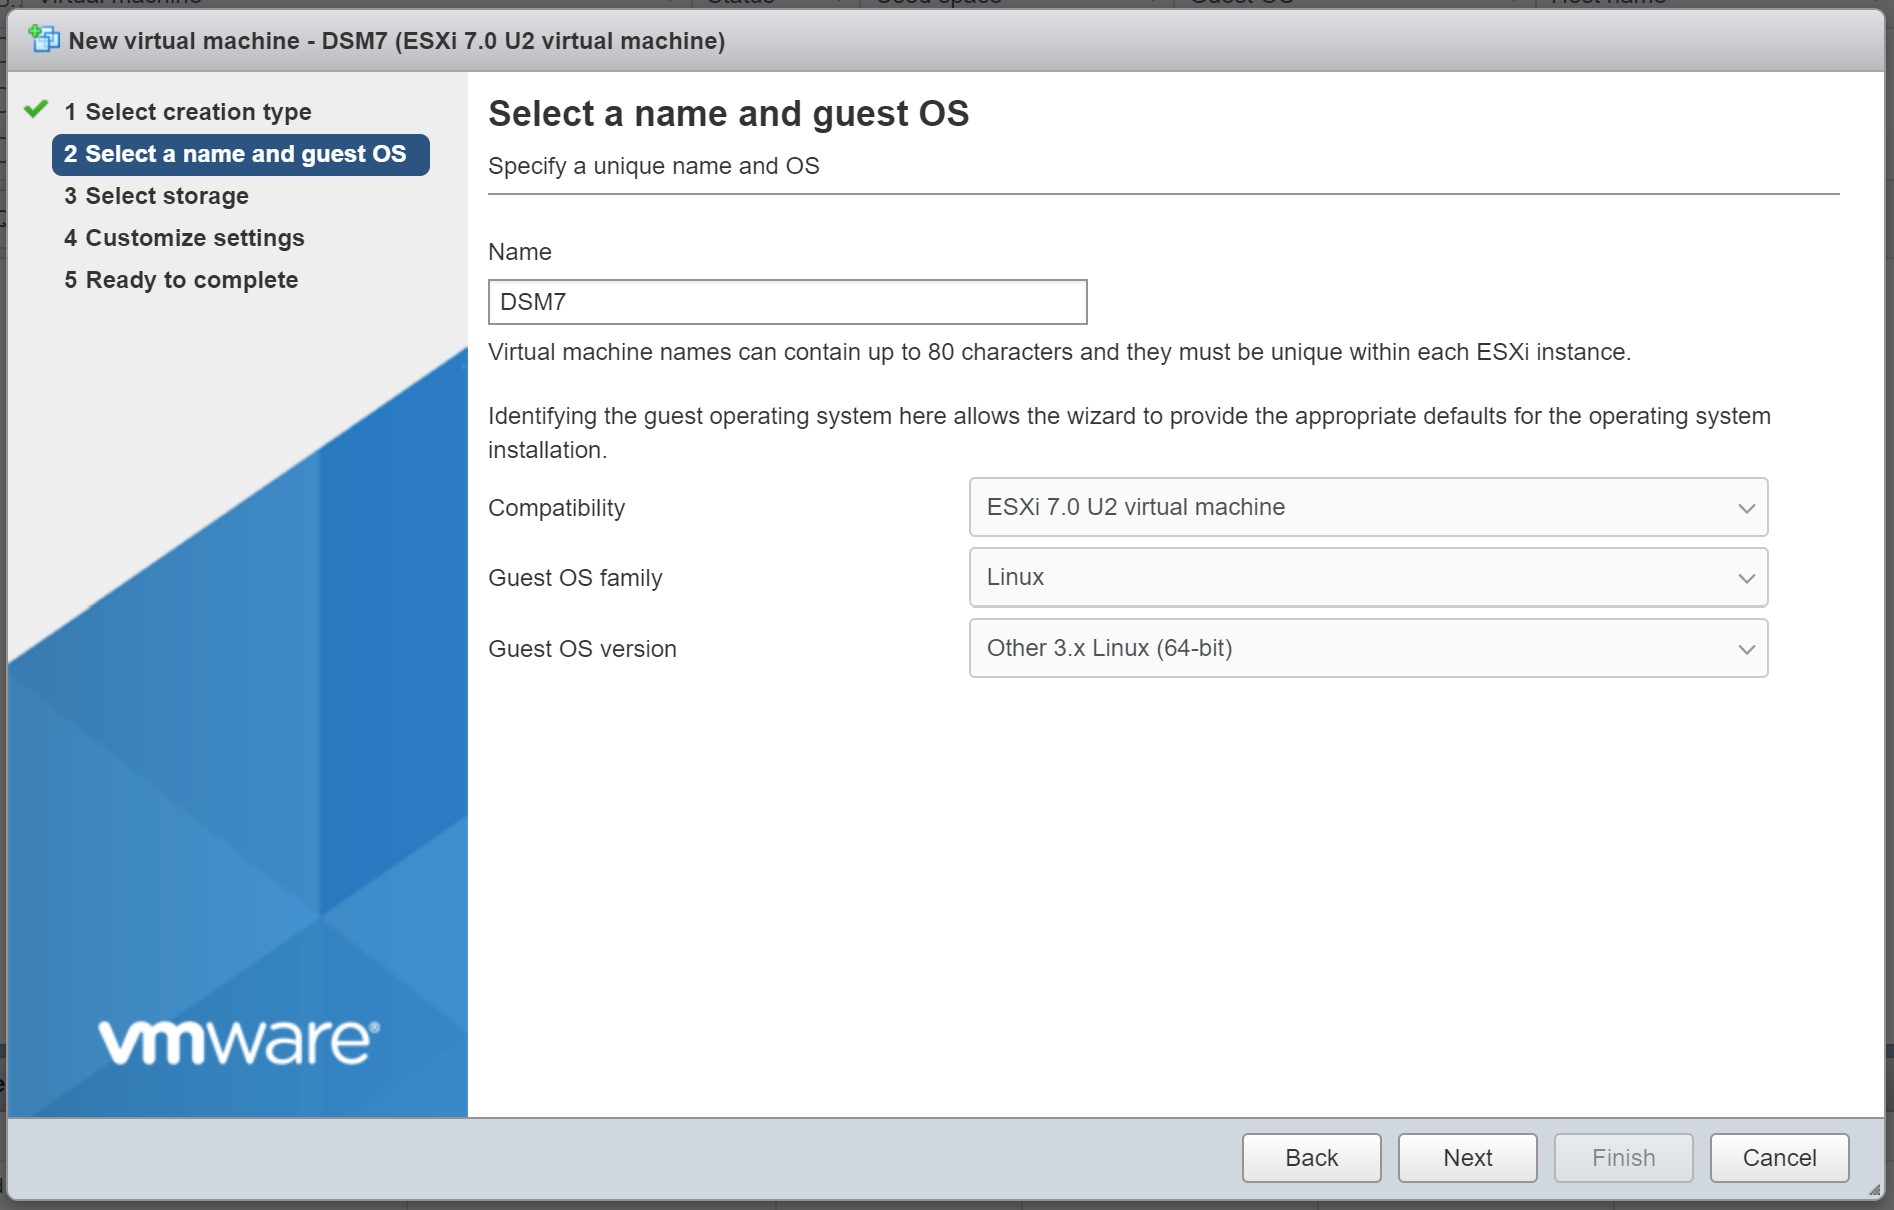
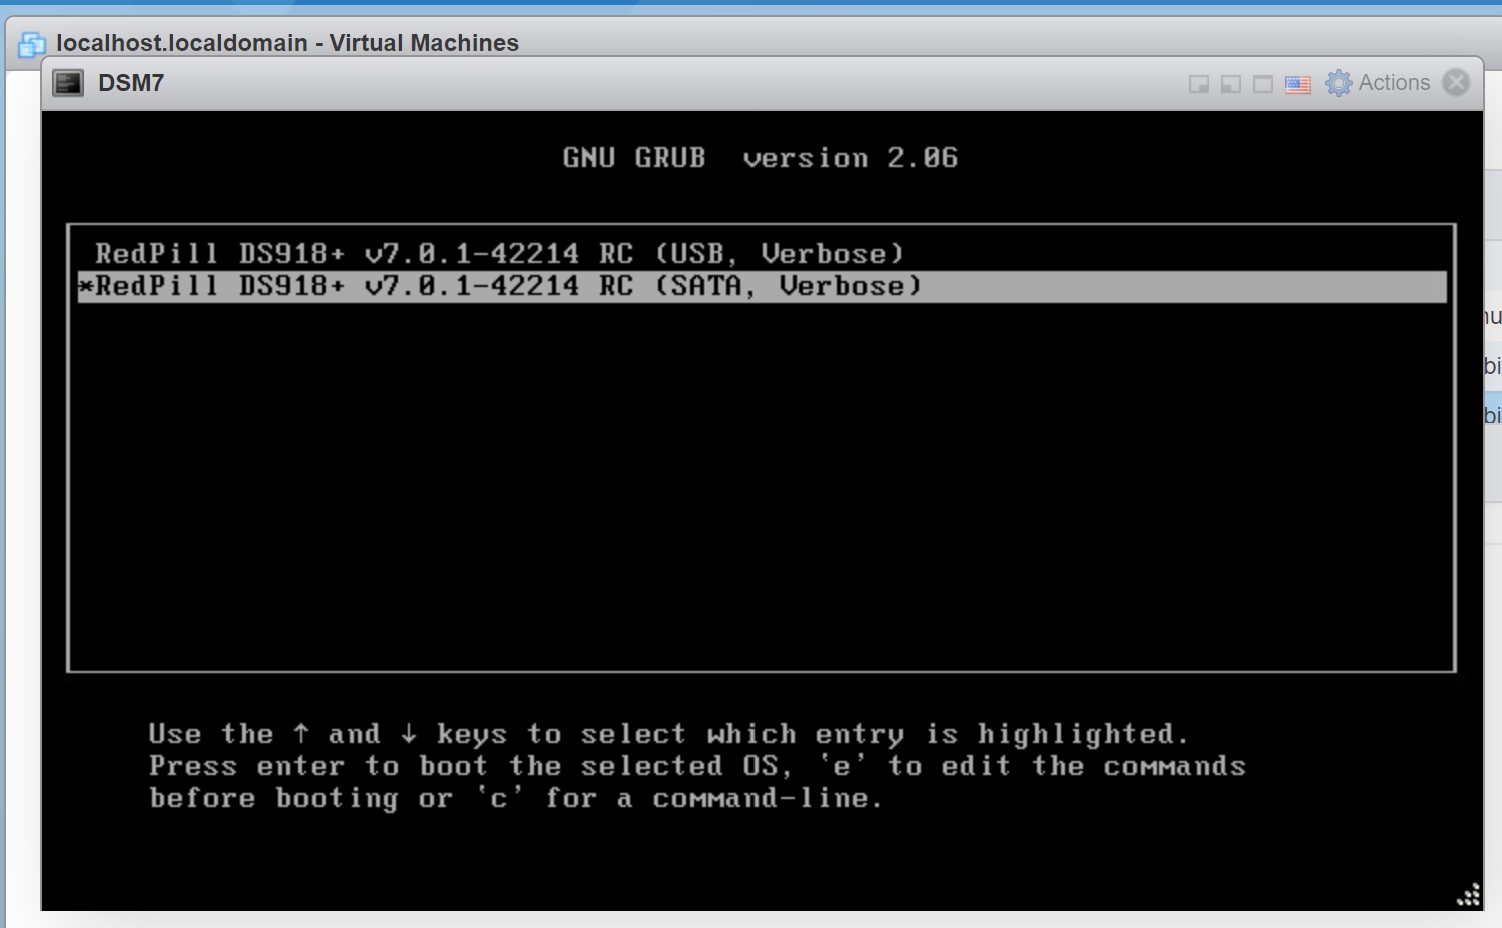
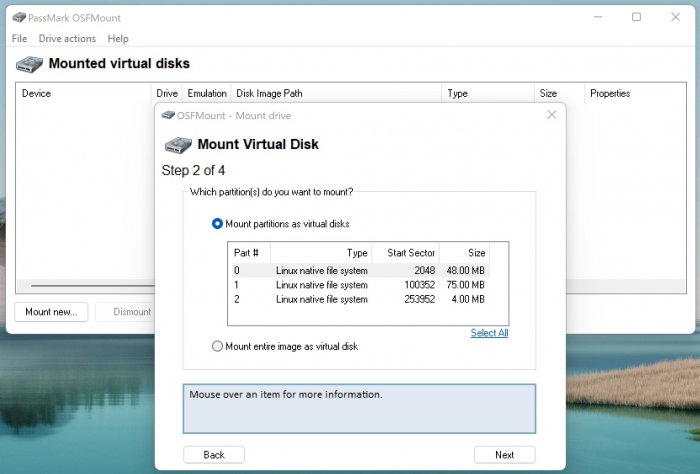
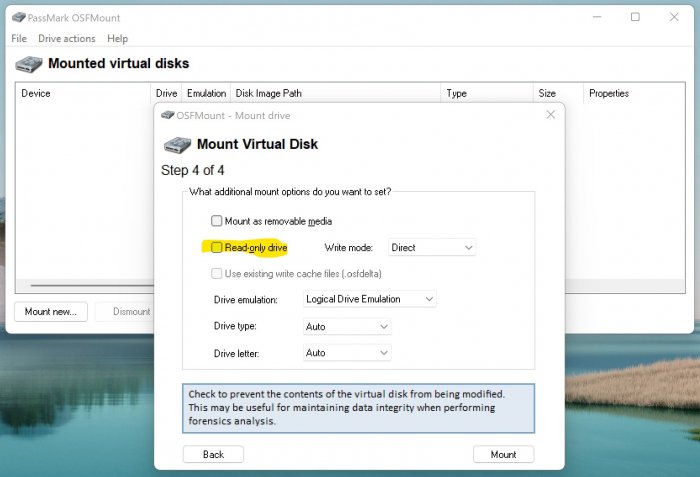
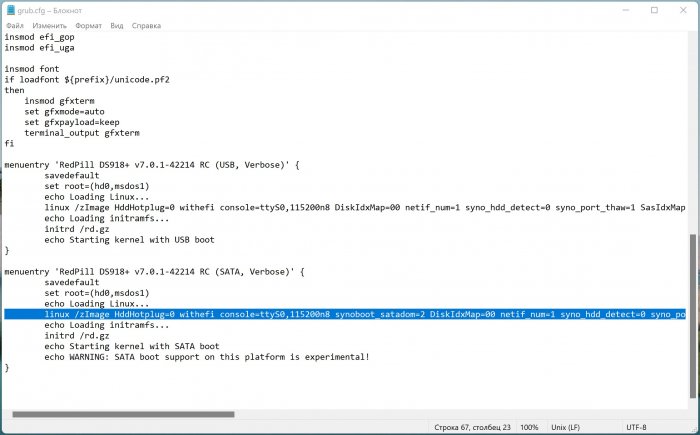
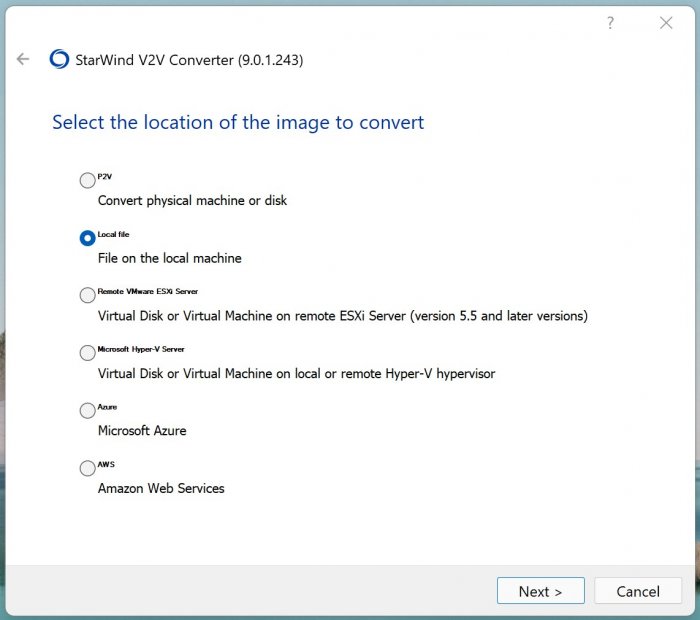
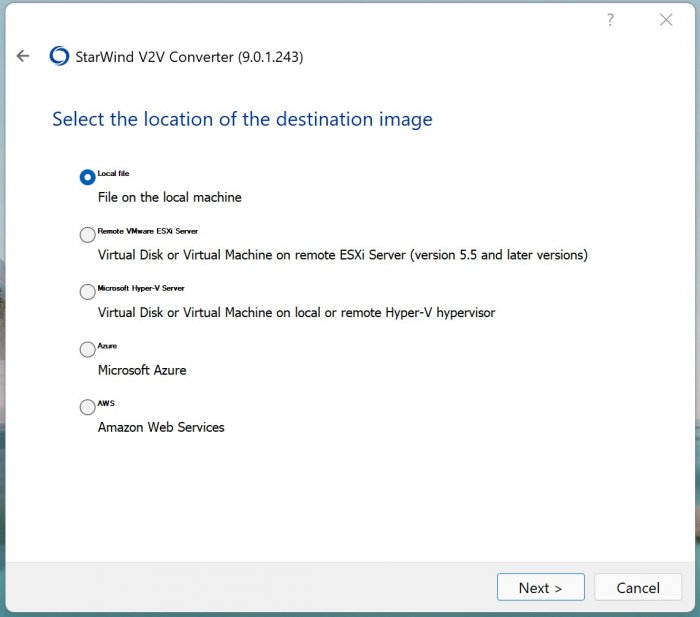
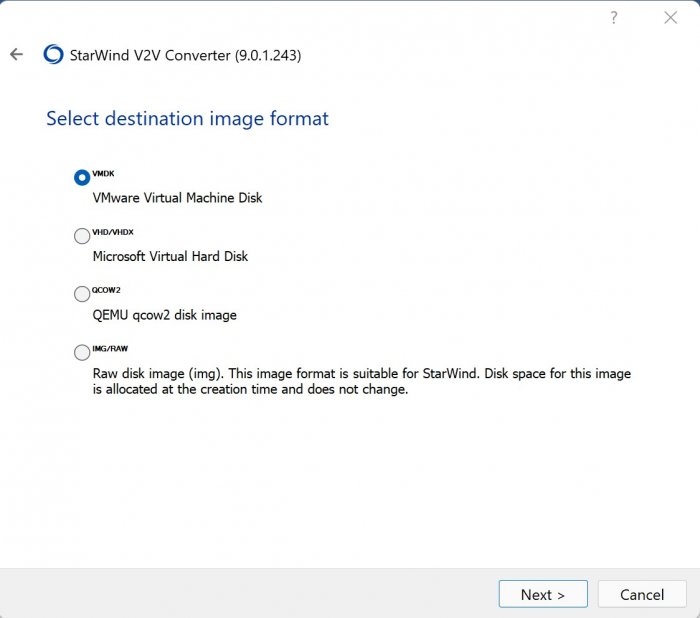
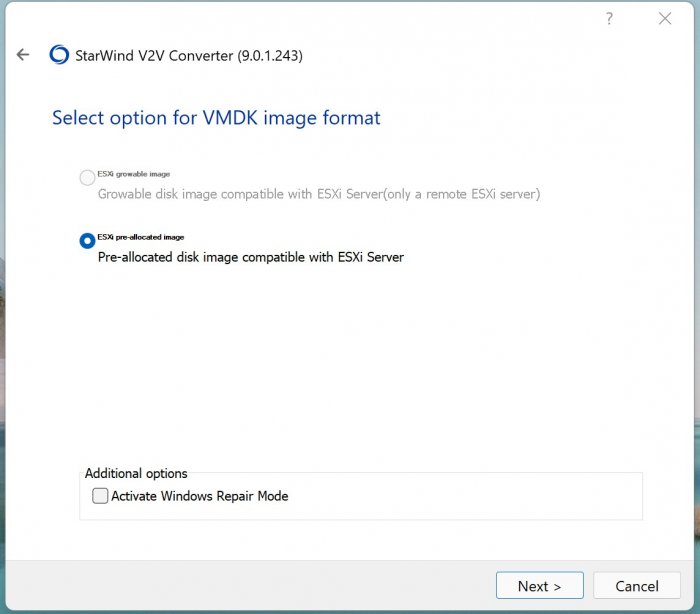
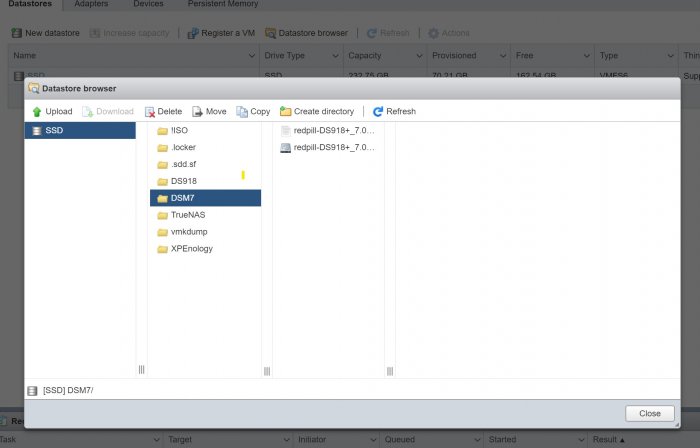
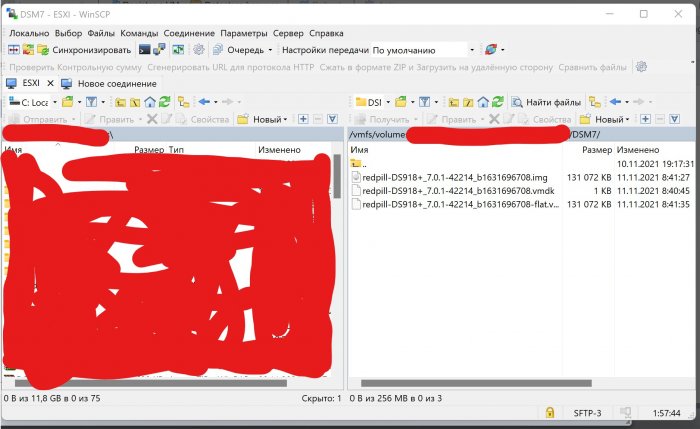
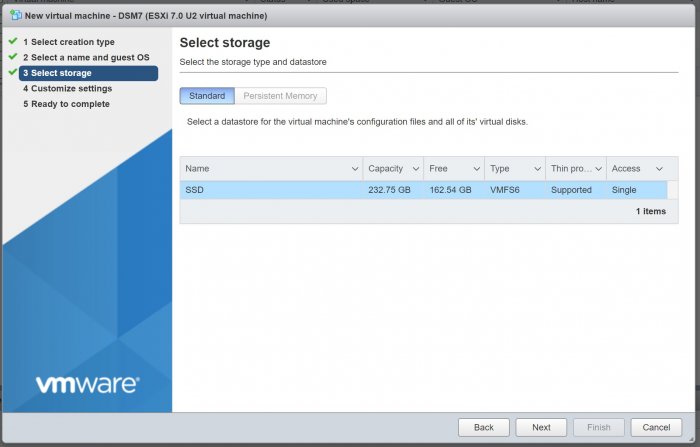
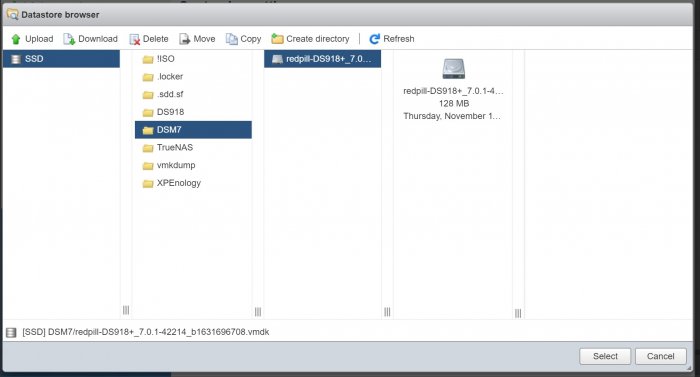
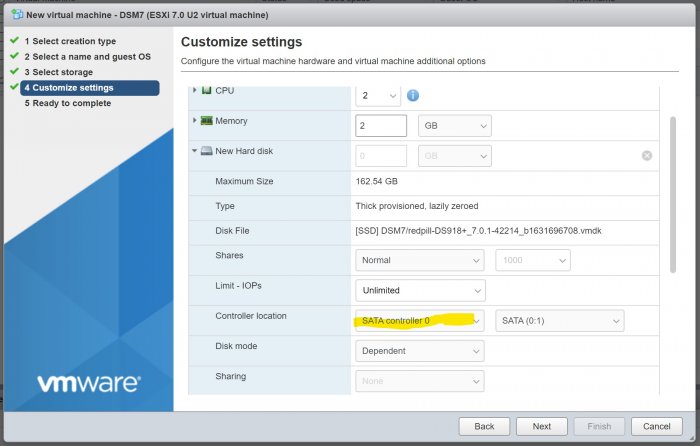
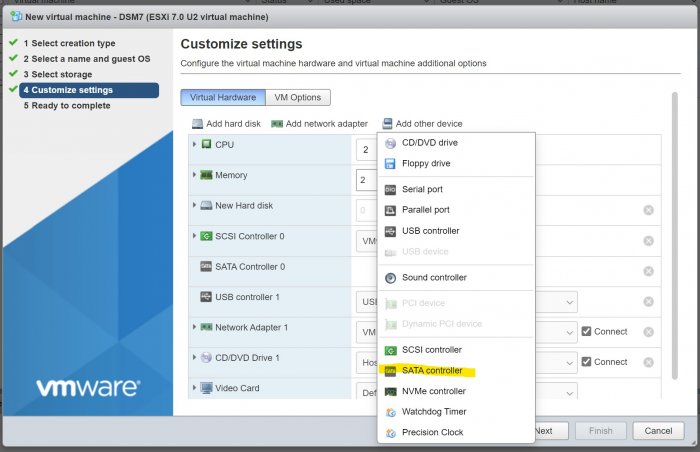
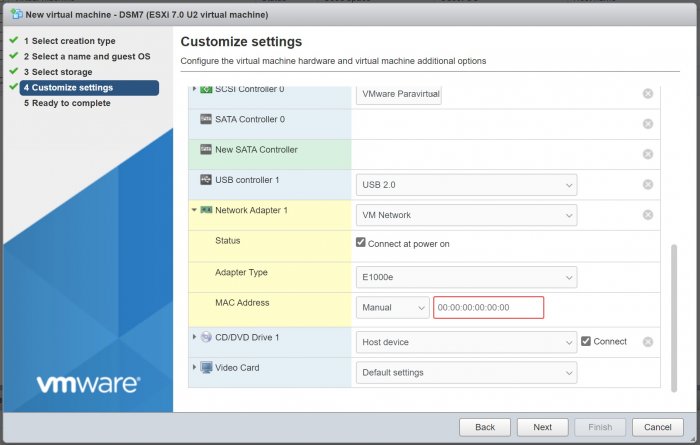
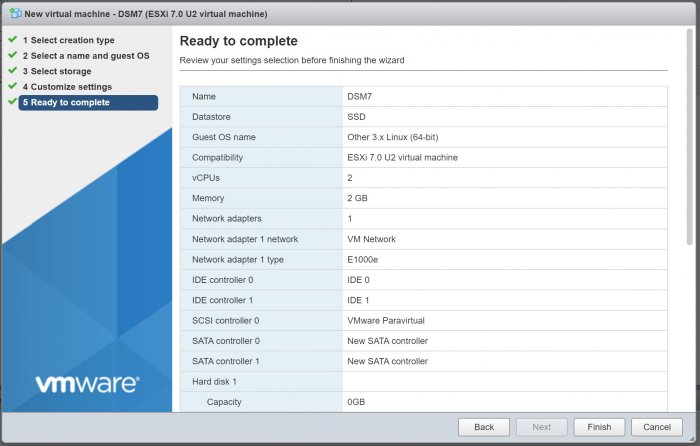
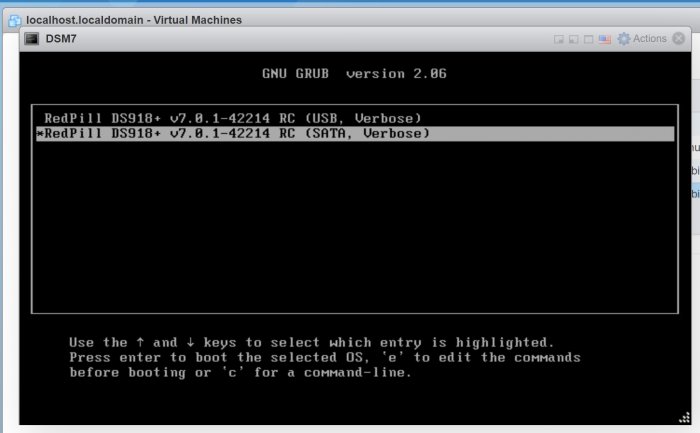
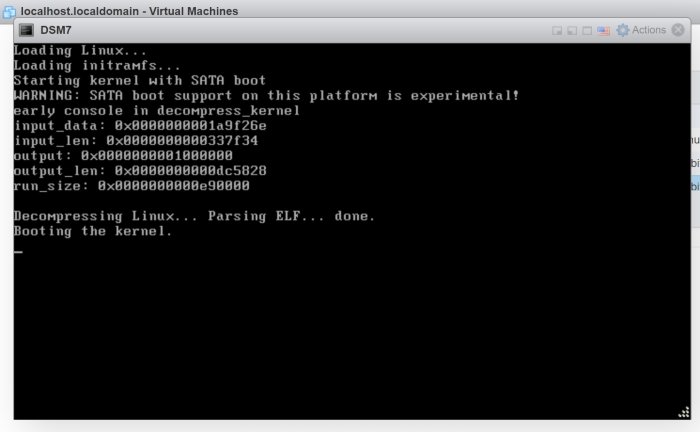
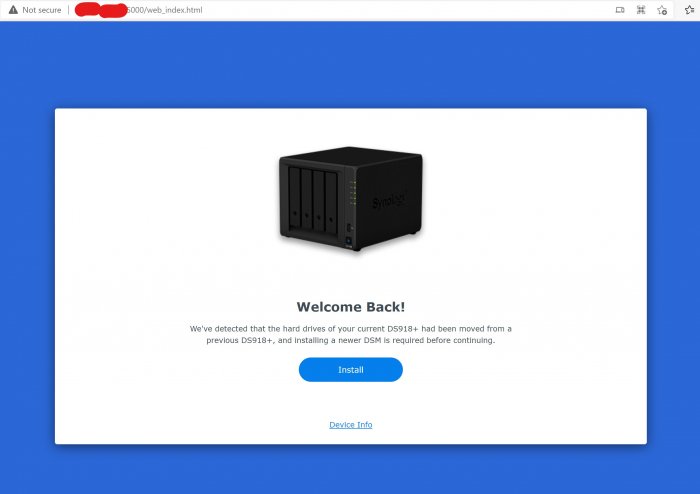
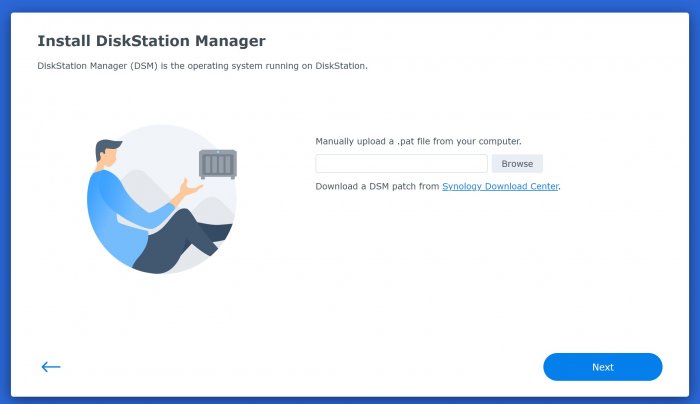
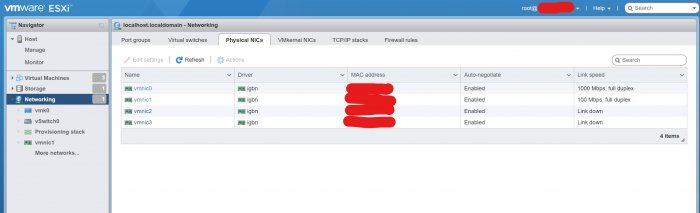
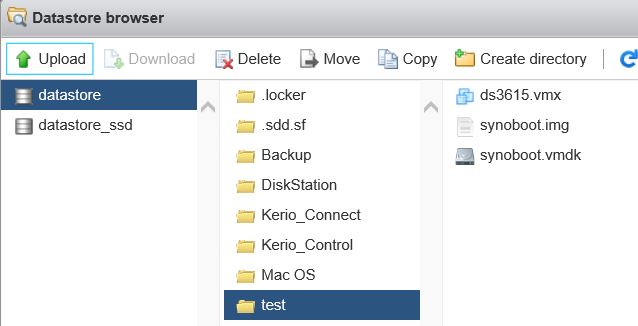
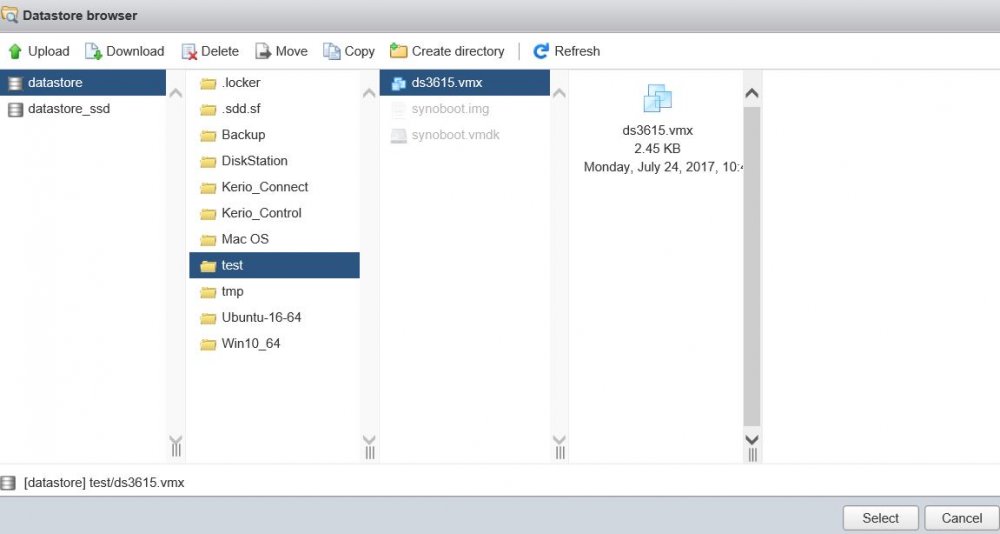
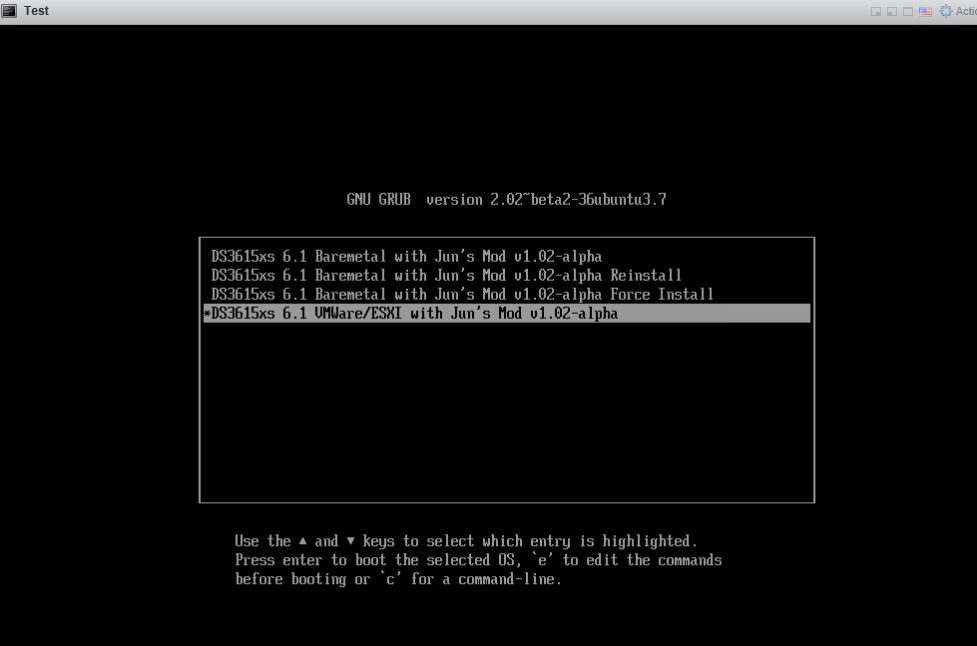
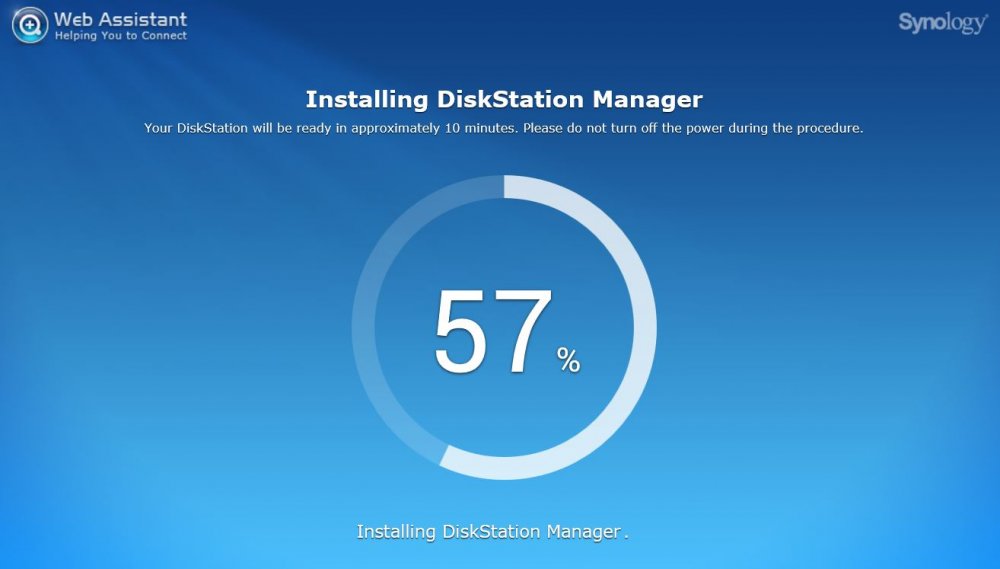
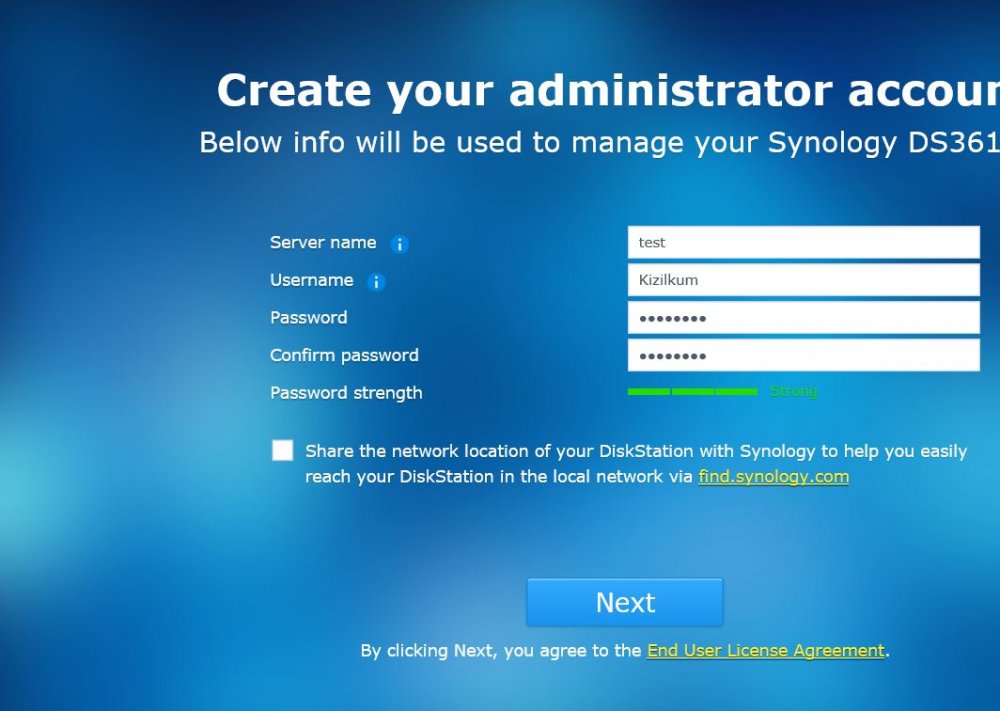
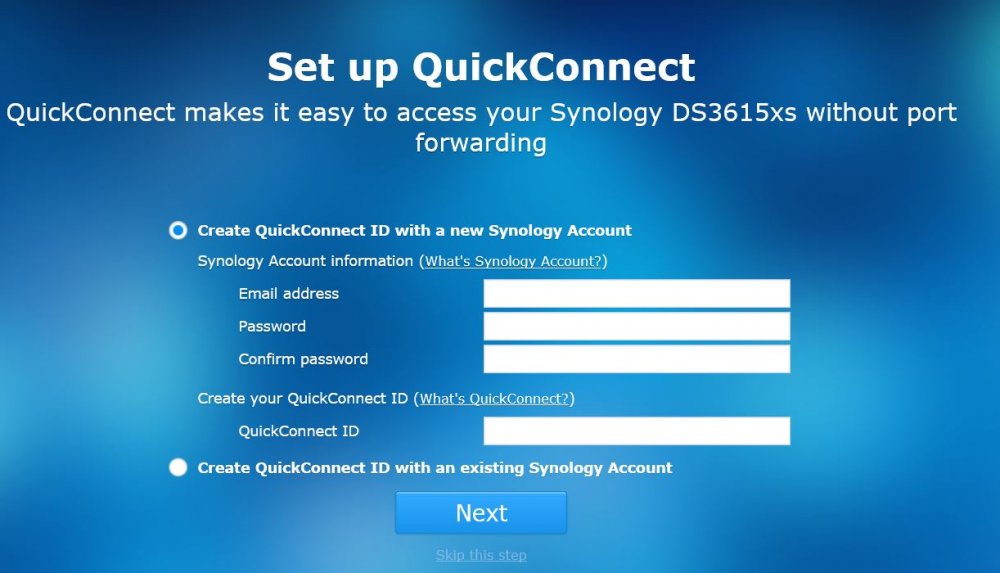
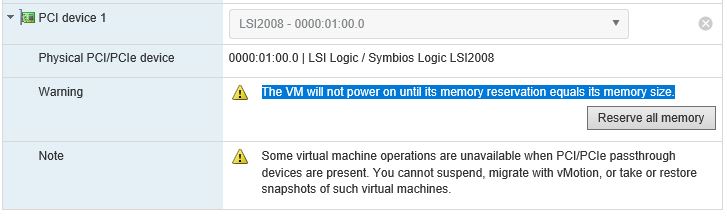
Здравствуйте, недавно я установил ESXI и пробовал устанавливать различные версии XPEnology. Есть много информации по установке DSM6, однако про DSM7 информации существенно меньше, а пошаговой инструкции по установке на ESXI я вообще не нашёл. После прочтения этой темы решил сделать инструкцию по установке DSM7 на ESXI, в первую очередь для себя, чтобы потом не забыть Для редактирования ISO образа и его конвертации понадобятся программы OSFMount и StarWind V2V Converter соответственно. Образ redpill-DS918+_7.0.1-42214 загружаем здесь. Открываем образ redpill-DS918+_7.0.1-42214_b1631696708.img в OSFMount. Выбираем 0 раздел. Снимаем галочку только для чтения. Заходим на смонтированный диск и открываем файл grub.cfg, расположенный по пути \boot\grub. В данном файле меняем mac1=D050997C770C на мак адрес своей сетевой карты. Мак адрес сетевой карты можно посмотреть в сетевых настройках ESXI. Мак адрес прописывается без символов двоеточия. Также в файле grub.cfg прописан серийный номер устройства sn=1230NZN018654, нужно ли его менять не знаю, я сменил серийник воспользовавшись генератором Xpenology_Tool_V142. Как мне известно подбор валидных мака и серийника требуется только для работы QuickConnect, мне он не нужен, поэтому не морочился. В файле grub.cfg мак адрес и серийный номер прописан дважды, в блоках RedPill DS918+ v7.0.1-42214 RC (USB, Verbose) и (SATA, Verbose), я исправил в двух местах, хотя по идеи требуется только в SATA. Сохраняем изменения и размонтируем образ. Далее правленный образ открываем в программе StarWind V2V Converter, выбираем место назначения свой компьютер, формат VMware Virtual Machine Disk, тип ESX image, вариант Pre-allocated disk image, затем завершаем конвертацию и получаем два файла redpill-DS918+_7.0.1-42214_b1631696708.vmdk и redpill-DS918+_7.0.1-42214_b1631696708-flat.vmdk Два вышеуказанных файла вместе с правленным образом redpill-DS918+_7.0.1-42214_b1631696708.img копируем в созданную папку на DataStore. При копировании через интерфейс ESXI видно только два файла, хотя по факту их три, если зайти на DataStore через WinSCP. Далее создаём новую виртуальную машину. Придумываем ей название, выбираем операционную систему Other 3.х Linux (64-bit). Пробовал версии 4.х и 5.х, но на них система не запустилась. Далее выбираем место установки, в моём случае это SSD диск. Настройки виртуальной машины следующие: 1. CPU – 2 2. Память – 2гб 3. Удаляем созданный по умолчанию жесткий диск 1 на 16 гб. 4. Добавляем существующий жесткий диск и выбираем на Datastore ранее скопированный файл redpill-DS918+_7.0.1-42214_b1631696708.vmdk, в настройках которого выбираем SATA контроллер 0. 5. Добавляем еще один SATA контроллер 6. Добавляем новый стандартный жесткий диск, в настройках которого выбираем SATA контроллер 1. Объем жесткого можно оставить по умолчанию, у меня это 16гб, если нужно больше, делаем больше. Имеется ещё другой вариант - вместо стандартного диска добавить RDM диск, в настройках которого также выбрать SATA контроллер 1. Как подключить локальный SATA-диск в качестве хранилища RDM для виртуальных машин читать здесь. 7. В настройках сетевой карты в качестве адаптера выбираем E1000e, вручную вбиваем мак адрес своей сетевой карты, которую ранее прописывали в grub.cfg, только в этот раз разделяем каждые два символа двоеточием. 8. Завершаем создание виртуальной машины. Далее запускаем созданную виртуальную машину. В появившемся меню выбираем RedPill DS918+ v7.0.1-42214 RC (SATA, Verbose). Если всё правильно сделать, то система запустится. Через приложение Synology Assistant находим запущенную DSM и открываем. Можно также искать, вбив в браузере http://find.synology.com/ , но через приложение находит лучше. Затем устанавливаем систему, вручную выбрав DSM_DS918+_42214.pat Данный релиз почему-то удален на официальном сайте, поиски в интернете мне ничего не дали, однако мир не без добрых людей, спасибо формучанину stefauresi, который поделился данной версией DSM, качаем здесь. Попытки установки версий DSM_DS918+_41890 и DSM_DS918+_42218, к успеху не привели. Всем добра!


-
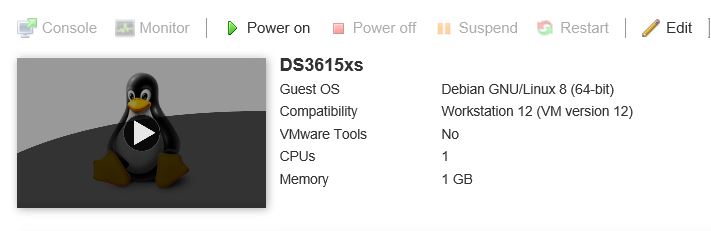
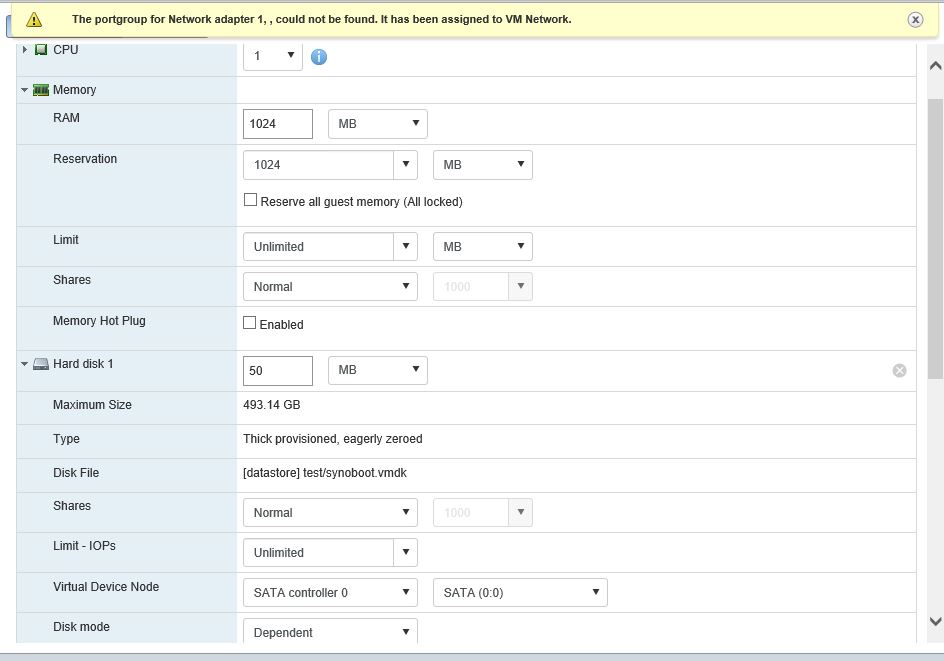
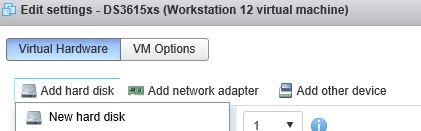
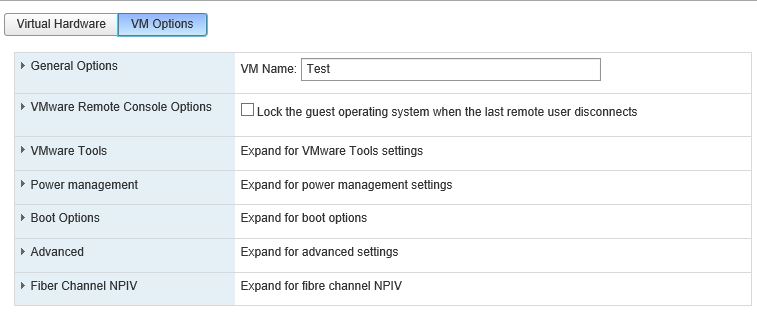
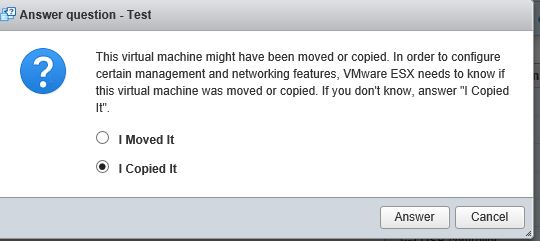
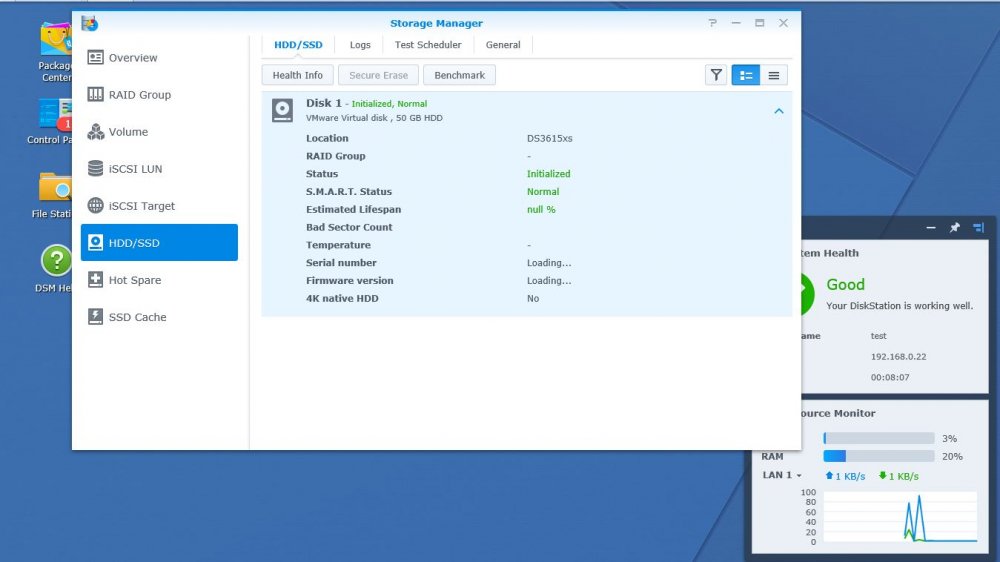
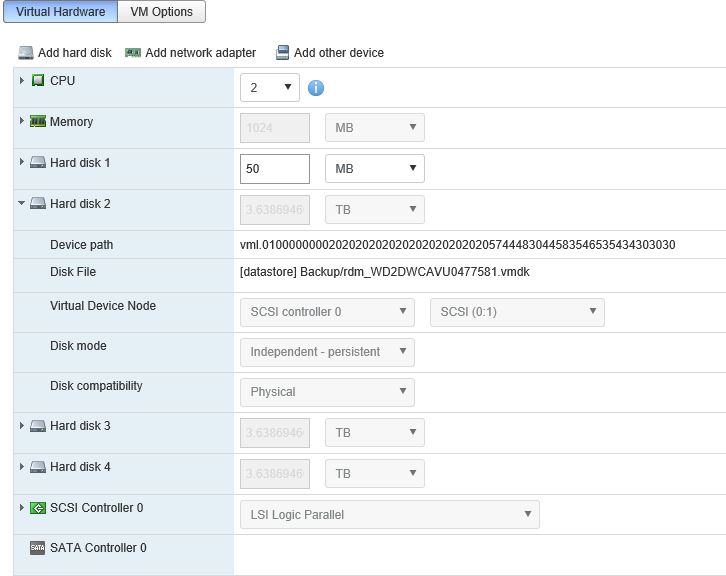
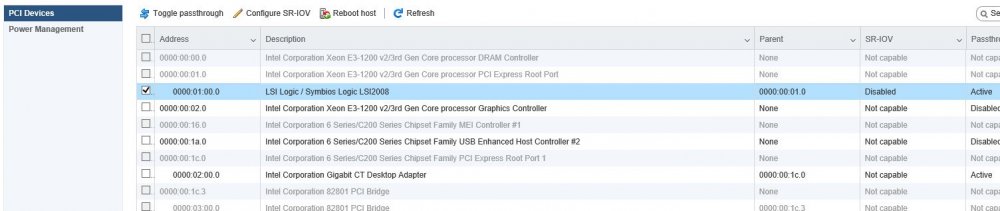
Как оказалось, у новичков возникают сложности с инсталляцией Хренологии на ESXI. поэтому решил написать краткий мануал, призванный облегчить жизнь. дополнения и уточнения приветствуются. 1. подключаемся к ESXI и создаем на датасторе директорию 2. далее в созданную директорию копируем 3 файла вот от сюда 3. после окончания копирования регистрируем нашу машину в ESXI указав на наш .vmx файл собственно доходим до финиша и жмем его все! машина установлена. но ее необходимо настроить перед запуском. 4. в настройках рекомендую задать необходимые параметры процессора и памяти, и обязательно указать размер резервируемой памяти. при недостаточном объеме зарезервированной памяти машина может не запуститься. далее необходимо создать виртуальный жесткий диск и указать его объем. после чего можно перейти на вкладку VM Options и поменять название машины на то которое нравится вам в принципе наша машина уже работоспособна. это простейший способ создания виртуальной машины. Лично я поступил немного иначе: можно или пробросить целиком дисковый контроллер в вашу виртуальную машину и подключить диски к контроллеру поставив крыжик и нажав на Toggle Passthrough после перезагрузки добавив в настройках новый PCI девайс. если у вас нет возможности пробросить целиком контроллер, можно подключить целиком физические диски, не пробрасывая весь контроллер называется это pRDM, как это делается подробно расписано здесь. данный способ хорош еще и тем, что диски целиком можно выдернуть и вставить в физическую машину, без лишних плясок с бубном, если вдруг ваши планы изменятся, а данные скопировать не куда. 5. запускаем машину. при первом запуске говорим: "я скопировал это" после чего стараемся успеть выбрать правильную загрузку далее выжидаем пару минут и начинаем искать свою машину в сети или через сервис http://find.synology.com, если вдруг сервис машину не найдет, то не паникуем и ищем через Синолоджи Ассистента. далее подключаемся к найденной машине и устанавливаем ОС просто нажав на Install Now и спокойно наблюдаем за процессом вводим свои данные, и желательно отключаем крыжик на следующем окне в самом низу говорим "пропустить данный шаг" вот и все, заходим в панель управления и в диспечере хранения радостно видим свои диски. ну и думаем как рачительно распорядиться этим богатством ну и в конце рекомендую установить vm-tools вопросов ввода серийного номера и МАК адреса касаться не стал, все это многократно расписано на форуме можете кидаться тапками, спасибами, кому что нравится.


-
Добрый день! Есть не особо новый пк на haswell i7-4770k и мат плате asus z87-a Вопрос. Стоит вообще ставить synology 7.0.1 и возможно ли сделать валидный серийник + мак. Если да. То не подскажите как?
-
Greetings to the whole community. For some time now I have installed DSM version 6.2.3-25426 on VMware ESxi 7.0 U2 XPEnology. For some time now the software has been offering me an update to version 7.0.1. Has anyone done the update yet? Are there any critical issues during installation and after installation? Before doing the update, I wanted to know if anyone has encountered any difficulties of any kind. Thank you
-
Hallo, ich versuche jetzt schon eine ganze Weile mir Infos zur Installation von Xpenology auf einem Unraid zu besorgen. Leider ist alles veraltet oder ich verstehe die Topics nicht so richtig. (Unraid läuft jetzt 3 Tage bei mir :-)) Deshalb frage ich hier mal direkt, ob es eine gute Anleitung gibt Xpenology auf Unraid zum laufen zu bekommen? MfG und schönes Wochenende
-
I successfully installed xpenology DSM for DS916+ on my computer. But there is strange behaviour. If I turn on the compueter, xpenology starts but after some while it shut down itself. If I use Synology assistant I can see "service starting" status. I have MB Asrock N3050M with 4 GB of RAM and 2x WD Black HDD each 4 TB. In grub.cfg I just changed MAC (I added the mac of my physical LAN) and PID/VID of boot flash disk. What can be wrong? Some bios settings?
-
Hola a todos y gracias por la ayuda de antemano. Hace tiempo que vengo disfrutando de un xpenology gracias a este foro. Lo tengo instalado en un HP Microserver Gen10, con 16 gb de ram y 4 núcleos, en una máquina virtual de vbox. Al xpenology le tengo dato: - Jun's Loader v1.02b - 8 gb de ram, 2 cores - el sistema está en un ssd de 15 gb con 8 y pico ocupados. - usb 2 y red en modo bridge con la tarjeta compatible con Intel pro/1000 MT 82540EM. - y luego le tengo dados 3 discos físicos enteros a la VM, nada de vdi, ni vmhk... los discos directamente conectados a la máquina virtual, que es donde tengo los datos. El caso es que haciendo una actualización esta pasada semana (subiendo de la 6.1.7-15284 Update 3 a una 6.2 que me daba el propio synology), se me ha cascado. Ya he visto en algún hilo que esta actualización a v6.2 puede dar problemas de red y otros... mal hecho por mi parte esta vez, que siempre suelo mirar primero y por ir deprisa le di a que vale y la he liado... Intenté tirar de una copia de seguridad, que hago de cuando en cuando porque ya tuve un problemilla una vez y así recuperaba, pero esta vez cuando pongo la bk y termina de cargar la máquina resulta que me sale la pantalla de gestión y me dice "que ha detectado que he movido los discos duros a una nueva maquina y que la tengo que recuperar" (y me dice quesu estado es recuperable), y al recuperarla se vuelve a cascar y estoy en bucle... Si le desconecto de la VM los discos duros con los datos, el synology funciona bien, pero en el momento que apago y se los conecto vuelvo al mismo problema. He probado a conectar los discos en caliente con el synology en marcha, pero entonces no los reconoce como volúmenes básicos, y me pide formatearlos y perdería los datos. Como ya no sabía como recuperarla, dije pues paso los datos a un disco externo desde el sistema anfitrión (ubuntu 18.04 lts) formateo un disco, se lo pongo al synology y le voy pasando los datos de los otros... pero al montar los discos en el anfitrión e ir a copiarlos me dice que no tengo permisos para hacerlo (los usuarios root/admin del anfitrión y del synology son distintos). Total que puedo ver los datos pero no acceder a ellos, con lo que no he puedido salvarlos de ninguna forma por ahora ni restaurar el synology. ¿Hay alguna manera de que me restaure el synology actual con mi BackUp anterior o qué cambiar para que no se quede muerto? ¿A alguien se le ocurre cómo puedo salvar los datos? Es como si en los discos de datos se hubiese grabado algo que le dice al synology que debe actualizarse y ahí se jode... Muchas gracias a todos y saludos, Héctor
-
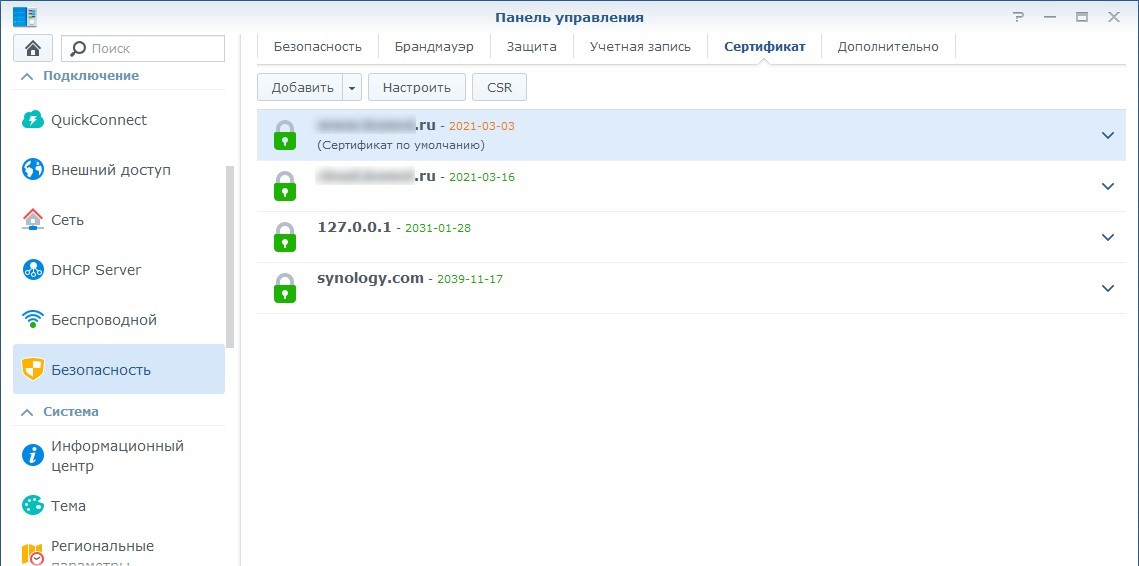
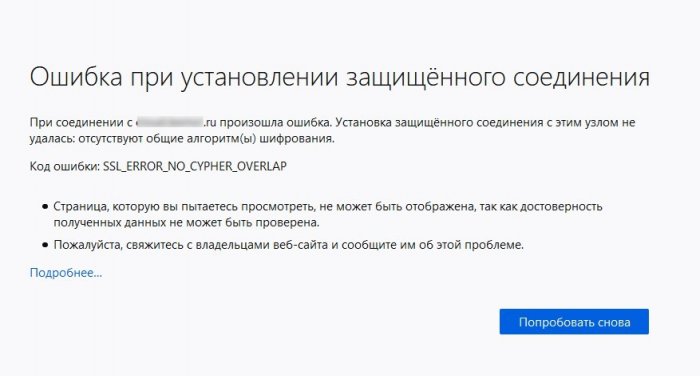
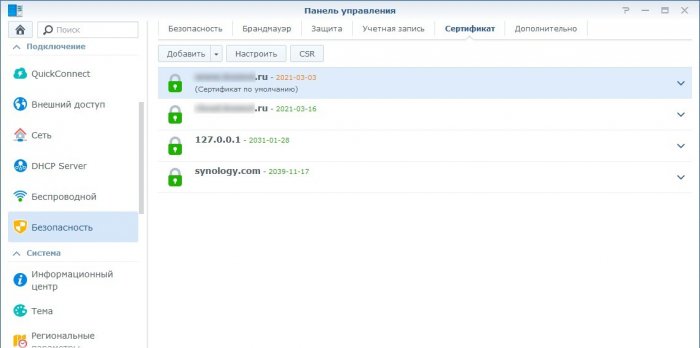
Здравствуйте. С недавнего времени возникли небольшие проблемы с ssl, а именно - "Ошибка при установлении защищенного соединения". Данная ошибка возникает при обращении к nas из локалки, а так-же извне. IP белый Xpenology DS3615xs DSM 6.2-23739 Основная задача - доступ к Synology Drive извне по доменному имени. Для этих целей приобрел ssl на firstssl.ru, прописал его в хрени, так-же приобрел домен на рег.ру До недавнего времени все работало отлично, теперь все возможные браузеры ругаются на "небезопасное соединение" (антивир потушен) Срок действия сертификата актуальный. Подскажите плз, куда копать?
-
Проблема с Virtual Machine Meneger, есть DSM 6.1.3, стоит последний для нее Virtual Machine Meneger, устанавливаю Windows, первая перезагрузка и все, NoVNC не отвечает, виртуалка уходит в себя, подкидывание или убирание iso не помогает, просто даже снова не грузится! (( В чем может быть причина ?!
-
 Bonsoir Je voudrai installer XPEnology sur HP dc7800p, mais le problème c’est que le BIOS du PC ne demmar pas en en UEFI. Si vous avais des suggestions pour faire fonctionner XPEnology sur HP dc7800p, je suis preneur. Merci.
 -
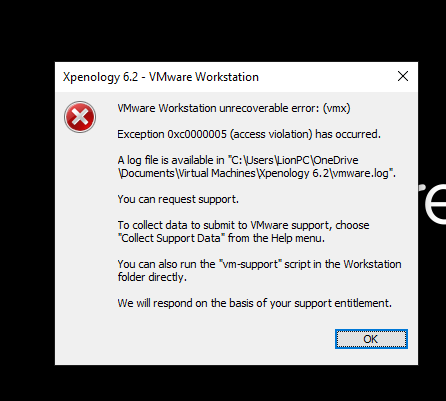
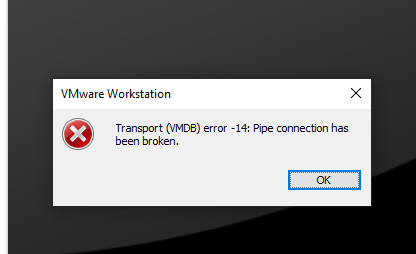
 Hi everyone, Thanks for your attention, I built a DSM DS918+ loader support 6.2 on VMware Workstation, everything is oke when I setup two disk, one for synboot and another is virtual disk 30G But, now I want to add my Seagate HDD 4T Ironwolf into this NAS, so How to do? I tried to using device partition but has error, I tried to add HDD Sata with SATA 1:0 but when config, It fail to format disk, Please help me this issue Thank you so much, Phu
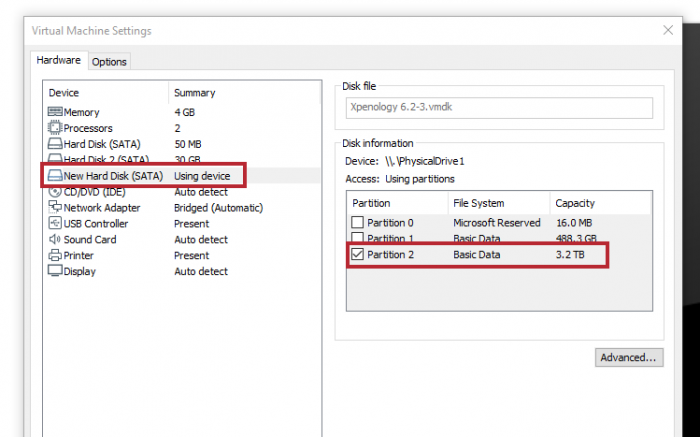
-
Ciao a tutti, sto tentando di installare xpenology su proxmox. Ho tentato varie guide, anche quella ufficiale su questo forum, ma senza successo. Inizialmente son riuscito a farlo partire, rilevava il nas (il sito di ricerca), tentavo di installarlo ma al 56% mi dava errore. Allora ho mollato per un giorno, oggi ho ripreso ma ora non viene rilevato nessun nas nonostante il booloader parta normalmente. Ora un paio di domandeda niubbio: - che cosa cambia tra i vari bootloader? 1.02, 1.03 ecc ecc - con che criterio scegliere il modello? (918, 3615 ecc ecc) C'è qualcuno che è riuscito nell'impresa? ho proxmox 6.2.4 Grazie!
-
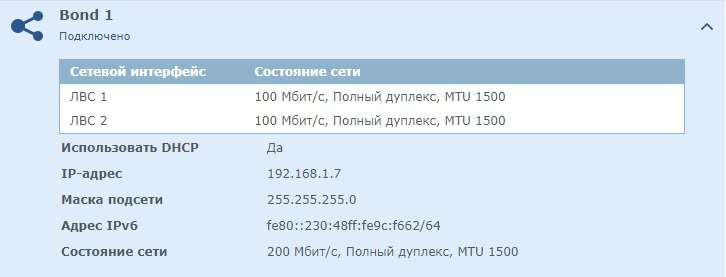
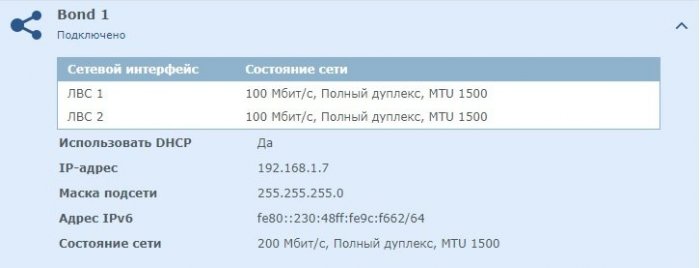
После установки сразу не обратил внимания, а при создании Bond`а увидел что сеть определилась как 100 Мбит/с В чём может быть проблема? (Свитч гигабитный, патчи "4 парные", ноут определяется на этих "хвостах" на гигабите) Мать SuperMicro X7DVL-3 Загрузчик Jun's Loader v1.03b DS3615xs Версия DSM: DSM 6.2-23739
-
 Hello everyone, I recently followed the tutorial step by step as it was writing and after rebooting i stumble with the message "Insert Media and Select Boot Device". My box spec's are as follow: MAIN BOARD ASROCK H61M-VG3\ Intel(R) Pentium(R) CPU G2020 @ 2.90GHz, 2900 Mhz, 2 Core(s), 2 Logical Processor(s) Physical Memory (RAM) 8.00 GB Intel(R) 6 Series/C200 Series Chipset Family Intel(R) Desktop/Workstation/Server Express Chipset SATA AHCI Controller Realtek PCIe GBE Family Controller Installation and all went fine!! Any help would be greatly appreciated. )
 -
 Hello I installed Contao CSM 4.9 in DMS 6.2.1-23824-6 (DS918+) successfully and I would like to share this guide How to install contao 4 in synology 6.pdf that describes all necessary steps with all of you are interested in it and you are willing to make this kind of advanced modifications of the DSM configuration by yourself and at your own risk. Best regards
 -
Hallo Zusammen Ich habe aktuell einen Xpenology Server mit Plex, der von einem USB Stick bootet. Diesen möchte ich auf einen Windows 2019 Server mit Hyper-V umziehen ohne das Dateien verloren gehen. Ist das überhaupt möglich? Ich habe gedacht ich kann den USB Stick wieder in den Windows Server stecken und von diesem Booten? Gruss Sniper8952
-
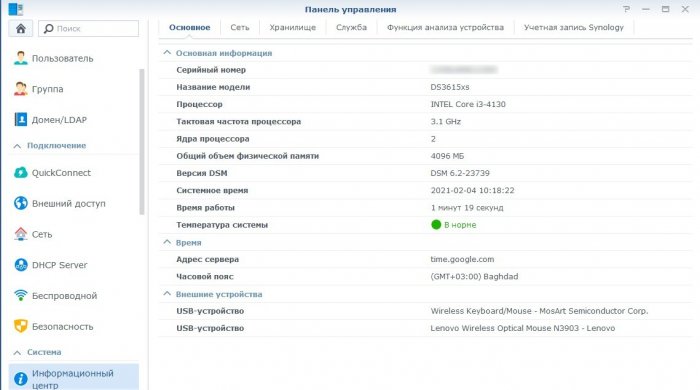
Коллеги! Изучил весь форум, и не нашел решения проблемы. Подскажите, кто уже в прошлом году столкнулся с такой проблемой? Это какая-то новая защита от Synology? Проблема в том, что не зайти в интерфейс DSM 5.2. Пишет: "Система готовится. Выполните вход позже". Загрузка с флешки. Сборка DSM_DS3615xs_5644. Три года назад собрал NAS на XPEnology DSM 5.0 и все отлично работало. При регистрации на account.synology.com/ использовал реальный серийный номер и реальный MAC адрес. Таким образом работало 24 часа в сутки с 2015 года, включая QuickConnect и DDNS, хотя очень часто через DNS не было доступа. Периодически обновлял пакеты и DSM, обновил до DSM 5.2. Пробовал перейти на 6.0, но чего-то не заработало, откатился обратно. Правда, в последний раз в админку DSM заходил где-то летом 2017 года. Т.е. когда это произошло точно не знаю. Вчера хотел подправить права на доступ и не смог зайти в интерфейс. SynologyAssistant сервер видит, но подключиться не дает, WOL не работает. Все кнопки серые (не активные). Подключил монитор, все нормально загрузилось, никаких ошибок при запуске системы не выдает. Вчера же обнаружил, что на Synology Account у меня все обнулилось и нет лицензии. Зарегистрировать тот же серийный номер Synology не дает. Сам сервер DSM работает, можно копировать и удалять файлы по сети, смотреть фильмы и фотки по сети и т.д., DS photo и DS video работает, но доступа в интерфейс нет. В 2017 году сдуру часто выключал сервер, бывало на 2 недели когда уезжал. Если я правильно понял, то мой серийник и МАС кто-то переписал на себя или Synology забанил серийник. Новый серийник под DS3615xs подобрать не удалось. Генератор не помог, похоже, что все серийники на DS3615xs уже заняты. Нужна квалифицированная помощь, что делать не понятно. Может кто-то дать валидный серийник, хотя бы попробовать, что это из-за него?
-
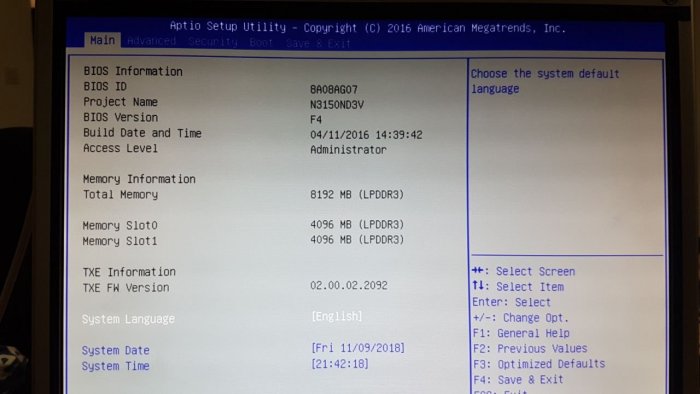
Hallo XPEnology Community, Ich habe auf meinem selbstgebauten NAS Server mit den untenstehenden Komponenten versucht XPEnology nach dem Tutorial installiert: Ich habe die Schritte genau so befolgt und die in der Videobeschreibung hinterlegten Dateien benutzt. Das Problem ist, dass nach dem Countdown der NAS neustartet und von dem installer Stick bootet und danach nicht mehr im Synology Assistant angezeigt wird. Ich habe die Installations Dateien von der DS3617XS Version verwendet. Hardware setup: CPU: Intel Celeron CPU N3150 @ 1.60GHz Ram: 2x Crucial 4GB DDR3L-1600 SOIDMM 1.35V CL11 Gygabite Micro ATX Mainboard Danke für jede Antwort im Voraus
-
Salve a tutti ho un HP ProLiant MicroServer N36L con sopra open media vault e volevo sapere come procedere per installare xpenology. Grazie a tutti.
-
Hi, I've just got an XPEnology install up and running with Jun's loader under a Proxmox hypervisor. Everything seems to be working fine, persisting across reboots etc, but I'm just wondering where the DSM configuration data is stored? I have 4 SATA disks configured for direct passthrough and a RAID5 volume placed on them, and I boot the system using the synoboot.img from the loader. But where is all the DSM data stored? I can't see the synoboot.img changing and I don't know where else it would go.
-
Hey everyone, Currently playing on an N40L, using Jun's loader 1.02b, and succeeded to use the latest DSM 6.1.4-15217 Update 4. However, i'll replace both my N40L and my genuine DS215J with an HP microserver gen10 next week, and i'm planning to take the latest possible DSM. Updating DSM 6.1.4-15217 Update 4 to DSM_DS3615xs_6.2_23511 or DSM_DS3615xs_6.2-22259 results in failing DSM. I'm not sure if Jun or anyone else is working on this but i wish and really hope it . So basically I'm looking for a tutorial/guide on how to install DSM 6.2 beta (yet) on Hp Microserver (gen10). Alternatively i wish to understand how to do some logging / data collection of the loader to help the guys make a working loader for DSM6.2. Any suggestion is welcome! R/Mark (And thanks goes for Synology for making such a shit product (DS215J) with a great software (DSM) and with the worst customer support who can only say we are sorry for the inconvenience but not helping at all. This really helped me a lot to decide and build a XPEnology lately.) Just found the other topic as well, but not updated in the past 2 months.
-
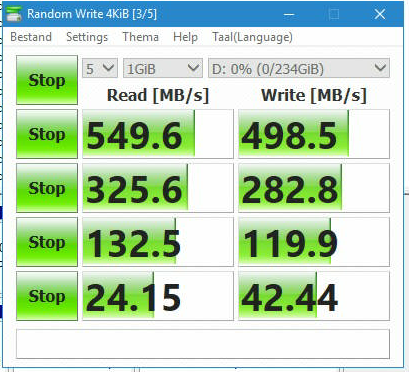
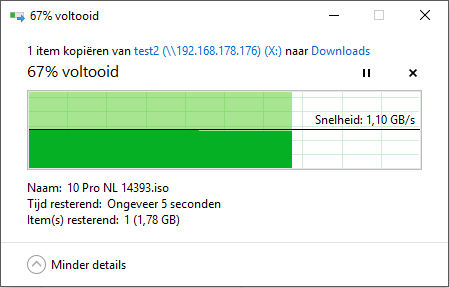
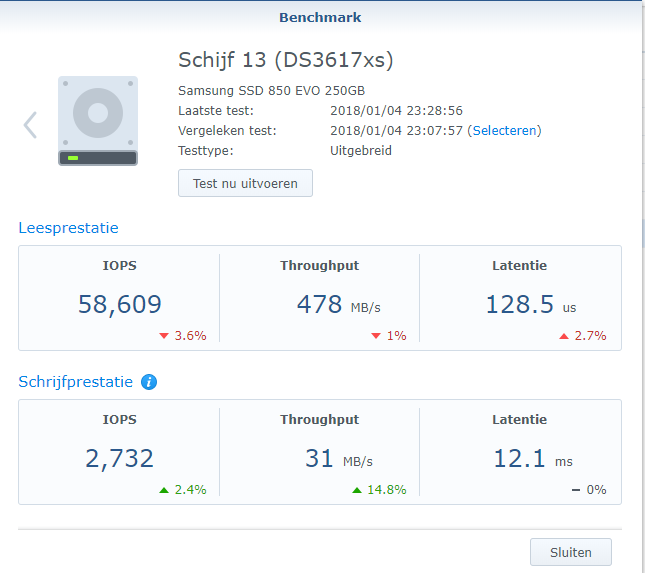
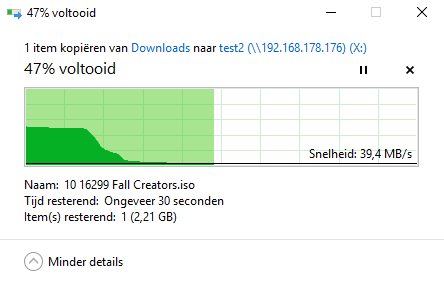
Hi Guys, I've been setting up my XPEnology for the past few weeks and noticed that my write speeds went down horribly after enabling SSD-cache. The transfer starts out at about 1GByte/s (not bit) but goes down all the way to 30MB/s or even lower write speeds, read speeds are fine though. After trying some diffrent settings and also making a RAID 0,1,5 and basic RAID setup the speed still seemed to stay really poor,.. I blamed the network settings at first but noticed my raid5 3 HDD setup manages to keep a steady 500-600MB/s (Bytes not Bits) while transfering from my pc to the XPEnology. Copying a large file from one SSD to another gave me the same poor performance. At the Benchmark in the storage manager the SSD read speed caps out at about 550MB/s but the Write caps out at about 30MB/s. I've tried a different ssd, port, cable and controller so far but nothing seems to help. Booting up Windows and benchmarking the SSD with Crystal Disk Mark gave me about 550/500 Read/Write on both SSDs. I'm using DSM6.1.4-5 on 1.02b with the extra.lmza v4.3 driver package on a SuperMicro a2sdi-h-tf motherboard. I have come across a couple of seemingly similar cases but these were unsolved or different causes (like SMB and networksettings). Does anyone have a tip for me to try out or could give me some advice? Kind regards, Mike
-
Bonjour, Dans le passé j'avais suivi le tuto (http://www.fredomotique.com/informatique/nas-synology-sur-n54l/) pour monter un proliant HP 54L. Je souhaite réaliser les améliorations suivantes à mon Proliant HP54L : 1) ajouter 2 HDD red 3To acheté depuis juillet ! 2) changer l'ordre des disques afin que le SSD de 120Go où il y a le DISKSTATION et les VM soit au niveau de l'emplacement du CD-ROM 3) ajouter une carte Ethernet TP-LINK TG-3468 pour augmenter le débit. Je suis sous Exsi 5.5 4) mettre à jour Xpenology pour une version 6.2 ou supérieure (si c'est possible) 5) migrer vers Exsi 6 6) mettre en place une copie entre mon 54L et mon DS213air qui a deux disques de 3To Red de manière à sauvegarder les données clefs. Je suis pour l'instant à l'étape 1. J'ai ajouté les 2 HDD de 3To dont un dans l'espace CD-ROM. Ce dernier est relié à la carte mère avec un cable SATA (il est en version 3 mais je ne sais pas si cela a une importance ?). Je suis passé par les étapes 5 et 6 du tuto mentionné ci-dessus et au moment de mettre en marche le DISKSATATION j'ai l'erreur suivante : "Cannot open the disk '/vmfs/volumes/540548fa-3fda98c2-c6a1-9cb654046298/DISKSTATION/WDC_WD30EFRX2D68EUZN0.vmdk' or one of the snapshot disks it depends on." L'erreur provient du disque placé dans l'emplacement CD-ROM. Questions : - comment résoudre ce problème ? - est-ce lié au fait qu'il soit relié à la carte mère avec un cable SATA ? - est-il possible de supprimer les .vmd dans cd /vmfs/volumes/120Go-DATABASE/DISKSTATION afin de recommencer l'étape 5 ? - est-il possible de changer les disques d'emplacement pour mettre le SSD qui ne chauffe pas dans l'emplacement du CD-ROM mais dans ce cas que dois-je faire ? Faut il refaire des configs en SSH ? - est-il possible de renommer les vmdk des disques pour avoir des noms plus parlant : SerialNumber_rack_n (n = emplacement du disque dans le serveur) ? Sans pour autant tout refaie et SURTOUT sans perdre les données ! les disques sont pour l'instant localisé ainsi : IDE (0:0) Hard disk 1 - [120Go-DATABASE] DISKSTATION/XPEnoboot_DS3615xs_5.1-5022.3.vmdk - dans le Rack 1 SCSI (O:1) Hard disk 2 - [120Go-DATABASE] DISKSTATION/WDC_WD2DWMC4N1163018_3T.vmdk - dans le Rack 2 SCSI (O:2) Hard disk 3 - [120Go-DATABASE] DISKSTATION/WDC_WD2DWMC4N2305136_3T.vmdk - dans le Rack 3 SCSI (O:3) Hard disk 4 - [120Go-DATABASE] DISKSTATION/WDC_WD30EFRX2D68EUZN0_3To.vmdk - dans le Rack 4 SCSI (O:4) Hard disk 5 - [120Go-DATABASE] DISKSTATION/WDC_WD30EFRX2D68EUZN0.vmdk --> ce dernier est dans l'espace CD-ROM --> c'est ce dernier qui génère l'erreur mentionné "Cannot open the disk '/vmfs/volumes/540548fa-3fda98c2-c6a1-9cb654046298/DISKSTATION/WDC_WD30EFRX2D68EUZN0.vmdk' or one of the snapshot disks it depends on." quand je souhaite démarrer DISKSTATION J'ai posté sur le forum fibaro des questions mais je ne suis pas certain qu'il y est beaucoup de monde comme par le passé. Donc je poste sur ce forum en espérant avoir de l'aide afin de redémarrer mon serveur.
-
The operating system does not boot, writes " Loading /zImage ... ". What will I do to the system boot? DSM Version 5.2. Reloading does not help.