Search the Community
Showing results for 'UFS Explorer'.
-
 Hello Everyone, Okay so the situation is this. My NAS shows up in the Synology Assistant. The drives are mapped, I can access in Windows File Explorer. It seems everything is working in the background. BUT I can no longer get into the NAS from my browser. I get this error "Sorry, the page you are looking for is not found." I spent a few hours searching the internet and this forum to see if I can fix it myself. I did not see any info. I've rebooted my router, tried other computers and browsers. I also rebooted the NAS few times. Hardware is bare metal. I am updated on the NAS to DSM 7.2.1-69057 Update 4 This problem came up when I shutdown the NAS and moved a drive from one of the sata ports. I was adding an SSD cache drive. After I rebooted, I can no longer get into the NAS from a web browser. I looked at Tiny loader on boot and it says up to date with 0.0.6 What do I do? I am awaiting your response before I do anything else. I was going to try recreating my Tiny USB boot drive but I will wait for you before I touch anything. THANKS!
 -
merci beaucoup de ton aide. ce qu'il faut savoir avant tous, je ne connais rien a linux! je ne sais pas si ces éléments vont solutionner le soucis de la carte reseaux. Mais il m'ont donné une piste a explorer, le addons. je pensais que l'on parlait des addons genre plex, ryns, hbs, ect.... ainsi je vais essayer de mettre le .conf avec la fonction addons du loader. par contre, les pièces jointes dans les posts ont été supprimées si quelqu'un les à, je suis preneur biens sur. tous, ainsi je vais pouvoir essayer. est-ce que quelqu'un sais cela est possible aussi avec le loader de qnap??
-

Dupliquer la clé USB de boot
Photodia56 replied to qwertyqwerty's topic in Compatibilité Hardware & Installation
Bonjour Après de nombreuses années sur WD Mycloud EX2, le récent problème subit par WD m'a incité à plus d'autonomie. J'ai commencé a bosser sur OMV mais je ne suis qu'un windowsien. J'ai pu faire un NAS opérationnel mais ça s'est compliqué avec l'accès à distance. Linux m'échappe et j'ai passé des semaines à explorer les pistes mais il manque toujours un bout de ficelle pour concrétiser... Cette fois j'explore Xpenology. J'ai pu avancer plus rapidement. Mon problème car il faut bien s'en créer. J'ai ma clé USB qui boot bien. Je souhaite la connecter en la bricolant pour l'intégrer à la carte mère. Méfiant, après avoir lu ce post, je tente d'en créer d'autres en prévision de manière traditionnelle avant de bricoler ma clé. Or les nouvelles clés réalisées de même manière que la première ne fonctionnent pas. A la rigueur, ça boot mais impossible d'atteindre la console depuis mon PC. Il semble que ce n'est pas le même port qui s'affiche. Comment réaliser exactement la même clé? Merci par avance -

TinyCore RedPill Loader Build Support Tool ( M-Shell )
Peter Suh replied to Peter Suh's topic in Software Modding
I'm glad that loader build is now possible smoothly.😀 The third partition is not easily accessible without mounting it when the loader is running normally. The 1st/2nd partition varies depending on the situation, but it is also difficult to check the contents without mounting it. If you are an expert, you can take it out with the mount, but for beginners, Considering this situation, the zlastbuild.log file does not seem to be convenient to retrieve no matter where it is placed on the 1st/2nd/3rd partition. I am also using MacOS Ventura as my default OS, but it is not easy to access the USB FAT partition for this loader. Just as Windows does not consider MacOS partition types APFS or MacOS Extended (Journaled), It seems natural that MacOS does not consider Windows FAT partitions. Since I don't use Windows much these days, I first noticed that the way FAT partitions are displayed is different even within the same Windows (11 and 10). The method previously used to make good use of this FAT partition was to run “Total Commander” with administrator privileges rather than Explorer. This tip is also useful for looking into the UEFI partition where the letters are assigned. -

TinyCore RedPill Loader Build Support Tool ( M-Shell )
gericb replied to Peter Suh's topic in Software Modding
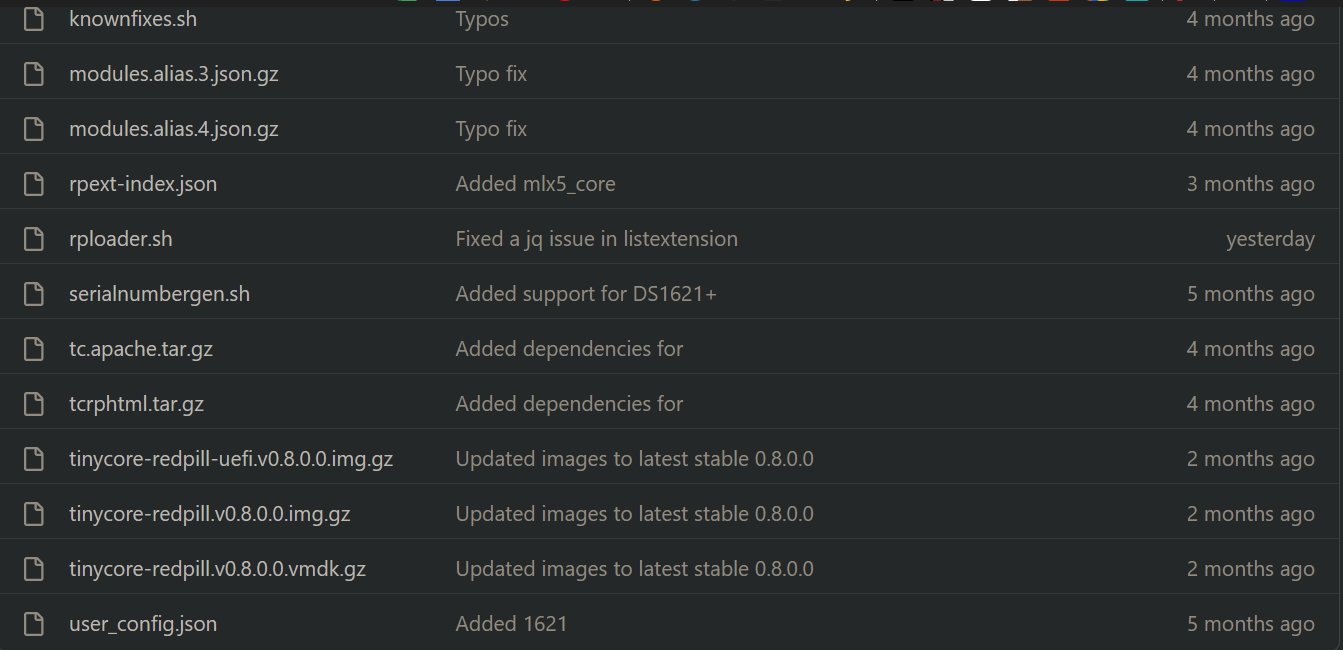
Fun times! Previously been using 0.9.4.3-2 no issues. I figured it was safe to reboot and rebuild the loader for the 7.2.1-69057, selected from the menu, and despite having a 16GB USB, it complained at some point, not having enough free space, went through the build, once it reboots, found a new FRIEND, but also couldn't process, complaining about free space. Of course it upgraded automatically the loader to 0.9.5, now it's back to the TCRP basic blue screen and lost my whole configuration, MAC addresses, SN, Model, etc. Looking at the USB layout, it's MBR style - 71MB (FAT), 75MB (FAT), 877MB (FAT32), 13.3GB (FREE) No doubt thanks to @Peter Suh I have found the multiple renamed/archived user_config.jsonYearMonthDay files which contains all of the relevant SN/MAC/etc. info. What's the best way to go here, just record that relevant data from the user_config, totally rebuild the USB from scratch manually encoding the data for the build... or some minor slight of hand with saving and restoring one of the user_config.json files? Curious too, I noticed on my Windows 11 Pro machine, when the USB is plugged in, none of the partitions show up in File Explorer, but on my Windows 10 Pro, no problem the 2nd (75MB) and 3rd (877MB) partitions show up just fine and accessible... I don't think this is do to the previous install of OSFMount program, but it could be. Just found it interesting. 🤔 Thanks -
 In case someone else runs across this topic in the future, I WAS ABLE TO GET EVERYTHING BACK. Had to use Recovery Explorer Pro to get the data back after the failed restriping. At first it seemed like it could not recover the data (but at least was able to get file names), so I reached out to their support team and they offered to have a look over TeamViewer. The guy took about 10 mins sussing out the drives, changing some recovery settings that were over my head despite working in all levels of IT Infrastructure for 25 years now, it was cool to watch him piece it back together. In the end, left it scanning overnight and I was able to fully recover everything. There were maybe 10 files that were corrupted out of over 300,000. Highly recommend these guys if someone else ends up in the same boat.
 -
Hi, its me again with a whole new issue hahaha! My build is DSM 7.2 Peter tcrp. I was connecting to it with my PC which runs on win11. But like a week ago I decided to do a clean install of win11 and now everytime I try to connect to my server through win11 using file explorer I get the message username or password incorrect. I can login to DSM tru webportal using User/Pass, but cannot access server from win. I know its a common issue with a lot of people reporting it, I google it, but cant find a working fix for this. Any help...
-

TinyCore RedPill loader (TCRP) - Development release 0.9
Gronaldo replied to pocopico's topic in Developer Discussion Room
@pocopico Using the WEBUI and tinycore-redpill-uefi.v0.9.4.9.img I got a bare metal build operational. (Asus P9D-I serverboard / Xeon E3-1225v2) However, Info Center- General page was completely empty (no info) and the USB-bootdrive was visible and accessible in File Explorer (as 3 devices) Reverted back to tinycore-redpill-uefi.v0.9.4.8.img, used the manual SSH procedure (including updating loader) and all issues were resolved. -
.thumb.png.d9d10dff71adcfbbbbe3147b9c23c99b.png) Hello, J'ai trouvé un sujet ici => https://www.nas-forum.com/forum/topic/76105-suppression-danciennes-versions-de-dsmsrm-des-serveurs-de-synology/ en regardant en diagonal il y as un lien qui mènerais à un backup avec toutes les anciennes versions=> https://web.archive.org/web/20230116203045/https://archive.synology.com/download/Os/DSM Aucune idée sur la fiabilité du site, mais peux être une piste à explorer.
Hello, J'ai trouvé un sujet ici => https://www.nas-forum.com/forum/topic/76105-suppression-danciennes-versions-de-dsmsrm-des-serveurs-de-synology/ en regardant en diagonal il y as un lien qui mènerais à un backup avec toutes les anciennes versions=> https://web.archive.org/web/20230116203045/https://archive.synology.com/download/Os/DSM Aucune idée sur la fiabilité du site, mais peux être une piste à explorer. -
Hi Guys Today I had a little power outage which cause that 2 of my Raids crashed on my DSM VM. None of the disks is faulty but both Raids are showing "Read-only" but I'm able to access the files via WinScp or File-Explorer. The Raids are mapped as md2 & md3 although md3 is showing "faulty active sync" when using mdadm -D but the state is "clean". Md2 is showing "clean, degraded, recovering" and active sync on all drives and "spare rebuilding" on the last drive. So I guess md2 will repair itself within the next hours. I did some research and I found the command "mdadm --stop /dev/md3" to unmount md3, so that I can rebuild it with the 3 disks that belong to that raid. But when I do that, I always get the message, that md3 is in use: "mdadm: Cannot get exclusive access to /dev/md3:Perhaps a running process, mounted filesystem or active volume group?" Anybody an idea how to solve this problem? Is there a command to stop all processes like syno_poweroff_task for DSM7?
-
 Greetings to all, to see if someone can help me or can know the cause: I have two machines with DSM 7.1.1 sp 5, when I want to transfer the information from one to the other, 1 TB in photos and 1 TB in music, I find that the destination machine, after a while, disappears from the network and I receive a file cannot be copied error, the destination machine is not visible in windows explorer, nor is it seen by synology assistant, but the nic has a link, but the sending machine remains accessible, I have tried with 3 intel ethernet cards and two switches, if I transfer the information in small batches I do not detect the incident, but if I copy each folder at once, that is, the entire music folder, then I encounter the problem, at different times, it is not that it happens after 15 minutes or 400 GB ... but it happens ... any ideas?
 -
No, I'm still holding out after 4 years for someone to reply to this post. My DS412 has just died like 2 weeks ago and I can't really use a blob backup for anything until I have a new synology since the Hyper Backup Explorer for windows doesn't support browsing blob storage!
-
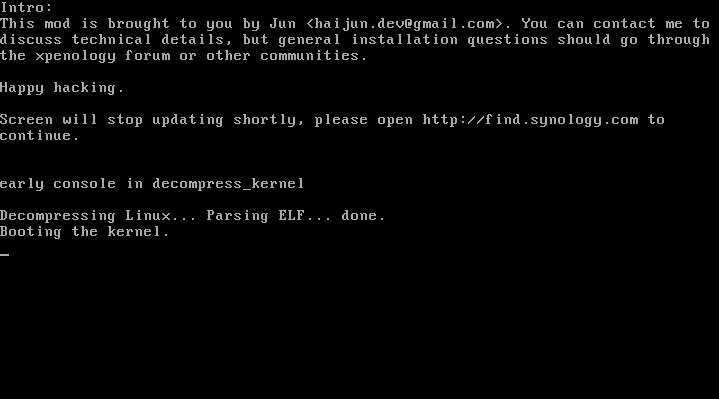
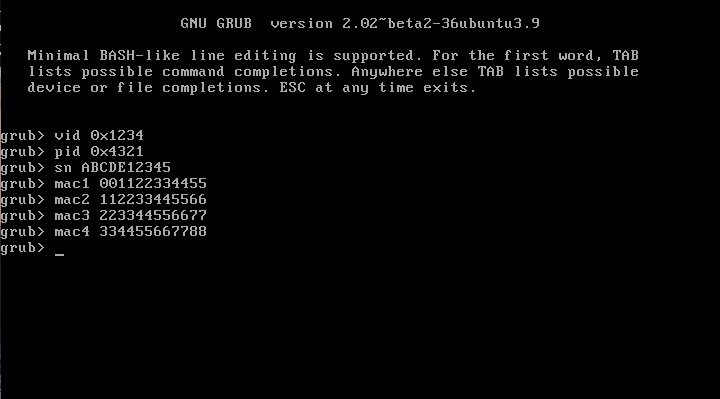
 This is an updated tutorial version from the one I made last year. It will enable you to migrate from DSM 5.2 to DSM 6.1.7 directly without the need to upgrade to DSM 6.0.2 first. If for some reason you want to upgrade to DSM 6.0.2 first or simply you do not want to upgrade to DSM 6.1.7 but only to DSM 6.0.2 then use the link above. To upgrade from DSM 6.0.2 to DSM 6.1.7 read here. As most of you know by now Jun was able to find a way to install DSM 6 on non Synology boxes. Here is the thread that I recommend reading. At least make an effort and read the OP: https://xpenology.com/forum/topic/6253-dsm-6xx-loader/ Below is what you need for the operation. I will assume you are doing all this under Windows 10, 8, 7 or XP. If you are on a MAC computer have a look at this post I made on how to burn the image to a USB drive and then mounting the USB drive for editing the content. The rest of the tutorial still applies. If you are currently using DSM 5.1 or below first update to DSM 5.2. If you are doing a fresh install of DSM 6.1 then carry on with the tutorial and omit references to DSM 5.2. - Win32 Disk Imager to make a bootable USB drive; - A 4GB (or any size really) USB drive (flash drive) to install the loader. Not that this is necessary but use preferably a brand name (Kingston, SanDisk...); - A way to read your USB drive VID/PID. Here is a how-to >>> VID and PID; - A good text editor: Notepad++ I really don't recommend using Windows's Notepad; - DSM 6.1.7 PAT file. Chose the one you need: DS3615sx or DS3617sx or DS916+. Download the ".pat" file not the ".pat.md5" - Jun's official v1.02b loader (mirror). This is a hybrid UEFI/BIOS loader so it should work in most machines which are capable or reading GUID partition table (GPT). For older machines that can only read MBR the above loader will simply not boot. If that is your case then use @Genesys's v1.02b loader rebuilt image which is MBR based. Note: Jun's loader supports Intel CPUs. For AMD CPUs Jun has stated that the loader needs some work but it has been reported by many users using HP machines that it actually works. The C1E function in the bios (in some HP machines) needs to be deactivated. I am unsure for other motherboards brands therefore if you have an AMD machine that is not an HP you might be out of luck. Try looking in the bios configuration and play around. - Custom extra.lzma ramdisk. This ramdisk is optional and should only be used if the default ramdisk included in the loader is not detecting your hardware. I am just providing it for those who are having issues with network detection or unrecognised HDD controllers. This custom ramdisk contains additional and updated modules & firmwares. Credits go to @IG-88 for compiling the modules against the latest DSM 6.1.3 source code. I do not warranty they all work but I think most do. If you chose to use this ramdisk, you will need to replace (or rename, so you can revert) the default extra.lzma ramdisk from Jun's loader with this one. If you a have question specific to the custom ramdisk please post it in the topic of IG-88, not here. - If you are doing a fresh install make sure your drives are plugged in direct succession starting from the 1st SATA port. Usually the first port is described as SATA0 on motherboards. Check with your MoBo manufacturer for exact nomenclature. - OSFMount to modify the grub.cfg file within the loader's image and if necessary to replace the extra.lzma ramdisk with the custom one. This is not strictly necessary as Jun has made it possible to configure what needs to be modified via the Grub Boot Menu. If you prefer using Jun's Grub Boot Menu configuration method, simply skip Point 4, read Note 4 instead and pick up at Point 5. PLEASE READ EVERYTHING PRIOR ATTEMPTING ANYTHING Use this loader at your own risk. I wont be held responsible for any loss of data or black smokes that may result in the use of this loader. Please note that this loader has a limited amount of modules (drivers) included. If it is fundamental for you to have a NAS operating as quick as possible I recommend you look at the included drivers very carefully at the bottom of this tutorial before attempting an upgrade. If they are not there you will have to compile your own modules/firmwares or use the custom ramdisk provided above. Don't ask me to compile modules for you. I wont do it. One last thing: DO NOT UPDATE DSM BEYOND VERSION 6.1.7 with loader v1.02b. IN OTHER WORDS DO NOT UPDATE TO DSM 6.2 You have been warned. Here we go: 1 - BACKUP your data and save your configuration prior any attempts to migrate from DMS 5.2 to DSM 6.1. I can't stress this enough. JUST DO IT, as Nike likes to say. Also, print this tutorial if you can. It will make your life easier. 2 - Turn off your NAS and unplug the USB drive you are currently using with DSM 5.2. I recommend you put this USB drive aside in case migration to DSM 6.1 doesn’t go as expected and you need to revert to DSM 5.2. It will just make your life easier. 3 - Now go to your workstation/PC, plug a new USB drive (or the old one if you really don’t have any spare USB drives). Use the link I provided earlier to check your USB drive VID/PID. Write down the info somewhere as we will need it later. 4 - Now launch OSFMount. Select Mount New, then select the image file you downloaded earlier (i.e. .img extension file) to open. Now select partition 0 (the one that is 15 MB). Click Ok. Then at the bottom of the window make sure to un-tick the "Read only drive". Click Ok. The partition should now be mounted in file explorer. At this point you can navigate to the /grub directory and edit the grub.cfg file. If you need to replace the extra.lzma ramdisk with the custom ramdisk provided above then you will also need to mount partition 1 (the one that is 30 MB). Below is what you will see in the grub.cfg file. I am only showing below the portion of the code that is relevant for the purpose of this tutorial [...] set extra_initrd="extra.lzma" set info="info.txt" set vid=0x058f set pid=0x6387 set sn=C7LWN09761 set mac1=0011322CA785 set rootdev=/dev/md0 set netif_num=1 set extra_args_3615='' set common_args_3615='syno_hdd_powerup_seq=0 HddHotplug=0 syno_hw_version=DS3615xs vender_format_version=2 console=ttyS0,115200n8 withefi elevator=elevator quiet' set sata_args='sata_uid=1 sata_pcislot=5 synoboot_satadom=1 DiskIdxMap=0C SataPortMap=1 SasIdxMap=0' set default='0' set timeout='1' set fallback='1' [...] You want to modify the following: Change vid=0x090C to vid=0x[your usb drive vid] Change pid=0x1000 to pid=0x[your usb drive pid] Change sn=C7LWN09761 to sn=generate your sn here with DS3615xs or DS 3617xs or DS916+ model (this will depend on which loader you chose) Change mac1=0011322CA785 to mac1=[your NIC MAC address #1]. You can also add set mac2=[your NIC MAC address #2] and so on until mac4 if you have multiple NICs. However, this is not necessary. Recommended: Change set timeout='1' to set timeout='4' - This will allow you more time to make a selection in the Grub Boot Menu when it appears on screen. Once you are done editing the grub.cfg file, save it and close your text editor. Now in OSFMount click on Dismount all & Exit. You are now ready to burn the image to your USB drive. 5 - Now use Win32 Disk Imager to burn the image file onto the USB drive. This will also make the USB drive bootable. 6 - Eject and unplug the USB drive from your workstation. Plug it in your NAS (avoid USB 3.0 ports. Use USB 2.0 port if available). Boot your NAS and before doing anything fancy, access your BIOS so to make your USB drive the 1st boot drive if it's not the case. The Jun official loader can boot in UEFI or in legacy BIOS, so you chose what suits you best. Also, make sure your HDDs are booting in AHCI mode and not in IDE. Finally, if disabled, also enable the serial port in BIOS. Some BIOS don't have this option so don't get too cranky on this if you can't find it. Save changes to the BIOS and REBOOT the NAS. 7 - Once rebooted, if you have a monitor connected to your NAS you will see the following Grub Boot Menu: ADVICE: even before you see the Grub Boot Menu press the up/down key. This will stop the countdown so you will be able to select the desired line. You won’t see much other than the following after you press enter: If you booted the USB drive in EFI mode then you will see the same text without the last 3 lines but that's ok. 8 - Now go back to your workstation, and launch Synology Assitant or go to http://find.synology.com. Within one minute or so you should normally be able to see your NAS on your local network (it took ~55 seconds on a test I did on a VM). Just follow the instructions and either chose "Install" if you wish to have a clean install or chose “Migration” if you are coming from DMS 5.2 and wish to update while retaining your data. You will be asked to provide the .PAT file you downloaded earlier (DSM_DS3615xs_15217.pat or DSM_DS3617xs_15217.pat or DSM_DS916+_15217.pat). 9 - When the migration is finished you will most probably have to update some of your packages. You can then proceed and update DSM 6.1.7 up to DSM 6.1.7 critical update 3. It is possible you might either need to hard reboot or re-image your usb drive. Make sure to deactivate auto-updates within DSM. Link to individual files (DSM and critical updates) can be found here: https://xpenology.com/forum/topic/7294-links-to-dsm-and-critical-updates/. DO NOT UPDATE TO DSM 6.2. The loader is not compatible. 10 - You are done. If you have questions, first search the forum and/or Google then leave a comment if nothing helps. Please provide your hardware specifications (motherboard model, LAN controller, driver controller etc). Failure to prove such information will lead to the post being deleted or not answered. -------------- Note 1: If after following the tutorial you can’t find your NAS through http://find.synology.com ou Synology Assistant it is highly possible that the drivers of your NIC are not included in the ramdisk of the loader. Make an effort and use Google to know what modules your NIC and HDD controller are using, then check if those modules are included in the custom extra.lzma ramdisk. If yes then use the custom ramdisk. Don't ask me to look for you. If nothing works then ask your question. Note 2: Synology increased security since the introduction of DSM 6. Root access through SSH is no longer possible out of the box. You can however use your admin account and elevate permissions with the following command if you need root permissions: sudo -i Note 3: Please check you have the right VID/PID prior proceeding. If you get the following error ”Failed to install the file. The file is probably corrupted. (13)" it most certainly means your VID and/or PID is/are wrong. If you still have the same error message after verifying the VID/PID then try another USB drive. Note 4: Configuration added to the grub.cfg file can also be done directly during the Grub Boot Menu, so technically you can skip Point 4 and burn the image on the USB drive without editing anything (read Point 5 onward first). If you wish to do the changes from the Grub Boot Menu directly you need to press the letter 'C' when you see the Boot Menu. You will literally only have one second, so be fast. Once you press 'C' you will be in a Grub command line environment. To change your VID enter the following: vid 0xYOUR 4 DIGITS USB DRIVE VID Do the same for pid, sn and mac1. Press enter at each command. The commands are: pid 0xYOUR 4 DIGITS USB DRIVE PID sn YOUR NAS SERIAL NUMBER mac1 YOUR NAS MAC1 ADDRESS If you have multiple NICs you can also issue mac2, mac3 and mac4 as commands. Maximum is mac4. See below: mac2 YOUR NAS MAC2 ADDRESS mac3 YOUR NAS MAC3 ADDRESS mac4 YOUR NAS MAC4 ADDRESS If you think you made a mistake in the numbers simply re-issue the command. When you are done press esc and select the appropriate menu entry. Below is an example (fake numbers) of how it looks under the Grub command line environment : Note 5: If you encounter the error "We've detected errors on your hard drives [drive number] and the SATA ports have also been disabled" during installation, then you have to fallback to adding SataPortMap to the grub environment. Press the letter 'C' at the Grub Boot Menu and then add the following: append SataPortMap=XX where XX is the number of drives. Don’t forget to update this parameter if you add additional drives to your machine. If you use Reinstall, don't forget to re-select the first line of the Boot Menu once the NAS has rebooted after the installation else the Loader will re-select Reinstall and you will be faced with some issues so please beware of this. @@@@@@@@ What does SataPortMap mean? @@@@@@@ @@@@@@@@@@@@@@@@@@@@@@@@@@@@@@@@@ ############## Know issues ##################### - When running on a slow single core machine, there is a race condition that causes the patcher to load too late. The most obvious sign is that console is not working properly. - Some ethernet drivers crash when set MTU above about 4096 (Jumbo frame). ############# Included default modules & firmwares in Jun's Loader ############# ############## Tutorial UPDATES ##################
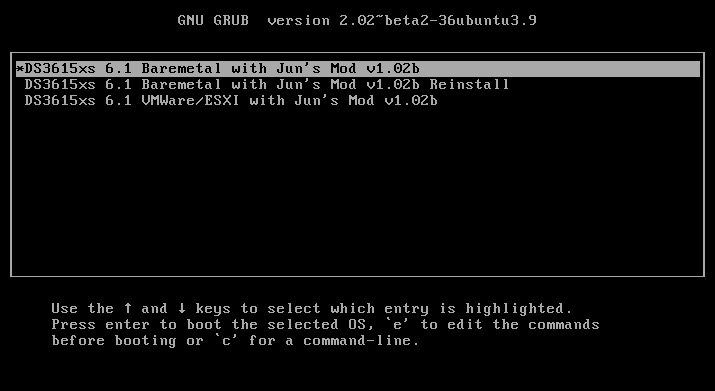
- 630 replies
-
- 32
-

-

-
Hi folks, I have a question and hope someone can help. I set up VM DS918 within ESXi. When I try to access it under Windows Explorer/network, It would not let me. It says username or password incorrect. I know they are correct. I have no problem accessing my real Synology NAS. Any idea how I can fix it? Thanks
-

Tutorial: Install DSM 7.x with TinyCore RedPill (TCRP) Loader on ESXi
tigs replied to flyride's topic in Tutorials and Guides
Setting a VM DVA3221 is fairly easy. However, I have been unable to access the device from Windows 10 explorer/network. It always tells the username and/or password are incorrect. Does anyone else have this issue? -
 Hello, I have a new issue, I don't see my NAS from my Windows explorer since ?? time, I don't know when, I'm more often under Mac and Linux and according to my researches, I need to activate SSDP and WS-Discovery and indeed, by activating this on my DS214+ (DSM 6.2) I can see my NAS (access to my SMB directories found, access to the Freebox in FTP found and there, I don't see the report... But hey, it didn't work before...) My problem is, how to activate SSDP and WS-Discovery on our XPEnology since these functions are not present under DSM 6.0 ? How can I find access to my XPEnology from Windows ? Thanks Akhlan
 -
Just in case, I will briefly describe the problem. ARPL and TCRP Friend: Virtual machines through VMM are very slow (long installation, long startup, very slow overall). CPU load 1-2% TCRP: No problem, virtual machines are working fine. CPU load 10-12% Described in more detail here: https://github.com/fbelavenuto/arpl/issues/260 https://github.com/pocopico/tinycore-redpill/issues/208 Test results (DVA3221): TCRP (0.9.3 classic mode): a) 2\4(cpu\memory): https://browser.geekbench.com/v5/cpu/19811712 6\8(cpu\memory): https://browser.geekbench.com/v5/cpu/19813994 b) Loredan@NAS:~$ sudo su Password: ash-4.4# grep flags /proc/cpuinfo | grep -m1 hwp flags : fpu vme de pse tsc msr pae mce cx8 apic sep mtrr pge mca cmov pat pse36 clflush dts acpi mmx fxsr sse sse2 ss ht tm pbe syscall nx pdpe1gb rdtscp lm constant_tsc arch_perfmon pebs bts rep_good nopl xtopology nonstop_tsc aperfmperf pni pclmulqdq dtes64 monitor ds_cpl vmx est tm2 ssse3 sdbg fma cx16 xtpr pdcm pcid sse4_1 sse4_2 x2apic movbe popcnt tsc_deadline_timer aes xsave avx f16c rdrand lahf_lm abm 3dnowprefetch epb invpcid_single intel_pt ssbd ibrs ibpb stibp ibrs_enhanced tpr_shadow vnmi flexpriority ept vpid fsgsbase tsc_adjust bmi1 avx2 smep bmi2 erms invpcid mpx avx512f rdseed adx smap clflushopt avx512cd sha_ni xsaveopt xsavec xgetbv1 dtherm ida arat pln pts hwp hwp_notify hwp_act_window hwp_epp hwp_pkg_req pku md_clear flush_l1d arch_capabilities ash-4.4# ARPL (v1.0-beta10) a) Before "modprobe acpi-cpufreq && echo "performance" | tee /sys/devices/system/cpu/cpu*/cpufreq/scaling_governor" 2\4(cpu\memory): https://browser.geekbench.com/v5/cpu/19813055 6\8(cpu\memory): https://browser.geekbench.com/v5/cpu/19813550 After "modprobe acpi-cpufreq && echo "performance" | tee /sys/devices/system/cpu/cpu*/cpufreq/scaling_governor" 2\4(cpu\memory): https://browser.geekbench.com/v5/cpu/19813250 6\8(cpu\memory): https://browser.geekbench.com/v5/cpu/19813746 b) Loredan@NAS_test:/$ sudo su Password: ash-4.4# grep flags /proc/cpuinfo | grep -m1 hwp flags : fpu vme de pse tsc msr pae mce cx8 apic sep mtrr pge mca cmov pat pse36 clflush dts acpi mmx fxsr sse sse2 ss ht tm pbe syscall nx pdpe1gb rdtscp lm constant_tsc arch_perfmon pebs bts rep_good nopl xtopology nonstop_tsc aperfmperf pni pclmulqdq dtes64 monitor ds_cpl vmx est tm2 ssse3 sdbg fma cx16 xtpr pdcm pcid sse4_1 sse4_2 x2apic movbe popcnt tsc_deadline_timer aes xsave avx f16c rdrand lahf_lm abm 3dnowprefetch epb invpcid_single intel_pt ssbd ibrs ibpb stibp ibrs_enhanced tpr_shadow vnmi flexpriority ept vpid fsgsbase tsc_adjust bmi1 avx2 smep bmi2 erms invpcid mpx avx512f rdseed adx smap clflushopt avx512cd sha_ni xsaveopt xsavec xgetbv1 dtherm ida arat pln pts hwp hwp_notify hwp_act_window hwp_epp hwp_pkg_req pku md_clear flush_l1d arch_capabilities ash-4.4# modprobe acpi-cpufreq && echo "performance" | tee /sys/devices/system/cpu/cpu*/cpufreq/scaling_governor performance ash-4.4# grep flags /proc/cpuinfo | grep -m1 hwp flags : fpu vme de pse tsc msr pae mce cx8 apic sep mtrr pge mca cmov pat pse36 clflush dts acpi mmx fxsr sse sse2 ss ht tm pbe syscall nx pdpe1gb rdtscp lm constant_tsc arch_perfmon pebs bts rep_good nopl xtopology nonstop_tsc aperfmperf pni pclmulqdq dtes64 monitor ds_cpl vmx est tm2 ssse3 sdbg fma cx16 xtpr pdcm pcid sse4_1 sse4_2 x2apic movbe popcnt tsc_deadline_timer aes xsave avx f16c rdrand lahf_lm abm 3dnowprefetch epb invpcid_single intel_pt ssbd ibrs ibpb stibp ibrs_enhanced tpr_shadow vnmi flexpriority ept vpid fsgsbase tsc_adjust bmi1 avx2 smep bmi2 erms invpcid mpx avx512f rdseed adx smap clflushopt avx512cd sha_ni xsaveopt xsavec xgetbv1 dtherm ida arat pln pts hwp hwp_notify hwp_act_window hwp_epp hwp_pkg_req pku md_clear flush_l1d arch_capabilities ash-4.4# grep . /sys/devices/system/cpu/cpu0/cpufreq/* /sys/devices/system/cpu/cpu0/cpufreq/affected_cpus:0 /sys/devices/system/cpu/cpu0/cpufreq/bios_limit:2601000 /sys/devices/system/cpu/cpu0/cpufreq/cpuinfo_cur_freq:2601000 /sys/devices/system/cpu/cpu0/cpufreq/cpuinfo_max_freq:2601000 /sys/devices/system/cpu/cpu0/cpufreq/cpuinfo_min_freq:800000 /sys/devices/system/cpu/cpu0/cpufreq/cpuinfo_transition_latency:10000 /sys/devices/system/cpu/cpu0/cpufreq/freqdomain_cpus:0 1 2 3 4 5 6 7 8 9 10 11 /sys/devices/system/cpu/cpu0/cpufreq/related_cpus:0 /sys/devices/system/cpu/cpu0/cpufreq/scaling_available_frequencies:2601000 2600000 2500000 2300000 2200000 2100000 2000000 1800000 1700000 1600000 1400000 1300000 1200000 1100000 900000 800000 /sys/devices/system/cpu/cpu0/cpufreq/scaling_available_governors:powersave performance userspace /sys/devices/system/cpu/cpu0/cpufreq/scaling_cur_freq:28171840 /sys/devices/system/cpu/cpu0/cpufreq/scaling_driver:acpi-cpufreq /sys/devices/system/cpu/cpu0/cpufreq/scaling_governor:performance /sys/devices/system/cpu/cpu0/cpufreq/scaling_max_freq:2601000 /sys/devices/system/cpu/cpu0/cpufreq/scaling_min_freq:800000 /sys/devices/system/cpu/cpu0/cpufreq/scaling_setspeed:<unsupported> grep: /sys/devices/system/cpu/cpu0/cpufreq/stats: Is a directory ash-4.4# TCRP Friend (0.9.3): a) After "modprobe acpi-cpufreq && echo "performance" | tee /sys/devices/system/cpu/cpu*/cpufreq/scaling_governor" 2\4(cpu\memory): https://browser.geekbench.com/v5/cpu/19812586 b) Loredan@NAS_test:/$ sudo su Password: ash-4.4# grep flags /proc/cpuinfo | grep -m1 hwp flags : fpu vme de pse tsc msr pae mce cx8 apic sep mtrr pge mca cmov pat pse36 clflush dts acpi mmx fxsr sse sse2 ss ht tm pbe syscall nx pdpe1gb rdtscp lm constant_tsc arch_perfmon pebs bts rep_good nopl xtopology nonstop_tsc aperfmperf pni pclmulqdq dtes64 monitor ds_cpl vmx est tm2 ssse3 sdbg fma cx16 xtpr pdcm pcid sse4_1 sse4_2 x2apic movbe popcnt tsc_deadline_timer aes xsave avx f16c rdrand lahf_lm abm 3dnowprefetch epb invpcid_single intel_pt ssbd ibrs ibpb stibp ibrs_enhanced tpr_shadow vnmi flexpriority ept vpid fsgsbase tsc_adjust bmi1 avx2 smep bmi2 erms invpcid mpx avx512f rdseed adx smap clflushopt avx512cd sha_ni xsaveopt xsavec xgetbv1 dtherm ida arat pln pts hwp hwp_notify hwp_act_window hwp_epp hwp_pkg_req pku md_clear flush_l1d arch_capabilities ash-4.4# modprobe acpi-cpufreq && echo "performance" | tee /sys/devices/system/cpu/cpu*/cpufreq/scaling_governor performance ash-4.4# grep flags /proc/cpuinfo | grep -m1 hwp flags : fpu vme de pse tsc msr pae mce cx8 apic sep mtrr pge mca cmov pat pse36 clflush dts acpi mmx fxsr sse sse2 ss ht tm pbe syscall nx pdpe1gb rdtscp lm constant_tsc arch_perfmon pebs bts rep_good nopl xtopology nonstop_tsc aperfmperf pni pclmulqdq dtes64 monitor ds_cpl vmx est tm2 ssse3 sdbg fma cx16 xtpr pdcm pcid sse4_1 sse4_2 x2apic movbe popcnt tsc_deadline_timer aes xsave avx f16c rdrand lahf_lm abm 3dnowprefetch epb invpcid_single intel_pt ssbd ibrs ibpb stibp ibrs_enhanced tpr_shadow vnmi flexpriority ept vpid fsgsbase tsc_adjust bmi1 avx2 smep bmi2 erms invpcid mpx avx512f rdseed adx smap clflushopt avx512cd sha_ni xsaveopt xsavec xgetbv1 dtherm ida arat pln pts hwp hwp_notify hwp_act_window hwp_epp hwp_pkg_req pku md_clear flush_l1d arch_capabilities ash-4.4# grep . /sys/devices/system/cpu/cpu0/cpufreq/* /sys/devices/system/cpu/cpu0/cpufreq/affected_cpus:0 /sys/devices/system/cpu/cpu0/cpufreq/bios_limit:2601000 /sys/devices/system/cpu/cpu0/cpufreq/cpuinfo_cur_freq:2601000 /sys/devices/system/cpu/cpu0/cpufreq/cpuinfo_max_freq:2601000 /sys/devices/system/cpu/cpu0/cpufreq/cpuinfo_min_freq:800000 /sys/devices/system/cpu/cpu0/cpufreq/cpuinfo_transition_latency:10000 /sys/devices/system/cpu/cpu0/cpufreq/freqdomain_cpus:0 1 2 3 4 5 6 7 8 9 10 11 /sys/devices/system/cpu/cpu0/cpufreq/related_cpus:0 /sys/devices/system/cpu/cpu0/cpufreq/scaling_available_frequencies:2601000 2600000 2500000 2300000 2200000 2100000 2000000 1800000 1700000 1600000 1400000 1300000 1200000 1100000 900000 800000 /sys/devices/system/cpu/cpu0/cpufreq/scaling_available_governors:powersave performance userspace /sys/devices/system/cpu/cpu0/cpufreq/scaling_cur_freq:28018838 /sys/devices/system/cpu/cpu0/cpufreq/scaling_driver:acpi-cpufreq /sys/devices/system/cpu/cpu0/cpufreq/scaling_governor:performance /sys/devices/system/cpu/cpu0/cpufreq/scaling_max_freq:2601000 /sys/devices/system/cpu/cpu0/cpufreq/scaling_min_freq:800000 /sys/devices/system/cpu/cpu0/cpufreq/scaling_setspeed:<unsupported> grep: /sys/devices/system/cpu/cpu0/cpufreq/stats: Is a directory ash-4.4# The difference is not big, but upon use it is significant and visible without any measurements. The explorer window opens for 30-60 seconds. The problem is probably something else, I'm confused by reading from the HDD, look in the issues, I've attached screenshots. p.s. Sorry in advance, I can not actively and quickly conduct tests to test, this is a working machine, and I am not a very experienced user.
-
Hello, I report that the beta version does not work with my hardware, instead the alpha version v0.5-alpha1 does work correctly (removing some errors that I had previously reported) the version i try rs4021xs+ If you need to carry out any additional tests, tell me fbelavenuto, thank you very much for the work .I proceed in the same way, I format a new USB, I install the image, I carry out the configuration process, everything seems correct, I restart to be able to install the dsm, on the screen everything appears correct, (search ip etc, booting etc) but the windows explorer gives it the ip, but it does nothing, i search with an ip scanner program, but that ip that the loader gives me is not there, as if it did not give the ip or that the drivers of the network cards did not they were fine...
-
Hi, ich habe ein großes Problem . Die xpenology 3615xs ist in Windows Explorer unter Computer nur kurz erschienen, und nach einiger Zeit sieht mann sie nicht mehr. Jedoch wenn ich den // "Name der xpenology " eingeben komme ich drauf . Also hat sie eine gültige IP . In der Box ist die Windows Erkennung abgehackt, SMB hab ich nicht verändert . ( Bin auf einer Lanparty und Jeden zu erklären ,er muss mit dem Namen in die Box ist mühsam). Einige machen es bereits so , jedoch kommt bei manchem die Aufforderung sie müssen Benutzer und password eingeben, bei anderen jedoch nicht . Bin für jeden Tipp froh.
-
I created a tutorial for the French section so I thought, what the heck, let's do it for the English one as well. Here it goes. As most of you know by now Jun was able to find a way to install DSM 6 on non Synology boxes. Here is the thread that I recommend reading. At least make an effort and read the OP: https://xpenology.com/forum/topic/6253-dsm-6xx-loader/ Below is what you need for the operation. I will assume you are doing all this under Windows 10, 8, 7 or XP. If you are on a MAC computer have a look at this post I made on how to burn the image to a USB drive and then mounting the USB drive for editing the content. The rest of the tutorial still applies. If you are currently using DSM 5.1 or below first update to DSM 5.2. If you are doing a fresh install of DSM 6.0 then carry on with the tutorial and omit references to DSM 5.2. - Win32 Disk Imager to make a bootable USB drive; - A 4GB (or any size really) USB drive (flash drive) to install the loader. Not that this is necessary but use preferably a brand name (Kingston, SanDisk...); - A way to read your USB drive VID/PID. Here is a how-to >>> VID and PID; - A good text editor: Notepad++ I really don't recommend using Windows's Notepad; - DSM 6.0.2. The file comes straight from Synology servers; - Jun's official v1.01 loader (mirror). This is a hybrid UEFI/BIOS loader so it should work in most machines. Loader supports Intel and AMD CPUs; - Customized extra.lzma ramdisk. This ramdisk is optional and should only be used if the default ramdisk included in the loader is not detecting your hardware. I am just providing it for those who are having issues with network detection or unrecognised HDD controllers. This custom ramdisk contains additional modules (drivers) that were mostly taken from Quicknick's loader. I don't warranty they all work but I think most do. If you chose to use this ramdisk, you will need to replace (or rename, so you can revert) the default extra.lzma ramdisk from Jun's loader with this one. See change log at the end of the tutorial for additional modules. - Make sure your drives are plugged in direct succession starting from the 1st SATA port. Usually the first port is described as SATA0 on motherboards. Check with your MB manufacturer for exact nomenclature. - OSFMount to modify the grub.cfg file within the loader's image. This is not strictly necessary as Jun has made it possible to configure what needs to be modified via the Grub Boot Menu. I recommend you use OSFMount for now although it adds an extra step. If you prefer using Jun's new feature simply skip Point 5, read Note 4 instead and pick up at Point 6. PLEASE READ EVERYTHING PRIOR ATTEMPTING ANYTHING Use this loader at your own risk. I wont be held responsible for any loss of data or black smokes that may result in the use of this loader. Please note that this loader is based on DSM 6.0 Beta 2 branch 7274 and that a limited amount of drivers are included in the loader. If it is fundamental for you to have a NAS operating as quick as possible I recommend you look at the included drivers first at the bottom of this tutorial. If they are not there you will have to compile your own drivers. One last thing: DO NOT UPDATE DSM BEYOND VERSION 6.0.2 (6.0.3, 6.1, 6.1.X, 6.2) with loader v1.01. You have been warned. Here we go: 1 - BACKUP your data and save your configuration prior any attempts to migrate from DMS 5.2 to DSM 6.0.2. I can't stress this enough. JUST DO IT, as Nike likes to say. Also, print this tutorial if you can. It will make your life easier. 2 - Turn off your NAS and unplug the USB drive you are currently using with DSM 5.2. I recommend you put this USB drive aside in case migration to DSM 6.0.2 doesn’t go as expected and you need to revert to DSM 5.2. It will just make your life easier. 3 - Now go to your workstation/PC, plug a new USB drive (or the old one if you really don’t have any spare USB drives). Use the link I provided earlier to check your USB drive VID/PID. Write down the info somewhere as we will need it later. 4 - Unzip the loader you downloaded earlier. You will end up with a folder containing several files. Since we are installing on bare-metal you will only need the image file "synoboot.img". 5 - Now launch OSFMount. Select Mount New, then select the image file (i.e. synoboot.img) to open. Now select partition 0 (the one that is 30 MB). Click Ok. Then at the bottom of the window make sure to un-tick the "Read only drive". Click Ok. The EFI partition of the image file should now be mounted in file explorer. At this point you can navigate to the /image/DS3615xs directory and replace the extra.lzma ramdisk with the one provided above. When you are done come back to the root directory and go to the /grub directory and edit the grub.cfg file. Below is what you will see in the file. I am only showing below the portion of the code that is relevant for the purpose of this tutorial [...] set extra_initrd="extra.lzma" set info="info.txt" set vid=0x058f set pid=0x6387 set sn=C7LWN09761 set mac1=0011322CA785 set rootdev=/dev/md0 set netif_num=1 set extra_args_3615='' set common_args_3615='syno_hdd_powerup_seq=0 HddHotplug=0 syno_hw_version=DS3615xs vender_format_version=2 console=ttyS0,115200n8 withefi elevator=elevator quiet' set sata_args='sata_uid=1 sata_pcislot=5 synoboot_satadom=1 DiskIdxMap=0C SataPortMap=1 SasIdxMap=0' set default='0' set timeout='1' set fallback='1' [...] You want to modify the following: Change vid=0x090C to vid=0x[your usb drive vid] Change pid=0x1000 to pid=0x[your usb drive pid] Change sn=C7LWN09761 to sn=generate your sn here with DS3615xs model Change mac1=0011322CA785 to mac1=[your NIC MAC address]. You can also add set mac2=[your NIC MAC address #2] and so on until mac4 if you have multiple NICs. However, this is not necessary. Optional: Change set timeout='1' to set timeout='4' - This will allow you more time to make a selection in the Grub Boot Menu when it appears. Once you are done editing the grub.cfg file, save it and close your text editor. Now in OSFMount click on Dismount all & Exit. You are now ready to burn the image to your USB drive. 6 - Now use Win32 Disk Imager to burn the image file onto the USB drive. This will also make the USB drive bootable. 7 - Eject and unplug the USB drive from your workstation. Plug it in your NAS (avoid USB 3.0 ports. Use USB 2.0 port if available). Boot your NAS and before doing anything fancy, access your BIOS so to make your USB drive the 1st boot drive if it's not the case. The loader can boot in UEFI or in legacy BIOS, so you chose what suits you best. Also, make sure your HDDs are booting in AHCI mode and not in IDE, else it wont work. Finally, if disabled, also enable the serial port in BIOS. Some BIOS don't have this option so don't get too cranky on this if you can't find it. Save changes to the BIOS and REBOOT the NAS. 8 - Once rebooted, if you have a monitor connected to your NAS you will see the following Grub Boot Menu: If you are on an Intel based machine you can simply let it be and the loader will automatically start. However, if you are on a AMD based machine you will need to select the 4th line and then press enter. ADVICE: even before you see the Grub Boot Menu press the up/down key. This will stop the countdown so you will be able to select the desired line. You won’t see much other than the following after you press enter: If you booted the USB drive in EFI mode then you will see the same text without the last 3 lines but that's ok. 9 - Now go back to your workstation, and launch Synology Assitant or go to http://find.synology.com. Within one minute or so you should normally be able to see your NAS on the local network (it took 55 seconds on a test I did on a VM). Just follow the instructions and either chose "Install" if you wish to have a clean install or chose “Migration” if you are coming from DMS 5.2 and wish to update while retaining your data. You will be asked to provide the .PAT file you downloaded earlier (DSM_DS3615xs_8451.pat). 10 - When the migration is finished you will most probably have to update some of your packages. You can then proceed and update DSM 6.0 up to DSM 6.0.2-8451 update 11. It is possible you might either need to hard reboot or re-image your usb drive. DO NOT UPDATE DSM TO VERSIONS 6.0.3, 6.1, 6.1.x, 6.2, with loader v1.01. Make sure to deactivate auto-updates within DSM. 11 - You are done. If you have questions, first search the forum and/or Google then leave a comment if nothing helps. Please provide your hardware specifications (motherboard model, LAN controller, driver controller etc). Failure to prove such information will lead to the post being deleted. -------------- Note 1: If after following the tutorial you can’t find your NAS through http://find.synology.com ou Synology Assistant it is highly possible that the drivers of your NIC are not included in the ramdisk of the loader. Make an effort and use Google to know what modules your NIC and HDD controller are using, then check if those modules are included in the custom extra.lzma ramdisk. If yes then use the custom ramdisk. Don't ask me to look for you. If nothing works then ask your question. Note 2: Synology increased security in DSM 6. Root access through SSH is no longer available out of the box. You can however use your admin account and elevate permissions with the following command sudo -i Note 3: Please check you have the right VID/PID prior proceeding. If you get the following error ”Failed to install the file. The file is probably corrupted. (13)" it means your VID and/or PID is wrong. If you are 200% sure that your VID/PID is correct and you still get that error message then try to 'Force Install'. If that doesn't work then try another USB drive. Note 4: Changes made to the grub.cfg file can also be done directly during the Grub Boot Menu, so technically you can skip Point 5 and burn the image on the USB drive without editing anything (read Point 6 onward first). If you wish to do the changes from the Grub Boot Menu directly you need to press the letter 'C' when you see the Boot Menu. You will literally only have one second, so be fast. Once you press C you will be in a Grub command line environment. To change your VID enter the following: vid 0xYOUR 4 DIGITS USB DRIVE VID Do the same for pid, sn and mac1. Press enter at each command. The commands are: pid 0xYOUR 4 DIGITS USB DRIVE PID sn YOUR NAS SERIAL NUMBER mac1 YOUR NAS MAC1 ADDRESS If you have multiple NICs you can also issue mac2, mac3 and mac4 as commands. Maximum is mac4. See below: mac2 YOUR NAS MAC2 ADDRESS mac3 YOUR NAS MAC3 ADDRESS mac4 YOUR NAS MAC4 ADDRESS If you think you made a mistake in the numbers simply re-issue the command. When you are done press esc and select the appropriate menu entry. Below is an example of how it looks under the Grub command line environment: Note 5: If your encounter the error "We've detected errors on your hard drives [drive number] and the SATA ports have also been disabled" during installation, try the Force Install menu entry in the Grub Boot Menu. If this does not work then you have to fallback to adding SataPortMap to the grub environment. Press the letter 'C' at the Grub Boot Menu and then add the following: append SataPortMap=XX where XX is the number of drives. Don’t forget to update this parameter if you add additional drives to your machine. If you use Force Install, don't forget to re-select the first line of the Boot Menu once the NAS has rebooted after the installation else the Loader will re-select Force Install and you will be faced with some issues so please beware of this. @@@@@@@@ What does SataPortMap mean? @@@@@@@ @@@@@@@@@@@@@@@@@@@@@@@@@@@@@@@@@ ############## Know issues ##################### - When running on a slow single core machine, there is a race condition that causes the patcher to load too late. The most obvious sign is that console is not working properly. - Some ethernet drivers crash when set MTU above about 4096 (Jumbo frame). ############# Included default modules in Jun's Loader ############# ############# Additional modules in the custom extra.lzma ramdisk ############# ############## Tutorial UPDATES ##################
-
 I have a basic volume on a VM running 918 image. it was a 10TB disk and were filled with 8TB, and after deleting files and the volume size still 8TB, and using file explorer to check the file size should be around 4TB. No recyclebin, no versioning. Any hint? Thanks.
 -

HP 54NL - RAID cassé, une idée ?
damdam replied to damdam's topic in Compatibilité Hardware & Installation
Je vais double-checker mes disques, mais cela semble bon. Par contre, le point du BIOS est bon à voir, j'ai déjà eu des problèmes dans le passé avec lui (HP qui bloquait au boot), donc à vérifier, oui ! Je vais explorer ça. Merci de ce retour en tous cas ! -
I have a kind of related question for everybody.... I have a proxmox redpill DS3622 build. Running paravirtual NIC in Proxmox with V9F ext drivers. I also have a PCI passthru Ethernet port, I used one of the intel ports onboard from the server motherboard. Both work fine, the Intel NIC in pci pass thru didn't require any additional ext drivers to work. Each has its own different IP, they are not bonded, so I know which port I am using. I am getting different smb speeds when copying over the network in Windows. Scenario 1: In windows, open network, open icon for DS3622, open temp shared folder, now drag and drop 1.1gb file.. I get a maximum transfer of 60mb/sec (\\ds3622\temp) Scenario 2: Change location in windows explorer to direct ip (\\192.168.1.100\temp) I get 110mb/sec. The proxmox virtual nic is ip 100, and the pci passthru is ip 101 (\\192.168.1.101\temp), same speeds on either direct ip. So if the window shows a direct ip in the location, the speed is nearly doubled. If it show ds3622 its about half speed...? any clue? This is a repeatable experiment. I get similar results from different pcs on the lan, different files, and the results almost always the same, give or take a few mbs/sec
-

[Tuto] DSM 7 Pour Proxmox en 8 minutes ( Update DSM-7.1.1 )
Lennart replied to Sabrina's topic in Installation Virtuelle
"si vous utilisez Tinycore RedPill Loader en version 0.8.0.5" Sur le site github, je ne trouve qu'une V0.8.0.0, je veux bien le lien de la v0.8.0.5 svp. "Il faut parfois comprendre ce qu'on fait et dépasser les tutos qui mâchent un peu trop le travail." Merci pour ce conseil très utile, malheureusement je n'ai plus le luxe du temps (situation familiale oblige) de pouvoir explorer tous les sujets que je souhaiterai.
-
 Hallo, ich habe vor etwa einer Woche von 5.2 auf 6.1.4 upgedatet. Funktionierte auch alles reibungslos. Danach habe ich Plex Server neuinstalliert und Moments, sowie die anderen Apps aktualisiert. Am Sonntag ist mir dann mein Router ausgefallen, so dass der Server in Ruhe vor sich hinwerkeln konnte und die zigtausend Fotos matchen konnte. Der Router ist immer noch defekt, so dass ich über mein Mobiltelefon und den Windows PC ein Netzwerk aufgebaut habe, worüber gestern die DS erreichbar war. Heute morgen habe ich das Netzwerk wieder aufgebaut, allerdings die DS nicht mehr erreicht. Möglicherweise war der USB Stick mit dem DS Starter nicht mehr OK, daher habe ich diesen gemäß dem Turorial vom Polanskiman auf einem neuen SanDisk Cruzer erneut erstellt und das System gebootet. Es wurde auch dann im Synology Assistant angezeigt und als wiederherstellbar gekennzeichnet. Dies habe ich soweit dann auch aktiviert. Es wurde ein Neustart gemacht und irgendwann war der Timer im Tool runtergezählt. Keine Fehlermeldung wurde ausgegeben, allerdings habe ich das System über den Browser nicht erreichen können. Auch im Synology Assistant ist dieser nach einem erneuten Scan nicht mehr aufgelistet worden. Über den Windows Explorer kann ich allerdings auf die Verzeichnisse im System zugreifen. Hat jemand eine Idee, wie ich das System über mit der DSM wieder erreichen kann? Danke schon mal. groovy Drunter läuft ein DELL T20