Search the Community
Showing results for 'Intel PRO 1000 GT'.
-
 edit 14.05.2020: 6.2.3 is back online as v25426, for newer coffeelake cpu's with problems using hardware transcoding (dev/dri present after boot) there is a new videostation that fixes the problem https://xpenology.com/forum/topic/28321-driver-extension-jun-104b-for-dsm623-for-918/?do=findComment&comment=144918 edit2 02.06.2020: as @richv31 pointed out here https://xpenology.com/forum/topic/21663-driver-extension-jun-103b104b-for-dsm622-for-3615xs-3617xs-918/?do=findComment&comment=148564 there seems to be a serious problem with 918+ and scsi/sas drivers, at least with mpt2sas/mpt3sas, not just with 6.2.2/6.2.3 it also happens with jun's original loader 1.04b and dsm 6.2.0 (23824), breaking raid sets after not properly waking up from hdd hibernation means potential data loss i had a two disk raid1 set on a lsi 9211-8i and after disks spinning down only one came up and i saw some really worrying messages on the serial console, i was not able to log in to the system, not on the web gui, even not on the serial console, the whole system was in lock down and only switching off seemed to work as of the problems with not getting s.m.a.r.t. values i used juns old original raid_class.ko, scsi_transport_sas.ko, scsi_transport_spi.ko to get the old state back (replacing my newly made ones from more recent synology kernel source 24922 ) in 0.11/0.12 - these version inherit the problem that seems to be present since the beginning with loader 1.04b anyone using mpt2sas/mpt3sas and disk hibernation on 918+ should disable it for now to not risk any data loss the new 0.13 for 918+ will have the raid_class.ko, scsi_transport_sas.ko, scsi_transport_spi.ko from kernel source 24922, that version did work on testing on my system without breaking anything and without such alarming errors on wakeup of disks, there will be no smart data but at least it seems safer then disks not waking up properly for "proper" lsi sas controller support i'd suggest using 3615 or 3617 as it is "native" in these units and should work better, maybe there are kernel options missing in the 918+ kernel and that cant be fixed, if anyone finds out more just add a comment (i might not have the time to dig into this) the other alternative is to use sata/ahci instead of scsi/sas with 918+, that works without problems on my system using 918+ (12 disks), JMB585 based controller seem to be the best choice atm as they support pcie 3.0 and can have up to 2000 MByte/s for its 5 sata ports (the older marvell and asm chips use only pcie 2.0 limiting the data rate to 500 MB/s or 1000 MB/s, even 8 port controller with two of the older chips use a pcie bridge chip with just two lanes making them terrible choice for a high port count - might be ok with just one or two 1GBit nic's but will at least limit the rebuild speed and ssd's should be kept away from these controllers and place in internal sata ports) for Instructions about installing or updating please read "Driver extension jun 1.03b/1.04b for DSM6.2.2 for 3615xs / 3617xs / 918+" if i have time i will write more in this place the new package is not well tested i just did some tests with hardware i have at hand (ahci, e1000e, r8168, igb, bnx2x, mpt2sas/mpt3sas) and tested update from 6.2.2 to 6.2.3 basically synology reverted the kernel config change made in 6.2.2 back to what was before so old drivers from original 1.04b loader (and older driver i made before 6.2.2) should work again - but as synology also introduced there own new i915 driver with 6.2.3 there will be a conflict when jun's i915 driver is loaded with 6.2.3 there are two positive new things, synology released a nearly recent kernel source code (24922) and 6.2.3 has a new i915 driver supporting as much gpu hardware as jun's backported i915 driver in loader 1.04b - so there is no need for jun's i915 driver anymore and in theory we should have good support for apollo lake, gemini lake and other newer hardware but it seems not all new UHD630 is supported as there is dev id "3E98" unsupported (i5-9400, i5-9600k, i7-9700t, i7-9700), ark.intel.com and wikichip.og are usually good sources to check the id https://ark.intel.com/content/www/us/en/ark/products/134898/intel-core-i5-9400-processor-9m-cache-up-to-4-10-ghz.html edit: there seems to be versions of the i5-9400 with a "3E92" GPU this versions don t need the patched driver, they will run with the default driver, /dev/dri should be present ootb, it also can be checked in /var/log/dmesg when searching for "[8086:3e92]" https://en.wikichip.org/wiki/intel/core_i5/i5-9400 there is also a good document from intel listing all coffeelake's https://01.org/sites/default/files/documentation/intel-gfx-prm-osrc-cfl-vol01-configurations.pdf coffeelake cup's without driver support (no hardware transcoding), SKU numbers should be listed when buying and can be checked on the box i9 SKU S82 i7 SKU S82 i5 SKU S6f2 a new 10th gen i5-10500 / i3-10300 have device id's "9BC8" and there are no "9xxx" numbers in the driver we use so don't expect any newer gen10 cpu to work with hardware transcoding even when it "only" has UHD630 igpu edit: there are also even lower end 10th gen cpus (2 core) with a different GPU device id "9BA8" like G5920, G5925, G6400 with a iGPU UHD 610, the equivalent in the 9th gen would be a G5400 and that comes with pci device id's 3E90/3E93, so we need to edit a different entry when patching for this edit: i made a modded i915 driver were the pci device id of the 9th gen UHD 630 iGPU (3E92/3E93) is replaces with the device id's of the newer/different UHD 610/630 iGPU's that are unsupported 8086:3E92 => iGPU UHD 630, Low End Desktop 9 Series (original driver) -> 8086:3E98 => iGPU UHD 630, High End Desktop 9 Series (i5-9400, i5-9600k, i7-9700t, i7-9700) 8086:9BC8 => iGPU UHD 630, Low End Desktop i5-10500, i5-10600T and lower 8086:9BC5 => iGPU UHD 630, High End Desktop i510600K and higher 8086:3E93 => iGPU UHD 610, Low End Desktop 9 Series -> 8086:9BA8 => iGPU UHD 610, low End Desktop Series like G6400 the zip file contains 3 versions in every one is 3E92 replaced with the one we want to get working, as its just a crude binary patch i choose 3E92 as it seemed the most similar device, was tested for 3E98 iGPU and seemed to work, for the 10th there is at least one positive feedback with plex its intended to be used with the extra/extra2 from this thread as this removes jun's old i915 driver (not just one file) that will prevent synologys new driver to work properly the patched i915.ko file is supposed to be copied to /usr/lib/modules/ and replaces the original file from synology for 6.2.3 Update3 (added 9BA8 support) https://gofile.io/d/4fFJA5 https://dailyuploads.net/x3e0nkxk6p0e https://usersdrive.com/zfl9csl91xwr.html https://www34.zippyshare.com/v/304gfbnO/file.html SHA256: EC2447F47FEE6457FE3F409E26B83E5BF73023310E10A624575A822FDBC10642 a little warning, in worst case the system might crash or freeze when transcoding and and such undefined states and hard resets can result i data loss (cache) or damaged raids (depending on the load of the system at this time) so until its more tested it should not be used on system with "important" data and a recent backup - ok i know its a little over cautious but i dont like the thought someone looses data because of this nice to have feature (software mdadm raids can be repaired in most cases if the worst happens) -> positive feedback for a i5-9400, i5-9600K, i9-9900T (8086:3E98) to fully working -> positive feedback for a G6400 (8086:9BA8) to have /dev/dri -> one user positive feedback for a i5-10600T (8086:9BC8) to fully working with plex -> one user negative feedback for a i5-10500 (8086:9BC8) to get /dev/dri devices but no transcoding with emby -> one user negative feedback for a i9-10900 (8086:9BC5) system does not boot anymore - seems to be a solid hands off? edit: there is a driver source patch for 10th gen that came up along 7.x and 9BC5 was confirmed to work with this new driver, so anyone with a 10th gen gpu and trouble can change to 7.x (tc rp loader) ot can try these 6.2.3 modules from this link (i915_918_623.7z) https://xpenology.com/forum/topic/59909-i915ko-backported-driver-for-intel-10th-gen-ds918-ver-701-up3/?do=findComment&comment=277236 i completely removed jun's i915 drivers from the extra/extra2 and changed/added the i915 firmware needed, also i took care of the "old" i915 drivers on the installed system in /usr/lib/modules/update/, they are now deleted on boot so if you come from 6.2.2 and used extra/extra2 std or recovery or you did already used juns original 1.04b extra/extra2, it should work as soon as you boot up (when drivers in "update" are not present then the default drivers from synology will be used and with the added i915 in place it will work on most intel gpu's up to coffee lake) the driver versions are the same as in the 6.2.2 extra/extra2 but are newly compiled, as every driver from 6.2.2 is renewed all the old drivers are overwritten and there should be no crashing drivers on boot (which can prevent proper shutdown or reboot) we now have one universal i915 driver (and not jun's and synologys) its back to one package for all cpu/gpu, if needed there will be a recovery version too i only did test a new created loader from 1.04b image file with zImage and rd.gz from "DSM_DS918+_25426.pat" and the new extra.extra2, it will also work with the 6.2.0 kernel that is by default in the 1.04b image if there are problems getting hardware transcoding to work it might help to disable vt-x/vt-d in bios (reported on a J5005 Gemini Lake), but there are other possible reasons because of the licensing thats needed for this to work, but at least it will not hurt as as lon as you dint intent to use the vmm package if you accidentally updated 6.2.2 to 6.2.3 and now have problems like no network after boot, no proper shutdown/reboot or missing /dev/dri (hardware transcoding) then you just copy the new extra/extra2 to your already updated usb drive (the update to 6.2.3 already installed the new kernel on it) with latest updates of win10 there is no drive letter anymore, its possible to still do it with the tools already used for creating the usb drive, read the usb to a imgae file with "Win32DiskImager 1.0" (activate "read only allocated partitions"), mount that image with osfmount (like in the tutorial section), overwrite old /extra/extra2.lzma and write the image back to usb with Win32DiskImager extra.lzma/extra2.lzma for loader 1.04b ds918+ DSM 6.2.3 v0.13.9 some intel and realtek driver updated so hopefully more onboard nic's will work (like realtek 8125), also realtek 8152 is newer so all 2.5G usb solutions from realtek schould work, there is still no way for the intel 2.5G nic as there is no standalone driver for older kernel versions, removed fireware, added bnxt_en and sr_mod/cdrom, nic Killer E2500, added *vf.ko in rc.modules https://pixeldrain.com/u/jHa2eYrc https://gofile.io/d/mUFYxQ 1CED32FCF63EB54DAA44335FA1EFBCE408D41A3E16D55771D35B0FD423F0B9CF extra.lzma/extra2.lzma for loader 1.04b ds918+ DSM 6.2.3 v0.13.3 scsi/sas disks will have no s.m.a.r.t. infos with lsi sas controllers (see edit2 above), newer atlantic.ko driver 2.3.4, r8125 added to rc.modules, used latest source for realtek drivers r8101/r8125/r8152/r8168/r8169, bna.ko firmware corrected https://pixeldrain.com/u/pkBY9XjC https://gofile.io/d/FvoFdo SHA256: EF6F26999C006A29B3B37A7D40C694943100F0A9F53EC22D50E749F729347EC6 for special purpose and tests, extra.lzma/extra2.lzma for loader 1.04b ds918+ DSM 6.2.3 v0.12.1 - this version shows s.m.a.r.t. info and serial of disks for lsi scsi/sas but might corrupt the raid when disk hibernation is active (see warning above) https://pixeldrain.com/u/kZJdPj1H https://gofile.io/d/nsglbX SHA256: 9089D38A4975AB212553DA7E35CE54027DE4F84D526A74A46A089FC7E88C1693 extra.lzma for loader 1.03b ds3615 DSM 6.2.3 v0.12.1_test, added virtio/9p, CDROM drivers, nic Killer E2500 lhttps://pixeldrain.com/u/Rx4tV6ay https://gofile.io/d/RnX1QA SHA256: E72820BF648CFD7F6075DEEB1208A3E0D8A61F38289AE17AC7E355910B9B0E0E extra.lzma for loader 1.03b ds3615 DSM 6.2.3 v0.11_test, same added drivers as for 6.2.2 like newer intel drivers, 10G nics, ... https://pixeldrain.com/u/5aN77nWf https://gofile.io/d/PMIDrX SHA256: 5DE93F95841CC01F9E87EE4EE2A330084B447E44EBAA6013A575A935D227D4AF extra.lzma for loader 1.03b ds3617 DSM 6.2.3 v0.12_test (2/2022), added virtio/9p, CDROM drivers, nic Killer E2500 https://pixeldrain.com/u/xmhCVxck https://gofile.io/d/VRtmC1 SHA256: B9AC8705D5D9DCEED1C0315346E4F2C7C4CD07C4ED519FC9901E8E368A3AE448 extra.lzma for loader 1.03b ds3617 DSM 6.2.3 v0.11.2_test, same added drivers as for 6.2.2 like newer intel drivers, 10G nics, ... (0.11.2 because i forgot bnx2/bnx2x firmware and mpt2/mp3 driver problem when updating from 6.2.2 in 0.11) https://pixeldrain.com/u/zwAJzKa9 https://gofile.io/d/0Tx8A7 SHA256: D467914E55582D238AC5EC4D31750F47AEB5347240F2EAE54F1866E58A8BD1C9
 -
Which spk module should I use for an Intel Core 5-11600KF?
-
https:ipc.net/products/h670-q670-8-bay-nas-motherboard-support-intel-12-13-14th-cpu-3x-m-2-nvme-8x-sata3-0-2x-intel-2-5g-network-port-hdmi-dp-4k-60hz-vpro-enterprise-class-commercial-nas-board
-
https:ipc.net/products/h670-q670-8-bay-nas-motherboard-support-intel-12-13-14th-cpu-3x-m-2-nvme-8x-sata3-0-2x-intel-2-5g-network-port-hdmi-dp-4k-60hz-vpro-enterprise-class-commercial-nas-board He can shop to UK
-
 Здравствуйте, форумчане. Имею опыт установки на старое железо 1155, 1156 и 1151 сокеты раньше с помощью ARPL, сейчас ARC. И вот потянуло меня на современное железо установить (в теме форума) в красивейшbq корпус Jonsbo N3. По старой схеме начал устанавливать - закинул на флешку последний ARC, всё вроде как обычно, установилось без проблем перезагрузилось... Запускается, выдает ip, сетевое гнездо мигает желтым, горит зеленый, советует в synology assistant поискать сервер, но через секунды 3-4 гнездо гаснет и через секунд 5 перезагружается. Я чуть ли не все возможные варианты устройств под которые сборка будет маскироваться и моды перепробовал, но результат тот же. И старые версии ARC пробовал, та же хрень. С другими загрузчиками не смог опробовать. Не понимаю, файлов образа нет на githubе (tinycore-redpill, arpl раньше были img файлы-образы, теперь их нет). Кто чем сможет помочь, буду очень благодарен. 🖐️
 -
 Hi All, Does anyone tested this mainboard with Xpenology? Is it any good? Is the bios good without Chinese Spyware? The hardware specs are perfect. It is the ultimate Nas mainboard. If any known brand should build this I would buy it directly. Szbox NAS N100 You need to buy a cpu fan. Amazon: https://www.amazon.nl/DDR5-geheugen-NAS-computercomponent-ITX-moederbord-2-1-interface-Qiaosibo-radiator/dp/B0CQ4NWNHP/ref=mp_s_a_1_6?crid=3U2K3C7FX9P6I&keywords=szbox&qid=1703369075&sprefix=szbox%2Caps%2C63&sr=8-6&th=1 Aliexpress: https://nl.aliexpress.com/item/1005006341205501.html?src=google&aff_fcid=b91c52790e43423eae3f19a617a9b2e1-1703411261720-07805-UneMJZVf&aff_fsk=UneMJZVf&aff_platform=aaf&sk=UneMJZVf&aff_trace_key=b91c52790e43423eae3f19a617a9b2e1-1703411261720-07805-UneMJZVf&terminal_id=f54450ce5ceb45b3a539ed765b0e9d52&afSmartRedirect=y https://liliputing.com/build-your-own-nas-with-this-alder-lake-n-motherboard-up-to-6-hard-drives-and-2-ssds/
.jpg.8ec90c51497870210dd4f97bdc6a26f2.jpg)
-
Всем доброго времени суток. Решил собрать NAS для дома. Толком ничего про это ещё не знаю, так что решил попробовать, посмотреть, как он облегчит мне жизнь. Откопал старый комп, из рабочего там были: Материнская плата — Gigabyte H61M-S2-B3; Процессор (вместе с no-name кулером) — Intel i5-2400; Оперативная память — 2x4 ГБ Kingston DDR3; и старый корпус V-Lazer неизвестной модели. Ко всему этому добру хочу прикупить: HDD под RAID1 — 2x4ТБ Seagate Exos 7E8 (ST4000NM000A); SSD — Apacer AS340 PANTHER (присмотрел по отзывам, чтобы не отстегнулся через месяц); Блок питания — DEEPCOOL PK550D (да, перебор, но решил взять со всеми защитами на всякий случай); Ну и остальное по мелочи, чтобы снизить шумы и повысить защиты: кулеры Arctic Cooling, патчкорд ARDOR GAMING HtsPcSffC8050, кабель питания, sata-шлейфы, сетевой фильтр Pilot L GP, антивибр.гвозди, пылевые фильтры, антивибр.шайбы для HDD, ножки для пк и стяжки для кабелей. Вопрос такой: будет ли работать NAS на дисках Seagate Exos? И ещё вопрос: что нужно сделать, чтобы была возможность подключиться к NAS вне дома?
-
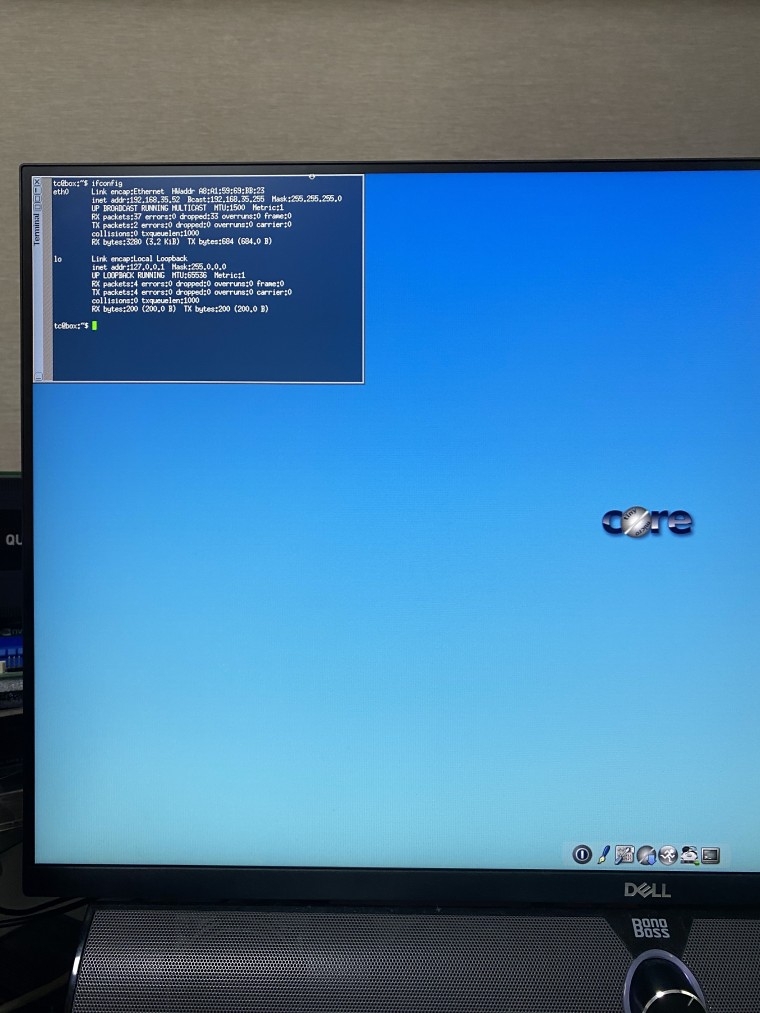
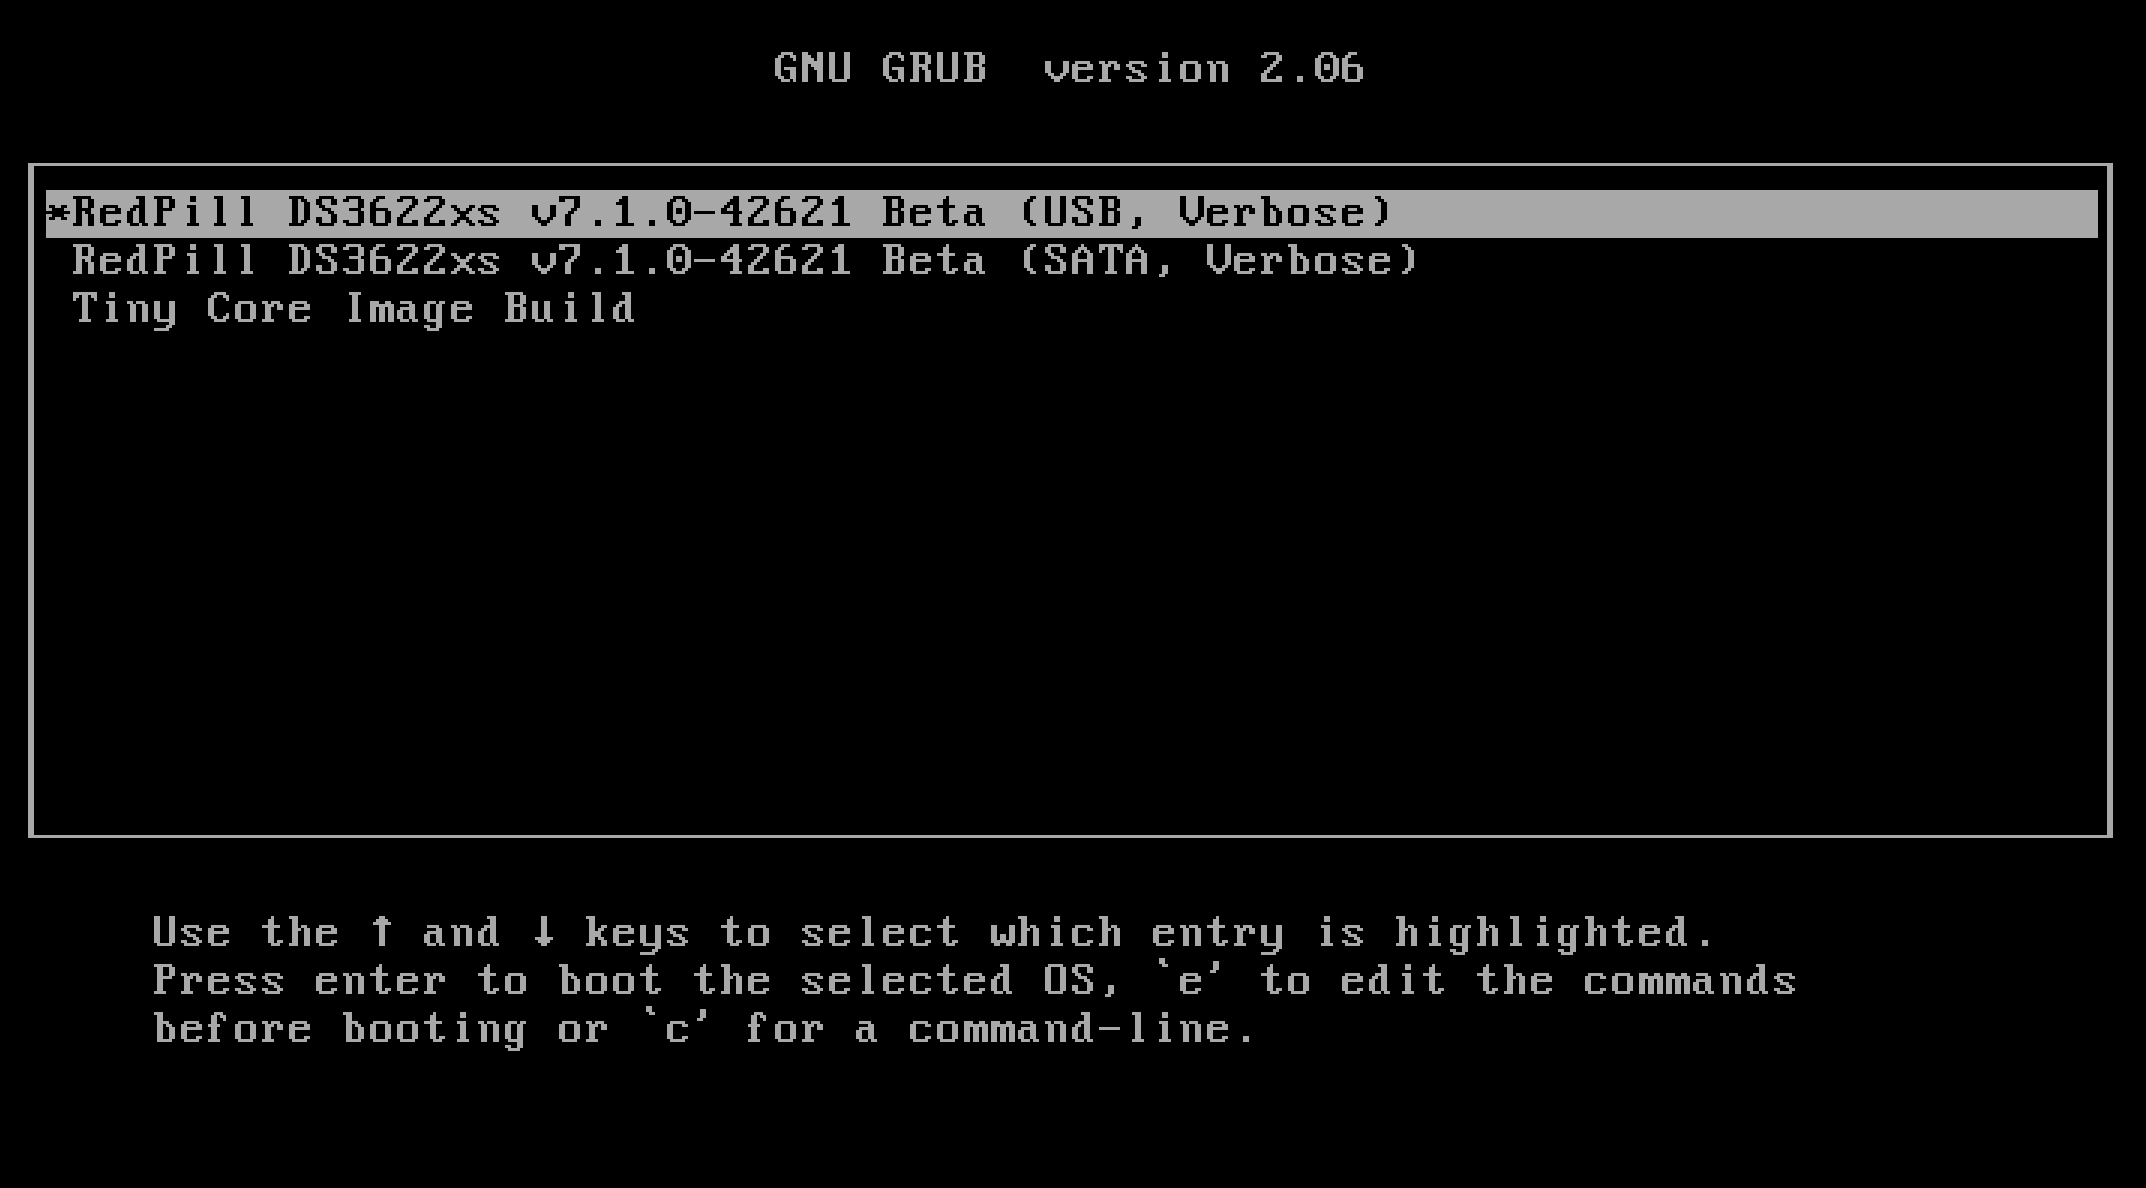
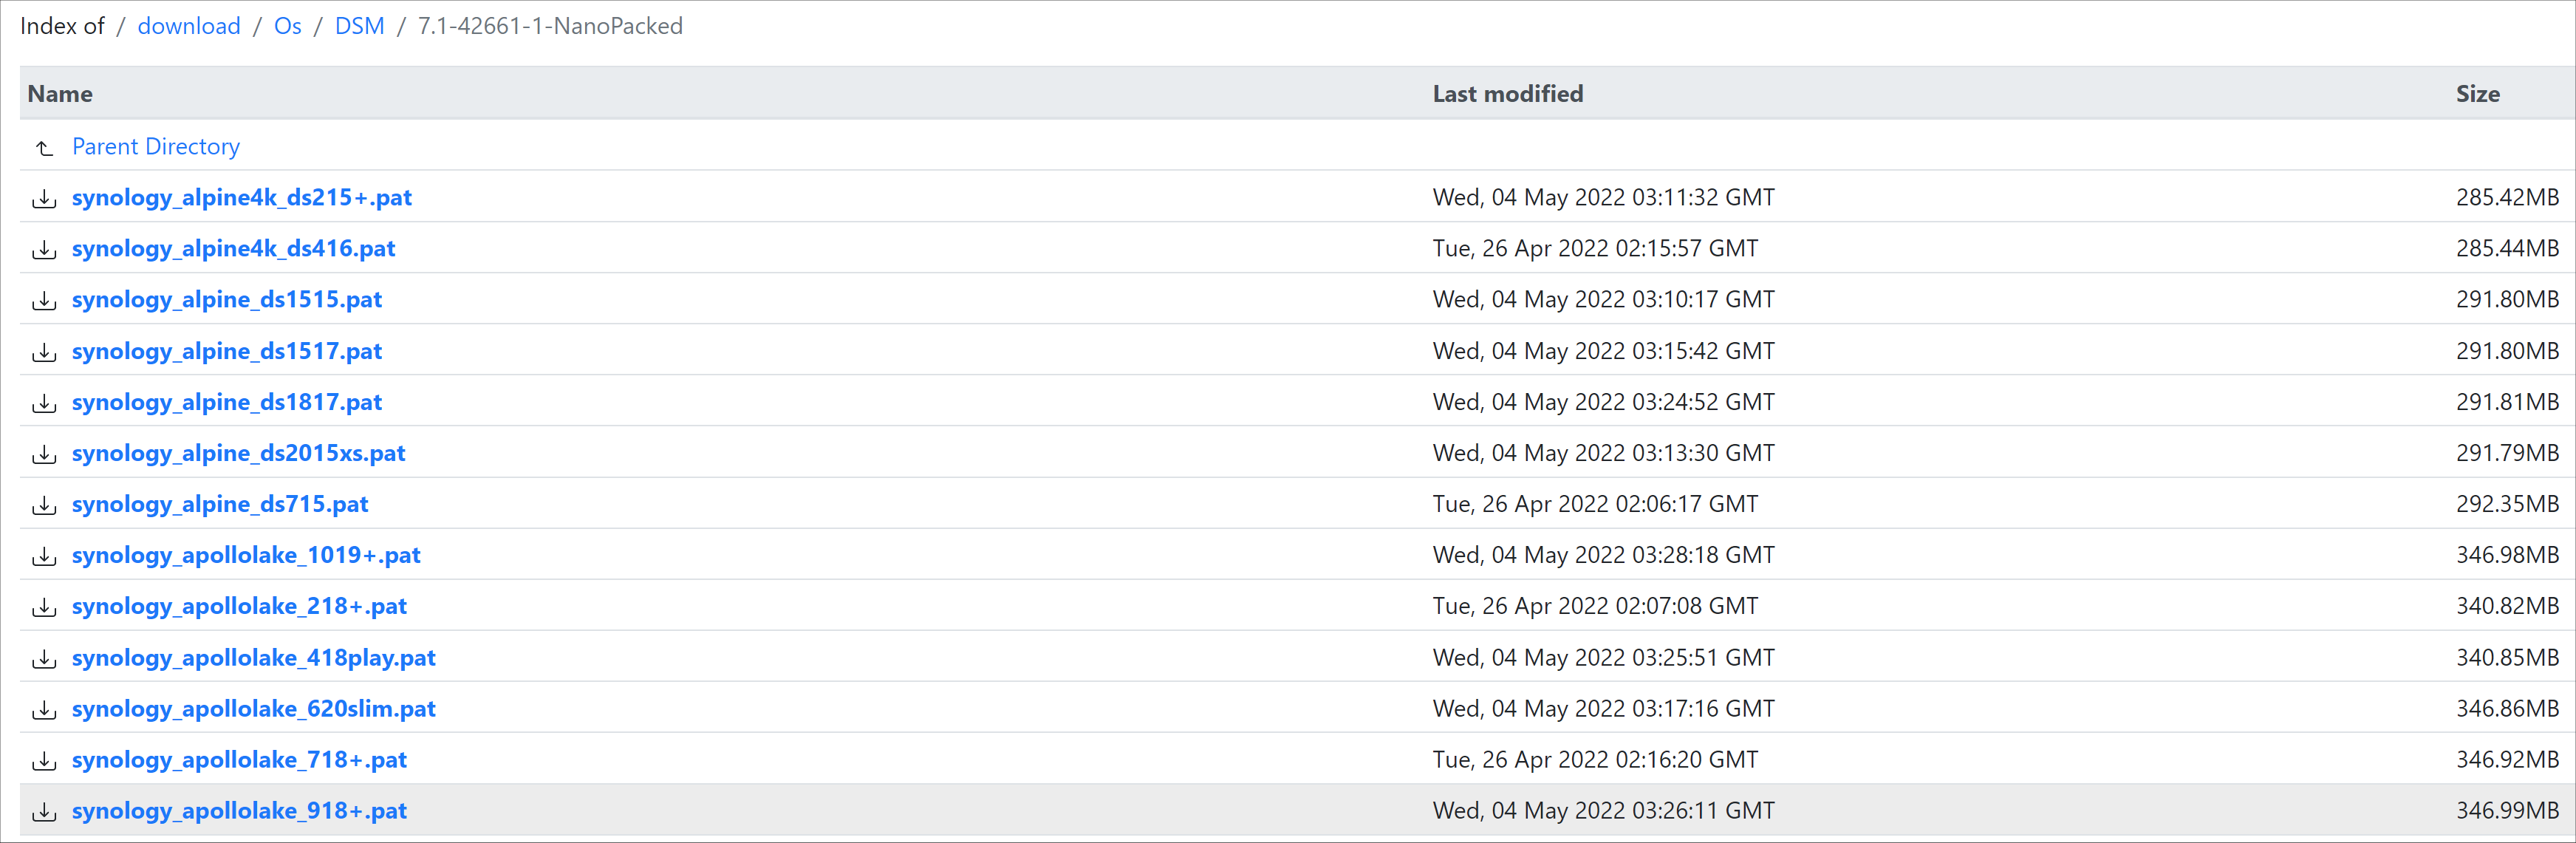
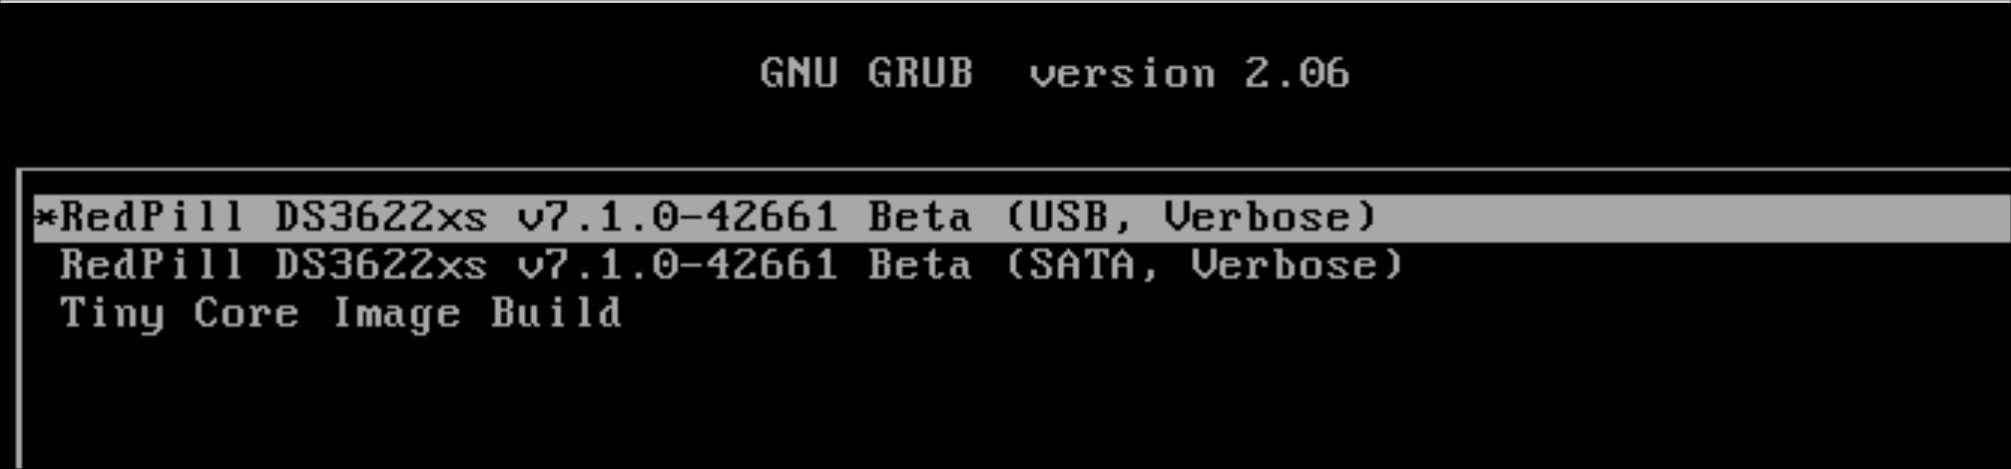
 Hello. If you are using an existing 7.0.1 after the version of the Synology DSM was updated to 7.1, you may want to update to 7.1 or this is a guide for those who want to install 7.1 from the beginning. For those who are new to this article, I will share it with you by adding and subtracting it from the existing 7.0.1 guide. It is a translation from Korean to English using a translator. Please understand if there is a slight misunderstanding. Existing RedPill, released last year, can generate IMG files directly through the compilation process of the bootloader only if Linux is available separately In the case of tinyCore RedPill, it comes completely with tinyCore Linux in the form of a USB boot image It's much easier without having to install and prepare linux separately. You can add the drivers you want to build after you select them and add them directly. The latest version of tinycore supports a total of 7 models (DS3622xs+/DS918+/DS3615xs/DS3617xs/DS1621+/DS920+/DVA3221) You can continuously change the boot loader on your own without re-imaging it (model/sn/mac, etc.) Tinycore supports both img for native installation and vmdk for virtual environments. 1.Preparing Bootloader IMG Use the Download button in the middle of the beam link below.Download the gz file In it 0.4.6 version img.You can decompress the gz file one more time and use the img file. (Full File) https://github.com/pocopico/tinycore-redpill (for LEGACY / EFI) https://github.com/pocopico/tinycore-redpill/raw/main/tinycore-redpill.v0.4.6.img.gz (for VMWARE) https://github.com/pocopico/tinycore-redpill/raw/main/tinycore-redpill.v0.4.6.vmdk.gz 2. Bootloader IMG File USB Recording Use the above tinycore-redfill.v0.4.6.img file to burn it with USB with a convenient image tool such as WinImage or Rufus. You don't need to adjust the configuration file in advance to modify the VID/PID/Serial/MAC/SATAPortMap like the JUN loader. If you want to create a USB image on a Mac or Linux like me, you can use the DD command below in the terminal. (Assuming that the DEVICE ID of the USB verified by diskutil is disk4) sudo diskutil unmountDisk /dev/disk4 sudo dd if=/Users/MyAccount/Downloads/tinycore-redpill.v0.4.5.img of=/dev/disk4 bs=1m sudo diskutil eject /dev/disk4 3.Starting TinyCore Linux USB boot by plugging it into a PC for xpenology (UEFI 1 partition or USB CSM can be booted) The tinyCore Linux (tinyCore Image Build menu) is running and appears. Run the far right icon terminal app here. Check the ip address automatically assigned an en0 LAN card with ifconfig. [tinyCore Linux Screen] 4. Adjust CONFIG after SSH connection Ssh connection with putty etc. from PC other than xpenology. ( id:tc / pass : P@ssw0rd ) I'm connecting. Tinycore Redfill is stabilizing right now PocoPico, the original author of this program, fixes bugs from time to time and announces rebuilding. There's a possibility that this rebuild will happen from time to time Even with the final image version of 0.4.6, changes can still be updated in real time over the Internet. Sometimes the rploader.sh file itself changes if there is a bug. If you've migrated from JUN xpenology, at tc@box:~$user_config.json Existing grub such as VID/PID/Sn/Mac/SataPortMap in user_config.json file.Refer to the cfg and move it as it is. For new installers, perform serial GEN/USB VID, PID auto-detect, SataPortMap auto-detect, etc. as shown below. For the next process, I will share the command focusing on the platform that I have completed the most normal verification. tc@box:~$./rploader.sh serialgen (select one from DS3622x+/DS918+/DS3615xs/DS3617xs/DS1621+/DS920+/DV3221) tc@box:~$ ./rploader.sh identifyusb now tc@box:~$./rploader.sh satamap now (no HBA card user required) You can see that the contents of user_config.json have been changed automatically. Finally, the commonality of existing users and new installers is tc@box:~$catuser_config.json If you assume that there are 4 internal Sata ports, SataPortMap = "4", DiskIdxMap = "00" Please check if it's changed to the back. After find.synology.com, you may not be able to find SATA HDDs during DSM installation. The following is an example of a 6-port SATA additional expansion card. SataPortMap = "46", DiskIdxMap = "0000" (Except for those who use H200, H310, H710, etc. cards, you don't have to clear the options for this SataPortMap and DiskIdxMap itself and use it. Please erase the lines of the above two options with the vi editor and organize them well so that there are no Syntex errors. Of course. ./rploader.sh satamap now command is not required.) 5.BIOS Internal SATA Port Hot Plug disable -> enable Handling (Important) To avoid temporarily reducing the number of SATA PortMap maps set above by the number of HDDs physically connected by the Sata cable during the DSM installation process: Make sure to turn on the Hot Plug function. This reduces the probability of encountering an error message stating that the above automatically recognizes the number of SATAPortMaps and the HDD is not found. Please refer to the link below for the relevant details highlighted by TheSTREET. http://www.2cpu.co.kr/nas/37891 6.Add boot loader extension driver after SSH connection (optional) (You can skip this part. The required expansion driver is automatically discovered and received during BUILD 6 process.) A detailed list of extension drivers can be found below. https://github.com/pocopico/rp-ext The supported platforms are as follows: DS918 apollake, DS3615xs bromolow, DS3617xs broodwell, and ds3622xs+broadwellnk. In my case, I added three types of extension drivers: Realtech, Intel LAN, and DELL PERC as follows. tc@box:~$ ./rploader.sh ext broadwellnk-7.0.1-42218 add https://raw.githubusercontent.com/pocopico/rp-ext/master/r8101/rpext-index.json tc@box:~$ ./rploader.sh ext broadwellnk-7.0.1-42218 add https://raw.githubusercontent.com/pocopico/rp-ext/master/r8125/rpext-index.json tc@box:~$ ./rploader.sh ext broadwellnk-7.0.1-42218 add https://raw.githubusercontent.com/pocopico/rp-ext/master/r8152/rpext-index.json tc@box:~$ ./rploader.sh ext broadwellnk-7.0.1-42218 add https://raw.githubusercontent.com/pocopico/rp-ext/master/r8168/rpext-index.json tc@box:~$ ./rploader.sh ext broadwellnk-7.0.1-42218 add https://raw.githubusercontent.com/pocopico/rp-ext/master/r8169/rpext-index.json tc@box:~$ ./rploader.sh ext broadwellnk-7.0.1-42218 add https://raw.githubusercontent.com/pocopico/rp-ext/master/igp/rpext-index.json tc@box:~$ ./rploader.sh ext broadwellnk-7.0.1-42218 add https://raw.githubusercontent.com/pocopico/rp-ext/master/e1000/rpext-index.json tc@box:~$ ./rploader.sh ext broadwellnk-7.0.1-42218 add https://raw.githubusercontent.com/pocopico/rp-ext/master/e1000e/rpext-index.json tc@box:~$ ./rploader.sh ext broadwellnk-7.0.1-42218 add https://raw.githubusercontent.com/pocopico/rp-ext/master/mpt3sas/rpext-index.json 7.Build Boot Loader After SSH Connection (Two Step Update - TSU) If you are done adding the above extension drivers, build the bootloader at the end. After 7.0.1 build, check if the custom-module -> /mnt/sdb3/auxfiles directory is created well with the ll command. Without this directory, the second 7.1.0 build will fail. If you do not see the custom-module -> /mnt/sdb3/auxfiles directory, Please do the 7.0.1 build again. [DS3622xs+] ./rploader.sh update now ./rploader.sh fullupgrade now ./rploader.sh serialgen DS3622xs+ ./rploader.sh identifyusb now ./rploader.sh satamap now ./rploader.sh build broadwellnk-7.0.1-42218 ./rploader.sh clean now ./rploader.sh build broadwellnk-7.1.0-42661 ./rploader.sh clean now; rm -rf /mnt/sdb3/auxfiles; rm -rf /home/tc/custom-module; ./rploader.sh backup now; [DS918+] ./rploader.sh update now ./rploader.sh fullupgrade now ./rploader.sh serialgen DS918+ ./rploader.sh identifyusb now ./rploader.sh satamap now ./rploader.sh build apollolake-7.0.1-42218 ./rploader.sh clean now ./rploader.sh build apollolake-7.1.0-42661 ./rploader.sh clean now; rm -rf /mnt/sdb3/auxfiles; rm -rf /home/tc/custom-module; ./rploader.sh backup now; [DS3615xs] ./rploader.sh update now ./rploader.sh fullupgrade now ./rploader.sh serialgen DS3615xs ./rploader.sh identifyusb now ./rploader.sh satamap now ./rploader.sh build bromolow-7.0.1-42218 ./rploader.sh clean now ./rploader.sh build bromolow-7.1.0-42661 ./rploader.sh clean now; rm -rf /mnt/sdb3/auxfiles; rm -rf /home/tc/custom-module; ./rploader.sh backup now; The last line doesn't get restored even if you reboot later It is the process of organizing the folders where the pat file exists and reducing the capacity and completing the backup. 8-1.Using the bootloader (update user) tc@box:~$ sudo poweroff Place the 7.1 bootloader on the bottom well In the existing 7.0.1 henol boot state, obtain the DSM 7.1.0-42661.pat file separately from the Sinology Download Center https://www.synology.com/ko-kr/support/download Click the Control Panel -> Update and Restore -> DSM Update -> Manual DSM Update button and proceed with the update to the prepared pat file above. If you are asked to wait 10 minutes after the update, use the telnet connection method that appears in the NAS column by searching for the title telnet I'll power off. -> using putty and telnet it using user=root without password. after you type root then enter, it will goes to linux prompt. By the way, if there are a lot of actual packages installed, it says that you have to wait 20 minutes. Very few packages appear to wait 10 minutes. If you don't want to let me go to the Wi-Telnet connection process, check the monitor to see if you want to power down when rebooting or when rebooting I think you can change it quickly to enter TC Linux. Replace the USB with the 7.1 boot loader prepared above and proceed with the boot You can use it. (There's nothing else I can do for you.) If you want to update from 7.0.1 to 7.1, Process 8-1 in the guide above, and if you're using it, boot from USB and enter Tinycore Linux again You can start from number 3. Tynicore Linux is the third menu, so you have to switch quickly in 4 seconds. This is a method that can be carried out without preparing one more USB memory, but the existing 7.0.1 boot loader may be erased You can use the new functions, backuploader now and restoreloader now action 8-2.Use bootloader (new installer) After successfully completing the build above, reboot the xpenology with USB using the command below. tc@box:~$ sudo reboot The settings or ext drivers that were backed up remain the same The setting values are restored from the mydata.tgz file and remain intact at the next Tiny Core Image Build boot for modification. (The default setting for automatic entry within 4 seconds is USB, Verbose at the top. If you don't touch it with your keyboard, it will automatically enter USB mode.) xpenology On-Screen After PC Boots In the case of the existing RedPill, you will be asked to find it at find.synology.com like the existing Jun loader For this tinyCore: Decompressing Linux... Parsing ELF... done. Booting the kernel. This is the message. There is a delay of 1 to 2 minutes from the IP allocation, so please wait a little bit. In this state, browse to find.synology.com on another PC and you will find the xpenology IP. After that, you can proceed with the installation process of the Synology DSM as you are working on the existing xpenology.

-
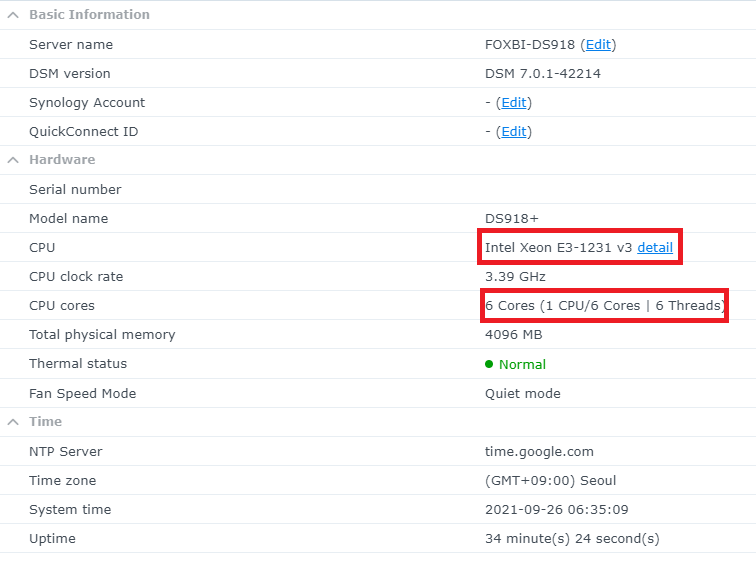
Outcome of the update: SUCCESSFUL DSM version prior update: DSM 7.2.1-69057 update-4 Loader version and model: arc 23.11.10 on / DS918+ Installation type: J3455-itx + SATA + Intel RJ45 Additional comments: Downloaded and automatically Installed from dsm interface. Reboot took about 6min
-
 I install Xpenology for the first time, the bootloader has started, asks to select the NAS model. Tell me what to choose. The specs are: pentium G3250, RAM- 8GB, MB- Asus h81m.
 -
 I have managed to compile the i915.ko module (and associated modules) for Intel 10th Gen CPUs (i.e. 9BC8 etc.) Tested and working on DS918+ 7.0.1-42218 up3; Redpill loader on baremetal instance. The patched i915 module from IG88 had issues and would end up in a hardlockup/kernel panic for me. For anyone who wants to test, i have attached the compiled modules. https://www.filehosting.org/file/details/3054890/i915.7z https://www104.zippyshare.com/v/oPItjx82/file.html https://dailyuploads.net/41tops2ix61g
 -
Для i3 8300 не требуется аддон i915 (он нужен только для тех процессоров, которые официально не поддерживаются DS918+/DS920+... - например, для Intel 10-го поколения). photosfacepatch - нужен для тех случаев, когда видеоядро в процессоре (iGPU) отсутствует (или не опознаётся даже с аддоном i915), тогда этот патч позволят распознавать лица в Photos за счёт CPU (это будет дольше, но зато работает).
-
lspci -pp 00:00.0 Host bridge: Intel Corporation Device 4e24 00:02.0 VGA Compatible controller: Intel Corporation JasperLake [UHD Graphics] (rev 01) 00:04.0 Signal processing controller: Intel Corporation Dynamic Tuning Service 00:08.0 System peripheral: Intel Corporation Device 4e11 00:14.0 USB controller: Intel Corporation Device 4ded (rev 01) 00:14.2 RAM memory: Intel Corporation Device 4def (rev 01)) 00:15.0 Serial bus controller: Intel Corporation Serial IO I2C Host Controller (rev 10) 00:15.2 Serial bus controller: Intel Corporation Device 4dea (rev 10) 00:16.0 Communication controller: Intel Corporation Management Engine Interface (rev 01) 00:17.0 SATA controller: Intel Corporation Device 4dd3 (rev 01) 00:19.0 Serial bus controller: Intel Corporation Device 4dc5 (rev 01) 00:19.1 Serial bus controller: Intel Corporation Device 4dc6 (rev 01) 00:1c.0 PCI bridge: Intel Corporation Device 4db8 (rev 01) 00:1c.1 PCI bridge: Intel Corporation Device 4db9 (rev 01) 00:1c.4 PCI bridge: Intel Corporation Device 4dbc (rev 01) 00:1c.5 PCI bridge: Intel Corporation Device 4dbd (rev 01) 00:1e.0 Communication controller: Intel Corporation Device 4da8 (rev 01) 00:1e.3 Serial bus controller: Intel Corporation Device 4dab (rev 01) 00:1f.0 ISA bridge: Intel Corporation Device 4d87 (rev 01) 00:1f.3 Audio device: Intel Corporation JasperLake HD Audio (rev 01) 00:1f.4 SMBus: Intel Corporation JasperLake SMBus (rev 01) 00:1f.5 Serial bus controller: Intel Corporation Jasper Lake SPI Controller (rev 01) 01:00.0 Ethernet controller: Intel Corporation Ethernet controller I225-v (rev 03) 02:00.0 Ethernet controller: Intel Corporation Ethernet controller I225-v (rev 03) 03:00.0 Non-Volatile memory controller: Device 1ed0:2283 04:00.0 Non-Volatile memory controller: Device 1ed0:2283 ls -al /sys/block ../devices/pci0000:00/0000:00:1c.4/0000:03:00.0/nvme/nvme0/nvme0n1 ../devices/pci0000:00/0000:00:1c.5/0000:04:00.0/nvme/nvme1/nvme1n1 ../devices/pci0000:00/0000:00:1c.5/ata2/host2/target1:0:0/1:0:0:0/block/sdb ../devices/pci0000:00/0000:00:17.0/ata2/host1/target0:0:0/0:0:0:0/block/sda ../devices/pci0000:00/0000:00:17.0/ata2/host2/target1:0:0/1:0:0:0/block/sdb ../devices/pci0000:00/0000:00:14.0/usb2/2-1/2-1:1.0/host2/target2:0:0/2:0:0:0/block/sdc ../devices/pci0000:00/0000:00:14.0/usb1/1-5/1-5:1.0/host3/target3:0:0/3:0:0:0/block/sdd usb2 (sdc) is the debian usb which I booted from usb1 (sdd) is the empty USB (it will be used for everything later boot included and no longer needs to be removed) please help in creating model.conf for the above disk setup and TVS-472XT as target model
-
hi, i've got the lspci -pp from ubuntu looking like this... " 00:1f.2 SATA controller: Intel Corporation C600/X79 series chipset 6-Port SATA AHCI Controller (rev 06) 00:1f.3 SMBus: Intel Corporation C600/X79 series chipset SMBus Host Controller (rev 06) 00:1f.6 Signal processing controller: Intel Corporation C600/X79 series chipset Thermal Management Controller (rev 06) 00:01.0/01:00.0 Serial Attached SCSI controller: Broadcom / LSI SAS3008 PCI-Express Fusion-MPT SAS-3 (rev 02) 00:02.0/02:00.0 PCI bridge: PLX Technology, Inc. PEX 8724 24-Lane, 6-Port PCI Express Gen 3 (8 GT/s) Switch, 19 x 19mm FCBGA (rev ca) 00:02.0/02:00.0/03:00.0 PCI bridge: PLX Technology, Inc. PEX 8724 24-Lane, 6-Port PCI Express Gen 3 (8 GT/s) Switch, 19 x 19mm FCBGA (rev ca) 00:02.0/02:00.0/03:08.0 PCI bridge: PLX Technology, Inc. PEX 8724 24-Lane, 6-Port PCI Express Gen 3 (8 GT/s) Switch, 19 x 19mm FCBGA (rev ca) 00:02.0/02:00.0/03:09.0 PCI bridge: PLX Technology, Inc. PEX 8724 24-Lane, 6-Port PCI Express Gen 3 (8 GT/s) Switch, 19 x 19mm FCBGA (rev ca) 00:02.0/02:00.0/03:00.0/04:00.0 Serial Attached SCSI controller: Broadcom / LSI SAS3008 PCI-Express Fusion-MPT SAS-3 (rev 02) 00:02.0/02:00.0/03:09.0/06:00.0 Serial Attached SCSI controller: Broadcom / LSI SAS3008 PCI-Express Fusion-MPT SAS-3 (rev 02) 00:03.0/07:00.0 Ethernet controller: Intel Corporation Ethernet Controller 10-Gigabit X540-AT2 (rev 01) 00:03.0/07:00.1 Ethernet controller: Intel Corporation Ethernet Controller 10-Gigabit X540-AT2 (rev 01) 00:11.0/09:00.0 Serial Attached SCSI controller: Intel Corporation C602 chipset 4-Port SATA Storage Control Unit (rev 06) " I do havy physical 2 HBAs in the system 00:01.0/01:00.0 Serial Attached SCSI controller: Broadcom / LSI SAS3008 PCI-Express Fusion-MPT SAS-3 (rev 02) > 9300-4i4e with ext SAS Expander (only external is connected) 00:02.0/02:00.0/03:00.0/04:00.0 Serial Attached SCSI controller: Broadcom / LSI SAS3008 PCI-Express Fusion-MPT SAS-3 (rev 02) 00:02.0/02:00.0/03:09.0/06:00.0 Serial Attached SCSI controller: Broadcom / LSI SAS3008 PCI-Express Fusion-MPT SAS-3 (rev 02) > 9300-16i with direct attaced drives with ls -al /sys/block /sd* i get this output, which shows 16 external connected and 14 internal connected drives to both HBAs lrwxrwxrwx 1 root root 0 May 6 2024 sdaa -> ../devices/pci0000:00/0000:00:02.0/0000:02:00.0/0000:03:09.0/0000:06:00.0/host10/port-10:1/end_device-10:1/target10:0:1/10:0:1:0/block/sdaa lrwxrwxrwx 1 root root 0 May 6 2024 sdab -> ../devices/pci0000:00/0000:00:02.0/0000:02:00.0/0000:03:09.0/0000:06:00.0/host10/port-10:2/end_device-10:2/target10:0:2/10:0:2:0/block/sdab lrwxrwxrwx 1 root root 0 May 6 2024 sdac -> ../devices/pci0000:00/0000:00:02.0/0000:02:00.0/0000:03:09.0/0000:06:00.0/host10/port-10:3/end_device-10:3/target10:0:3/10:0:3:0/block/sdac lrwxrwxrwx 1 root root 0 May 6 2024 sdad -> ../devices/pci0000:00/0000:00:02.0/0000:02:00.0/0000:03:09.0/0000:06:00.0/host10/port-10:4/end_device-10:4/target10:0:4/10:0:4:0/block/sdad lrwxrwxrwx 1 root root 0 May 6 2024 sdae -> ../devices/pci0000:00/0000:00:02.0/0000:02:00.0/0000:03:09.0/0000:06:00.0/host10/port-10:5/end_device-10:5/target10:0:5/10:0:5:0/block/sdae lrwxrwxrwx 1 root root 0 May 6 2024 sdaf -> ../devices/pci0000:00/0000:00:02.0/0000:02:00.0/0000:03:09.0/0000:06:00.0/host10/port-10:6/end_device-10:6/target10:0:6/10:0:6:0/block/sdaf lrwxrwxrwx 1 root root 0 May 6 2024 sdag -> ../devices/pci0000:00/0000:00:02.0/0000:02:00.0/0000:03:09.0/0000:06:00.0/host10/port-10:7/end_device-10:7/target10:0:7/10:0:7:0/block/sdag lrwxrwxrwx 1 root root 0 May 6 2024 sdb -> ../devices/pci0000:00/0000:00:01.0/0000:01:00.0/host1/port-1:0/expander-1:0/port-1:0:0/end_device-1:0:0/target1:0:0/1:0:0:0/block/sdb lrwxrwxrwx 1 root root 0 May 6 2024 sdc -> ../devices/pci0000:00/0000:00:01.0/0000:01:00.0/host1/port-1:0/expander-1:0/port-1:0:1/end_device-1:0:1/target1:0:1/1:0:1:0/block/sdc lrwxrwxrwx 1 root root 0 May 6 2024 sdd -> ../devices/pci0000:00/0000:00:01.0/0000:01:00.0/host1/port-1:0/expander-1:0/port-1:0:2/end_device-1:0:2/target1:0:2/1:0:2:0/block/sdd lrwxrwxrwx 1 root root 0 May 6 2024 sde -> ../devices/pci0000:00/0000:00:01.0/0000:01:00.0/host1/port-1:0/expander-1:0/port-1:0:3/end_device-1:0:3/target1:0:3/1:0:3:0/block/sde lrwxrwxrwx 1 root root 0 May 6 2024 sdf -> ../devices/pci0000:00/0000:00:01.0/0000:01:00.0/host1/port-1:0/expander-1:0/port-1:0:4/end_device-1:0:4/target1:0:4/1:0:4:0/block/sdf lrwxrwxrwx 1 root root 0 May 6 2024 sdg -> ../devices/pci0000:00/0000:00:01.0/0000:01:00.0/host1/port-1:0/expander-1:0/port-1:0:5/end_device-1:0:5/target1:0:5/1:0:5:0/block/sdg lrwxrwxrwx 1 root root 0 May 6 2024 sdh -> ../devices/pci0000:00/0000:00:01.0/0000:01:00.0/host1/port-1:0/expander-1:0/port-1:0:6/end_device-1:0:6/target1:0:6/1:0:6:0/block/sdh lrwxrwxrwx 1 root root 0 May 6 2024 sdi -> ../devices/pci0000:00/0000:00:01.0/0000:01:00.0/host1/port-1:0/expander-1:0/port-1:0:7/end_device-1:0:7/target1:0:7/1:0:7:0/block/sdi lrwxrwxrwx 1 root root 0 May 6 2024 sdj -> ../devices/pci0000:00/0000:00:01.0/0000:01:00.0/host1/port-1:0/expander-1:0/port-1:0:8/end_device-1:0:8/target1:0:8/1:0:8:0/block/sdj lrwxrwxrwx 1 root root 0 May 6 2024 sdk -> ../devices/pci0000:00/0000:00:01.0/0000:01:00.0/host1/port-1:0/expander-1:0/port-1:0:9/end_device-1:0:9/target1:0:9/1:0:9:0/block/sdk lrwxrwxrwx 1 root root 0 May 6 2024 sdl -> ../devices/pci0000:00/0000:00:01.0/0000:01:00.0/host1/port-1:0/expander-1:0/port-1:0:10/end_device-1:0:10/target1:0:10/1:0:10:0/block/sdl lrwxrwxrwx 1 root root 0 May 6 2024 sdm -> ../devices/pci0000:00/0000:00:01.0/0000:01:00.0/host1/port-1:0/expander-1:0/port-1:0:11/end_device-1:0:11/target1:0:11/1:0:11:0/block/sdm lrwxrwxrwx 1 root root 0 May 6 2024 sdn -> ../devices/pci0000:00/0000:00:01.0/0000:01:00.0/host1/port-1:0/expander-1:0/port-1:0:12/end_device-1:0:12/target1:0:12/1:0:12:0/block/sdn lrwxrwxrwx 1 root root 0 May 6 2024 sdo -> ../devices/pci0000:00/0000:00:01.0/0000:01:00.0/host1/port-1:0/expander-1:0/port-1:0:13/end_device-1:0:13/target1:0:13/1:0:13:0/block/sdo lrwxrwxrwx 1 root root 0 May 6 2024 sdp -> ../devices/pci0000:00/0000:00:01.0/0000:01:00.0/host1/port-1:0/expander-1:0/port-1:0:14/end_device-1:0:14/target1:0:14/1:0:14:0/block/sdp lrwxrwxrwx 1 root root 0 May 6 2024 sdq -> ../devices/pci0000:00/0000:00:01.0/0000:01:00.0/host1/port-1:0/expander-1:0/port-1:0:15/end_device-1:0:15/target1:0:15/1:0:15:0/block/sdq lrwxrwxrwx 1 root root 0 May 6 2024 sdr -> ../devices/pci0000:00/0000:00:1f.2/ata2/host2/target2:0:0/2:0:0:0/block/sdr lrwxrwxrwx 1 root root 0 May 6 2024 sds -> ../devices/pci0000:00/0000:00:02.0/0000:02:00.0/0000:03:00.0/0000:04:00.0/host9/port-9:0/end_device-9:0/target9:0:0/9:0:0:0/block/sds lrwxrwxrwx 1 root root 0 May 6 2024 sdt -> ../devices/pci0000:00/0000:00:02.0/0000:02:00.0/0000:03:00.0/0000:04:00.0/host9/port-9:1/end_device-9:1/target9:0:1/9:0:1:0/block/sdt lrwxrwxrwx 1 root root 0 May 6 2024 sdu -> ../devices/pci0000:00/0000:00:02.0/0000:02:00.0/0000:03:00.0/0000:04:00.0/host9/port-9:2/end_device-9:2/target9:0:2/9:0:2:0/block/sdu lrwxrwxrwx 1 root root 0 May 6 2024 sdv -> ../devices/pci0000:00/0000:00:02.0/0000:02:00.0/0000:03:00.0/0000:04:00.0/host9/port-9:4/end_device-9:4/target9:0:4/9:0:4:0/block/sdv lrwxrwxrwx 1 root root 0 May 6 2024 sdw -> ../devices/pci0000:00/0000:00:02.0/0000:02:00.0/0000:03:00.0/0000:04:00.0/host9/port-9:3/end_device-9:3/target9:0:3/9:0:3:0/block/sdw lrwxrwxrwx 1 root root 0 May 6 2024 sdx -> ../devices/pci0000:00/0000:00:02.0/0000:02:00.0/0000:03:00.0/0000:04:00.0/host9/port-9:5/end_device-9:5/target9:0:5/9:0:5:0/block/sdx lrwxrwxrwx 1 root root 0 May 6 2024 sdy -> ../devices/pci0000:00/0000:00:1d.0/usb1/1-1/1-1.1/1-1.1:1.0/host4/target4:0:0/4:0:0:0/block/sdy lrwxrwxrwx 1 root root 0 May 6 2024 sdz -> ../devices/pci0000:00/0000:00:02.0/0000:02:00.0/0000:03:09.0/0000:06:00.0/host10/port-10:0/end_device-10:0/target10:0:0/10:0:0:0/block/sdz the drives from HBA 9300-4i4e (0-15) are correctly addressed so far, it's only the internal HBA which right now pushes me to the cliff.... i've got 4 Dev_Bus addresses currently here (because of the pcie switch).... can you please show me your disk-settings and lspci -pp for them? so i can compare to my ones
-
- Outcome of the update: SUCCESSFUL - DSM version prior update: DSM 7.2 64570 Update 3 | ARPL 23.8.1 - Loader version and model: RR v24.5.1 | DS918+ - Using custom extra.lzma: NO - Installation type: Baremetal ASRock J3160DC-ITX, mini-pcie Intel 82574 (E1000e) ethernet card, 16 GB RAM, 4x SATA drives - Additional comments: 1. Created new USB boot disk, using RR v24.5.1.img 2. Configured via web interface 3. findsynology > Recover 4. Once back into DSM, performed update to U5 from the web console, reboot
-
Результат: Успешно (DS3622xs+) - Версия загрузчика: Arc 24.4.30 - Версия DSM: - DSM 7.2.1-69057 Update 4 -> Update 5 - Дополнительные модули: по умолчанию установленные в загрузчике. - Аппаратное обеспечение: MB Jingsha x99-D8, Xeon E5-2630 v3 (8/16); Ram 2x8Gb 2133 ECC; Ethernet 1 (internal): 1Gb адаптер RLT 8111; Ethernet 2 (pci-e): 1Gb адаптер Intel e1000; Блок Питания Sea Sonic 500W Gold; Дисковая система: 2 x Sata в Raid 1 - cерверные Transcend 256 Gb SSD470K, 2 x Sata в Raid 1 - IronWolf 6Tb 7200; ИБП Ippon 850 по USB работает. - Вход в учетную запись Synology с привязкой SN: ОК - Завелось без проблем. - Поднят FreeBPX на виртуалке. P.S.: Китайская материнка Jingsha x99-D8 перепрошита на стоковый биос, т.к. продают обычно с разгоном и унлоком. Интегрированная и дискретная видеокарты отсутствуют.
-
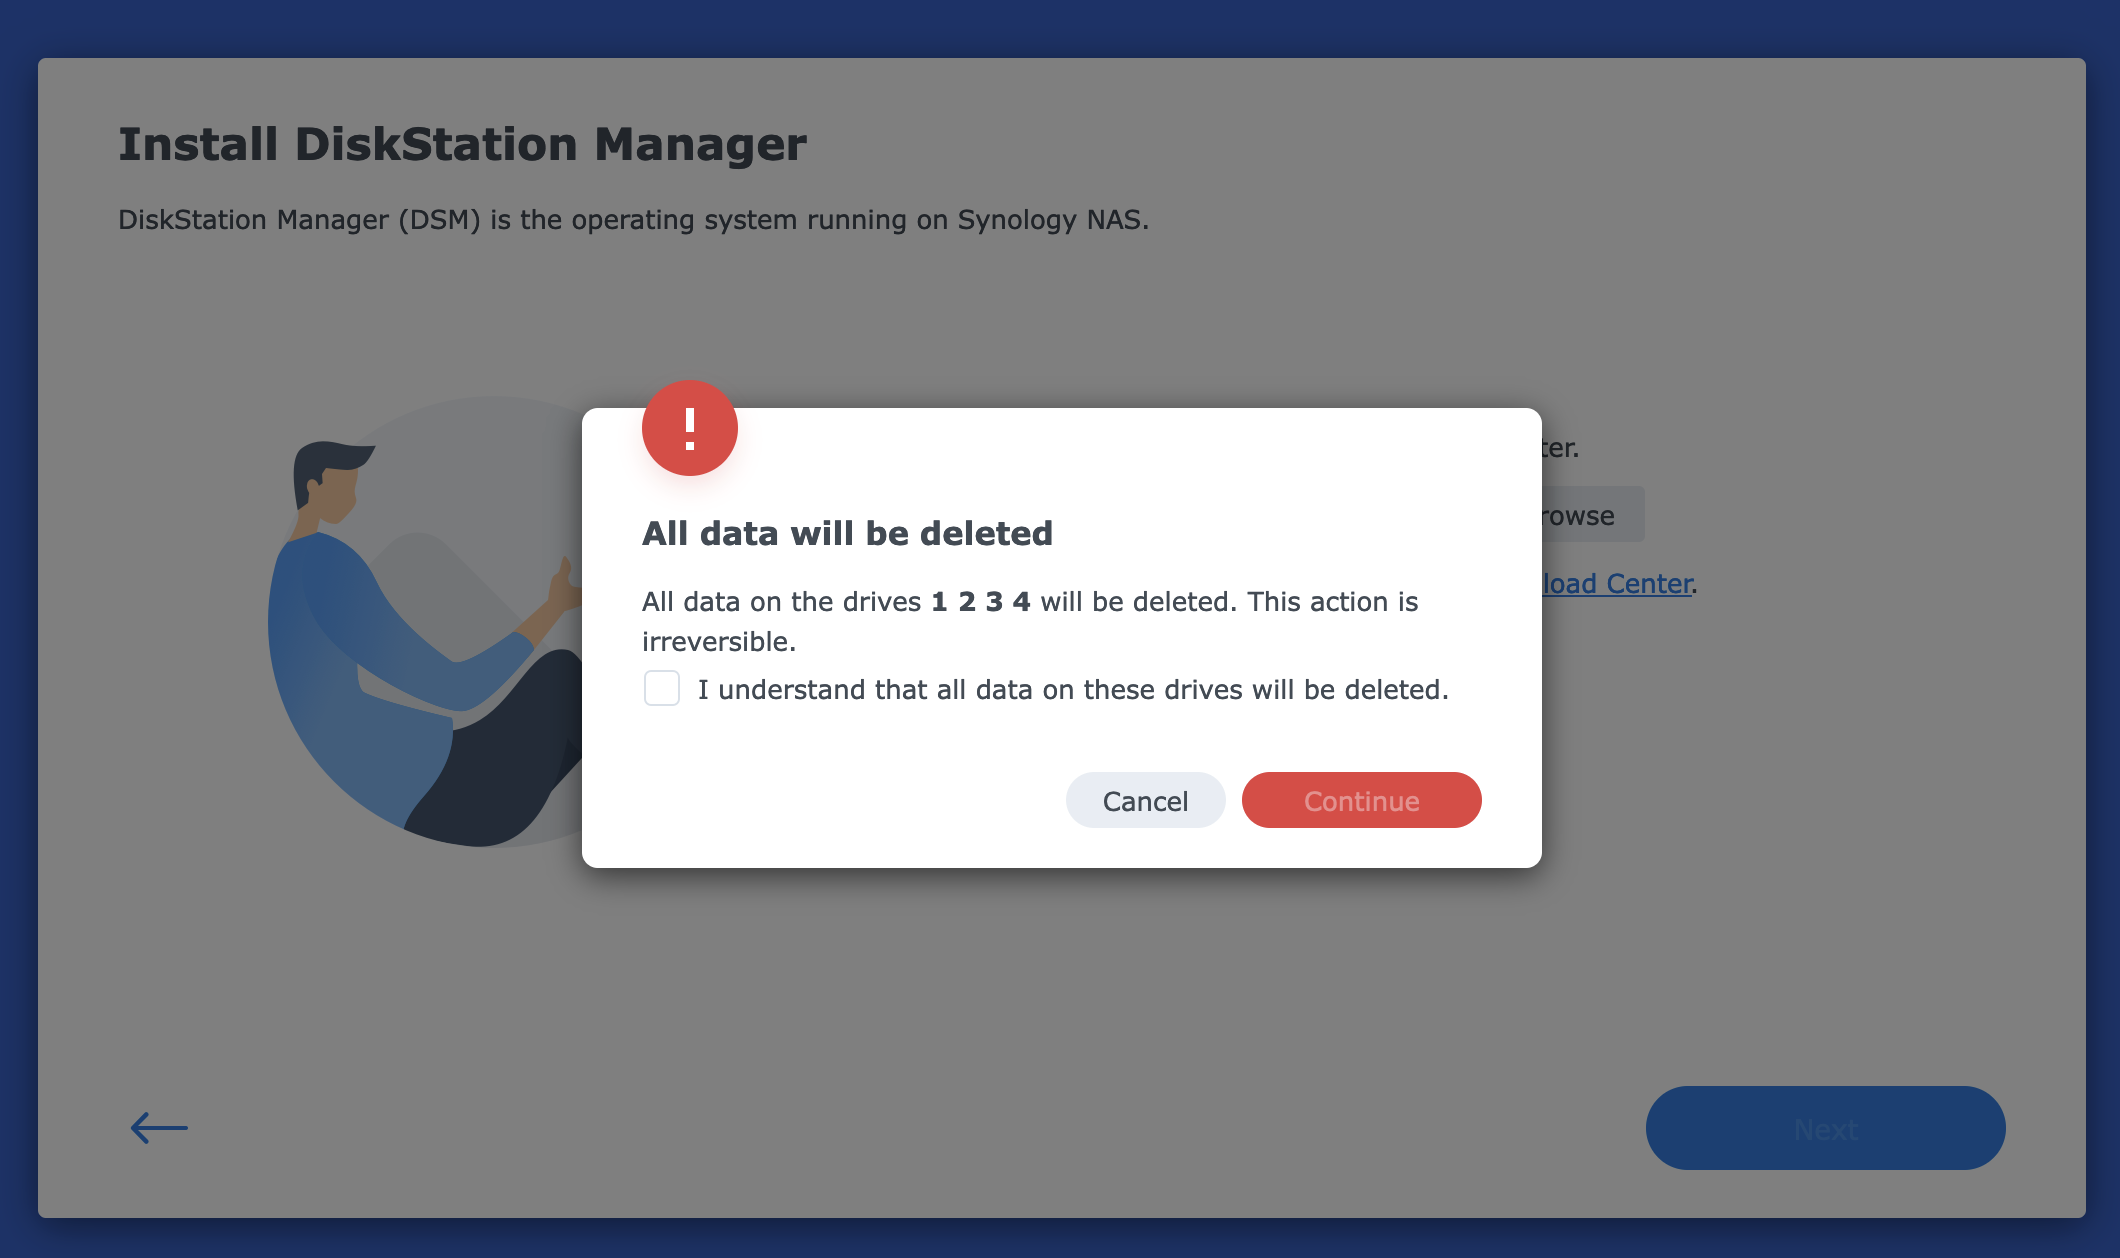
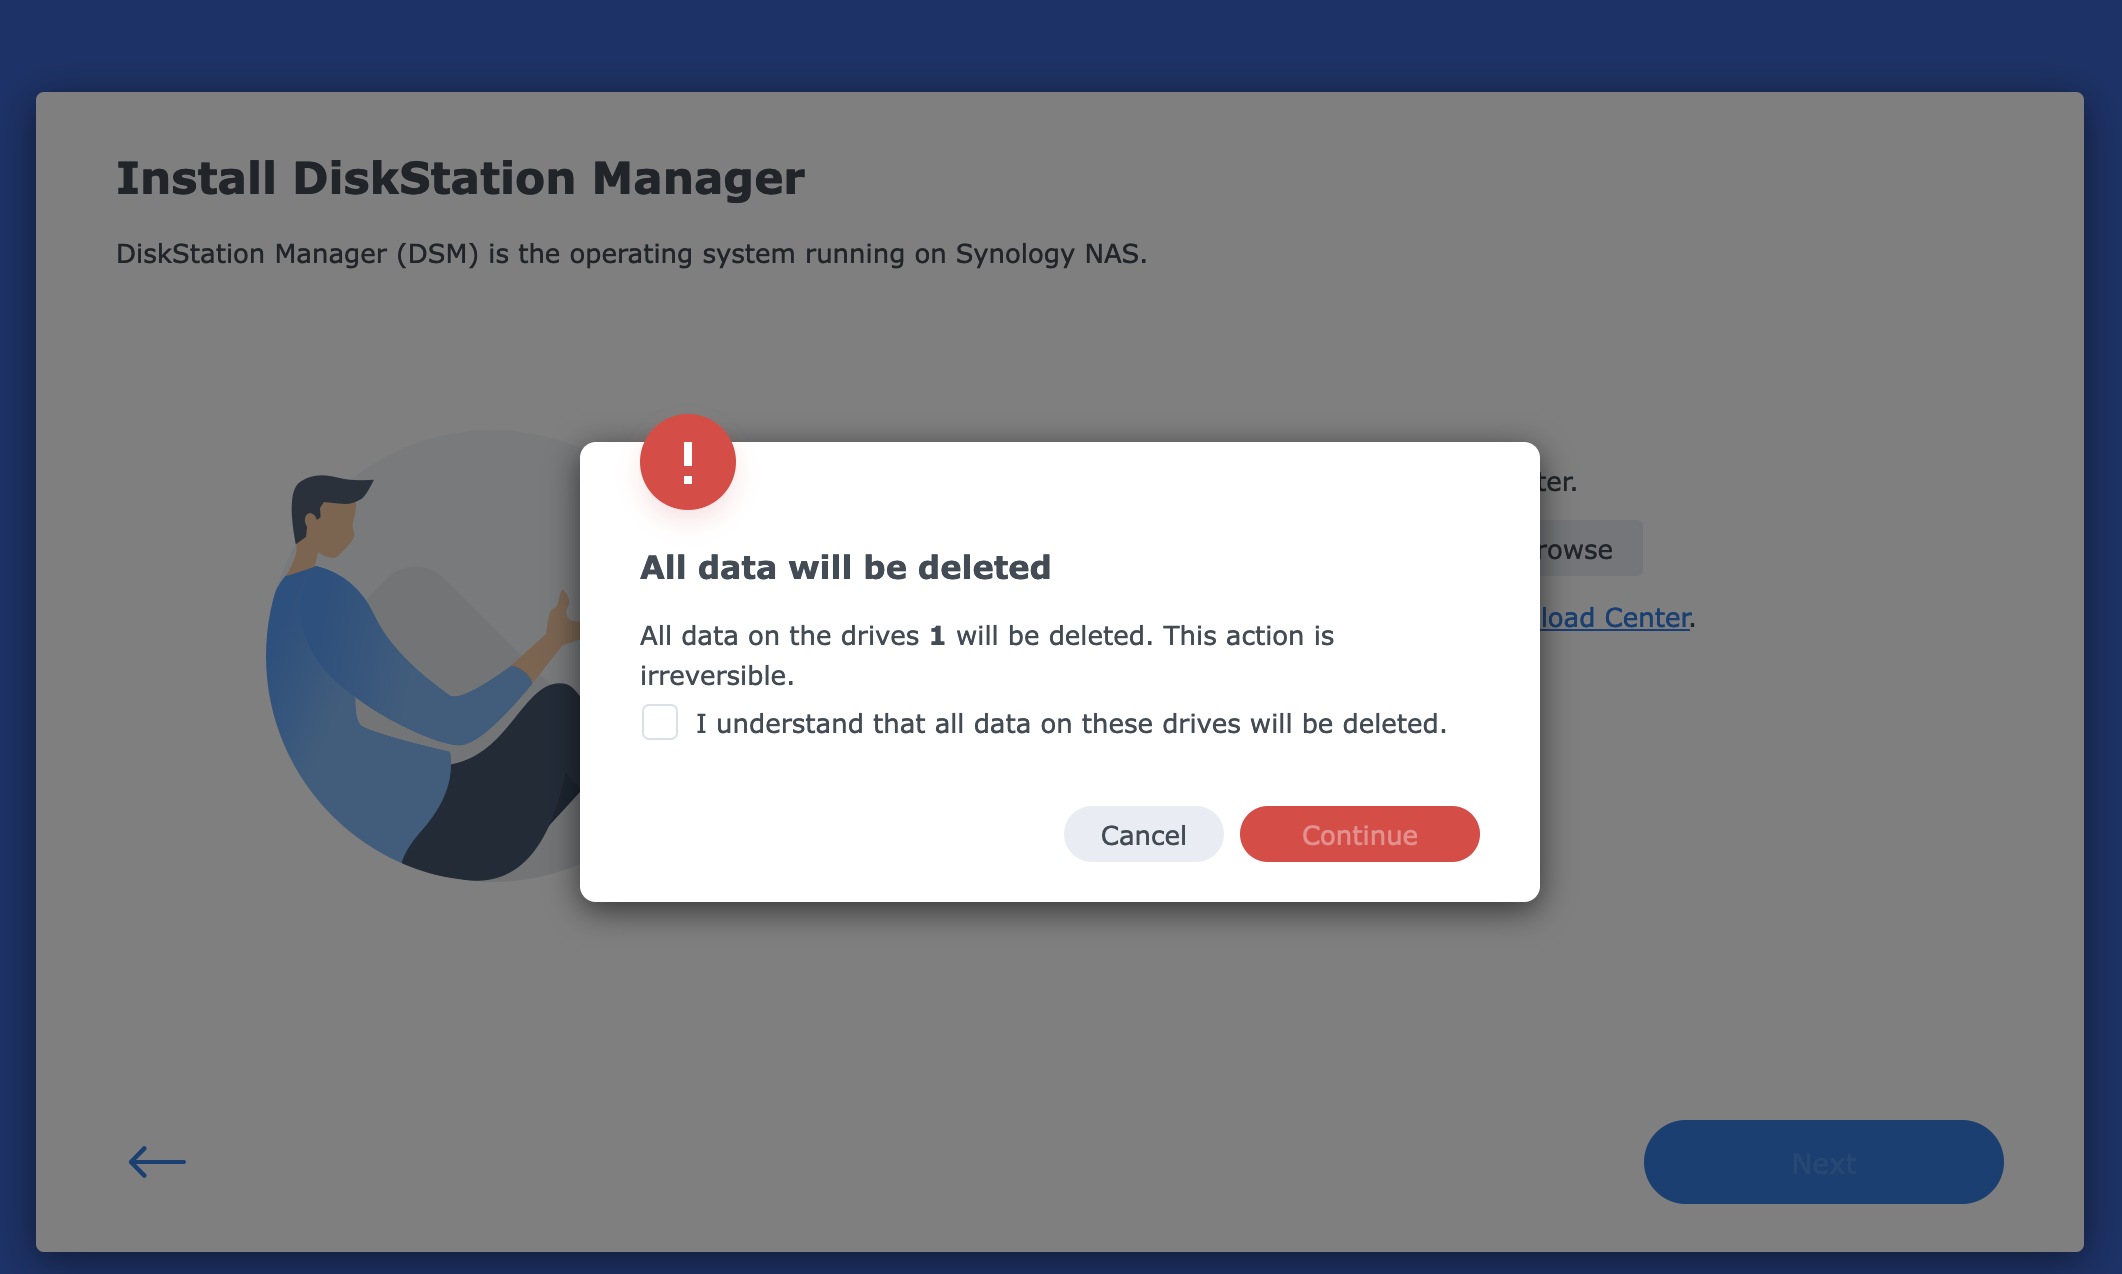
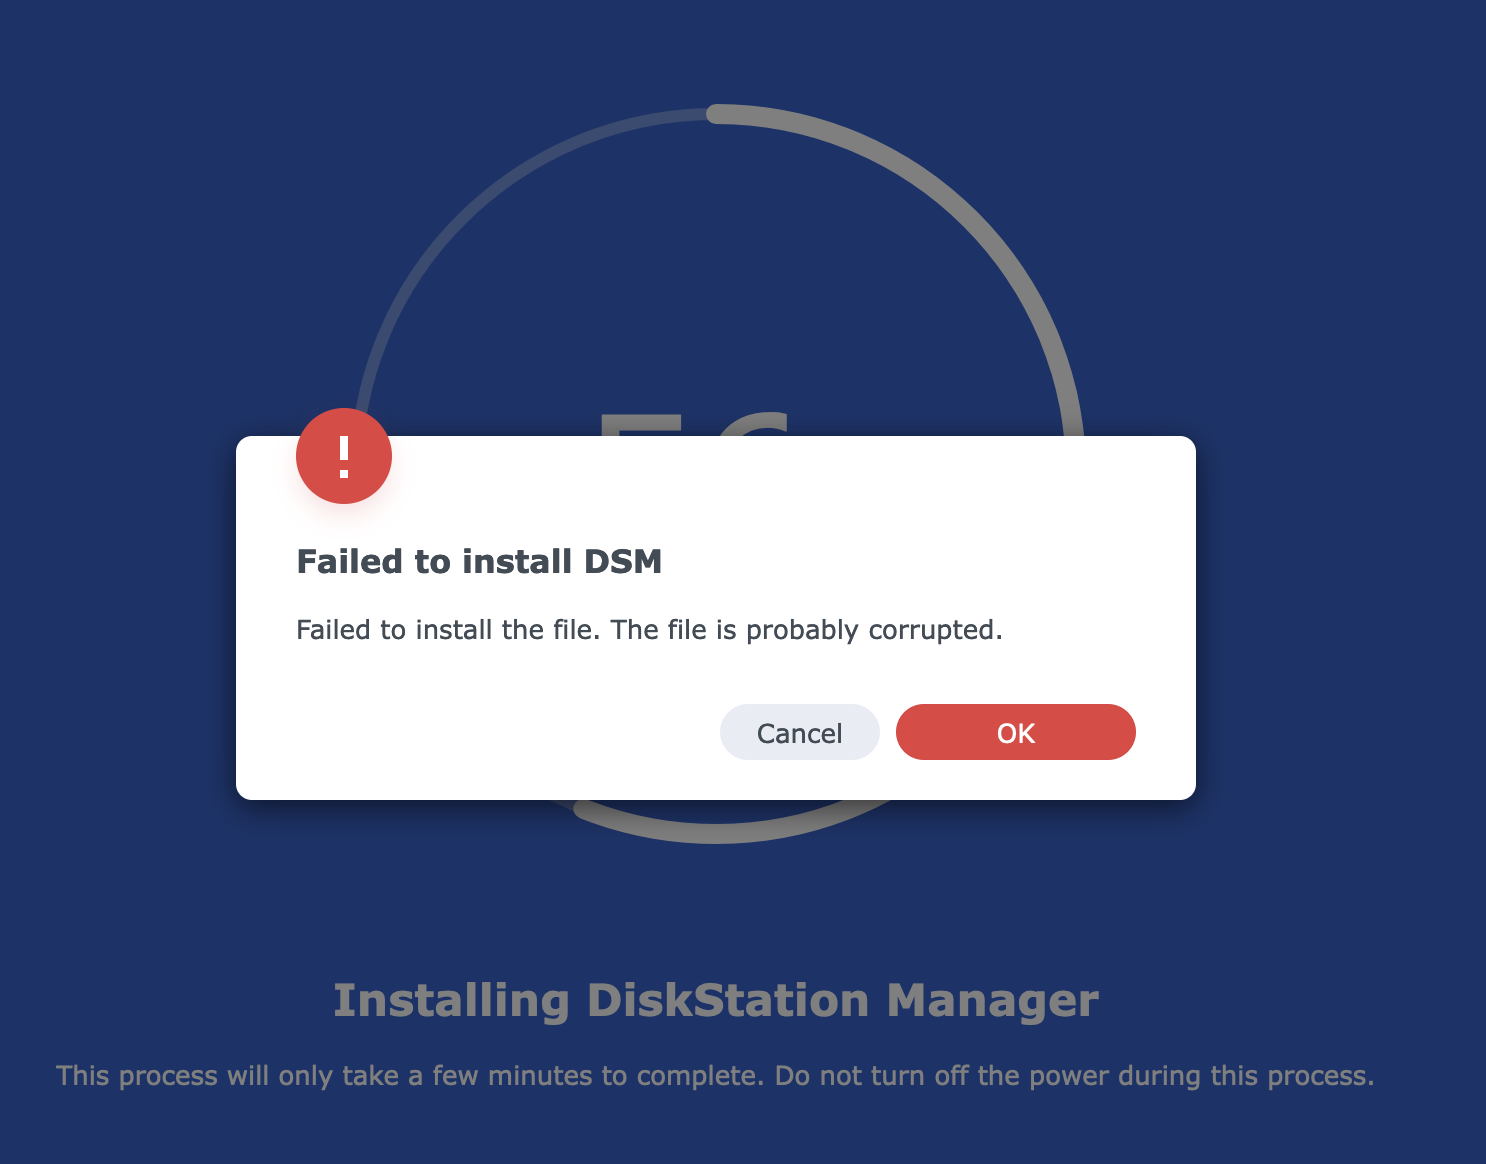
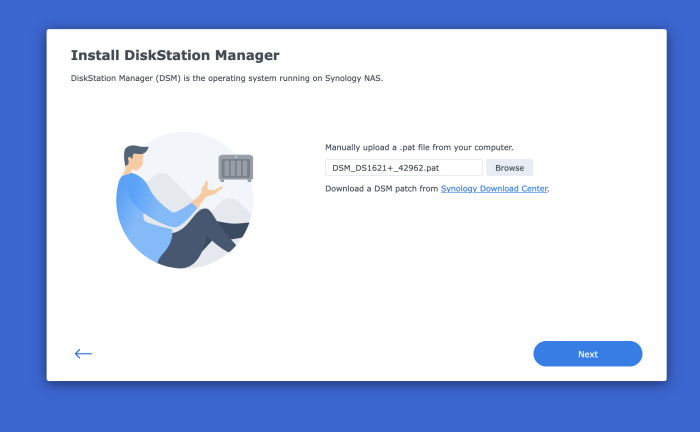
I need to install a fully functioning version of DSM (not the Virtual DSM available from Synology). Long story, but in short I need to restore an "Entire System" Hyper Backup from my RS1221+ in order to go through the postgres database of that backup. The Virtual DSM available from Synology does not allow to restore "Entire System". Through trial and error, I've been able to get close. I create a new vm in Synology VMM by importing the TCRP vmdk image and adding 3 more sata drives. The process breaks during the DSM Installation. Here below is a summary of the VM I create: Import a virtual machine Summary Item Value Storage HDD VM Storage Name vdsm5 CPU(s) 4 Memory 8 GB Video Card vga CPU Relative Weight Normal Description - Enable CPU compatibility mode Disabled Reserved CPU Threads - Virtual Disk 1 10 GB (SATA) Virtual Disk 2 100 GB (SATA) Virtual Disk 3 200 GB (SATA) Virtual Disk 4 300 GB (SATA) Auto Switch Disabled Network Default VM Network (e1000) Autostart No Keyboard Layout Default Virtual USB Controller Disabled Firmware Legacy BIOS ISO File Unmounted, Unmounted Users with permissions - Groups with permissions administrators I boot up the VM and ssh into TinyCore, then do the following: sudo ./rploader.sh update sudo ./rploader.sh fullupgrade sudo ./rploader.sh serialgen DS1621+ realmac sudo ./rploader.sh satamap sudo vi user_config.json <-- here I change the model and the version sudo ./rploader.sh listmods ds1621p-7.1.1-42962 sudo ./rploader.sh ext ds1621p-7.1.1-42962 add https://raw.githubusercontent.com/pocopico/rp-ext/master/e1000/rpext-index.json sudo ./rploader.sh ext ds1621p-7.1.1-42962 add https://raw.githubusercontent.com/pocopico/rp-ext/master/v9fs/rpext-index.json sudo ./rploader.sh build ds1621p-7.1.1-42962 sudo ./rploader.sh backup sudo vi user_config.json <-- just to make sure everything looks good sudo exitcheck.sh reboot During the above steps, when I do 'sudo ./rploader.sh satamap', I get a warning saying "Other drives are connected that will not be accessible!": tc@box:~$ sudo ./rploader.sh satamap Machine is VIRTUAL Hypervisor=KVM Found "00:1a.0 Intel Corporation 82801IR/IO/IH (ICH9R/DO/DH) 6 port SATA Controller [AHCI mode] (rev 02)" Detected 6 ports/4 drives. Mapping SATABOOT drive after maxdisks WARNING: Other drives are connected that will not be accessible! Computed settings: SataPortMap=1 DiskIdxMap=10 Should i update the user_config.json with these values ? [Yy/Nn] y Done. tc@box:~$ Here is what my user_config.json looks like. I changed the hashes, sn, and mac1. { "general": { "model": "DS1621+", "version": "7.1.1-42962", "smallfixnumber": "0", "zimghash": "XXXXXXX", "rdhash": "XXXXXXX", "usb_line": "earlyprintk syno_hw_version=DS1621+ console=ttyS0,115200n8 netif_num=1 synoboot2 pid=0xa4a5 earlycon=uart8250,io,0x3f8,115200n8 mac1=1234567890 sn=1234567890 SMBusHddDynamicPower= "sata_line": "earlyprintk syno_hw_version=DS1621+ console=ttyS0,115200n8 netif_num=1 synoboot2 pid=0xa4a5 earlycon=uart8250,io,0x3f8,115200n8 synoboot_satadom=2 mac1=1234567890 sn=1234567890 S "redpillmake": "prod", "friendautoupd": "true", "staticboot": "false", "hidesensitive": "false" }, "ipsettings": { "ipset": "", "ipaddr": "", "ipgw": "", "ipdns": "", "ipproxy": "" }, "extra_cmdline": { "pid": "0xa4a5", "vid": "0x0525", "sn": "1234567890", "mac1": "1234567890", "netif_num": "1", "SataPortMap": "1", "DiskIdxMap": "10" }, "synoinfo": { "internalportcfg": "0xffff", "maxdisks": "16", "support_bde_internal_10g": "no", "support_disk_compatibility": "no", "support_memory_compatibility": "no", "maxlanport": "8", "netif_seq": "0 1 2 3 4 5 6 7" }, "ramdisk_copy": {} } After I boot up, I select the 'RedPill DS1621+ 7.7.1-42962 (SATA, Verbose)' option. After this I go to https://find.synology.com/ and select the one that shows the IP address of the vm, accept the EULA, then I get the Synology NAS Welcome Screen, I click Install, then it asks me to Manually upload a .pat file from my computer, which I do as shown below. The file is downloaded from https://global.download.synology.com/download/DSM/release/7.1.1/42962/DSM_DS1621%2B_42962.pat When I click next, I get the following screen, showing the VM is recognizing all 4 drives: If I click the checkbox and continue, the installation begins, but it fails at around 56% and I get the following message saying the file is probably corrupted. I tried doing this whole same process with DSM 7.2 and got the same message with that different file. I doubt it's the file. After I click OK, it takes me back to the screen where it asks to manually upload .pat file from my computer. When I do that, however, there is a small change from before: It seems it's only recognizing 1 drive, not 4 like the previous attempt, as shown here: After clicking the checkbox and continue, the process fails once again at the same point and I get the same Fail screen: If I force reboot the VM, it doesn't boot up. What am I doing wrong? What do I need to do in order to go through with the installation properly? Thank you.


-
 Loader Information and Background RedPill is the core technology that enables DSM 7.x to run on non-Synology hardware. This post is intended to serve as a definitive tutorial/reference for configuring @pocopico's TinyCore RedPill (TCRP) loader. It explains how to install TCRP on baremetal, i.e. with DSM as the only operating system on your NAS hardware. A tutorial to install TCRP using the ESXi hypervisor is located here. There are other hypervisor tutorials in the Tutorials and Guides forum. TCRP uses a two step-process. First, a Linux OS (TinyCore) boots and evaluates the NAS hardware configuration. Therefore, it is best to have the hardware you plan to use (disk controllers and network cards in particular) installed prior to starting the TCRP setup. Then, an individualized loader (RedPill) is created. This loader is used to install and run DSM. After that, you can switch between starting DSM with RedPill, and booting back into TinyCore to adjust and rebuild the loader as needed. Basic Linux command line skills are needed to complete the installation. The tutorial provides examples of the commands that are needed, but exact syntax and capitalization are critical. If unfamiliar, research and review the following minimal list of commands: ls show the files in the current directory cat <file> show the contents of the specified file pwd show the current directory name cd <directory path> change to the specified directory (same rules as Windows, except with forward slashes instead of backslashes). With no argument, it returns to the “home” TCRP directory vi <file> a file editor, for manual editing of configuration files if required Ongoing Development This tutorial is maintained for consistency with the pocopico stable repository. Since TCRP is completely open-sourced, anyone can fork their own repo and contribute to development, and pocopico now maintains a separate development repo. As the best features and ideas are fully vetted and tested, they may be incorporated into the stable repo over time. If you use a repo, script or shell other than the pocopico stable repo, the loader may behave quite differently and the instructions and troubleshooting steps in this tutorial might no longer apply. In an open-source community, you can use any development resource you want, but you add the additional responsibility of understanding, vetting and testing that code on your system. Migration Step 1. Choose a DSM Platform/Architecture Evaluate your intended NAS hardware and your the intended use of DSM, and select a platform that best meets your needs. Reference information here: https://xpenology.com/forum/topic/61634-dsm-7x-loaders-and-platforms/ Write down the selected platform (e.g. DS918+), the corresponding architecture (e.g. apollolake) and whether the platform uses SataPortMap/DiskIdxMap or Device Tree for slot mapping. This information will be needed later. Now, make sure the NAS hardware is compatible, and prepare it correctly: x86-64-compatible CPU with two cores or more Each platform have maximum threads support! Any threads in excess will be ignored For certain platforms, Intel CPUs must be 4th generation “Haswell” or newer with FMA3 instruction set The corresponding AMD CPU architecture is “Piledriver” or newer AMD-based systems may require deactivation of the C1E option in the BIOS 2GB of RAM or more 2GB or larger USB flash drive Configure the BIOS to boot from the USB flash drive ONLY SATA disk controllers are preferred, but SCSI/SAS are compatible IMPORTANT: All SATA controllers must be configured to AHCI mode SATA controllers with port multipliers are not compatible ATA controllers are not compatible (disable embedded ATA in BIOS if possible) At least one SATA/SCSI/SAS drive (HDD or SSD), minimum size 21GB IMPORTANT: Enable SATA port hotplug on each disk port, if hotplug is supported by the BIOS/controller IMPORTANT: Disable M.2 SATA ports that are not in use, if supported by the BIOS/controller NVMe drives are not usable except as dedicated cache devices Host Bus Adapters are not currently compatible with Device Tree platforms Install any NVMe drives intended as cache devices On Device Tree platforms, NVMe drives must be installed prior to loader installation in order for them to be recognized Step 2. Download TCRP and Write Image to the USB Flash Drive The latest pocopico stable loader code is always linked here: https://xpenology.com/forum/topic/7848-links-to-loaders/ Download the tinycore-redpill 7.x loader and save it to your personal computer. Then, open it with a zip manager to show the boot images: tinycore-redpill.vX.X.X.img.gz (for BIOS/CSM/Legacy boot from USB flash drive) tinycore-redpill-uefi.vX.X.X.img.gz (for UEFI/EFI boot from USB flash drive) tinycore-redpill.vX.X.X.vmdk.gz (for virtual machine SATABOOT from disk image) Select the boot image that matches the boot capability of the NAS motherboard. If unsure, choose BIOS/CSM/Legacy boot. Save the gzip file to your personal computer, then open it with a zip archive manager and save the uncompressed version. Write the uncompressed image to the USB flash drive using Win32DiskImager or other appropriate tool. The USB flash drive is used to store TinyCore and the RedPill loader that it generates. It is a permanent component of an operational XPEnology system. Do not remove it, even after the DSM installation is complete and the NAS is fully up and running. Step 3. Boot into TinyCore and Complete Pre-Configuration Updates Start your NAS with the USB flash drive installed and TinyCore will boot. Then, launch a command-line session with either of these methods: Click the Terminal icon at the bottom right of the TinyCore desktop to launch a console window Use a ssh client (e.g. PuTTY) on your computer to connect a network-based console Consult your DHCP server/router for the IP address assignment (TinyCore's host name is "box") Login credentials: tc/P@ssw0rd When the Linux command line prompt ($) is displayed, update the TCRP script ./rploader.sh update Checking Internet Access -> OK Checking if a newer version exists -> There is a newer version on the repo should we use that ? [yY/nN] Y OK, updating, please re-run after updating Updating tinycore loader with latest updates Backing up files to /mnt/sda3//mydata.tgz Then, update the TCRP support files ./rploader.sh fullupgrade <downloads snipped> Current /home/tc size is 114M , try to keep it less than 1GB as it might not fit into your image Should i update the sda with your current files [Yy/Nn] Y Backing up home files to sda : Backing up files to /mnt/sda3//mydata.tgz Finally, choose a DSM release number Each DSM build as provided by Synology has a release number. You can display the combinations of platforms and releases supported by TCRP by just running the script with no arguments ./rploader.sh <command help snipped> Available platform versions: ---------------------------------------------------------------------------------------- apollolake-7.0-41890 apollolake-7.0.1-42218 apollolake-7.1.0-42661 broadwell-7.0.1-42218 broadwell-7.1.0-42661 broadwellnk-7.0.1-42218 broadwellnk-7.1.0-42661 bromolow-7.0.1-42218 bromolow-7.1.0-42661 denverton-7.0.1-42218 denverton-7.1.0-42661 geminilake-7.0.1-42218 geminilake-7.1.0-42661 v1000-7.0.1-42218 v1000-7.1.0-42661 Step 4. Configure System-Specific Parameters Custom system parameters are stored in the user_config.json file. This can be manually edited, or TCRP can help determine appropriate values for the hardware. USB flash drive VID/PID: TCRP can query the USB flash drive for the hardware vid/pid values that DSM uses to identify the loader during bootup ./rploader.sh identifyusb Found: Superdisk Flash SerialNumber: 123456 Vendor ID: 0x1234 Product ID: 0x0001 Should i update the user_config.json with these values ? [Yy/Nn] Y Serial number/MAC: TCRP can automatically generate a serial number for the platform selected in step 1. Additionally, it will generate a random MAC address for the NAS network card. If you prefer to use the actual hardware MAC address instead, append "realmac" to the command. Example 1: random MAC address ./rploader.sh serialgen DS3622xs+ Serial Number for Model : 20C0SQRLR47QM Mac Address for Model DS3622xs+ : 00:11:32:80:B2:36 Should i update the user_config.json with these values ? [Yy/Nn] Y Example 2: real MAC address ./rploader.sh serialgen DS3622xs+ realmac Serial Number for Model : 2150SQRGS7N5T Mac Address for Model DS3622xs+ : 00:11:32:57:3A:9B Real Mac Address : 00:0C:24:62:3E:3D Notice : realmac option is requested, real mac will be used Should i update the user_config.json with these values ? [Yy/Nn] Y Drive Slot Mapping: TCRP can try to determine how to map the NAS disk controller ports to DSM slots. If the chosen platform uses SataPortMap/DiskIdxMap for port mapping, the command below will do this. If it uses Device Tree for slot mapping, the command may be skipped, as the Device Tree is configured automatically during the loader build. ./rploader.sh satamap Found "02:02.0 SATA AHCI controller" Detected 4 ports/2 drives. Override # of ports or ENTER to accept: <4> Recommended settings: SataPortMap=4 DiskIdxMap=00 Should I update the user_config with these values ? [Yy/Nn] Y If the port count is not what you expect, it may be due to the motherboard design servicing physical ports with multiple controllers, or because of M.2 SATA slot support. If necessary, the port count can be overridden with whatever you like. NOTE: If you see a WARNING message, it is certain that either some of your drives are inaccessible or the DSM install will encounter problems. Evaluate and investigate the issue. The satamap command can be rerun as many times as needed to understand the system. Manual Review: With prior loaders (such as Jun's), the configuration of these parameters was completely manual. There is no single setup that works for all hardware. Even after using the tools above, please review and verify the parameters, understand what they do, and manually edit if needed. Whatever changes rploader.sh makes to the user_config.json file can be reviewed by displaying the file contents cat user_config.json and overridden by editing the file vi user_config.json You can also add a simpler editor, nano tce-load -iw nano nano user_config.json And there is also a graphical editor accessible from the TinyCore desktop Step 5. Optional: Manually Add Driver Extensions While TCRP can automatically add drivers based on the detected NAS hardware, it isn’t foolproof. You might want to build a loader for a device you don’t actually have yet. And there are features that are "opt-in" only. So, a process exists to manually add drivers and other functionality. Extensions are stored in repositories hosted on the web. All the extensions in the main repository are viewable here: https://github.com/pocopico/rp-ext To list all the extensions recommended by TCRP's hardware detection algorithm, use ./rploader.sh listmods <architecture>-<version>-<DSMreleasenumber> ./rploader.sh listmods apollolake-7.1.0-42661 To add a specific extension, choose from the list and reference the architecture from Step 1. ./rploader.sh ext <architecture>-<version>-<DSMreleasenumber> <extensionurl> ./rploader.sh ext apollolake-7.1.0-42661 add https://raw.githubusercontent.com/pocopico/rp-ext/master/redpill-acpid/rpext-index.json ./rploader.sh ext denverton-7.1.0-42661 add https://raw.githubusercontent.com/pocopico/rp-ext/master/v9fs/rpext-index.json The examples illustrate adding ACPI and VIRTIO support. These are often chosen enhancements to a basic installation. Step 6. Build the Loader When all preparation steps are complete, build the loader using the command structure ./rploader.sh build <architecture>-<version>-<DSMreleasenumber> Example #1: DS3622xs+, auto detect hardware ./rploader.sh build broadwellnk-7.1.0-42661 Example #2: DS918+, use preselected drivers ./rploader.sh build apollolake-7.1.0-42661 manual TCRP will download resources from the Internet to complete the complex process of the loader build. When finished, it will write it to the USB flash drive and add new items to the GRUB boot menu. Review the output for any errors and make corrections if necessary. Step 7. Optional Backup Tasks Save the TinyCore configuration state as the default, so that the next boot of TInyCore starts with all your settings ./rploader.sh backup Back up the generated RedPill loader partition to available space on the USB flash drive ./rploader.sh backuploader Step 8: Restart and Boot DSM Using the Grub USB Option Cleanly shutdown and reboot with the TinyCore command exitcheck.sh reboot First, the GRUB Menu is displayed. If necessary, use the arrow keys to ensure that USB is selected and press ENTER. The loader will show some initialization information and silently boot DSM. Nothing else will be displayed unless a serial console is attached (see the Troubleshooting section below). Wait a few minutes, then launch either https://find.synology.com or the Synology Assistant desktop utility. If the loader is working properly, a new "SynologyNAS" will be displayed as Not installed (for a new build) or the name of your existing Migratable NAS (if upgrading from a previous version). Use your browser to connect to the NAS. If "Something went wrong" is displayed, jump to the Basic Troubleshooting section below. Otherwise, browse to the Synology Download Center and download the DSM install PAT file that matches the platform and release number specified in the loader build. Do not use the PAT file stored in TinyCore. It has modifications that are incompatible with DSM installation. However, its name may help identify the correct PAT file to download below. There can be several files that appear to be candidates. PAT files marked VirtualDSM will not work. Also there can be patch PAT files with the same numbering. These will not work and will usually be smaller than 50MB. The correct PAT file is 300MB or larger. Once the correct DSM PAT file is saved to your personal computer, upload it to the NAS. Follow the prompts to complete the installation. FOR UPGRADES ONLY: If Synology Assistant shows Not installed, or if prompted to erase the disks during the upgrade, STOP! Some or all of your array disks are not visible to DSM. This must be resolved via troubleshooting and reconfiguration before installing DSM 7.x. IMPORTANT: During the install, always select DSM manual updates. If a new install completes normally, but then fails after the reboot, it may be that DSM has attempted to auto-update itself with incompatible code. Basic Troubleshooting Where to Post for Help It’s easy for requests for installation help to get lost in various unrelated forum threads. Post requests for help as a new topic in the DSM Installation Forum. At a minimum, state the hardware configuration, selected platform, DSM version, user_config.json information (delete or redact the serial number and configured MAC address) and any information from debugging analysis that you have done. DON’T post general requests for help on this thread. Please DON’T post general requests for help on TCRP or RedPill development threads unless providing feedback on a dev issue.
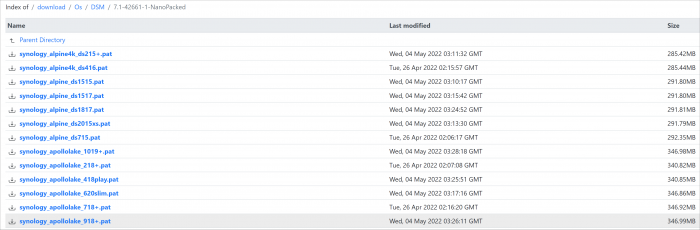


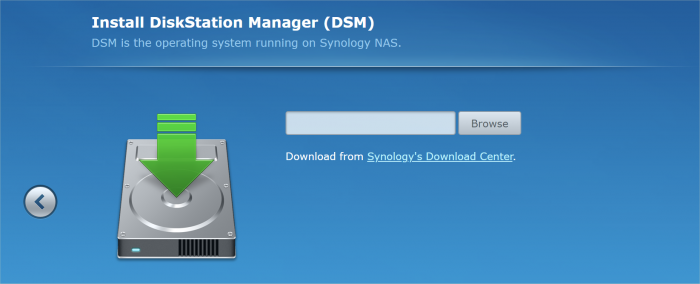
- 158 replies
-
- 40
-

-

-

From Intel 8th gen to Intel 12th/13th/14th gen in DSM 6.2.3
ed_co posted a question in General Questions
Hello guys, I need your help. I was using a xpenology build since fall of 2018 and was working AMAZING!! The configuration was: - Asrock H370M-ITX/ac (6 SATA, 2 x NIC: i211V and i219V) - i3 8700 - 32Gb DDR4 RAM - SATA card SYBA SI-MPE40125 4 SATA ports -with Marvell 88SE9215 controller-, installed via M.2 e-key to mini pic-e adapter. So with the 6 ports of the motherboard have a total of 10 SATA ports. - 5x8Tb disks - Using Jun's loader 1.04b 918+ BAREMETAL (with extra.lzma for the second NIC) with DSM 6.2.3 I was completely in love with the build, I thought it was almost perfect for my needs (well, never had enough space ). I was always updating until I couldn't do it more in DSM 6.2.3. It was working so well, that even that I was tempted numerous of times to update to DSM 7 (but I was not confident enough), I kept locked to DSM 6.2.3 because I was not sure if there was anything I could do better with DSM 7, at least for my needs, and I wanted to wait until I buy new disks in summer, to do an update to DSM 7.2. It was working rock solid almost 24/7 for almost 5.5 years!! Sadly, a couple of weeks ago, the motherboard died (with no explanation), and there was no way to find a motherboard to replace it, at least in this form factor. So I had to find a replacement board (with obviously a new processor) to match the needs (and seriously there are really few possibilities, the world shortage is huge, at least in mini-ITX boards), thinking I would be able to make it work straight away with my build with few changes in the config, so I found the following: - Asrock H610M-ITX/AC (4 SATA, 1 x NIC: i219V) - i3 12100 - Same 32GB DDR4 RAM Using the mentioned SYBA card in the M.2 port, still have 8 SATA ports, and is fine for my needs even losing 2 ports, as have just 5 disks. I can see the disks in the EFI BIOS, so are being recognised, which is great as was one of my fears. So, I changed the grub.cfg of the USB with the Jun's loader of the previous configuration, and modified: - The mac address of my NIC, I got the mac address of the new board via USB with Ubuntu LTS (NOTE ABOUT MAC ADDRESSES IN THE PREVIOUS BUILD: "strangely" I was using in the previous build a "well known" mac addresses with a serial number that you can find in the forum, and it was working beautifully even with transcoding, and I don't think I was using the real mac addresses of the board!! Don't remember seriously... unless I changed the NIC mac addresses permanently to these ones, which I am not sure if it is even possible). - The SataPortMap configuration to 44 (means first 4 ports of 1st controller and first 4 ports of 2nd controller), instead the previous 64 As the previous build was using the extra.lzma for the i219V, I chose this motherboard because it had the same NIC, and I thought it would work straight away. So I booted the computer with the USB, and I am not not able to run the previous DSM installation nor able to find any Synology device with the web or the Synology assistant. Not sure if I have to use the reinstall option of the Jun's loader because of the new configuration (or is just if you want to install again DSM), and just used it with the default option of the loader (the first BAREMETAL one). I have the feeling that maybe the NIC is not being recognised and I don't understand why. Being headless I don't see any message when connected to my monitor via DisplayPort about if the loader is having any problem. Not sure what to do nor debug. Don't remember if I changed any BIOS settings in the past that maybe could matter. Just changed the hot plug of the SATA and few things more... Obviously, as I want to recover all the disks and see that everything is correct, I would like to avoid installing the DSM 7 for now (as I don't want to risk the existent disks and I have no other backups), and would love to first having DSM 6.2.3 working, and not have any problem afterwards to updated. But now I just want to see everything is correct and the DSM 6.2.3. Can anyone help me with that? I am very desperate and I don't know what more to do. Find attached the grub.cfg just in case there is any error. Thank you very much. grub.cfg -
 Hello, Just picked up the Topton N5105 NAS Motherboard from Ali (Link to Specs on Ali) Intel Celeron (11th) N5105 16GB RAM 4 x 2.5GPS ethernet ports (Intel i226-V) Having issues trying to install DSM7 wondering if anyone else has tried and had issues with this board. Specifically, TC OS loads but cannot connect to the internet. Blinky Green/Yellow lights on any of the four ethernet ports but cannot resolve any domains and does not show up on my local network. I guess this is related to NIC drivers? Any help or thoughts would be appreciated.
 -
Outcome of the update: SUCCESSFUL - DSM version prior to update: DSM 7.2.1-69057 Update 4 - DSM version after update: DSM 7.2.1 69057 Update 5 - Loader version and model: ARC 24.4.10 / DS920+ - Installation type: BAREMETAL - Intel i5-10500T on ASUS ROG STRIX Z490-I with 16GB - Additional comments: no ARC loader update needed, will do it later as Restore config function isn't recommanded at all Outcome of the update: SUCCESSFUL - DSM version prior to update: DSM 7.2.1-69057 Update 4 - DSM version after update: DSM 7.2.1 69057 Update 5 - Loader version and model: ARC 24.4.10 / DS920+ - Installation type: BAREMETAL - Intel i5-10500T on ASRock Z490 ITX/TB3 with 32GB - Additional comments: no ARC loader update needed, will do it later as Restore config function isn't recommanded at all
-
Hello! I am xpenology user. And I am an IT engineer who creates shell scripts as hobbies. Please understand that it is written by a google translate site. because i’m korean who is not fluent in English. I created a tool to change cpu information for Xpenology’s users. Modify the actual cpu name and cores of your pc or server. Howto Run ============================================================= 1. Download attached file on your PC (ch_cpuinfo.tar) (ch_cpuinfo_en.tar) / (ch_cpuinfo_kr.tar is file for korean) 2. Upload file to your DSM location (by filestation, sftp, webdav etc....) 3. Connect to ssh by admin account. (dsm > control panel > terminal & snmp > terminal > enable ssh check) 4. Switch user to root: sudo su - (input admin password) 5. Change directory to where ch_cpuinfo.tar file is located: cd /volume1/temp 5-1. in another way, Download ch_cpuinfo.tar with wget wget https://github.com/FOXBI/ch_cpuinfo/releases/download/ch_cpuinfo/ch_cpuinfo.tar 6. Decompress file & check file: tar xvf ch_cpuinfo.tar ls -lrt (check root’s run auth) 7. Run to Binary file ./ch_cpuinfo or ./ch_cpuinfo.sh (If you use busybox in DSM 5.x, you can use it as a source file) 8. When you execute it, proceed according to the description that is output. 9. Check your DSM’s CPU name, CPU cores at “information center” made a video of the how to run ch_cpuinfo. Extra Action If you want to use ch_cpuinfo in your language Modify and use the LANG.txt file in the same path as ch_cpuinfo. It is possible to use after changing the English content of each variable after translation and changing the value of CUSTLANG in line 8 to Y. Sample image(by Google trans) ==================================================== Addtional, Adjust binary to excute file made by shc(http://www.datsi.fi.upm.es/~frosal) The tool does not inclue worms, bad code. If you want to edit the CPU information yourself manually, please refer to the contents below. ——————————————————————————————————————————————————————————————— Location : /usr/syno/synoman/webman/modules/AdminCenter Source : admin_center.js / admin_center.js.gz(above 6.2) Add Before -> if(Ext.isDefined(h.cpu_vendor)&&Ext.isDefined(h.cpu_family)&&Ext.isDefined(h.cpu_series)){ o.push([_T("status","cpu_model_name"),String.format("{0} {1} {2}",h.cpu_vendor,h.cpu_family,h.cpu_series)])} if(Ext.isDefined(h.cpu_cores)){o.push([_T("status","cpu_cores"),h.cpu_cores])} Add contents: h.cpu_vendor="Intel";h.cpu_family="Xeon";h.cpu_series="E3-1220 V3";h.cpu_cores="4 Cores (1 CPU/4 Cores | 4 Threads)"; h.cpu_detail="<a href='https://ark.intel.com/content/www/us/en/ark/search.html?_charset_=UTF-8&q=E3-1220 V3' target=_blank>detail</a>" Change contens: String.format("{0} {1} {2}",h.cpu_vendor,h.cpu_family,h.cpu_series) to String.format("{0} {1} {2} {3}",h.cpu_vendor,h.cpu_family,h.cpu_series,h.cpu_detail) ——————————————————————————————————————————————————————————————— Finally, All descriptions are based on version 6.2, and the actual executable file supports 5.x, 6.x and 7.x Publish the source through github(https://github.com/FOXBI/ch_cpuinfo). For versions DSM 6.x and later, you can use the binary as before. If you use busybox in DSM 5.x, you can use it as a source file(ch_cpuinfo.sh). Please contact me by comment or bug report, i’ll respond to you as much as possible within my ability. Test & Made Environment ———————————————————————————————————— Base Server : HP ML310e v2 gen8 + VMware ESXi 6.0 + RDM DSM : DSM 6.2.3-25426 Update 3 (DS3615xs) Base Server : HP ML310e v2 gen8 + VMware ESXi 6.0 DSM : DSM 7.0.1-42214 (DS3615xs) Base Server : HP ML310e v2 gen8 + VMware ESXi 6.0 DSM : DSM 7.0.1-42214 (DS918+) Base Server : HP ML310e v2 gen8 + VMware ESXi 6.0 DSM : DSM 6.2.4-25556 (DS3615xs) Base Server : Intel E5-2630 v2 + VMware ESXi 6.7u2 DSM : 6.2.2-24922 Update 2 (DS3617xs) ———————————————————————————————————— Change Log Update new version (ch_cpuinfo ver 4.2.0-r01) 2023.02.18 - Application of AMD's CPU information collection function improvement - xpenlib(cpu_info.sh) refered https://github.com/FOXBI/xpenlib/blob/main/cpu_info.sh Update new version (ch_cpuinfo ver 4.2.1-r01) 2023.03.05 - Fixed error when users of previous version perform redo with version 4.2.0-r01 (Thanks for the @Mentat report.) I am sorry for not being able to actively respond to your inquiries due to busy life. Thank you!! Have a nice day!! Cheer up!! We can do it!! Reduce activity & Stay home & Wear a Mask!! Let's overcome COVID-19 !! Let's pray and support together for the two countries where the earthquake caused great damage and many deaths and missing people. ============================================= Download links: ch_cpuinfo ver 4.2.0-r01 - new version update -> ch_cpuinfo ver 4.2.1-r01 - new version update -> ch_cpuinfo.tar Reference images # 1.04b + DS918+ # 1.03b + DS3615xs # 1.03b + DS3617xs # Normal output is possible even when using more than 8core. # Support DSM 7.x
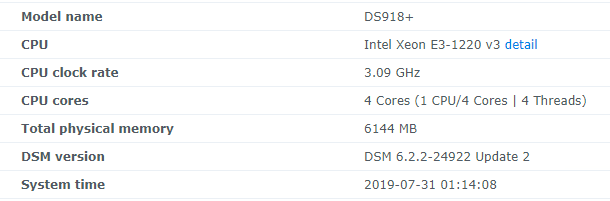
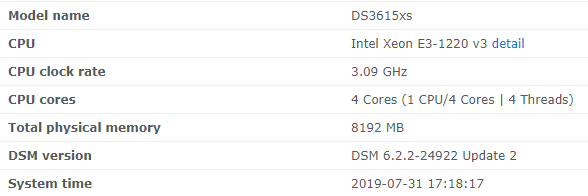
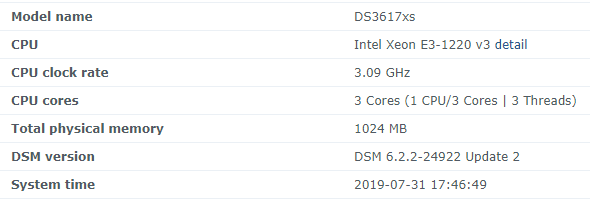
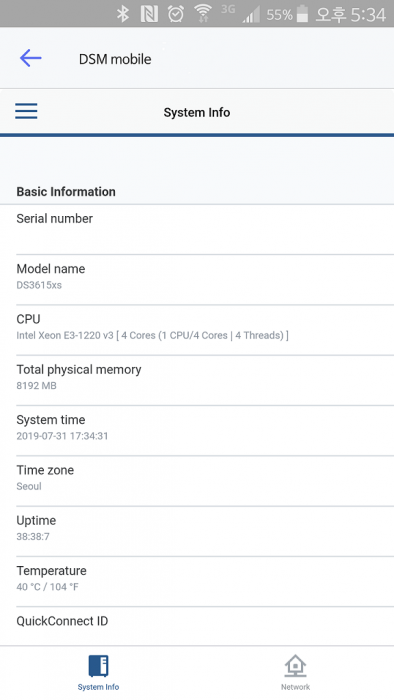
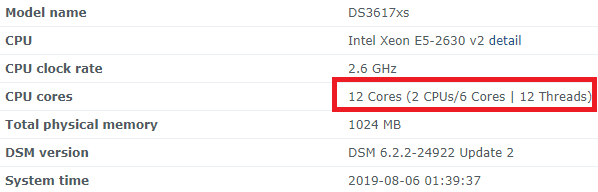


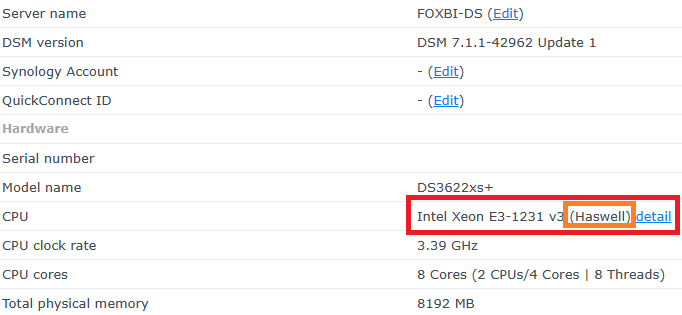
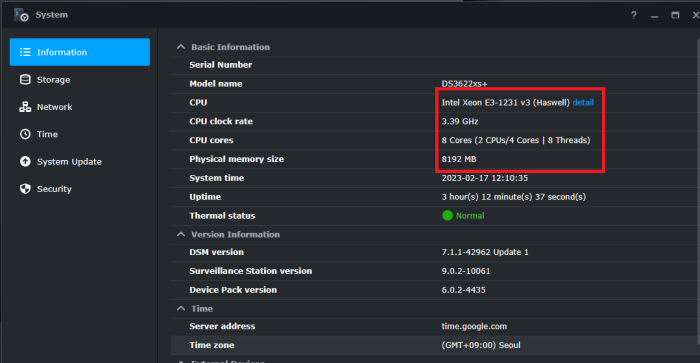
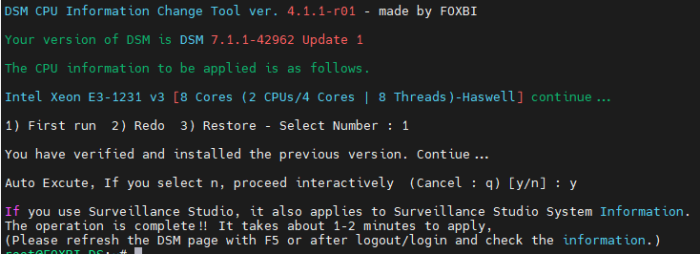
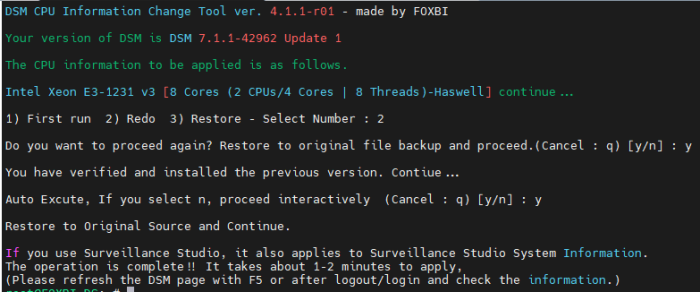
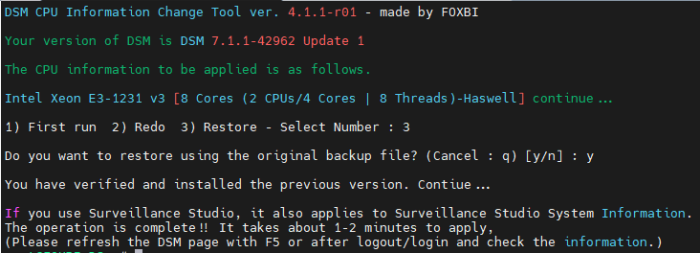
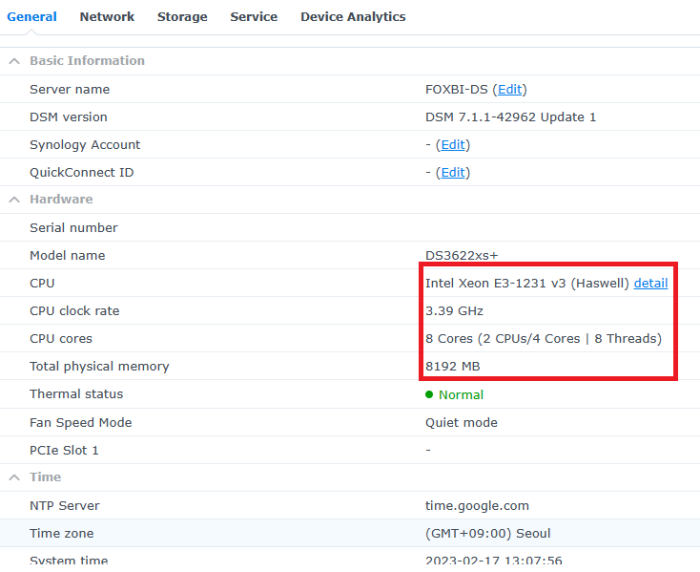
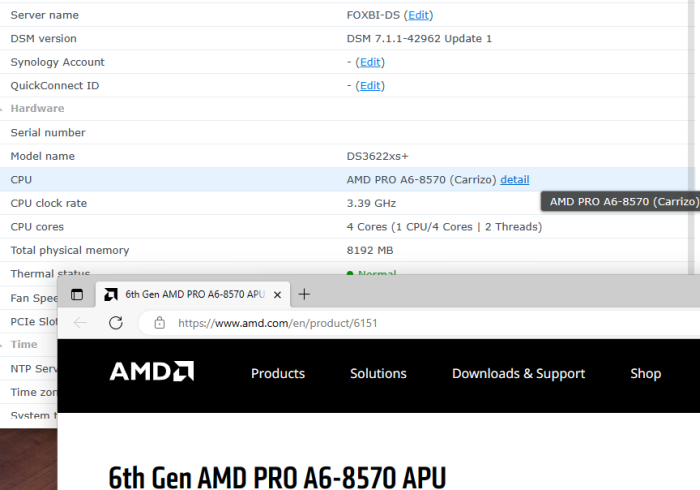
- 398 replies
-
- 54
-
-
-
After much research and more Research between the different model.conf this forum and this site --> (https://imnks.com/4925.html) I have been able to build 4 different system TS-2483XU TES-3085U(SAS with expander only) TS-3088XU TS-3087XU [LSI 9211-8I with SAS expander, LSI 3005-24i, m.2 nvme , gpu, Ethernet: 1G Intel I210 Intel 10G x540 and 10G (marvel chipset nic card] Still not sure why my HBA physical drive starts are 8 and the other starts at 12 but QNAP respects the physical port more than the port or slot number Internal nics you should use the Ubuntu usb image and run lspci -PP that will help because some cards have two DEV BUS number and for internal devices you should use the first one and for pcie slot you should use the second 00:1d.0/05:00.0 internal nic vs 00:1b.0/03:00.0 external nic PCI NVME use 00:1c.0/04:00.0 the first for pcie slot and the second one for mapping to a system disk slot I turned of CE1 and CSTATE but I did have success with them on and I use CSM UEFI boot with OX QNAP disk tc@ubuntu:~$ lspci -PP 00:00.0 Host bridge: Intel Corporation Device 3e31 (rev 0a) 00:01.0 PCI bridge: Intel Corporation 6th-10th Gen Core Processor PCIe Controller (x16) (rev 0a) 00:01.1 PCI bridge: Intel Corporation Xeon E3-1200 v5/E3-1500 v5/6th Gen Core Processor PCIe Controller (x8) (rev 0a) 00:08.0 System peripheral: Intel Corporation Xeon E3-1200 v5/v6 / E3-1500 v5 / 6th/7th/8th Gen Core Processor Gaussian Mixture Model 00:12.0 Signal processing controller: Intel Corporation Cannon Lake PCH Thermal Controller (rev 10) 00:14.0 USB controller: Intel Corporation Cannon Lake PCH USB 3.1 xHCI Host Controller (rev 10) 00:14.2 RAM memory: Intel Corporation Cannon Lake PCH Shared SRAM (rev 10) 00:15.0 Serial bus controller: Intel Corporation Cannon Lake PCH Serial IO I2C Controller #0 (rev 10) 00:15.1 Serial bus controller: Intel Corporation Cannon Lake PCH Serial IO I2C Controller #1 (rev 10) 00:16.0 Communication controller: Intel Corporation Cannon Lake PCH HECI Controller (rev 10) 00:16.4 Communication controller: Intel Corporation Cannon Lake PCH HECI Controller #2 (rev 10) 00:17.0 SATA controller: Intel Corporation Cannon Lake PCH SATA AHCI Controller (rev 10) 00:1b.0 PCI bridge: Intel Corporation Cannon Lake PCH PCI Express Root Port #21 (rev f0) 00:1c.0 PCI bridge: Intel Corporation Cannon Lake PCH PCI Express Root Port #1 (rev f0) 00:1d.0 PCI bridge: Intel Corporation Cannon Lake PCH PCI Express Root Port #9 (rev f0) 00:1d.1 PCI bridge: Intel Corporation Cannon Lake PCH PCI Express Root Port #10 (rev f0) 00:1d.2 PCI bridge: Intel Corporation Cannon Lake PCH PCI Express Root Port #11 (rev f0) 00:1e.0 Communication controller: Intel Corporation Cannon Lake PCH Serial IO UART Host Controller (rev 10) 00:1f.0 ISA bridge: Intel Corporation Device a30a (rev 10) 00:1f.4 SMBus: Intel Corporation Cannon Lake PCH SMBus Controller (rev 10) 00:1f.5 Serial bus controller: Intel Corporation Cannon Lake PCH SPI Controller (rev 10) 00:01.0/01:00.0 VGA compatible controller: NVIDIA Corporation GP106 [GeForce GTX 1060 6GB] (rev a1) 00:01.0/01:00.1 Audio device: NVIDIA Corporation GP106 High Definition Audio Controller (rev a1) 00:01.1/02:00.0 Serial Attached SCSI controller: Broadcom / LSI SAS2008 PCI-Express Fusion-MPT SAS-2 [Falcon] (rev 03) 00:1c.0/04:00.0 Non-Volatile memory controller: Phison Electronics Corporation Device 5015 (rev 01) 00:1d.0/05:00.0 Ethernet controller: Intel Corporation I210 Gigabit Network Connection (rev 03) 00:1d.1/06:00.0 PCI bridge: ASPEED Technology, Inc. AST1150 PCI-to-PCI Bridge (rev 04) 00:1d.1/06:00.0/07:00.0 VGA compatible controller: ASPEED Technology, Inc. ASPEED Graphics Family (rev 41) 00:1d.2/08:00.0 Ethernet controller: Intel Corporation I210 Gigabit Network Connection (rev 03)
-
С автозапуском DSM решилось просто... Подумалось, один ... пересобирать arc. Взял и обновил его из него до 24.5.1 Так потом вообще ничего делать не пришлось! Он пробилдился сам и DSM реинсталлил и польку-бабочку сбацал ! Ну и на последней перезагрузке - пожалте, таймер обратного отсчёта щёлкает. Присоединюсь с доп. вопросом... Дело в том, что мои эксперименты проходят на железке с пассивным охладом( Intel N100), которая готовится заменить старенький Acer Revo 3610, верой и правдой прослуживший на DSM 5.2 хз сколько лет. Так вот, при всяческих манипуляциях с загрузчиком корпус (он типа радиатор) еле-еле тёплый. А вот при запущенной DSM он прилично горяченький, хотя по Монитору ресурсов никто ничего практически не делает. Как-то это не алё... P.S. А можно надеяться на штатную(в смысле при инсталляции 7.2) миграцию c 5.2, если подсунуть диск из Асера при установке DSM?
-
 i have a i5 6 CPUs x Intel(R) Core(TM) i5-9400 CPU @ 2.90GHz 32 gb ram and 4 tb ssd ESXI host. currently running a vmware, but i want to leave cvmware behind so i was thinking what if iturn it into a powerful nas+vmhost combo. which synology nas is the closest to this , and if it can run virtual machines ( windows and linux)