Search the Community
Showing results for 'SataPortMap'.
-
SataPortmap 18 and DiskIdxmap 1B00 did the trick: Now to find out if its possible to disable the pesky Power Supply warning that appears on each startup and in logs:

-

RS4021xs+ loader development thread
phone guy replied to Peter Suh's topic in Developer Discussion Room
as apposed to what exactly? (and the max disk is 16 btw on 3622, but I think on any? only difference being the graphics. I run a 918 on a 5 bay too) { "extra_cmdline": { "pid": "pid", "vid": "vid", "sn": "serial", "mac1": "mac", "SataPortMap": "6", "DiskIdxMap": "00" }, "synoinfo": { "internalportcfg" : "0xffff", "maxdisks" : "16", "support_bde_internal_10g" : "no", "support_disk_compatibility" : "no", "support_memory_compatibility" : "no" }, "ramdisk_copy": { } } -
Hi, I seem to be having an issue. I was hoping you could help me speed up my troubleshooting. I have the loader built but it seems to hang when booting. As you'll see in the screenshot I attached, I'm getting a netif_num message. I have two NIC's. The built in 1GB Realtek and the PCI-e rtl8125 2.5 Gbe NIC. I'm not sure what "set netif_num to 0 ***" means. I'm guessing that it's not literal when asking me to add the stars, but I figured I'd ask just in case. Thank you in advance EDIT: I should have read fbelavenuto's github more thoroughly. I didn't realize that I would have to add drives manually for "sataportmap" and "diskidxmap". But I'm not sure how to do that. If you could help me with that, that would be awesome!

-
sure, put the sataportmap in cmdline
-
 Hello all. My first attempt after reading the forum 300000 times. here is my output for my satamap tc@box:~$ ./rploader.sh satamap Found SCSI HBAs, We need to install the SCSI modules scsi-5.10.3-tinycore64 is already installed! Succesfully installed SCSI modules Found "00:17.0 Intel Corporation Sunrise Point-H SATA controller [AHCI mode] (rev 31)" Detected 6 ports/0 drives. Override # of ports or ENTER to accept <6> Found SCSI/HBA "01:00.0 LSI Logic / Symbios Logic SAS2008 PCI-Express Fusion-MPT SAS-2 [Falcon] (rev 03)" (7 drives) Computed settings: SataPortMap=6 DiskIdxMap=00 All my drive are on the LSI. But DSM assistant doesnt see any drives because I assume SataPortMap=6. As my on board sata controller has 6 ports. This numbering was consistant with 6.x. as my first drive was always drive 7. No nvm2 drives are installed. I am using a migration attempt. But I have everything backed up. Seems the LSI is not reporting ports just drives. Any help is appreciated and thank you in advance. CD
 -
This is not 100% correct. SataPortMap/DiskIdxMap are not consulted for HBA disk assignment, but the HBA assignment begins wherever the SataPortMap assignments end. If there are no SATA ports of any kind mapped, it is required to have SataPortMap=00 and DiskIdxMap=00 so that the HBA assignments occur in the port namespace. If a virtual SATA port is being mapped out of the port namespace (Sataboot or the ProxMox false controller) and there are no other SATA ports mapped, then SataPortMap=1000 and DiskIdxMap=00 for proper HBA assignment. TCRP rploader.sh satamap attempts to calculate this if it detects only SCSI/HBA even though it is technically not configuring HBA ports with SataPortMap
-
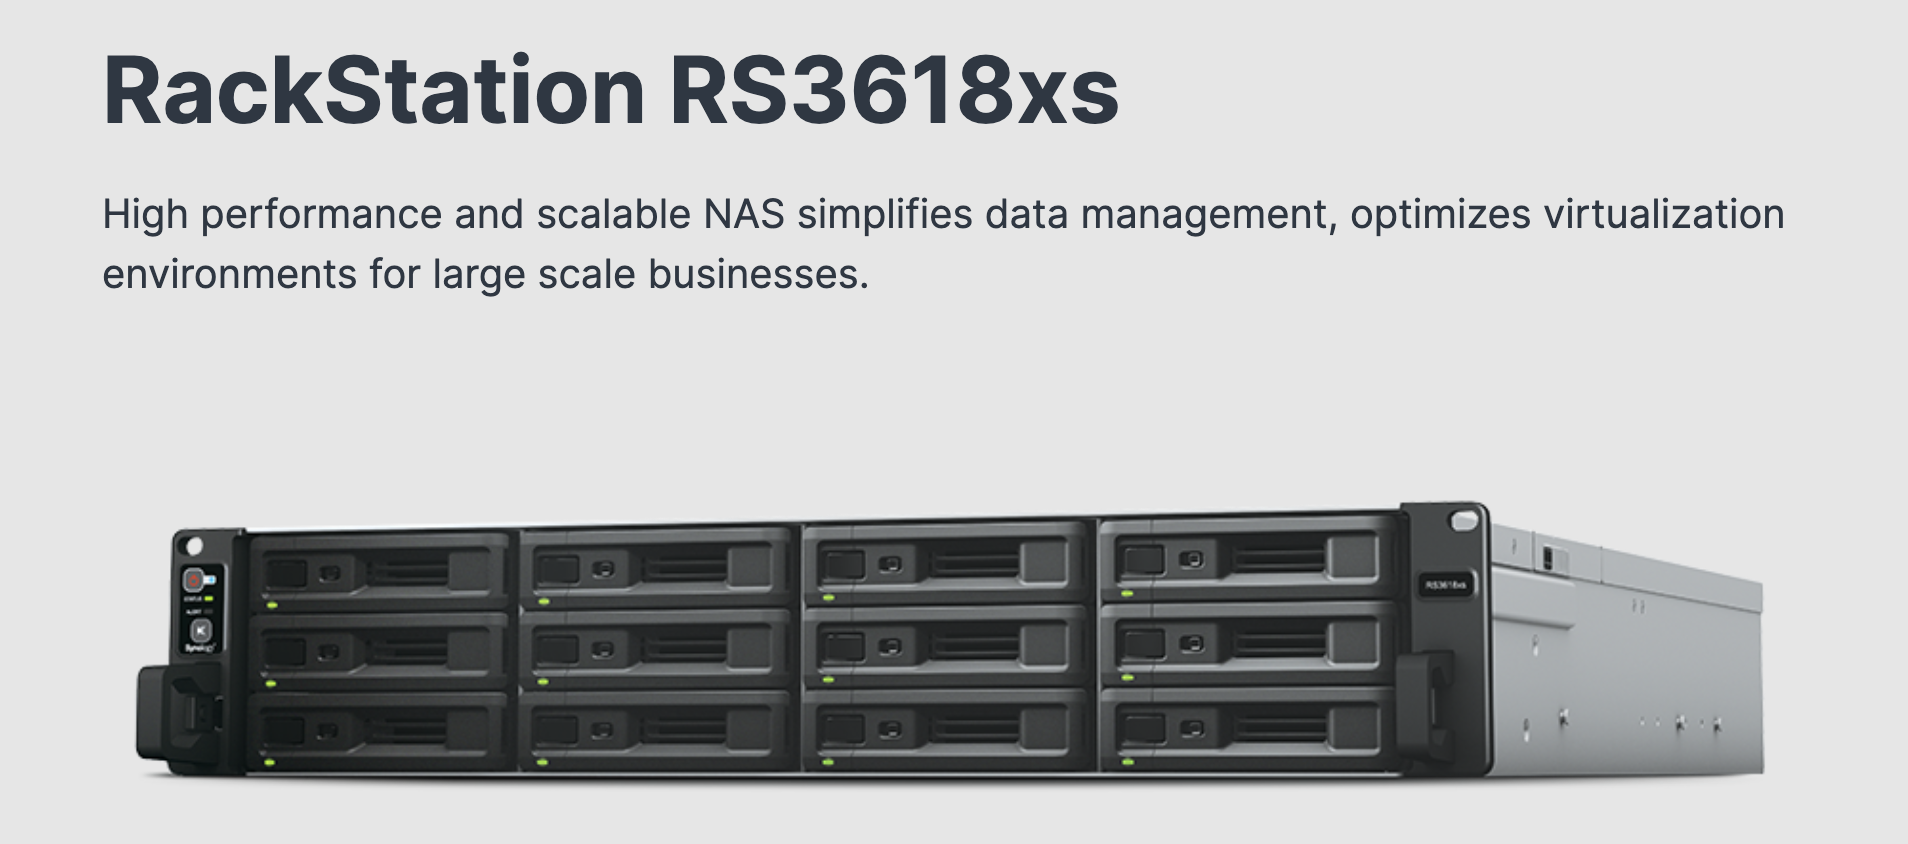
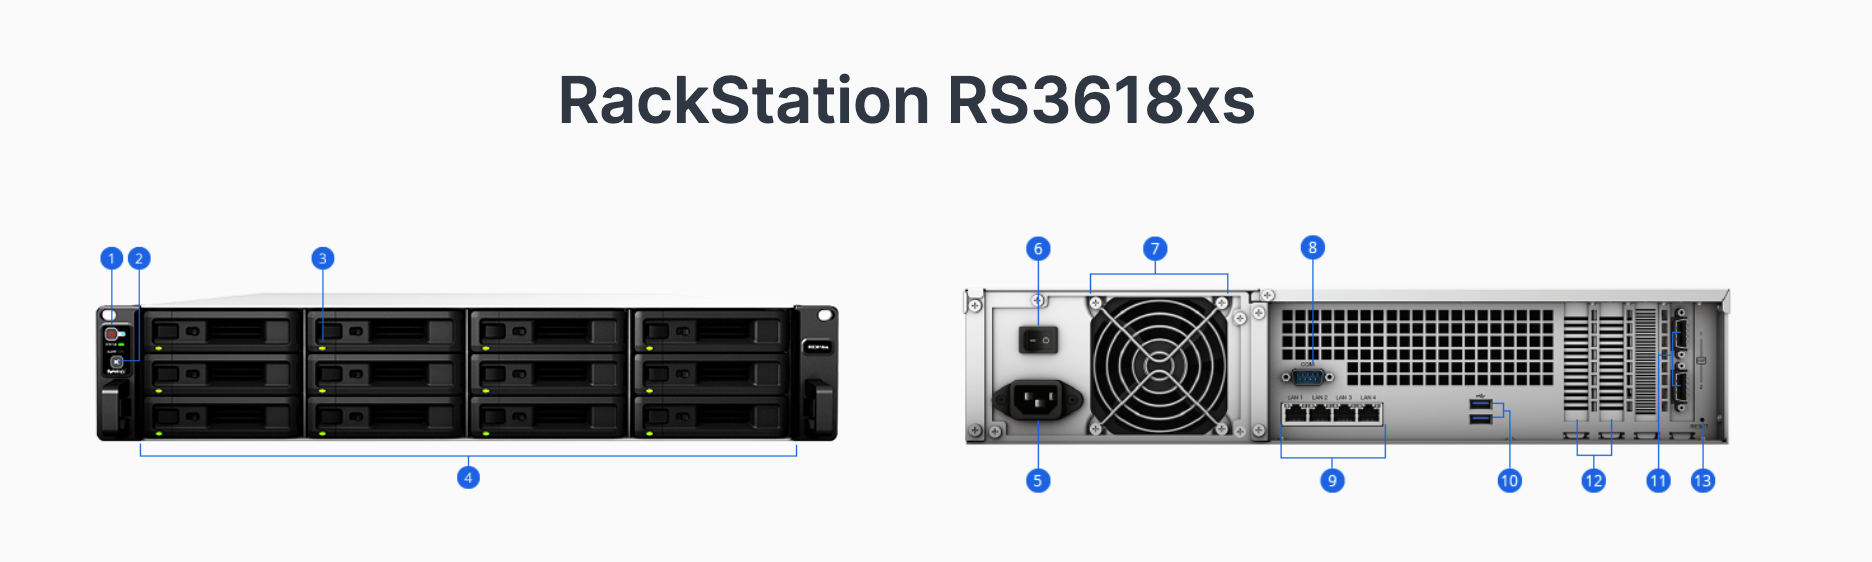
 Release to build RS3618xs loader using TCRP and M shell. It is a 12-bay Broadwell platform-based Rack Station model. It is the second Rack Station after RS4021xs+ and The power supply unit PSU features a single PSU rather than a dual PSU. Since the coding for the dual PSU in Redpill has not been completed yet, a power warning message is displayed in the dual PSU models. Since this model is a single PSU, there is no warning message. Both Jun Mode / Jot Mode are released at the same time. In Jot mode, be sure to process postupdate once more. For first-time users of M SHELL, please proceed with the following command on TC Linux. curl --location "https://github.com/PeterSuh-Q3/tinycore-redpill/raw/main/my.sh.gz" -O; tar -zxvf my.sh.gz; ----------------------------------------------------------------------------------------- Usage: ./my.sh <Synology Model Name> <Options> Options: postupdate, noconfig, noclean, manual, realmac, userdts - postupdate : Option to patch the restore loop after applying DSM 7.1.0-42661 after Update 2, no additional build required. - noconfig: SKIP automatic detection change processing such as SN/Mac/Vid/Pid/SataPortMap of user_config.json file. - noclean: SKIP the 💊 RedPill LKM/LOAD directory without clearing it with the Clean command. However, delete the Cache directory and loader.img. - manual: Options for manual extension processing and manual dtc processing in build action (skipping extension auto detection). - realmac : Option to use the NIC's real mac address instead of creating a virtual one. - userdts : Option to use the user-defined platform.dts file instead of auto-discovery mapping with dtcpatch. Please type Synology Model Name after ./my.sh - for jot mode ./my.sh DS918+ ./my.sh DS3617xs ./my.sh DS3615xs ./my.sh DS3622xs+ ./my.sh DVA3221 ./my.sh DS920+ ./my.sh DS1621+ ./my.sh DS2422+ ./my.sh DVA1622 ./my.sh DS1520+ (Not Suppoted, Testing...) ./my.sh FS2500 ./my.sh DS1621xs+ ./my.sh RS4021xs+ ./my.sh DVA3219 ./my.sh RS3618xs - for jun mode ./my.sh DS918+J ./my.sh DS3617xsJ ./my.sh DS3615xsJ ./my.sh DS3622xs+J ./my.sh DVA3221J ./my.sh DS920+J ./my.sh DS1621+J ./my.sh DS2422+J ./my.sh DVA1622J (Not Suppoted) ./my.sh DS1520+J ./my.sh FS2500J ./my.sh DS1621xs+J ./my.sh RS4021xs+J ((Not Suppoted, Testing...) ./my.sh DVA3219J (Not Suppoted, Testing...) ./my.sh RS3618xsJ ex) Except for postupdate and userdts that must be used alone, the rest of the options can be used in combination. - When you want to build the loader while maintaining the already set SN/Mac/Vid/Pid/SataPortMap ./my.sh DS3622xs+ noconfig - When you want to build the loader while maintaining the already set SN/Mac/Vid/Pid/SataPortMap and without deleting the downloaded DSM pat file. ./my.sh DS3622xs+ noconfig noclean - When you want to build the loader while using the real MAC address of the NIC, with extended auto-detection disabled ./my.sh DS3622xs+ realmac manual
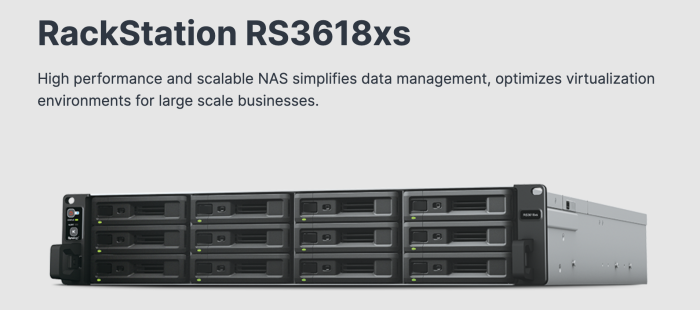

- 1 reply
-
- 2
-

-

-
sata port auf 1 setzen weil ich habe nur 1 festplatte keine msata SataPortMap=01 DiskIdxMap=00
-
This tool really is the easiest way to install RP - I spun up a test 3622xs+ on 7.1.1RC using ESXI, all within my lunch hour. Would have been a lot quicker if I didn't need to check a couple of disk mapping entries. ESXi SATA controller has 30 slots detected by ARPL, so initially no drives detected. But I changed SataPortMap=28 (2 ports on controller 0, 8 ports on controller 1) and DiskIdxMap=1B00 (disks start numbering on controller 1). My broad steps: Download arpl.vmdk from github and upload it to datastore on Esxi. Follow Flyride's TCRP on ESXi guide to prep a VM in Esxi: Creating a DSM Virtual Machine, Part 1 Preparing the TCRP Image (substitute the trcp.vmdk for the arpl.vmdk of course) Creating a DSM Virtual Machine, Part 2 ( also increased the size of the boot disk to 500mb as mentioned in recent posts) From here, I booted the VM and went trhough arpl menu.sh as per normal, with addition of SataPortMap & DiskIdxMap above. I also chose the 7.1.1. RC build. After booting DSM, it went through new install process (I downloaded the 7.1.1 RC pat). Everything installed fine, boot time for DSM is super quick as the datastore is on NVMe. Just a small 40GB test system. I am now considering converting my main NAS from tcrp-on-esxi to arpl-on-esxi... Thanks again @fbelavenuto!
-
Entiendo que es modificar el SataPortMap o simplemente hacer build con una nueva. Tambien puedes usar ARPL que creo tiene una mejor gestión de discos duros que con Tinycore
-

LSI issue 7.1
flyride replied to cabldevil's topic in General Installation Questions/Discussions (non-hardware specific)
SataPortMap does not apply to LSI drives. You have an on board controller with 6 SATA ports. You are reserving slots for them. The LSI ports are tacked on to the end automatically (in your case, starting with slot #7) If no LSI drives are visible during the DSM installation (migration), then your LSI controller is not being recognized by DSM. Please don't confuse that with it being recognized by TinyCore - two different operating systems. You need to look into another driver for the LSI or another platform that supports LSI better. -
 What was the output of ./rploader.sh satamap? Does your laptop have a M.2 slot? you may have to edit the user_config.jason to : SataPortMap=1 DiskIdxMap=00
 -
The hotplug seems to be on (I haven't found it it BIOS but because system works I guess it is on and I don't plan to take out HDD on a working server) As for mapping I had those "SataPortMap": "6", "DiskIdxMap": "00" Because previously I had DS3617xs with DSM 6.1 and in a tutorial here in other thread it is said that DS3617xs is legacy so better use DS3622xs+ instead. I initially tried to set DS3617xs but failed (quite possible because of my errors) I hope this helps
-
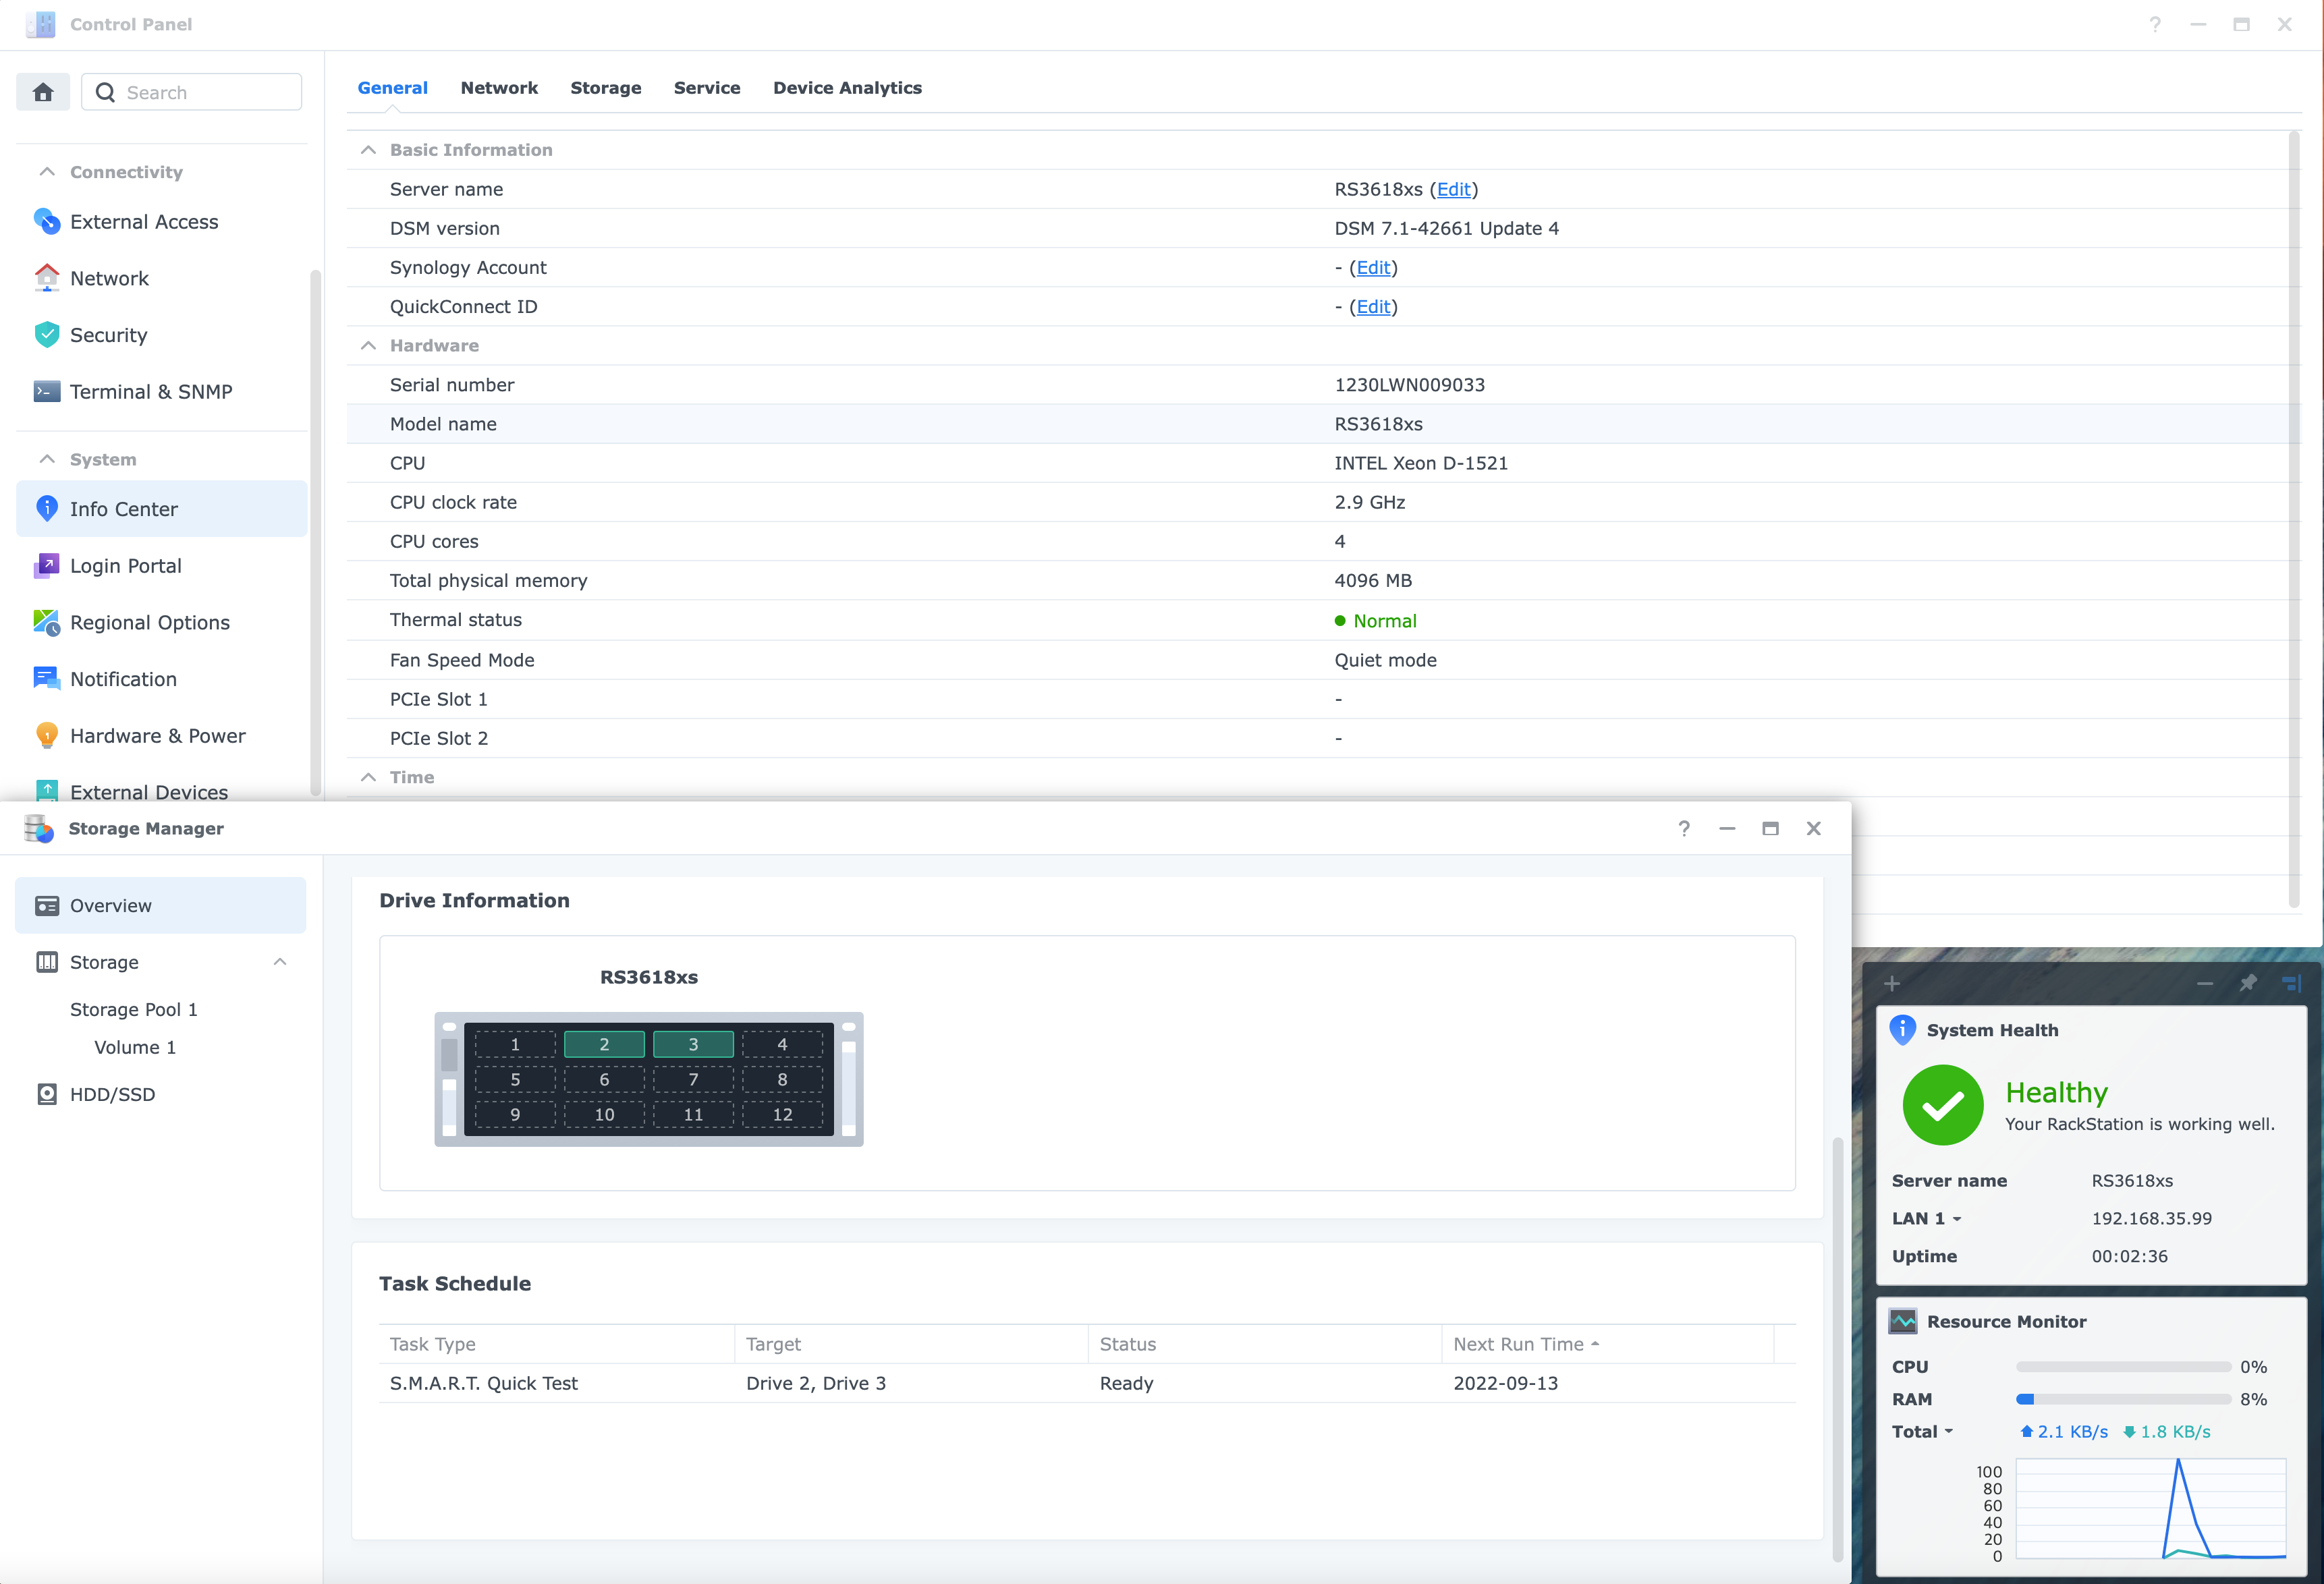
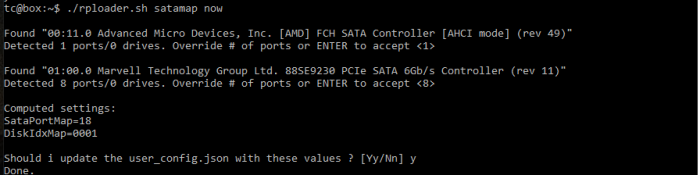
Hi guys, Don't know if this is the proper place to ask for it so here we go: I'm trying to do a clean installation to DSM 7.1.0-42661 but with no success... I always get stuck at 73% of installation and then reboots with a 10 min counter, once is rebooted the installation prompt is shown again. I used broadwellnk architecture to build the loader so the model version used is DS3622xs+, just in case I used the default choice for satamap assignation which is in the image attached, something weird to me since I got 4 SATA ports, not 8 and It states as 0 drives which I don't know if its correct or not. This is my user_config: { "extra_cmdline": { "pid": "0x6545", "vid": "0x0930", "sn": "2030SQRMN5HWZ", "mac1": "70106FCA609E", "SataPortMap": "18", "DiskIdxMap": "0001" }, "synoinfo": { "internalportcfg": "0xffff", "maxdisks": "16", "support_bde_internal_10g": "no", "support_disk_compatibility": "no", "support_memory_compatibility": "no" }, "ramdisk_copy": {} } My setup is a HPE ProLiant Microserver Gen10 with a CPU: AMD Opteron X3216 which I think it's a pretty common setup in XPE world. Regards
-
Just add mac2 under mac1 in the user_config.jason: { "extra_cmdline": { "pid": "0x0000", "vid": "0x0000", "sn": "21XXXXXXXXXXX", "mac1": "00xx00xx00x1", "mac2": "00xx00xx00x2", "SataPortMap": "2", "DiskIdxMap": "00"
-
На HP Microserver G8, Proxmox 7.1.7 Установил так: DS3622xs+ - архитектура DSM 7.1-42661 Update 1 результат Отсюда скачал https://github.com/pocopico/tinycore-redpill/tree/develop https://github.com/pocopico/tinycore-redpill/blob/develop/tinycore-redpill.v0.9.0.2.img.gz После сделал VM с 32gb диском, залил на сервер образ. Сделал импорт образа в диск командой: qm importdisk 100 /root/tinycore-redpill.v0.9.0.2.img local-lvm Не забываем добавить к вм консольный интерфейс qm set 100 -serial0 socket Запускаем вм, установив приоритет загрузки с нового 1G диска и диски должны быть SATA в свойствах машины. Загружаем tinycore. Подключаемся по ssh или как удобнее. Команды по очереди, когда спрашивает тыкаем Y как ответ. ./rploader.sh fullupgrade now ./rploader.sh serialgen DS3622xs+ ./rploader.sh satamap now ./rploader.sh ext broadwellnk-7.1.0-42661 add https://raw.githubusercontent.com/pocopico/redpill-load/master/redpill-virtio/rpext-index.json ./rploader.sh ext broadwellnk-7.1.0-42661 add https://raw.githubusercontent.com/pocopico/redpill-load/develop/redpill-acpid/rpext-index.json Редактируем конфиг, вносим инфу о сетевом интерфейсе. Копируем мак и заменяем после в свойствах вм. edit user_config.json "SataPortMap": "4" "DiskIdxMap": "00" "netif_num": "1" ./rploader.sh build broadwellnk-7.1.0-42661 После exec sudo reboot. Загружаемся с sata интерфейса. Бекап новой тачки на гугл диске https://drive.google.com/file/d/1nw-TGysHe47rAJukZI-SB61aSklSVNbw/view?usp=sharing
-
Other members have faced the same issue with DSM 7 and decided to go with DSM 6.2.3 instead. Have a look at this thread: Have you tried manually editing the user config with WinSCP before you do your build command? { "extra_cmdline": { "pid": "0x5151", "vid": "0x0781", "sn": "2150SXXXXXXXX", "mac1": "Your ReadyNAS MAC", "SataPortMap": "4", "DiskIdxMap": "00" }, "synoinfo": { "internalportcfg" : "0xffff", "maxdisks" : "16", "support_bde_internal_10g" : "no", "support_disk_compatibility" : "no", "support_memory_compatibility" : "no" }, "ramdisk_copy": {
-
It might be a good idea to rebuild the TCRP loader on a USB stick. However, if it is confirmed that the NIC ext added by auto-detection in the old PC is exactly the same, it is okay to use it as is. If you try the latter method, You may need to attach a USB stick to your MS Windows PC, access the first FAT partition, edit the BOOT/GRUB/grub.cfg file, and adjust SataPortMap, etc. It is recommended to modify the MAC address if you used the real MAC address of the old PC on the USB stick. If the virtual MAC address generated by TCRP is recorded, it is okay to leave it alone. The disks used in the old PC can be used in the new PC without any changes.
-
Hi @fbelavenuto as you see here: I am not able to use SATA0:0. If I try 0:1 and SataPortMap=0 no disk will be found during the DSM Setup. With "SataPortMap": "10" & "DiskIdxMap": "00" the installation is successful but the first used data disk within the storage manager is #2. Not beautiful but at least functional.
-
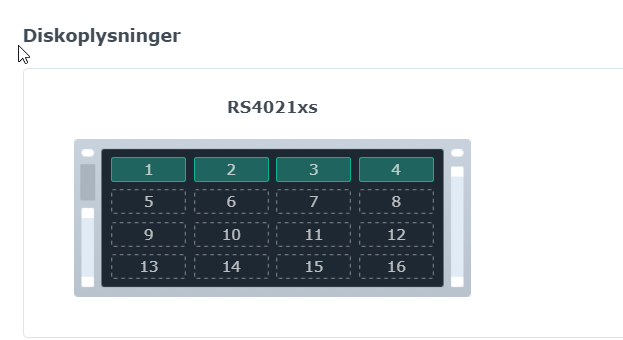
So far, I have decided that it is most convenient to divide the RAID volume into virtual disks and assemble JBODs from them inside the DSM. When increasing the RAID array (which is also a very long operation), you can simply add a new virtual disk to the JBOD that occupies all the free space of the new array. Unfortunately, DSM 7.1 does not work very well with the number of disks greater than 16, all these problems with Sataportmap do not allow us to think that in the future, with the restructuring of the disk system, DSM 7.1 will not fail and will not be blocked. With hardware RAID, there is a problem with parallelization of write operations, which software RAID does natively by the number of disks, but fundamentally the writeback cache increases the write speed to comparable levels.
-
Try put loader disk into SATA0:0 and use SataPortMap=1 The first disk will be 2, and it will not be possible to remove that first phantom disk, as using SataPortMap=0 causes kernel panic and non-SATA disks do not work with DiskIdxMap
-
 Before you begin to change something in your working system, it is strongly recommended to make backups of your most valuable data, so you do not regret about their irretrievable loss. Everything you do is your fear and risk, no one encourages you to do it. The easiest and most reliable way to safely try to do it, turn off all the disks and the boot flash drive from the current system, take a clean disk and another USB flash drive and try to install a new version of the bootloader and the system, if it rolled, then do already on the current system. 1. How to install (described for a computer with Windows): a) download the 1.04 b boot loader image (the original theme is here), create a directory in the root of the disk, for example, c:/918/ and put the bootloader image there b) determine the VID/PID of the flash drive or card reader into which it is inserted (control Panel-Device Manager-USB Controllers-Your flash drive/reader-Properties-Information-hardware ID, you need to ensure that the DSM system recognizes this disk and does not try to install itself on it, if you incorrectly define and register these parameters, the istall process will crash by mistake 13) c) download, install and run the OSFmount program, mount Partition 0 (15 Mb) from the bootloader file, remove the "Read-only drive" checkbox before mounting d) download, install and run Akelpad, open grub/grub file.cfg on previously mounted disk, edit and save: set vid=0xA234 #VID flash drive/reader set pid=0xB678 #PID of flash drive/reader set sn=1780PDN123456 #sn set mac1=001132123456 #mac of the first network card set mac2=001132123457 #mac of the second network card, the second and subsequent differ from the first by +1 in the last bit in the hex system ... set netif_num=2 #number of network cards ... set sata_args= 'SataPortMap=6' # sata controller, values: 6 - 1 controller on 6 ports; 22-2 controllers on 2 ports; 42-2 controllers, the first on 4 ports, the second on 2, etc. Where to get sn and mac - is your headache, Google will help you, the system will be installed and will work with those that are initially registered in the bootloader, but with the restriction of the functioning of some services and modules, such as: QC, push notifications, activation of codecs for transcoding, installation of syno licenses... e) unmount the disk in OSFmount f) download, install and run the Rufus program and record the previously prepared image on a flash drive g) insert the flash drive into the computer on which you plan to run xpen, connect the drives, turn on the power h) disable the firewall in the anti-virus, in the browser type http://find.synology.com or install Synology Assistant from the syno website and find the newly installed xpen on your network j) install DSM following the instructions of the installation program and start setting up (how to do it here is not described, because all the answers are in the syno knowledge base) There is a utility where the main programs for Windows x64 are collected 2. Transcoding (needs sn and mac from real syno hardware) Most likely to run on Intel processors starting from the 4th generation (Haswell), but there are nuances with motherboard models and BIOS. Check as follows: hardware (hw) transcoding - at the root of the system should be a directory /dev/dri with subdirectories in it, if not, but there is no HW transcoding to check - look for the directory with the terminal/ssh command cd /dev/dri . software (sw) transcoding - some codecs must run in DSM, you can check it with the command in the terminal / ssh cat /usr/syno/etc/codec/activation.conf If the result is the same, sw transcoding will ran {"success":true,"activated_codec":["h264_dec","h264_enc","mpeg4part2_dec","hevc_dec","aac_dec","aac_enc","ac3_dec","vc1_dec","vc1_enc"],"token":"123456789987654abc"} If there is nothing similar, there is no sw transcoding. 3. Perhaps the most optimal budget solutions with transcoding will be the following: ASRock J4105-ITX Asrock J5005-ITX Who wants more - use mb with the latest generation of Intel processors with Intel i210 or realtek 8111 . But this is already determined by the size of the your wallet and the functionality that you additionally want to get from xpen. P.S. Sorry for my english 😂
- 264 replies
-
- 6
-
-
-
- trancoding
- 1.04b
- (and 1 more)
-
Im trying start DVA3221 on Asrock J3455-ITX with tc@box:~$ ./rploader.sh serialgen DVA3221 realmac Serial Number for Model : 2150SJRBN35DV Mac Address for Model DVA3221 : 00:11:32:E7:ED:C4 Real Mac Address : 70:85:C2:7D:4D:0F Notice : realmac option is requested, real mac will be used Should i update the user_config.json with these values ? [Yy/Nn] Y tc@box:~$ ./rploader.sh satamap now Found "00:12.0 Intel Corporation Celeron N3350/Pentium N4200/Atom E3900 Series SATA AHCI Controller (rev 0b)" Detected 2 ports/2 drives. Override # of ports or ENTER to accept <2> Found "02:00.0 JMicron Technology Corp. Device 0585" Detected 5 ports/2 drives. Bad ports: 3 4 5. Override # of ports or ENTER to accept <5> 2 Found "03:00.0 ASMedia Technology Inc. ASM1062 Serial ATA Controller (rev 02)" Detected 2 ports/2 drives. Override # of ports or ENTER to accept <2> Computed settings: SataPortMap=222 DiskIdxMap=000204 If u see, micron make some problem, i had on 918+ 6.2.3 all 6 HDD works fine, and now i cant install system What is the problem and what i can do to install latest DVA3221 system ?
-
@pocopicodo you think that this is a matter of SasIdxMap, SataPortMap and DiskIdxMap setting? Update: with "SataPortMap": "42" & "DiskIdxMap": "0004" I am able to install DSM. The only thing is, that during installation I was ask to delete the 5 data disk and within DSM storage manager my first data disk is disk number 5. Which config I have to change to show my first data disk as number 1?
-
 Hardware: SUPERMICRO X10SDV-TLN4F D-1541 (2 x 10 GbE LAN & 2 x Intel i350-AM2 GbE LAN) LSI HBA with 8 HDDs (onboard STA controllers disabled) Previous attempts using TCRP & broadwellnk failed because I couldn't get a network connection (may be related to 10g NICs) Using TCRP & broadwell gets me further because the device is now discoverable in Synology Assistant, however, I keep getting "no drives" found. SataPortMap=8 DiskIdxMap=00 and SataPortMap=1 DiskIdxMap=00 tc@box:~$ ls -la /sys/class/ata_port total 0 tc@box:~$ lspci -tvnnq -+-[0000:ff]-+-0b.0 Intel Corporation Xeon E7 v4/Xeon E5 v4/Xeon E3 v4/Xeon D R3 QPI Link 0/1 [8086:6f81] | +-0b.1 Intel Corporation Xeon E7 v4/Xeon E5 v4/Xeon E3 v4/Xeon D R3 QPI Link 0/1 [8086:6f36] | +-0b.2 Intel Corporation Xeon E7 v4/Xeon E5 v4/Xeon E3 v4/Xeon D R3 QPI Link 0/1 [8086:6f37] | +-0b.3 Intel Corporation Xeon E7 v4/Xeon E5 v4/Xeon E3 v4/Xeon D R3 QPI Link Debug [8086:6f76] | +-0c.0 Intel Corporation Xeon E7 v4/Xeon E5 v4/Xeon E3 v4/Xeon D Caching Agent [8086:6fe0] | +-0c.1 Intel Corporation Xeon E7 v4/Xeon E5 v4/Xeon E3 v4/Xeon D Caching Agent [8086:6fe1] | +-0c.2 Intel Corporation Xeon E7 v4/Xeon E5 v4/Xeon E3 v4/Xeon D Caching Agent [8086:6fe2] | +-0c.3 Intel Corporation Xeon E7 v4/Xeon E5 v4/Xeon E3 v4/Xeon D Caching Agent [8086:6fe3] | +-0c.4 Intel Corporation Xeon E7 v4/Xeon E5 v4/Xeon E3 v4/Xeon D Caching Agent [8086:6fe4] | +-0c.5 Intel Corporation Xeon E7 v4/Xeon E5 v4/Xeon E3 v4/Xeon D Caching Agent [8086:6fe5] | +-0c.6 Intel Corporation Xeon E7 v4/Xeon E5 v4/Xeon E3 v4/Xeon D Caching Agent [8086:6fe6] | +-0c.7 Intel Corporation Xeon E7 v4/Xeon E5 v4/Xeon E3 v4/Xeon D Caching Agent [8086:6fe7] | +-0f.0 Intel Corporation Xeon E7 v4/Xeon E5 v4/Xeon E3 v4/Xeon D Caching Agent [8086:6ff8] | +-0f.4 Intel Corporation Xeon E7 v4/Xeon E5 v4/Xeon E3 v4/Xeon D Caching Agent [8086:6ffc] | +-0f.5 Intel Corporation Xeon E7 v4/Xeon E5 v4/Xeon E3 v4/Xeon D Caching Agent [8086:6ffd] | +-0f.6 Intel Corporation Xeon E7 v4/Xeon E5 v4/Xeon E3 v4/Xeon D Caching Agent [8086:6ffe] | +-10.0 Intel Corporation Xeon E7 v4/Xeon E5 v4/Xeon E3 v4/Xeon D R2PCIe Agent [8086:6f1d] | +-10.1 Intel Corporation Xeon E7 v4/Xeon E5 v4/Xeon E3 v4/Xeon D R2PCIe Agent [8086:6f34] | +-10.5 Intel Corporation Xeon E7 v4/Xeon E5 v4/Xeon E3 v4/Xeon D Ubox [8086:6f1e] | +-10.6 Intel Corporation Xeon E7 v4/Xeon E5 v4/Xeon E3 v4/Xeon D Ubox [8086:6f7d] | +-10.7 Intel Corporation Xeon E7 v4/Xeon E5 v4/Xeon E3 v4/Xeon D Ubox [8086:6f1f] | +-12.0 Intel Corporation Xeon E7 v4/Xeon E5 v4/Xeon E3 v4/Xeon D Home Agent 0 [8086:6fa0] | +-12.1 Intel Corporation Xeon E7 v4/Xeon E5 v4/Xeon E3 v4/Xeon D Home Agent 0 [8086:6f30] | +-13.0 Intel Corporation Xeon E7 v4/Xeon E5 v4/Xeon E3 v4/Xeon D Memory Controller 0 - Target Address/Thermal/RAS [8086:6fa8] | +-13.1 Intel Corporation Xeon E7 v4/Xeon E5 v4/Xeon E3 v4/Xeon D Memory Controller 0 - Target Address/Thermal/RAS [8086:6f71] | +-13.2 Intel Corporation Xeon E7 v4/Xeon E5 v4/Xeon E3 v4/Xeon D Memory Controller 0 - Channel Target Address Decoder [8086:6faa] | +-13.3 Intel Corporation Xeon E7 v4/Xeon E5 v4/Xeon E3 v4/Xeon D Memory Controller 0 - Channel Target Address Decoder [8086:6fab] | +-13.4 Intel Corporation Xeon E7 v4/Xeon E5 v4/Xeon E3 v4/Xeon D Memory Controller 0 - Channel Target Address Decoder [8086:6fac] | +-13.5 Intel Corporation Xeon E7 v4/Xeon E5 v4/Xeon E3 v4/Xeon D Memory Controller 0 - Channel Target Address Decoder [8086:6fad] | +-13.6 Intel Corporation Xeon E7 v4/Xeon E5 v4/Xeon E3 v4/Xeon D DDRIO Channel 0/1 Broadcast [8086:6fae] | +-13.7 Intel Corporation Xeon E7 v4/Xeon E5 v4/Xeon E3 v4/Xeon D DDRIO Global Broadcast [8086:6faf] | +-14.0 Intel Corporation Xeon E7 v4/Xeon E5 v4/Xeon E3 v4/Xeon D Memory Controller 0 - Channel 0 Thermal Control [8086:6fb0] | +-14.1 Intel Corporation Xeon E7 v4/Xeon E5 v4/Xeon E3 v4/Xeon D Memory Controller 0 - Channel 1 Thermal Control [8086:6fb1] | +-14.2 Intel Corporation Xeon E7 v4/Xeon E5 v4/Xeon E3 v4/Xeon D Memory Controller 0 - Channel 0 Error [8086:6fb2] | +-14.3 Intel Corporation Xeon E7 v4/Xeon E5 v4/Xeon E3 v4/Xeon D Memory Controller 0 - Channel 1 Error [8086:6fb3] | +-14.4 Intel Corporation Xeon E7 v4/Xeon E5 v4/Xeon E3 v4/Xeon D DDRIO Channel 0/1 Interface [8086:6fbc] | +-14.5 Intel Corporation Xeon E7 v4/Xeon E5 v4/Xeon E3 v4/Xeon D DDRIO Channel 0/1 Interface [8086:6fbd] | +-14.6 Intel Corporation Xeon E7 v4/Xeon E5 v4/Xeon E3 v4/Xeon D DDRIO Channel 0/1 Interface [8086:6fbe] | +-14.7 Intel Corporation Xeon E7 v4/Xeon E5 v4/Xeon E3 v4/Xeon D DDRIO Channel 0/1 Interface [8086:6fbf] | +-15.0 Intel Corporation Xeon E7 v4/Xeon E5 v4/Xeon E3 v4/Xeon D Memory Controller 0 - Channel 2 Thermal Control [8086:6fb4] | +-15.1 Intel Corporation Xeon E7 v4/Xeon E5 v4/Xeon E3 v4/Xeon D Memory Controller 0 - Channel 3 Thermal Control [8086:6fb5] | +-15.2 Intel Corporation Xeon E7 v4/Xeon E5 v4/Xeon E3 v4/Xeon D Memory Controller 0 - Channel 2 Error [8086:6fb6] | +-15.3 Intel Corporation Xeon E7 v4/Xeon E5 v4/Xeon E3 v4/Xeon D Memory Controller 0 - Channel 3 Error [8086:6fb7] | +-1e.0 Intel Corporation Xeon E7 v4/Xeon E5 v4/Xeon E3 v4/Xeon D Power Control Unit [8086:6f98] | +-1e.1 Intel Corporation Xeon E7 v4/Xeon E5 v4/Xeon E3 v4/Xeon D Power Control Unit [8086:6f99] | +-1e.2 Intel Corporation Xeon E7 v4/Xeon E5 v4/Xeon E3 v4/Xeon D Power Control Unit [8086:6f9a] | +-1e.3 Intel Corporation Xeon E7 v4/Xeon E5 v4/Xeon E3 v4/Xeon D Power Control Unit [8086:6fc0] | +-1e.4 Intel Corporation Xeon E7 v4/Xeon E5 v4/Xeon E3 v4/Xeon D Power Control Unit [8086:6f9c] | +-1f.0 Intel Corporation Xeon E7 v4/Xeon E5 v4/Xeon E3 v4/Xeon D Power Control Unit [8086:6f88] | \-1f.2 Intel Corporation Xeon E7 v4/Xeon E5 v4/Xeon E3 v4/Xeon D Power Control Unit [8086:6f8a] \-[0000:00]-+-00.0 Intel Corporation Xeon E7 v4/Xeon E5 v4/Xeon E3 v4/Xeon D DMI2 [8086:6f00] +-01.0-[01]-- +-02.0-[02]--+-00.0 Intel Corporation Xeon Processor D Family QuickData Technology Register DMA Channel 0 [8086:6f50] | +-00.1 Intel Corporation Xeon Processor D Family QuickData Technology Register DMA Channel 1 [8086:6f51] | +-00.2 Intel Corporation Xeon Processor D Family QuickData Technology Register DMA Channel 2 [8086:6f52] | \-00.3 Intel Corporation Xeon Processor D Family QuickData Technology Register DMA Channel 3 [8086:6f53] +-02.2-[03]--+-00.0 Intel Corporation Ethernet Connection X552/X557-AT 10GBASE-T [8086:15ad] | \-00.1 Intel Corporation Ethernet Connection X552/X557-AT 10GBASE-T [8086:15ad] +-03.0-[04]----00.0 LSI Logic / Symbios Logic SAS2008 PCI-Express Fusion-MPT SAS-2 [Falcon] [1000:0072] +-05.0 Intel Corporation Xeon E7 v4/Xeon E5 v4/Xeon E3 v4/Xeon D Map/VTd_Misc/System Management [8086:6f28] +-05.1 Intel Corporation Xeon E7 v4/Xeon E5 v4/Xeon E3 v4/Xeon D IIO Hot Plug [8086:6f29] +-05.2 Intel Corporation Xeon E7 v4/Xeon E5 v4/Xeon E3 v4/Xeon D IIO RAS/Control Status/Global Errors [8086:6f2a] +-14.0 Intel Corporation 8 Series/C220 Series Chipset Family USB xHCI [8086:8c31] +-16.0 Intel Corporation 8 Series/C220 Series Chipset Family MEI Controller #1 [8086:8c3a] +-16.1 Intel Corporation 8 Series/C220 Series Chipset Family MEI Controller #2 [8086:8c3b] +-1a.0 Intel Corporation 8 Series/C220 Series Chipset Family USB EHCI #2 [8086:8c2d] +-1c.0-[05]--+-00.0 Intel Corporation I350 Gigabit Network Connection [8086:1521] | \-00.1 Intel Corporation I350 Gigabit Network Connection [8086:1521] +-1c.4-[06-07]----00.0-[07]----00.0 ASPEED Technology, Inc. ASPEED Graphics Family [1a03:2000] +-1d.0 Intel Corporation 8 Series/C220 Series Chipset Family USB EHCI #1 [8086:8c26] +-1f.0 Intel Corporation C224 Series Chipset Family Server Standard SKU LPC Controller [8086:8c54] +-1f.3 Intel Corporation 8 Series/C220 Series Chipset Family SMBus Controller [8086:8c22] \-1f.6 Intel Corporation 8 Series Chipset Family Thermal Management Controller [8086:8c24]