Search the Community
Showing results for tags '1.04b'.
Found 7 results
-
Hi, Since I was not yet able to build a working cpufreq_ondemand.ko to allow automatic frequency scaling for JUN's loader 1.04b (DSM 6.2.2-24922 Update 2), i've written this script to allow dynamic CPU frequency scaling. It's hosted here : https://github.com/Trauma/cpufreq-userspace-scaler # cpufreq-userspace-scaler ##### Cpu frequency scaling script for cpufreq userspace governor ## If you're missing ondemand or conservative governors, this script is for you. This script is scaling cpu frequency according to current average load. You can set 3 frequency steps : low, mid, high. This 3 thresholds will automatically set cpu frequency accordingly : - the `lowload` threshold will set the cpu to his minimal frequency, unless you force it to `scalingminfreq` - the `midload` threshold will set the cpu to approximate mid range cpu frequency - the `highload` threshold will set the cpu to his maximal frequency, unless you force it to `scalingmaxfreq` If you set `scalingmaxfreq` and/or `scalingminfreq` the cpu will never override those values. ### Usage : ### Parameters : Variable name | Default | Type | Comments ----------------|---------|-----------------------------|----------- lowload | 050 | integer between 000 and 999 | 050 = load average : 0.50 midload | 065 | integer between 000 and 999 | 065 = load average : 0.65 highload | 085 | integer between 000 and 999 | 085 = load average : 0.85 scalingminfreq | auto | integer in hertz | 800000 = 800 Mhz scalingmaxfreq | auto | integer in hertz | 2500000 = 2,5 Ghz ### Default commande line : `./scaling.sh &` ### Custom command line example : `lowload=100 highload=200 scalingmaxfreq=2000000 scalingminfreq=1500000 ./scaling.sh &` Enjoy.
-
 Before you begin to change something in your working system, it is strongly recommended to make backups of your most valuable data, so you do not regret about their irretrievable loss. Everything you do is your fear and risk, no one encourages you to do it. The easiest and most reliable way to safely try to do it, turn off all the disks and the boot flash drive from the current system, take a clean disk and another USB flash drive and try to install a new version of the bootloader and the system, if it rolled, then do already on the current system. 1. How to install (described for a computer with Windows): a) download the 1.04 b boot loader image (the original theme is here), create a directory in the root of the disk, for example, c:/918/ and put the bootloader image there b) determine the VID/PID of the flash drive or card reader into which it is inserted (control Panel-Device Manager-USB Controllers-Your flash drive/reader-Properties-Information-hardware ID, you need to ensure that the DSM system recognizes this disk and does not try to install itself on it, if you incorrectly define and register these parameters, the istall process will crash by mistake 13) c) download, install and run the OSFmount program, mount Partition 0 (15 Mb) from the bootloader file, remove the "Read-only drive" checkbox before mounting d) download, install and run Akelpad, open grub/grub file.cfg on previously mounted disk, edit and save: set vid=0xA234 #VID flash drive/reader set pid=0xB678 #PID of flash drive/reader set sn=1780PDN123456 #sn set mac1=001132123456 #mac of the first network card set mac2=001132123457 #mac of the second network card, the second and subsequent differ from the first by +1 in the last bit in the hex system ... set netif_num=2 #number of network cards ... set sata_args= 'SataPortMap=6' # sata controller, values: 6 - 1 controller on 6 ports; 22-2 controllers on 2 ports; 42-2 controllers, the first on 4 ports, the second on 2, etc. Where to get sn and mac - is your headache, Google will help you, the system will be installed and will work with those that are initially registered in the bootloader, but with the restriction of the functioning of some services and modules, such as: QC, push notifications, activation of codecs for transcoding, installation of syno licenses... e) unmount the disk in OSFmount f) download, install and run the Rufus program and record the previously prepared image on a flash drive g) insert the flash drive into the computer on which you plan to run xpen, connect the drives, turn on the power h) disable the firewall in the anti-virus, in the browser type http://find.synology.com or install Synology Assistant from the syno website and find the newly installed xpen on your network j) install DSM following the instructions of the installation program and start setting up (how to do it here is not described, because all the answers are in the syno knowledge base) There is a utility where the main programs for Windows x64 are collected 2. Transcoding (needs sn and mac from real syno hardware) Most likely to run on Intel processors starting from the 4th generation (Haswell), but there are nuances with motherboard models and BIOS. Check as follows: hardware (hw) transcoding - at the root of the system should be a directory /dev/dri with subdirectories in it, if not, but there is no HW transcoding to check - look for the directory with the terminal/ssh command cd /dev/dri . software (sw) transcoding - some codecs must run in DSM, you can check it with the command in the terminal / ssh cat /usr/syno/etc/codec/activation.conf If the result is the same, sw transcoding will ran {"success":true,"activated_codec":["h264_dec","h264_enc","mpeg4part2_dec","hevc_dec","aac_dec","aac_enc","ac3_dec","vc1_dec","vc1_enc"],"token":"123456789987654abc"} If there is nothing similar, there is no sw transcoding. 3. Perhaps the most optimal budget solutions with transcoding will be the following: ASRock J4105-ITX Asrock J5005-ITX Who wants more - use mb with the latest generation of Intel processors with Intel i210 or realtek 8111 . But this is already determined by the size of the your wallet and the functionality that you additionally want to get from xpen. P.S. Sorry for my english 😂
- 264 replies
-
- 6
-

-

-
- trancoding
- 1.04b
- (and 1 more)
-
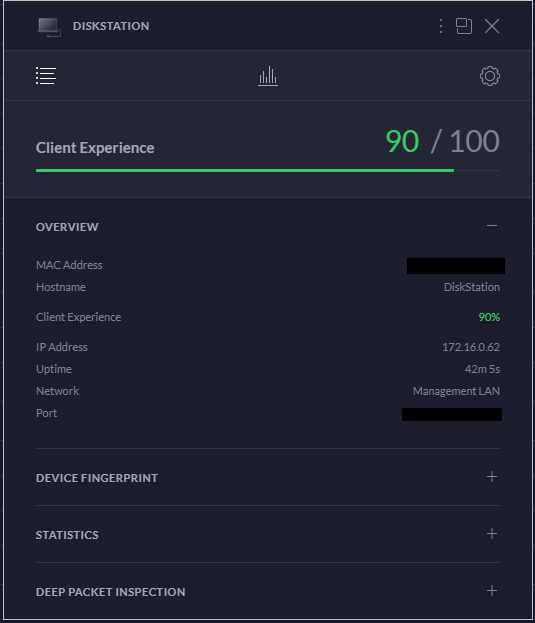
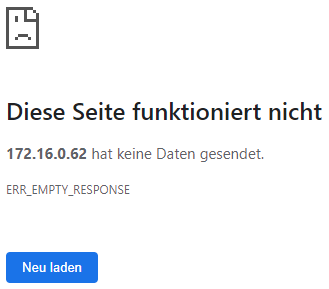
Hi everybody, maybe I can get some help here... I've bought a new mainboard (https://www.reichelt.com/gb/en/fujitsu-d3543-s3-intel-pentium-silver-j5005-mini-itx-fujitsu-d3543-s3-p251627.html?r=1) because my old one is damaged. Details: Intel® Pentium® Silver Processor J5005 (QC @1.5GHz / 2.8GHz), integrated Intel® UHD Graphics 605 (18EUs @800MHz) 10W TDP No legacy OS support, no MBR installation (UEFI only due to Intel restrictions) 1 x Intel i210 with 10/100/1000MBit/s 1 x Realtek RTL8111G with 10/100/1000 MBit/s I want to install DSM6.2 with juns loader 1.04b My problem is: i cant get it to work I've used about five or six different types of usb-stick - no success. Yes!, I have edited the grub.cfg. I have changed the vid/pid everytime i use an new stick... When I take a look at my UniFi-Controller, I can see, that the "Diskstation" is noticed in Network and got an IP: I can successful ping the Diskstation: Synology-Assistant doesn't find my Diskstation and if I want to access the Web GUI/Webinterface: I think it's a bios settings failure at my side but i don't know where. I've already turned off iGPU and tryed every extra.lzma i could find in the forum - no success. Maybe the board is incompatible? Thanks for helping me

-
Интересный трюк проделал наш комрад deloza. Если на материнской плате с LAN intel или realtek по какой-то причине после установки загрузчика хрень не ищется в сети, то можно попробовать следующее: - с помощью созданной загрузочной флешки установить хрень на железе, на котором она гарантированно встает; - перенести флешку и диск с установленной хренью на мать на которой процесс установки не запускался; - включить и возможно DSM сама запустится... Пробуйте и отписывайтесь, очень интересно, если еще у кого-нибудь прокатит.
-
Hallo, erst einmal zur Vorstellung meines Servers: H370m-itx - i5-8400 8GB RAM 6xWD Red 3TB Raid 5 AQ107C von ASUS (Aquantia 10G NIC) Intel 211 und 219 NIC (219V nicht betriebsbereit) Läuft super und gut mit der 6.1.7 unter Zuhilfenahme von Loader 1.02b mit extra.lzma (AQ107 dann funktional) als DS3617xs Nun zum Problem: Sobald ich Loader 1.03b oder 1.04b (1.03b dann als 3617xs, 1.04b als 918+) einrichte und booten will als Test-Setup, kann ich nur booten, wenn ich keine extra.lzma austausche, aber dann funktioniert meine Asus 10G NIC nicht. Ich würde gerne auf 6.2.2 gehen und auch SSD Cache nutzen, daher am Liebsten 918+ Nur brauche ich auch die 10G NIC unbedingt. Da er mit der originalen lzma bootet würde ich schätzen er mag diese nicht, kann ich das verifizieren? Kann ich Abhilfe schaffen und trotzdem 1.03b oder 1.04b nutzen bei 6.2.2 und funktionierender 10G NIC??? Danke für jeglichen Input dazu.
-
Перед тем как что-то менять в своей работающей системе, настоятельно рекомендуется сделать резервные копии своих особо ценных данных, чтобы потом не жалеть об их безвозвратной потере. Все, что вы творите - это ваш страх и риск, никто не побуждает вас это делать. Самый простой и надежный способ безопасно попробовать - выключить хрень, отключить все диски и загрузочную флешку от действующей системы, взять чистый диск и другую флешку и попробовать установить новую версию загрузчика и системы, если прокатило, то делать уже на действующей системе. 1. Как установить (подготовительные работы описаны для компа с Windows): а) скачать образ загрузчика 1.04b (исходная тема тут), создать каталог в корне диска без символов на кириллице, например, c:/918/ и поместить туда образ загрузчика б) определить VID/PID флешки или картридера в который она вставлена (Панель управления - Диспетчер устройств - Контроллеры USB - Ваша флешка/ридер - Свойства - Сведения - ИД оборудования, нужно для того, чтобы система DSM опознала этот диск и не пыталась устанавливать себя на него, если неправильно определите и пропишите эти параметры, то система будет вылетать по ошибке 13 при установке в) скачать, установить и запустить программу OSFmount, смонтировать Partition 0 (15 Mb) из файла загрузчика, перед монтированием убрать галку Read-only drive г) скачать, установить и запустить программу Akelpad, открыть файл grub/grub.cfg на ранее смонтированном диске, правим, сохраняем: set vid=0xA234 #VID флешки/ридера set pid=0xB678 #PID флешки/ридера set sn=1780PDN123456 #sn set mac1=001132123456 #mac первой сетевой карты set mac1=001132123457 #mac второй сетевой карты, второй и последующий отличаются от первого на +1 в последнем разряде в шестнадцатеричной системе ... set netif_num=2 #количество сетевых карт ... set sata_args='SataPortMap=6' #контроллер sata, значения: 6 - 1 контроллер на 6 портов; 22 - 2 контроллера по 2 порта; 42 - 2 контроллера, первый на 4 порта, второй на 2 и т.п. Где брать sn и mac - ваша головная боль, гугл в помощь, система установится и будет работать с теми, которые изначально прописаны в загрузчике, но с ограничением функционирования некоторых сервисов и модулей, таких как: QC, пуш уведомления, активация кодеков для транскодинга, установка лицензий syno... Но для большинства и без них будет достаточно. На форуме писали, что прокатывало с sn и mac от других реальных моделей syno, но так не пробовал, поэтому утверждать не буду, кто хочет - дерзайте. д) размонтировать диск в OSFmount е) скачать, установить и запустить программу Rufus и записать ранее подготовленный образ на флешку з) вставить флешку в машину, на которой планируете запустить хрень, подключить диски, включить питание ж) отключить брандмауэр в антивирусе, в браузере набрать http://find.synology.com или установить Synology Assistant с сайта syno и найти вновь установленную хрень в вашей сети и) установить DSM установить хрень следуя инструкциям программы установки и приступить к настройке (как это делать здесь не описываю, ибо все ответы есть в базе знаний syno) Для ленивых есть утилита, где собраны основные проги для Windows x64 2. Если хрень не обнаружилась в сети, то скорее всего в загрузчике нет драйверов для ваших сетевых карт и/или для sata контроллеров. a) запустить программу OSFmount, смонтировать Partition 1 (30 Mb) из файла загрузчика, перед монтированием убрать галку Read-only drive б) скачать extra.lzma из этой темы и перезаписать в смонтированном диске в) размонтировать диск и перезаписать образ с добавленными драйверами на флешку г) попробовать запустить и найти хрень в сети, если не получилось, то увы и ах, либо просить, чтобы добавили дрова для ваших устройств в этой теме или самому их добавлять - теория тут 3. Транскодинг (нужны sn и mac от реальной железки) С наибольшей степени вероятности запустиnся на процессорах Intel начиная с 4го поколения (Haswell), но есть нюансы с моделями материнских плат и биосами. Проверяем следующим образом: hardware (hw) транскодинг - в корне системы должен быть каталог /dev/dri с тремя подкаталогами внутри, если его нет, но нет и hw транскодинга, чтобы проверить - ищем каталог в терминале/ssh командой cd /dev/dri. software (sw) транскодинг - должны подняться соответствующие кодеки, проверить можно командой в терминале/ssh cat /usr/syno/etc/codec/activation.conf Если результат такой, то он есть: {"success":true,"activated_codec":["hevc_dec","h264_dec","h264_enc","mpeg4part2_dec","ac3_dec","vc1_dec","vc1_enc","aac_dec","aac_enc","mpeg4part2_enc"],"token":"абракадабра"} Если ничего похожего нет, то нет и транскодинга. P.S. Просьба к админам прибить тему в шапке и дать мне доступ на редактирование первого поста этой темы, буду добавлять по мере поступления вопросов, ибо задолбали оленеводы, которые задают вопросы по установке, во всех подряд темах.
- 265 replies
-
- 30
-
-
-

-
Very interesting trick was done by our comrad deloza. If on the motherboard with intel or realtek NIK's for some reason after installation of the loader xpen is not looked for in a network, it is possible to try the following: - using the newly created bootable USB drive to install xpen on the hardware on which it guaranteed starts; - move the flash drive and the HDD where you installed xpen to the mb on which the installation process does not start; - power on and possibly DSM will start... Try and report, it is very interesting if anybody else will do it.


