jensmander
-
Posts
628 -
Joined
-
Last visited
-
Days Won
32
Everything posted by jensmander
-
Hi, Has anyone already virtualized a DS3018xs?
jensmander replied to SaugPirat's question in General Questions
There’s no way to virtualize any other Synology except for models where loaders exist (916+, 918+, DS3615xs & DS3617xs). -
Link Aggregation - traffic flow on only 1 NIC
jensmander replied to vanst's question in General Questions
Ah, ok. Had to handle the non-E version once and it was dumb. -
Link Aggregation - traffic flow on only 1 NIC
jensmander replied to vanst's question in General Questions
802.3ad means LACP. LACP only balances on multiple requests. If you access the NAS from 2 different clients at the same time then both network ports should be used or show throughput. Afaik this switch is unmanaged. Don’t know how you‘ve set up a lag. -
Did you do that?
-
The stick is needed on every boot/reboot. In theory you can unplug it when DSM is up. But if you forgotten to plug it back on the next reboot or power cycle the system won’t boot anymore.
-
Ist auf den Systemen eventuell die Firewall aktiv und blockiert entweder das Subnetz oder die Anwendungen?
-
Afaik background transcoding isn’t working anymore in DSM 6.x when using Xpenology (genuine hardware/serial check). This might be an explanation why it worked in DSM 5.2. But I’m not 100% sure.
-
Hast Du das wie hier beschrieben versucht? https://www.synology.com/de-de/knowledgebase/DSM/tutorial/Backup/How_to_sync_data_between_multiple_Synology_NAS_via_Cloud_Station
-
Wenn sich die echte Synology im gleichen Subnetz befindet, sollte das kein Problem sein. Rsync/HyperBackup, Remote CIFS, etc. Es sei denn, die Box sitzt dann zwischen Deinem Router und dem vorgelagerten System. Wenn hier keine entsprechenden Routen gesetzt sind wird es schwierig.
-
Never give your kids access to your router 😎 That’s some kind of Kamikaze 😅
-
It looks like your box is reachable from the internet. Did you put your Xpenology in your router‘s DMZ? Or is QuickConnect active?
-
Was @IG-88 meint ist, dass so ziemlich jeder halbwegs moderne Router DynDNS-Dienste beherrscht. Sprich: man registriert eine kostenlose dynamische Domain, aktiviert dies auf dem Router und hat dann - wenn die entsprechenden NAT Regeln in der Firewall des Routers eingerichtet sind und auf die interne IP der Xpenology verweisen - darüber Zugriff von außerhalb. Beispiel: https://meinedyndomain.dyndns.org:5001 Dann würde man auf die Standard Oberfläche von DSM von außen zugreifen können. Man sollte sich aber bewusst sein, dass sowas mit Risiken verbunden ist. Zum besseren Schutz gibt es einige Ansätze, bspw.: - Aktivierung der DoS-Protection - 2FA für Admin-Accounts - Änderung des https Ports von 5001 auf höhere Ports (45001, 50001, etc.) - am besten kein NAT für SSH auf die Box - Firewall aktivieren
-
Natürlich, aber das ist noch kein Grund, diesen Dienst trotzdem (illegalerweise) zu benutzen. Man bewegt sich mit Xpenology eh schon in einer Grauzone. Und wenn man dann noch gültige Kombos „klaut“, schadet das noch mehr - Stichwort „Blacklisting“.
-
Xpenology + Quickconnect = no-go, steht auch in den FAQ. 1.) Ist das ein Dienst, der Usern echter Boxen vorbehalten ist 2.) Zieht das nur unnötig weitere Aufmerksamkeit seitens Synology auf das Projekt 3.) Schadet man mit geklauten Kombos aus Serial & Mac den Besitzern dieser Boxen (bspw. von DS Fotos aus dem Netz)
-
Is it a Raid member or a single drive? If it’s not part of a Raid copying 6TB from one drive to another can take some time. But it depends on the filetypes. Thousands of images will take longer than a handful of large videos. And there’s a chance that new bad sectors can slow down or even break the process of copying.
-
As @IG-88 said: once disks start failing it’s advisable to replace them. I wouldn’t use such drives anymore, except as an ash-can or riot equipment for throwing them at some idiots.
-
XPEnology on a HP ProLiant DL380e Gen8 Server
jensmander replied to Zsolo's topic in The Noob Lounge
Put in your boot stick into your Windows PC and check, if the second partition of it gets a drive letter. If yes - you can simply rename the extra.lzma (for example: extra.lzma.bak) and copy @IG-88‘s modified extra.lzma on it. If the partition doesn’t show up, check this tutorial for assigning drive letters to your stick: -
If you say so... Closed
-
This is a forum consisting of volunteers, not payed professionals. What did you expect? Ultra fast response times? Read the forum rules and be patient regarding your questions. There‘s a function in this forum, called „search“. This would give you hundreds of results if you search for „not found in network“. And it’s always the same problem: the NIC is not recognized by the built-in drivers. There are 2 choices: 1st) try the extra.lzma 2nd) exchange the NIC with a known working model
-
No, I don’t know how Synology handles encrypted messages inside the database or if they remain after a purge. Maybe you could try the archive viewer as an admin user. https://www.synology.com/en-global/knowledgebase/DSM/help/Chat/chat_archive_viewer
-
Synology stores it in a Postgres SQL DB, including data from the MediaServer, NoteStation, etc. Enable SSH/Terminal access and connect with PuTTy (or similar tools). enter: sudo -u postgres psql followed by your admin password. Your input cursor should change to "postgres=#". The command \l (<- little L) shows a list of all databases. To connect to the synochat DB type \c synochat With \q you'll quit the session.
-
Increase space HDD NAS with different sizes disk
jensmander replied to Tone's question in General Questions
If you don't need this HDD in another system I would think about it as an extra drive for backups, just my 2 cents 😉 -
Increase space HDD NAS with different sizes disk
jensmander replied to Tone's question in General Questions
RAID5 (not SHR) needs a minimum of 3 HDDs. If you mix up a RAID with different HDD sizes the smallest one defines the size. So with 1x3TB and 2x4TB it would be 6TB in total (one HDD is used for parity in RAID5). With 3x4TB it would be 8TB in total. If you add 3x4TB you could first create the RAID5 on these disks and after that you can copy all data from the 3TB to the new volume. -
I made an English version of the tutorial mentioned by @IG-88 in the appropiate section:
-
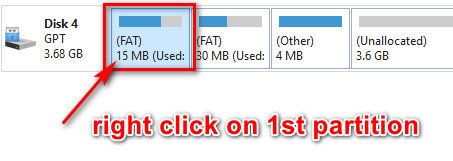
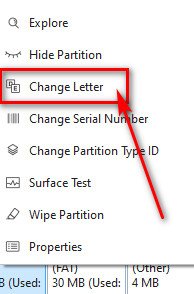
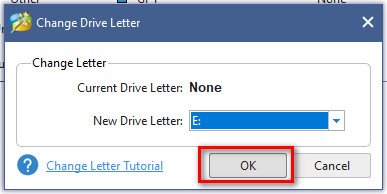
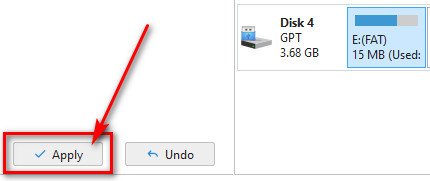
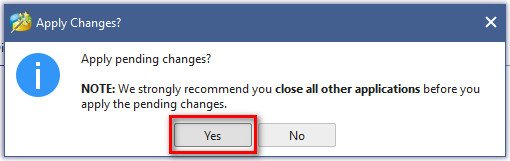
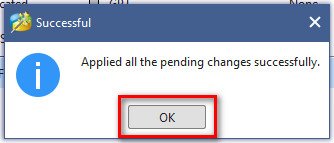
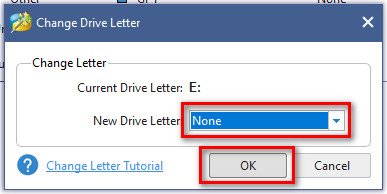
If you want to modify your grub.cfg of your written boot stick or want to access the partitions (adding extra.lzma from @IG-88) you can use a free portable tool. Notes: - the grub.cfg is located in the folder "grub" on the first partition (15MB) - the extra.lzma is on the second partition (30MB) 1.) Download MiniTool Partition Wizard Free Edition (portable): https://www.partitionwizard.com/download/v12-portable/pw12-free-64bit.zip 2.) Unzip it and launch the "partitionwizard.exe" with administrative rights. 3.) Plug in your boot stick. Partition Wizard will automatically recognize the new drive. In this example it is drive no. 4. Now select the 1st partition of your stick (15MB) -> rightclick and select "Change Letter" in the context menu. 4.) Select a desired drive letter and click on "OK". 5.) In the lower left pane of the tool click on "Apply" and confirm the pending changes: If everything went OK you should see a success message: Now you have full access to the 1st partition with the Explorer or your favourite file manager. If you're done with any modifications it's advisable to unmount the drive letter. The steps are nearly the same. 6.) Right click the 1st partition again -> "Change Letter" -> select "New Drive Letter: none" -> "OK" -> click on "Apply" to the lower left and confirm the changes.