Leaderboard


Popular Content
Showing content with the highest reputation on 05/19/2022 in all areas
-
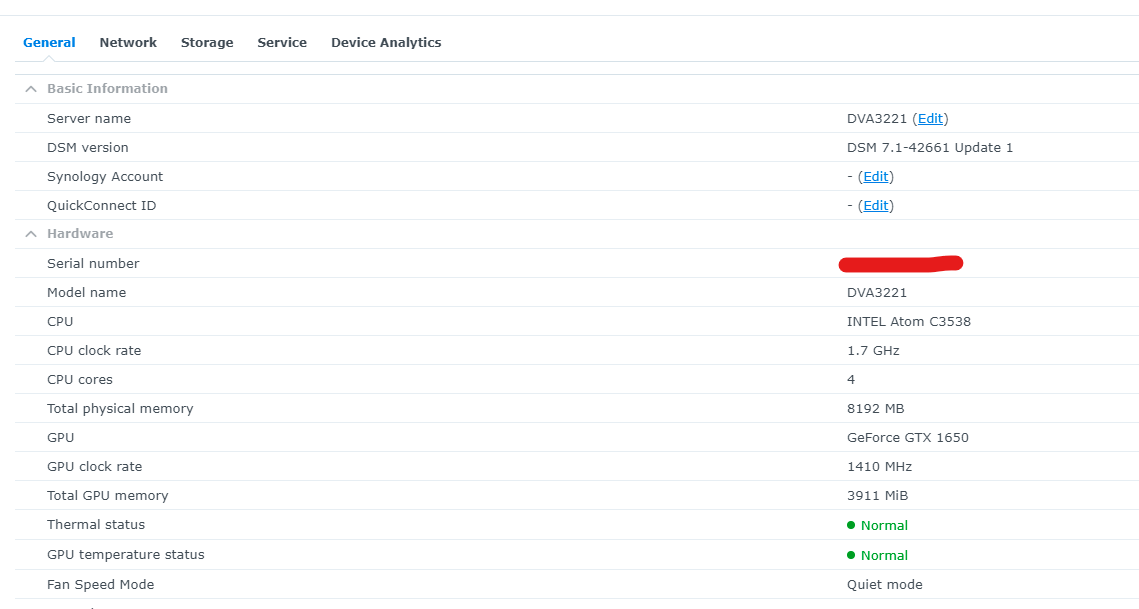
This is not a guide, this is my personal experience with the installation of DVA3221 on the ESXI. Software/files used: tinycore-redpill.v0.4.6.img.gz StarWind V2V Converter Putty for windows WinSCP for windows ESXI host with 7.0 Synology x2 pat files dva3221_42218.pat and dva3221_42661.pat Extract tinycore-redpill.v0.4.6.img.gz With StarWind V2V Converter convert tinycore-redpill.v0.4.6.img to vmdk file. (redpill provided .vmdk file not working for some reasons) Upload tinycore-redpill.v0.4.6.vmdk file to ESXI Create VM in ESXI. BOIS: EFI CPU 4 cores 8G Ram (2G min) Network: VMXNET3 MAC Manual SATA Controller 0 SATA Controller 1 Video card (Default) Sound card (HD audio) ADD LATER PCI device (GPU passthrough) Add Existing HDD (tinycore-redpill.v0.4.6.vmdk file converted above from .img file) SATA 0:0 Add New HDD 32G (your choice) SATA 1:0 Power On VM. Find tinycore IP, With WinSCP or Putty add additional config from first topic to custom_config.json to handle this loader ./rploader.sh update now ./rploader.sh fullupgrade now ./rploader.sh serialgen DVA3221 (Save the MAC for later use.) ./rploader.sh ext denverton-7.0.1-42218 add https://raw.githubusercontent.com/OrpheeGT/redpill-ext/master/acpid/rpext-index.json ./rploader.sh ext denverton-7.0.1-42218 add https://raw.githubusercontent.com/OrpheeGT/redpill-load/develop/redpill-virtio/rpext-index.json (After this step, I got an error /home/tc/custom-module/*42218*.pat': No such file or directory Solution: manually uploaded dva3221_42218.pat to /home/tc/custom-module/ folder.) Run two times build denverton-7.0.1-42218 (recommended somewhere on the forum) ./rploader.sh build denverton-7.0.1-42218 ./rploader.sh build denverton-7.0.1-42218 ./rploader.sh clean now ./rploader.sh build denverton-7.1.0-42661 Power down the VM. Change the Network adapter with MAC from step above. Block the future Synology IP for accessing to Internet. (for Installation time and first boot) Powerup VM Select SATA, Verbose. Install DVA3221 with the dva3221_42661.pat file. I experienced more troubles with passthrough GPU to DVA3221, if someone needed I can post it later, maybe my hardware related. (GTX1650 used)
 2 points
 -
DS3622xs+ has been tested with Intel 1st generation, and CPU generation is not restricted. DS3622xs+, DS3615xs, DS3617xs of the same DS36XX series can be mixed. However, SataportMap and HotPlug settings are closely related to the corrupted message during DSM installation. Today Pocopico has a guide on this topic. Please see the contents of this topic.2 points
-
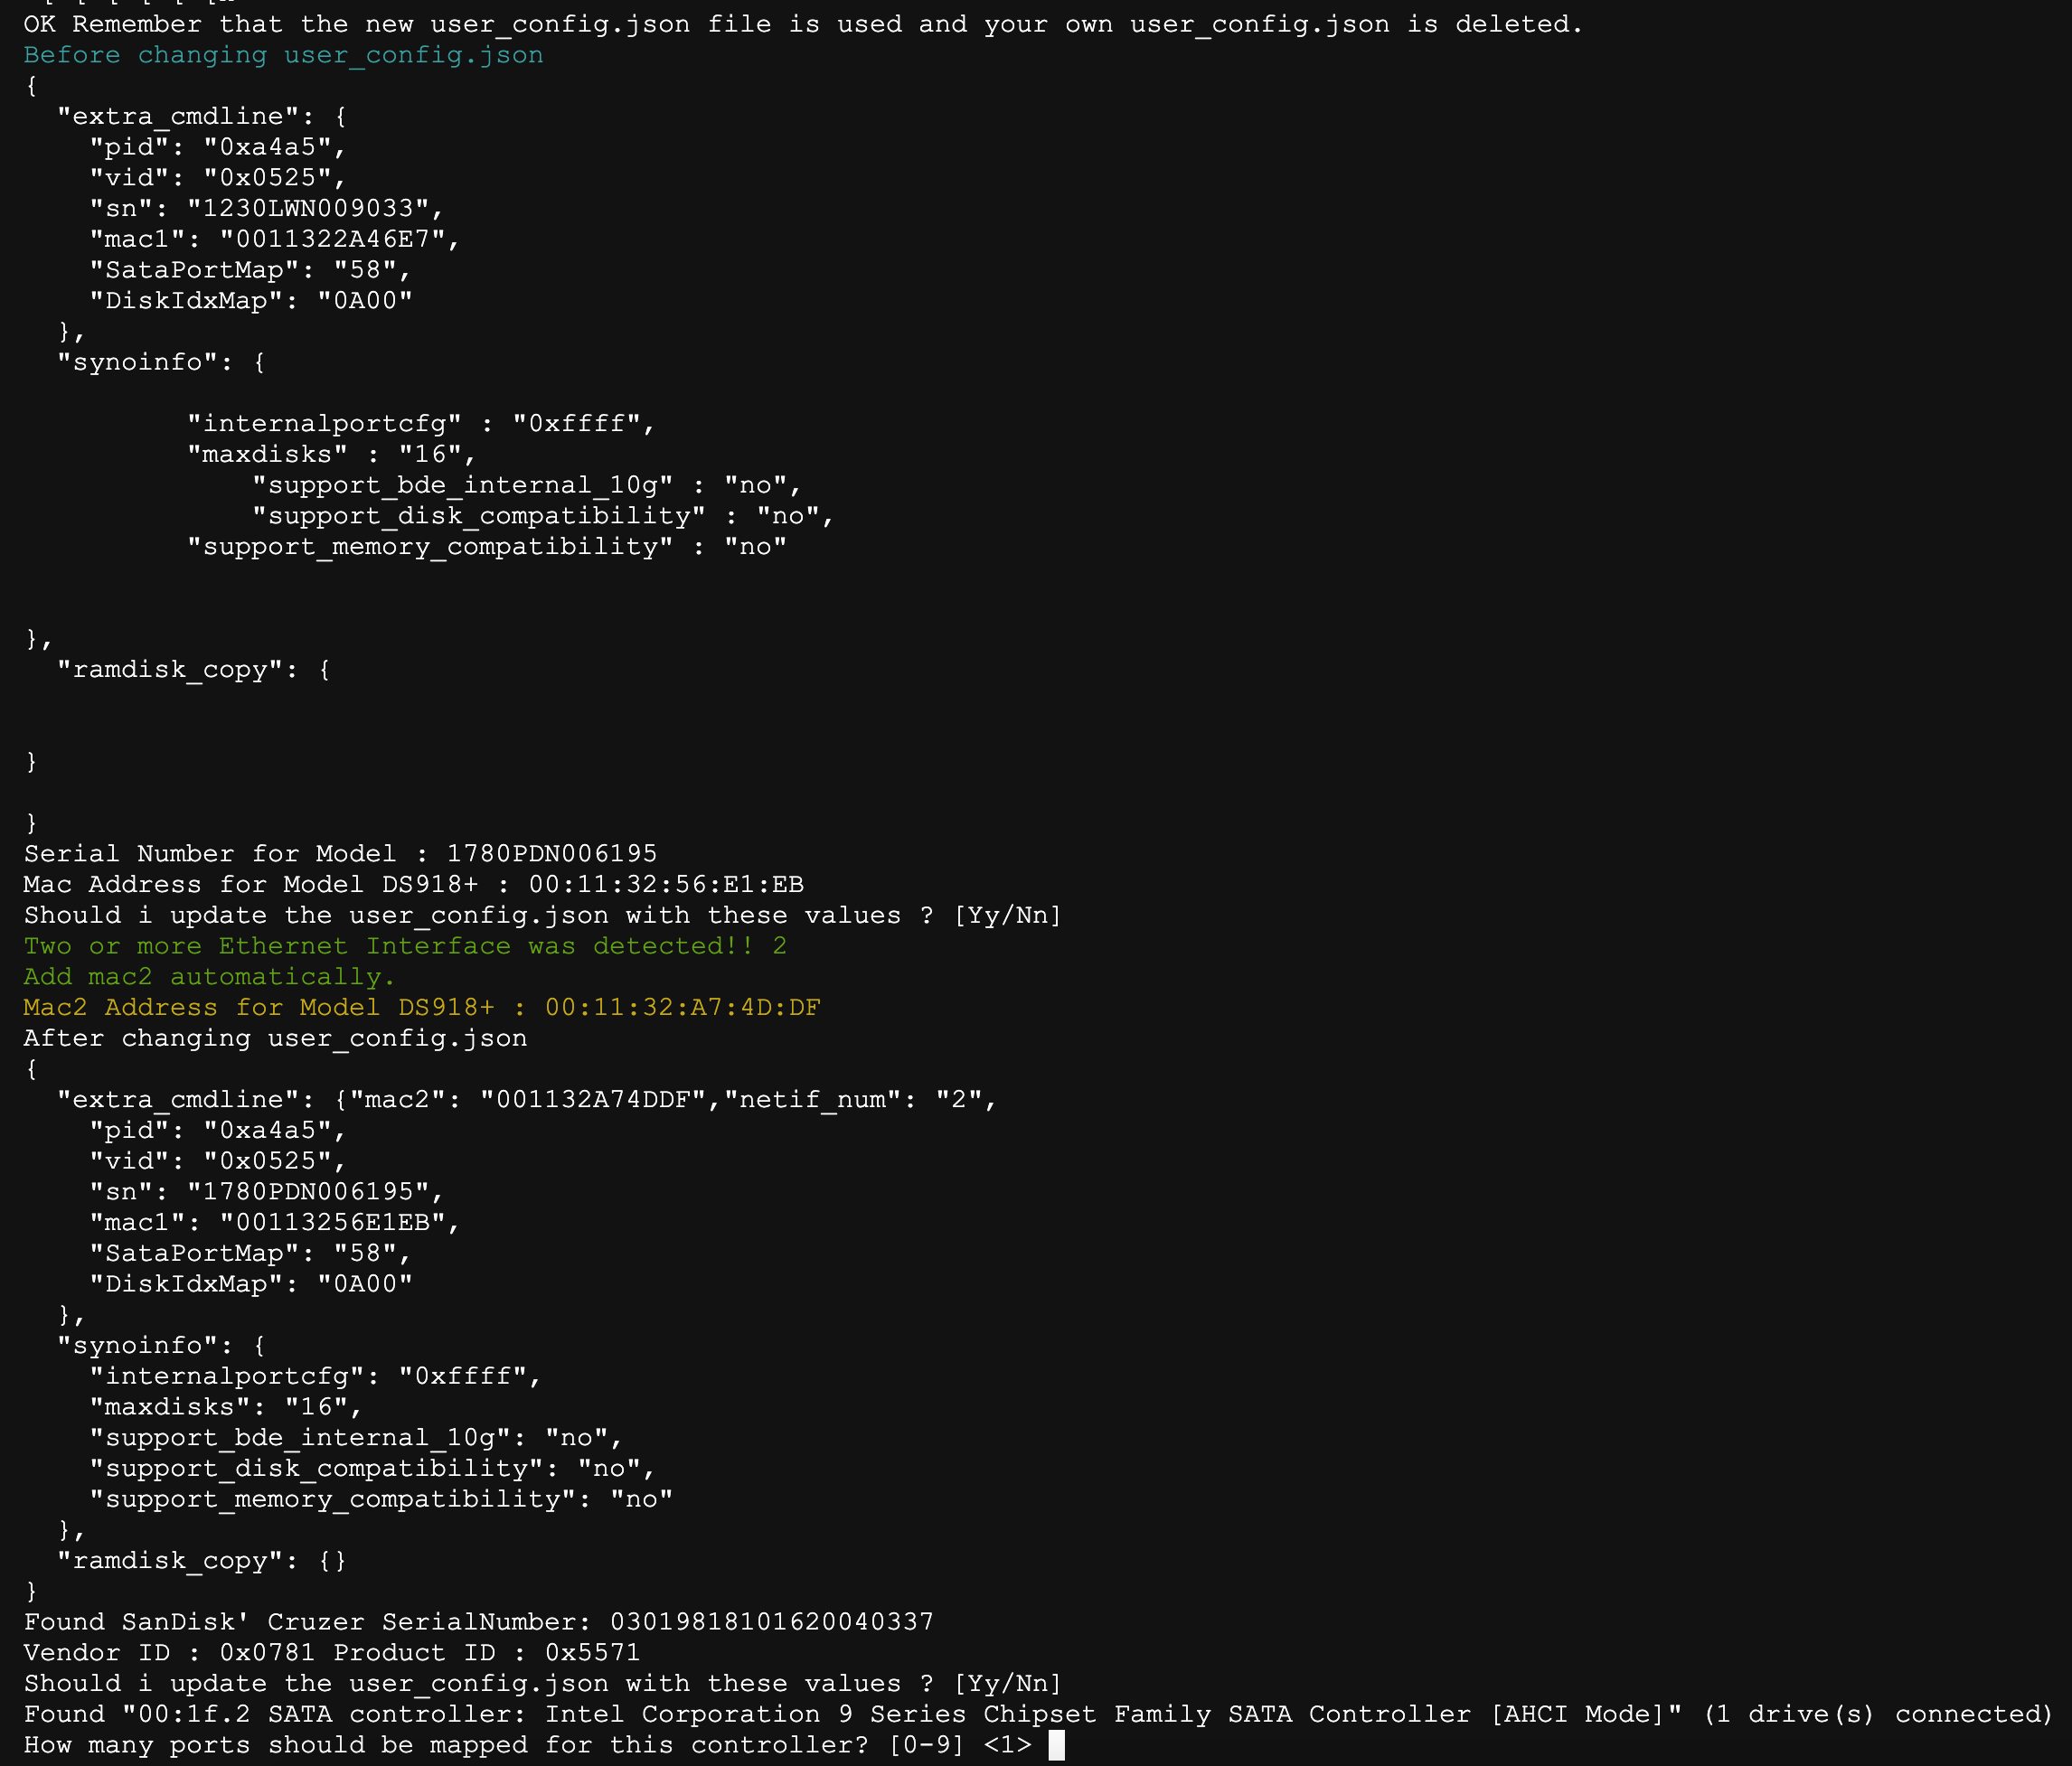
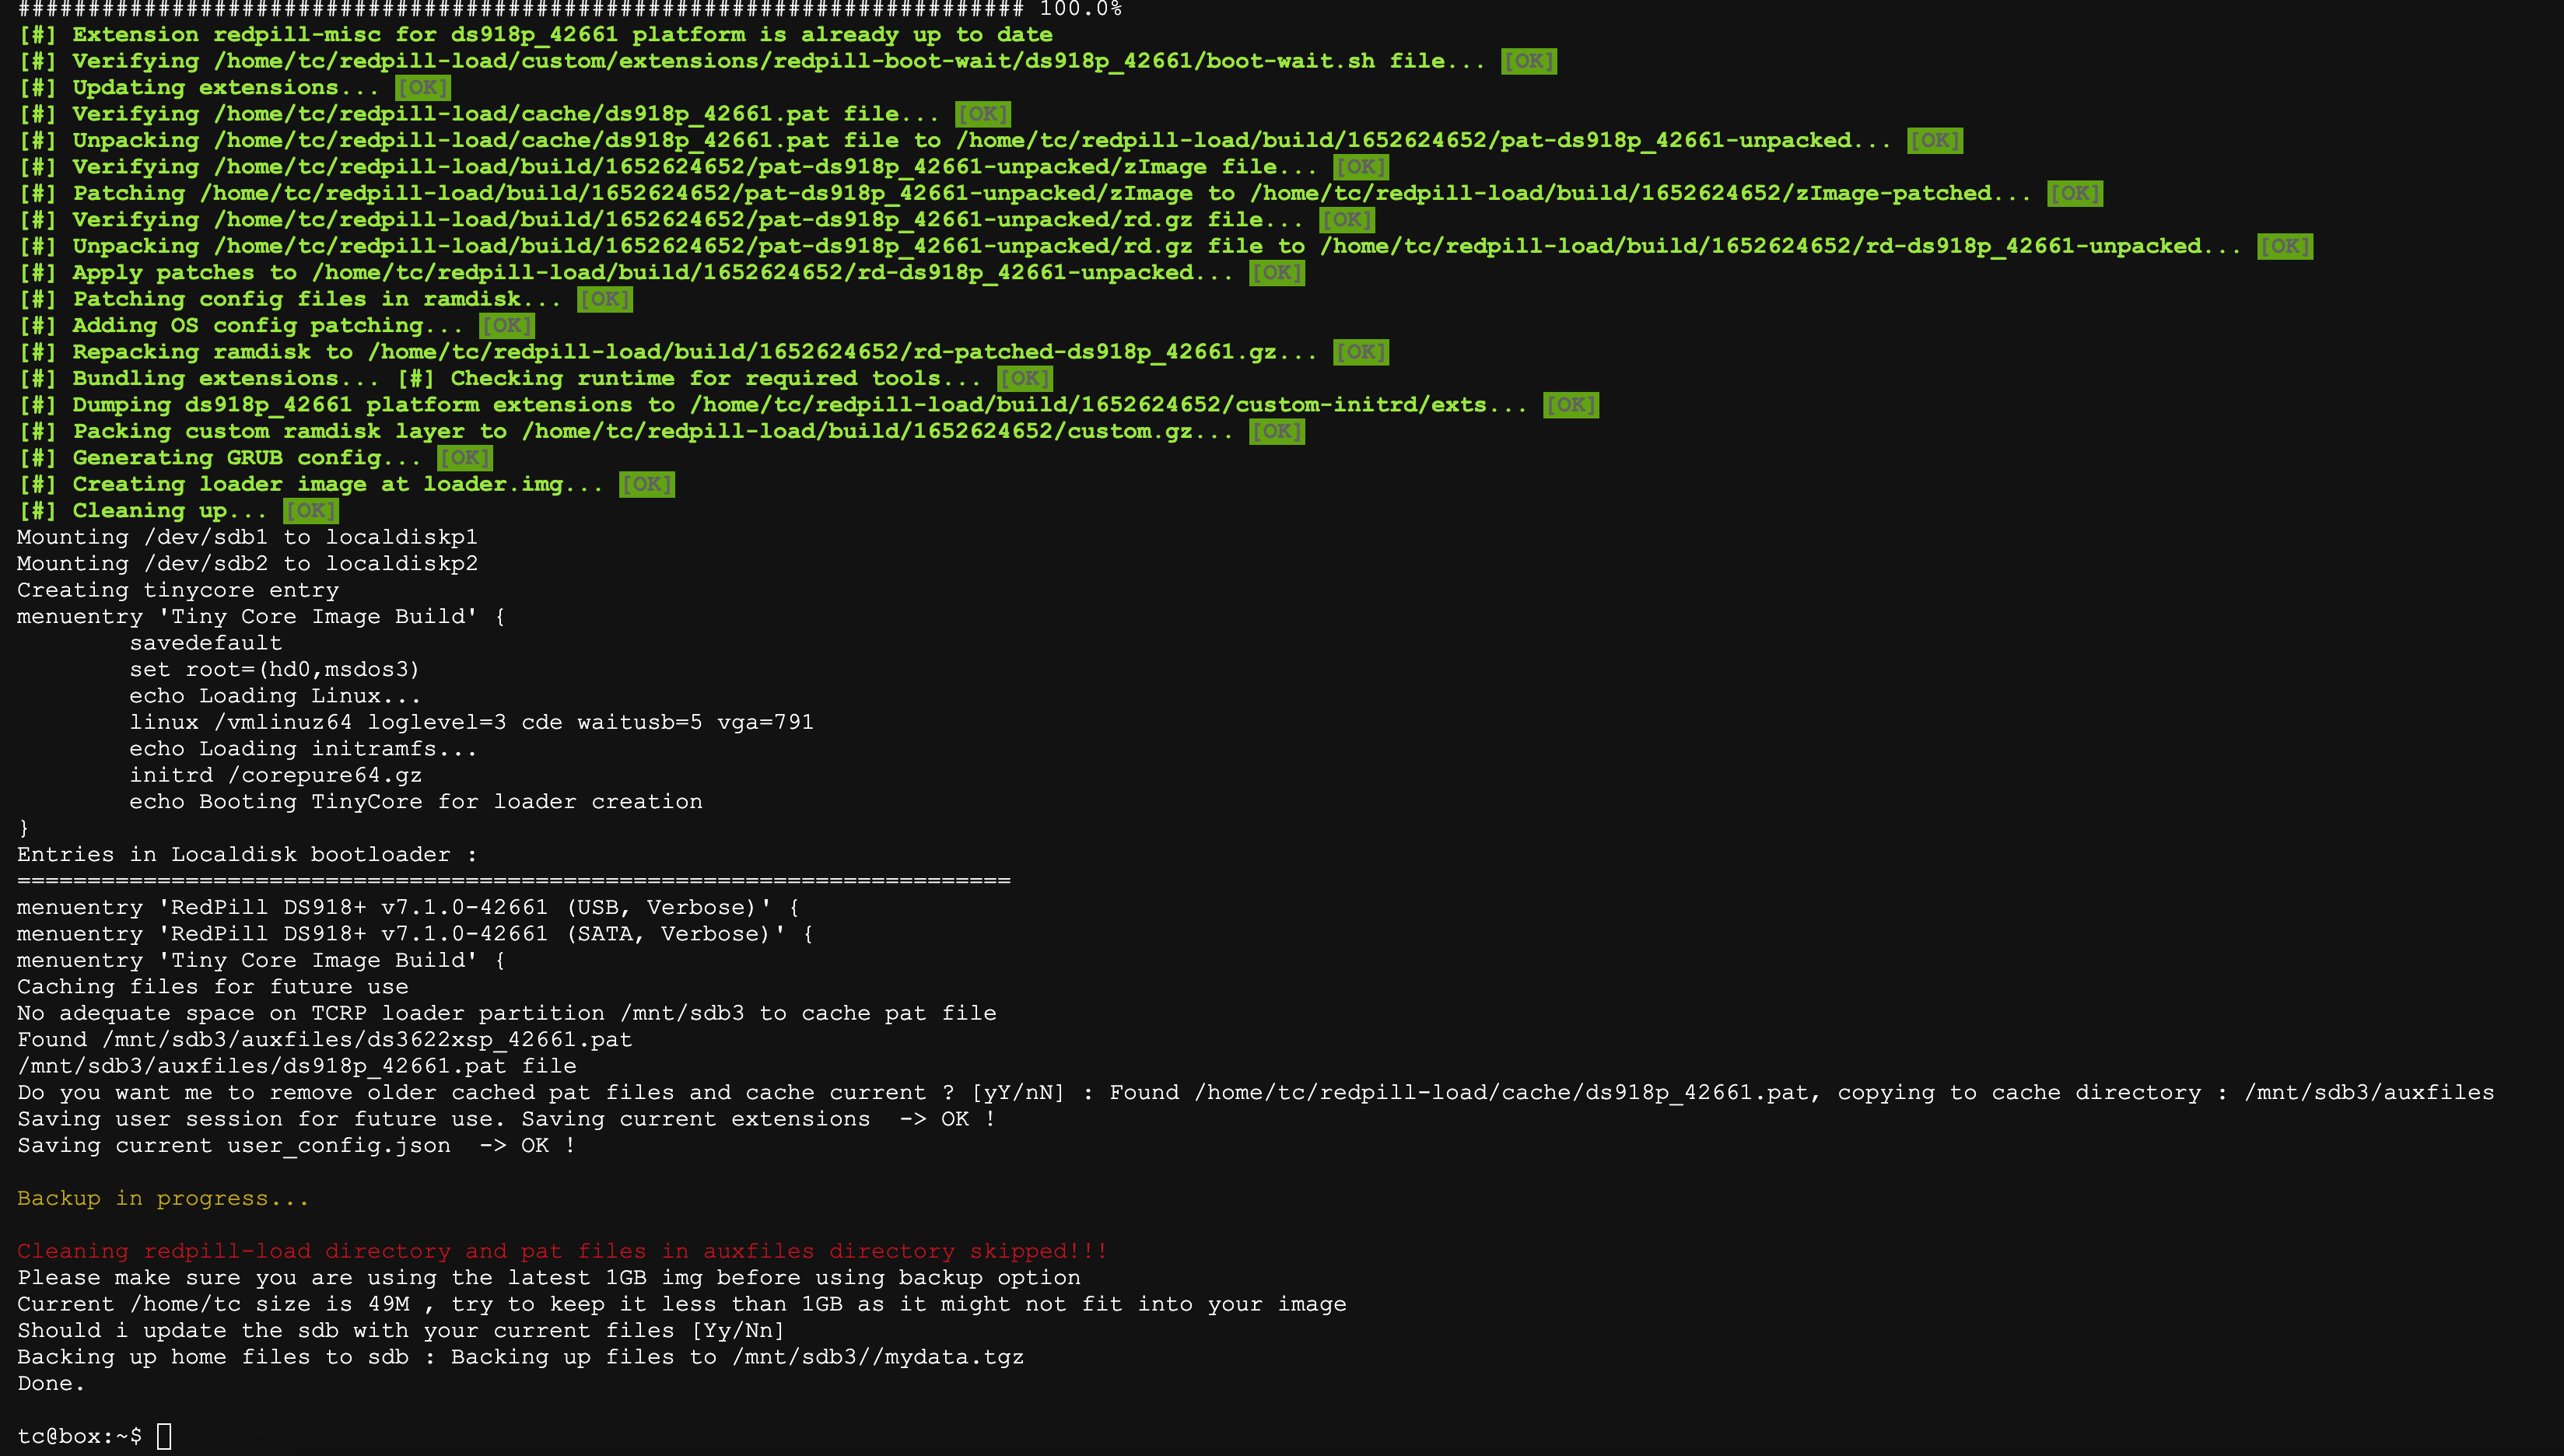
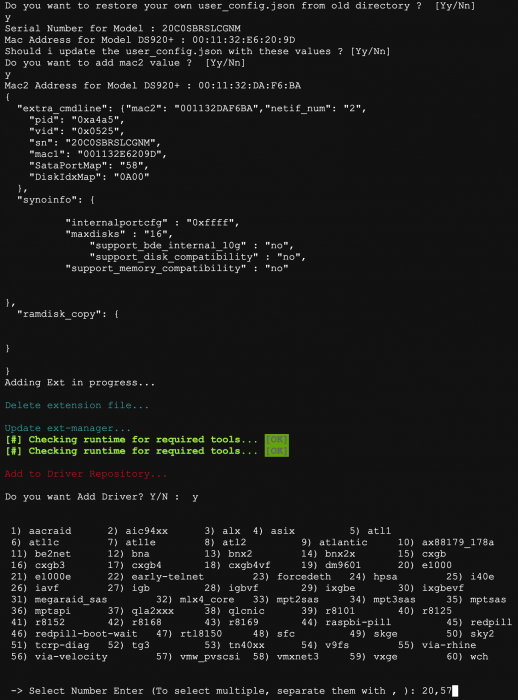
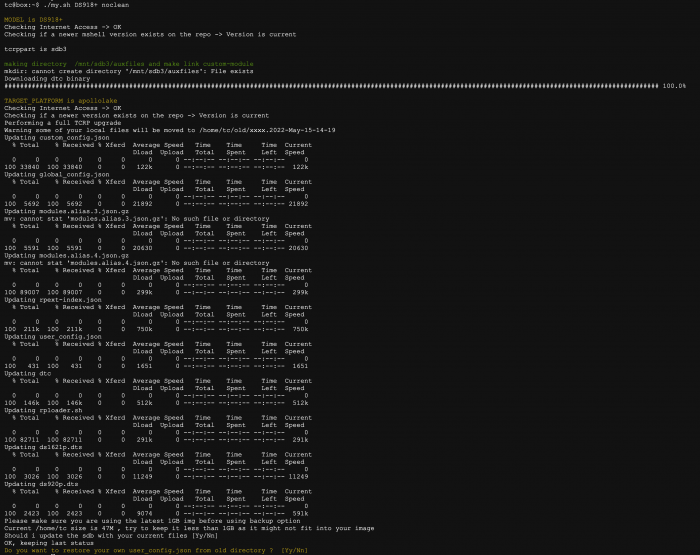
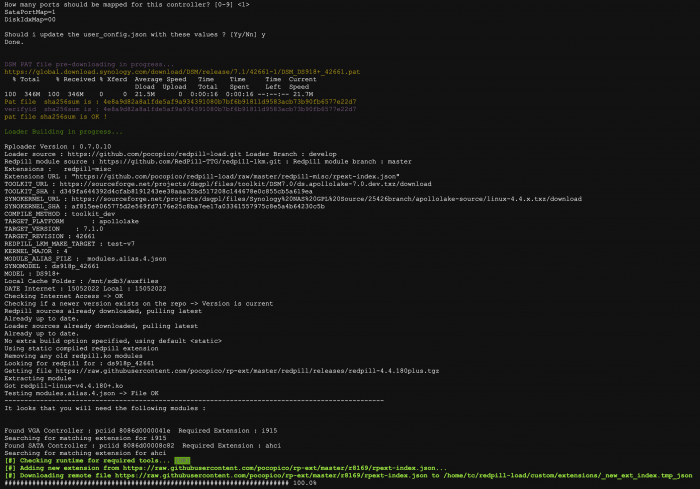
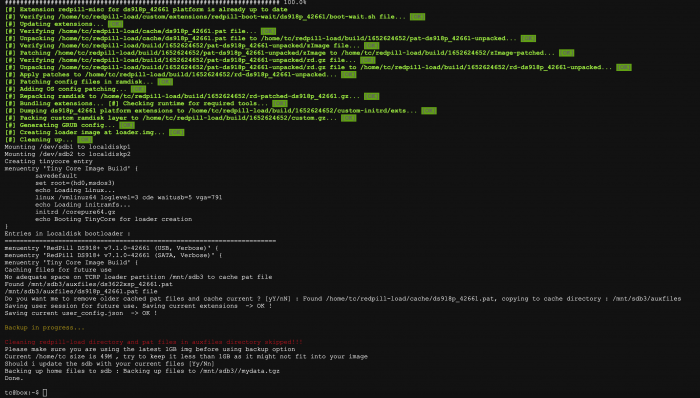
1.This is a shell script that executes several commands at once as described in the "Redpill Tinycore Loader DSM 7.1 Build" guide. To use, you can download and untar it as follows and use it in the /home/tc directory. Helps build DSM 7.1 by managing the PAT file directory required for decryption. ( It currently supports the latest version of the DSM, 7.1.0-42661 update 1 nanopack version. ) Automatically add mac2 to user_config.json file for dual NIC, a feature that TC doesn't have. ( Manual Response Version ) wget https://github.com/PeterSuh-Q3/tinycore-redpill/raw/main/m.sh.gz; tar -zxvf m.sh.gz; ( Auto Answer Version with y ) wget https://github.com/PeterSuh-Q3/tinycore-redpill/raw/main/my.sh.gz; tar -zxvf my.sh.gz; Where y is unnecessarily asked, it automatically responds. Usage: ./my.sh <Synology Model Name> <Option> <Option> <Option> Options: noconfig, noclean, manual - noconfig: SKIP automatic detection change processing such as SN/Mac/Vid/Pid/SataPortMap of user_config.json file. - noclean: SKIP the 💊 RedPill LKM/LOAD directory without clearing it with the Clean now command. However, delete the Cache directory and loader.img. - manual: Options for manual extension processing and manual dtc processing in build action (skipping extension auto detection) Please type Synology Model Name after ./my.sh ./my.sh DS918+ ./my.sh DS3617xs ./my.sh DS3615xs ./my.sh DS3622xs+ ./my.sh DVA3221 ./my.sh DS920+ ./my.sh DS1621+ # Update : add noconfig, noclean, manual combination options # 2022.05.06 You can use it like this. ./my.sh DS918+ noconfig noclean manual ----------------------------------------------------------------------------------------------------- 2. Deploy scripts that you can leverage if you need to add a separate ext manually for VM users. It includes the fuction to add exts created by @FOXBI with multiple selections like capture. For the instructions on how to use, you can download and decompress as below and use it in /home/tc directory. ( Auto Answer Version with y ) wget https://github.com/PeterSuh-Q3/tinycore-redpill/raw/main/myv.sh.gz; tar -zxvf myv.sh.gz; The way to use it is existing same as my.sh. Where y is unnecessarily asked, it automatically responds. ---------------------------------------------------------------------------------------- Usage: ./myv.sh <Synology Model Name> <Options> Options: noconfig, noclean, manual - noconfig: SKIP automatic detection change processing such as SN/Mac/Vid/Pid/SataPortMap of user_config.json file. - noclean: SKIP the 💊 RedPill LKM/LOAD directory without clearing it with the Clean now command. However, delete the Cache directory and loader.img. - manual: Options for manual extension processing and manual dtc processing in build action (skipping extension auto detection) Please type Synology Model Name after ./myv.sh ./myv.sh DS918+ ./myv.sh DS3617xs ./myv.sh DS3615xs ./myv.sh DS3622xs+ ./myv.sh DVA3221 ./myv.sh DS920+ ./myv.sh DS1621+ CAUTION) Not all exts correspond to 7.1.0-42661. Please check @pocopico's ext GITHUB in advance and use it. We do not respond to errors caused by unsupported revisions.

 1 point
 -
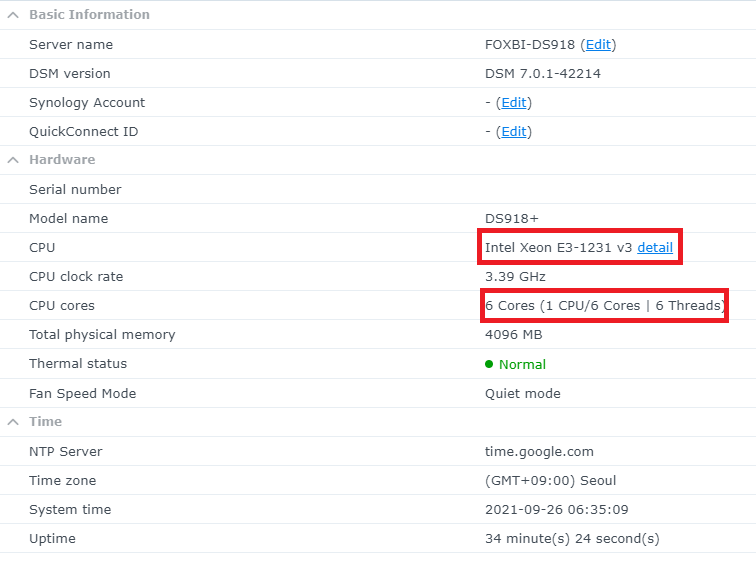
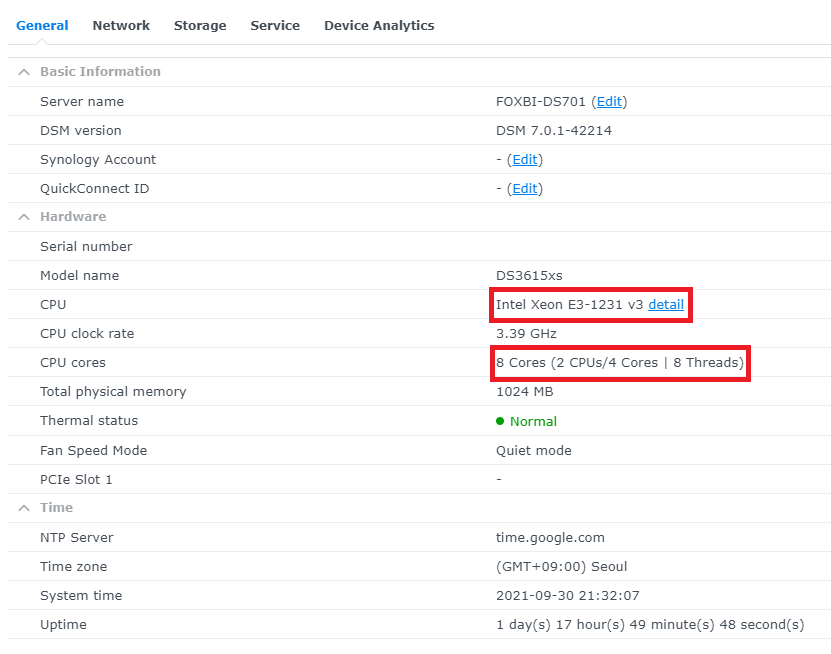
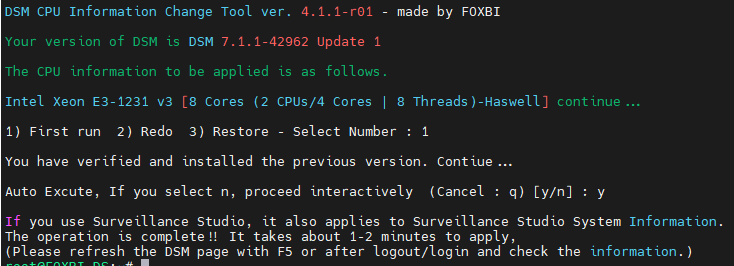
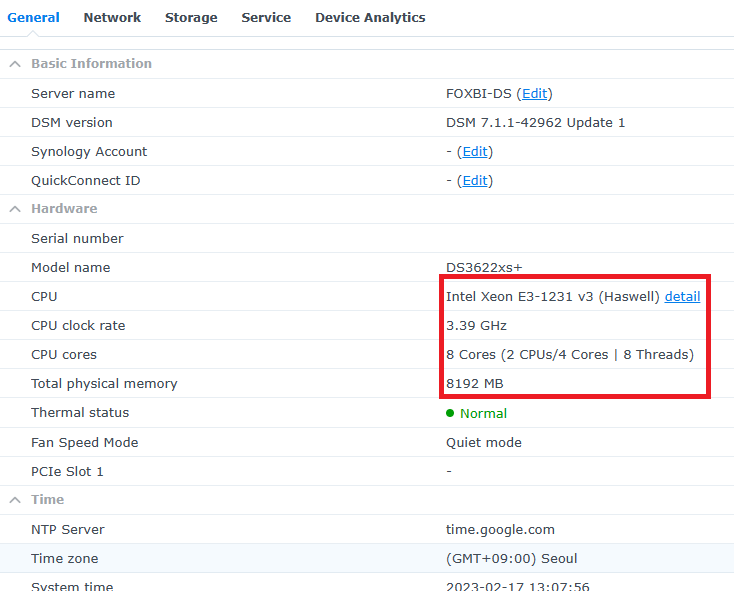
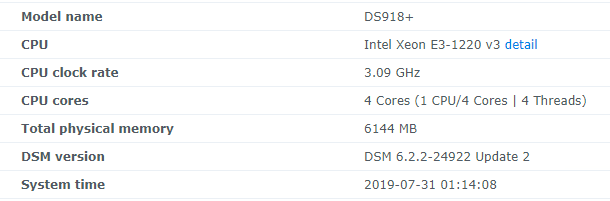
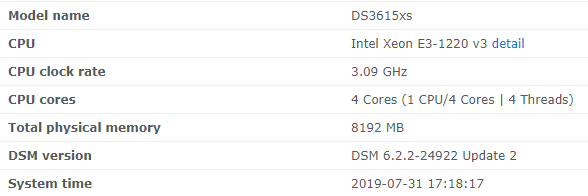
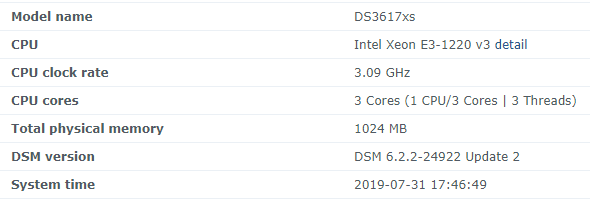
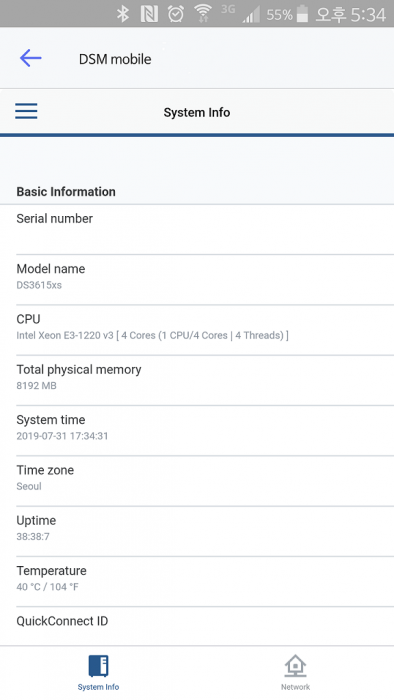
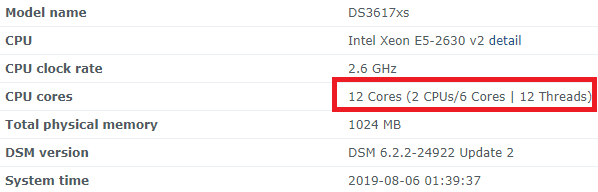
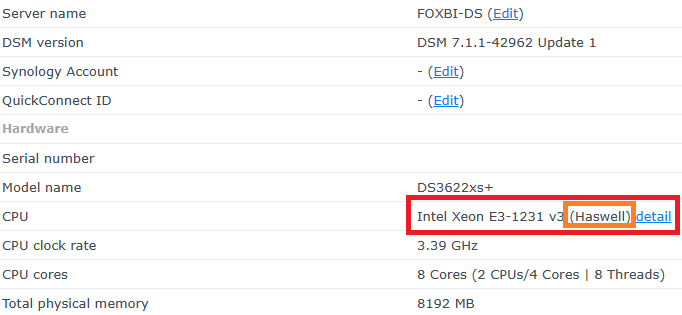
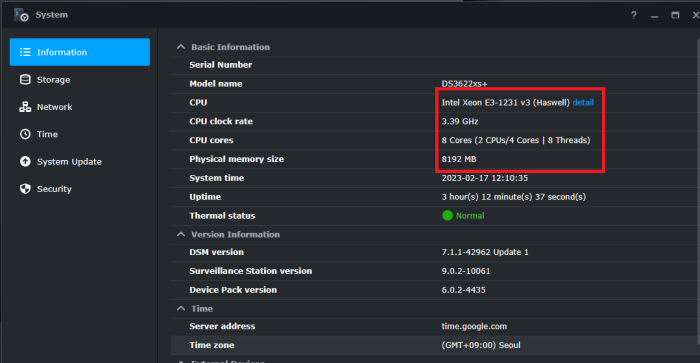
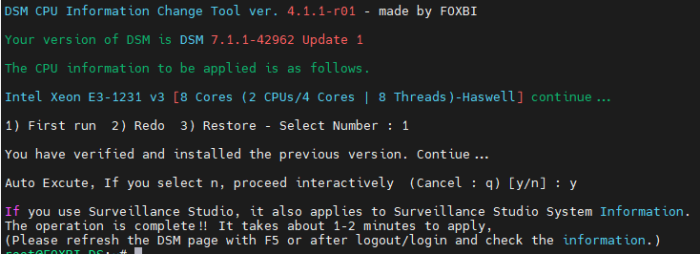
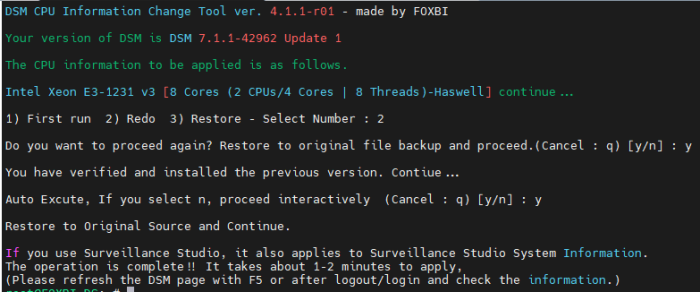
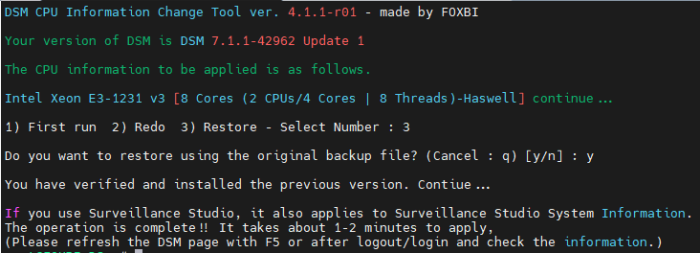
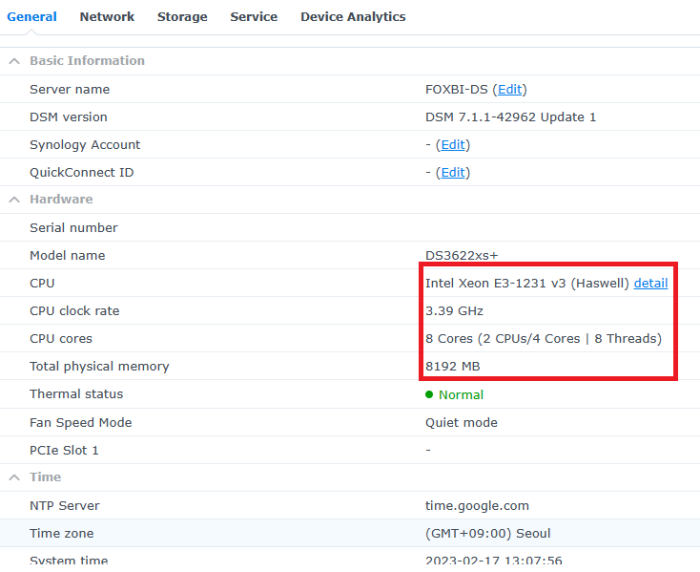
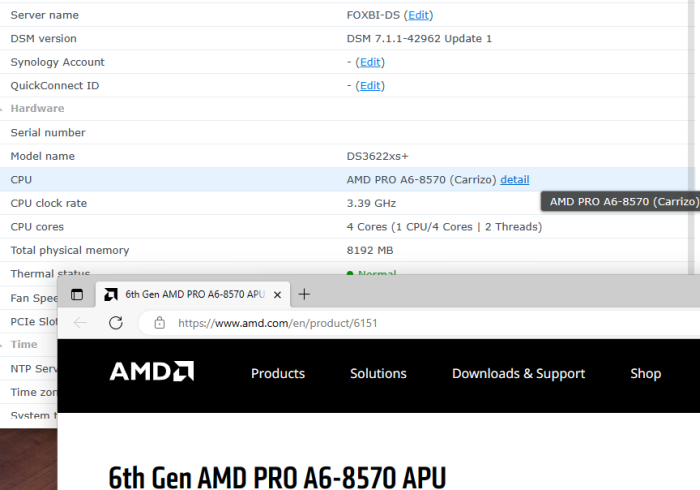
Hello! I am xpenology user. And I am an IT engineer who creates shell scripts as hobbies. Please understand that it is written by a google translate site. because i’m korean who is not fluent in English. I created a tool to change cpu information for Xpenology’s users. Modify the actual cpu name and cores of your pc or server. Howto Run ============================================================= 1. Download attached file on your PC (ch_cpuinfo.tar) (ch_cpuinfo_en.tar) / (ch_cpuinfo_kr.tar is file for korean) 2. Upload file to your DSM location (by filestation, sftp, webdav etc....) 3. Connect to ssh by admin account. (dsm > control panel > terminal & snmp > terminal > enable ssh check) 4. Switch user to root: sudo su - (input admin password) 5. Change directory to where ch_cpuinfo.tar file is located: cd /volume1/temp 5-1. in another way, Download ch_cpuinfo.tar with wget wget https://github.com/FOXBI/ch_cpuinfo/releases/download/ch_cpuinfo/ch_cpuinfo.tar 6. Decompress file & check file: tar xvf ch_cpuinfo.tar ls -lrt (check root’s run auth) 7. Run to Binary file ./ch_cpuinfo or ./ch_cpuinfo.sh (If you use busybox in DSM 5.x, you can use it as a source file) 8. When you execute it, proceed according to the description that is output. 9. Check your DSM’s CPU name, CPU cores at “information center” made a video of the how to run ch_cpuinfo. Extra Action If you want to use ch_cpuinfo in your language Modify and use the LANG.txt file in the same path as ch_cpuinfo. It is possible to use after changing the English content of each variable after translation and changing the value of CUSTLANG in line 8 to Y. Sample image(by Google trans) ==================================================== Addtional, Adjust binary to excute file made by shc(http://www.datsi.fi.upm.es/~frosal) The tool does not inclue worms, bad code. If you want to edit the CPU information yourself manually, please refer to the contents below. ——————————————————————————————————————————————————————————————— Location : /usr/syno/synoman/webman/modules/AdminCenter Source : admin_center.js / admin_center.js.gz(above 6.2) Add Before -> if(Ext.isDefined(h.cpu_vendor)&&Ext.isDefined(h.cpu_family)&&Ext.isDefined(h.cpu_series)){ o.push([_T("status","cpu_model_name"),String.format("{0} {1} {2}",h.cpu_vendor,h.cpu_family,h.cpu_series)])} if(Ext.isDefined(h.cpu_cores)){o.push([_T("status","cpu_cores"),h.cpu_cores])} Add contents: h.cpu_vendor="Intel";h.cpu_family="Xeon";h.cpu_series="E3-1220 V3";h.cpu_cores="4 Cores (1 CPU/4 Cores | 4 Threads)"; h.cpu_detail="<a href='https://ark.intel.com/content/www/us/en/ark/search.html?_charset_=UTF-8&q=E3-1220 V3' target=_blank>detail</a>" Change contens: String.format("{0} {1} {2}",h.cpu_vendor,h.cpu_family,h.cpu_series) to String.format("{0} {1} {2} {3}",h.cpu_vendor,h.cpu_family,h.cpu_series,h.cpu_detail) ——————————————————————————————————————————————————————————————— Finally, All descriptions are based on version 6.2, and the actual executable file supports 5.x, 6.x and 7.x Publish the source through github(https://github.com/FOXBI/ch_cpuinfo). For versions DSM 6.x and later, you can use the binary as before. If you use busybox in DSM 5.x, you can use it as a source file(ch_cpuinfo.sh). Please contact me by comment or bug report, i’ll respond to you as much as possible within my ability. Test & Made Environment ———————————————————————————————————— Base Server : HP ML310e v2 gen8 + VMware ESXi 6.0 + RDM DSM : DSM 6.2.3-25426 Update 3 (DS3615xs) Base Server : HP ML310e v2 gen8 + VMware ESXi 6.0 DSM : DSM 7.0.1-42214 (DS3615xs) Base Server : HP ML310e v2 gen8 + VMware ESXi 6.0 DSM : DSM 7.0.1-42214 (DS918+) Base Server : HP ML310e v2 gen8 + VMware ESXi 6.0 DSM : DSM 6.2.4-25556 (DS3615xs) Base Server : Intel E5-2630 v2 + VMware ESXi 6.7u2 DSM : 6.2.2-24922 Update 2 (DS3617xs) ———————————————————————————————————— Change Log Update new version (ch_cpuinfo ver 4.2.0-r01) 2023.02.18 - Application of AMD's CPU information collection function improvement - xpenlib(cpu_info.sh) refered https://github.com/FOXBI/xpenlib/blob/main/cpu_info.sh Update new version (ch_cpuinfo ver 4.2.1-r01) 2023.03.05 - Fixed error when users of previous version perform redo with version 4.2.0-r01 (Thanks for the @Mentat report.) I am sorry for not being able to actively respond to your inquiries due to busy life. Thank you!! Have a nice day!! Cheer up!! We can do it!! Reduce activity & Stay home & Wear a Mask!! Let's overcome COVID-19 !! Let's pray and support together for the two countries where the earthquake caused great damage and many deaths and missing people. ============================================= Download links: ch_cpuinfo ver 4.2.0-r01 - new version update -> ch_cpuinfo ver 4.2.1-r01 - new version update -> ch_cpuinfo.tar Reference images # 1.04b + DS918+ # 1.03b + DS3615xs # 1.03b + DS3617xs # Normal output is possible even when using more than 8core. # Support DSM 7.x


 1 point
 -
No it works after i modified HddHotPlug , before i modify it the installatiom went 56% and tells me there is error with dsm version , after i modified HddHotPlug it the installation completed so fine1 point
-
@yanjun IMHO, its always better to separate the OS hack from the loader hack. OS is something that should at some extension be open due to the GNU license (and XPEN is all about our objection to that ) . The individual software is licensed and it should stay like that. Developers should have their jobs right ?1 point
-
Thank you so much , after modifying SataPortMap to 1 and HddHotPlug to 1 it works so fine1 point
-
Должен быть, правда я переходил с 6.2 на 7.0.1. сами понимаете, его надо будет поправить под себя VID,PID, MAC и т.д Отправлю ссылку в ЛС тогда.1 point
-
I would like you to forget about Juns 6.2.4 loader and create a TCRP one.1 point
-
Yeah, except with that example they were "active" enough to display the PCI 106 SATA class, and on all my test systems they don't. I eventually dismissed them as they have no kernel modules active. I don't know that much about QEMU/Proxmox/KVM but it seems to have a thing for creating a lot of controllers, including one it mislabels as IDE but doesn't connect any devices to. ESXi has its warts but it seems to have so much more control over the hardware. Doing some experimentation now...1 point
-
The creation of these two Marvell SATA controllers are part of the redpill magic. 0001:09:00.0 SATA controller [0106]: Marvell Technology Group Ltd. 88SE9235 PCIe 2.0 x2 4-port SATA 6 Gb/s Controller [1b4b:9235] (rev 11) 0001:0c:00.0 SATA controller [0106]: Marvell Technology Group Ltd. 88SE9235 PCIe 2.0 x2 4-port SATA 6 Gb/s Controller [1b4b:9235] (rev 11) Its on all redpill systems. Have a look : https://github.com/RedPill-TTG/redpill-lkm/blob/master/shim/pci_shim.c and https://github.com/RedPill-TTG/redpill-lkm/blob/master/config/platforms.h1 point
-
Затем, что она у него работает, а другие пока не запускаются.1 point
-
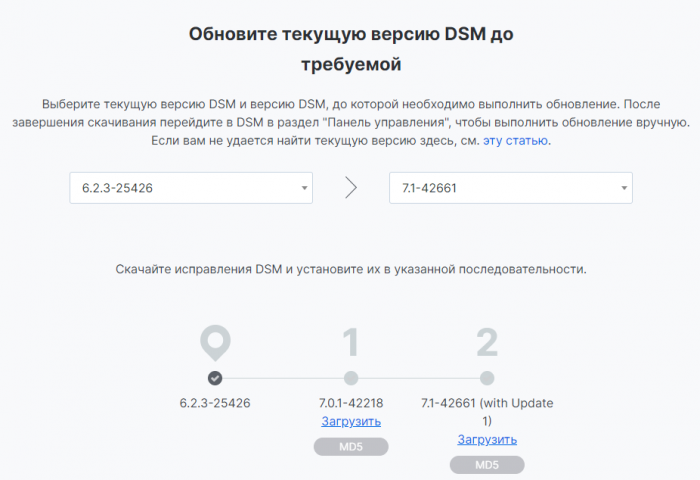
- это? Как загрузчик-то создавали? При первой загрузке в Image Build - видит сеть? Тогда, скорее всего надо просто аккуратно собрать загрузчик по актуальным на сегодня инструкциям - с большой вероятностью всё само настроится правильно. Если стоит задача переехать с 6 на 7 без потери настроек, то порядок несколько отличается от того, который для "установить с нуля". Если очень коротко, то: 1) подготовить флешку с "чистым" лоадером для 7 (скачать и записать нужный образ из https://github.com/pocopico/tinycore-redpill/). Флешку можно воткнуть, заменить старую от версии 6, прямо не выключая DSM, чтобы при перезагрузке уже с неё стартовал, иначе на п.3 придётся "перехватывать" перезагрузку с помощью монитора и клавиатуры 2) скачать .pat файл под нужную модель и версию на компе (для 7.1.0 Update 1 - здесь, не перепутайте! https://archive.synology.com/download/Os/DSM/7.1-42661-1-NanoPacked) 3) установить скачанный .pat через "Обновление DSM вручную" в веб интерфейсе () 4) после перезагрузки - сборка загрузчика по инструкциям, например: ./rploader.sh update now ./rploader.sh fullupgrade now ./rploader.sh identifyusb now ./rploader.sh satamap now ./rploader.sh serialgen DS918+ now #сгенерить новые SN/MAC или указать старые/правильные SN/MAC вручную (vi /home/tc/user_config.json) #./rploader.sh ext apollolake-7.1.0-42661 add https://github.com/.../rpext-index.json #возможно здесь потребуется добавить расширения под своё железо, например под сетевую карту ./rploader.sh build apollolake-7.1.0-42661 sudo reboot 5) после перезагрузки должен появиться в сети (через несколько минут!) - зайти в веб интерфейс DSM и завершить обновление версии (возможно, какие-то пакеты придётся удалить/переустановить). Всё. Если есть сомнения, что заработает, то можно сначала протестировать: выключить DSM, отключить (физически!) все рабочие диски, воткнуть вместо них какой-нибудь временный HDD для тестирования, выполнить пункты 1), 2), 4), убедиться что появляется в сети, установить .pat вручную, поэкспериментировать с DSM 7 (может ещё какие-то расширения и патчи захочется испробовать - аппаратное транскодирование и т.п.). После этого выключить, воткнуть всё по-старому (диски, флешку), загрузиться в версию 6 и выполнить все пункты 1-5 (в первом пункте рекомендую ещё раз заново перезаписать флешку для 7 версии, чтобы не париться со следами тестирования). UPD: возможно, на версию 7.1 придётся переходить в два этапа - проверяйте здесь: https://www.synology.com/ru-ru/support/download например, вот так пишет: - тогда просто дважды проходите по инструкции 🙂
 1 point
 -
Thank you. We cleared something up - that is the device that satamap sees attached to your virtual SATA controller is the virtual CD-ROM. I'll have to code that out. I've loaded Proxmox on a VM and will work on a solution.1 point
-
This is not your hypervisor boot disk. The SATA controller you see here is virtualized and part of your VM. That means your VM has an embedded disk device that we haven't accounted for.1 point
-
Just to assuage my curiosity, run this when you have a moment - at this point I'm betting that it is just a kernel stub and not an actual device, but to see it mapped to Class 106 is odd (on all my systems it doesn't show a class). lspci -kvd 1b4b:92351 point
-
00:1f.6 Ethernet controller [0200]: Intel Corporation Ethernet Connection (14) I219-V [8086:15fa] (rev 11) 01:00.0 Ethernet controller [0200]: Realtek Semiconductor Co., Ltd. RTL8125 2.5GbE Controller [10ec:8125] (rev 05) Судя по вашим логам нужно Интел 219 и 8125 реалтек, а не е1000...1 point
-
In the last week, satamap has been getting a lot of updates to help things out. It looks to me that the VirtiIO SCSI/LSI 53C895A are also part of q35 and cannot be removed. In this regard, Proxmox is less flexible than ESXi. I may have to fire up a Proxmox VM and noodle this out, but that will be after we sort out the Device Tree automation and install documentation for baremetal and ESXi. One thing that is really interesting to me is that the output from rploader satamap reported a disk connected to the Intel controller (again that is part of the Proxmox q35 hardware model) and you overrode it and said it wasn't there. You didn't report that disk in the first place - do you mean to have it in the system? What is it? I'm guessing it might be a VMDK - please confirm. To my knowledge, it is not possible to delete the ICH9 SATA controller from q35. It might be necessary to have a dummy disk connected to the SATA controller. If Proxmox can support SATAMAP that would be ideal but that will take some testing. In the meantime, if the disk attached to the Intel controller isn't something that you are worried about damaging, try rerunning satamap, accept it and see what happens.1 point
-
This shows a VirtIO SCSI which would probably be an issue as well, except I don't see evidence of it in lspci. That may be if there is no driver present to service it and so while it's physically present in the VM, we might not be able to see it. Generally, build a VM with only the hardware required to run the system. It's a nit, but the CD-ROM is totally superfluous for example.1 point
-
Marvell 4-port SATA controllers (doubtful if these are emulated, are these sitting idle in your system?) Intel ICH9 SATA AHCI controller (might be default hardware emulated in the VM? EDIT: confirmed as part of q35 machine model) This is your LSI HBA1 point
-
While this was ok for Jun's loader, it really isn't recommended for RedPill. Make your changes in user_config.json1 point
-
A full output of lspci please. I think the issue is that you actually have idle SATA controllers active in your VM. You may not mean to have them, but they are present and affecting sataportmap and the slot numbering. When you run rploader.sh, does it ask you for the number of ports on controllers? How many controllers does it report? Maybe post the entire result of the ./rploader satamap now too if you don't mind. Be sure to ./rploader update now first.1 point
-
Please report the result of lspci | grep "Class 01.*"1 point
-
Whether that works or not, please post the results of this command just so I get a better picture of what is happening with Proxmox. ls -la /sys/block/s*1 point
-
What FILE did you use for the tinycore image (there are three)? Try SataPortMap=18 and DiskIdxMap 10001 point
-
You don't need any guide. Just install 7.1 dsm with 7.1 loader and it will be updated. Sent from my iPhone using Tapatalk1 point
-
I'd suggest you rebuild the loader with the latest rploader.sh script and see if you get a different result, but if you want to deconstruct it, post the current of all the following: 1. platform 2. disk controller types and all disks attached to which ports 3. SATABOOT or USB - and how that device is attached 3. sataportmap and diskidxmap1 point
-
If it tests similarly on other platforms, we might as well code support into the script. For giggles, did you check: 30 0 31 1 32 2 33 3 34 4 35 5 36 6 37 7 38 8 39 9 3A : - 10? 3B ; - 11? 3C < - 12? 3D = - 13? 3E > - 14? 3F ? - 15? 40 @ - 16? 41 A - 17 42 B - 18 43 C - 19 44 D - 20 45 E - 21 46 F - 22 47 G - 23? ...1 point
-
If the maxdisks count also the USB disks then the total is exceeding your values (11 blocks * 4 = 44). And as per your internalportcfg, 30 disks will be represented as internal disks. "internalportcfg": "0x3FFFFFFF", "esataportcfg": "0x00000000000", "usbportcfg": "0xFFFC0000000", 1111 1111 1111 1100 0000 0000 0000 0000 0000 0000 0000 usbdisks = "usbportcfg": "0xFFFC0000000", 0000 0000 0000 0011 1111 1111 1111 1111 1111 1111 1111 internal disks = "internalportcfg": "0x3FFFFFFF", I would decrease the internalportcfg from 30 to 24 and leave 8 for USB and increase maxdisks to 32 which is 8 blocks of 4. 1111 1111 0000 0000 0000 0000 0000 0000 usbdisks = "usbportcfg": "0xFF000000" 0000 0000 1111 1111 1111 1111 1111 1111 internal disks "internalportcfg": "0xFFFFFF"1 point
-
- Outcome of the update: SUCCESSFUL - DSM version prior update: Jun's Loader v1.04b DS918+, DSM 6.2.3-25426 Update 3 (DS918+) - Loader version and model: Redpill Tinycore V0.4.6, DSM 7.1-42661 (DS918+) - Using custom extra.lzma: NO - Installation type: Baremetal ASRock J3160DC-ITX, mini-pcie Intel 82574 (E1000e) ethernet card, 16 GB RAM, 4x SATA drives - Additional comments: Use official Synology .pat file. Added E1000e and r8168 ext.1 point
-
- Outcome of the update: SUCCESSFUL - DSM version prior update: RedPill TinyCore DS3622xs+ DSM 7.0.1-42218 - Loader version and model: RedPill TinyCore broadwellnk-7.1.0-42661 - Using custom extra.lzma: NO - Installation type: BAREMETAL - HP Gen8 Microserver - Intel Xeon E3-1220L V2, 16GB RAM, NIC: Intel X520 SFP+ 10Gbit - Additional comments: Doing this Manual that the Network Driver ixgbe is NOT Additional added - Command for 3622 XS - [DS3622xs+] ./rploader.sh update now ./rploader.sh fullupgrade now ./rploader.sh serialgen DS3622xs+ ./rploader.sh identifyusb now ./rploader.sh satamap now ./rploader.sh build broadwellnk-7.0.1-42218 manual ./rploader.sh clean now ./rploader.sh build broadwellnk-7.1.0-42661 manual -and it is working without "manual" there was Kernel Panic because from the ixgbe Driver or you can disable the network adapater during the loader building -Onboard SATA ports and the SSD in the obbe Slot Found all drives and they are listed in order.1 point
-
"Above 6.2".... Succesfully updated to DSM 7.0.1 3615xs with RedPill tinycore going by this guide here:https://xpenology.club/install-dsm-7-on-baremetal-or-vm/ Everything seems to be fine for now. Running a Gen8 with E3 1265L v11 point
-
usb drives can't be part of volumes in dsm, they are meant to be used as local backup or additional share (without and redundancy) depending of "backup" you might hit a limit with a system only capable of having lets say 2 disks (nvme does not count as "disk" as dsm only can use them as cache drives) nuc's a usually a bad choice as they only can handle up to two 2.5" drives and there a no 8TB hdd's with CMR to fit in 2.5" slots (maybe you will find a ssd but i dont thing you want to spend that amount of money) HP 260 G2 USFF - same problems as nuc, only 2 x 2.5" and nvme (you would even need two nvme's to have a cache with write capabilitys and with having just a 1G nic will render your nvme cache pointless as the nic limits the traffic to ~112 MB/s) Fujitsu Esprimo Q520, same as above only calculate sata ahci ports as usable, usb and nvme are not to integrate into a raid set (if you do that manually - even if its complicated but possible in some way - you might and with a broken raid every time you update anything on dsm, the whole point of easy of mind with dsm is gone that way) imho you need to rethink your plan a come up with priority's like noise lever, size of case and amount of disk space needed for 2 x 8TB you need 3.5" hdd's and that makes it bigger an noisier then you initially planed1 point