Search the Community
Showing results for 'SataPortMap'.
-
updated to alpha5, still no luck.. tried without and custom cmdline, tested with sataportmap 1, sataportmap1 and diskidxmap 08, nothing.
-
i have the same problem in ESXi, i made some more tests. leaving arpl.vmdk on sata controller 0:0 (like tcrp), and the HBA in passthrough. if i do the hw detection, it detects the vmware sata controller as 30 disks, with only 1 populated in green.. doing that and nothing else, building the loader and booting, it boots and recovers the system, and dsm loads but it freaks out on the disks.. doing an fdisk -l i can see that the disks attached to the hba show as /dev/sdaj /dev/sdak ecc ecc. if i go in the bootloader and set SataPortMap 1 and booting dsm i can see in the log Adjust maxdisks and internalportcfg automatically maxdisks=0 and Exit on error [1] DISK NOT INSTALLED... doing fdisk -l i can see that now the disk of the hba are named /dev/sdb /dev/sdc ecc ecc, but dsm wont recover or install. i rebooted in the bootloader and added in synoinfo "maxdisks 12" and booted dsm, i can see that maxdisks are now 12 with the correct naming /dev/sdb /dev/sdc ecc ecc but dsm still wont install or recover. DiskIdxMap to 08 10 or 0800 wont change a thing. since tinycore build and loads dsm fine i think something in arpl is missing or missbuild. @fbelavenuto the same error appears in @jrac86 logs, i have the same mpt2sas with the same firmware, so must be something in the loader.
-

No drives detected
Steve W replied to trublu's topic in General Installation Questions/Discussions (non-hardware specific)
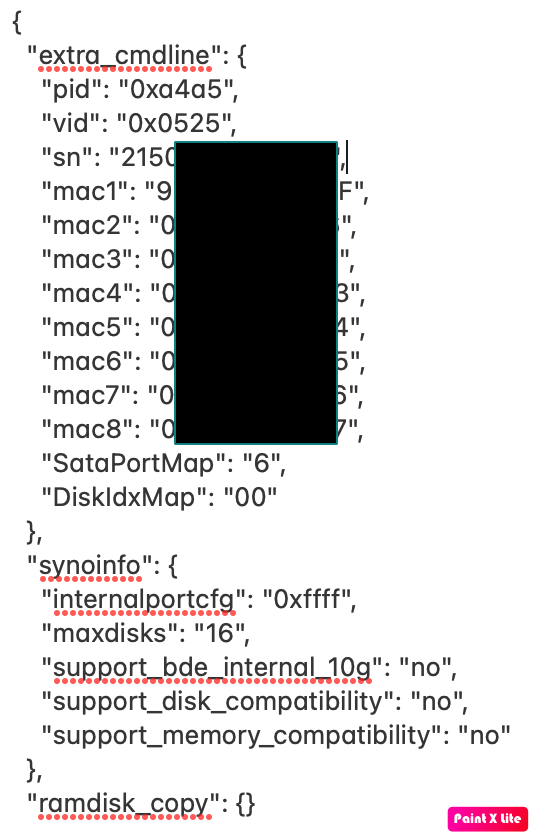
I did a fresh install and no difference. New updated user_config.json { "extra_cmdline": { "pid": "0xa4a5", "vid": "0x0525", "sn": "20C0SQRFE3QPZ", "mac1": "74D4358EF252", "SataPortMap": "1", "DiskIdxMap": "00" }, "synoinfo": { "internalportcfg": "0xffff", "maxdisks": "16", "support_bde_internal_10g": "no", "support_disk_compatibility": "no", "support_memory_compatibility": "no" }, "ramdisk_copy": {} } Still not detecting drives. Any more suggestions? -

No drives detected
apriliars3 replied to trublu's topic in General Installation Questions/Discussions (non-hardware specific)
Test with this ./rploader.sh satamap Or change manually "SataPortMap": "58", "DiskIdxMap": "0A00" -

Переход на 7.X.X с помощью tinycore-redpill
andy2001 replied to Olegin's topic in Програмное обеспечение
Спасибо автору, поставил 7.1. Вроде все работает, тестирую только. Плата на H81 где при установке пишет что sata 3 и 4 отключены и будут проблемы при установке. Установил с опцией SataPortMap=2. Был совет убрать эту строку и добавить sata_remap=4\>2:5\>3. Это правда для H61 чипсета было и человек ответил, что работает. Кто-то понимает синтаксис этого? Что за бэкслеши? Порты с 1 нумеруются или с 0? У меня вроде 3 и 4 порты работают, но отображаются как 5 и 6. Пробовал sata_remap=5\>3:6\>4 - ничего не меняется. Диск правда пока один и я его просто перетыкаю. -
No drives detected
Steve W replied to trublu's topic in General Installation Questions/Discussions (non-hardware specific)
I'm also having trouble with No Drives Detected. Any help would be appreciated. I've been trying to get this working for the last 10 hours and no luck. Followed these instructions: ./rploader.sh update ./rploader.sh fullupgrade Configure System-Specific Parameters USB flash drive VID/PID : ./rploader.sh identifyusb Serial number/MAC : ./rploader.sh serialgen DS3622xs+ realmac Build the Loader ./rploader.sh build broadwellnk-7.1.0-42661 exitcheck.sh reboot My user_config.json file is: { "extra_cmdline": { "mac2": "001132A8B800", "netif_num": "2", "pid": "0x6364", "vid": "0x058f", "sn": "1430ODN024343", "mac1": "0011327B8CF8", "SataPortMap": "58", "DiskIdxMap": "0A00" }, "synoinfo": { "internalportcfg": "0xffff", "maxdisks": "16", "support_bde_internal_10g": "no", "support_disk_compatibility": "no", "support_memory_compatibility": "no" }, "ramdisk_copy": {} }
-
Try add only SataPortMap=1
-
 Hello all, I tried looking through past topics to understand how satamap worked, but I seem to be going in circles. I have tinycore set up in a VM on proxmox. I only want xpenology to see the 24 disks attached in my diskshelf which is attached with an SAS2008 card. The internal sata ports are not being used and can be ignored by xpenology. I already changed the max disks to 24 in the user_config.json as shown below and confirmed that my bios has SATA running in AHCI mode and that global c states are disabled. { "extra_cmdline": { "pid": "0xa4a5", "vid": "0x0525", "sn": "2040SQRMWYV0J", "mac1": "001132192ED2", "SataPortMap": "11", "DiskIdxMap": "1818" }, "synoinfo": { "internalportcfg": "0xffff", "maxdisks": "24", "support_bde_internal_10g": "no", "support_disk_compatibility": "no", "support_memory_compatibility": "no" }, "ramdisk_copy": {} When I run "./rploader.sh satamap now", here is what I see tc@box:~$ sudo ./rploader.sh satamap now Machine is VIRTUAL Hypervisor=KVM Found SCSI HBAs, We need to install the SCSI modules Don't run this as root. Succesfully installed SCSI modules Found "00:1f.2 Intel Corporation 82801IR/IO/IH (ICH9R/DO/DH) 6 port SATA Controller [AHCI mode] (rev 02)" Detected 6 ports/0 drives. Mapping KVM q35 bogus controller after maxdisks Found "06:07.0 Intel Corporation 82801IR/IO/IH (ICH9R/DO/DH) 6 port SATA Controller [AHCI mode] (rev 02)" Detected 6 ports/2 drives. Mapping SATABOOT drive after maxdisks WARNING: Other drives are connected that will not be accessible! Found SCSI/HBA "01:00.0 LSI Logic / Symbios Logic SAS2008 PCI-Express Fusion-MPT SAS-2 [Falcon] (rev 03)" (24 drives) Computed settings: SataPortMap=11 DiskIdxMap=1818 However, when I complete the build and reboot, it stops at "Booting the Kernel", but xpenology is never found with the Synology assistant or find.synology.com. I think this is due to the satamap being incorrect and trying to use the motherboard sata ports. Any assistance in getting this working is greatly appreciated.
 -
ARPL worked beautifully on my baremental setup on 1037u motherboard which reportedly has 6 Sata ports but 2 of them are disabled by factory. Played with SataPortMap a bit with no luck (SataPortMap=1 installs but only sees 1 drive, SataPortMap=4 won't install). This just saved my day!
-
RedPill - the new loader for 6.2.4 - Discussion
andy2001 replied to ThorGroup's topic in Developer Discussion Room
My motherboard is H81 based. satamap now reports that port 3 and 4 are bad (disabled). I used sataportmap=2 for the installation. I add sata_remap=4\>2:5\>3 line to the grub.conf but the DSM still shows me ports as 5 and 6 not as 3 and 4. -
@fbelavenuto i'm trying the same on a ESXi test enviroment, it detects the mpt3sas but on reboot and dsm boot it shows disk 34 35 36 37 (with sdae sdaj disk numbering) ecc ecc, i tried adding cmdline such as sataportmap and diskidxmap but does not seem to work. any idea?
-
 You mean the TCRP? I tried that to create the loader, it tells me that there are 6 Sata ports with 2 bad ports, and ask me to confirm to set SataPortMap to 6.
 -
 @shadowcliffs Test 1 : SataPortMap=13 DiskIdxMap=0001 Test 2 SataPortMap=22 DiskIdxMap=0002 Test 3 SataPortMap=31 DiskIdxMap=0003 If not working, post results for this: dmesg | fgrep "ata" dmesg | fgrep "DUMMY"
 -
 I would suggest the other bootloader stuff that @renegadeBE linked higher up this thread. I tried hours to get it to work with manual trying different Sataportmap and SATA remap, nothing worked. But this loader.. it just worked and was very easy to setup.
 -
Hi gangs, I have a similar issue with disabled Sata ports, but mine are port 2 and 4. The motherboard is Biostar NM70I-1037U. It comes with 3 Sata ports, 1 x 6Gb, 3 x 3Gb. Previously running 6.2.3 with 4 drives. I managed to have 3615xs 7.0.1.42281 installed with SataPortMap=1, but it only sees 1 drive. If I start the installation with SataPortMap=4, the installation stopped with error message: errors found in drive 2 and 4, Sata port 2, 4 are disabled. Can the right sata_remap fix this issue? What value should be used? Any suggestions are much appreciated.
-
Oh : are you sure you have compiled during the modifications ? Sataportmap=8
-
When i press "E" on startup i get some kind of config but there is no "SataPortMap" and stuff. See:
-
Last test : edit directly to grub, press "e" on start. After edit, press F10 "SataPortMap" : "3" "DiskIdxMap" : "00" "sata_remap" : "4\\>0:5\\>1:6\\>2"
-
Edit your user_config.json "SataPortMap" : "4", "DiskIdxMap" : "00", "sata_remap" : "4\\>0:5\\>1:6\\>2:7\\>3" }, WARNING : If the last argument is not sata_remap add a "," After, compil your loader and test ! @IG-88 Can you watch this please?
-
Thanks for your reply! Sadly with SataPortMap=4 i get the same error.. I also tryed the linked Tutorial but with that i no longer find my NAS after building the bootloader. Used Plattform: DS3622xs+ used architecture:broadwellnk.
-
Hi, Your chipset on your motherboard is an INTEL B660, It manages 4 sata ports (present on the motherboard). Why map your USB port? Your usb stick is recognized by the VID and PID that you enter in user_config.json (./rploader.sh identifyusb) Test : SataPortMap=4 DiskIdxMap=00 For any help, read :
-
Hi there! Iam setting up a Xpenology NAS and have trouble with the satamap command. First my Hardware: i3-12100 Biostar B660GTN (ITX board with 4 Sata Ports) 3x Crucial MX500 1TB SSDs 16GB RAM I used THIS guide to install DSM7 but have some trouble with the satamap command. It looks like this: Found "00:17.0 Intel Corporation Device 7ae2 (rev 11)" Detected 8 ports/3 drives. Bad ports: 1 2 3 4. Override # of ports or ENTER to accept <8> Computed settings: SataPortMap=8 DiskIdxMap=00 WARNING: Bad ports are mapped. The DSM installation will fail! I searched and found THIS post. So i tryed the "dmesg |grep sd" command and got my 3 SSDs and my USB stick: [ 0.690617] sd 4:0:0:0: [sda] 1953525168 512-byte logical blocks: (1.00 TB/932 GiB) [ 0.690731] sd 5:0:0:0: [sdb] 1953525168 512-byte logical blocks: (1.00 TB/932 GiB) [ 0.690839] sd 7:0:0:0: [sdc] 1953525168 512-byte logical blocks: (1.00 TB/932 GiB) [ 2.722473] sd 8:0:0:0: [sdd] 242614272 512-byte logical blocks: (124 GB/116 GiB) So i tryed to put in: SataPortMap=41 (4= 4 Sata Ports - 1 = one USB stick) DiskIdxMap=48 (4 because the first ssd is 4:0:0:0 - 8 because the usb stick is 8:0:0:0 But when i build the bootloader and restart the system i get some error (no drives found or something like that). Is my understanding of the satamap command wrong? What kind of settings should i use? Pls help Thanks!
-
 Most of the ESXi XPe tutorials suggest that the user installs a virtual disk as an example device, separate from the loader vmdk. Maybe you want to use a virtual disk in your installation, and maybe you would rather use a passthrough controller. It is not always clear and often people install the virtual disk when it isn't necessary. Because we map the loader vmdk away (with SataPortMap=10 and DiskIdxMap=1) that causes the vmdk to be assigned outside of the addressable port range (assuming 16 ports). Any SATA devices on that same controller (SATA0) would be similarly not addressable, so we ask the user to add a second SATA controller (SATA1) for the virtual disks (or RDM devices) to be attached to. Those are then addressed at the beginning of the port range (SataPortMap=1000 and DiskIdxMap=1n, where n is the number of virtual disks). In @aerolite's case, they did not need a "21GB" virtual disk because data drives were being delivered via LSI HBA but it appears they had created one and set up the virtual controller as above. Non-SATA ports tack onto the end of whatever SATA ports are reserved by SataPortMap/DiskIdxMap. So they were asking how to get the starting port for the HBA back to the beginning of the range. Therefore, since they do not need the 21GB disk it can be deleted, the SATA1 controller also deleted, and SataPortMap and DiskIdxMap adjusted. With no SATA devices in the system (aside from the loader vmdk) then SataPortMap=1000 and DiskIdxMap=1. Unusually, the last SataPortMap 00 is required so that the HBA knows where to start addressing its ports. Unfortunately, there is an anomaly exhibited with TCRP/DSM7/HBA's that causes a single port gap between the last SATA disk and the first HBA disk. I haven't figured out how to make that go away outside of a device tree configuration.
- 89 replies
-
- 1
-

-
- virtualization
- tcrp
- (and 2 more)
-
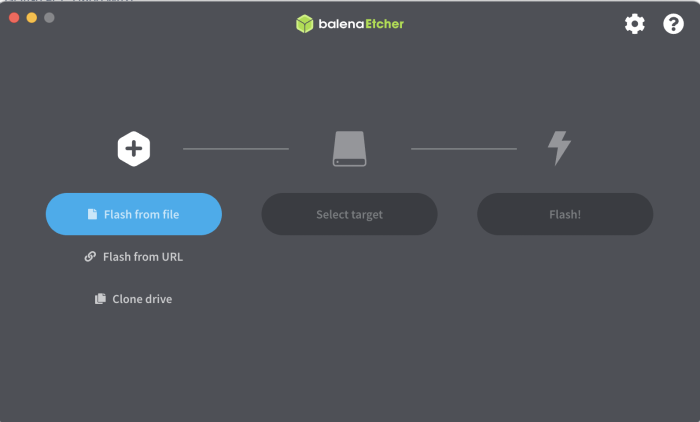
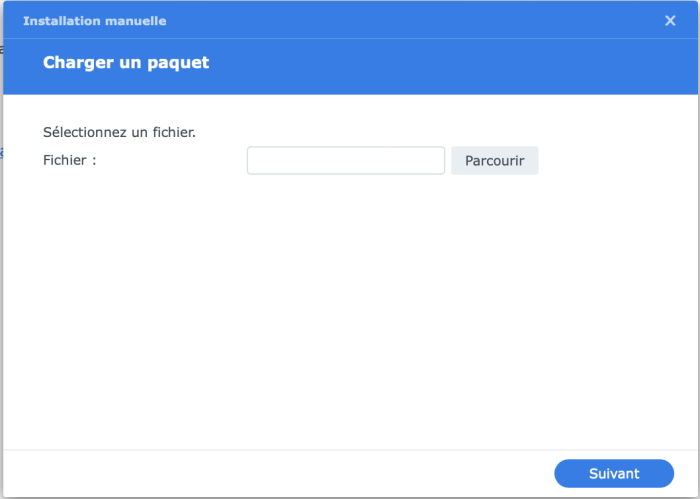
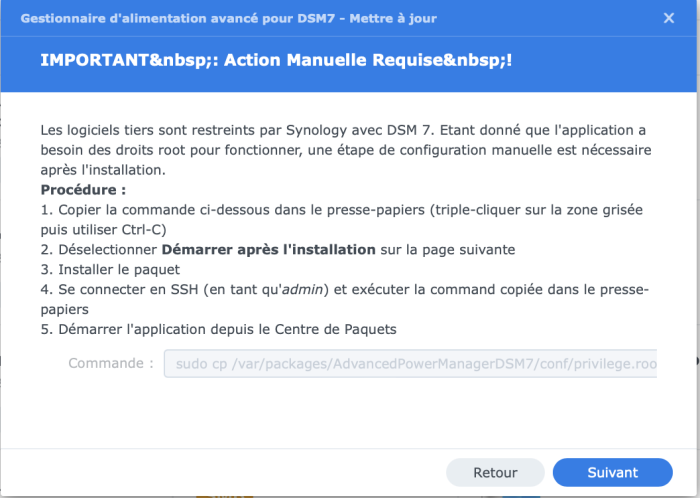
Info pour l'update du N54L avec 6 Disques Dur selon cette procédure faite à l'époque (2019) et en réactivant la NIC Interne tout en laissant la carte HP NC360T Téléchargement du tinycore-redpill.v0.8.0.0.img.gz sur le GitHub: https://github.com/pocopico/tinycore-redpill Flash de la Micro carte (j'utilise un porte carte micro-Sd) avec balena Etcher simple et efficace. Mise en place de la clé USB à l'intérieur du Serveur N54L Démarrage puis paramètrage du BIOS pour remettre en service le NIC interne Redémarrage sur le serveur et boot sur la clé USB toute fraiche Lancement du Tiny et commande pour récupérer l'adresse IP affectée au serveur ifconfig Depuis un pc sur le même réseau : commandes avec Terminal (ou autre soft sous windaube) ssh tc@votre ip local (ex:ssh tc@192.168.1.9) Mot de passe : P@ssw0rd update the TCRP script ./rploader.sh update update the TCRP support file ./rploader.sh fullupgrade Identification auto du PID/VID de la clé USB ./rploader.sh identifyusb création d'un Serial number/MAC (j'en profite pour passer upgrader du DSM3615xs au DS3622xs+ deux possibilités : random MAC address ./rploader.sh serialgen DS3622xs+ real MAC address ./rploader.sh serialgen DS3622xs+ realmac mapping auto de ma grappe HDD ./rploader.sh satamap pour mon cas (6HDD) Recommended settings: SataPortMap=6 DiskIdxMap=00 Pour ajouter une extension spécifique : pour ma part je vais tester l'extension "Power button package"' qui me permettait de mettre en veille le serveur avec le bouton "Power" en facette du serveur. Cette extension devait être installer manuellement depuis le serveur sous DSM6 (cf. tuto) ./rploader.sh ext <architecture>-<version>-<DSMreleasenumber> <extensionurl> ./rploader.sh ext broadwellnk-7.1.0-42661 add https://raw.githubusercontent.com/pocopico/rp-ext/master/redpill-acpid/rpext-index.json une fois tout cela fait, ouverture de user_config.json (ici avec VI) vi user_config.json Vérification de tous les paramètres et ajouts d'autres adresse MAC une fois modifié: escape puis :X pour sauvegarder et sortir de VI Compile ensuite avec le bon .pat Synology DSM. Commande DS3615XS 7.0.1 ./rploader.sh build bromolow-7.0.1-42218 DS3615XS 7.1 ./rploader.sh build bromolow-7.1.0-42661 DS3622XS+ 7.0.1 ./rploader.sh build broadwellnk-7.0.1-42218 DS3622XS+ 7.1 ./rploader.sh build broadwellnk-7.1.0-42661 Une fois fait, reboot du serveur sudo reboot Paramétrage de mon DSM Première réglage: la récupération du gestionnaire d'alimentation créé par Renaud Métrich. Ce dernier me permet de mettre en veille le serveur selon plusieurs possibilités bien expliqués dans l'extension depuis DSM Téléchargement du spk ici. Puis installation Manuelle obligatoire depuis DSM (Attention de décocher lancer après installation car une commande SSH est obligatoire avant lancement du soft pour l'autoriser a utiliser les droits root La commande SSH: sudo cp /var/packages/AdvancedPowerManagerDSM7/conf/privilege.root /var/packages/AdvancedPowerManagerDSM7/conf/privilege


-

Help needed - Expand Xpenology (DSM7) beyond x drives
smileyworld replied to smileyworld's topic in The Noob Lounge
I can finally report that I fixed it. What I did to resolve my issue tried to determine if it is a hardware/software failure connected 8 disks to 1 HBA (HBA2 was not installed at that time) and checked if every disk was listed (computer management in windows server 2016, another OS would probably work as well) unplugged HBA1 and connected HBA2 -> also checked if 8 disks were listed -> one disk was missing, so I checked all connectors and one was loose. flashed firmware of my second HBA. connected both HBAs, installed 22 disks and all were listed in WIN server 2016 unplugged my X540-T2 10Gbit NIC installed Xpenology as follows ran command by command ./rploader.sh clean ./rploader.sh update ./rploader.sh fullupgrade ./rploader.sh identifyusb ./rploader.sh serialgen DS3622xs+ vi user_config.json adapted my user_config.json to my environment { "extra_cmdline": { "pid": "0x1000", "vid": "0x090c", "sn": "xxxxxxxxxxxxx", "mac1": "xxxxxxxxxxxxx", "mac2": "xxxxxxxxxxxxx", "mac3": "xxxxxxxxxxxxx", "SataPortMap": "", "DiskIdxMap": "" }, "synoinfo": { "esataportcfg" : "0x00", "usbportcfg" : "0xc00000", "internalportcfg" : "0x3fffff", "maxdisks": "22", "support_bde_internal_10g": "no", "support_disk_compatibility": "no", "support_memory_compatibility": "no" }, "ramdisk_copy": {} ran these commands to finish the tcrp loader ./rploader.sh build broadwellnk-7.1.0-42661 ./rploader.sh backup ./rploader.sh backuploader exitcheck.sh reboot plugged my x540 in connected my LAN cable to one of the LAN ports booted from USB and installed the appropriate DSM_DS3622xs+_42661.pat Special thanks to @Peter Suh @IG-88 @flyride for your support.