jensmander
-
Posts
628 -
Joined
-
Last visited
-
Days Won
32
Everything posted by jensmander
-
Please open a new thread in the corresponding section of the forum 🙂
-
The serial generator is not my code nor did I write the program. So you’ll to use either the supplied serial in the synoboot.img or search the web for images of a 918+.
-
 Synology NAS systems are - along with QNAPs - currently the target of a wide brute-force attack. A botnet tries to break in via weak passwords and infects the system with ransomware. Once infected, it encrypts all files and data. This affects systems which are reachable over the internet (open firewall ports / NAT). To protect yourself you should - activate the DoS protection including account blocking - apply strong password rules to all users - create a new admin account with a strong password and disable the standard „admin“ account More informations: https://www.synology.com/en-global/company/news/article/2019JulyRansomware
 -
Maybe you selected the wrong setting for the update installation and it made an automatic update. But even if it installed the update your hdds should be recognized. Do they show up in your Bios? Are your Bios settings ok? Empty CR2032 batteries or initial default settings with stuff like IDE mode on older boards can prevent your loader from seeing your hdds. What you can try is another bootstick with 1.02b and the DS3615. Try if it detects your Nas and the hdds.
-
If you have a serial port (or usb to rs232 converter) and a cable you can establish a connection with putty. You’ll need a serial port on both systems (your PC/Laptop and your NAS). Connect each port with a null modem cable. Log in with your admin account and follow these steps: https://www.ask-sheldon.com/reset-authenticator-synology-diskstation/?cn-reloaded=1 Another solution would be to boot a live linux system on your NAS. Then you would first have to mount your drives and then follow the steps described in the link above.
-
Sounds like a non supported nic. As @Olegin said: you should post the details of your hardware setup.
-
Without physical access and/or unblock expiry there’s no way to disable the 2FA. You can try (as written above) a VPN connection but if there’s a general problem with the 2FA you’ll get banned again.
-
ASROCK J3455 DSM 6.2.X - External Access
jensmander replied to pawan's topic in Packages & DSM Features
Quickconnect only works with original serials & macs from real boxes which you should own. If you intend to access your Xpenology‘s shares with SMB/CIFS from outside your local network you should use a VPN solution which is available from the package center. -
Yep. Classic Raid always takes the smallest drive as „reference“ (what makes sense). If you have 1x1TB and 3x4TB it results in 2TB in case of raid 10. So if you want to expand you always have to backup your data, recreate a new raid and restore the data. It‘s not possible to expand it step by step with larger drives.
-
I always prefer „classic“ raid modes over shr. Shr is designed for the user with no to little knowledge and supports easy raid setups with drives of different size. And (imho) classic raids are more easy to recover and accessible with other *nix systems. Raid 10 is a combination of 2x stripes and has a theoretical redundancy of 2 faulty drives. If you have 4x2TB then the system will create two raid 0 and mirror these two raid 0. The result is (technical correct spoken) raid 1+0. That’s the reason why you will loose 50% of your total capacity. Due to it’s nature raid 1+0 is the fastest raid mode you can set up (read & write speeds) with redundancy. As written above in theory two drives can fail when using 4 drives. Raid 5 uses one drive for parity. That results in the biggest available volume size (beside raid 0 or jbod which provide no redundancy at all). Raid 6 uses two drives for parity and is slower and you‘ll lose more available capacity. There are other raid modes like 50, 60, 5E, 6E, etc. 50 & 60 are mixed modes of striping and parity. All these modes usually need special hardware raid controllers.
-
NAS in the role of Internet access control
jensmander replied to Alexandr's topic in The Noob Lounge
You mean that the NAS should act as a router/firewall/gateway? It’s possible but I wouldn’t recommend this. It’s very limited. I would implement a small open source solution like opnsense or pfsense as a central firewall and routing solution. DHCP for local clients including DNS is not a problem and runs good, especially when you use DSM as an Active Directory replacement. -
Every time a raid with parity (raid5, 6 or shr-x) is created, expanded or repaired, DSM will perform the parity check. It’s possible to skip this by rebooting the system, but not advisable. Other raid setups like mirroring (raid 1 or 10), stripes (raid 0) or jbod don‘t need this.
-
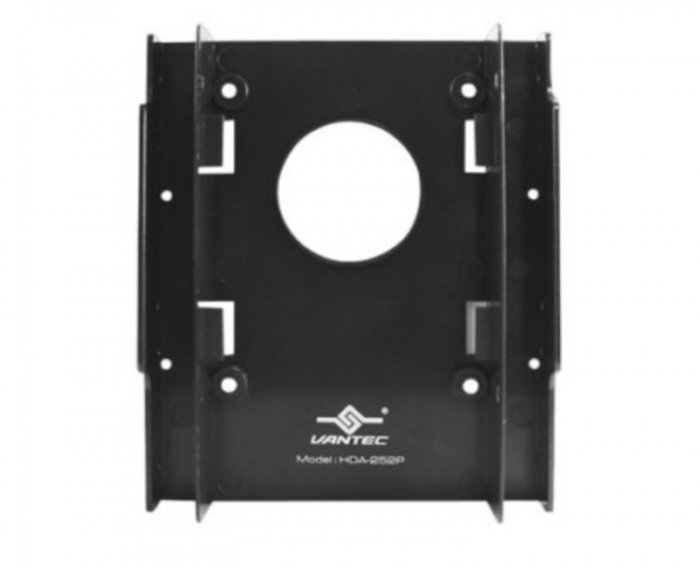
Hm... just a basic idea: you could use a dual ssd mounting cage. They usually have bore holes at the bottom. Then you can mount both SSDs in it and place it directly behind the perforated front plate. They would „sit“ in the air stream of the hdd cage fan. Something like in the sample picture.
-
xpenelogy wont start, blinking cursor on screen
jensmander replied to cksasquatch's question in Answered Questions
That’s happening to everyone of us 😂 Last week I cleaned one of my Xpenology boxes with compressed air. I forgot to reassemble the s-ata cables. Took me one hour to figure it out 🙈 -
In most cases this happens when you haven’t disabled the automatic installation of updates. If you have a s-ata port left you could try the following: - shut down your nas - unplug your current drives - if you have different drive sizes write down which drive is connected to each s-ata port - add a blank hdd to your free port - power up the nas and do a fresh install on the blank hdd, follow the initial setup and shut the nas down once it’s complete - reconnect your old drives and start the system again, you should see your raid/volumes now again Or you can add an additional NIC (Intel) which is supported by the 918+ loader.
-
Synology uses a blacklist (I guess). I had a XPE DS3615xs with a generated serial on DSM 6.1 which once showed me a window „Oops, invalid serial!“ when I logged in DSM. This occured after an update of the Video Station package. I reflashed a new stick with a new number and migrated the system. Everything went ok until I started the Video Station again. Next step was a clean install with the 1st stick and (guess what) after installing the Video station...
-
Can you test each SSD in a Windows PC? Then you could run a few load tests while monitoring the temperature. Other question: how are the SSDs installed? In a normal PC case with enough room or space between each drive? If they are mounted with little or no space between each drive it‘s possible that the amount of heat is too high when both drives are under heavy load. In this case it makes sense that the system doesn’t crash if only one drive is used or working. You should also check if new firmwares are available. Some older fw had faulty temperature readings.
-
I think he should have wrapped his words with <irony>...</irony> 🤔
-
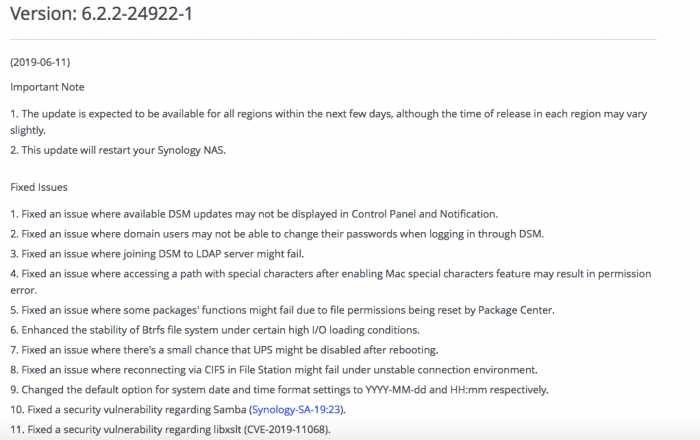
- Outcome of the update: SUCCESSFUL - DSM version prior update: DSM 6.2.2-24922-1 - Loader version and model: JUN'S LOADER v1.04b - DS918+ - Using custom extra.lzma: NO - Installation type: BAREMETAL - Z97, C232, C236, B370 - Additional comment: reboot required | NICs: Intel i340t2, Intel Gigabit CT, Intel X520-DA2
-
From the official Synology blog: https://blog.synology.com/synology-drive-leads-a-new-era-of-file-collaboration/ Synology Drive will replace the Cloud Station in DSM 7.0.
- 1 reply
-
- 1
-

-
- dsm 7
- cloud station
- (and 1 more)
-
😂 Maybe in 4k?
-
What do you mean? The simple exe which contains a collection freeware tools and download links? No, it’s not.
-
- Outcome of the update: SUCCESSFUL - DSM version prior update: DSM 6.2.2-24922 - Loader version and model: JUN'S LOADER v1.04b - DS918+ - Using custom extra.lzma: NO - Installation type: BAREMETAL - Z97, C232, C236, B370 - Additional comment: reboot required | NICs: Intel i340t2, Intel Gigabit CT, Intel X520-DA2
-
https://www.synology.com/en-global/releaseNote/DS3615xs
-
You mean an image of an original installed DSM partition of a 1511+? I think that you won’t have any luck in this forum. If you intend to make a clean installation of DSM in your 1511+ you could eject the hdds from your nas, attach them to your Pc and clean all partitions up. Reassemble your hdds to your Nas and start the installation from scratch.


