Leaderboard


Popular Content
Showing content with the highest reputation on 09/03/2021 in all areas
-
Here are bsp files for 7.0.1 for everyone who has problems with manual patching the vmlinux 7.0.1-42214.zip6 points
-
Update the toolchain builder to 0.6.0 # Inofficial redpill toolchain image builder - Creates a OCI Container (~= Docker) image based tool chain. - Takes care of downloading (and caching) the required sources to compile redpill.ko and the required os packages that the build process depends on. - Caches .pat downloads inside the container on the host. - Configuration is done in the JSON file `global_config.json`; custom <platform_version> entries can be added underneath the `building_configs` block. Make sure the id is unique per block! - Support a `user_config.json` per <platform_version> - Allows to bind a local redpill-load folder into the container (set `"docker.local_rp_load_use": "true"` and set `"docker.local_rp_load_path": "path/to/rp-load"`) ## Changes - removed `user_config.json.template`, as it was orphaned and people started to use it in an unintended way. - new parameters in `global_config.json`: -- `docker.local_rp_load_use`: wether to mount a local folder with redpill-load into the build container (true/false) -- `docker.local_rp_load_path`: path to the local copy of redpill-load to mount into the build container (absolute or relative path) -- `build_configs[].user_config_json`: allows to defina a user_config.json per <platform_version>. ## Usage 1. edit `<platform>_user_config.json` that matches your <platform_version> according https://github.com/RedPill-TTG/redpill-load and place it in the same folder as redpill_tool_chain.sh 2. Build the image for the platform and version you want: `./redpill_tool_chain.sh build <platform_version>` 3. Run the image for the platform and version you want: `./redpill_tool_chain.sh auto <platform_version>` You can always use `./redpill_tool_chain.sh run <platform_version>` to get a bash prompt, modify whatever you want and finaly execute `make -C /opt/build_all` to build the boot loader image. Note1: run `./redpill_tool_chain.sh` to get the list of supported ids for the <platform_version> parameter. Note2: if `docker.use_local_rp_load` is set to `true`, the auto action will not pull latest redpill-load sources. See README.md for examples redpill-tool-chain_x86_64_v0.6.zip2 points
-
No I have a h220 card in the g8 , it’s flashed to IT mode , it’s basically an LSI 9207-8i (which supports 8 drives) I connect this to the internal 4 drive bay (with the existing Sas cable, I.e moving the existing Sas to backplane cable from the onboard connector to the LSI card ) , and mounted 3 ssd inside with a Sas to 4 Sata cable on the other port on the LSi. .This now allows me to still add 4 drives on the existing onboard Sas port , and a drive on the odd sata port. (I.e potential for 13 drives) conscious I’m going off topic on this thread so feel free to pm me if you need any ideas.1 point
-
@loomes Thank you for sharing. I have get the patching working too after hours of testing.1 point
-
This is what is said before, as I mentioned into other posts, virtualisation has a lot less hassle. On my first XPEnology build I bought a MB with the I-219v ethernet chipset which was not supported...my bad. I had to throw that board away and buy a new one with 2 ethernets I-211 and I-219 to make it work... As I expressed my opinion in another post and ThorGroup also commented on that, recent AMD leaks suggest that soon we will have 96cores/192treads CPU. With such a CPU as @taiziccf expressed in his own way you can build a lot more stuff than just a DSM. That 96 cores CPU can run a university lab with virtual machines. Virtualisation has evolved a lot with Passing-through GPUs, ethernets, USB Controllers, Sata Controllers etc... The performance difference between baremetal and virtualisation is not really noticable. Now if you have a BareMetal that is fully compatible it's not a problem at all, but not everybody has compatible hardware... other users would like to run XPEnology on an AMD CPU with higher clock speeds, or the latest Intel CPUs that might not be supported by Synology. At the end virtualisation is a choice...but is the solution with less hassle in terms of compatibility for most users...1 point
-
I have manualy patched the vmlinux and made a loader for ds3615xs 7.0.1... it boots and i can install 7RC Version. Working so far. The Info Site in SystemControl is empty as in the beta 7 Version. Edit: 918+ is also working.1 point
-
Thanks @ThorGroup for RedPill, and @haydibe for simple way to create image for bootloader with Docker. A little instruction how to use last version toolchain in macOS Big Sur 11.5.2 : 1. Install Xcode, Xcode command line tools, and Docker on Mac. Run Docker. Download last version toolchain, moved to Desktop and unzip. 2. Install HomeBrew in Terminal /bin/bash -c "$(curl -fsSL https://raw.githubusercontent.com/Homebrew/install/HEAD/install.sh)" 3. Instal jq and coreutils in Terminal brew install jq brew install coreutils 4. cd ~/Desktop/redpill-tool-chain_x86_64_v0.6 sudo chmod 777 redpill_tool_chain.sh 5. In Finder rewrite config in bromolow_user_config.json or apollolake_user_config.json for your setup. 6. After choosing config use the commands for: build toolchain image ./redpill_tool_chain.sh build bromolow-6.2.4-25556 ./redpill_tool_chain.sh build bromolow-7.0-41222 ./redpill_tool_chain.sh build apollolake-6.2.4-25556 ./redpill_tool_chain.sh build apollolake-7.0-41890 create redpill bootloader image ./redpill_tool_chain.sh auto bromolow-6.2.4-25556 ./redpill_tool_chain.sh auto bromolow-7.0-41222 ./redpill_tool_chain.sh auto apollolake-6.2.4-25556 ./redpill_tool_chain.sh auto apollolake-7.0-41890
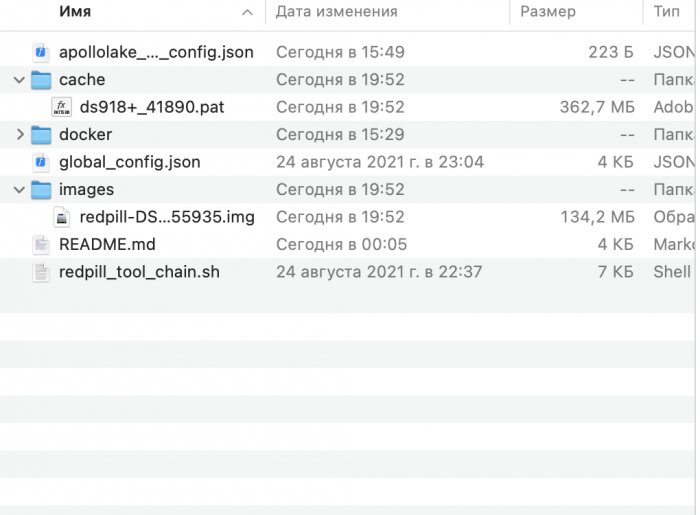 1 point
 -
Today I'm transfer my previews nas to new HW From Z87X-UD5H to X10SRA-F i7-4771 to E5-2630LV3 DDR3 RAM To DDR4 ECC REG And total build - X10SRA-F in Bios switch to Legacy boot - Xeon E5-2630LV3 - 32Gb DDR4 ECC REG - LSI 9201-i16 - Mellanox ConnectX3 C311A - All 8 USB3.0 ports is work You can use internal 10 SATA ports or disable it and working only External SAS\SATA like as LSI.1 point
-
Записываем загрузочную флешку. Редактируем grub.cfg программой OSFMount Начальная стадия установки DSM, это создание загрузочной флешки. После определения Хардового конфига (железо, его конфигурация) и дальнейших потребностей для себя от DSM, определяем версию DSM загрузчика под неё. На данный момент, имеется три версии загрузчика под разные эмуляции DSM , это : ds3615 , ds3617, ds918+ Под ds3615 , ds3617 - последний загрузчик v1.03 b Под ds918+ - последний загрузчик v1.04b Имеются и более ранние версии, всё зависит от вашей конфигурации и желаемого результата. Совместимость загрузчика и железа (возможно, список не полный): Все версии собраны здесь: https://mega.nz/#F!yQpw0YTI!DQqIzUCG2RbBtQ6YieScWg!7AoyySoS И так..... Определились с загрузчиком, начинаем его редактировать под себя и записываем на флешку. Нам необходимы, любая флешка от 128мб и установленные программы: OSFMount - небольшая бесплатная утилита, которая позволяет монтировать ранее сделанные образы дисков и представлять их в виде виртуальных приводов. Необходима для монтирования и последующей редакции образа загрузчика. https://www.osforensics.com/tools/mount-disk-images.html Notepad++ - свободный текстовый редактор с открытым исходным кодом для Windows. Необходима для редактирования grub.cfg https://notepad-plus-plus.org/ Rufus - это утилита, которая помогает форматировать и создавать загрузочные Flash. Необходима для записи загрузчика. https://rufus.ie/ Данные программы, кроме OSFMount, могут быть и другими, в зависимости от вашего предпочтения. Скачиваем необходимый вам загручик и открываем его в программе OSFMount, монтируем образ. Открываем ранее скачанный образ загрузчика Выбираем необходимый нам раздел. В нём находится нужный нам для редакции файл grub.cfg Обязательно снимаем галочку с опции: read only - только для чтения. Монтируем образ и открываем необходимый нам файл grub.cfg Редактируем в Notepad++ Редактируем значения: set vid=0x(Ваш vid - обязательно) set pid=0x(Ваш pid - обязательно) К вопросу о значении "0x" (мнения разнятся)..... Загрузчик имеет исходный формат (0xabcd). Значение 0x говорит что это шестнадцатеричный код. Если VID и PID вашей флешки состоит из цифр (1234), то без значения "0x" загрузчик работает , если имеются буквы (12АБ), то без значения "0x" может не сработать. Потому лучше прописывайте VID и PID как в исходнике: "0xВаши данные" set sn=Ваш серийник set mac1=Ваш mac1 set mac1=Ваш mac2,3,4 (если сетевая карта имеет больше одного порта) Значения set sn и set mac можно оставить по дефолту, если ван не нужны такие функции, как транскодинг, Push уведомления и QuickConnect. Так же, необязательно, но лучше отредактировать значение: set timeout='1' - изменить значение "1" на другое, скажем на 5 или больше. Это значение отвечает на время видимости начального загрузчика из трёх пунктов. Многие не успевают прочесть то, что там написано. Изменение этого значения даст возможность увеличить время отображения начальной страницы Отредактировав под себя grub.cfg , сохраняем его и размонтируем образ Теперь можно записать загрузчик на флешку Открываем , выбираем наш, уже правленый образ загрузчика и записываем на флешку Ну вот и всё, загрузочная флешка готова. Можно начинать установку DSM Из личного опыта........ Всегда сохраняйте свой, правленый образ загрузчика. Всякое может случиться и всегда полезно иметь уже готовый для записи образ. Лично я, всегда делаю ДВЕ флешки. Тоже, на непредвиденный случай. 😉1 point
-
- Outcome of the update: UNSUCCESSFUL - DSM version prior update: DSM 6.2.3_25426 - Loader version and model: JUN'S LOADER v1.03b - DS3615xs - Using custom extra.lzma: YES - Installation type: ML-350 G6, CPU-X5690, 36Gb-RAM, 2xLSI9211-IT with 12x2Tb in RAID6, 2x512Gb CACHE-SSD, DELL X520-2T 10Gbe - Additional comments: Downloaded and applied the update through DSM control panel. after reboot no network connection, no activity.0 points