Search the Community
Showing results for 'mtu issue login'.
-
I bought a mini nas with nearly same board, but same AMD cpu version, so tried to use xpeno, but get same result 2 month completely. Tried all of loaders, all of methods, set everyting in bios, disable vga, usc, pci slots, nothing counts, so i ask about that issue everywhere, finally got that method from Thailand. After that it works immediately. I'm happy, you can use yours, cheers. No, model doesn't affect, cpu power counts. Better cpu will sping faster operation system. That's all! :-))
-
Hello, I have this rig (see specs below) and now I received a warning message about filesystem error(s) on Volume1. Storage Manager tells me to run a file system check. However this fails every time (after ~1 minute) with this error message: The system could not complete the file system check on Volume 1 because errors occurred. You can check Log Center for more information and try again later. If this issue persists, please contact Synology Technical Support. The Log Center lists the following: - System ran [ext4 filesystem check & repairing] on [Volume 1]. Exit code: [4] I also get the following logs: - File system error was found on volume [1]. - [ext4 filesystem check & repairing] completed. System reactivated [Volume 1] and related services. Do you have any advice about how I could solve this problem. Currently, files on Volume1 seem to be available normally. PC specs: - Gigabyte GA-z87-hd3 (BIOS version: F8) - i7 4770s - 4x2GB DDR3 1333 - 9x 12TB Seagate Ironwolf (6x on MB, 3x on PCIe AIC) : Setup as RAID5 on 8 disks +1 hot spare - 5ports sATA3 PCIe3.0 x4 AIC - 550W PSU - DSM 7.1-42661 update 1 (Model "DS918+")
-

TinyCore RedPill Loader Build Support Tool ( M-Shell )
Tibag replied to Peter Suh's topic in Software Modding
Hi @Peter Suh I've been trying your build for the first time, using ESXI, with the latest version (v1.0.1.0.m-shell) and when building ds3622xsp_64570 (or later) I get: I couldn't find someone else with the same issue... any idea? -
Great work, i am using it for some time but i have an interesting issue. When rebooted, sometimes the vm gets stuck with 100% cpu usage and i need to restart it 1-2 times before it works. Any chance for a solution? Im using it with a nuc, on a proxmox vm for ds918+.
-
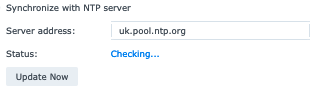
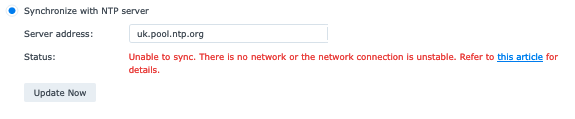
 I spend a good amount of tiime creating a Full explanitory post, only to have it claim it was spam, So here is a simple question. Has anyone running DS3615 DS 7.1.1 have a funtioning time server? I am trying to use my nas as a time source, and i keep getting TIME_ERROR: 0x41: Clock Unsynchronized when checking the ntpd service. It updated manually fine, it only seems to be the ntpd.service that has this issue.

-
Hello, I'm reaching out to seek your guidance on resolving an issue I'm currently facing. Any advice or suggestions you could provide would be immensely appreciated. Thank you in advance for your assistance.

-
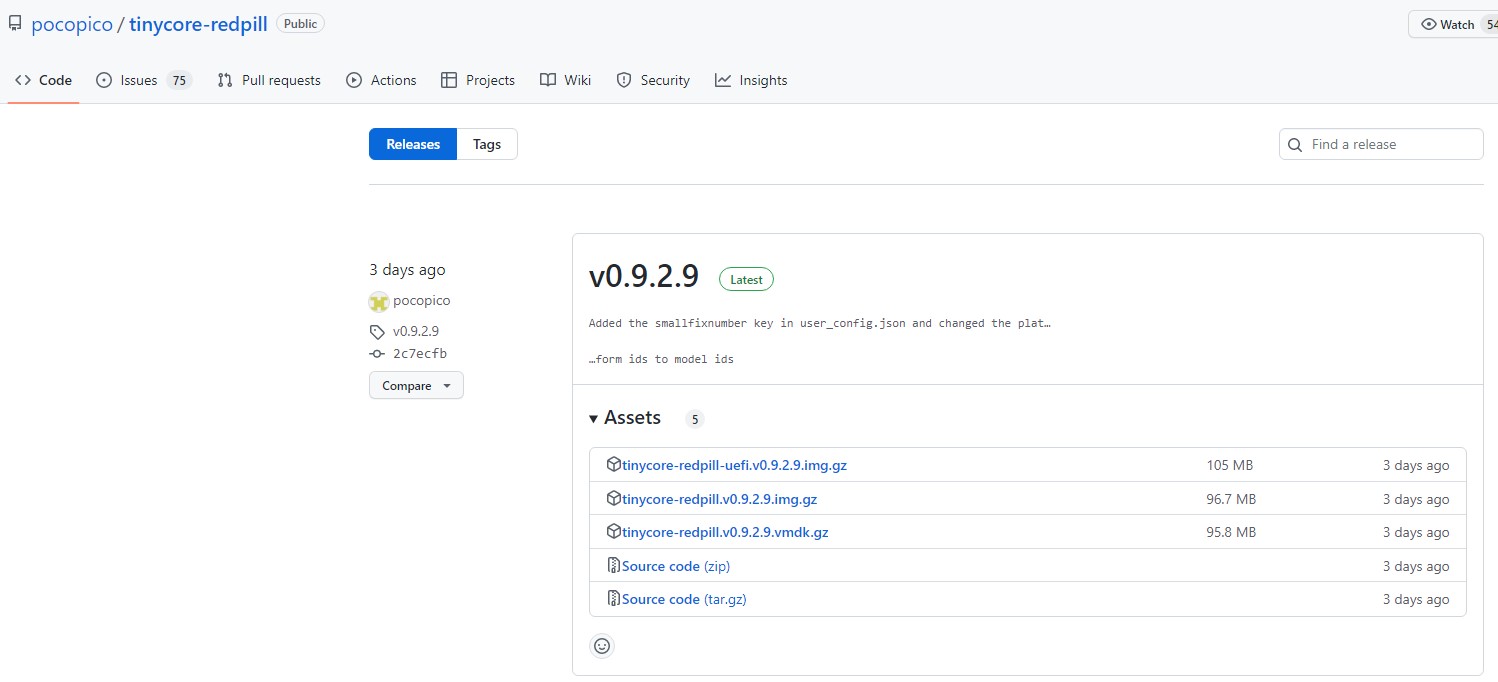
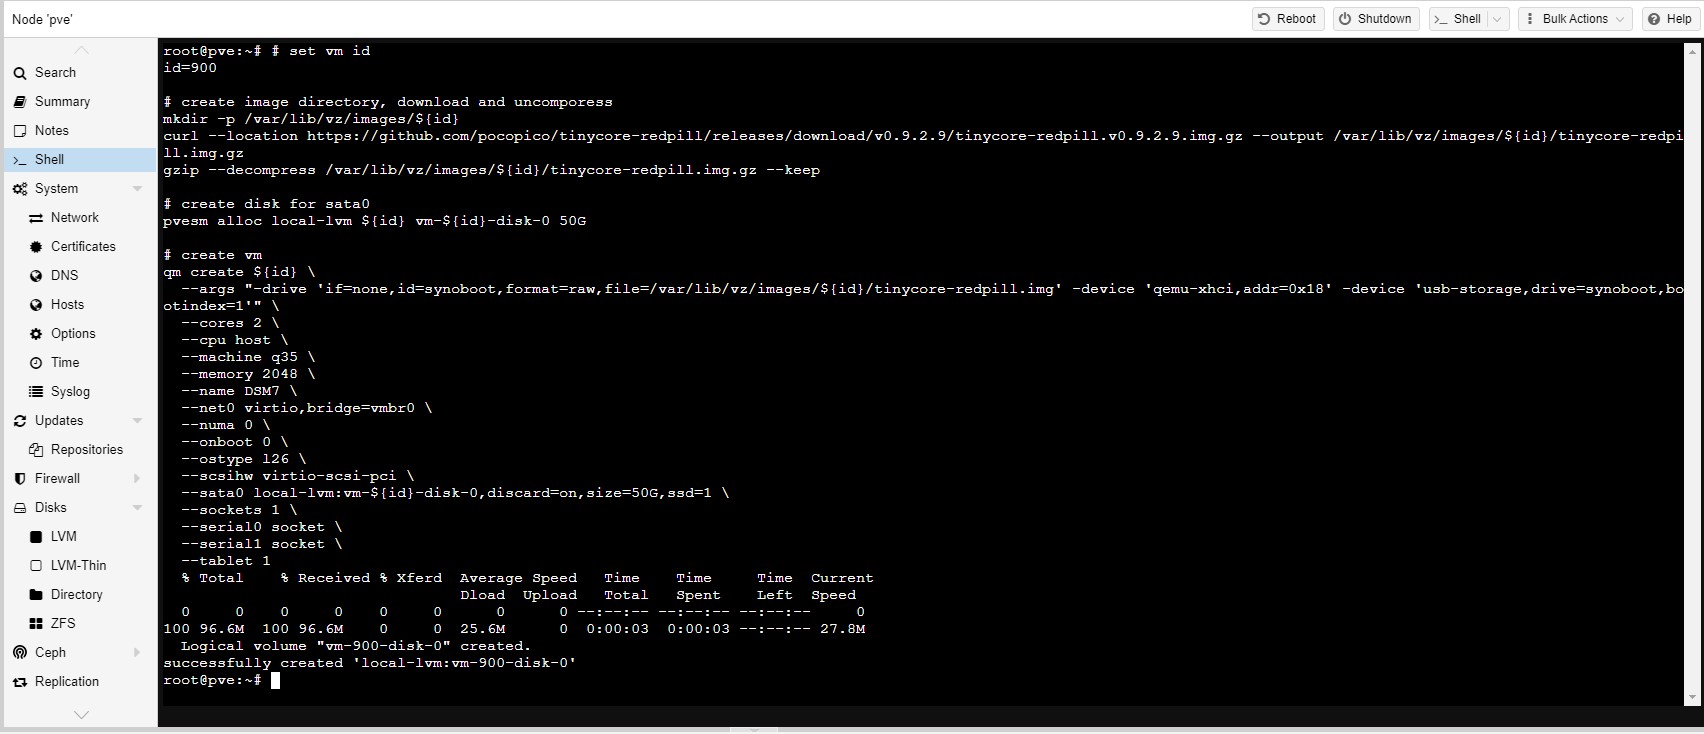
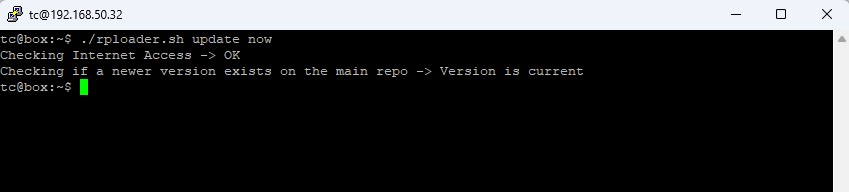
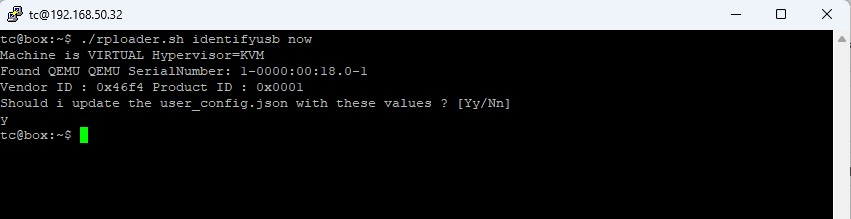
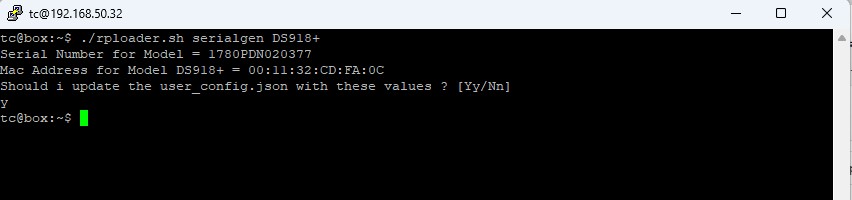
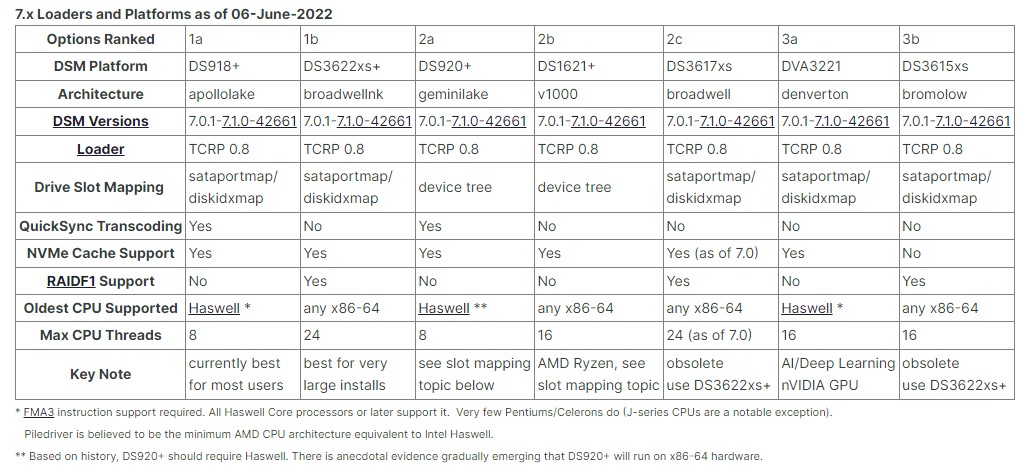
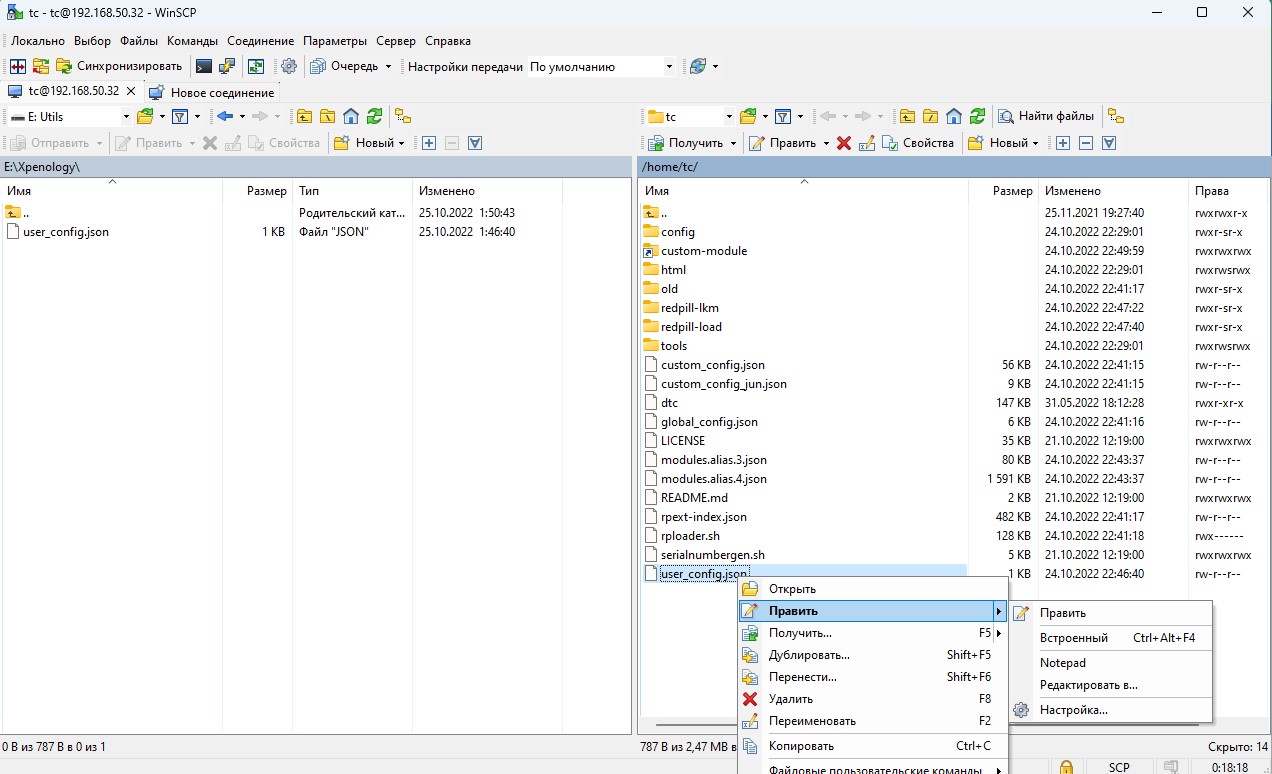
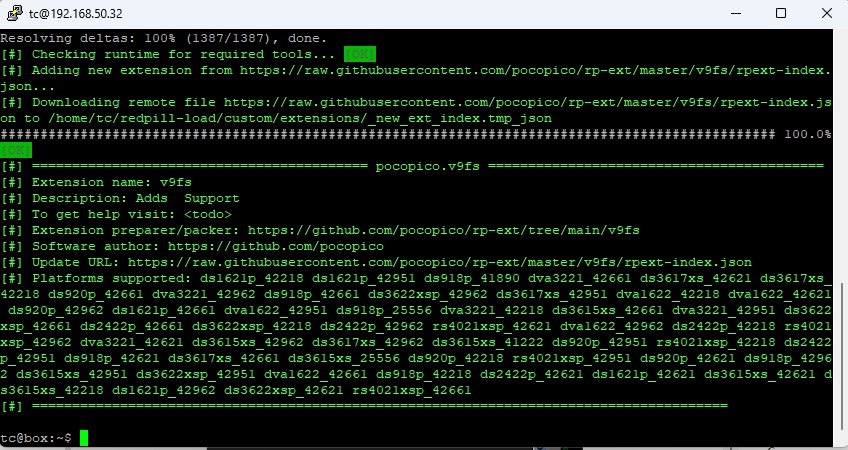
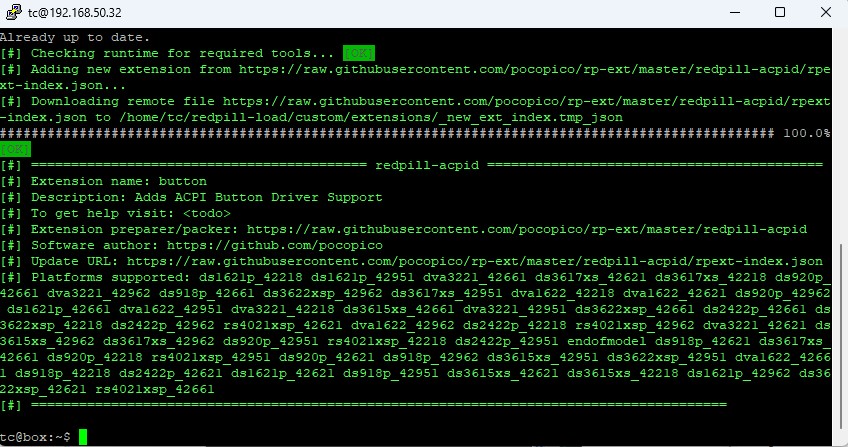
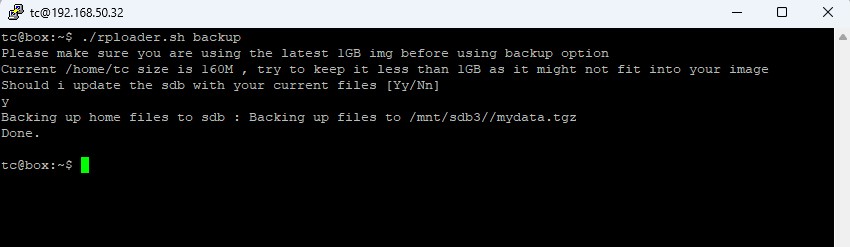
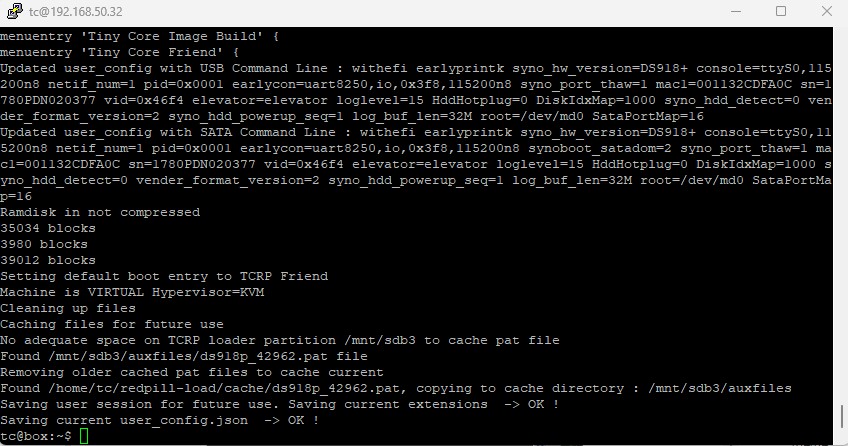
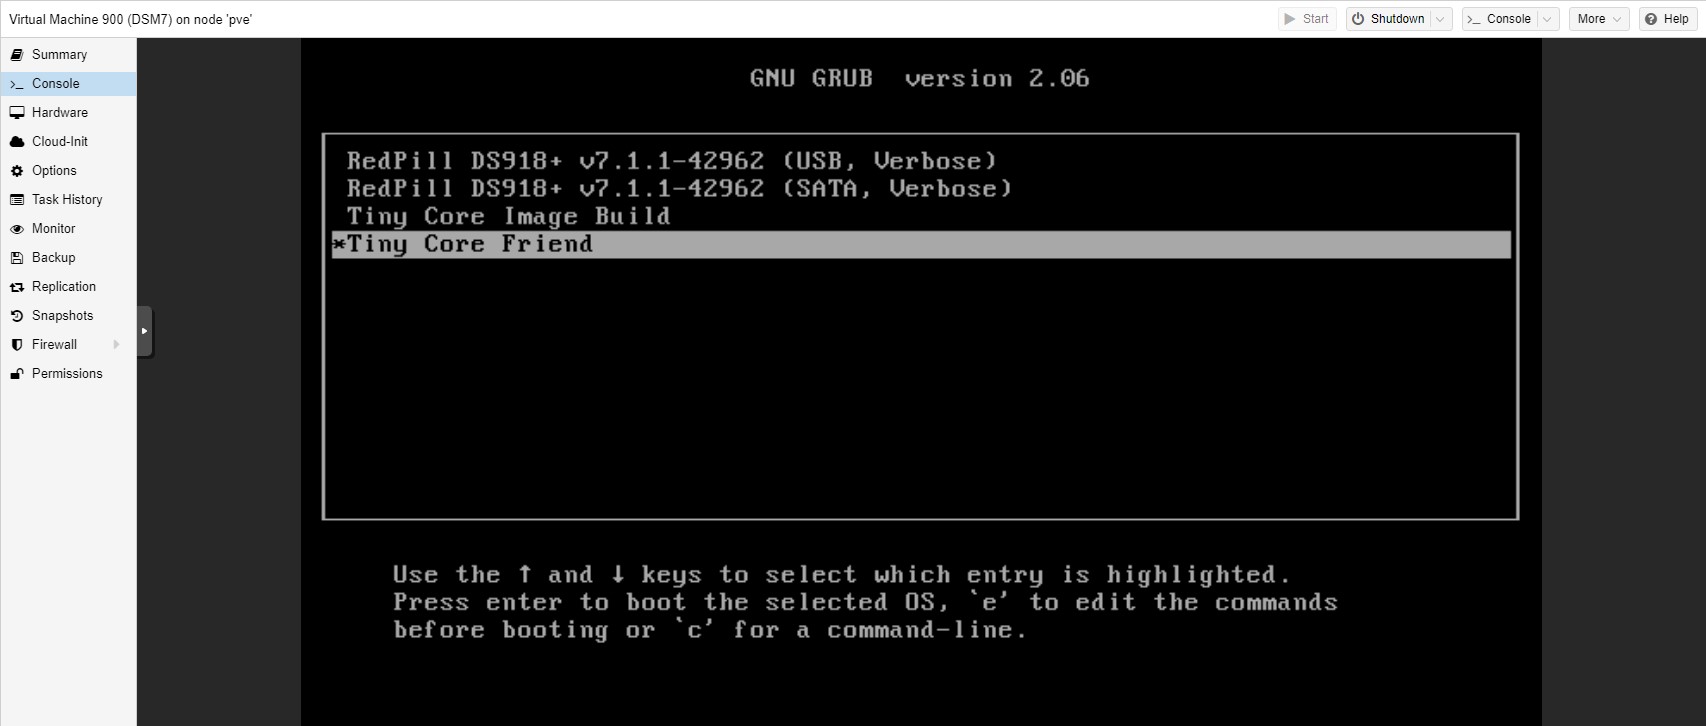
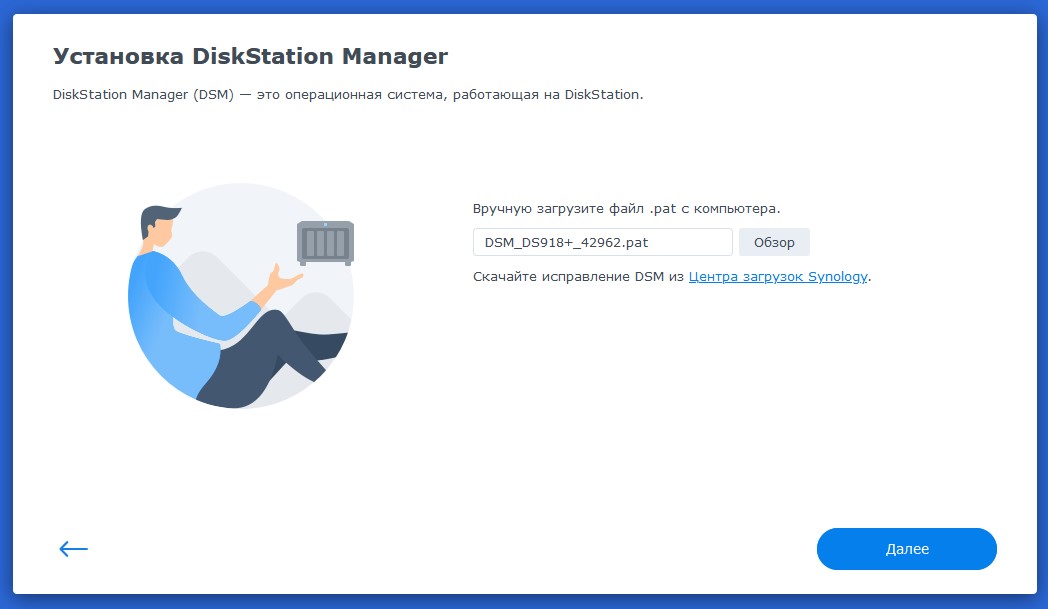
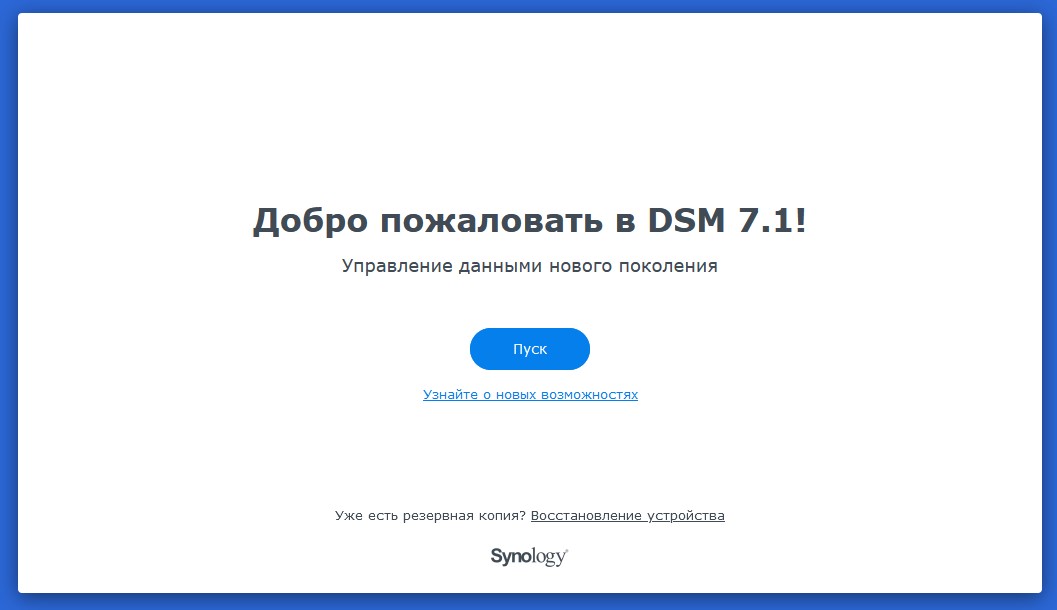
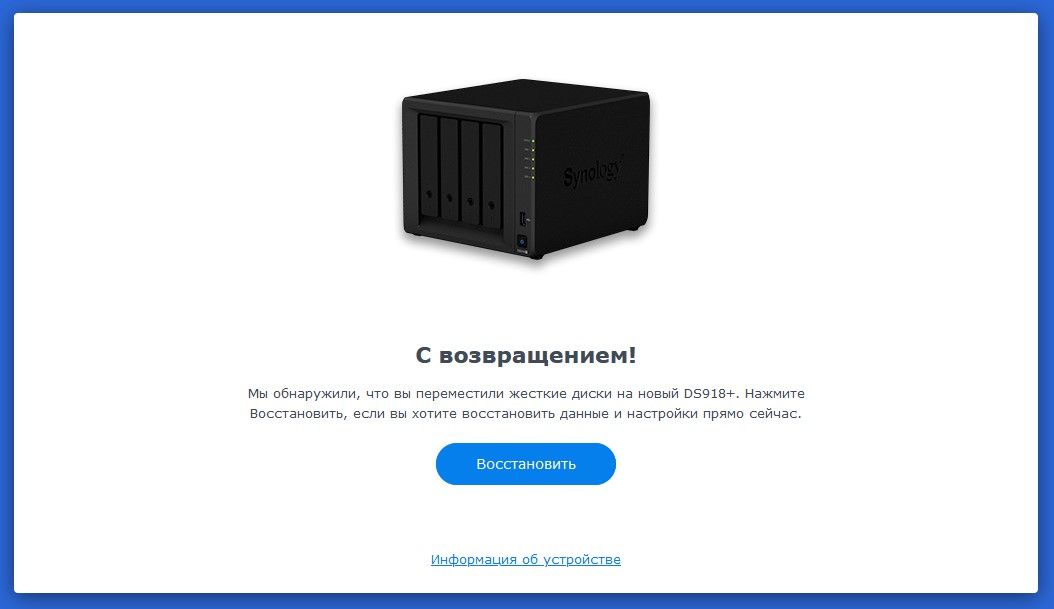
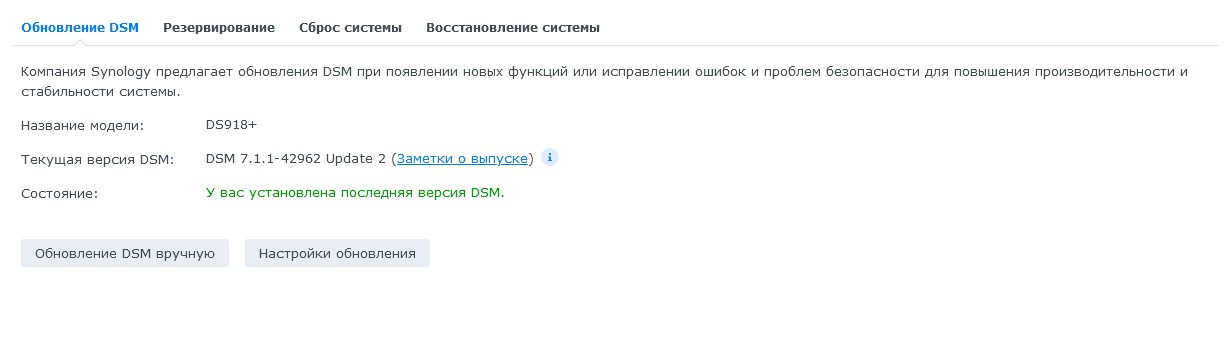
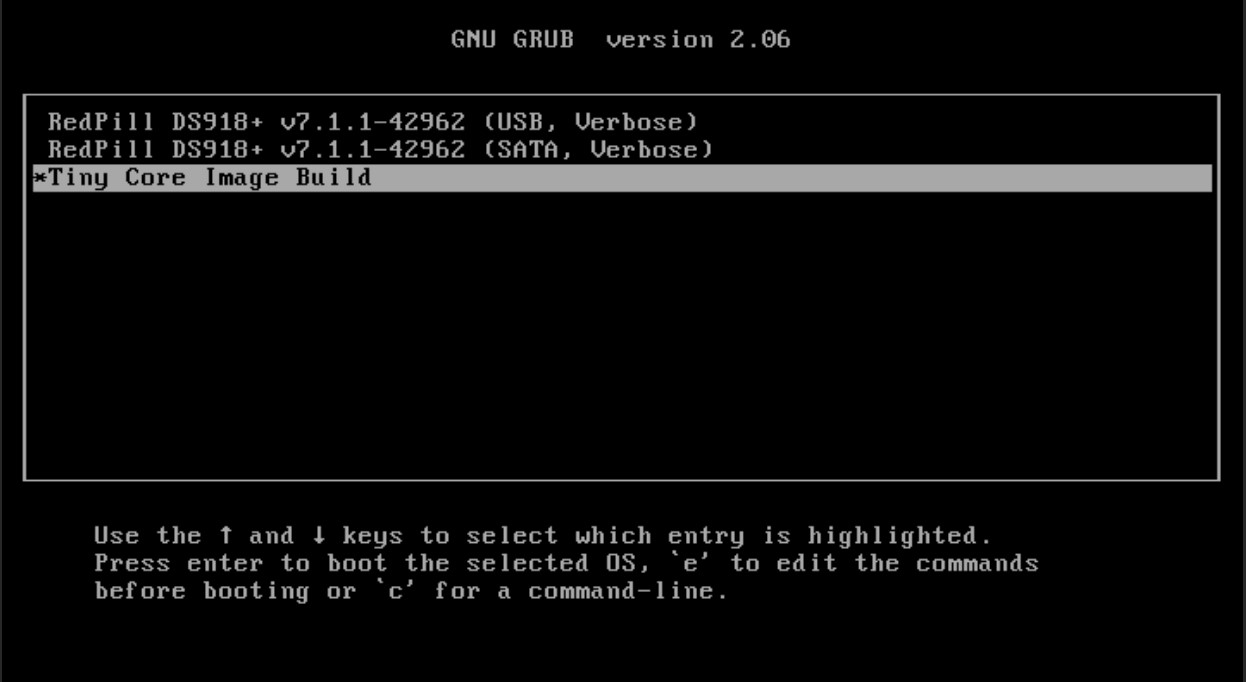
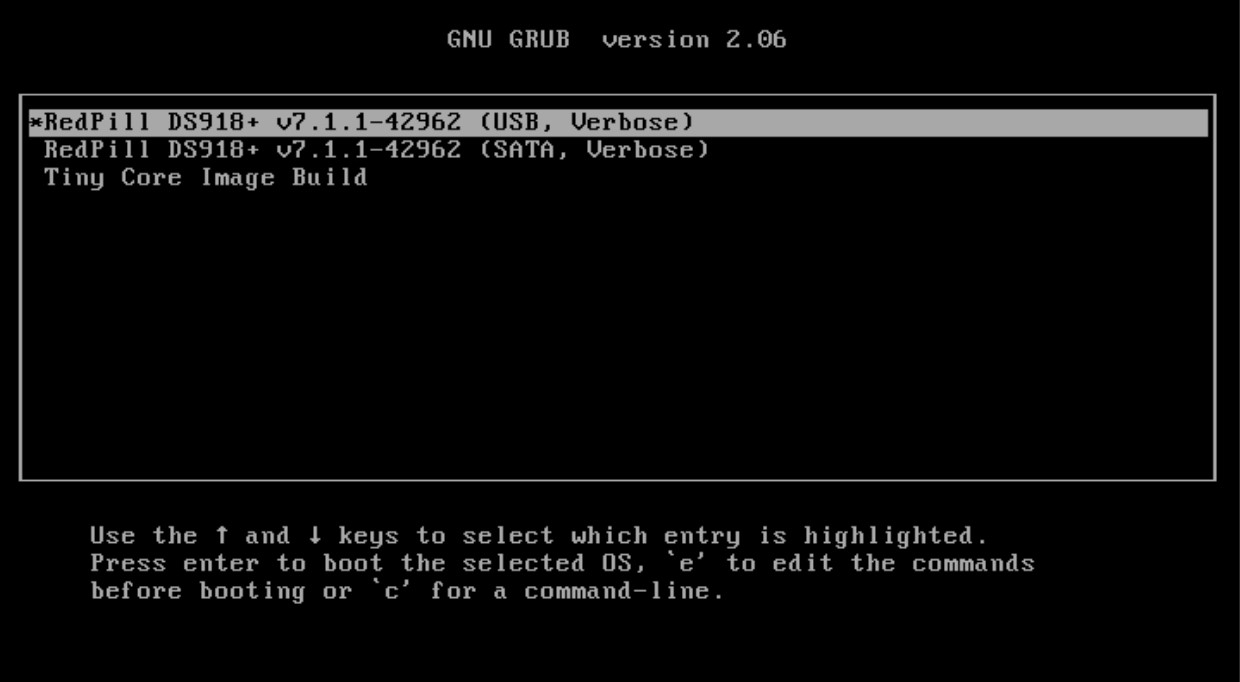
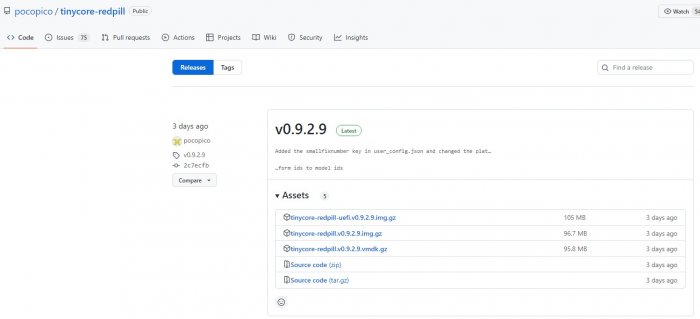
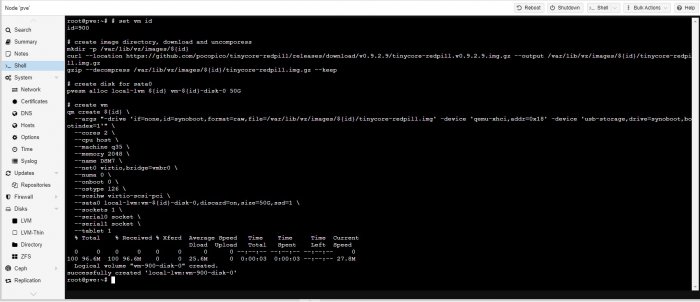
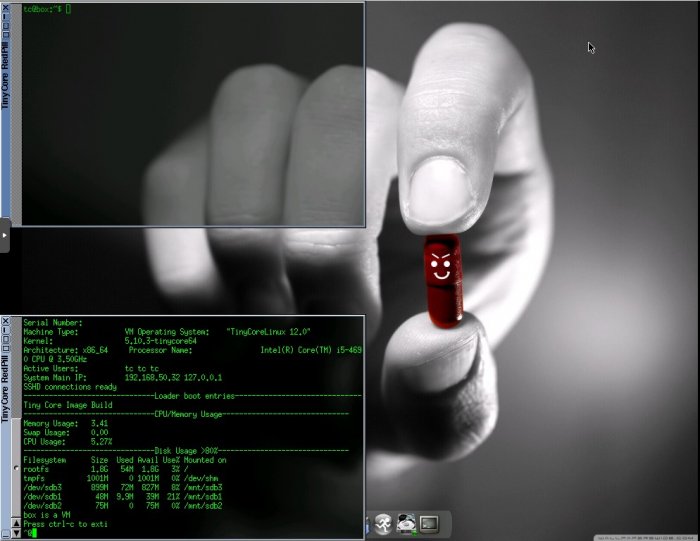
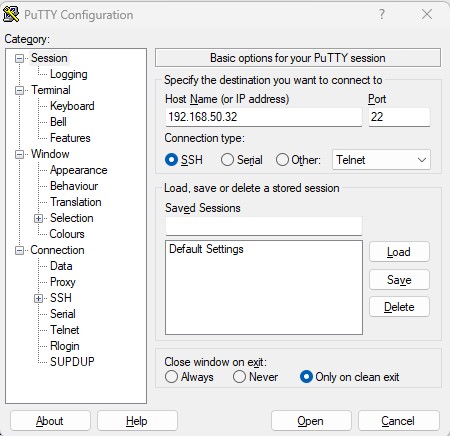
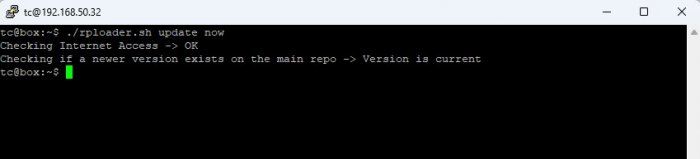
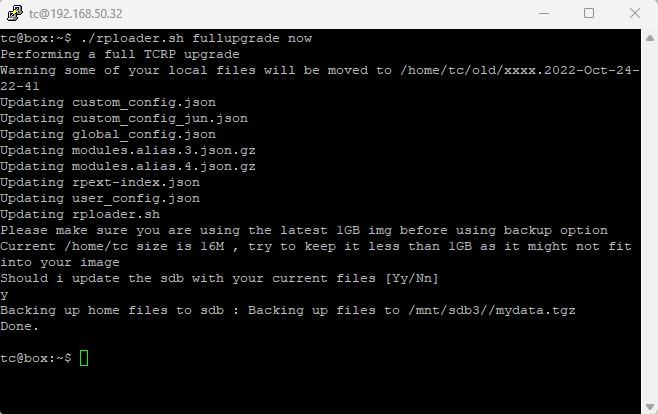
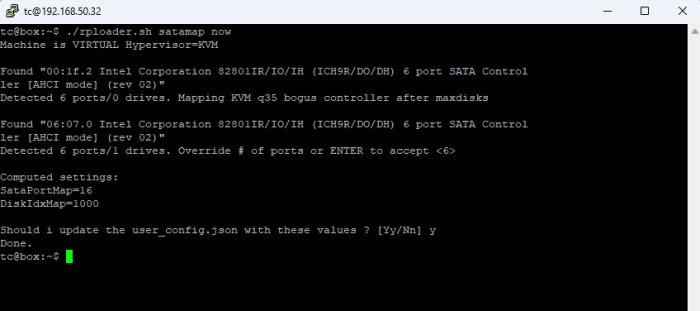
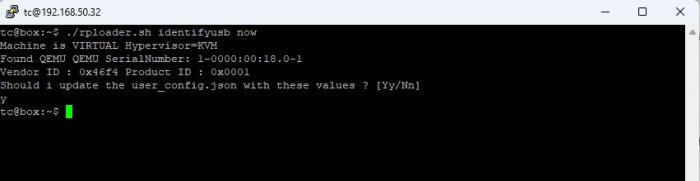
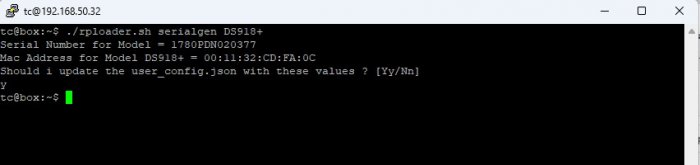
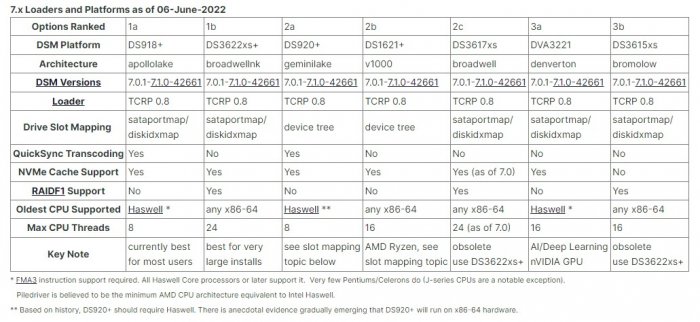
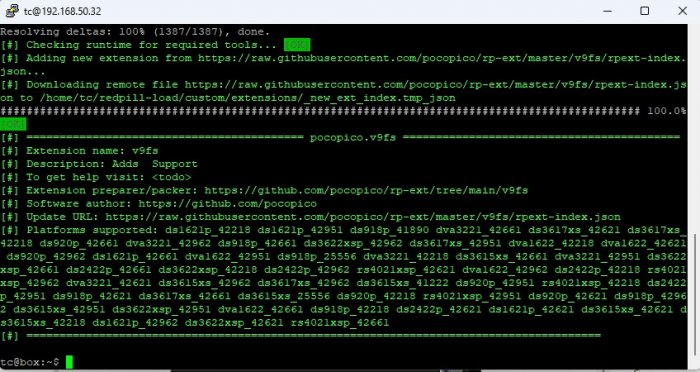
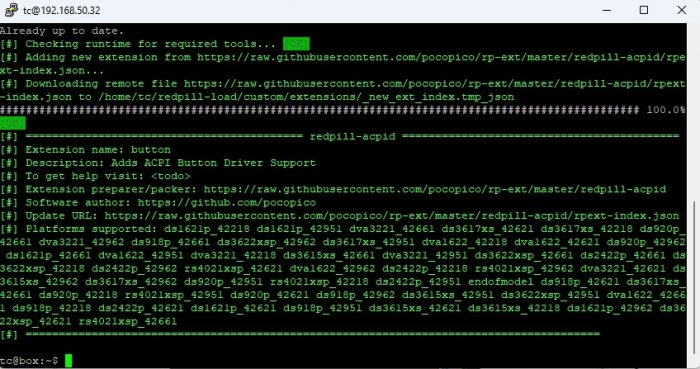
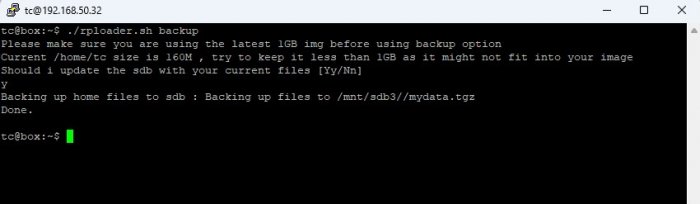
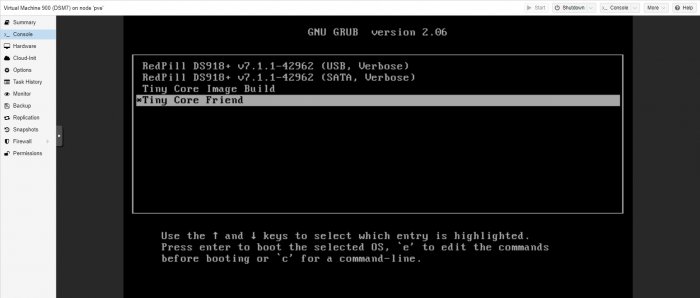
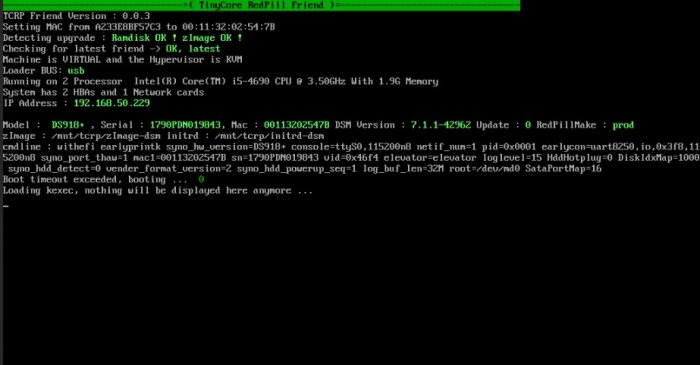
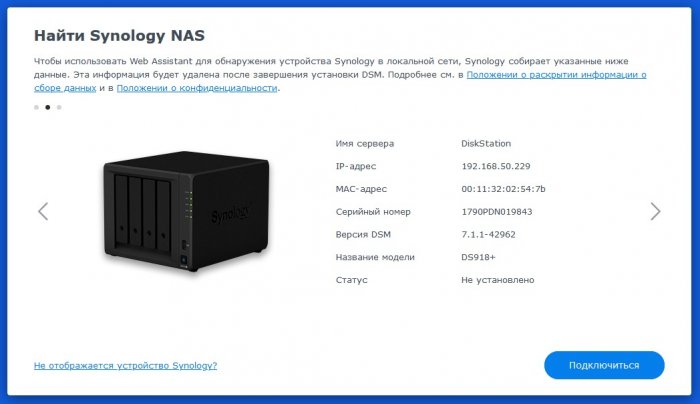
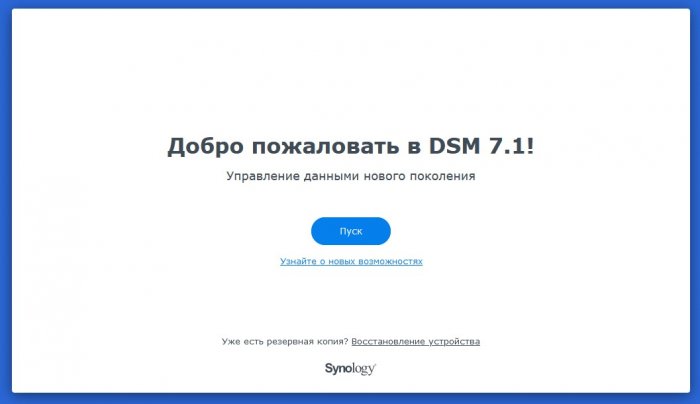
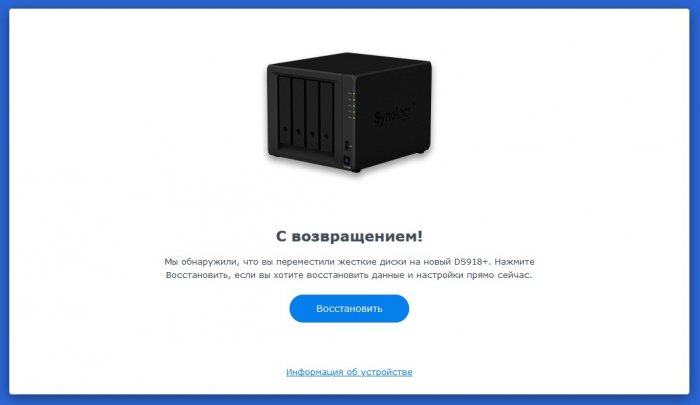
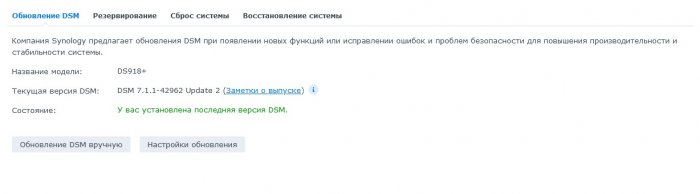
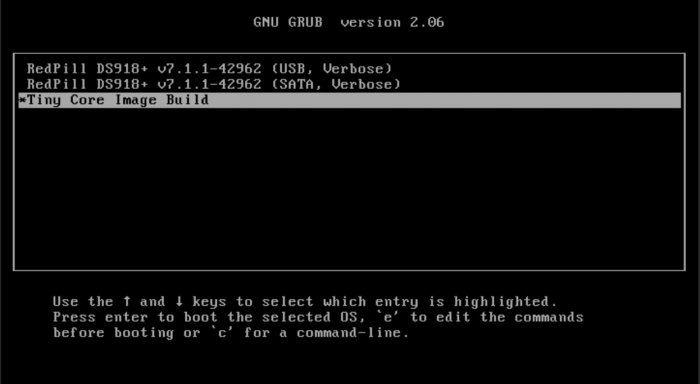
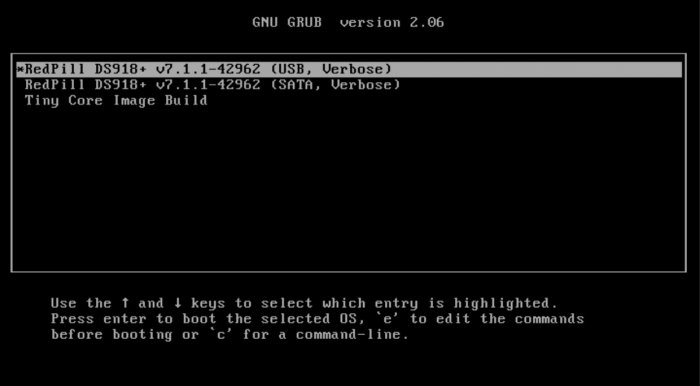
Загрузчик TinyCore RedPill Loader (TCRP Friend) В связи с выходом DSM 7.1.1, новой версии загрузчика Tinycore-redpill и Proxmox 7.2 решил немного исправить и дополнить инструкцию по установке. Для установки в полуавтоматическом режиме будем использовать Tinycore RedPill Loader от pocopico Создание виртуальной машины Для создания виртуальной машины я использовал шаблон скрипта от haydibe и использовал последний на данный момент stable имидж tinycore-redpill.v0.9.2.9 Под себя в скрипте можете исправить id для виртуальной машины, которую будете создавать и ресурсы, которые хотите выделить для NAS (cores, memory, name и в двух местах размер диска sata0). Диск делайте не меньше 25GB. Обязательно проверьте в GitHub какая версия имиджа актуальна на данный момент и исправьте это в скрипте. # set vm id id=900 # create image directory, download and uncomporess mkdir -p /var/lib/vz/images/${id} curl --location https://github.com/pocopico/tinycore-redpill/releases/download/v0.9.2.9/tinycore-redpill.v0.9.2.9.img.gz --output /var/lib/vz/images/${id}/tinycore-redpill.img.gz gzip --decompress /var/lib/vz/images/${id}/tinycore-redpill.img.gz --keep # create disk for sata0 pvesm alloc local-lvm ${id} vm-${id}-disk-0 50G # create vm qm create ${id} \ --args "-drive 'if=none,id=synoboot,format=raw,file=/var/lib/vz/images/${id}/tinycore-redpill.img' -device 'qemu-xhci,addr=0x18' -device 'usb-storage,drive=synoboot,bootindex=1'" \ --cores 2 \ --cpu host \ --machine q35 \ --memory 2048 \ --name DSM7 \ --net0 virtio,bridge=vmbr0 \ --numa 0 \ --onboot 0 \ --ostype l26 \ --scsihw virtio-scsi-pci \ --sata0 local-lvm:vm-${id}-disk-0,discard=on,size=50G,ssd=1 \ --sockets 1 \ --serial0 socket \ --serial1 socket \ --tablet 1 Обратите внимание, что в зависимости от платформы вашего сервера с proxmox может понадобиться в конфиге изменить --cpu host \ на --cpu kvm64 \ В Proxmox В консоли вставляем и запускаем созданный скрипт. После создания виртуальной машины запускаем ее и дожидаемся загрузки. Все дальнейшие действия можно делать в веб интерфейсе консоли виртуальной машины, но это будет не очень удобно и довольно криво. Я использовал Putty и WinSCP. В виртуальной машине смотрим IP У меня это 192.168.50.32 Putty Подключаемся к виртуальной машине Login: tc Password: P@ssw0rd Последовательно выполняем несколько команд ./rploader.sh update now ./rploader.sh fullupgrade now ./rploader.sh satamap now ./rploader.sh identifyusb now Определитесь какую платформу NAS будете использовать Более подробно можете ознакомиться с рекомендации по выбору из поста flyride Далее нужно сгенерировать серийный номер и mac под нужную платформу. Если вы используете свою связку реальных SN+MAC для работы QuickConnect, то пропускаем этот пункт. Например, для DS918+ указываем: ./rploader.sh serialgen DS918+ *DS918+/DS920+/ DS3622x+/DS3617xs/DS3615xs /DS1621+/DV3221 Переходим в WinSCP Подключаемся к виртуальной машине Нам нужно будет проверить и возможно отредактировать файл user_config.json Проверяем, что все пункты соответствуют тому, что были сгенерированы ранее. Иногда почему-то скрипт не с первого раза записывает полученные данные в файл. Если используете свою связку SN+MAC, то исправляем нужные пункты. "extra_cmdline": { "pid": "0x0001", "vid": "0x46f4", "sn": "1780PDN020377", "mac1": "001132CDFA0C", "netif_num": "1", "SataPortMap": "16", "DiskIdxMap": "1000" Возвращаемся в Putty Теперь надо добавить драйвера сетевой карты VirtIO или других сетевых карт, которые вы используете в Proxmox. В зависимости от выбранной вами платформы NAS и версии DSM выполняем команды: драйвер VirtIO ./rploader.sh ext ds918p-7.1.1-42962 add https://raw.githubusercontent.com/pocopico/rp-ext/master/v9fs/rpext-index.json драйвер Intel E1000 ./rploader.sh ext ds918p-7.1.1-42962 add https://raw.githubusercontent.com/pocopico/rp-ext/master/e1000/rpext-index.json драйвер Realtek RTL8139 ./rploader.sh ext ds918p-7.1.1-42962 add https://raw.githubusercontent.com/pocopico/rp-ext/master/8139too/rpext-index.json Так же иногда требуется добавить драйвер ACPI ./rploader.sh ext ds918p-7.1.1-42962 add https://raw.githubusercontent.com/pocopico/rp-ext/master/redpill-acpid/rpext-index.json *можно добавить все драйвера по очереди. **драйвера для других устройств можно найти тут Делаем бекап. ./rploader.sh backup В зависимости от выбранной ранее платформы выполняем сборку загрузчика: для DS918+ ./rploader.sh build ds918p-7.1.1-42962 withfriend для DS3622xs+ ./rploader.sh build ds3622xsp-7.1.1-42962 withfriend для DS920+ ./ rploader.sh build ds920p-7.1.1-42962 withfriend для DS1621+ ./rploader.sh build ds1621p-7.1.1-42962 withfriend для DS3617xs ./rploader.sh build ds3617xs-7.1.1-42962 withfriend для DS3615xs ./rploader.sh build ds3615xs-7.1.1-42962 withfriend для DVA3221 ./rploader.sh build dva3221-7.1.1-42962 withfriend Перегружаем виртуальную машину sudo reboot -f Загрузка Обратите внимание, что сейчас при загрузке виртуальной машины надо выбирать загрузку с Tiny Core Friend или RedPill DS918+ 7.1.1-42962 (USB, Verbose) Tiny Core Friend автоматически обрабатывает обновления DSM. Если вы будете выполнять обновление из графического интерфейса DSM, обновление будет обнаружено и автоматически исправлено TCRP Friend. Поэтому рекомендуется использовать TCRP Friend. Экран нового загрузчика отличается от стандартной версии большей информативностью. Ждем пару минут и в браузере открываем http://find.synology.com, используем Synology Assistant или сразу заходим по IP показанный на экране загрузки. Скачиваем с сайта Synology образ DSM_DS918+_42962.pat или другой под нужную вам платформу. Указываем загруженный файл для продолжения установки. После полной установки новый NAS перезагрузиться и порадует окном приветствия. Обновление DSM (если нет Tiny Core Friend) При обновлении NAS (например, на 7.1.1-42962 Update 2) может перестать нормально загружаться и начнет предлагать восстановиться Чтобы это исправить необходимо загрузиться в Tiny Core Image Build В Putty последовательно выполняем несколько команд и на все соглашаемся. ./rploader.sh clean new ./rploader.sh update new ./rploader.sh fullupgrade new ./rploader.sh postupdate ds918p-7.1.1-42962 Делаем очередной backup и перегружаемся. ./rploader.sh backup now sudo reboot -f Выбираем опять загрузку с USB NAS обновился и опять нормально загружается


-
Hmmmmm, Solved issue Debian share I have is /mnt/share_name/ DSM have /volume1/share_name/ Go Figure....
-
I am having the exact same issue - Using https://github.com/AuxXxilium/arc loader - DVA1622 within a VM in URNAID Did you find a solution? Reading on forums seems that DSM 7.x has always had issues with push notification...
-
 I had couple of troubles with my installition with a good google search, I have found out couple of fixes. I have combined them into one script. This will be easier for many beginners. I am not really good Bash script writer but this is just fine. I have tried couple of times. Tried on DSM 6.2.3 with Juns 1.04 Loader on a Vm. Use it with caution. https://github.com/Jlozde/Xpenology-6.2.3-EasyFix Usage: wget https://raw.githubusercontent.com/Jlozde/xpenology-6.2.3-easyfix/master/patch.sh chmod +x patch.sh ./patch.sh reboot & reindex Thanks to;
 -
 I have a fully functional DS412+. I want to try DSM 7.2 on it. Here's what I did: 1) Removed the DOM from the motherboard 2) Use Rufus to write the Arc loader to a USB stick (PID=F400, VID=F400) 3) Insert the USB stick into the front USB port of the DS412+ 4) Power on the unit 5) Access the Arc loader web console (port 7681) to configure the loader. Chose DS918+ as the model. Build the loader. 6) From Arc loader, choose "Boot the loader". 7) It boots into DSM. I can access the web for DSM installation. But it says "No drives detected on DS918+". I think it's the SATA mapping issue in the loader because those drives work fine in native DSM 6.2. How shall I troubleshoot? Thank you! I also read from this thread that the DSM image can be mod to spoof another model (e.g. spoof a 412+ into a 713+). How is that option compared to the loader option? Thank you!
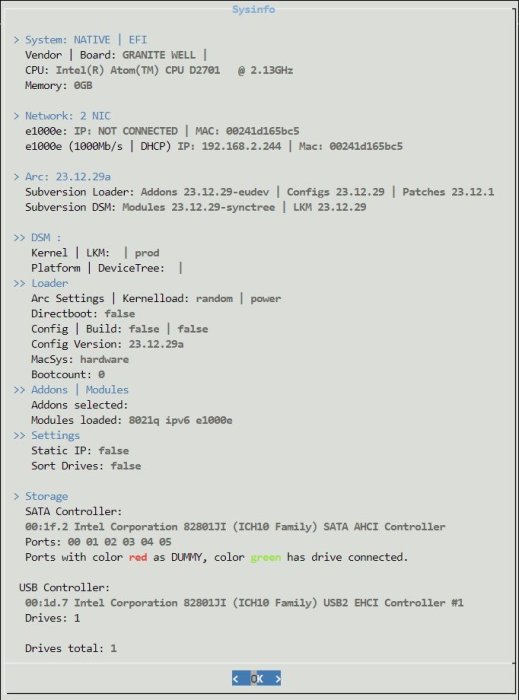
-

TinyCore RedPill Loader Build Support Tool ( M-Shell )
Biocef replied to Peter Suh's topic in Software Modding
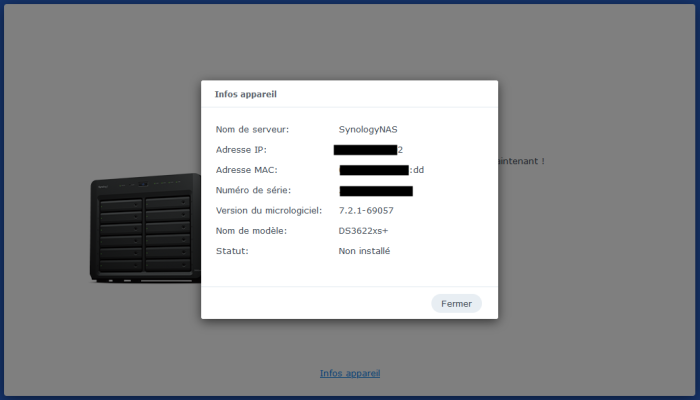
Hi, I still have the mac address issue 😕 I tried to rebuild the loader, I also made a new usb key with the latest release but DSM still use the real mac. Is there anything else to do? Thanks for your help !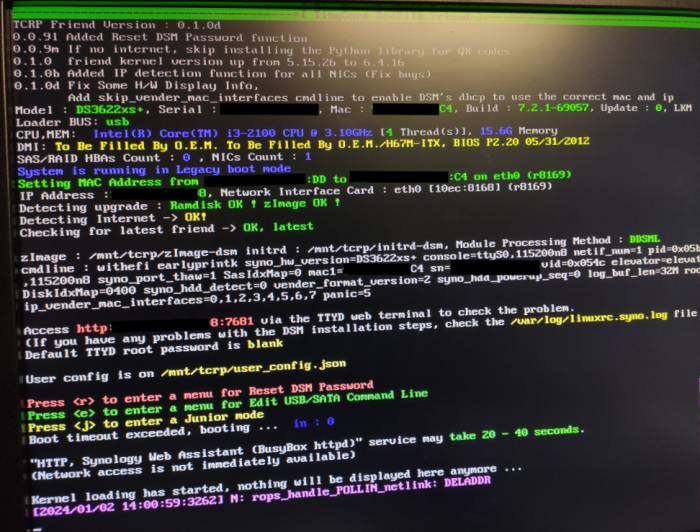
-

TinyCore RedPill Loader Build Support Tool ( M-Shell )
Peter Suh replied to Peter Suh's topic in Software Modding
Nothing has been confirmed yet. Unfortunately, TCRP-mshell may have been connected when the SAN MANAGER issue occurred. Maybe the Synology community needs to find out more? -

TinyCore RedPill Loader Build Support Tool ( M-Shell )
Orphée replied to Peter Suh's topic in Software Modding
I don't know... Did TRCP broke something RR is not able to recover ? I don't recall having this issue until I switched from RR to TCRP M-shell. Edit : is it expected to still have : Setting MAC address from [Real MAC Address set in proxmox] to [Same MAC address] on eth0 (virtio_net) ? -

Advanced Media Extension will not activate dsm7.1-42661
pitiriguisvi replied to phone guy's topic in Synology Packages
good morning, did you manage to resolve this? i have exactly the same issue. Im unable to login to synology account INSIDE dsm. For example control panel > synology account. Or: Package center > Advanced Media Extensions > Open > Login with synology account. When i click, nothing happens. Im on ARC 23.10.5 -
TinyCore RedPill Loader Build Support Tool ( M-Shell )
Orphée replied to Peter Suh's topic in Software Modding
FYI I just switched to RR 23.12.10 from Syno Community, and SAN manager is still broken. Looking further, pkg-iscsi fails to start : Jan 01 13:44:10 xxxxxx systemd[1]: Starting iSCSI Service... Jan 01 13:44:10 xxxxxx synocheckiscsitrg[5791]: iSCSI:iscsi_repair.cpp:80:SYNOiSCSIRepair Total 0 issue(s) are detected. Jan 01 13:44:10 xxxxxx S78iscsitrg.sh[5759]: :: Running lunbackup garbage collection ... [ OK ] Jan 01 13:44:10 xxxxxx synoiscsiep[5800]: iSCSI:iscsi_lun_service_start_all.cpp:105:SYNOiSCSILunServiceStartAllWithoutLock mkdir(/config/target/core/iblock_0, 448), err=No such file or directory Jan 01 13:44:10 xxxxxx synoiscsiep[5800]: iSCSI:iscsi_start_all.cpp:22:SYNOiSCSIStartAllWithoutLock SYNOiSCSILunServiceStartAllWithoutLock(), err=Failed to create directory Jan 01 13:44:10 xxxxxx synoiscsiep[5800]: iSCSI:iscsi_start_all.cpp:115:SYNOiSCSIStartAll SYNOiSCSIStartAllWithoutLock(), err=Failed to create directory Jan 01 13:44:11 xxxxxx synoiscsiep[5805]: iSCSI:iscsi_lun_service_start_all.cpp:105:SYNOiSCSILunServiceStartAllWithoutLock mkdir(/config/target/core/iblock_0, 448), err=No such file or directory Jan 01 13:44:11 xxxxxx synoiscsiep[5805]: iSCSI:vhost_scsi_start_all.cpp:13:SYNOiSCSIVhostStartAllWithoutLock SYNOiSCSILunServiceStartAllWithoutLock(), err=Failed to create directory Jan 01 13:44:11 xxxxxx synoiscsiep[5805]: iSCSI:vhost_scsi_start_all.cpp:39:SYNOiSCSIVhostStartAll SYNOiSCSIVhostStartAllWithoutLock(), err=Failed to start service Jan 01 13:44:11 xxxxxx synoiscsiep[5810]: iSCSI:iscsi_lun_service_start_all.cpp:105:SYNOiSCSILunServiceStartAllWithoutLock mkdir(/config/target/core/iblock_0, 448), err=No such file or directory Jan 01 13:44:11 xxxxxx synoiscsiep[5810]: iSCSI:iscsi_lun_service_start_all.cpp:145:SYNOiSCSILunServiceStartAll SYNOiSCSILunServiceStartAllWithoutLock(), err=Failed to create directory Jan 01 13:44:11 xxxxxx synoiscsiep[5819]: iSCSI:iscsi_lun_service_start_all.cpp:105:SYNOiSCSILunServiceStartAllWithoutLock mkdir(/config/target/core/iblock_0, 448), err=No such file or directory Jan 01 13:44:11 xxxxxx synoiscsiep[5819]: iSCSI:iscsi_loopback_start_all.cpp:29:SYNOiSCSILoopbackStartAll SYNOiSCSILunServiceStartAllWithoutLock(), err=Failed to create directory Jan 01 13:44:11 xxxxxx synoiscsiep[5822]: iSCSI:iscsi_lun_service_start_all.cpp:105:SYNOiSCSILunServiceStartAllWithoutLock mkdir(/config/target/core/iblock_0, 448), err=No such file or directory Jan 01 13:44:11 xxxxxx synoiscsiep[5822]: iSCSI:fc_start_all.cpp:53:SYNOFCStartAll SYNOiSCSILunServiceStartAllWithoutLock(), err=Failed to create directory Jan 01 13:44:11 xxxxxx systemd[1]: pkg-iscsi.service: main process exited, code=exited, status=221/CONFIRM Jan 01 13:44:11 xxxxxx systemd[1]: Failed to start iSCSI Service. Jan 01 13:44:11 xxxxxx systemd[1]: Unit pkg-iscsi.service entered failed state. Jan 01 13:44:11 xxxxxx systemd[1]: pkg-iscsi.service failed. Jan 01 13:44:12 xxxxxx systemd[1]: Stopped iSCSI Service. Jan 01 13:45:15 xxxxxx systemd[1]: Starting iSCSI Service... Jan 01 13:45:15 xxxxxx synocheckiscsitrg[12044]: iSCSI:iscsi_repair.cpp:80:SYNOiSCSIRepair Total 0 issue(s) are detected. Jan 01 13:45:15 xxxxxx S78iscsitrg.sh[12016]: :: Running lunbackup garbage collection ... [ OK ] Jan 01 13:45:15 xxxxxx synoiscsiep[12049]: iSCSI:iscsi_lun_service_start_all.cpp:105:SYNOiSCSILunServiceStartAllWithoutLock mkdir(/config/target/core/iblock_0, 448), err=No such file or directory Jan 01 13:45:15 xxxxxx synoiscsiep[12049]: iSCSI:iscsi_start_all.cpp:22:SYNOiSCSIStartAllWithoutLock SYNOiSCSILunServiceStartAllWithoutLock(), err=Failed to create directory Jan 01 13:45:15 xxxxxx synoiscsiep[12049]: iSCSI:iscsi_start_all.cpp:115:SYNOiSCSIStartAll SYNOiSCSIStartAllWithoutLock(), err=Failed to create directory Jan 01 13:45:15 xxxxxx synoiscsiep[12053]: iSCSI:iscsi_lun_service_start_all.cpp:105:SYNOiSCSILunServiceStartAllWithoutLock mkdir(/config/target/core/iblock_0, 448), err=No such file or directory Jan 01 13:45:15 xxxxxx synoiscsiep[12053]: iSCSI:vhost_scsi_start_all.cpp:13:SYNOiSCSIVhostStartAllWithoutLock SYNOiSCSILunServiceStartAllWithoutLock(), err=Failed to create directory Jan 01 13:45:15 xxxxxx synoiscsiep[12053]: iSCSI:vhost_scsi_start_all.cpp:39:SYNOiSCSIVhostStartAll SYNOiSCSIVhostStartAllWithoutLock(), err=Failed to start service Jan 01 13:45:15 xxxxxx synoiscsiep[12060]: iSCSI:iscsi_lun_service_start_all.cpp:105:SYNOiSCSILunServiceStartAllWithoutLock mkdir(/config/target/core/iblock_0, 448), err=No such file or directory Jan 01 13:45:15 xxxxxx synoiscsiep[12060]: iSCSI:iscsi_lun_service_start_all.cpp:145:SYNOiSCSILunServiceStartAll SYNOiSCSILunServiceStartAllWithoutLock(), err=Failed to create directory Jan 01 13:45:15 xxxxxx synoiscsiep[12065]: iSCSI:iscsi_lun_service_start_all.cpp:105:SYNOiSCSILunServiceStartAllWithoutLock mkdir(/config/target/core/iblock_0, 448), err=No such file or directory Jan 01 13:45:15 xxxxxx synoiscsiep[12065]: iSCSI:iscsi_loopback_start_all.cpp:29:SYNOiSCSILoopbackStartAll SYNOiSCSILunServiceStartAllWithoutLock(), err=Failed to create directory Jan 01 13:45:15 xxxxxx synoiscsiep[12070]: iSCSI:iscsi_lun_service_start_all.cpp:105:SYNOiSCSILunServiceStartAllWithoutLock mkdir(/config/target/core/iblock_0, 448), err=No such file or directory Jan 01 13:45:15 xxxxxx synoiscsiep[12070]: iSCSI:fc_start_all.cpp:53:SYNOFCStartAll SYNOiSCSILunServiceStartAllWithoutLock(), err=Failed to create directory Jan 01 13:45:15 xxxxxx systemd[1]: pkg-iscsi.service: main process exited, code=exited, status=221/CONFIRM Jan 01 13:45:15 xxxxxx systemd[1]: Failed to start iSCSI Service. Jan 01 13:45:15 xxxxxx systemd[1]: Unit pkg-iscsi.service entered failed state. Jan 01 13:45:15 xxxxxx systemd[1]: pkg-iscsi.service failed. Jan 01 13:45:16 xxxxxx systemd[1]: Stopped iSCSI Service. Comparing my 2 loaders : It seems some folders are missing on DVA3221 system... # ls -Rtl .: total 0 drwxr-xr-x 2 root root 0 Jan 1 13:56 pool drwxr-xr-x 6 root root 0 Jan 1 13:56 target drwxr-xr-x 2 root root 0 Dec 22 18:26 volume drwxr-xr-x 2 root root 0 Dec 22 18:26 vsys drwxr-xr-x 2 root root 0 Dec 22 18:26 rodsys ./pool: total 0 -r--r--r-- 1 root root 4096 Jan 1 13:56 cache_info -rw-r--r-- 1 root root 4096 Jan 1 13:56 ext_jnl_cache_cnt -rw-r--r-- 1 root root 4096 Jan 1 13:56 ext_jnl_enable -rw-r--r-- 1 root root 4096 Jan 1 13:56 ext_jnl_path -rw-r--r-- 1 root root 4096 Jan 1 13:56 ext_jnl_suspend -r--r--r-- 1 root root 4096 Jan 1 13:56 help -rw-r--r-- 1 root root 4096 Jan 1 13:56 preread_control ./target: total 0 -rw-r--r-- 1 root root 4096 Jan 1 13:56 dbroot -r--r--r-- 1 root root 4096 Jan 1 13:56 dump_qos_lists -rw-r--r-- 1 root root 4096 Jan 1 13:56 io_delay_msec -rw-r--r-- 1 root root 4096 Jan 1 13:56 io_delay_per_io -r--r--r-- 1 root root 4096 Jan 1 13:56 lio_event -rw-r--r-- 1 root root 4096 Jan 1 13:56 target_iops -r--r--r-- 1 root root 4096 Jan 1 13:56 version drwxr-xr-x 3 root root 0 Dec 22 18:26 vhost drwxr-xr-x 3 root root 0 Dec 22 18:26 iscsi drwxr-xr-x 3 root root 0 Dec 22 18:26 loopback drwxr-xr-x 8 root root 0 Dec 22 18:26 core ./target/vhost: total 0 -rw-r--r-- 1 root root 4096 Jan 1 13:56 throttle_interval_msec -r--r--r-- 1 root root 4096 Jan 1 13:56 version drwxr-xr-x 2 root root 0 Dec 22 18:26 discovery_auth ./target/vhost/discovery_auth: total 0 ./target/iscsi: total 0 -rw-r--r-- 1 root root 4096 Jan 1 13:56 global_np_enable -r--r--r-- 1 root root 4096 Jan 1 13:56 lio_version drwxr-xr-x 2 root root 0 Dec 22 18:26 discovery_auth ./target/iscsi/discovery_auth: total 0 -r--r--r-- 1 root root 4096 Jan 1 13:56 authenticate_target -rw-r--r-- 1 root root 4096 Jan 1 13:56 enforce_discovery_auth -rw-r--r-- 1 root root 4096 Jan 1 13:56 password -rw-r--r-- 1 root root 4096 Jan 1 13:56 password_mutual -rw-r--r-- 1 root root 4096 Jan 1 13:56 userid -rw-r--r-- 1 root root 4096 Jan 1 13:56 userid_mutual ./target/loopback: total 0 -r--r--r-- 1 root root 4096 Jan 1 13:56 version drwxr-xr-x 2 root root 0 Dec 22 18:26 discovery_auth ./target/loopback/discovery_auth: total 0 ./target/core: total 0 drwxr-xr-x 2 root root 0 Dec 22 18:26 epio_0 drwxr-xr-x 2 root root 0 Dec 22 18:26 epio_1 drwxr-xr-x 2 root root 0 Dec 22 18:26 multifile_0 drwxr-xr-x 2 root root 0 Dec 22 18:26 fileio_0 drwxr-xr-x 2 root root 0 Dec 22 18:26 iblock_0 drwxr-xr-x 3 root root 0 Dec 22 18:26 alua ./target/core/epio_0: total 0 -r--r--r-- 1 root root 4096 Jan 1 13:56 hba_info -rw-r--r-- 1 root root 4096 Jan 1 13:56 hba_mode -r--r--r-- 1 root root 4096 Jan 1 13:56 odx_info -rw-r--r-- 1 root root 4096 Jan 1 13:56 odx_mode ./target/core/epio_1: total 0 -r--r--r-- 1 root root 4096 Jan 1 13:56 hba_info -rw-r--r-- 1 root root 4096 Jan 1 13:56 hba_mode -r--r--r-- 1 root root 4096 Jan 1 13:56 odx_info -rw-r--r-- 1 root root 4096 Jan 1 13:56 odx_mode ./target/core/multifile_0: total 0 -r--r--r-- 1 root root 4096 Jan 1 13:56 hba_info -rw-r--r-- 1 root root 4096 Jan 1 13:56 hba_mode -r--r--r-- 1 root root 4096 Jan 1 13:56 odx_info -rw-r--r-- 1 root root 4096 Jan 1 13:56 odx_mode ./target/core/fileio_0: total 0 -r--r--r-- 1 root root 4096 Jan 1 13:56 hba_info -rw-r--r-- 1 root root 4096 Jan 1 13:56 hba_mode -r--r--r-- 1 root root 4096 Jan 1 13:56 odx_info -rw-r--r-- 1 root root 4096 Jan 1 13:56 odx_mode ./target/core/iblock_0: total 0 -r--r--r-- 1 root root 4096 Jan 1 13:56 hba_info -rw-r--r-- 1 root root 4096 Jan 1 13:56 hba_mode -r--r--r-- 1 root root 4096 Jan 1 13:56 odx_info -rw-r--r-- 1 root root 4096 Jan 1 13:56 odx_mode ./target/core/alua: total 0 drwxr-xr-x 3 root root 0 Dec 22 18:26 lu_gps ./target/core/alua/lu_gps: total 0 drwxr-xr-x 2 root root 0 Dec 22 18:26 default_lu_gp ./target/core/alua/lu_gps/default_lu_gp: total 0 -rw-r--r-- 1 root root 4096 Jan 1 13:56 lu_gp_id -r--r--r-- 1 root root 4096 Jan 1 13:56 members ./volume: total 0 ./vsys: total 0 -r--r--r-- 1 root root 4096 Jan 1 13:56 help ./rodsys: total 0 -r--r--r-- 1 root root 4096 Jan 1 13:56 help -r--r--r-- 1 root root 4096 Jan 1 13:56 local_key -rw-r--r-- 1 root root 4096 Jan 1 13:56 throttle_interval_msec

-
TinyCore RedPill Loader Build Support Tool ( M-Shell )
Peter Suh replied to Peter Suh's topic in Software Modding
To me, it sounds like they are asking for M-SHELL to have features like ARPL.^^ LOL Let's consider adding features. First I have to solve the MAC-SPOOF issue. -
Коллеги приветствую! Пытаюсь поставить хренолоджи уже который день. Перепробывал разные конфигурации, но все упирается в том, что на 60-65% ловлю ошибку DiskStation login: [ 121.038020] perf interrupt took too long (127857 > 19230), lowering kernel.perf_event_max_sample_rate to 13000 [ 126.661214] perf interrupt took too long (126858 > 35714), lowering kernel.perf_event_max_sample_rate to 7000 [ 127.165409] perf interrupt took too long (126262 > 62500), lowering kernel.perf_event_max_sample_rate to 4000 [ 131.596433] perf interrupt took too long (125654 > 125000), lowering kernel.perf_event_max_sample_rate to 2000 [ 132.591707] md: bind<sda1> [ 132.608980] md: bind<sdb1> [ 132.610986] md/raid1:md0: active with 2 out of 16 mirrors [ 132.620525] md0: detected capacity change from 0 to 8589869056 [ 135.822962] md: bind<sda2> [ 135.840703] md: bind<sdb2> [ 135.850886] md/raid1:md1: active with 2 out of 16 mirrors [ 135.860526] md1: detected capacity change from 0 to 2147418112 [ 136.018837] md1: unknown partition table [ 136.425808] md0: unknown partition table [ 139.552016] EXT3-fs (md0): error: couldn't mount because of unsupported optional features (2c0) [ 139.599547] EXT2-fs (md0): error: couldn't mount because of unsupported optional features (2c0) [ 139.756823] EXT4-fs (md0): mounted filesystem with ordered data mode. Opts: (null) [ 140.115647] EXT3-fs (md0): error: couldn't mount because of unsupported optional features (2c0) [ 140.137134] EXT2-fs (md0): error: couldn't mount because of unsupported optional features (2c0) [ 140.196262] EXT4-fs (md0): mounted filesystem with ordered data mode. Opts: (null) [ 140.421429] EXT3-fs (md0): error: couldn't mount because of unsupported optional features (2c0) [ 140.562286] EXT2-fs (md0): error: couldn't mount because of unsupported optional features (2c0) [ 140.619656] EXT4-fs (md0): mounted filesystem with ordered data mode. Opts: (null) [ 252.792143] FAT-fs (synoboot2): fat_set_state: set=1 process=updater pid=7106 [ 252.836250] FAT-fs (synoboot2): fat_set_state: set=0 process=updater pid=7106 [ 253.176978] FAT-fs (synoboot2): fat_set_state: set=1 process=updater pid=7106 [ 253.239231] FAT-fs (synoboot2): fat_set_state: set=0 process=updater pid=7106 [ 253.442477] FAT-fs (synoboot2): fat_set_state: set=1 process=updater pid=7106 [ 253.569284] FAT-fs (synoboot2): fat_set_state: set=0 process=updater pid=7106 [ 253.706202] FAT-fs (synoboot2): fat_set_state: set=1 process=updater pid=7106 [ 258.251339] FAT-fs (synoboot2): fat_set_state: set=0 process=updater pid=7106 [ 263.574038] FAT-fs (synoboot2): fat_set_state: set=1 process=updater pid=7106 [ 264.244948] FAT-fs (synoboot2): fat_set_state: set=0 process=updater pid=7106 [ 264.408545] FAT-fs (synoboot1): fat_set_state: set=1 process=updater pid=7106 [ 264.519643] FAT-fs (synoboot1): fat_set_state: set=0 process=updater pid=7106 [ 264.883035] FAT-fs (synoboot1): fat_set_state: set=1 process=updater pid=7106 [ 264.909609] FAT-fs (synoboot1): fat_set_state: set=0 process=updater pid=7106 [ 265.253432] FAT-fs (synoboot2): fat_set_state: set=1 process=updater pid=7106 [ 265.903292] FAT-fs (synoboot2): fat_set_state: set=0 process=updater pid=7106 Что кто может посоветовать?
-
@mmih had the same issue when using first the TCRP uefi version, try the other one instead.
-

TinyCore RedPill loader (TCRP) - Development release 0.9
Gronaldo replied to pocopico's topic in Developer Discussion Room
Found updating to TCRP 10.0.0.10 resolved issue. Also removed additional USB-devices showing up in DS-file App. -
 I was surprised that adding adding all the extra DSM 7.2 information in DSM 7.1.1 db files never caused an issue.
 -
I left a new issue to @007revad https://github.com/007revad/Synology_HDD_db/issues/195
-
I wish we would focus only on this problem, which is a database issue.
-
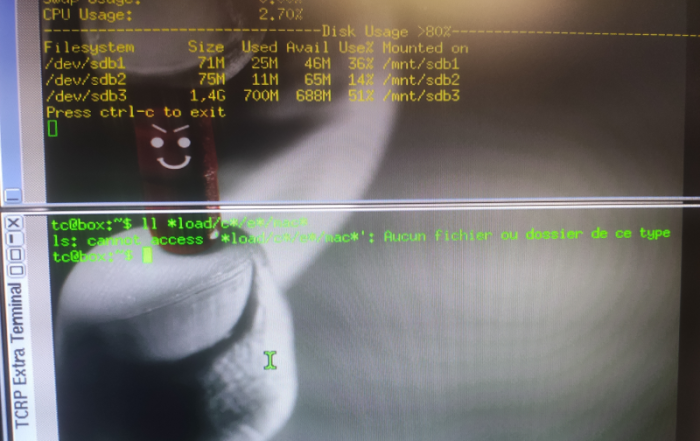
 just to be clear cancel any backup. restart machine... press J key within these 7 seconds then Using the IP address displayed on the screen Please enter http://192.168.50.223:7681 in your web browser. The login account is root and there is no password. Please try the command below first. cat /var/log/*rc* That is all? You have a lot of code below this.. ONLY run cat /var/log/*rc* correct?
 -
I created a DB file as shown below. There is no problem creating DB files. I have one suspicion. Micron 1100 seems to have disappeared at the time this DB file was created. I think it disappears like that and then appears stably at this point when DSM has completed booting. Drive DB files are updated through Junior mode, which is very early in the DSM boot phase. I will tell you how to enter junior mode in Friend. I think I need to test running the same script as now in junior mode. When Friend is booting, there is 7 seconds to spare. Please enter the j key within these 7 seconds. In that state, it will remain in junior mode. There is no damage to your DSM or data, so you don’t have to worry. If it progresses to that state Using the IP address displayed on the screen Please enter http://192.168.50.223:7681 in your web browser. The login account is root and there is no password. Please try the command below first. cat /var/log/*rc* { "key": "1100_MTFDDAK2T0TBN", "value": { "M0MU033": { "compatibility_interval": [ { "compatibility": "support", "not_yet_rolling_status": "support", "fw_dsm_update_status_notify": false, "barebone_installable": true } ] }, "default": { "compatibility_interval": [ { "compatibility": "support", "not_yet_rolling_status": "support", "fw_dsm_update_status_notify": false, "barebone_installable": true } ] } } }, { "key": "2TB", "value": { "HP2818D8": { "compatibility_interval": [ { "compatibility": "support", "not_yet_rolling_status": "support", "fw_dsm_update_status_notify": false, "barebone_installable": true } ] }, "default": { "compatibility_interval": [ { "compatibility": "support", "not_yet_rolling_status": "support", "fw_dsm_update_status_notify": false, "barebone_installable": true } ] } } }