Search the Community
Showing results for 'SataPortMap'.
-
satacontroller: "1", хотя при сборке загрузчика было выбрано "SataPortMap: Active Ports *" Нужно исправить на 3? Или лучше перебрать загрузчик со значением "SataPortMap: Max Ports"?
-
I ran into the exact problem when upgrading from DSM 7.1.x to 7.2.y. I only found 1 thing talking about it. (See Link) https://hedichaibi.com/fix-xpenology-problems-viewing-internal-hard-drives-as-esata-hard-drives/ My /etc/synoinfo.conf and /etc.defaults/synoinfo.conf had a problem with the esataportcfg setting. Original: esataportcfg="0xff000" internalportcfg="0x3fff" usbportcfg="0x8700" Changed to: esataportcfg="0x00" internalportcfg="0xffff" usbportcfg="0x00" I think I had to make the changes in both conf files. The USB one maybe a problem later but that should be easier to fix now that I know the problem. Note: These can be 32 bit values (32 drives... or maybe even 64-bit and 64 drives... but definitely at least 32) so up to: "0xffffffff" I'm really glad I got this figured out. I hope this helps people. PREngineer on this link had some other interesting changes for configuring the drives. These would make my drive ordering look better. (But my system is working so maybe I won't mess with this.) https://xpenology.com/forum/topic/52094-how-to-config-sataportmap-sata_remap-and-diskidxmap/
-
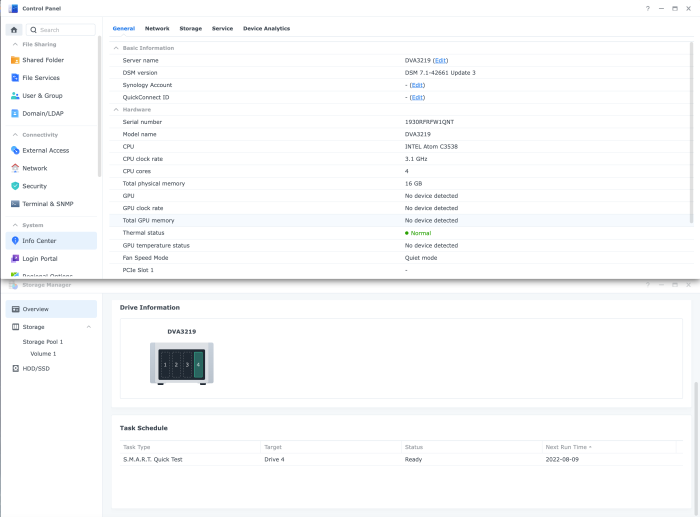
DVA3219 Jot Mode is released by user request. Denverton platform-based surveillance equipment such as the DVA3221. It is for 4 bays like the captured image. In jun mode, bugs have not been caught yet, so only jot mode is released first. TC Original does not support it, and can only be built with my M Shell. Below is how to download. curl --location "https://github.com/PeterSuh-Q3/tinycore-redpill/raw/main/my.sh.gz" -O; tar -zxvf my.sh.gz; ./my.sh DVA3219 For VMs that require additional drivers, etc. You can use it as ./myv.sh DVA3219 And you will surely meet the infinite recovery mode. then Please take care of it like this. sudo ./my.sh DVA3219 postupdate ---------------------------------------------------------------------------------------- Usage: ./my.sh <Synology Model Name> <Options> Options: postupdate, noconfig, noclean, manual, realmac - postupdate : Option to patch the restore loop after applying DSM 7.1.0-42661 Update 2, no additional build required. - noconfig: SKIP automatic detection change processing such as SN/Mac/Vid/Pid/SataPortMap of user_config.json file. - noclean: SKIP the 💊 RedPill LKM/LOAD directory without clearing it with the Clean command. However, delete the Cache directory and loader.img. - manual: Options for manual extension processing and manual dtc processing in build action (skipping extension auto detection). - realmac : Option to use the NIC's real address instead of creating a virtual one. Please type Synology Model Name after ./my.sh - for jot mode ./my.sh DS918+ ./my.sh DS3617xs ./my.sh DS3615xs ./my.sh DS3622xs+ ./my.sh DVA3221 ./my.sh DS920+ ./my.sh DS1621+ ./my.sh DS2422+ ./my.sh DVA1622 ./my.sh DS1520+ (Not Suppoted, Testing...) ./my.sh FS2500 (Not Suppoted, Testing..., Has DTC issue) ./my.sh DS1621xs+ ./my.sh RS4021xs+ ./my.sh DVA3219 - for jun mode ./my.sh DS918+J ./my.sh DS3617xsJ ./my.sh DS3615xsJ ./my.sh DS3622xs+J ./my.sh DVA3221J ./my.sh DS920+J ./my.sh DS1621+J ./my.sh DS2422+J ./my.sh DVA1622J (Not Suppoted) ./my.sh DS1520+J ./my.sh FS2500J (Not Suppoted, Has DTC issue) ./my.sh DS1621xs+J ./my.sh RS4021xs+J ((Not Suppoted, Testing...) ./my.sh DVA3219J (Not Suppoted, Testing...)
- 48 replies
-
- 1
-

-
- postupdate
- jot mode
- (and 1 more)
-
Перетыкал пару раз,запускается проверка и всё. Банально перепутал местами. Потом стал наклеивать скотч с порядковыми номерами. Но это в рамках своего девайса, при одном контроллере и неизменном SataPortMap То есть Хрень не особо любит перемену мест хардов, но дозволяет )))
-

RedPill TinyCore Loader Installation Guide for DSM 7.1 BareMetal
xpe48 replied to Peter Suh's topic in Tutorials and Guides
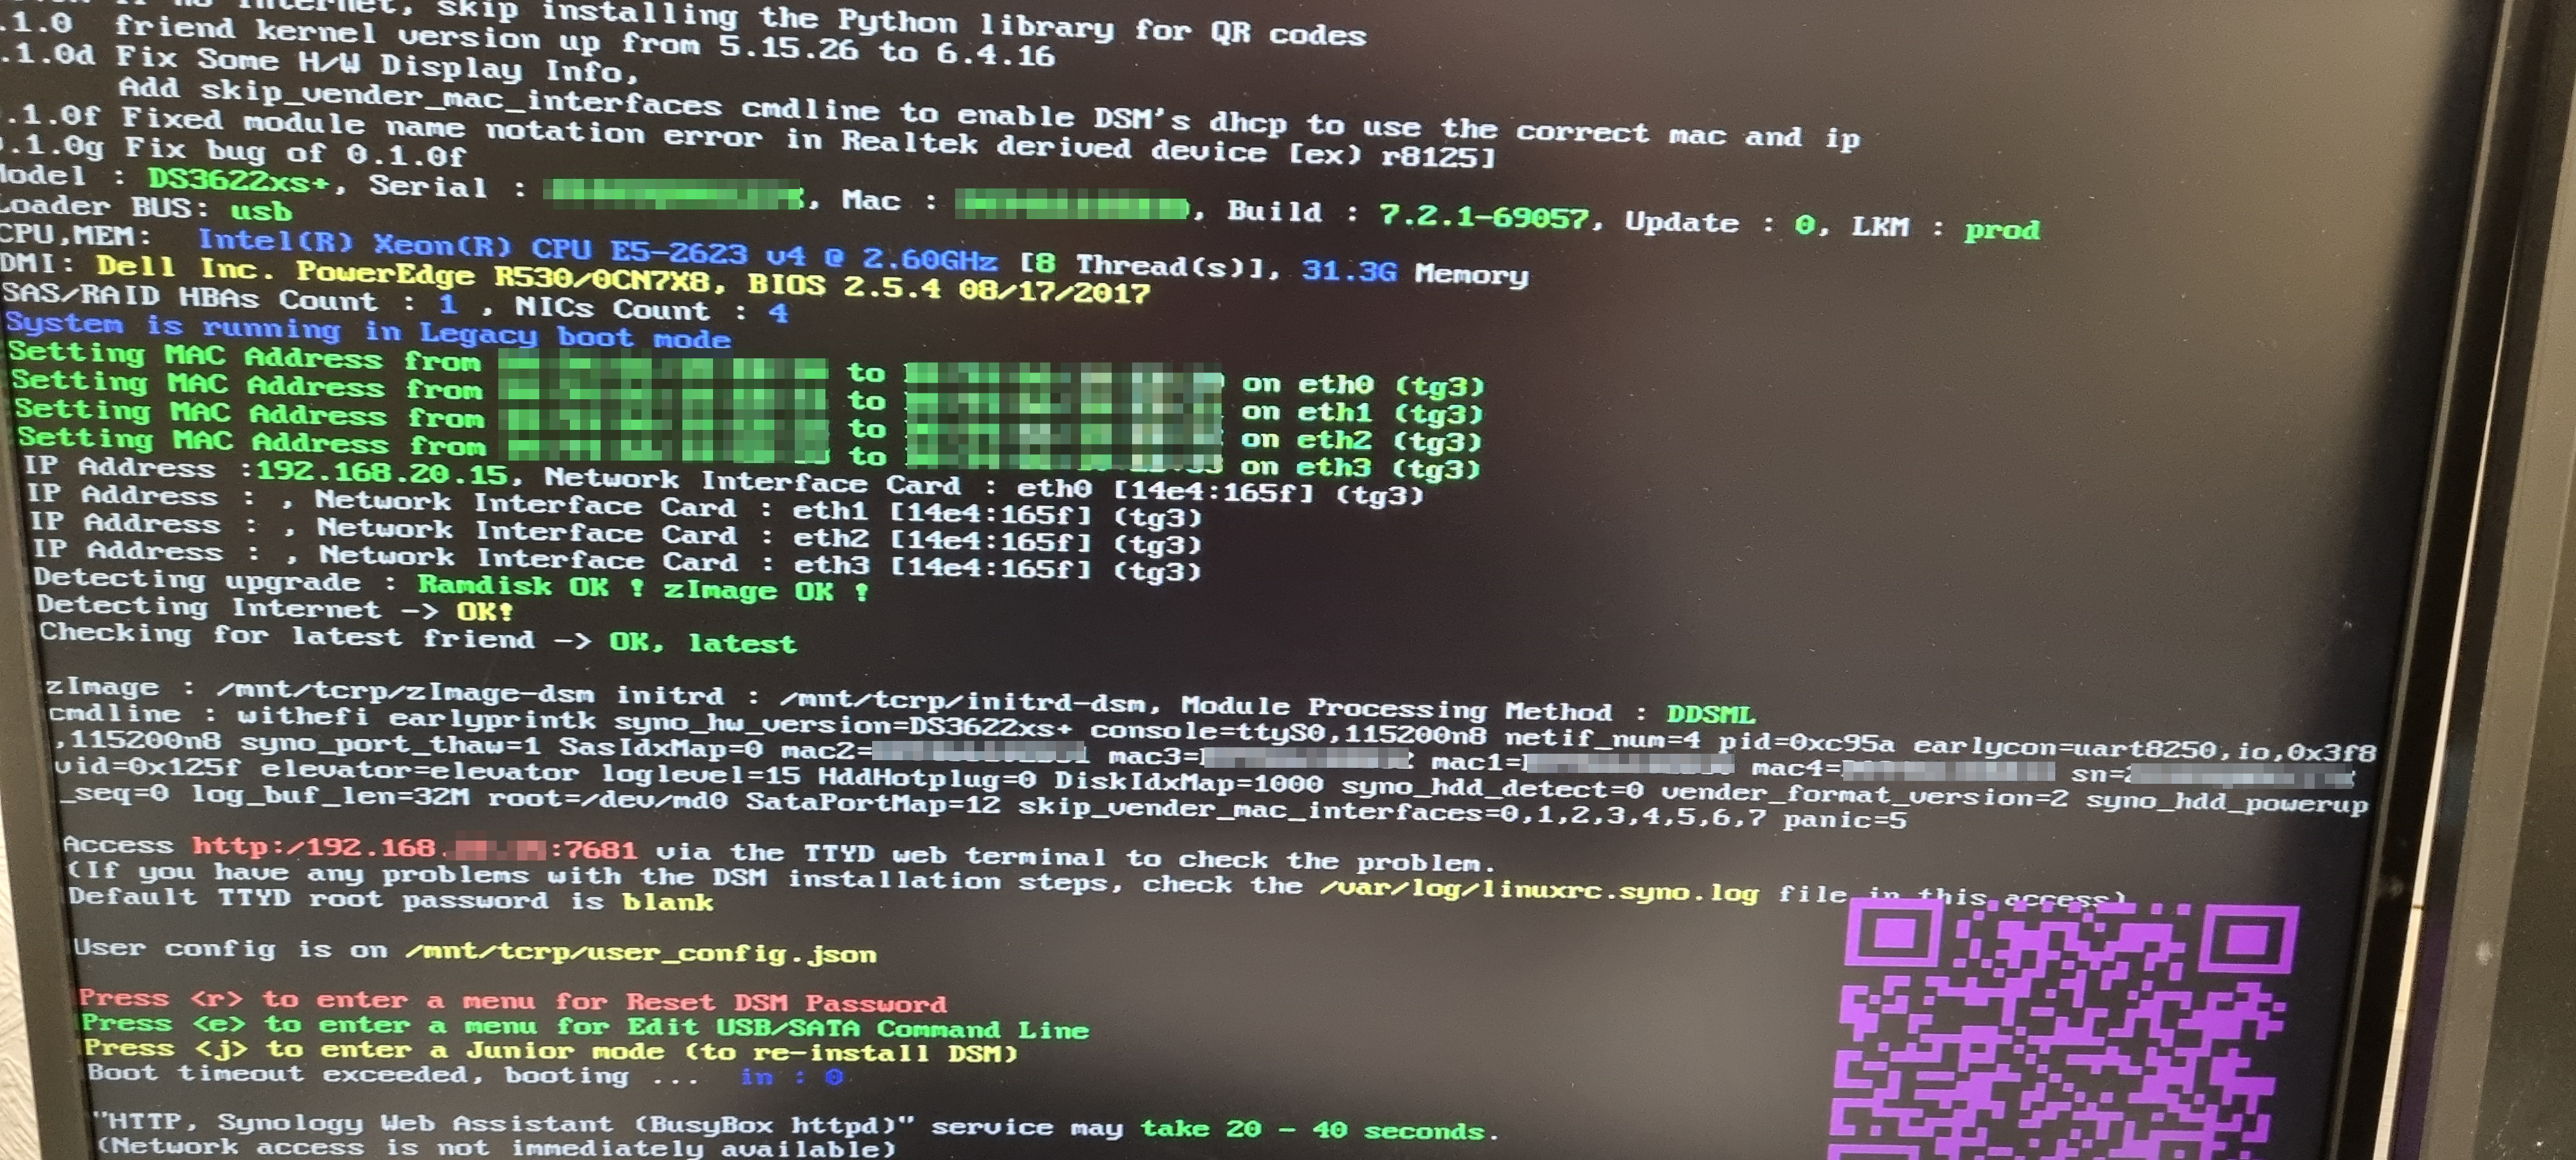
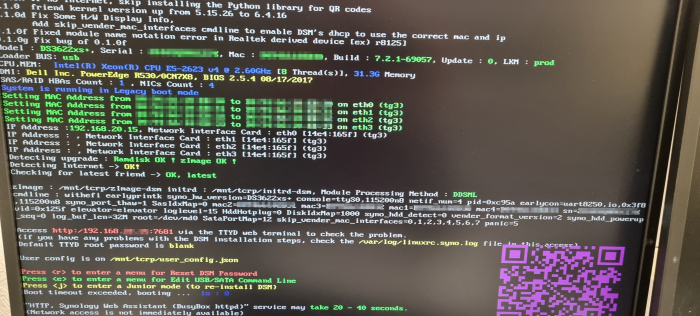
Hi, trying this method, however I run into an issue after this loads to install DSM all of a sudden the screen goes blank and ping connectivity is lost to the hardware. Could this be related to i915 driver? --------------------------------------={ TinyCore RedPill Friend }=-------------------------------------- TCRP Friend Version : 0.1.0k 0.1.0 friend kernel version up from 5.15.26 to 6.4.16 0.1.0d Fix Some H/W Display Info, Add skip_vender_mac_interfaces cmdline to enable DSM's dhcp to use the correct mac and ip 0.1.0h Add process to abort boot if corrupted user_config.json is used 0.1.0j Remove skip_vender_mac_interfaces and panic cmdline (SAN MANAGER Cause of damage) 0.1.0k Added timestamp recording function before line in /mnt/tcrp/friendlog.log file. Model : SA6400, Serial : 2270TQRHSMTMY, Mac : D843AE17BF5B, Build : 7.2.0-64570, Update : 0, LKM : prod Loader BUS: usb CPU,MEM: 12th Gen Intel(R) Core(TM) i5-12500 [12 Thread(s)], 31.2G Memory DMI: Micro-Star International Co., Ltd. MS-7D40/MPG B760I EDGE WIFI (MS-7D40), BIOS A.60 01/10/2024 SAS/RAID HBAs Count : 0 , NICs Count : 1 System is running in UEFI boot mode Setting MAC Address from D8:43:AE:17:BF:5B to D8:43:AE:17:BF:5B on eth0 (r8169) IP Address :192.168.1.83, Network Interface Card : eth0 [10ec:8125] (r8125) Detecting upgrade : Ramdisk OK ! zImage OK ! Detecting Internet -> OK! Checking for latest friend -> OK, latest zImage : /mnt/tcrp/zImage-dsm initrd : /mnt/tcrp/initrd-dsm, Module Processing Method : EUDEV cmdline : withefi earlyprintk syno_hw_version=SA6400 console=ttyS0,115200n8 netif_num=1 pid=0xa836 earlycon=uart8250,io,0x3f8,115200n8 syno_port_thaw=1 SasIdxMap=0 mac1=D843AE17BF5B sn=2270TQRHSMTMY SMBusHddDynamicPower=0 vid=0x05dc elevator=elevator loglevel=15 HddHotplug=0 DiskIdxMap syno_hdd_detect=0 vender_format_version=2 sataboot2 syno_hdd_powerup_seq=0 log_buf_len=32M root=/dev/md0 SataPortMap syno_ttyS1=serial,0x2f8 syno_ttyS0=serial,0x3f8 Access http:/192.168.1.83:7681 via the TTYD web terminal to check the problem. (If you have any problems with the DSM installation steps, check the /var/log/linuxrc.syno.log file in this access) Default TTYD root password is blank User config is on /mnt/tcrp/user_config.json Press <r> to enter a menu for Reset DSM Password Press <e> to enter a menu for Edit USB/SATA Command Line Press <j> to enter a Junior mode (to re-install DSM) Press <ctrl-c> to stop boot booting in : 6 Press <ctrl-c> to stop boot booting in : 5 -
 I am trying install DSM 7.2 - DS3622xs+ on the following system: Ryzen 5 4650g Rog Strix b550i (4xsata, 2xNvme) 32gb ram On motherboard sata: 2xSSD for Proxmox boot, 2xSSD for Proxmox VMs, 2xNVME for Xpenology cache On LSI/Broadcom SAS3008 HBA Controller in IT Mode: 4x18tb HDD, 2x SSD for VMs, 2xSata empty for future expansion ARC Loader 21.4.24.img I followed some PCIE passthrough tutorials to install xpenology using the manual HDD pass-through method which worked fine but was limited to 6 sata ports only. Installed with ARC Loader 21.4.24, selected the first option for SataportMap: Active Ports*. When I got to the find.synology.com screen, it recognized I had drives 2 to 7 and installed DSM. However, I would like the option to have more drives in the future, so I scrapped the VM and try to install again by passing the whole HBA card to the VM itself. I added- Raw Device - select HBA Card - ROM-BAR and PCI-Express Checked. I have tried every option for the SataportMap, but each time I get 'No Drives Detected'. In the Arc Loader sysinfo, when you scroll down, it recognizes the HBA card and says it has 6 drives attached to it. This told me that the loader can see the drives, so I manually passed through one of my NVME drives using scsi. When you get to the find.synology.com screen, it recognized the 1 nvme drive and was able to install DSM. When it finally loads, my 4x18th and 2xSSDs attached to the HBA are visible and working fine in DSM. So what am I missing? Can I not boot into DSM without having at least one HDD or SSD manually passed through? My eyes are going cross trying to troubleshoot every possibility, I wanted to list here everything I have done to troubleshoot but that would be a huge post. Should I skip trying to pass through the whole HBA Card and just manually pass through the drives? How do I add more drives then? Any suggestions are welcome.
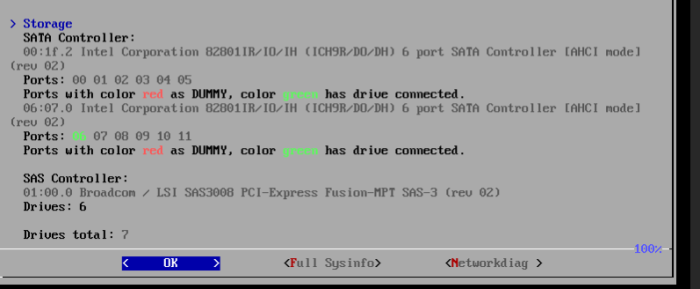
-

TinyCore RedPill Loader Build Support Tool ( M-Shell )
ansh replied to Peter Suh's topic in Software Modding
I figured out how SataPortMap / DiskIdxMap works, but when I change these parameters, there are no changes in the DSM interface. The first disk is always empty...( I set the values but no change...( "SataPortMap": "", "DiskIdxMap": "0С00", "SasIdxMap: "0xffffffff" -

TinyCore RedPill Loader Build Support Tool ( M-Shell )
Orphée replied to Peter Suh's topic in Software Modding
Lot of guys before you requested same thing with HBA cards. Using random values will not help. You have to understand how SataPortMap / DiskIdxMap works, and how it can match your particular setup. and even with this, there is a high chance you never "figure it out". If it works, just get over it. Otherwise, just use search function about "HBA" cards... have fun. -
TinyCore RedPill Loader Build Support Tool ( M-Shell )
ansh replied to Peter Suh's topic in Software Modding
I would like to figure it out... It’s strange why the settings SataPortMap": "12", "DiskIdxMap": "1000", "SasIdxMap: "0" do not work? -
TinyCore RedPill Loader Build Support Tool ( M-Shell )
ansh replied to Peter Suh's topic in Software Modding
Thanks. Reinstalled DSM completely with parameters set to SataPortMap": "12", "DiskIdxMap": "1000", "SasIdxMap: "0", "MaxDisks: "24", but the result is the same.(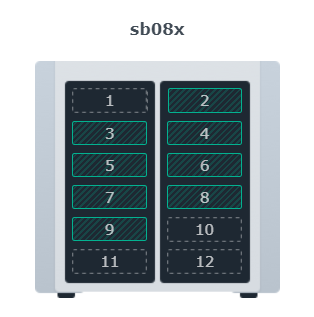
-

TinyCore RedPill Loader Build Support Tool ( M-Shell )
Peter Suh replied to Peter Suh's topic in Software Modding
[HBA Recommended settings from flyride] Not EUDEV , Use Only DDSML (If you use TCRP-mshell ) "SataPortMap": "12", "DiskIdxMap": "1000", "SasIdxMap: "0" "MaxDisks: "24" -
TinyCore RedPill Loader Build Support Tool ( M-Shell )
ansh replied to Peter Suh's topic in Software Modding
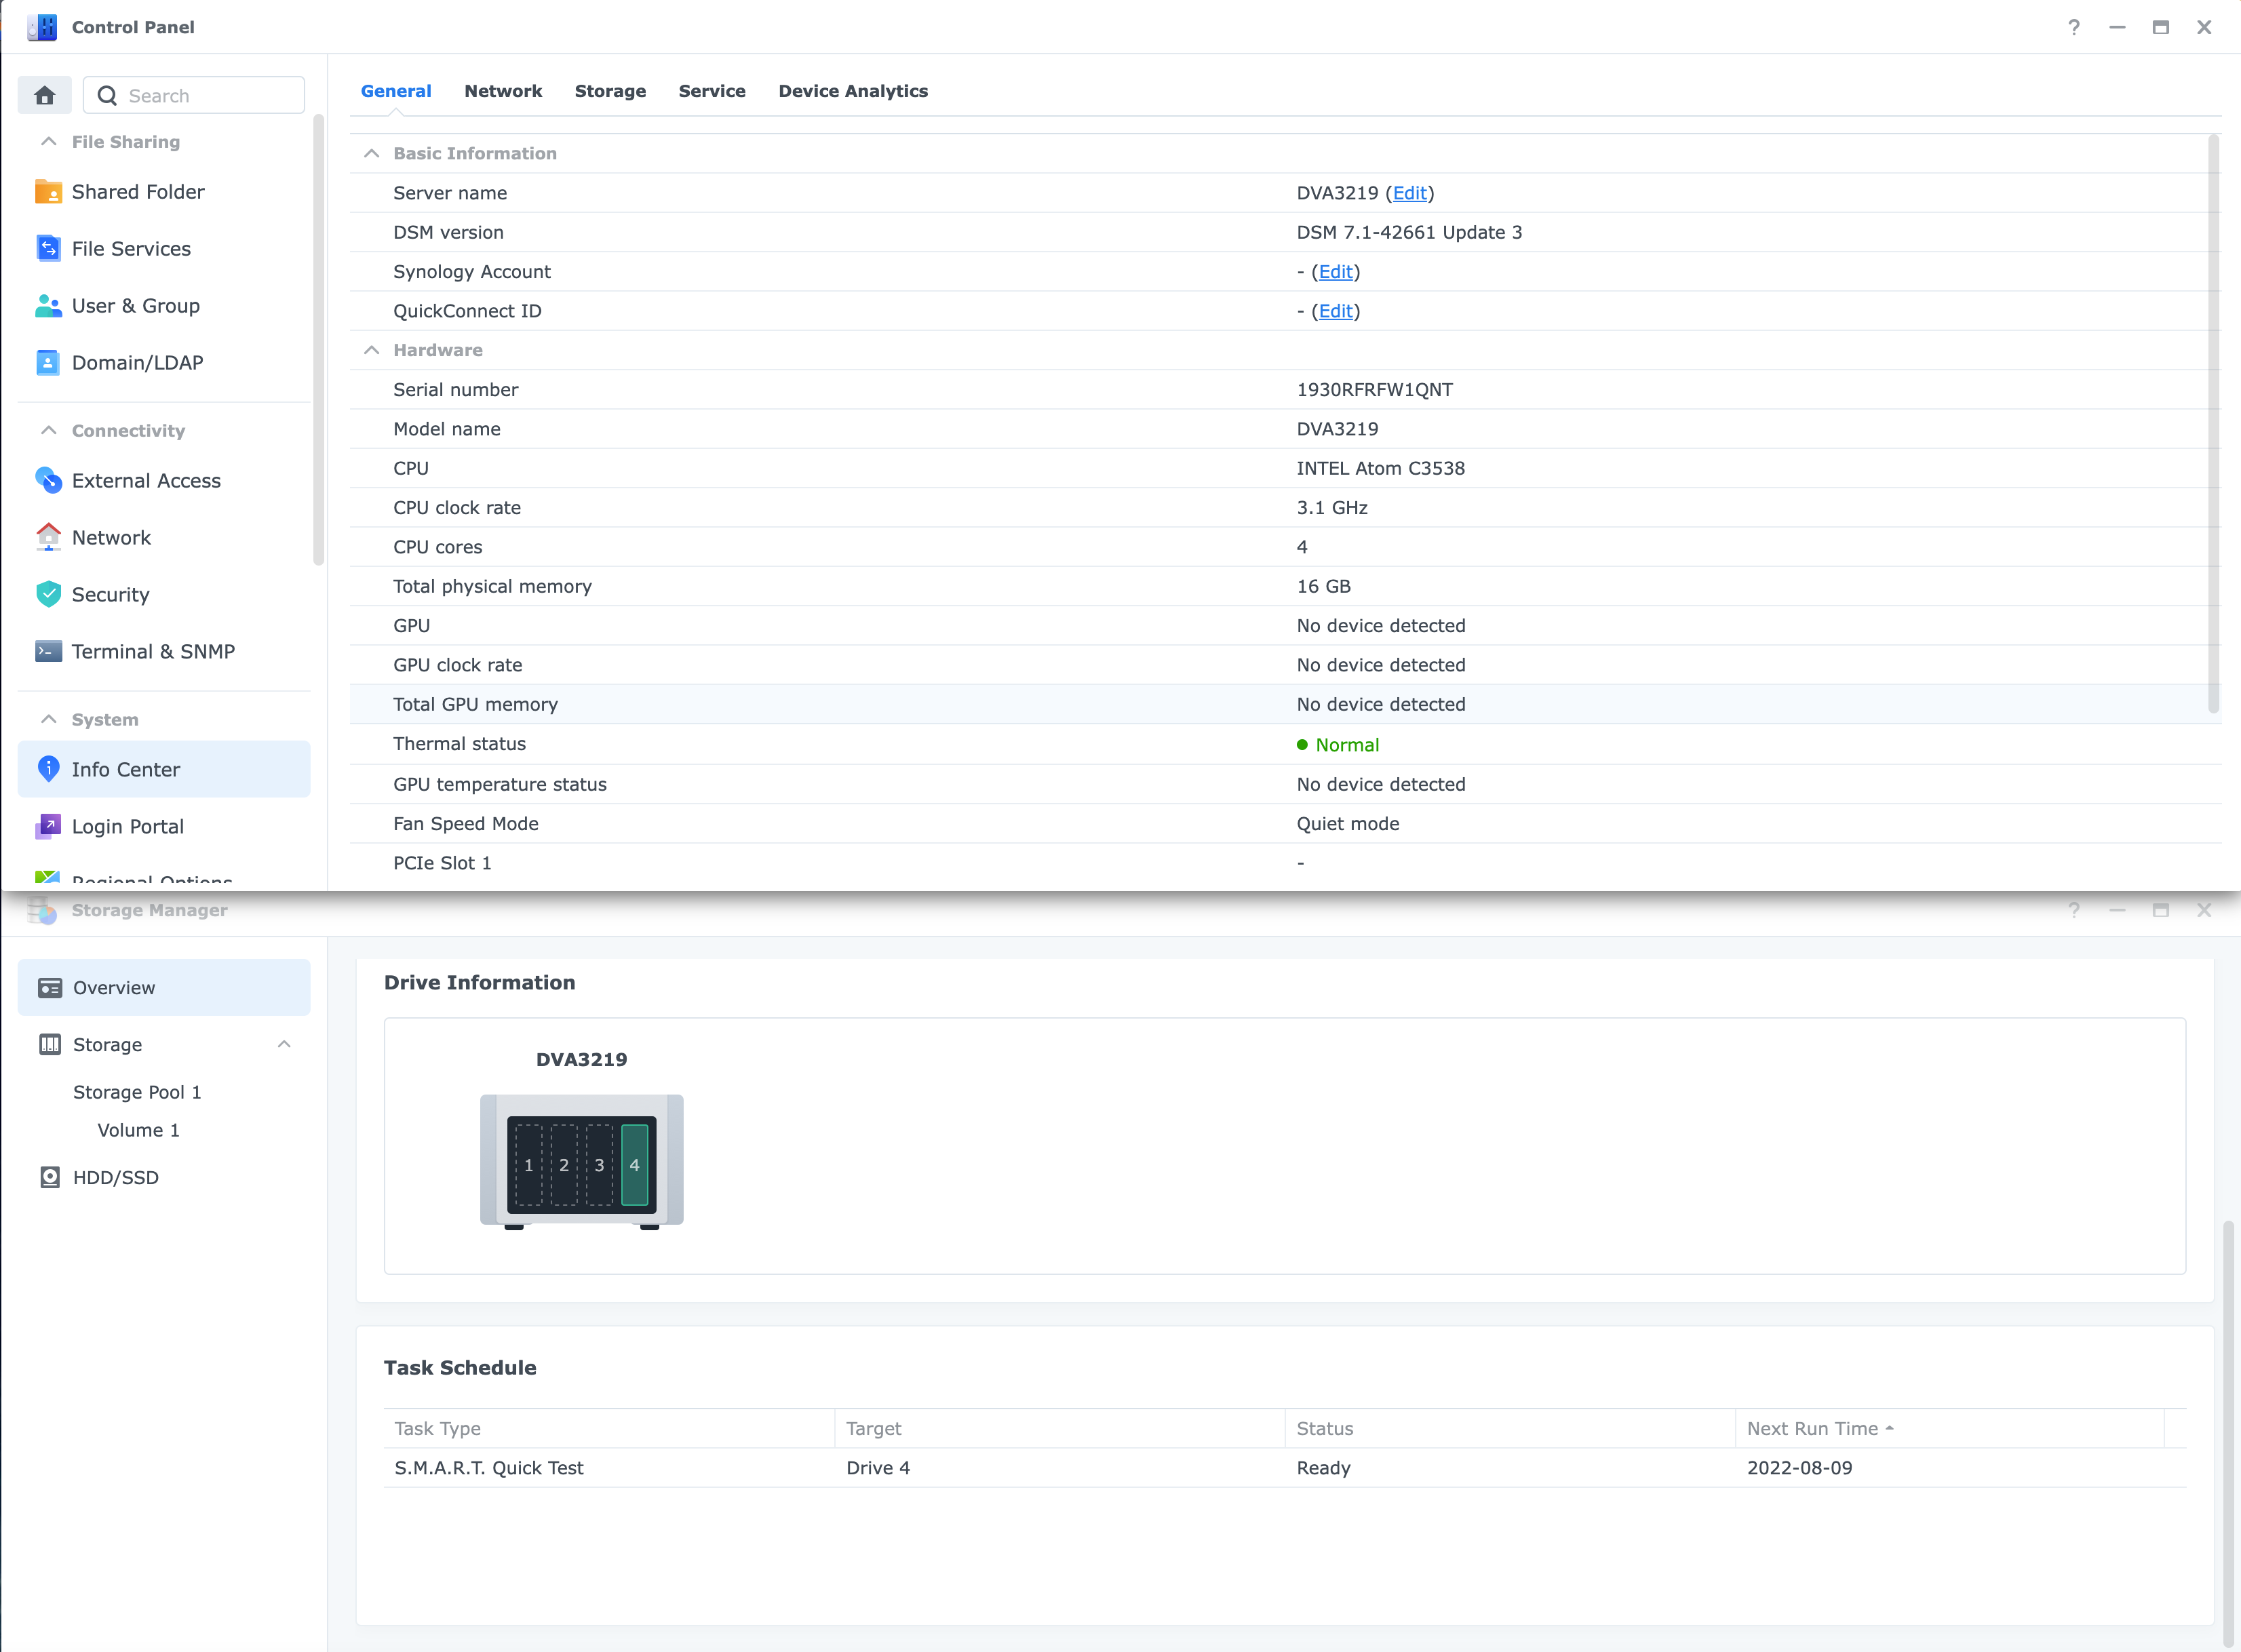
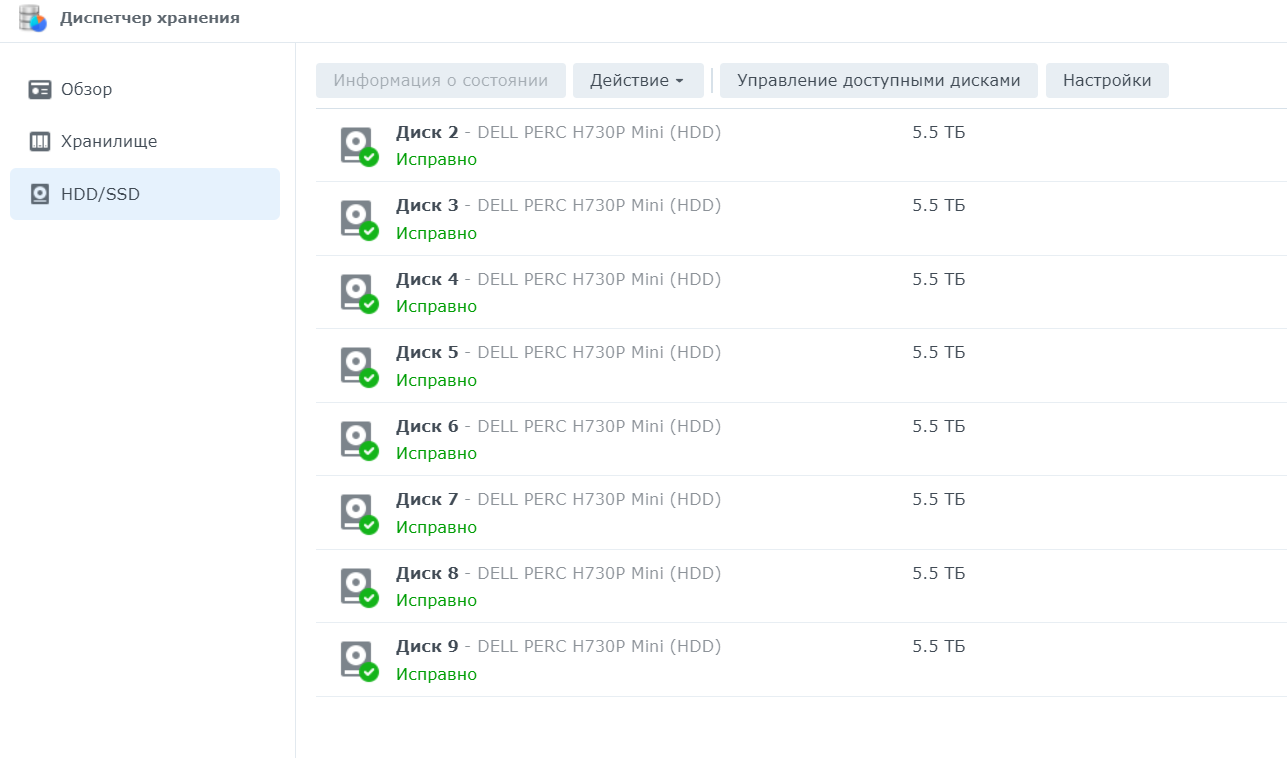
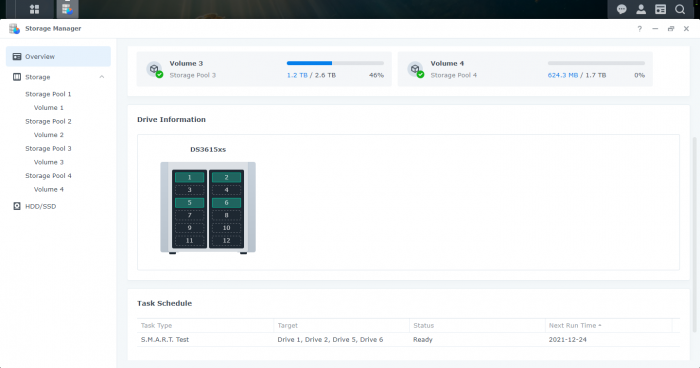
Hi Why do disks start with DISK 2? DELL PowerEdge R530 - Intel(R) Xeon(R)CPUE5-2623 v4 2.60GH, RAM 32Gb ECC DDR4 2133Mhz, HDD SAS 5.4TB x 8pices (), Integrated RAID Dell PERC H730P mini RAID5 38.2TB Sata controller disabled BIOS. CPU. MEM: Intel(R) Xeon(R) CPU E5-2623 u4 2.60GHz (8 Thread(s)1, 31.3G Memory DMI: Dell Inc. PowerEdge R530 0CH?X8, BIOS 2.5.4 08.17/2017 SAS RAID HBAs Count : 1 , NICs Count Systen is running in Legacy b boot mode Setting MAC Address from D0:94:66:10:EB:30 to D0:94:66:10:EB:30 on eth0 (tg3) Setting MAC Address from D0:91:66:10:EB:31 to D0:94:66:10::EB:31 on eth1 (tg3) Setting MAC Address from D0:94:66:10:EB:32 to D0:94:66:10:EB:32 on eth2 (tg3) Setting MAC Address from D0:34:66:10:EB:33 to D0:94:66:10:EB:33 on eth3 (tg3) IP Address :192.168.40.55, Network Interface Card : eth0 (14e4:165f1 (tg3) IP Address : Network Interface Card : eth1 L11e4:165f1 (tg3) IP Address : , Network Interface Card : eth2 [14e4:165f] (tg3) IP Address : Network Interface C Card : eth3 (14e4:165f1 (tg3) Detecting upgrade : Ramdisk OK ? zlmage OK ? Detecting Internet -> OX! Checking for latest friend -> ox, latest zimage : /mnt tcrp/zImagedum initrd : /mnt/tcrp/initrd-dsm, Module Processing Method : DDSML cndline : withefi earlyprintk syno_hw_version=D33622xs+ consoie=ttyS0,115200n8 nctif_num=1 pid=0xc95a carlycon=uart8250,io,0x3f8 ,115200n8 syno_part_thaw 1 SasIdxMap mac2=XXXXXXXXX mac3=XXXXXXXXXX mac1=XXXXXXXX mac1=XXXXXXXXX sn=XXXXXXXXX vi d-0x125f clevator=clevator logleve1=15 HddHotplug=0 DiskIdxMap=00 syno_hdd_detect-0 vender_format_version=2 syno_hdd_powerup_seq =0 log_buf_len=32M root=/dev/md0 SataPortMap=1 skip_vender_mac_interfaces=0,1,2,3,4,5,6,7 panic=5 :/$ lspci -tvnnq -+-[0001:0c]---00.0 Marvell Technology Group Ltd. 88SE9235 PCIe 2.0 x2 4-port SATA 6 Gb/s Controller [1b4b:9235] +-[0001:09]---00.0 Marvell Technology Group Ltd. 88SE9235 PCIe 2.0 x2 4-port SATA 6 Gb/s Controller [1b4b:9235] +-[0000:ff]-+-0b.0 Intel Corporation Xeon E7 v4/Xeon E5 v4/Xeon E3 v4/Xeon D R3 QPI Link 0/1 [8086:6f81] | +-0b.1 Intel Corporation Xeon E7 v4/Xeon E5 v4/Xeon E3 v4/Xeon D R3 QPI Link 0/1 [8086:6f36] | +-0b.2 Intel Corporation Xeon E7 v4/Xeon E5 v4/Xeon E3 v4/Xeon D R3 QPI Link 0/1 [8086:6f37] | +-0b.3 Intel Corporation Xeon E7 v4/Xeon E5 v4/Xeon E3 v4/Xeon D R3 QPI Link Debug [8086:6f76] | +-0c.0 Intel Corporation Xeon E7 v4/Xeon E5 v4/Xeon E3 v4/Xeon D Caching Agent [8086:6fe0] | +-0c.1 Intel Corporation Xeon E7 v4/Xeon E5 v4/Xeon E3 v4/Xeon D Caching Agent [8086:6fe1] | +-0c.2 Intel Corporation Xeon E7 v4/Xeon E5 v4/Xeon E3 v4/Xeon D Caching Agent [8086:6fe2] | +-0c.3 Intel Corporation Xeon E7 v4/Xeon E5 v4/Xeon E3 v4/Xeon D Caching Agent [8086:6fe3] | +-0f.0 Intel Corporation Xeon E7 v4/Xeon E5 v4/Xeon E3 v4/Xeon D Caching Agent [8086:6ff8] | +-0f.1 Intel Corporation Xeon E7 v4/Xeon E5 v4/Xeon E3 v4/Xeon D Caching Agent [8086:6ff9] | +-0f.4 Intel Corporation Xeon E7 v4/Xeon E5 v4/Xeon E3 v4/Xeon D Caching Agent [8086:6ffc] | +-0f.5 Intel Corporation Xeon E7 v4/Xeon E5 v4/Xeon E3 v4/Xeon D Caching Agent [8086:6ffd] | +-0f.6 Intel Corporation Xeon E7 v4/Xeon E5 v4/Xeon E3 v4/Xeon D Caching Agent [8086:6ffe] | +-10.0 Intel Corporation Xeon E7 v4/Xeon E5 v4/Xeon E3 v4/Xeon D R2PCIe Agent [8086:6f1d] | +-10.1 Intel Corporation Xeon E7 v4/Xeon E5 v4/Xeon E3 v4/Xeon D R2PCIe Agent [8086:6f34] | +-10.5 Intel Corporation Xeon E7 v4/Xeon E5 v4/Xeon E3 v4/Xeon D Ubox [8086:6f1e] | +-10.6 Intel Corporation Xeon E7 v4/Xeon E5 v4/Xeon E3 v4/Xeon D Ubox [8086:6f7d] | +-10.7 Intel Corporation Xeon E7 v4/Xeon E5 v4/Xeon E3 v4/Xeon D Ubox [8086:6f1f] | +-12.0 Intel Corporation Xeon E7 v4/Xeon E5 v4/Xeon E3 v4/Xeon D Home Agent 0 [8086:6fa0] | +-12.1 Intel Corporation Xeon E7 v4/Xeon E5 v4/Xeon E3 v4/Xeon D Home Agent 0 [8086:6f30] | +-12.2 Intel Corporation Xeon E7 v4/Xeon E5 v4/Xeon E3 v4/Xeon D Home Agent 0 Debug [8086:6f70] | +-13.0 Intel Corporation Xeon E7 v4/Xeon E5 v4/Xeon E3 v4/Xeon D Memory Controller 0 - Target Address/Thermal/RAS [8086:6fa8] | +-13.1 Intel Corporation Xeon E7 v4/Xeon E5 v4/Xeon E3 v4/Xeon D Memory Controller 0 - Target Address/Thermal/RAS [8086:6f71] | +-13.2 Intel Corporation Xeon E7 v4/Xeon E5 v4/Xeon E3 v4/Xeon D Memory Controller 0 - Channel Target Address Decoder [8086:6faa] | +-13.3 Intel Corporation Xeon E7 v4/Xeon E5 v4/Xeon E3 v4/Xeon D Memory Controller 0 - Channel Target Address Decoder [8086:6fab] | +-13.4 Intel Corporation Xeon E7 v4/Xeon E5 v4/Xeon E3 v4/Xeon D Memory Controller 0 - Channel Target Address Decoder [8086:6fac] | +-13.5 Intel Corporation Xeon E7 v4/Xeon E5 v4/Xeon E3 v4/Xeon D Memory Controller 0 - Channel Target Address Decoder [8086:6fad] | +-13.6 Intel Corporation Xeon E7 v4/Xeon E5 v4/Xeon E3 v4/Xeon D DDRIO Channel 0/1 Broadcast [8086:6fae] | +-13.7 Intel Corporation Xeon E7 v4/Xeon E5 v4/Xeon E3 v4/Xeon D DDRIO Global Broadcast [8086:6faf] | +-14.0 Intel Corporation Xeon E7 v4/Xeon E5 v4/Xeon E3 v4/Xeon D Memory Controller 0 - Channel 0 Thermal Control [8086:6fb0] | +-14.1 Intel Corporation Xeon E7 v4/Xeon E5 v4/Xeon E3 v4/Xeon D Memory Controller 0 - Channel 1 Thermal Control [8086:6fb1] | +-14.2 Intel Corporation Xeon E7 v4/Xeon E5 v4/Xeon E3 v4/Xeon D Memory Controller 0 - Channel 0 Error [8086:6fb2] | +-14.3 Intel Corporation Xeon E7 v4/Xeon E5 v4/Xeon E3 v4/Xeon D Memory Controller 0 - Channel 1 Error [8086:6fb3] | +-14.4 Intel Corporation Xeon E7 v4/Xeon E5 v4/Xeon E3 v4/Xeon D DDRIO Channel 0/1 Interface [8086:6fbc] | +-14.5 Intel Corporation Xeon E7 v4/Xeon E5 v4/Xeon E3 v4/Xeon D DDRIO Channel 0/1 Interface [8086:6fbd] | +-14.6 Intel Corporation Xeon E7 v4/Xeon E5 v4/Xeon E3 v4/Xeon D DDRIO Channel 0/1 Interface [8086:6fbe] | +-14.7 Intel Corporation Xeon E7 v4/Xeon E5 v4/Xeon E3 v4/Xeon D DDRIO Channel 0/1 Interface [8086:6fbf] | +-15.0 Intel Corporation Xeon E7 v4/Xeon E5 v4/Xeon E3 v4/Xeon D Memory Controller 0 - Channel 2 Thermal Control [8086:6fb4] | +-15.1 Intel Corporation Xeon E7 v4/Xeon E5 v4/Xeon E3 v4/Xeon D Memory Controller 0 - Channel 3 Thermal Control [8086:6fb5] | +-15.2 Intel Corporation Xeon E7 v4/Xeon E5 v4/Xeon E3 v4/Xeon D Memory Controller 0 - Channel 2 Error [8086:6fb6] | +-15.3 Intel Corporation Xeon E7 v4/Xeon E5 v4/Xeon E3 v4/Xeon D Memory Controller 0 - Channel 3 Error [8086:6fb7] | +-16.0 Intel Corporation Xeon E7 v4/Xeon E5 v4/Xeon E3 v4/Xeon D Target Address/Thermal/RAS [8086:6f68] | +-16.6 Intel Corporation Xeon E7 v4/Xeon E5 v4/Xeon E3 v4/Xeon D DDRIO Channel 2/3 Broadcast [8086:6f6e] | +-16.7 Intel Corporation Xeon E7 v4/Xeon E5 v4/Xeon E3 v4/Xeon D DDRIO Global Broadcast [8086:6f6f] | +-17.0 Intel Corporation Xeon E7 v4/Xeon E5 v4/Xeon E3 v4/Xeon D Memory Controller 1 - Channel 0 Thermal Control [8086:6fd0] | +-17.4 Intel Corporation Xeon E7 v4/Xeon E5 v4/Xeon E3 v4/Xeon D DDRIO Channel 2/3 Interface [8086:6fb8] | +-17.5 Intel Corporation Xeon E7 v4/Xeon E5 v4/Xeon E3 v4/Xeon D DDRIO Channel 2/3 Interface [8086:6fb9] | +-17.6 Intel Corporation Xeon E7 v4/Xeon E5 v4/Xeon E3 v4/Xeon D DDRIO Channel 2/3 Interface [8086:6fba] | +-17.7 Intel Corporation Xeon E7 v4/Xeon E5 v4/Xeon E3 v4/Xeon D DDRIO Channel 2/3 Interface [8086:6fbb] | +-1e.0 Intel Corporation Xeon E7 v4/Xeon E5 v4/Xeon E3 v4/Xeon D Power Control Unit [8086:6f98] | +-1e.1 Intel Corporation Xeon E7 v4/Xeon E5 v4/Xeon E3 v4/Xeon D Power Control Unit [8086:6f99] | +-1e.2 Intel Corporation Xeon E7 v4/Xeon E5 v4/Xeon E3 v4/Xeon D Power Control Unit [8086:6f9a] | +-1e.3 Intel Corporation Xeon E7 v4/Xeon E5 v4/Xeon E3 v4/Xeon D Power Control Unit [8086:6fc0] | +-1e.4 Intel Corporation Xeon E7 v4/Xeon E5 v4/Xeon E3 v4/Xeon D Power Control Unit [8086:6f9c] | +-1f.0 Intel Corporation Xeon E7 v4/Xeon E5 v4/Xeon E3 v4/Xeon D Power Control Unit [8086:6f88] | \-1f.2 Intel Corporation Xeon E7 v4/Xeon E5 v4/Xeon E3 v4/Xeon D Power Control Unit [8086:6f8a] \-[0000:00]-+-00.0 Intel Corporation Xeon E7 v4/Xeon E5 v4/Xeon E3 v4/Xeon D DMI2 [8086:6f00] +-01.0-[01]----00.0 Broadcom / LSI MegaRAID SAS-3 3108 [Invader] [1000:005d] +-02.0-[04]-- +-02.2-[05]-- +-03.0-[06]-- +-05.0 Intel Corporation Xeon E7 v4/Xeon E5 v4/Xeon E3 v4/Xeon D Map/VTd_Misc/System Management [8086:6f28] +-05.1 Intel Corporation Xeon E7 v4/Xeon E5 v4/Xeon E3 v4/Xeon D IIO Hot Plug [8086:6f29] +-05.2 Intel Corporation Xeon E7 v4/Xeon E5 v4/Xeon E3 v4/Xeon D IIO RAS/Control Status/Global Errors [8086:6f2a] +-05.4 Intel Corporation Xeon E7 v4/Xeon E5 v4/Xeon E3 v4/Xeon D I/O APIC [8086:6f2c] +-11.0 Intel Corporation C610/X99 series chipset SPSR [8086:8d7c] +-16.0 Intel Corporation C610/X99 series chipset MEI Controller #1 [8086:8d3a] +-16.1 Intel Corporation C610/X99 series chipset MEI Controller #2 [8086:8d3b] +-1a.0 Intel Corporation C610/X99 series chipset USB Enhanced Host Controller #2 [8086:8d2d] +-1c.0-[07]-- +-1c.1-[08-0c]----00.0-[09-0c]----00.0-[0a-0b]----00.0-[0b]----00.0 Matrox Electronics Systems Ltd. G200eR2 [102b:0534] +-1c.2-[02]--+-00.0 Broadcom Inc. and subsidiaries NetXtreme BCM5720 Gigabit Ethernet PCIe [14e4:165f] | \-00.1 Broadcom Inc. and subsidiaries NetXtreme BCM5720 Gigabit Ethernet PCIe [14e4:165f] +-1c.3-[03]--+-00.0 Broadcom Inc. and subsidiaries NetXtreme BCM5720 Gigabit Ethernet PCIe [14e4:165f] | \-00.1 Broadcom Inc. and subsidiaries NetXtreme BCM5720 Gigabit Ethernet PCIe [14e4:165f] +-1c.4-[0d]-- +-1d.0 Intel Corporation C610/X99 series chipset USB Enhanced Host Controller #1 [8086:8d26] \-1f.0 Intel Corporation C610/X99 series chipset LPC Controller [8086:8d44] pcilib: Cannot write to /var/services/homes/adminmiuz/.pciids-cache: No such file or directory :/$ dmesg | grep sd [ 11.767550] sd 0:0:0:0: [synoboot] 7892087 512-byte logical blocks: (4.04 GB/3.76 GiB) [ 11.768419] sd 0:0:0:0: [synoboot] Write Protect is off [ 11.768424] sd 0:0:0:0: [synoboot] Mode Sense: 00 00 00 00 [ 11.769322] sd 0:0:0:0: [synoboot] Asking for cache data failed [ 11.769325] sd 0:0:0:0: [synoboot] Assuming drive cache: write through [ 11.952672] sd 0:0:0:0: [synoboot] Attached SCSI removable disk [ 14.353790] sd 1:2:0:0: [sdb] 11719933952 512-byte logical blocks: (6.00 TB/5.46 TiB) [ 14.354419] sd 1:2:1:0: [sdc] 11719933952 512-byte logical blocks: (6.00 TB/5.46 TiB) [ 14.354422] sd 1:2:1:0: [sdc] 4096-byte physical blocks [ 14.354473] sd 1:2:1:0: [sdc] Write Protect is off [ 14.354476] sd 1:2:1:0: [sdc] Mode Sense: 1f 00 00 08 [ 14.354510] sd 1:2:1:0: [sdc] Write cache: disabled, read cache: enabled, doesn't support DPO or FUA [ 14.355377] sdc: sdc1 sdc2 [ 14.355812] sd 1:2:2:0: [sdd] 11719933952 512-byte logical blocks: (6.00 TB/5.46 TiB) [ 14.355814] sd 1:2:2:0: [sdd] 4096-byte physical blocks [ 14.355878] sd 1:2:1:0: [sdc] Attached SCSI disk [ 14.355915] sd 1:2:2:0: [sdd] Write Protect is off [ 14.355919] sd 1:2:2:0: [sdd] Mode Sense: 1f 00 00 08 [ 14.355954] sd 1:2:2:0: [sdd] Write cache: disabled, read cache: enabled, doesn't support DPO or FUA [ 14.356639] sdd: sdd1 sdd2 [ 14.357024] sd 1:2:2:0: [sdd] Attached SCSI disk [ 14.357893] sd 1:2:3:0: [sde] 11719933952 512-byte logical blocks: (6.00 TB/5.46 TiB) [ 14.357896] sd 1:2:3:0: [sde] 4096-byte physical blocks [ 14.357956] sd 1:2:3:0: [sde] Write Protect is off [ 14.357959] sd 1:2:3:0: [sde] Mode Sense: 1f 00 00 08 [ 14.357994] sd 1:2:3:0: [sde] Write cache: disabled, read cache: enabled, doesn't support DPO or FUA [ 14.358677] sde: sde1 sde2 [ 14.359065] sd 1:2:3:0: [sde] Attached SCSI disk [ 14.361523] sd 1:2:4:0: [sdf] 11719933952 512-byte logical blocks: (6.00 TB/5.46 TiB) [ 14.361526] sd 1:2:4:0: [sdf] 4096-byte physical blocks [ 14.361587] sd 1:2:4:0: [sdf] Write Protect is off [ 14.361590] sd 1:2:4:0: [sdf] Mode Sense: 1f 00 00 08 [ 14.361624] sd 1:2:4:0: [sdf] Write cache: disabled, read cache: enabled, doesn't support DPO or FUA [ 14.362322] sdf: sdf1 sdf2 [ 14.362711] sd 1:2:4:0: [sdf] Attached SCSI disk [ 14.366053] sd 1:2:5:0: [sdg] 11719933952 512-byte logical blocks: (6.00 TB/5.46 TiB) [ 14.366056] sd 1:2:5:0: [sdg] 4096-byte physical blocks [ 14.366134] sd 1:2:5:0: [sdg] Write Protect is off [ 14.366138] sd 1:2:5:0: [sdg] Mode Sense: 1f 00 00 08 [ 14.366172] sd 1:2:5:0: [sdg] Write cache: disabled, read cache: enabled, doesn't support DPO or FUA [ 14.366932] sdg: sdg1 sdg2 [ 14.367325] sd 1:2:5:0: [sdg] Attached SCSI disk [ 14.374469] sd 1:2:6:0: [sdh] 11719933952 512-byte logical blocks: (6.00 TB/5.46 TiB) [ 14.374472] sd 1:2:6:0: [sdh] 4096-byte physical blocks [ 14.374556] sd 1:2:6:0: [sdh] Write Protect is off [ 14.374560] sd 1:2:6:0: [sdh] Mode Sense: 1f 00 00 08 [ 14.374593] sd 1:2:6:0: [sdh] Write cache: disabled, read cache: enabled, doesn't support DPO or FUA [ 14.375296] sdh: sdh1 sdh2 [ 14.375691] sd 1:2:6:0: [sdh] Attached SCSI disk [ 14.382469] sd 1:2:7:0: [sdi] 11719933952 512-byte logical blocks: (6.00 TB/5.46 TiB) [ 14.382472] sd 1:2:7:0: [sdi] 4096-byte physical blocks [ 14.382546] sd 1:2:7:0: [sdi] Write Protect is off [ 14.382549] sd 1:2:7:0: [sdi] Mode Sense: 1f 00 00 08 [ 14.382588] sd 1:2:7:0: [sdi] Write cache: disabled, read cache: enabled, doesn't support DPO or FUA [ 14.383235] sdi: sdi1 sdi2 [ 14.383642] sd 1:2:7:0: [sdi] Attached SCSI disk [ 15.954331] sd 1:2:0:0: [sdb] 4096-byte physical blocks [ 15.960230] sd 1:2:0:0: [sdb] Write Protect is off [ 15.965584] sd 1:2:0:0: [sdb] Mode Sense: 1f 00 00 08 [ 15.971289] sd 1:2:0:0: [sdb] Write cache: disabled, read cache: enabled, doesn't support DPO or FUA [ 15.983796] sdb: sdb1 sdb2 [ 15.987251] sd 1:2:0:0: [sdb] Attached SCSI disk [ 22.764073] md: bind<sdc1> [ 22.767495] md: bind<sdd1> [ 22.772053] md: bind<sde1> [ 22.776698] md: bind<sdf1> [ 22.781232] md: bind<sdg1> [ 22.785764] md: bind<sdh1> [ 22.790296] md: bind<sdi1> [ 22.793810] md: bind<sdb1> [ 34.588715] sd 0:0:0:0: Attached scsi generic sg0 type 0 [ 34.596211] sd 1:2:0:0: Attached scsi generic sg1 type 0 [ 34.603659] sd 1:2:1:0: Attached scsi generic sg2 type 0 [ 34.611141] sd 1:2:2:0: Attached scsi generic sg3 type 0 [ 34.618615] sd 1:2:3:0: Attached scsi generic sg4 type 0 [ 34.626091] sd 1:2:4:0: Attached scsi generic sg5 type 0 [ 34.633572] sd 1:2:5:0: Attached scsi generic sg6 type 0 [ 34.641052] sd 1:2:6:0: Attached scsi generic sg7 type 0 [ 34.648536] sd 1:2:7:0: Attached scsi generic sg8 type 0 [ 37.007477] md: bind<sdc2> [ 37.011370] md: bind<sdd2> [ 37.014802] md: bind<sde2> [ 37.017959] md: bind<sdf2> [ 37.021123] md: bind<sdg2> [ 37.024294] md: bind<sdh2> [ 37.027458] md: bind<sdi2> [ 37.058846] md: bind<sdb2>
-
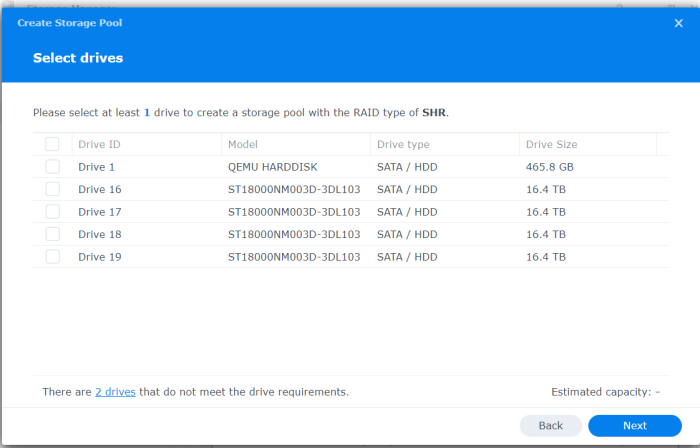
Motherboard has 2 sata port #1 and #2 . DSM shows HDD #1,2,5,6 (skipped 3,4) How to configure so that it shows HDD#1,2,3,4 and hide all the empty slots?
-
easy 0.000000] Command line: withefi earlyprintk syno_hw_version=RS4021xs+ console=ttyS0,115200n8 netif_num=3 pid=0x3379 earlycon=uart8250,io,0x3f8,115200n8 syno_port_thaw=1 mac2=A0369F4E8D08 mac3=A0369F4E8D0A mac1=F832E4A093F0 sn=2250T2RCZFQSY vid=0x23a5 elevator=elevato r loglevel=15 SasIdxMap=0 HddHotplug=0 DiskIdxMap=00 syno_hdd_detect=0 vender_format_version=2 syno_hdd_powerup_seq=0 log_buf_len=32M root=/dev/md0 SataPortMap=8 skip_vender_mac_interfaces=0,1,2,3,4,5,6,7 panic=5 sasidxmap is here ... one disk less no nice picture in rack panel ... other ? this /dev/synoboot eat latter ..
-
can you try : sataportmap=8 diskidxmap=00 I'm curious
-
n So. I populated port 6 from motherboard sata controler and all in HBA card. satamap and driveidxmap are empty Command line: withefi earlyprintk syno_hw_version=RS4021xs+ console=ttyS0,115200n8 netif_num=3 pid=0x3379 earlycon=uart8250,io,0x3f8,115200n8 syno_port_thaw=1 mac2=A0369F4E8D08 mac3=A0369F4E8D0A mac1=F832E4A093F0 sn=2250T2RCZFQSY vid=0x23a5 elevator=elevator loglevel=15 HddHotplug=0 DiskIdxMap syno_hdd_detect=0 vender_format_version=2 syno_hdd_powerup_seq=0 log_buf_len=32M root=/dev/md0 SataPortMap skip_vender_mac_interfaces=0,1,2,3,4,5,6,7 panic=5 result.same as before with "SataPortMap": "12", "DiskIdxMap": "1000", "SasIdxMap: "0" "MaxDisks: "24" get mess one disk is missing ... but they count good no holes between "SataPortMap": "86", "DiskIdxMap": "0600", "SasIdxMap: "0" result is here ... bad I try and many others 618 816 with no luck sa6300 is not option too not see disks bonus pics any suggestion ?
-
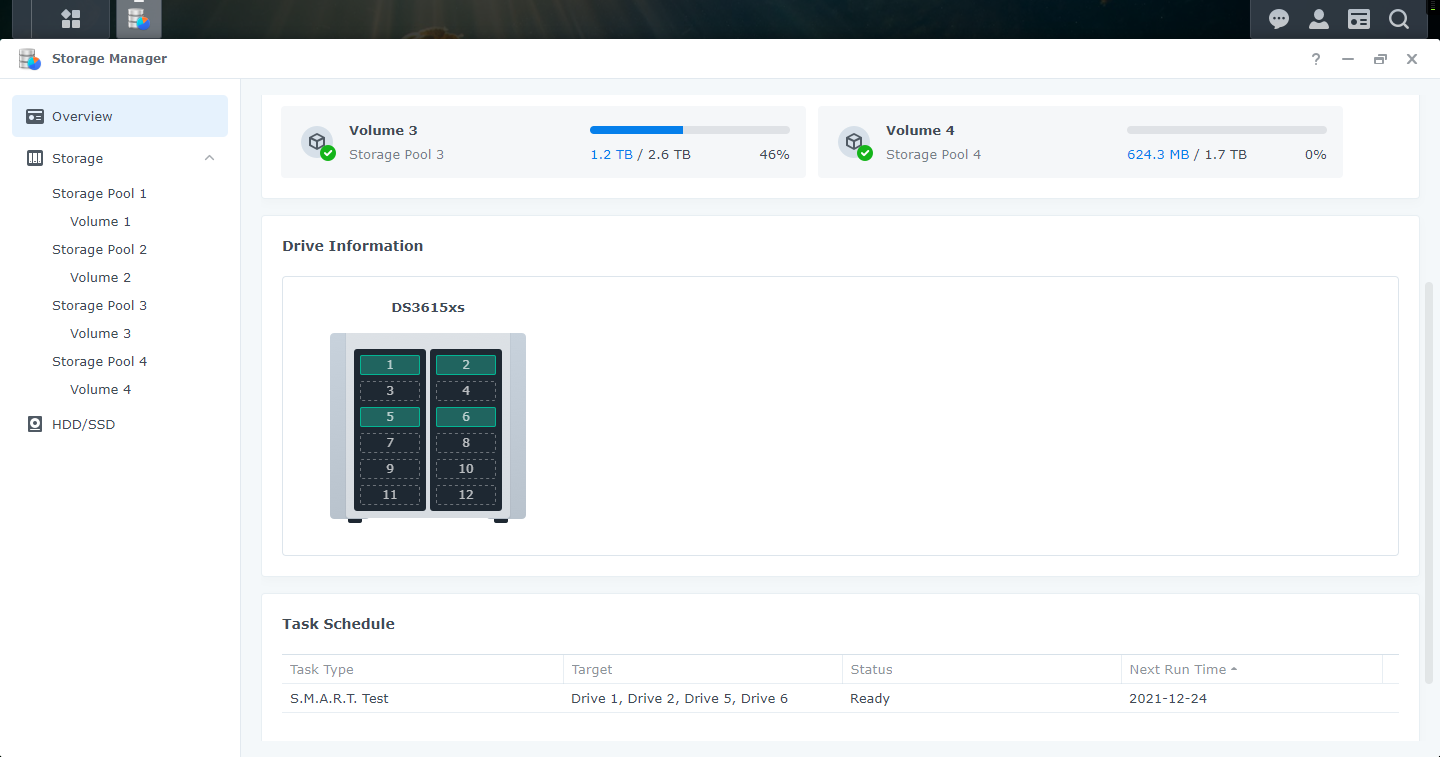
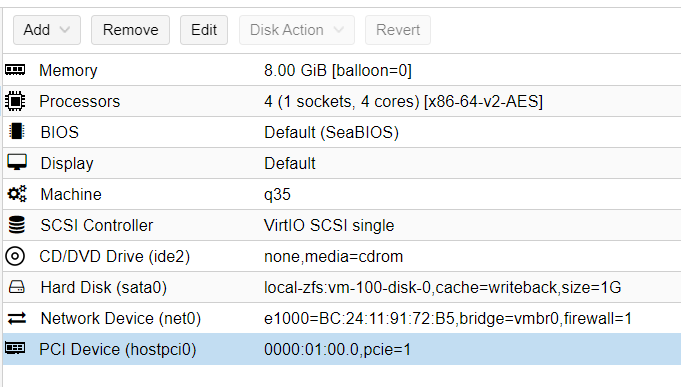
It seems there is still some missunderstanding with SataPortMap values. SataPortMap works with 1 digit matching a sata board. The number you assign limits the number or disks detected on each sata board. I you set : 12 : First sata board will only have one disk detected, and second sata board will detect only 2 disks. Your current settings limits your sataboard to 6 disks max, and 2nd Sata board is not configured at all, so default is used. In the beginning you should try to remove SataPortMap and DiskIdxMap and check how it is handled/detected. If with this (wrong) settings you only see 6 disks instead of the 7... maybe it means sata board are detected reversed, and your first sata is actually the 8 ports. So SataPortMap would be more like 86 (8 disks for first sata board and 6 disks for 2nd sata board). Regarding DiskIdxMap, it works with 2 digits for each sata board. and match the one digit from SataPortMap This parameter defines the start position of the first disk from each sata board. If you set DiskIdxMap = 1000 you actually say : First disk sata board 1 will begin in position 10. First disk sata board 2 will begin in position 0. As you already know, disks are labelled with letters starting from /dev/sda So position 0 is "a" and position 10 is like "k" So regarding DiskIdxMap=1000 you force first sata board disk 1 to begin at /dev/sdk, and you force first disk from sata board 2 to begin at /dev/sda and depending of the SataPortMap value you set earlier, you may limit available disks... If your sata controller has 8 ports but you limit SataPortMap single digit to 6, last 2 slots from your sata board won't be detected. You should never randomly take these values from a tutorial without understanding them. Most of the time there are not needed, they only help to "order" the disks in DSM GUI to make something cosy. Only some times you have to specify it to fix undetected sata controllers or disks when there is like 3 sata boards etc... As an example on Proxmox Q35 VM machines, there is a dummy Sata board controller unused. When you don't set SataPortMap / DiskIdxMap, the first disk shown in DSM GUI is always empty. So on Q35 VM machine, configuring it as "SataPortMap=18 DiskIdxMap=1000" you say there is only one disk on 1 sata bard controller, and move the first dummy sata controller board to /dev/sdk And you say there is 8 disks on sata controller board 2 (the real one used on the VM) and says the first disk start at /dev/sda But this is only to have something "pretty" on DSM GUI. You could let it without any settings, the first slot(s) would be empty in DSM, but it would work as usual.
-
[HBA Recommended settings from flyride] Not EUDEV , Use Only DDSML (If you use TCRP-mshell ) "SataPortMap": "12", "DiskIdxMap": "1000", "SasIdxMap: "0" "MaxDisks: "24" If you do this and still cannot see the disk, I recommend switching to the SA6400 model that supports disk automapping. There is no need for manual settings such as SataPortMap, and it supports HBA.
-
TinyCore RedPill Loader Build Support Tool ( M-Shell )
Peter Suh replied to Peter Suh's topic in Software Modding
Do not use sataportmap/diskidxmap without accurate information. You can also refer to the instructions that result from ./rploader.sh satamap . -
Super ! Non mais sérieux tu veux qu'on fasse quoi de ces infos... ? Tu ne donnes absolument rien pour te répondre, ni le loader utilisé, ni le synology choisi, ni la configuration matérielle (ou VM), ni comment c'était configuré "avant", avant quoi d'ailleurs ? Bref, pour toi comme pour les autres, si vous voulez de l'aide, soyez clairs, précis, exhaustifs ! Ceci étant dit, avec les loaders actuels, cet affichage est totalement cosmétique, ils sont pas placés 12345, c'est pas grave, c'est fait pour faire joli... à la louche, je mets une pièce sur SataPortMap et DiskIdxMap, mais sans rien savoir de ta conf, c'est au pifomètre.
-
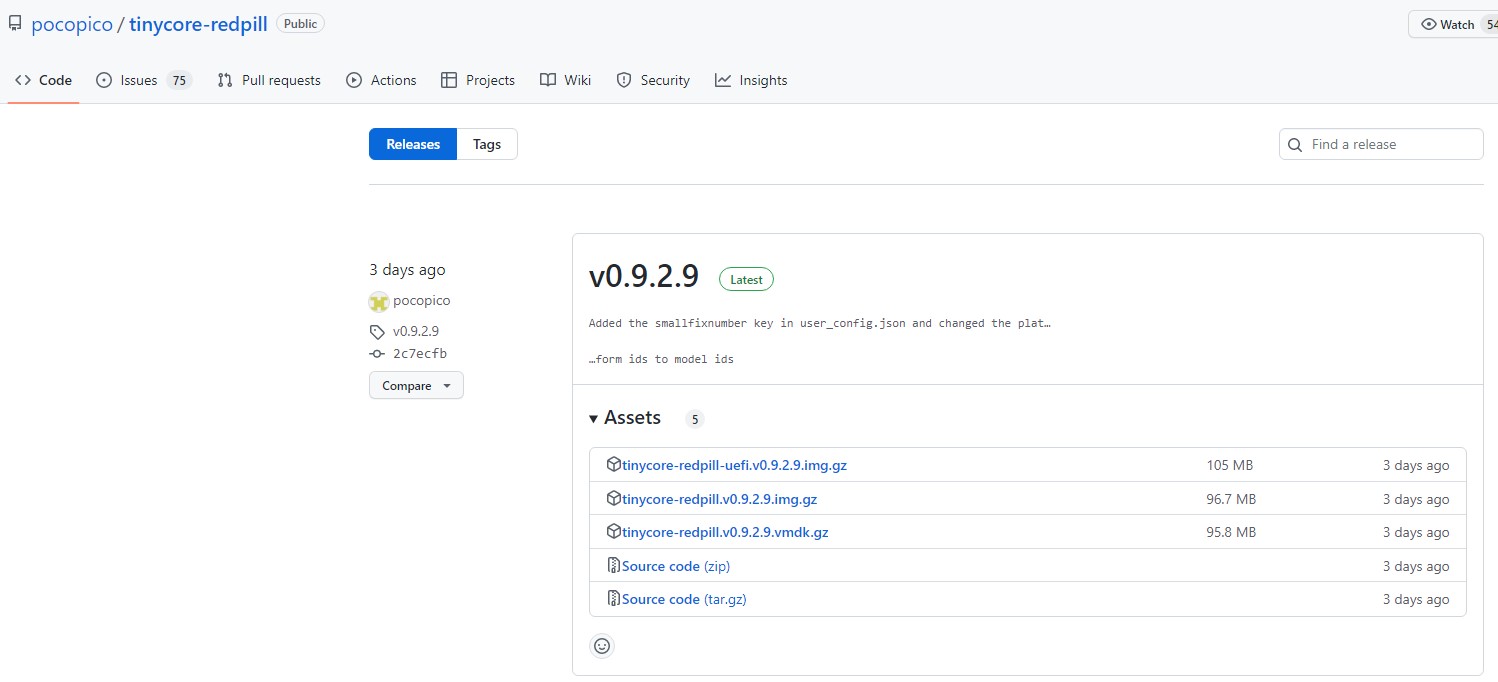
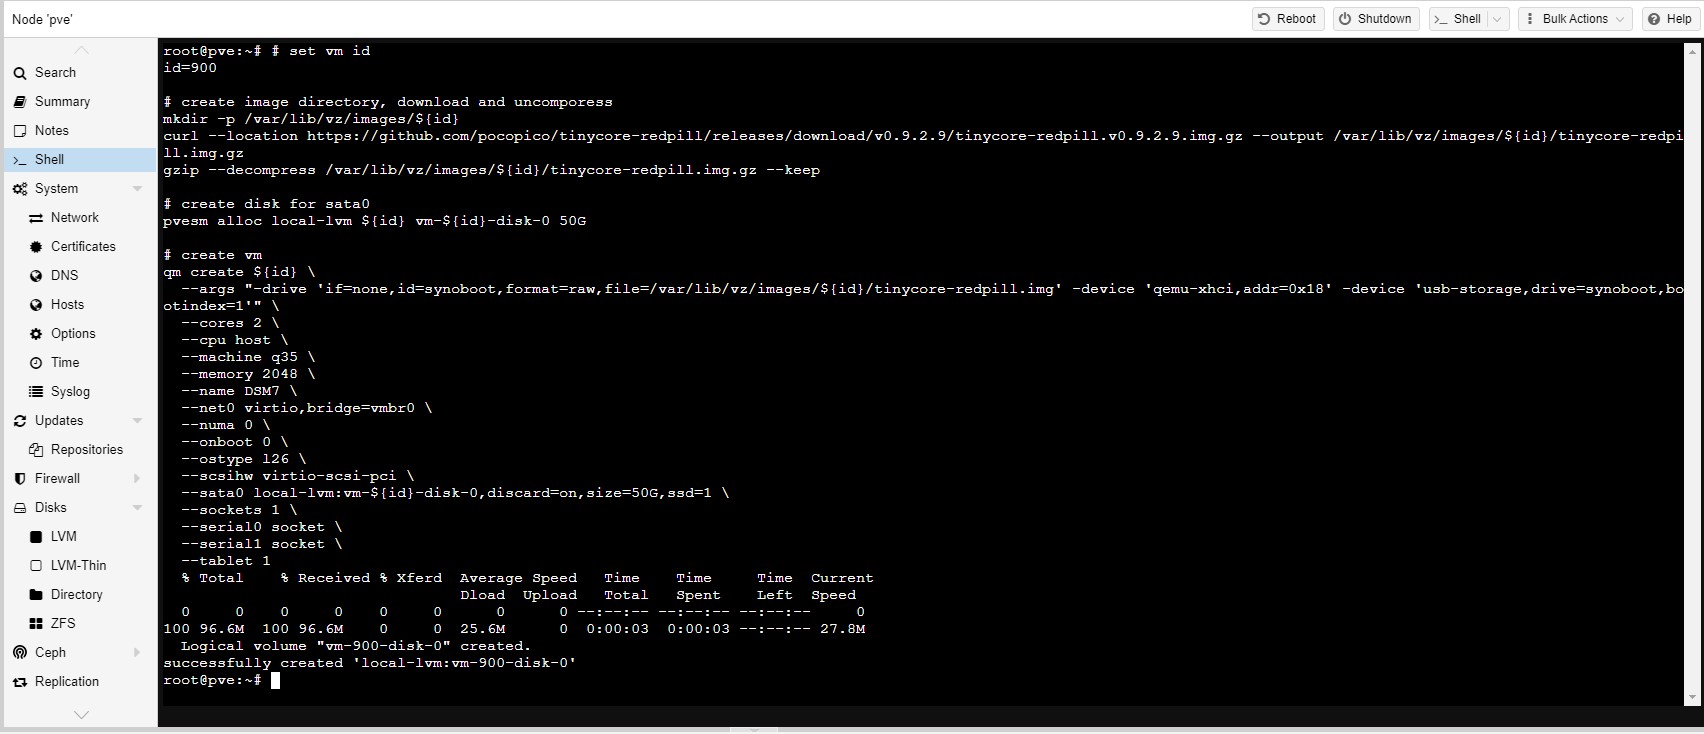
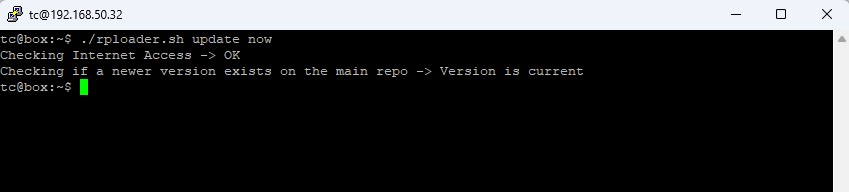
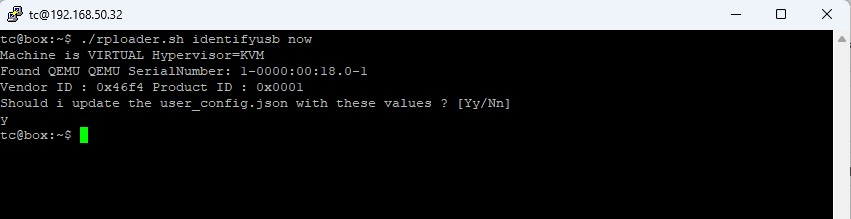
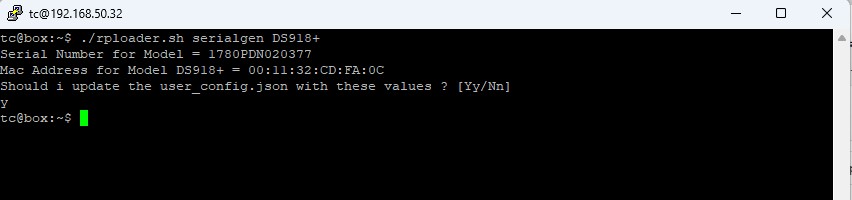
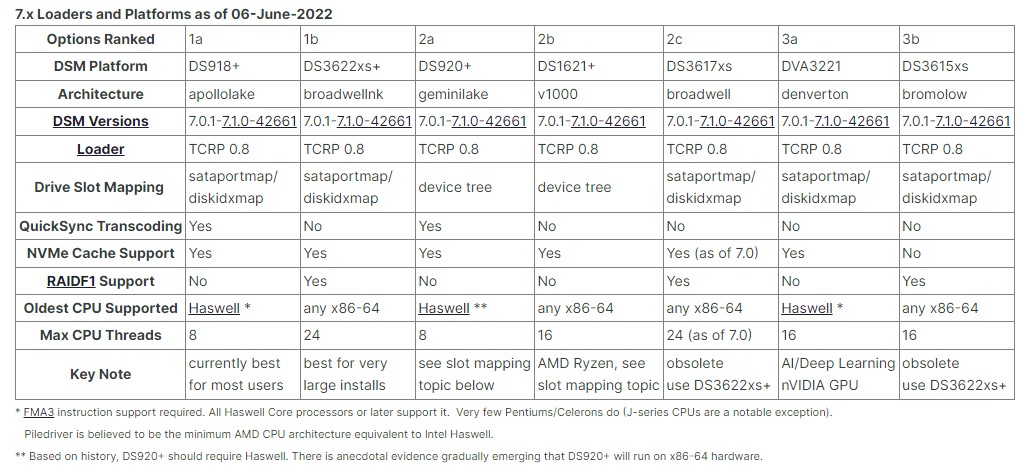
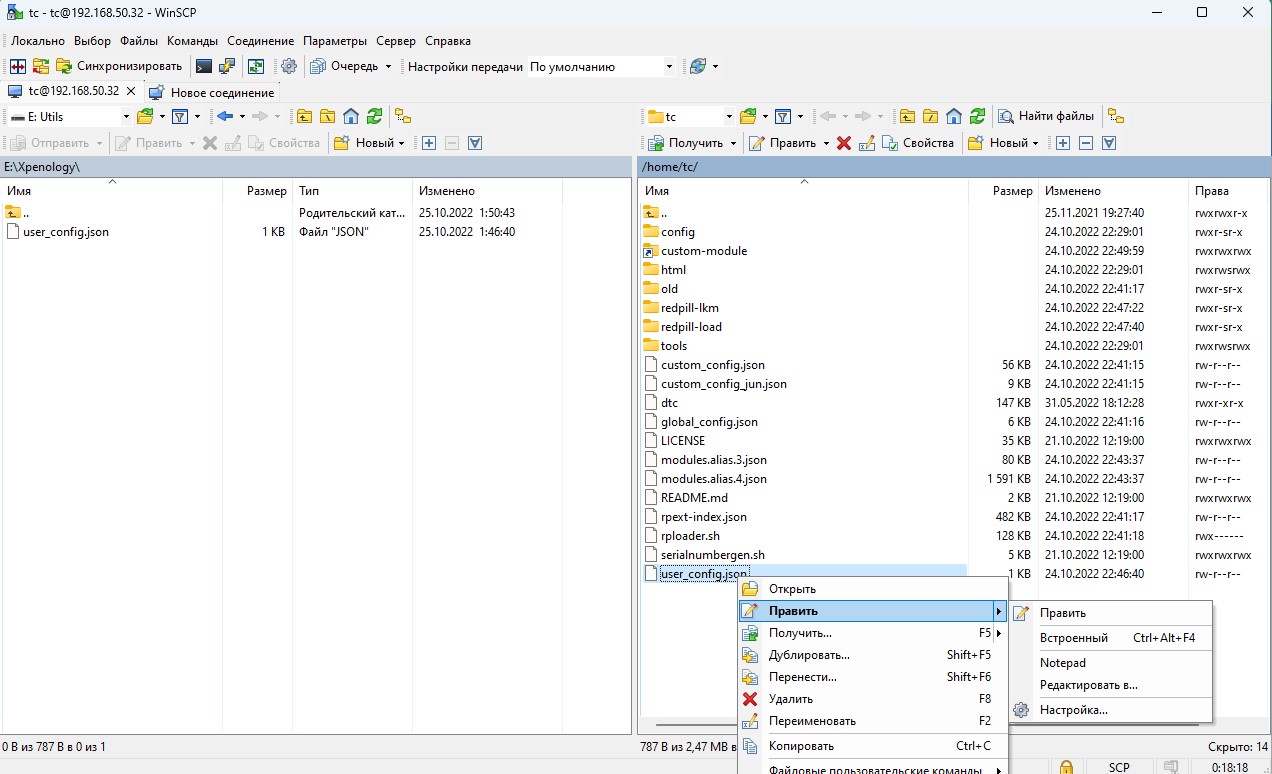
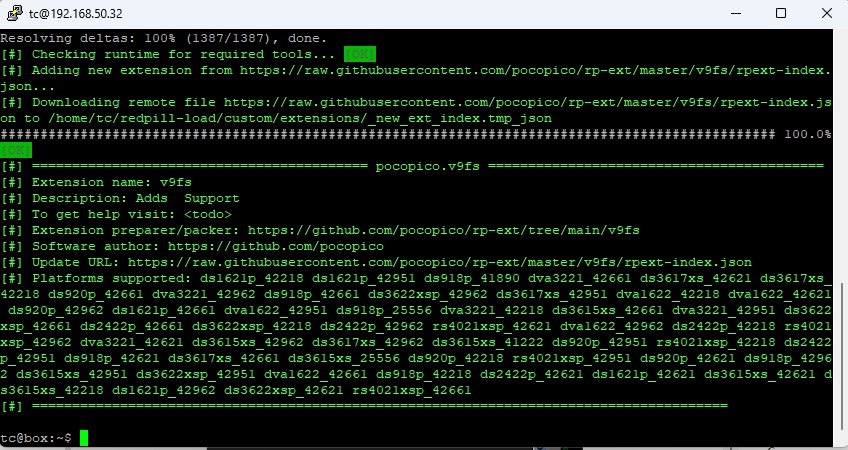
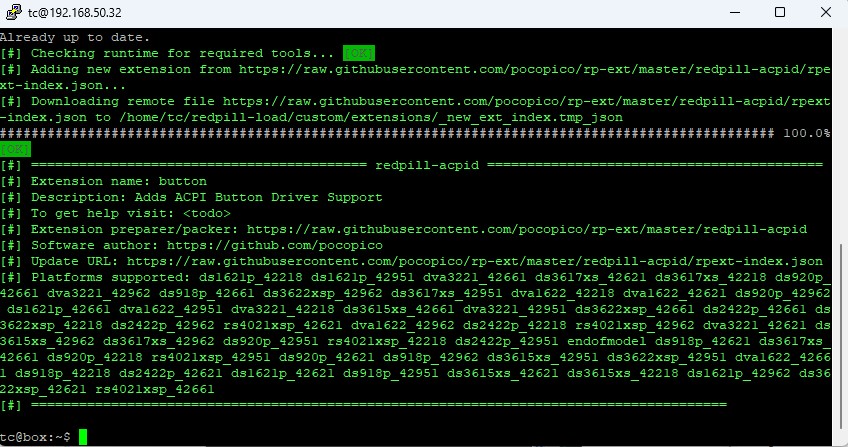
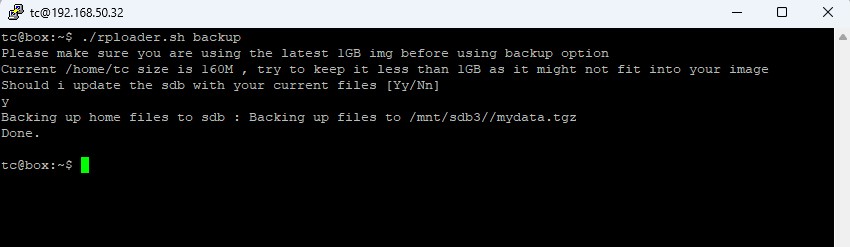
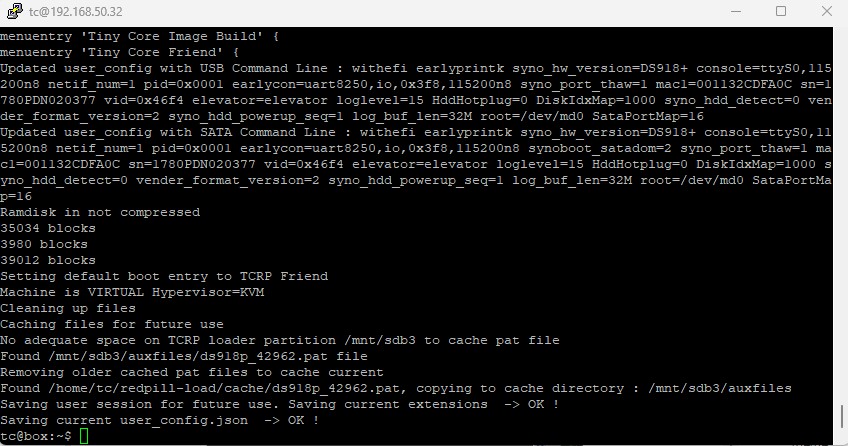
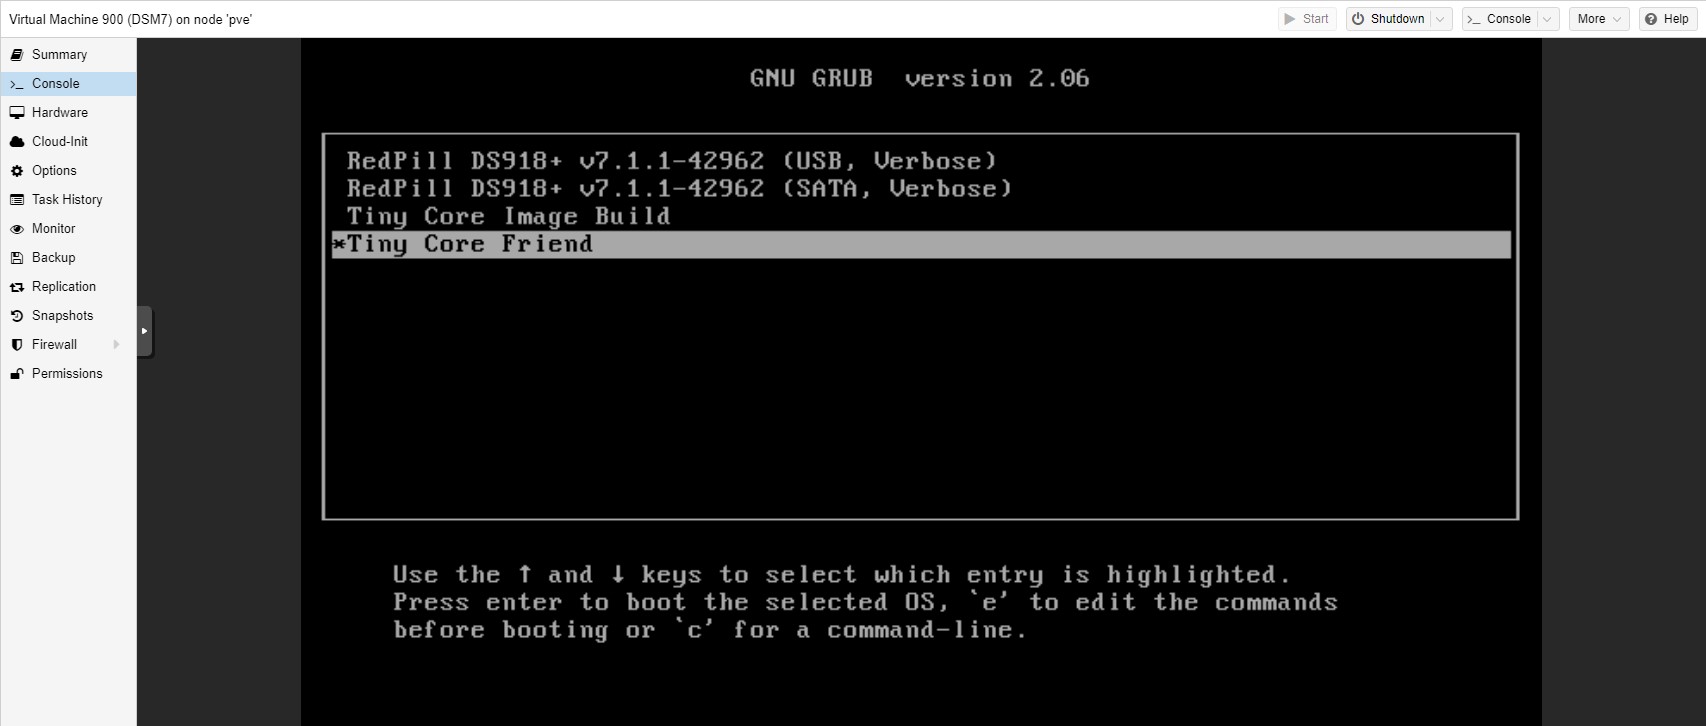
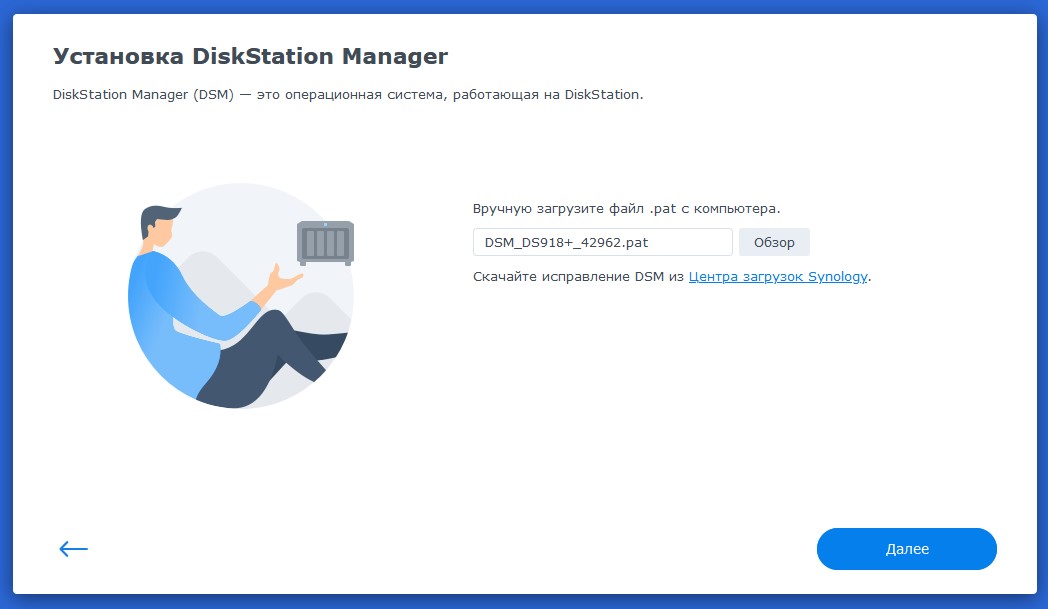
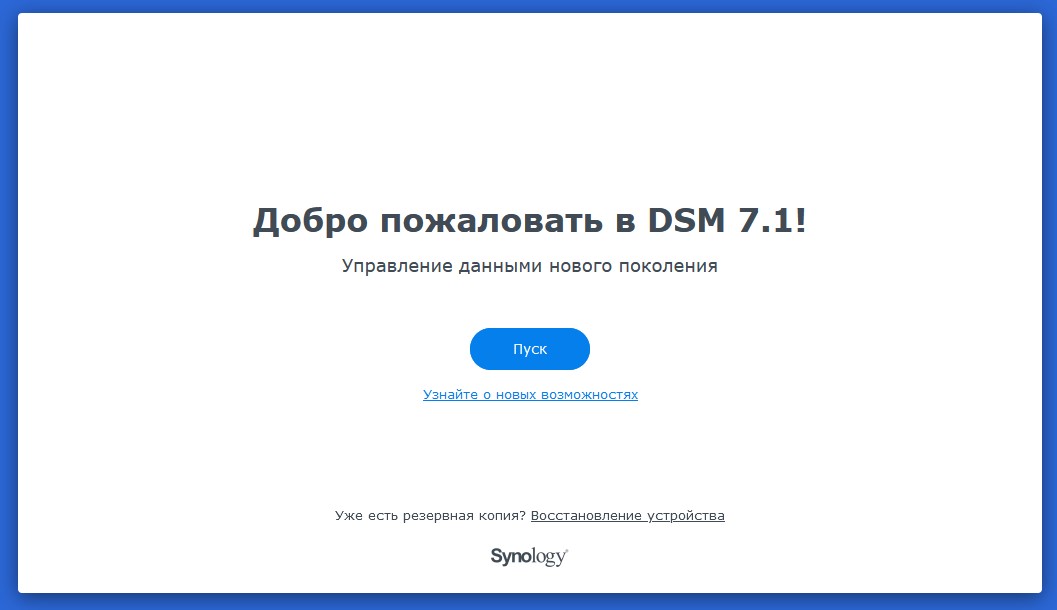
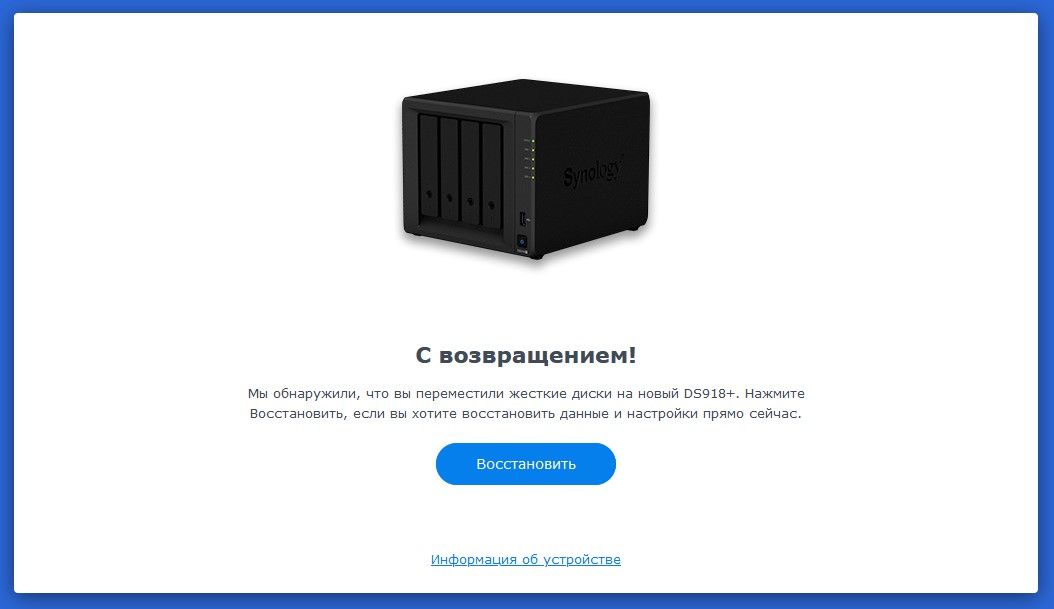
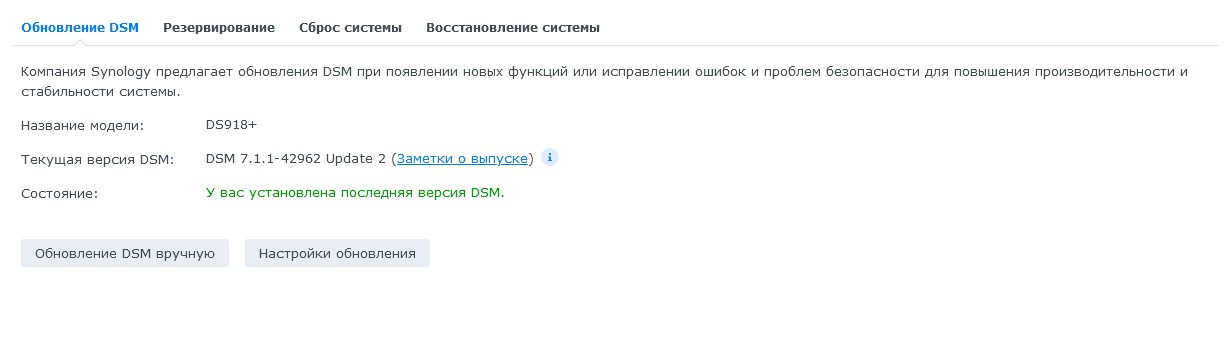
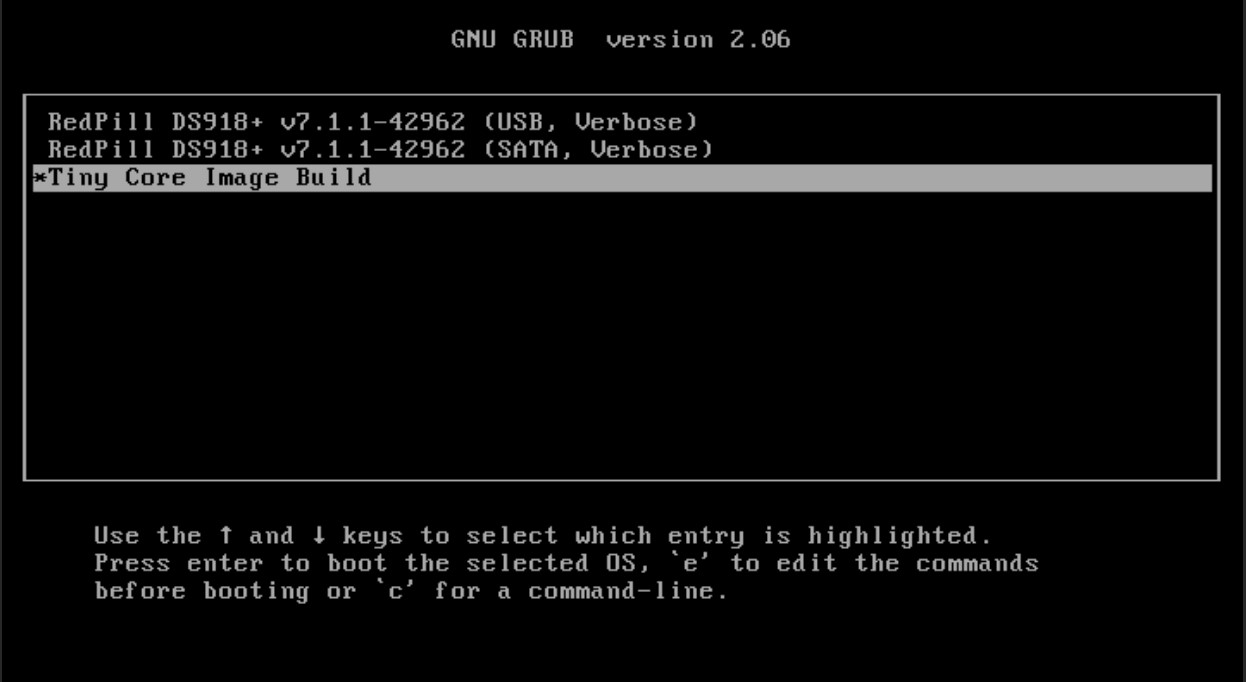
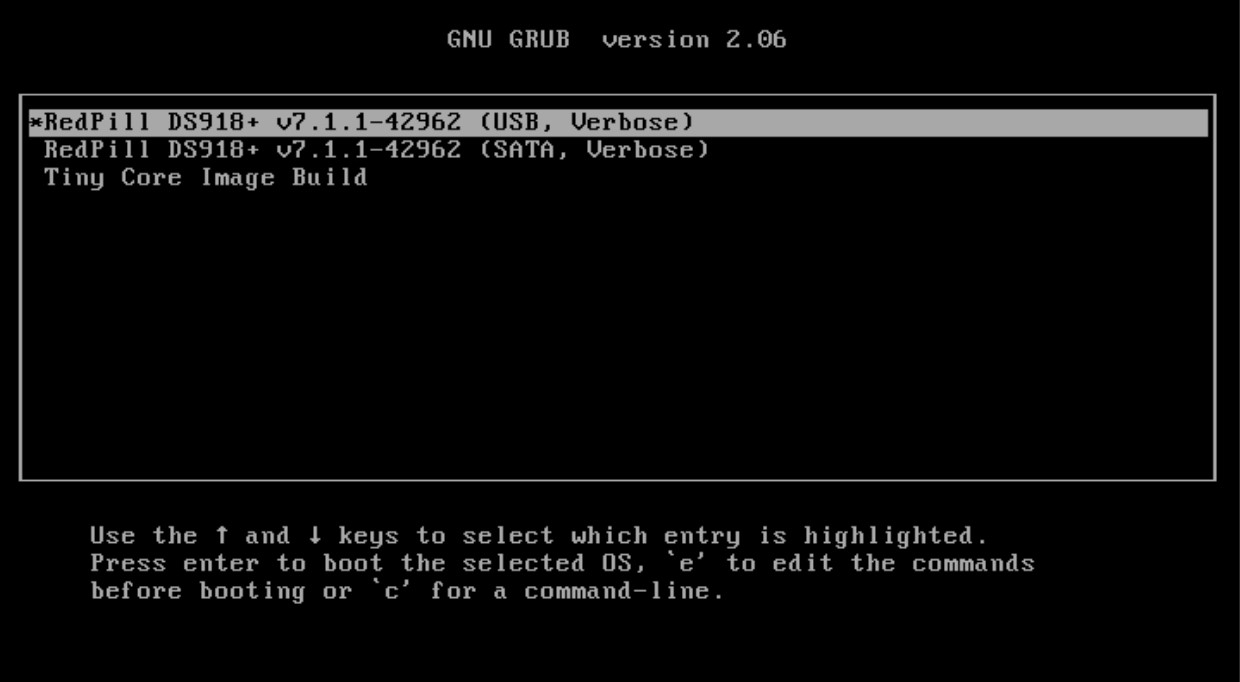
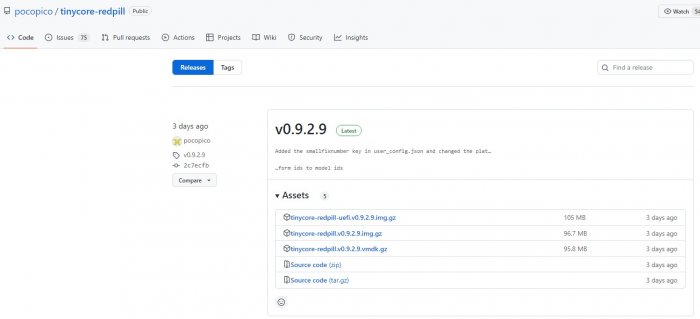
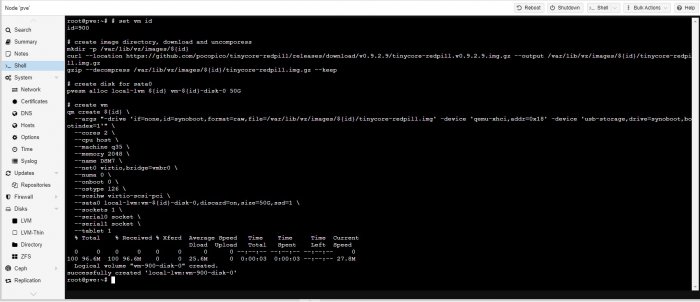
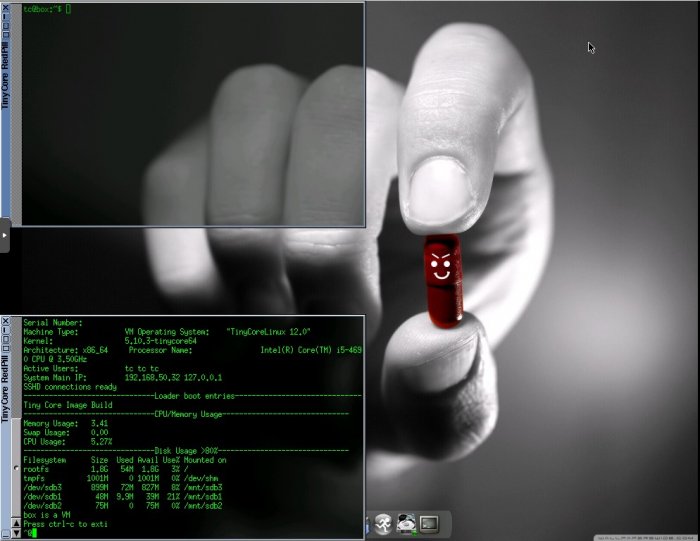
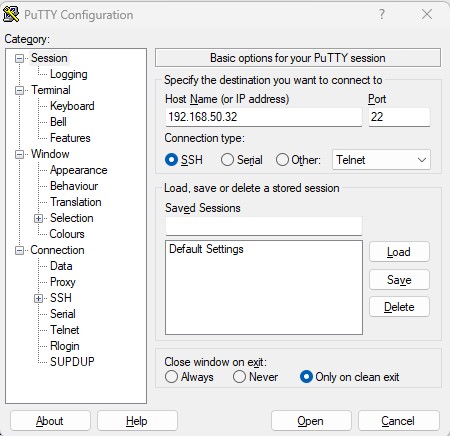
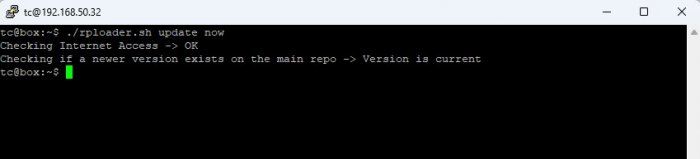
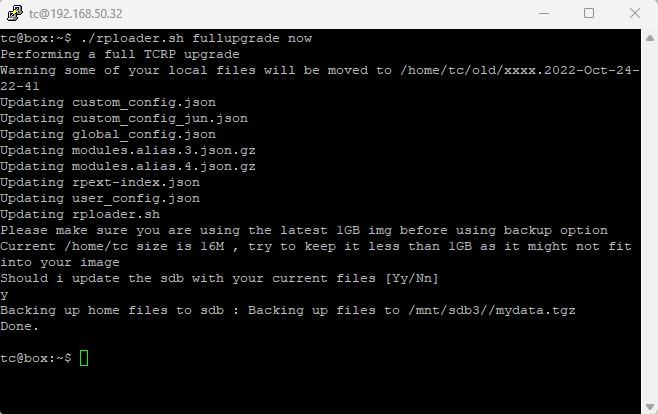
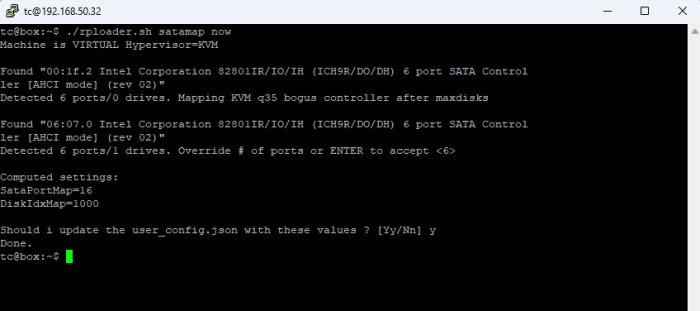
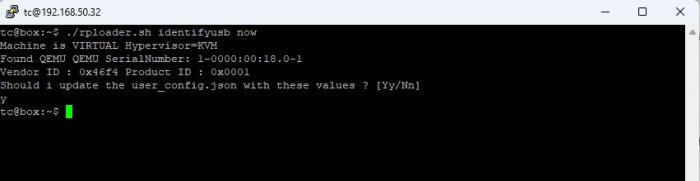
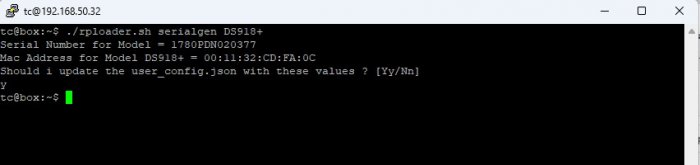
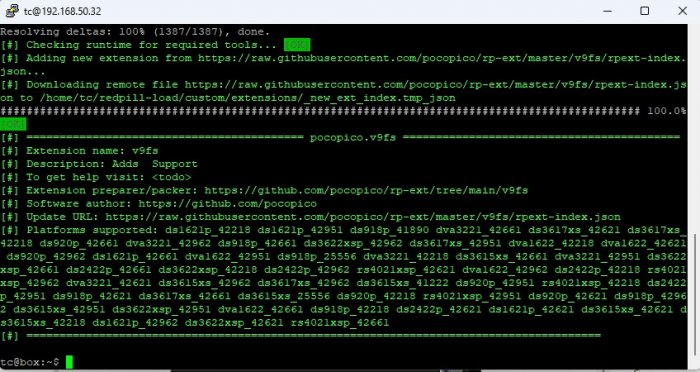
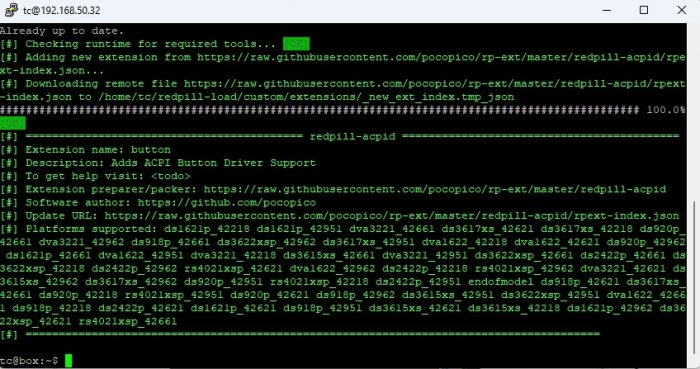
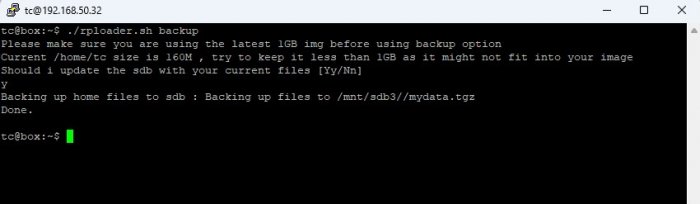
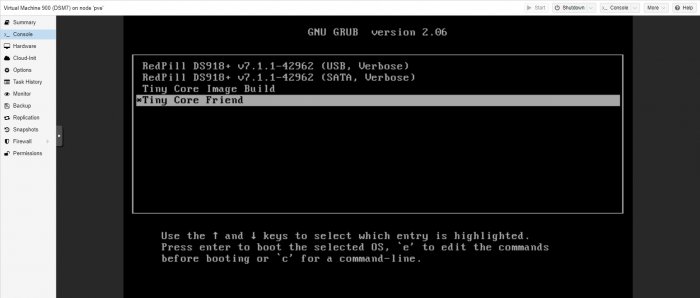
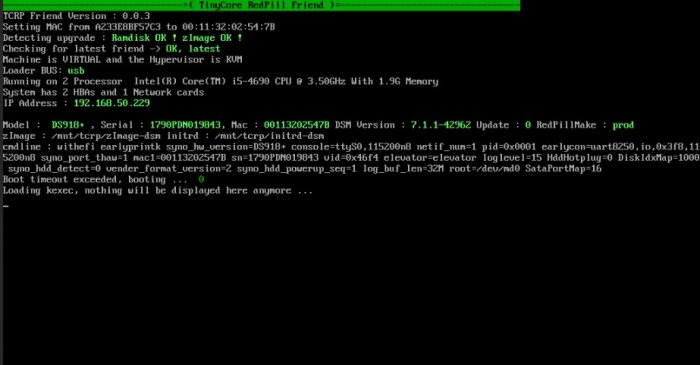
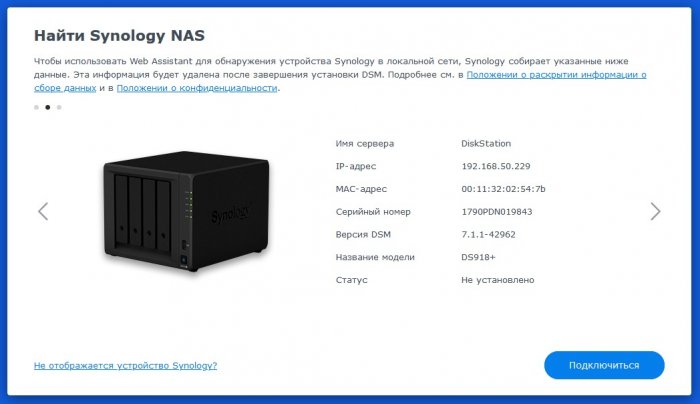
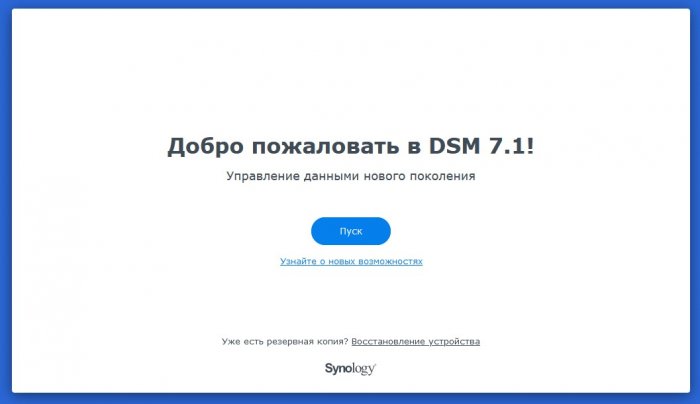
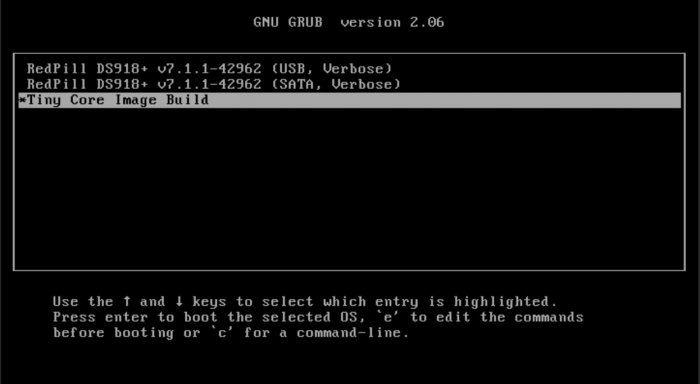
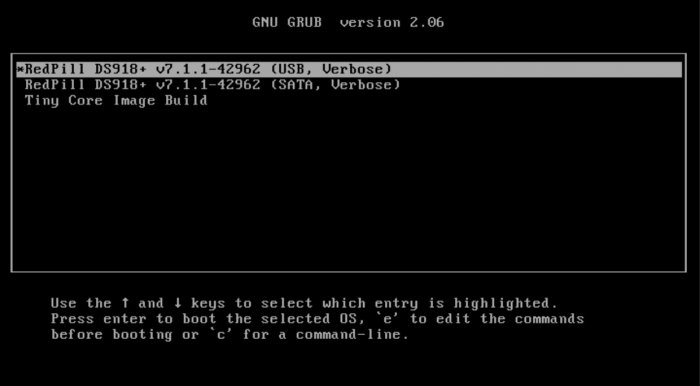
Загрузчик TinyCore RedPill Loader (TCRP Friend) В связи с выходом DSM 7.1.1, новой версии загрузчика Tinycore-redpill и Proxmox 7.2 решил немного исправить и дополнить инструкцию по установке. Для установки в полуавтоматическом режиме будем использовать Tinycore RedPill Loader от pocopico Создание виртуальной машины Для создания виртуальной машины я использовал шаблон скрипта от haydibe и использовал последний на данный момент stable имидж tinycore-redpill.v0.9.2.9 Под себя в скрипте можете исправить id для виртуальной машины, которую будете создавать и ресурсы, которые хотите выделить для NAS (cores, memory, name и в двух местах размер диска sata0). Диск делайте не меньше 25GB. Обязательно проверьте в GitHub какая версия имиджа актуальна на данный момент и исправьте это в скрипте. # set vm id id=900 # create image directory, download and uncomporess mkdir -p /var/lib/vz/images/${id} curl --location https://github.com/pocopico/tinycore-redpill/releases/download/v0.9.2.9/tinycore-redpill.v0.9.2.9.img.gz --output /var/lib/vz/images/${id}/tinycore-redpill.img.gz gzip --decompress /var/lib/vz/images/${id}/tinycore-redpill.img.gz --keep # create disk for sata0 pvesm alloc local-lvm ${id} vm-${id}-disk-0 50G # create vm qm create ${id} \ --args "-drive 'if=none,id=synoboot,format=raw,file=/var/lib/vz/images/${id}/tinycore-redpill.img' -device 'qemu-xhci,addr=0x18' -device 'usb-storage,drive=synoboot,bootindex=1'" \ --cores 2 \ --cpu host \ --machine q35 \ --memory 2048 \ --name DSM7 \ --net0 virtio,bridge=vmbr0 \ --numa 0 \ --onboot 0 \ --ostype l26 \ --scsihw virtio-scsi-pci \ --sata0 local-lvm:vm-${id}-disk-0,discard=on,size=50G,ssd=1 \ --sockets 1 \ --serial0 socket \ --serial1 socket \ --tablet 1 Обратите внимание, что в зависимости от платформы вашего сервера с proxmox может понадобиться в конфиге изменить --cpu host \ на --cpu kvm64 \ В Proxmox В консоли вставляем и запускаем созданный скрипт. После создания виртуальной машины запускаем ее и дожидаемся загрузки. Все дальнейшие действия можно делать в веб интерфейсе консоли виртуальной машины, но это будет не очень удобно и довольно криво. Я использовал Putty и WinSCP. В виртуальной машине смотрим IP У меня это 192.168.50.32 Putty Подключаемся к виртуальной машине Login: tc Password: P@ssw0rd Последовательно выполняем несколько команд ./rploader.sh update now ./rploader.sh fullupgrade now ./rploader.sh satamap now ./rploader.sh identifyusb now Определитесь какую платформу NAS будете использовать Более подробно можете ознакомиться с рекомендации по выбору из поста flyride Далее нужно сгенерировать серийный номер и mac под нужную платформу. Если вы используете свою связку реальных SN+MAC для работы QuickConnect, то пропускаем этот пункт. Например, для DS918+ указываем: ./rploader.sh serialgen DS918+ *DS918+/DS920+/ DS3622x+/DS3617xs/DS3615xs /DS1621+/DV3221 Переходим в WinSCP Подключаемся к виртуальной машине Нам нужно будет проверить и возможно отредактировать файл user_config.json Проверяем, что все пункты соответствуют тому, что были сгенерированы ранее. Иногда почему-то скрипт не с первого раза записывает полученные данные в файл. Если используете свою связку SN+MAC, то исправляем нужные пункты. "extra_cmdline": { "pid": "0x0001", "vid": "0x46f4", "sn": "1780PDN020377", "mac1": "001132CDFA0C", "netif_num": "1", "SataPortMap": "16", "DiskIdxMap": "1000" Возвращаемся в Putty Теперь надо добавить драйвера сетевой карты VirtIO или других сетевых карт, которые вы используете в Proxmox. В зависимости от выбранной вами платформы NAS и версии DSM выполняем команды: драйвер VirtIO ./rploader.sh ext ds918p-7.1.1-42962 add https://raw.githubusercontent.com/pocopico/rp-ext/master/v9fs/rpext-index.json драйвер Intel E1000 ./rploader.sh ext ds918p-7.1.1-42962 add https://raw.githubusercontent.com/pocopico/rp-ext/master/e1000/rpext-index.json драйвер Realtek RTL8139 ./rploader.sh ext ds918p-7.1.1-42962 add https://raw.githubusercontent.com/pocopico/rp-ext/master/8139too/rpext-index.json Так же иногда требуется добавить драйвер ACPI ./rploader.sh ext ds918p-7.1.1-42962 add https://raw.githubusercontent.com/pocopico/rp-ext/master/redpill-acpid/rpext-index.json *можно добавить все драйвера по очереди. **драйвера для других устройств можно найти тут Делаем бекап. ./rploader.sh backup В зависимости от выбранной ранее платформы выполняем сборку загрузчика: для DS918+ ./rploader.sh build ds918p-7.1.1-42962 withfriend для DS3622xs+ ./rploader.sh build ds3622xsp-7.1.1-42962 withfriend для DS920+ ./ rploader.sh build ds920p-7.1.1-42962 withfriend для DS1621+ ./rploader.sh build ds1621p-7.1.1-42962 withfriend для DS3617xs ./rploader.sh build ds3617xs-7.1.1-42962 withfriend для DS3615xs ./rploader.sh build ds3615xs-7.1.1-42962 withfriend для DVA3221 ./rploader.sh build dva3221-7.1.1-42962 withfriend Перегружаем виртуальную машину sudo reboot -f Загрузка Обратите внимание, что сейчас при загрузке виртуальной машины надо выбирать загрузку с Tiny Core Friend или RedPill DS918+ 7.1.1-42962 (USB, Verbose) Tiny Core Friend автоматически обрабатывает обновления DSM. Если вы будете выполнять обновление из графического интерфейса DSM, обновление будет обнаружено и автоматически исправлено TCRP Friend. Поэтому рекомендуется использовать TCRP Friend. Экран нового загрузчика отличается от стандартной версии большей информативностью. Ждем пару минут и в браузере открываем http://find.synology.com, используем Synology Assistant или сразу заходим по IP показанный на экране загрузки. Скачиваем с сайта Synology образ DSM_DS918+_42962.pat или другой под нужную вам платформу. Указываем загруженный файл для продолжения установки. После полной установки новый NAS перезагрузиться и порадует окном приветствия. Обновление DSM (если нет Tiny Core Friend) При обновлении NAS (например, на 7.1.1-42962 Update 2) может перестать нормально загружаться и начнет предлагать восстановиться Чтобы это исправить необходимо загрузиться в Tiny Core Image Build В Putty последовательно выполняем несколько команд и на все соглашаемся. ./rploader.sh clean new ./rploader.sh update new ./rploader.sh fullupgrade new ./rploader.sh postupdate ds918p-7.1.1-42962 Делаем очередной backup и перегружаемся. ./rploader.sh backup now sudo reboot -f Выбираем опять загрузку с USB NAS обновился и опять нормально загружается


-
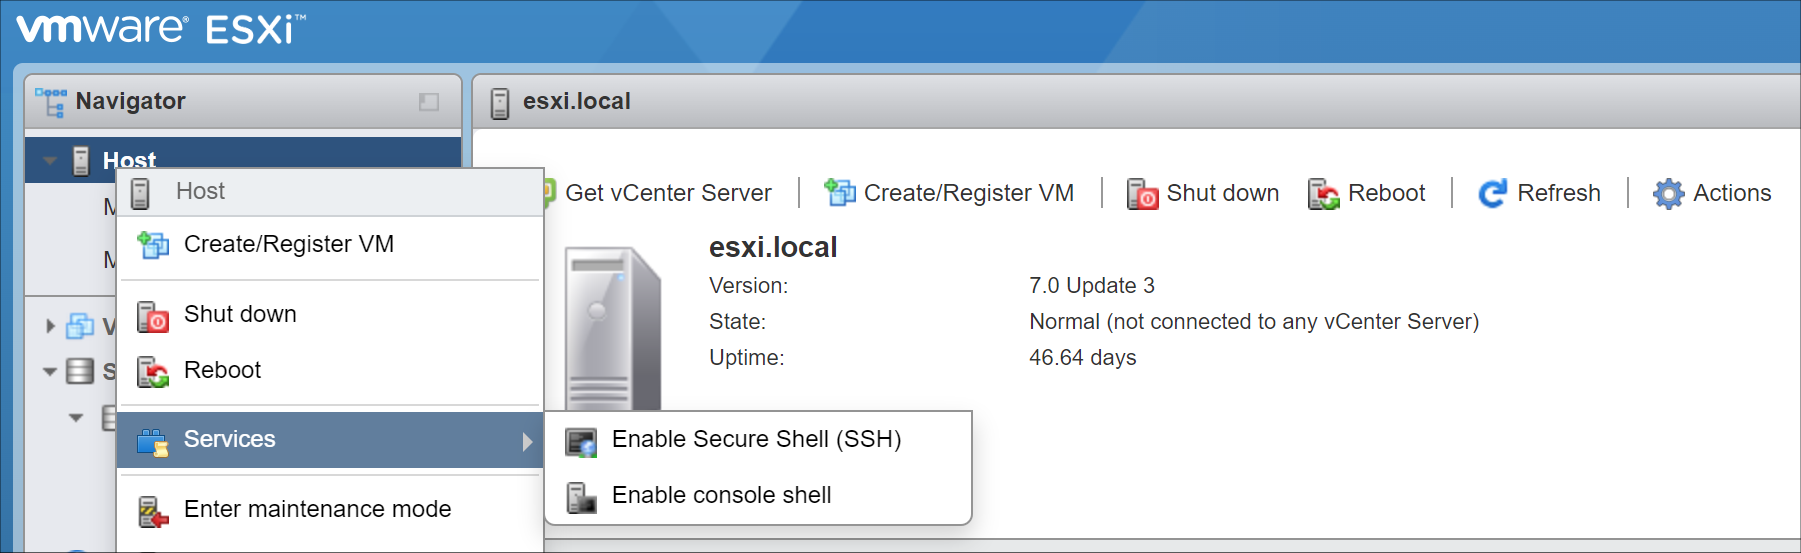
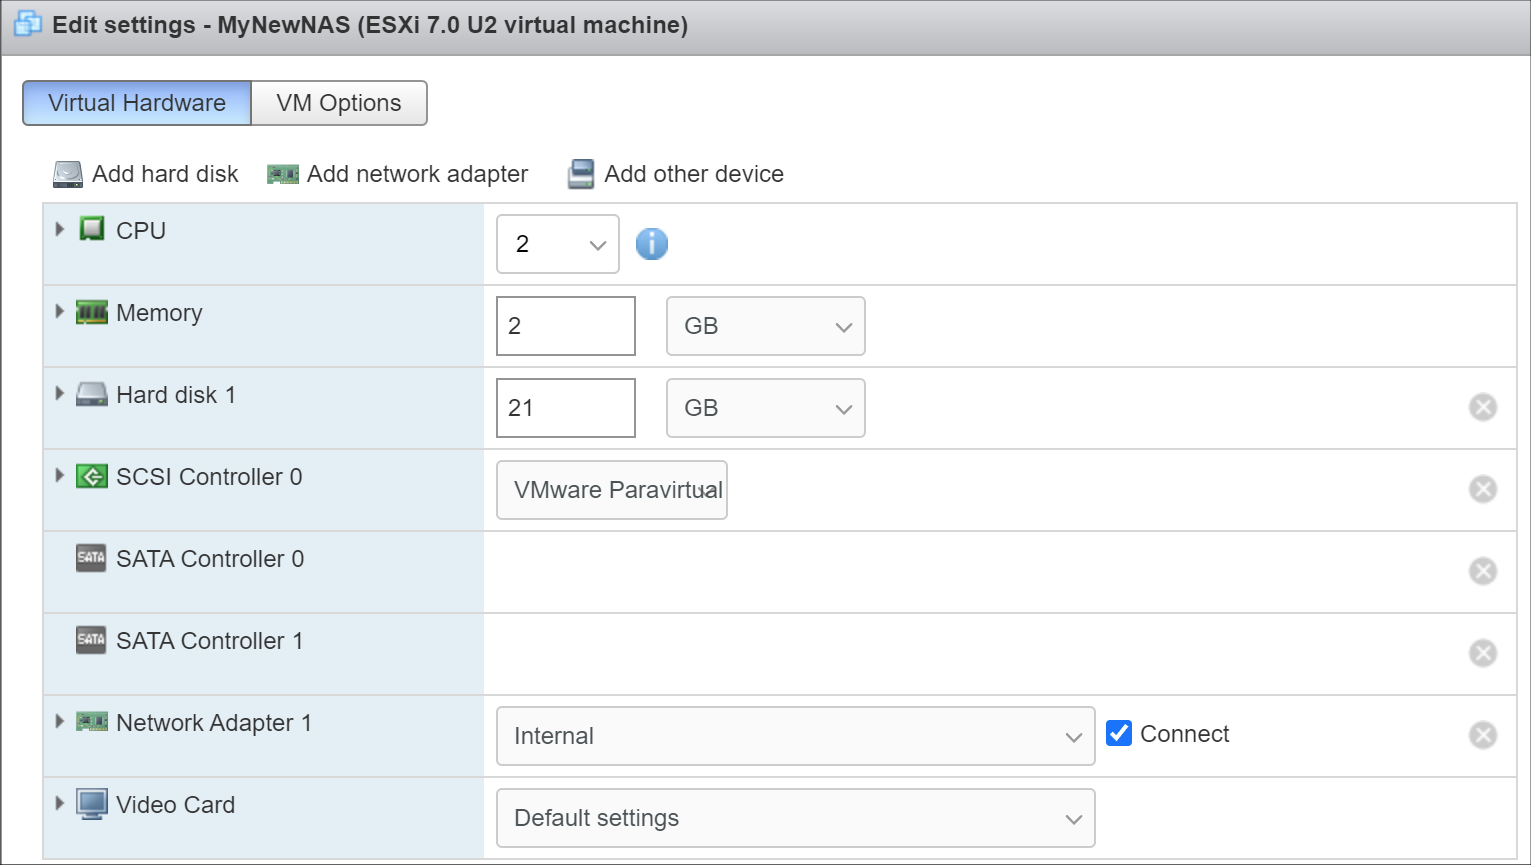
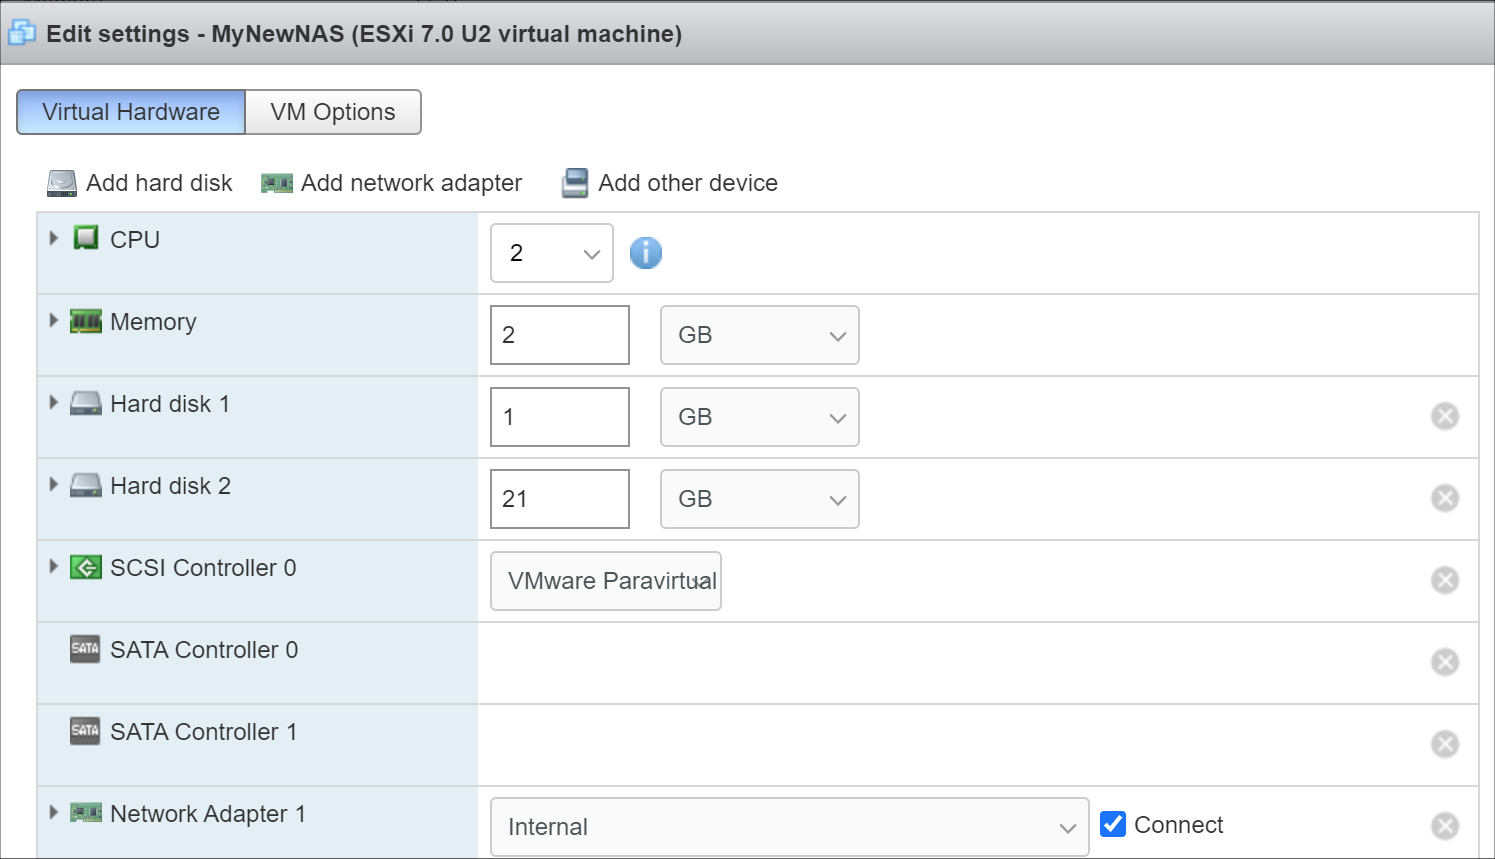
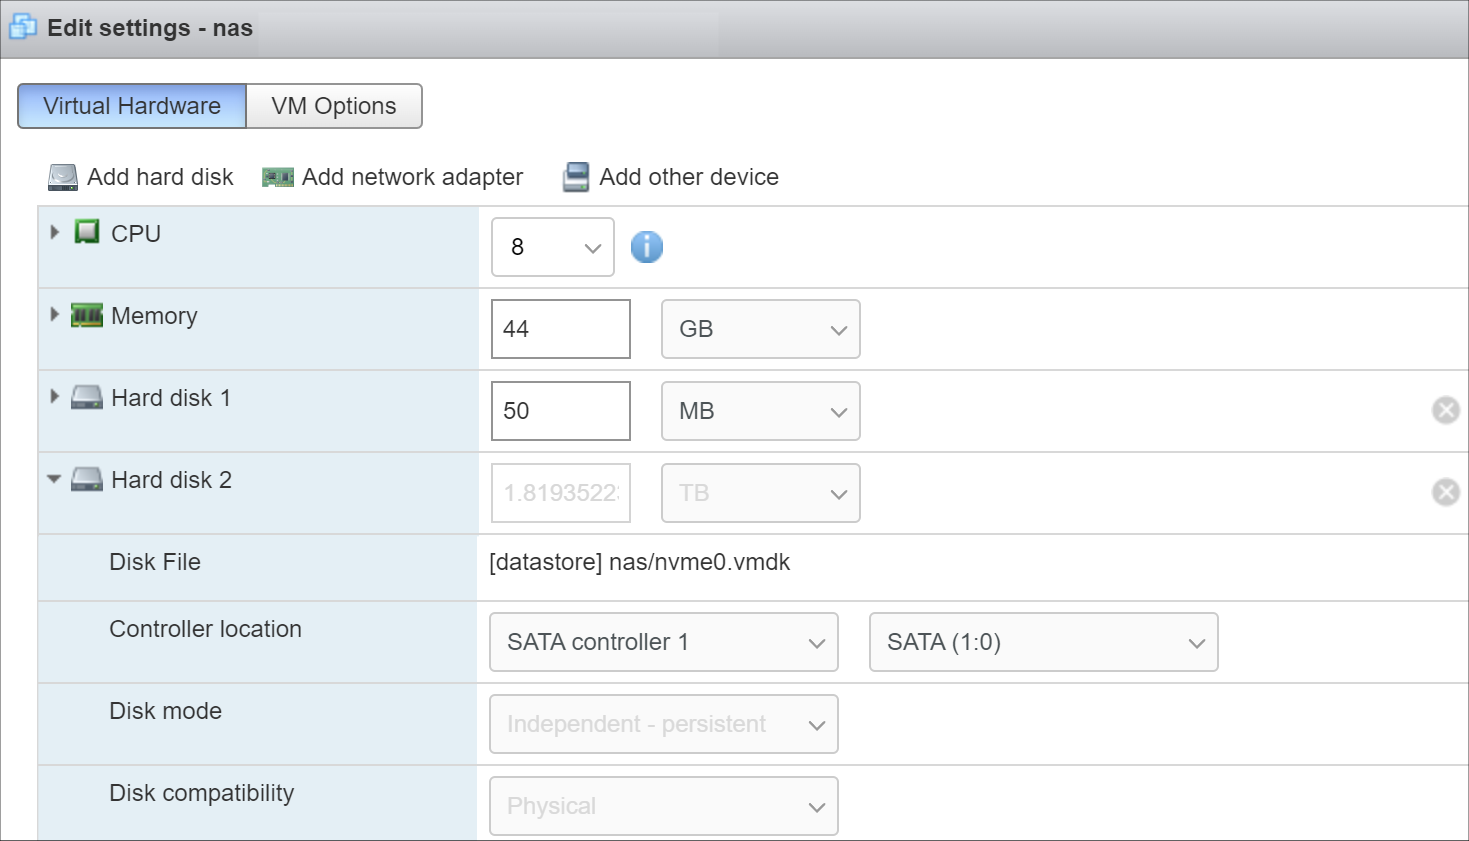
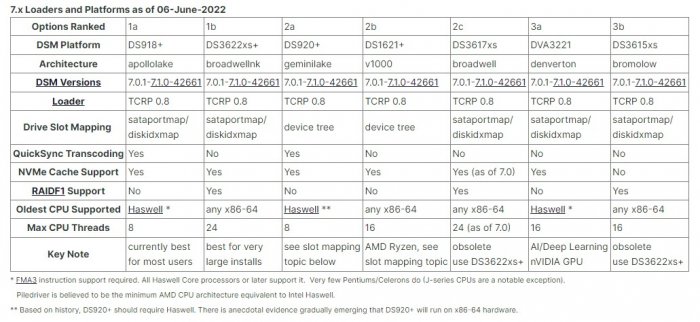
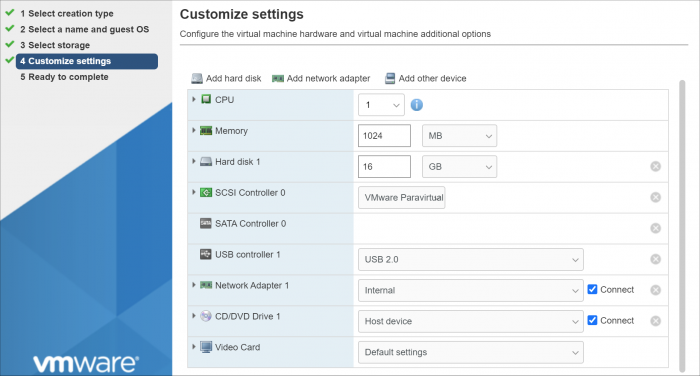
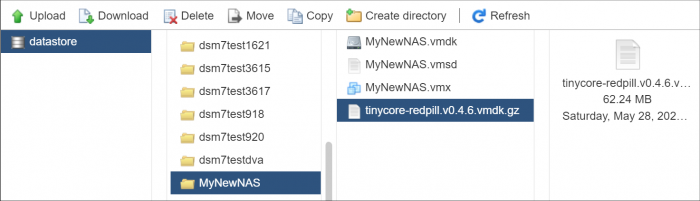
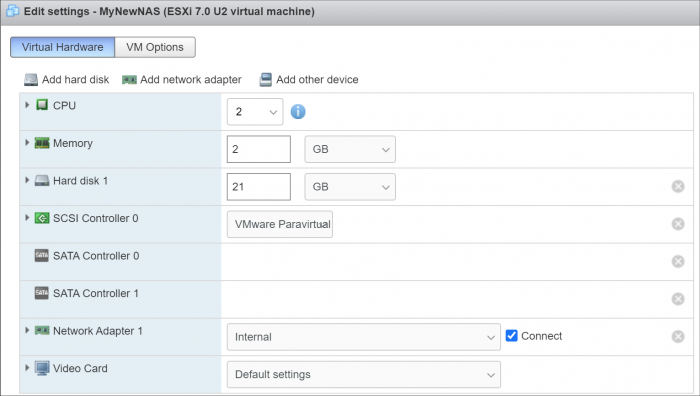
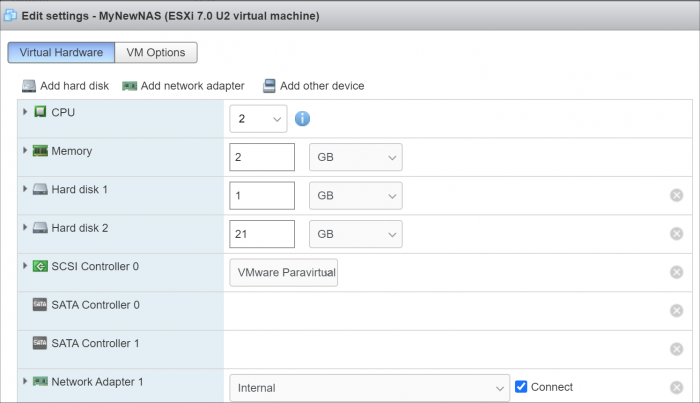
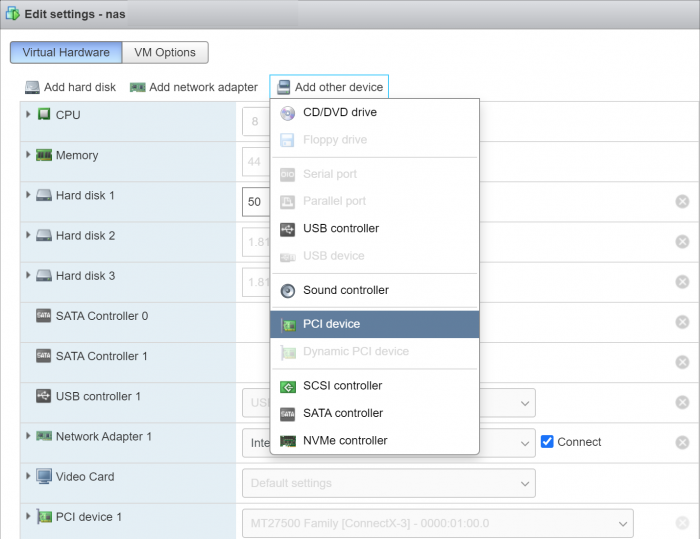
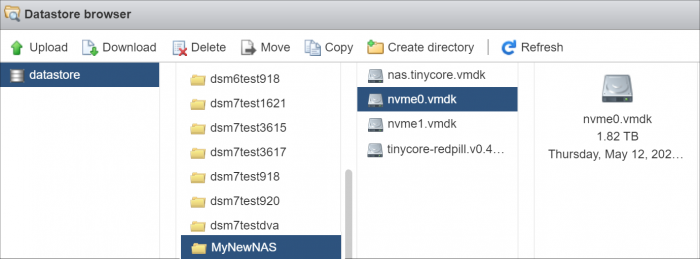
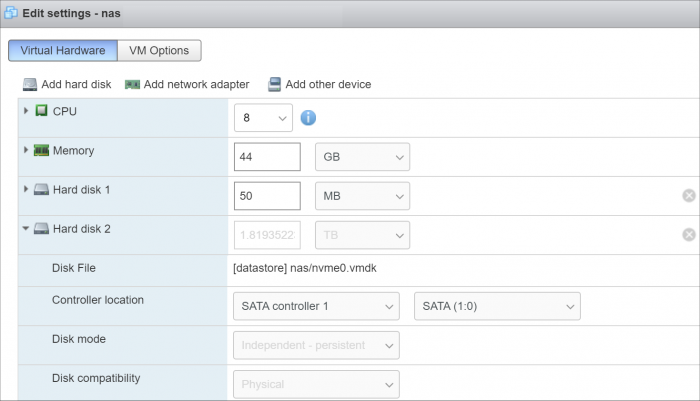
 Introduction This tutorial is a supplement to the main TCRP installation tutorial located here: https://xpenology.com/forum/topic/62221-tutorial-installmigrate-to-dsm-7x-with-tinycore-redpill-tcrp-loader/ You should be familiar with all the concepts and procedures in that tutorial, and general knowledge of VMware ESXi installation and virtual machine management. The focus here is on differences between installing on baremetal (with DSM as the only OS on the NAS), and as a virtual machine using VMware ESXi as the hypervisor. However, much of the conceptual information applies to other hypervisors. Some reasons to install DSM using a hypervisor: virtualize unsupported network card virtualize NVMe or other storage and present to DSM as SATA run other VMs in parallel on the same hardware (as an alternative to Synology VMM) share storage or network cards with other non-XPEnology VMs testing and rollback of updates About VMware ESXi ESXi (currently branded as the "VMware vSphere Hypervisor") is a stand-alone hypervisor that is part of the VMware enterprise computing platform. ESXi's strength includes robust testing and support, good compatibility with modern hardware platforms, and very flexible control over the hypervisor configuration. The core hypervisor is free to use, all that is needed is to sign up to receive a lifetime free license key. Key limitations of the free license are 8 vCPU's (8 threads, same as DS918+) and no serial port virtualization. To use the serial console, a physical connection is needed from the motherboard to your personal computer, or if the motherboard has IPMI features, intercepting the physical serial data with the IPMI remote access tools works as well. There is also a trial ESXi license that offers 256 vCPUs and serial port virtualization. ESXi and DSM Platform/Architecture All currently supported DSM platforms can run as virtual machines. As of this writing, the Device Tree platforms (DS920+ and DS1621+) are not supported by the TCRP device tree patcher when ESXi virtual SATA controllers are used. The problem is understood but currently the only way to make these platforms work is to manually patch the DTS. Transcoding platforms are supported with a compatible CPU, but actual transcoding requires a passthrough configuration of the VGA display adapter, which is somewhat complicated to set up, and beyond the scope of a basic tutorial. As DSM is run as a workload inside ESXi, there is an overhead tax, so the minimum requirements are somewhat higher: x86-64 CPU with two cores or more Hardware virtualization features enabled in the BIOS (Intel VT-x or AMD RVI) 4GB of RAM or more Dedicated 138GB or larger boot and storage device for ESXi system files, run-time files and datastore containing VM configuration files and virtual disks Block storage/controllers on ESXi's compatibility list OR compatible with DSM for passthrough Storage for use with DSM (either as backing storage for virtual disks, or passthrough devices) Creating a DSM Virtual Machine, Part 1 When we create a virtual machine we are defining its hardware characteristics. This machine must be compatible with DSM. For the purposes of the tutorial, we'll create a simple DSM VM with a 21GB virtual SATA drive. First the hardware profile must be selected. The recommended options are illustrated below. Other 3.x Linux (64-bit) is best even when installing a DSM platform with 4.x kernel. The selection here doesn't actually have anything to do with the OS being installed - it's just defining the behavior of the emulated hardware. Here's the initial complement of hardware created with Other 3.x Linux (64-bit): The pre-configured Network Adapter is VMware 10Gbe virtual vmxnet3 and is directly supported by TCRP. However, some changes need to be made to the virtual machine: Change the CPU vCore count to 2 or more Change the memory amount to 2048 or more Change the virtual hard disk size to 21GB or larger (see minimum spec here) If desired, open the drop-down menu and change the virtual disk type to Thin if the VM is only for testing Delete the USB controller Delete the CD/DVD Drive Add a second SATA controller - this will initially be called "New SATA Controller" Save the virtual machine. This creates a virtual machine folder on the datastore, and provisions the VM configuration file and virtual disk in that folder. It is not ready for use yet; some additional preparatory steps need to be completed. Preparing the TCRP Image ESXi VMs cannot boot virtualized USB flash drive images. A passthrough physical USB can be used, but is not recommended. Instead, a special version of the loader is used as a bootable virtual SATA drive. When the TCRP loader boots in this manner, it is called SATABOOT. Download the tinycore-redpill 7.x loader and save it to your personal computer. Then, open it with a zip manager to show the boot images: tinycore-redpill.vX.X.X.img.gz (for BIOS/CSM/Legacy boot from USB flash drive) tinycore-redpill-uefi.vX.X.X.img.gz (for UEFI/EFI boot from USB flash drive) tinycore-redpill.vX.X.X.vmdk.gz (for virtual machine SATABOOT from disk image) Save the vmdk gzip file to your personal computer. Then, upload it to the new virtual machine folder contained in the datastore: For the next step, ESXi console access is required. From the web GUI, enable both SSH and the console shell. SSH into the ESXi host and navigate to the new VM's folder: [root@esxi:] cd /vmfs/volumes [root@esxi:] cd <datastore> [root@esxi:] cd MyNewNAS [root@esxi:] ls -la total 65664 drwxr-xr-x 1 root root 73728 May 28 09:02 . drwxr-xr-t 1 root root 81920 May 28 08:58 .. -rw------- 1 root root 22548578304 May 28 08:58 MyNewNAS-flat.vmdk -rw------- 1 root root 474 May 28 08:58 MyNewNAS.vmdk -rw-r--r-- 1 root root 0 May 28 08:58 MyNewNAS.vmsd -rwxr-xr-x 1 root root 1941 May 28 08:58 MyNewNAS.vmx -rw-r--r-- 1 root root 65260813 May 28 09:02 tinycore-redpill.v0.4.6.vmdk.gz The TCRP SATABOOT image is provided compressed and in VMware Workstation format. These commands prepare it for use with ESXi: [root@esxi:] gunzip tinycore-redpill.v0.4.6.vmdk.gz [root@esxi:] vmkfstools -i tinycore-redpill.v0.4.6.vmdk MyNewNAS-TCRP.vmdk Destination disk format: VMFS zeroedthick Cloning disk 'tinycore-redpill.v0.4.6.vmdk'... Clone: 100% done. Creating a DSM Virtual Machine, Part 2 From the GUI console, select the DSM virtual machine and Edit. This is what things look like now: Now the SATABOOT loader must be added to the virtual machine. Select Add hard disk (existing hard disk) and choose the TCRP vmdk created in the previous step It will be displayed as "New hard disk" - expand the dropdown Change the controller to SATA Controller 0 The disk address should be SATA0:0 Save the changes to the VM The default for the Other 3.x Linux (64-bit) hardware profile is to create a SCSI virtual controller and attach all new virtual disks to it. DSM works better with the virtual SATA controller, so we need to move the DSM virtual data disk to it. Edit the virtual machine Expand the dropdown for Hard disk 1 (note that it is 21GB or whatever size we selected) Change the controller to SATA Controller 1 The disk address should be SATA1:0 Save the changes to the VM VMWare has an odd behavior in that it renumbers all the hard disks based on the last edit. This is cosmetic, and only affects the VM configuration screen. It does not change the disk addressing order in any way. The VM edit window now looks like this: Now that no disks are attached to the SCSI controller, we can (and should) delete it. The final configuration of controllers and disks is: SATA Controller 0: SATABOOT (SATA0:0) SATA Controller 1: DSM Data DIsk (SATA1:0) Any additional virtual DSM data disks should be added to SATA1 (i.e. SATA1:1, SATA1:2, etc). SATA0 should be reserved only for SATABOOT. The VM is now ready for the TinyCore boot (main tutorial, Step 3). System-Specific Parameters and SATABOOT ESXi requires minor adjustments to the basic tutorial configuration steps: The USB flash drive VID/PID configuration step (./rploader.sh identifyusb) is invalid and can be skipped when using SATABOOT. When using a virtual network adapter (such as VMXNET 3), its MAC address and the loader's MAC address setting must match. When a virtual machine is booted for the first time, a random address is assigned to each virtual adapter. Unless your primary network interface is a passthrough device, the serialgen configuration step requires the realmac argument to match the virtual NIC's random address to TCRP. Example: ./rploader.sh serialgen DS3622xs+ realmac The Drive Slot Mapping configuration step is the same, but the outcome is different when SATABOOT is in use. ./rploader.sh satamap will enforce the prohibition on data disks attached to SATA0 and warn if this configuration exists. SataPortMap and DiskIdxMap are configured to remove a blank slot between the SATA0 and SATA1 controllers. SCSI/SAS controllers or HBAs (either passthrough or virtual) ignore satamap functionality. When SATABOOT is also in use, there is an unavoidable blank slot between the last SATA controller and the first SCSI/SAS controller or HBA. Boot DSM with GRUB When the GRUB Menu is displayed: if necessary, use the arrow keys to ensure that SATA is selected and press ENTER. Advanced Configuration Examples: Passthrough and Raw Device Mapping (RDM)
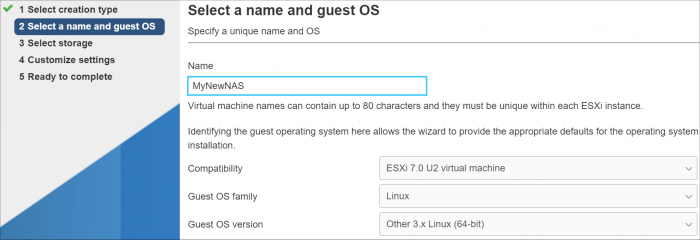


- 89 replies
-
- 11
-

-
-
- virtualization
- tcrp
- (and 2 more)
-
TinyCore RedPill Loader Build Support Tool ( M-Shell )
Orphée replied to Peter Suh's topic in Software Modding
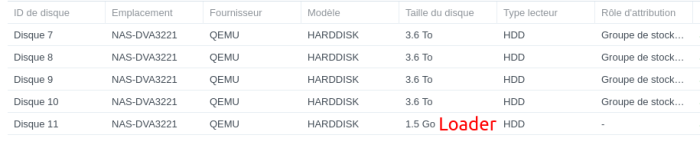
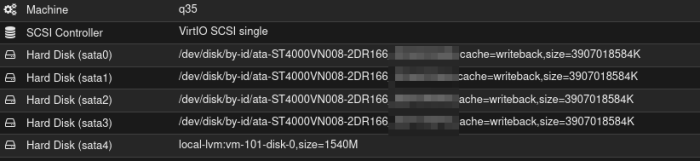
It does not seems to work well. Running "boot-wait.sh" for thethorgroup.boot-wait->on_patches->patches Still waiting for boot device (waited 1 of 10 seconds) Still waiting for boot device (waited 2 of 10 seconds) Still waiting for boot device (waited 3 of 10 seconds) Still waiting for boot device (waited 4 of 10 seconds) Still waiting for boot device (waited 5 of 10 seconds) Still waiting for boot device (waited 6 of 10 seconds) Still waiting for boot device (waited 7 of 10 seconds) Still waiting for boot device (waited 8 of 10 seconds) Still waiting for boot device (waited 9 of 10 seconds) Still waiting for boot device (waited 10 of 10 seconds) ERROR: Timeout waiting for /dev/synoboot device to appear. Most likely your vid/pid configuration is not correct, or you don't have drivers needed for your USB/SATA controller ========== BEGIN DUMP OF ALL PARTITIONS DETECTED =========== /dev/sda1 2048 4982527 4980480 fd /dev/sda2 4982528 9176831 4194304 fd /dev/sda3 9437184 7813832351 7804395168 fd /dev/sdb1 2048 4982527 4980480 fd /dev/sdb2 4982528 9176831 4194304 fd /dev/sdb3 9437184 7813832351 7804395168 fd /dev/sdc1 2048 4982527 4980480 fd /dev/sdc2 4982528 9176831 4194304 fd /dev/sdc3 9437184 7813832351 7804395168 fd /dev/sdd1 2048 4982527 4980480 fd /dev/sdd2 4982528 9176831 4194304 fd /dev/sdd3 9437184 7813832351 7804395168 fd /dev/sde1 2048 147455 145408 83 /dev/sde2 147456 301055 153600 83 /dev/sde3 301056 3147775 2846720 83 ========== END OF DUMP OF ALL PARTITIONS DETECTED ========== Force the creation of synoboot, synoboot1 and synoboot2 nodes... Confirmed a valid-looking /dev/synoboot device Ran "boot-wait.sh" for thethorgroup.boot-wait->on_patches->patches - exit=0 SynologyNVR> fdisk -l fdisk: device has more than 2^32 sectors, can't use all of them Disk /dev/sda: 2048 GB, 2199023255040 bytes, 4294967295 sectors 267349 cylinders, 255 heads, 63 sectors/track Units: sectors of 1 * 512 = 512 bytes Device Boot StartCHS EndCHS StartLBA EndLBA Sectors Size Id Type /dev/sda1 0,0,1 1023,254,63 1 4294967295 4294967295 2047G ee EFI GPT fdisk: device has more than 2^32 sectors, can't use all of them Disk /dev/sdb: 2048 GB, 2199023255040 bytes, 4294967295 sectors 267349 cylinders, 255 heads, 63 sectors/track Units: sectors of 1 * 512 = 512 bytes Device Boot StartCHS EndCHS StartLBA EndLBA Sectors Size Id Type /dev/sdb1 0,0,1 1023,254,63 1 4294967295 4294967295 2047G ee EFI GPT fdisk: device has more than 2^32 sectors, can't use all of them Disk /dev/sdc: 2048 GB, 2199023255040 bytes, 4294967295 sectors 267349 cylinders, 255 heads, 63 sectors/track Units: sectors of 1 * 512 = 512 bytes Device Boot StartCHS EndCHS StartLBA EndLBA Sectors Size Id Type /dev/sdc1 0,0,1 1023,254,63 1 4294967295 4294967295 2047G ee EFI GPT fdisk: device has more than 2^32 sectors, can't use all of them Disk /dev/sdd: 2048 GB, 2199023255040 bytes, 4294967295 sectors 267349 cylinders, 255 heads, 63 sectors/track Units: sectors of 1 * 512 = 512 bytes Device Boot StartCHS EndCHS StartLBA EndLBA Sectors Size Id Type /dev/sdd1 0,0,1 1023,254,63 1 4294967295 4294967295 2047G ee EFI GPT Disk /dev/sde: 1540 MB, 1614807040 bytes, 3153920 sectors 196 cylinders, 255 heads, 63 sectors/track Units: sectors of 1 * 512 = 512 bytes Device Boot StartCHS EndCHS StartLBA EndLBA Sectors Size Id Type /dev/sde1 * 0,32,33 9,45,36 2048 147455 145408 71.0M 83 Linux /dev/sde2 9,45,37 18,188,42 147456 301055 153600 75.0M 83 Linux /dev/sde3 18,188,43 195,239,44 301056 3147775 2846720 1390M 83 Linux Disk /dev/md0: 2431 MB, 2549940224 bytes, 4980352 sectors 622544 cylinders, 2 heads, 4 sectors/track Units: sectors of 1 * 512 = 512 bytes Disk /dev/md0 doesn't contain a valid partition table Disk /dev/md1: 2047 MB, 2147418112 bytes, 4194176 sectors 524272 cylinders, 2 heads, 4 sectors/track Units: sectors of 1 * 512 = 512 bytes Disk /dev/md1 doesn't contain a valid partition table SynologyNVR> fdisk above seems OK, disk 1 to 4 seems to be my 4 RDM disks and disk 5 is the loader. But : It detects errors on disk 7 and 8, whereas on fdisk -l above, there should not have disks in 7 and 8... As soon as I edit the SATA command line (e) to remove SataPortMap and DiskIdxMap values, it starts OK. There must be something different from ARPL/RR loader handling these values. And my "SAN manager" package is broken, I try to repair it but it fails... did not catch why yet. Edit : Switched loader from SATA mode to USB by modifying/adding args value in proxmox VM conf : args: -device 'nec-usb-xhci,id=usb-bus0,multifunction=on' -drive 'file=/var/lib/vz/dump/DVA3221-m-shell.img,media=disk,format=raw,if=none,id=drive-disk-bootloader' -device 'usb-storage,bus=usb-bus0.0,port=1,drive=drive-disk-bootloader,id=usb-disk-bootloader,bootindex=999,removable=on' I also changed SataPortMap=16 instead of 18 as only 6 slots are detected... It fixed the boot... But SAN Manager package still broken 2024/01/01 04:32:04 Failed to stop ScsiTarget[0x0000 file_get_section.c:83] 2024/01/01 04:32:23 Failed to start package, pkg=[ScsiTarget] context=[{"action":"repair","beta":false,"betaIncoming":false,"error":{"code":272,"description":"Failed to run script, script=[start]"},"finished":false,"installReboot":false,"installing":true,"language":"fre","last_stage":"prepare_start","package":"ScsiTarget","packageName":"SAN Manager","pid":5743,"scripts":[{"code":0,"message":"","type":"prestop"},{"code":0,"message":"","type":"preupgrade"},{"code":0,"message":"","type":"preuninst"},{"code":0,"message":"","type":"postuninst"},{"code":0,"message":"","type":"preinst"},{"code":0,"message":"","type":"postinst"},{"code":0,"message":"","type":"postupgrade"},{"code":0,"message":"","type":"prestart"},{"code":1,"message":"","type":"start"}],"spk":"/volume1/@tmp/synopkg/download.APns21/@SYNOPKG_DOWNLOAD_ScsiTarget","stage":"start_failed","status":"repairing","success":false,"username":"xxxx","version":"1.0.10-0314"}] 2024/01/01 04:32:23 Failed to start ScsiTarget[0x0000 file_get_section.c:83] Service fails to start : systemctl status pkgctl-ScsiTarget.service -l ● pkgctl-ScsiTarget.service - ScsiTarget's service unit Loaded: loaded (/usr/local/lib/systemd/system/pkgctl-ScsiTarget.service; enabled; vendor preset: disabled) Active: failed (Result: exit-code) since Mon 2024-01-01 04:39:19 CET; 16s ago Process: 32172 ExecStart=/bin/bash -c /usr/syno/sbin/synopkgctl start $SELF && /bin/touch /var/packages/$SELF/enabled (code=exited, status=1/FAILURE) Main PID: 32172 (code=exited, status=1/FAILURE) Jan 01 04:39:19 XXXXXX synopkgctl[32564]: SYNOPKG: Release usr-local-linker for ScsiTarget when 0x0001 (ready) Jan 01 04:39:19 XXXXXX synopkgctl[32564]: SYNOPKG: Release usr-local-linker for ScsiTarget when 0x0001 (done) Jan 01 04:39:19 XXXXXX synopkgctl[32174]: plugin_action.c:76 synoplugin: [PRE][package][package_action][MAIN] Plugin Action Start Jan 01 04:39:19 XXXXXX synopkgctl[32174]: plugin_action.c:76 synoplugin: [PRE][package][package_action][MAIN] Runtime: 0.000s Jan 01 04:39:19 XXXXXX synopkgctl[32174]: SYNOPKGMGR: Failed to start package, pkg=[ScsiTarget] context=[{"action":"install","beta":false,"betaIncoming":false,"error":{"code":272,"description":"Failed to run script, script=[start]"},"finished":false,"installReboot":false,"installing":true,"language":"fre","last_stage":"prepare_start","package":"ScsiTarget","packageName":"SAN Manager","pid":32174,"scripts":[{"code":0,"message":"","type":"preinst"},{"code":0,"message":"","type":"postinst"},{"code":0,"message":"","type":"prestart"},{"code":1,"message":"","type":"start"}],"spk":"/volume1/@tmp/synopkg/download.OTCxcI/@SYNOPKG_DOWNLOAD_ScsiTarget","stage":"start_failed","status":"installing","success":false,"username":"xxxxxx","version":"1.0.10-0314"}] Jan 01 04:39:19 XXXXXX systemd[1]: pkgctl-ScsiTarget.service: main process exited, code=exited, status=1/FAILURE Jan 01 04:39:19 XXXXXX systemd[1]: Failed to start ScsiTarget's service unit. Jan 01 04:39:19 XXXXXX systemd[1]: Unit pkgctl-ScsiTarget.service entered failed state. Jan 01 04:39:19 XXXXXX systemd[1]: Triggering OnFailure= dependencies of pkgctl-ScsiTarget.service. Jan 01 04:39:19 XXXXXX systemd[1]: pkgctl-ScsiTarget.service failed.
-
TinyCore RedPill Loader Build Support Tool ( M-Shell )
Peter Suh replied to Peter Suh's topic in Software Modding
sa6400 and dva3221 have completely different disk mapping methods. sa6400 is a device-tree method with automatic mapping. I will also create an option to not initialize sataportmap in the tinycore menu loader build in the virtual system. For beginners, I think it is still safe not to use this sataportmap value. Sent from my iPhone using Tapatalk -
TinyCore RedPill Loader Build Support Tool ( M-Shell )
Orphée replied to Peter Suh's topic in Software Modding
Hello, @Peter Suh would it be possible to have SataPortMap / DiskIdxMap manual edit available even with Friend mode ? Usually on my Proxmox Q35 machine I set SataPortMap=18 DiskIdxMap=1000. And I don't know why but loader disk is detected in Storage Manager on DVA3221 loader. Whereas it does not happen on SA6400. Thanks