Leaderboard


Popular Content
Showing content with the highest reputation since 04/29/2024 in Posts
-
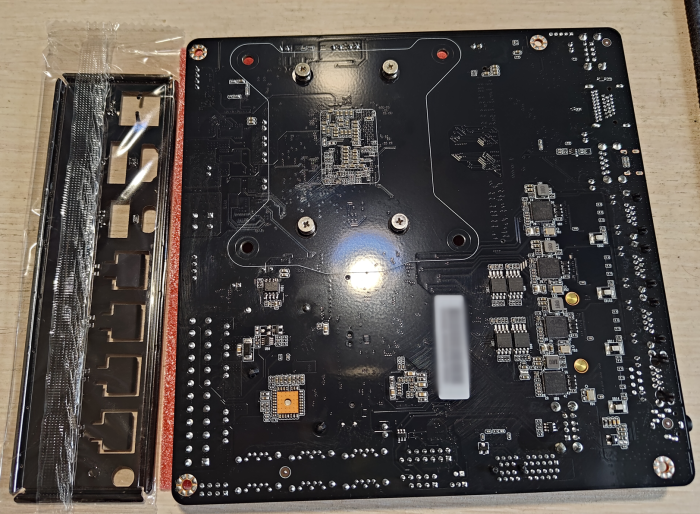
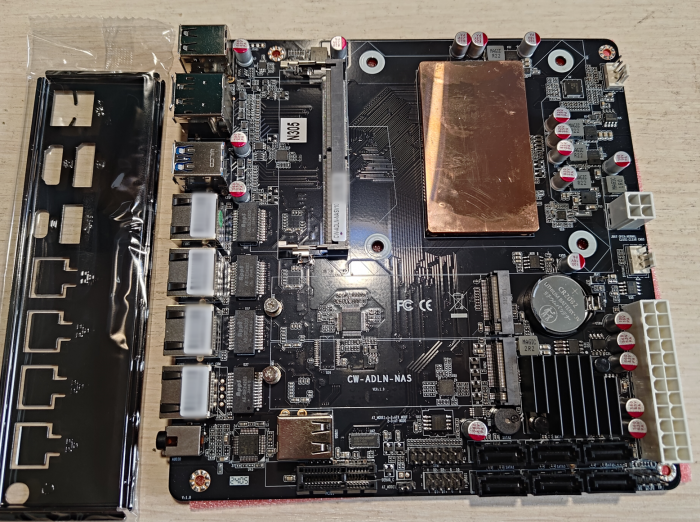
Hello everyone, my long-awaited motherboard arrived in early March. For the first time, the seller canceled the shipment because they found some problems with the batch of motherboards. As a result, they sent it to me at the end of February. The first launch is very long, after everything is initialized the launch becomes fast. hdmi only works in OS, it’s better not to rely on it, there are resolution problems there. But through DP everything works well. I was able to install 32GB of memory from the Chinese brand PUSKILL, frequencies 5200MHz did not work, but at 4800MHz everything works. https://www.aliexpress.com/item/1005005989535277.html?spm=a2g2w.orderdetail.0.0.d9704aa6ABmHvJ&sku_id=12000035200940840 I installed 2 SSDs in m2 from KingSpec, let's see how long they last https://www.aliexpress.com/item/1005003844066987.html?spm=a2g2w.orderdetail.0.0.20f84aa6C22z9Q&sku_id=12000037919355571 Xpenology installed without any problems at all. I used the bootloader from Peter Suh, screenshots of the system and board are attached. I've been using it for 2 weeks now and it's great. https://github.com/PeterSuh-Q3/tinycore-redpill

 2 points
 -
Етого точно не знаю. Что знаю из форумов от старых dsm6 и dsm5 частоту регулирует dsm acpi. Есть 3 состояния процессора: 0%, 50% и 100% в зависимости от нагрузки. Turbo boost по отзывам на форумах вроде не работает и поддерживается максимум 16 потоков. Возможно моя информация устарела. Мне самому интересно как оно сейчас работает. Подключал сервер через ваттметр ради интереса, в простое 60 ватт вся система потребляет, в нагрузке (транскодинг на проце) 110. I3 8300, 6 винтов, apc ups + роутер ax73 от tplink. Тоесть чтото там в процессоре регулирует.1 point
-
Если есть возможность, возьмите дискретную сетевую карту. Даже дешевая на чипе реалтек или интел стоит 5 доларов, прекрасно работает. Не стоит гемороя с драйверами и постоянными и отвалами dsm из сети на встройке. Встройка вообще далеко не у всех заводится и стабильно работает.1 point
-
I have a Tera Master also yes it's horrible. You can install DSM from what I have read on a tera master. That maybe a great solution. DSM is different in some ways to a QNap not worse not better. QNAps are more unfriendly to new NAs users unlike DSM. What I hate about all store bought Nas's they are under powered and starved for ram for most stuff unlike a PC.1 point
-
Только конфиг загрузчика, после перезагрузки DSM сама предложит восстановление, все на месте останется. Обновил на основной хранилке версию загрузчика, все прошло нормально, траскодинг на месте.1 point
-
Just in case other people are looking for a modded BIOS, this BIOS works on N36L/N40L/N54L. I have used it on all my microserver Gen7 builds. Info can be found here: https://www.avforums.com/threads/hp-n36l-n40l-n54l-microserver-updated-ahci-bios-support.1521657/ TheBay_Microserver_Bios_041.rar1 point
-
You should not consider Synology VMM as a real option... ESXI / Promox VE are the way to go to use virtualisation on daily basis.1 point
-
Et c'est passé nickel1 point
-
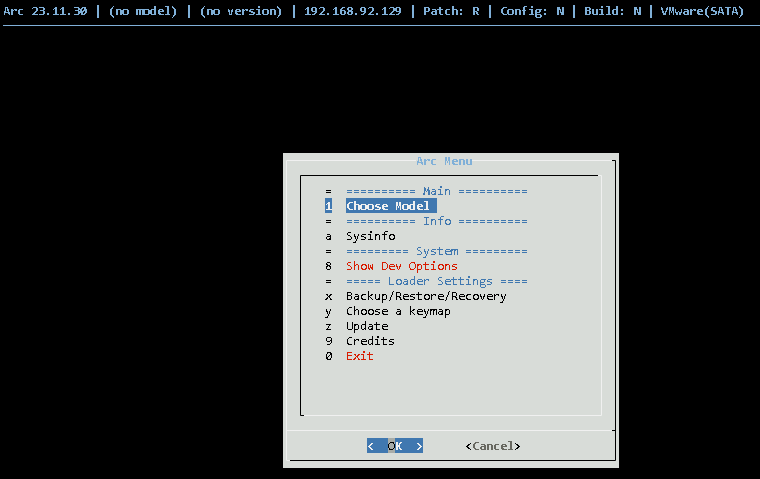
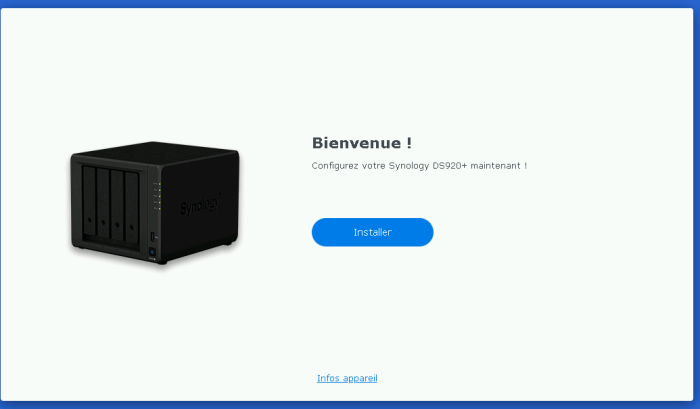
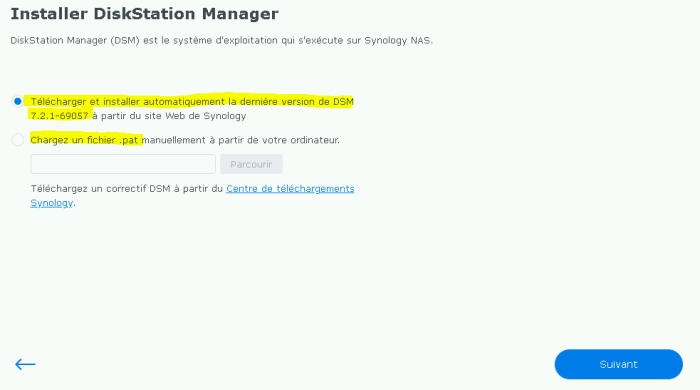
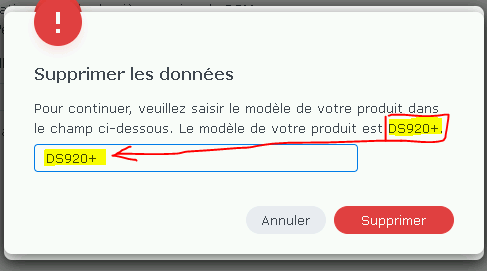
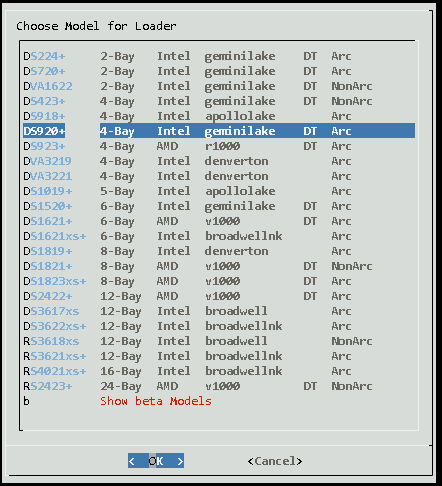
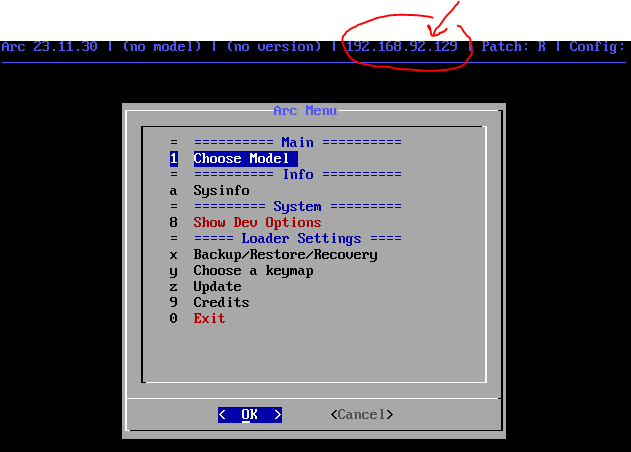
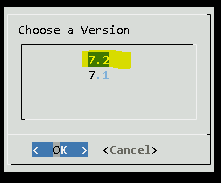
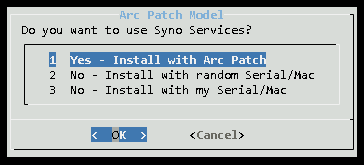
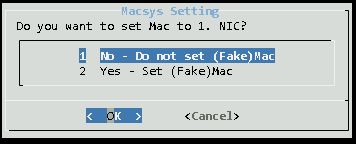
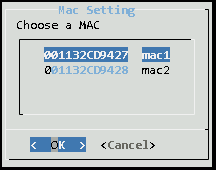
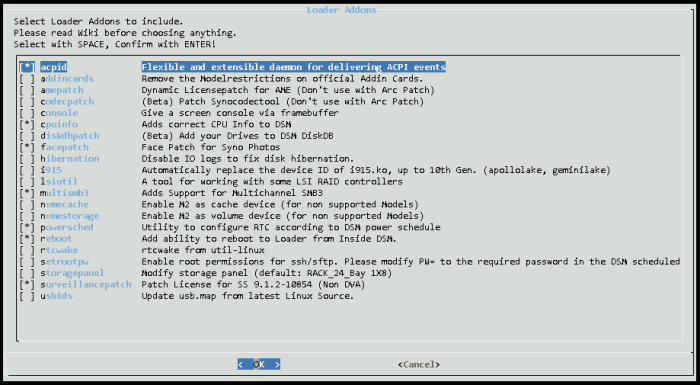
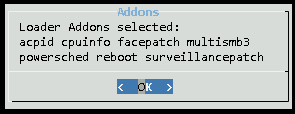
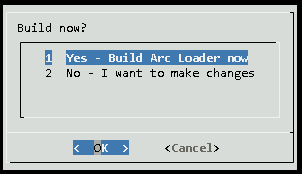
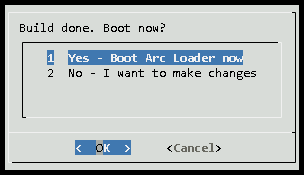
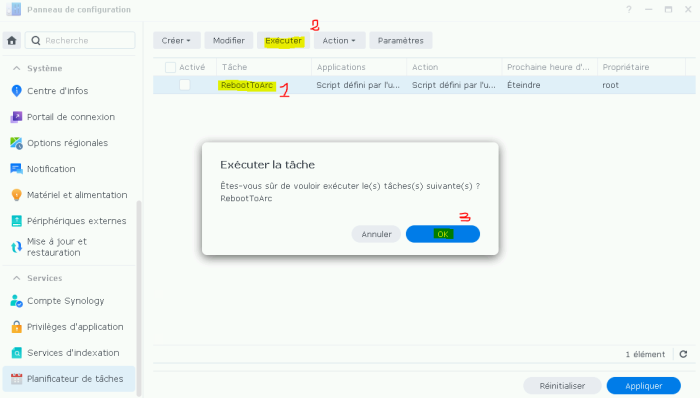
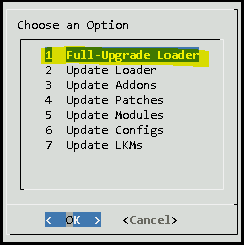
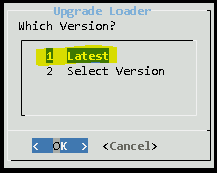
[EDIT du 01/12/2023] refonte du tuto pour utilise le loader arc à la place de arpl/rr [EDIT du 28/11/2023] fin du repo GitHub et fin de support des mises à jour [EDIT du 28/11/2023] support proxy [EDIT du 17/11/2023] adaptation refonte du loader rr Bonjour à tous, Voici une procédure permettant d'installer DSM 7 sur votre matos avec le loader ARC : >> Enorme bravo à toute la team pour leur travail régulier << Pré-requis : Un service DHCP doit être actif sur votre réseau, Lors de la construction du loader, le serveur doit avoir accès à Internet (pour utiliser un proxy, il faut quitter le menu, et en ligne de commande faire export https_proxy=http://proxy_host:proxy_port/), Une clé USB récente d'au moins 8Go et USB 3 si possible Configurer correctement votre BIOS selon les recommandations suivantes : https://github.com/AuxXxilium/AuxXxilium/wiki/Settings:-Bios-&-UEFI 1. Création de la clé USB Bootable : Télécharger puis décompresser le fichier arc-YY.MM.version.img.zip. Pour ESXi prenez la version estampillée arc-YY.MM.vv.vmdk-flat.zip Dézipper-le avec 7zip par exemple et à l'aide de l'outil BalenaEtcher "graver" le fichier .img correspondant sur votre clé USB. 2. Connecter la clé USB au serveur et booter dessus pour démarrer sur le loader (assurez-vous que le BIOS soit configuré pour booter sur l'USB) 3. Attendez que l'écran affiche l'adresse IP et le n° de port attribué par votre serveur DHCP. 4. A partir d'un autre PC (c'est aussi possible de le faire depuis le NAS directement, mais moins convivial) saisir l'url affichée dans votre navigateur web (ou scanner le QR code avec votre téléphone si vous à l'aise avec votre smartphone), par exemple : http://192.168.92.129:7681 5. [Choose Model for Loader] : Cliquer "Choose Model" et choisir le modèle de votre choix. Conseil : renseignez-vous bien en amont sur celui-qui correspond à vos besoins et l'architecture de votre CPU. Perso je recommande soit le DS3622XS, soit le DS920+, soit le DVA1622 pour disposer de 8 licences Surveillance Station. Pour vous aidez cette rubrique du wiki est très détaillée. 6. [Version] Sélectionner la version de DSM, par exemple 7.2 et patienter le temps que le script analyse les options possibles avec le modèle choisi 7. [Arc Patch Model] Je vous laisse le soin de décider qu'elle option vous souhaitez. Si vous avez un vrai couple Serial/Mac évidement c'est la meilleur option, sinon et si seulement l'option apparait en fonction du modèle choisi alors vous pouvez tenter d'activer l'arc Patch à vos risques périls. 8. [Mac Setting] Choisir l'adresse MAC qui sera mappée sur votre carte réseau (encore une fois ça dépend du modèle). Sauf indication contraire, je vous conseille la 1ère! 9. [Macsys Setting] Choisir si vous souhaitez affecter l'adresse mac du Syno à l'interface physique de votre serveur. Il n'y a pas de bonne ou mauvaise réponse. Essayer la 1ère par défaut et si après la fin du tuto le NAS n'est pas visible, tenter l'autre option. 10. [Loader Addons] Sélectionner les addons dont vous avez besoin en plus de ceux par défaut selon vos besoins puis accepter la confirmation. Par exemple, chez moi j'utilise ceux là : --> 11. [Build now ?] Lancer la construction du loader : Note : si vous souhaitez ajuster d'autres options comme des modules ou activer le direct boot, sélectionner No - I want to make changes et naviguer dans les options du menu principal. -->--> 12. [Build done] Lancer le démarrage du loader --> Le NAS va rebooter sur loader, patienter jusqu'au démarrage de DSM (vérifier que les LED de la carte réseau clignotent) 13. Soit depuis Syno Assistant, soit en regardant l'IP attribuée, ouvrir l'url : http://192.168.92.129:5000, vous devriez voir la page de configuration de DSM 14. Suivre la configuration de DSM de manière standard. Vous pouvez télécharger le fichier pat en amont et le sélectionner ou laisser DSM le faire pour vous mais dans ce cas précis vérifier bien la version de DSM avec la version du loader arpl pour qu'elle soit compatible entre elle. --> --> [...] 15. Enjoy ################################################################### ################# FAIRE UNE MISE A JOUR ###################### ################################################################### 1. Depuis DSM, dans le panneau de configuration > Planificateur de tâches : exécuter la tâche RebootToArc Patienter le temps du reboot... 2. Une fois le loader rechargé, rendez-vous sur la page initiale de configuration : http://192.168.92.129:7681 et sélectionner le menu Update : 3. Ne vous prenez pas la tête, sélectionner l'option Full-Upgrade Loader : ->-> Astuce : Le loader permet un mécanisme de rollback à l'aide d'un code, conserver le au cas-où! 4. Patientez le temps du téléchargement de la nouvelle version du loader. A la fin vous devriez avoir un message de confirmation. Cliquer sur Yes pour confirmer le reboot. 5. Après le reboot, vous devriez voir la dernière version du loader s'afficher en haut à gauche (après rafraichissement forcé (CTRL+F5) de la page http://192.168.92.129:7681) 6. Reprendre le tuto comme si c'était une installation normale! Changer la version de DSM évidement et lors de la mise à jour sélectionner le fichier pat correspondant ou laisser DSM choisir pour vous si vous être sûr de la compatibilité entre le loader et DSM.


 1 point
 -
Arc: Modules Да.... Карту применить можно не именно от Intel, а всего лишь с чипом от Intel.1 point
-
With this CPU, 6x6, you will be very limited with number of VMs at the same time. The DS3622xs+ is the most flexible.1 point
-
Royal Orphée, cela a très bien fonctionné, merci milles fois
 1 point
 -
A little while ago, I checked nvmesystem, a new addon included in rr. It seems that it is possible to use this addon only for SA6400. Let's add features to tcrp-mshell as well. Author: jim3ma. Install the system on only m2 disk (current only support SA6400).1 point
-
Возможно мне показалось, но как-то это немного агрессивно написано. Ну раз знаешь, то и хорошо. Думаю как пользоваться поиском и что писать в консоле тоже найдёшь, тут во многих темах это рассказывали. Диски расширить сможешь, данные тоже сохраняться, всё делается.1 point
-
Если у DSM нет задач, требующих много памяти, просто ограничьте выделенную для виртуалки память 2-4-мя ГБ. Более чем достаточно. DSM будет стараться использовать всю память, что увидит для задач и для кэша. Про то, что она на виртуалке и надо экономить и делиться с другими ВМ, DSM не знает.1 point
-
Indeed! Thanks @Peter Suh for the mental ping, regarding the Power Schedule & S5. I had not been able to get that working reliably, and this mention was all it took! I have an XPS 8950 12th Gen i7, running the SA6400 with your latest bootloader/Friend. There is a "Deep Sleep Control" in the BIOS. I had it disabled, so I could enable "WOL". Could not get Shutdown/Startup working correctly, but as soon as I enabled "Deep Sleep Control" Enabled in S4 and S5, it automatically disabled the BIOS WOL feature, but the Power Schedule works perfectly, even with multiple Startup/Shutdown configured for a 24HR period. So you are right, it does seem to rely on S4/S5. I don't generally think I'd care to much for WOL, at least right now, possibly later I might. If in the BIOS settings the 2 options seem to be mutually exclusive with the built-in Intel NIC, I'll cross that bridge if/when I need to. Update: https://www.dell.com/support/kbdoc/en-us/000146067/newer-dell-system-models-will-not-wake-on-lan-with-deep-sleep-control-set-to-s5-in-the-windows1 point
-
1 point
-
изменён интерфейс загрузчика:1 point
-
Подтверждаю. Обновление прошло без проблем в штатном режиме.1 point
-
Я обновился на старом загрузчике Arc 23.11.15 . Проблем нет1 point
-
check your drive numbering/calculation within the model.conf " [System Disk 1] DEV_BUS=B00:D23:F0 DEV_PORT = 0 ERR_LED = EC:1 PRESENT_LED = EC:1 LOCATE_LED = EC:1 SLOT_NAME = Disk 1 [System Disk 2] DEV_BUS=B00:D23:F0 DEV_PORT = 1 PCI_SWITCH_PORT = 0 ERR_LED = EC:2 PRESENT_LED = EC:2 LOCATE_LED = EC:2 SLOT_NAME = Disk 2 " Also exclude the "boot disk" in "system disk" [Boot Disk 1] DISK_DRV_Type = ATA DEV_BUS=B00:D23:F0 DEV_PORT = 6 in my example system (https://lenovopress.lenovo.com/lp1548-thinksystem-st250-v2) there are 8 SATA connector numbered from 0 to 7 while i connected my boot ssd to port 6...so i have 7 HDD/SSD slots assingend with dev_port 0-5,7 With your HBA it is the same just find the correct numbering and exclude your boot disk from system disk1 point
-
DS920+: DSM 7.2.1-69057 Update 4 (последний на 29.03.2024) - результат обновления: УСПЕШНЫЙ - версия DSM до обновления: D918+ DSM 6.2.3-25426 Update 3 - версия и модель загрузчика до обновления: Jun's Loader v1.04b - версия и модель загрузчика после обновления: Arc Loader 24.3.29 (последний на 29.03.2024) - железо: ASRock J4105-ITX, 8 Гб - комментарий: автоматическое обновление и миграция через Web, оригинальный мак адрес и серийный номер - работает: транскодин, QuickConnect.1 point
-
When setting up an XPEnology system, you must first select a DSM platform and version. XPEnology supports a few specific DSM platforms that enable certain hardware and software features. All support a minimum of 4 CPU cores, 64GB of RAM, 10Gbe network cards and 12-disk arrays. When you choose a platform and the desired DSM software version, you must download the correct corresponding loader. That may not be the "newest" loader available. The last 6.x version (6.2.4-25556) is functional only with the TCRP loader. TCRP is very different than the Jun loader. If you want to learn more, or if you are interested in deploying the latest 7.x versions, see the 7.x Loaders and Platforms thread. Be advised that installing 6.2.4 with TCRP is basically the same procedure as installing 7.x. Each of these combinations can be run "baremetal" as a stand-alone operating system OR as a virtual machine within a hypervisor (VMWare ESXi is most popular and best documented, but other hypervisors can be used if desired). Review the table and decision tree below to help you navigate the options. 6.x Loaders and Platforms as of 16-May-2022 Options Ranked DSM Platform DSM Version Loader Boot Methods*** Hardware Transcode Support NVMe Cache Support RAIDF1 Support Oldest CPU Supported Max CPU Threads Notes 1,3a DS918+ 6.2.0 to 6.2.3-25426 Jun 1.04b UEFI, BIOS/CSM Yes Yes No Haswell ** 8 6.2.0, 6.2.3 ok, 6.2.1/6.2.2 not recommended for new installs* 2,3b DS3617xs 6.2.0 to 6.2.3-25426 Jun 1.03b BIOS/CSM only No No Yes any x86-64 16 6.2.0, 6.2.3 ok, 6.2.1/6.2.2 not recommended for new installs* DS3615xs 6.2.0 to 6.2.3-25426 Jun 1.03b BIOS/CSM only No No Yes any x86-64 8 6.2.0, 6.2.3 ok, 6.2.1/6.2.2 not recommended for new installs* DS918+ 6.2.4-25556 TCRP 0.4.6 UEFI, BIOS/CSM Yes Yes No Haswell ** 8 recommend 7.x instead DS3615xs 6.2.4-25556 TCRP 0.4.6 UEFI, BIOS/CSM No No Yes any x86-64 8 recommend 7.x instead DS916+ 6.0.3 to 6.1.7 Jun 1.02b UEFI, BIOS/CSM Yes No No Haswell ** 8 obsolete, use DS918+ instead DS3617xs 6.0.3 to 6.1.6 Jun 1.02b UEFI, BIOS/CSM No No Yes any x86-64 16 6.1.7 may kernel panic on ESXi 4 DS3615xs 6.0.3 to 6.1.7 Jun 1.02b UEFI, BIOS/CSM No No Yes any x86-64 8 best compatibility on 6.1.x * 6.2.1 and 6.2.2 have a unique kernel signature causing issues with most kernel driver modules, including those included in the loader. Hardware compatibility is limited. ** FMA3 instruction support required. All Haswell Core processors or later support it. Only a select few Pentium, and no Celeron CPUs do. ** Piledriver is believed to be the minimum AMD CPU architecture to support the DS916+ and DS918+ DSM platforms. *** If you need an MBR version of the boot loader because your system does not support a modern boot methodology, follow this procedure. CURRENT LOADER/PLATFORM RECOMMENDATIONS/SAMPLE DECISION POINTS: 1. DEFAULT install DS918+ 6.2.3 - also if hardware transcoding or NVMe cache support is desired, or if your system only support UEFI boot Prerequisite: Intel Haswell (aka 4th generation) or newer CPU architecture (or AMD equivalent) Configuration: baremetal loader 1.04b, DSM platform DS918+ version 6.2.3 Compatibility troubleshooting options: extra.lzma or ESXi 2. ALTERNATE install DS3617xs 6.2.3 - if RAIDF1, 16-thread or best SAS support is desired, or your CPU is too old for DS918+ Prerequisite: USB key boot mode must be set to BIOS/CSM/Legacy Boot Configuration: baremetal loader 1.03b, DSM platform DS3617xs version 6.2.3 Compatibility troubleshooting options: extra.lzma, DS3615xs platform, or ESXi 3. ESXi (or other hypervisor) virtual machine install - generally, if hardware is unsupported by DSM but works with a hypervisor Prerequisites: ESXi hardware compatibility, free or full ESXi 6.x or 7.x license Use case examples: virtualize unsupported NIC, virtualize SAS/NVMe disks and present as SATA, run other ESXi VM's instead of Synology VMM Option 3a: 1.04b loader, DSM platform DS918+ version 6.2.3 Option 3b: 1.03b loader, DSM platform DS3617xs version 6.2.3 (VM must be set to BIOS Firmware) Preferred configurations: passthrough SATA controller and disks, and/or configure RDM/RAW disks 4. FALLBACK install DS3615xs 6.1.7 - if you can't get anything else to work Prerequisite: none Configuration: baremetal loader 1.02b, DSM platform DS3615xs version 6.1.7 SPECIAL NOTE for Intel 8th generation+ (Coffee Lake, Comet Lake, Ice Lake, etc.) motherboards with embedded Intel network controllers: Each time Intel releases a new chipset, it updates the PCI id for the embedded NIC. This means there is a driver update required to support it, which may or may not be available with an extra.lzma update. Alternatively, disable the onboard NIC and install a compatible PCIe NIC such as the Intel CT gigabit card.1 point
-
Hi As a follow up for anyone who may have the same issue I managed to fix my DSM without losing any data or settings. Booted into a live Linux, deleted the autoupdate and update folders, and the logs from var folder from the 1st partition, that gave enough space to successfully reinstall the DSM.1 point
-
@Rebutia Well you're the first one to report this issue, you may want to try with another loader. Currently with SA6400 and DVA3221 it works fine for me.1 point