Leaderboard


Popular Content
Showing content with the highest reputation on 04/08/2022 in all areas
-
Hey, just wanted to say thank you. No complaints, no errors, no issues, just thank you for all you do and all those who help you out.2 points
-
Indeed what you are asking is correct and I do not know the answer when you pass portions of your disk space to the VM but maybe the below examples will help but I am not entirely sure if my assumptions are correct. When you pass-through entire disks you do not pass the ports. Therefore, if a disk is on port #4 on your Mobo on the VM it will display as #1 for example. For my Virtual DS918+ I am passing through the entire disks (not portions/ I believe the SATA protocol is virtual) but this does not mean you pass through also the SMART values... so if a drive fails you might not get a warning that it failed. The message that the drive has failed I will get it on the Hypervisor (Unraid) because I can see the actual SMART values from that level. Regarding the RAID protection since I am passing through the entire disk not virtual portions of the disk the RAID protection is valid. When you pass portions of a disk of course it seems that you "trick" DSM thinking that the given disks are 2 separate Hard Disks when it's not and the raid protection makes no sense when both virtual disks are from the same Hard Disk. If the physical disk fails the virtual will fail also. But as I mentioned on the previous paragraph on the Hypervisor maybe those hard disks are already on a raid protection... Therefore, if a drive fails, your DSM will not work but your data are protected due to the raid protection of the Hypervisor. You replace the drive on the Hypervisor the array will rebuild and the 2 virtual disks will be available again on your virtual DSM. I hope all that makes sense... In theory, when you pass through portions of a disk that is already in Raid (does not matter 1,5,6 etc) from the Hypervisor it makes no sense to create another raid on the DSM. In my case though which I am passing through entire disks not portions of a disk that are not already raid protected by the hypervisor it makes sense to use the Raid of the DSM.1 point
-
Hallo hat alles nichts gebracht. Habe aber eine Lösung gefunden "Neustart" - ✔ "Herunterfahren" - ✔ "HDD Sleep-Modus" - ✔ "USB Sleep Modus" - ✔ Über einen Link (den ich in einem Beitrag von IG-88 gefunden habe) https://linux-hardware.org/?view=computers&type=notebook&vendor=Medion&model=Akoya+E4214+MD99570 habe ich herausgefunden, das ACPI funktioniert. Nach einer Google Suche "E4214 acpi" bin ich auf folgende Seite gestoßen. https://bugzilla.kernel.org/show_bug.cgi?id=100691 Und hier fand sich die Lösung. Im BIOS umstellen auf UEFI. Danke eurer Unterstützung.1 point
-
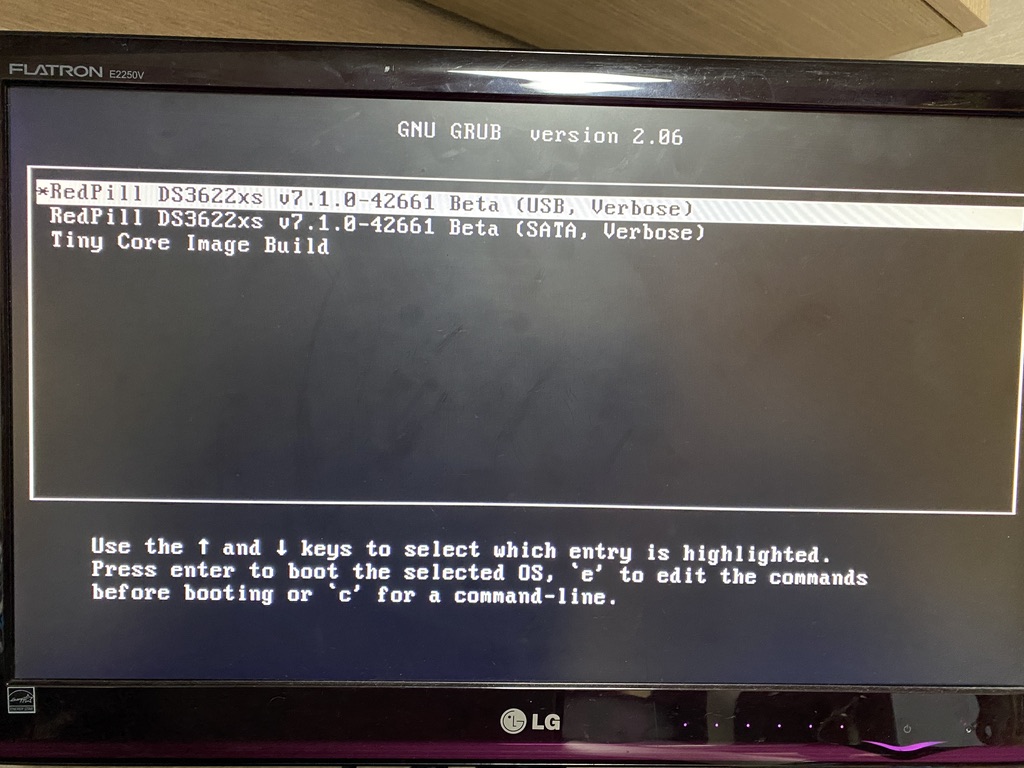
A few hours ago, the ds3622xs+ bsp was shown, so I finished building with TCRP using the bsp. It was successful by modifying the Intel ext of the pocopico. It was possible to jump to 7.0.1-42218 -> 7.1.0-42661 by two step update. I think it's because misc and boot-wait are not ready at the moment There is a file corruption phenomenon in 56% of the pat file installation.
 1 point
 -
While at GRUB , You can also press e and where it says hd0 you can change to hd1 or hd2 etc and then press F10 to boot1 point
-
Note to self..dont be a dick and unplug your external hdd 🙂. Works now1 point
-
Почитайте, появится ясность. Version: 7.1-42621 Release Candidate (2022-03-24) - Version: 7.1-42661 (2022-04-06) https://www.synology.com/ru-ru/releaseNote/DSM https://www.blackvoid.club/dsm-7-1-42621-rc/ Потому в архиве и нет DSM 7.1.0-42621 RС1 point
-
Мама дАрагая..... Аттракцион неслыханной щедрости.... )))) 2 гига это очень мало. Начните хотя бы с 8_ми гигов. Да и Десятина поди ставилась Чистая, без правок и вырезов Если надо, подскажу где взять почищенные от всякого хлама образы. Почитайте, это вам поможет Понимание протокола удаленного рабочего стола (RDP) Как подключиться по RDP c ОС Windows, Ubuntu или Debian (Linux), Mac OS, а также с телефона на Android и iPhone1 point
-
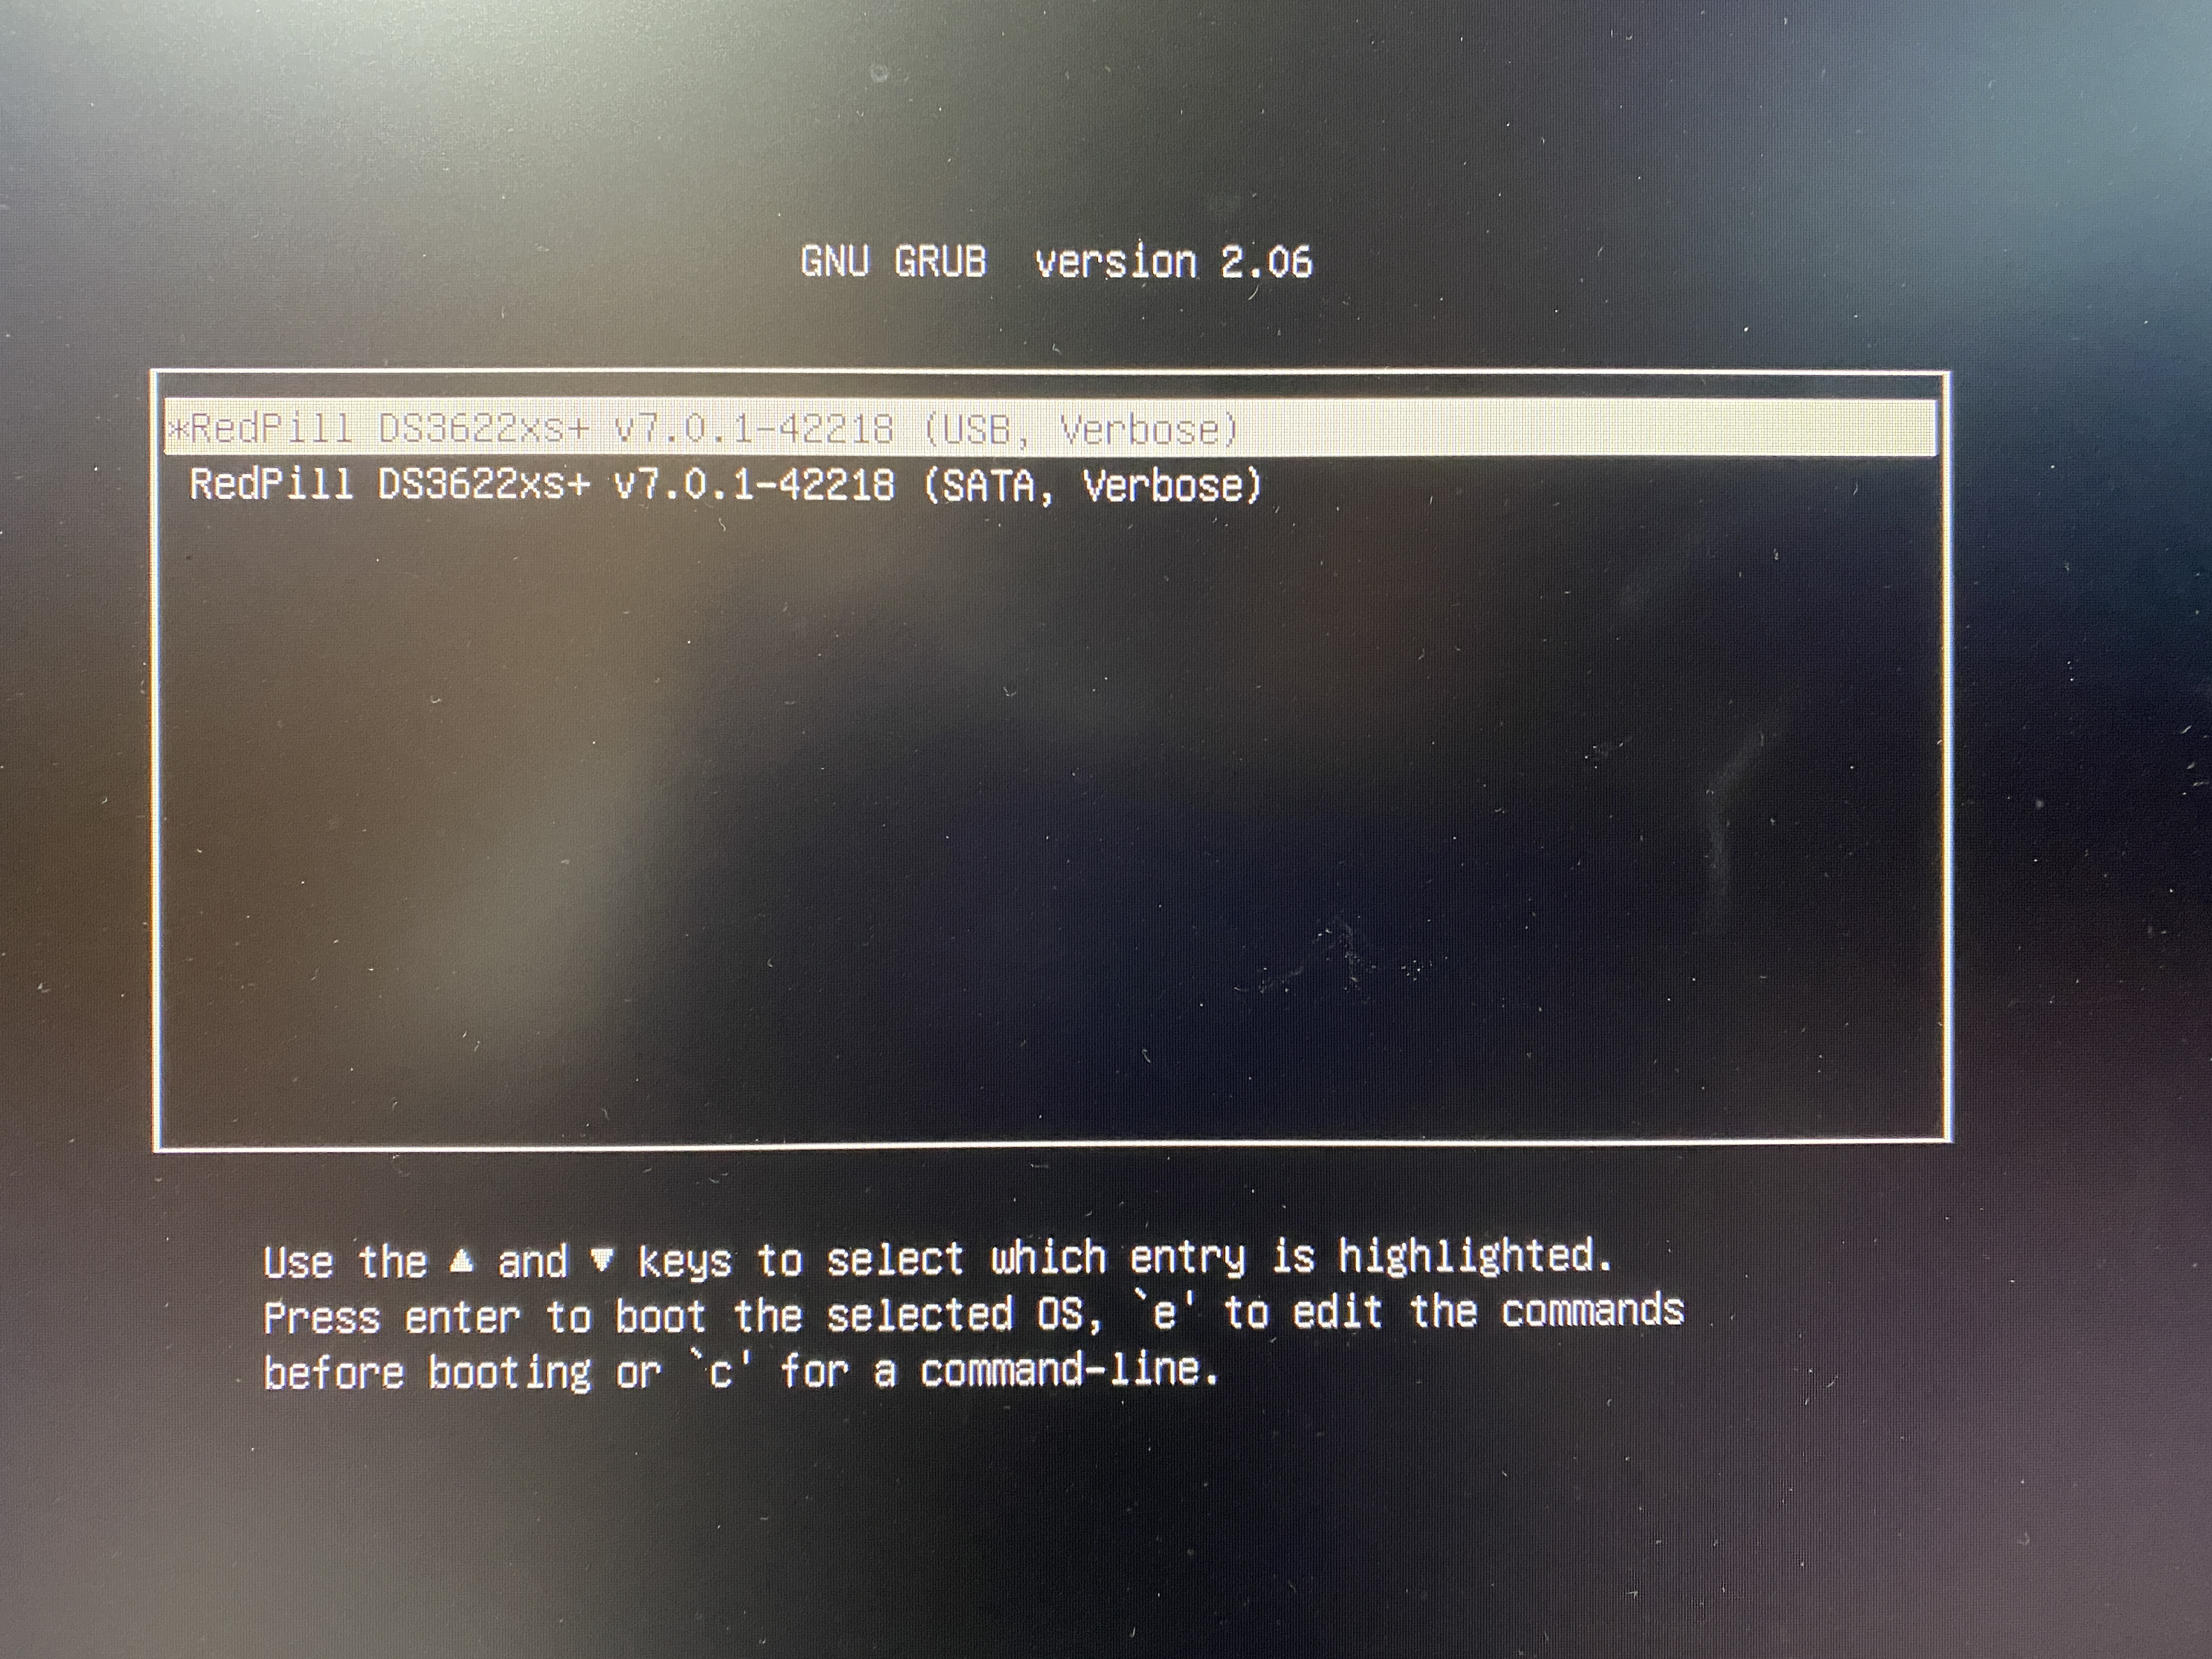
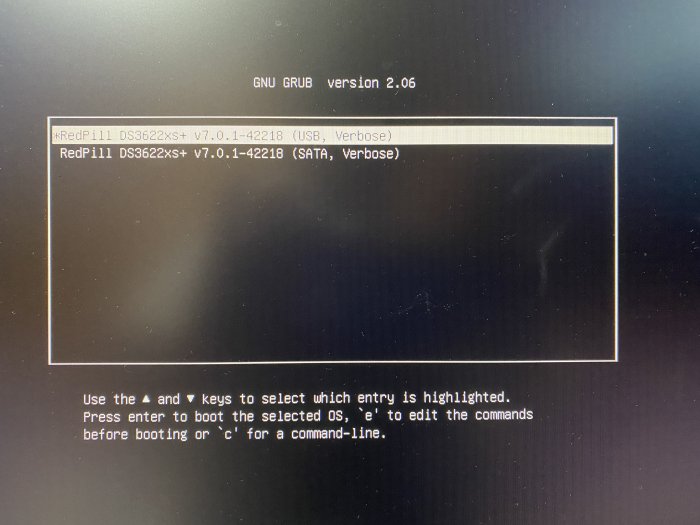
I'm currently running DSM 7.0.1 42218 using model 918+, using apollolake, is it possible to got up to 7.1 with the 918+ as the model or would I need to change to 920 or 3622 TIA1 point
-
Do you know what pre-test means? The developed program has a minimal test of the developer himself. If even this is not an environment for @pocopico to help, I will not make any more unreasonable demands.1 point
-
Join as well... Big thank you!1 point
-
Extensions will be rebuilt soon1 point
-
yes it was requested in the past ... assuming that you have loaded what ever extensions you need manually, you can use : ./rploader.sh build xxxxx manual1 point
-
Back in the day (Jun Loader) when we did not have the RedPill loader where you can add extensions and load additional drivers, it was a lot easier to install DSM on a Virtual Machine due to the drivers. For ethernet you had to use the e1000 driver which is supported by default by DS918+ and no need to worry which ethernet chips are compatible with DS918+. Other reason, like my self, I have an AMD 3900X CPU with 12Cores/24Threads, there is no reason to utilize all 12 cores for DSM, instead I allocate 8vCores and use the other vCores for other VMs like Windows Servers, Dockers etc... With now days virtualization you can pass through ethernet cards, hard disks, GPUs and other PCI cards. In terms of performance you might not notice any difference between a baremetal. Whether you use a VM or Baremetal it's a choice and there is nothing wrong either way...1 point
-
Посмотрите тут. Ваша М/П и проблема в прописке контроллера1 point
-
The rploader.sh has reached version 0.7.0.0 It now includes the following : - Two stage upgrade for 7.1 - 7.1. Loader creation from scratch - Local (on stick/disk) Caching of created and downloaded files - Support for DS920+ (Extensions have been compiled and added to my repo) - Local Backup (on stick/disk) of current loader partitions 1/2 to /mnt/sdx3/backup/ Reminders : - always add jumkeys redpill-misc extension before you build loader for 7.1 - always add jumkeys redpill-dtb patch for model.dtb and update the model.dtb inside the extension (for ds1621 and ds920) Please when starting from clear image always perform : ./rploader.sh clean now ./rploader.sh update now ./rploader.sh fullupgrade now (old files will be moved to /home/tc/old) ./rploader.sh backup now1 point
-
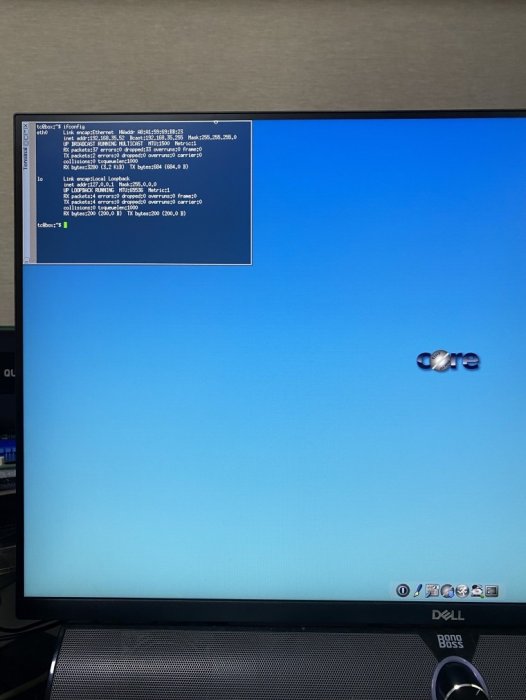
Hello. This guide is dedicated to installing DSM 7.0.1 BareMetal. It is a translation from Korean to English using a translator. Please understand if there is a slight misunderstanding. Existing RedPill, which has been released since last year, can generate IMG files directly through the bootloader compilation process only if Linux is available separately. This tinyCore RedPill provides a USB boot image with tinyCore Linux. It's much easier to work without having to install Linux separately. As usual, you can add the desired driver directly from the selection header and build it. Tinycore supports the following platforms (DS918+/DS3615xs/DS3617xs/DS3622xs+/DS1621+/DV3221/DS920+). You can continuously change the bootloader without re-creating the image (model/sn/mac, etc.) Tinycore supports both legacy versions for baremetal and virtual environments. 1. Prepare bootloader IMG file With the Download button in the middle of the GITHUB link below.Download the gz file. In it, 0.4.6 version img.You can unzip the gz file again and use the img file. (All files) https://github.com/pocopico/tinycore-redpill (for LEGACY) https://github.com/pocopico/tinycore-redpill/raw/main/tinycore-redpill.v0.4.6.img.gz (for UEFI) https://github.com/pocopico/tinycore-redpill/raw/main/tinycore-redpill-uefi.v0.4.6.img.gz (for VMWARE) https://github.com/pocopico/tinycore-redpill/raw/main/tinycore-redpill.v0.4.6.vmdk.gz 2. Bootloader IMG file USB recording Use the above tinycore-redpill.v0.4.6.img file to burn to USB with convenient image tools such as WinImage and Rufus. There is no need to pre-adjust the configuration file to modify the VID/PID/Serial/MAC/SATAPortMap like JUN loader. If you want to create a USB image on Mac or Linux, you can use the following DD command at the terminal. (Suppose the USB DEVICE ID identified by diskutil is disk4) sudo diskutil unmountDisk /dev/disk4 sudo dd if=/Users/MyAccount/Downloads/tinycore-redpill.v0.4.6.img of=/dev/disk4 bs=4m agree eject. 3.tinyCore Linux Boot USB boot by plugging into the PC you want to use as XPENOLOGY (you can start using UEFI 1 partition or USB CSM) Only TinyCore Linux menu appears and runs automatically Start the terminal app on the far right icon. Use the ifconfig command to verify the ip address where the en0 LAN card is automatically allocated. 4. CONFIG adjustment after SSH connection Connect ssh from another PC, such as putty. ( id:tc / pass : P@ssw0rd ) After connecting, update to the latest version with the following command. tc@box:~$ ./rploader.sh update now Tinycore Redpill is still in a stable state of stabilization. PocoPico, the developer of this program, will frequently fix bugs and announce rebuilding. There's a possibility that this rebuild will happen from time to time. Even if you use the first IMG file version of 0.4.6, you can continue to receive real-time updates of changes through the Internet. Therefore, before using it for the first time, please make sure to download the final patch status with the update option. If you've continued to migrate from JUN's XPhenology, tc@box:~$vi user_config.json The user_config.json file's VID/PID/Sn/Mac/SataPortMap, etc. are existing grub.Please refer to the cfg and insert it as it is. For new installers, perform serial GEN/USB VID, PID auto detect, SataPortMap auto detect, etc. as follows. The next process is DS3622xs+, which is currently undergoing the most stable session first. I will focus on explaining. tc@box:~$ ./rploader.sh serialgen DS3622xs+ tc@box:~$ ./rploader.sh identifyusb now tc@box:~$./rploader.sh satamap now (HBA card users are not required) You can see that the contents of user_config.json are changed automatically. Finally, it is common for existing users and new installers. tc@box:~$catuser_config.json, assuming there are 4 built-in sata ports. SataPortMap = "4", DiskIdxMap = "00" Please check if it is changed to the back. After find.synology.com, you may not be able to find the SATA HDD during DSM installation. The following is an example when a 6-port SATA expansion card is installed. SataPortMap = "46", DiskIdxMap = "0000" (For those who use cards such as H200, H310, H710, etc., exceptional, you do not need to erase the option of this SataPortMap and DiskIdxMap itself. Please erase the lines of the above two options in the vi editor and organize them well so that they don't end with Syntex errors. Of course. ./rploader.sh satamap now command is not required.) 5.BIOS built-in SATA port Hot Plug disable -> enable (important) To avoid temporarily reducing the SataPortMap value set above by the number of HDD physically connected by Sata cable during DSM installation, Be sure to turn on the Hot Plug function. This reduces the probability of encountering an error message saying that the HDD cannot be found because the number of SataPortMap automatically above is recognized as normal recognized. However, if M.2 and Sata ports are Muxed Sata ports that share Lane, it should be considered unusable. 6. Build bootloader after SSH connection When you have finished adding the above extension driver, you will finally build the bootloader. tc@box:~$ ./rploader.sh build broadwellnk-7.0.1-42218 The list of supported platforms can only be found in Help with the following commands: tc@box:~$ ./rploader.sh 7. backup and reboot for bootloader use After successfully completing the build, back up the configuration with the following command and restart the genology with USB. tc@box:~$ filetool.sh -b &&/usr/bin/exitcheck.sh Or tc@box:~$ ./rploader.sh backup now tc@box:~$ sudo reboot It has the same effect. The backed up settings and ext drivers remain the same. The next time TinyCore Linux starts for correction, the setting value will be restored from the mydata.tgz file. 8. Launch the Grub Menu BareMetal must select the first USB boot menu. The first USB menu will be automatically selected. The last selected menu will be stored and used for the next boot. 9. Installing DSM with find.synology.com On an XPhenology PC, There is a delay of about 1 to 2 minutes for IP allocation, so please wait a little longer. There is nothing more to do on this XPhenology PC once you have checked the Kernel boot message. Now look for XPhenology on another PC at find.synology.com. If found successfully, proceed with the initial installation of DSM or the expected migration DSM installation process.
 1 point
 -
Then you might want to try Tinycore redpill and use platform DS3622xs+ (broadwellnk) for that. In any case it would be nice to test the easiness on less linux oriented people. Just download the image : https://github.com/pocopico/tinycore-redpill/blob/main/tinycore-redpill.v0.4.6.img.gz Uncompress write that to on a USB stick and start using that. Its a few commands and i'm pretty sure you'll be able to handle that. After writing the image on a USB you can use it to boot you N54L into Tinycore Redpill and you will be presented with a Desktop GUI. You open the terminal command and type : ./rploader.sh update now ./rploader.sh fullupgrade now ./rploader.sh serialgen DS3622xs+ ./rploader.sh identifyusb DS3622xs+ ./rploader.sh satamap now ./rploader.sh backup now ./rploader.sh build broadwellnk-7.0.1-42218 Then upon succesfull completion you can reboot and select USB Boot at GRUB and then after a couple of minutes you can open a browser to http://find.synology.com/ Enjoy and let me know how it went1 point