Leaderboard


Popular Content
Showing content with the highest reputation on 04/29/2020 in all areas
-
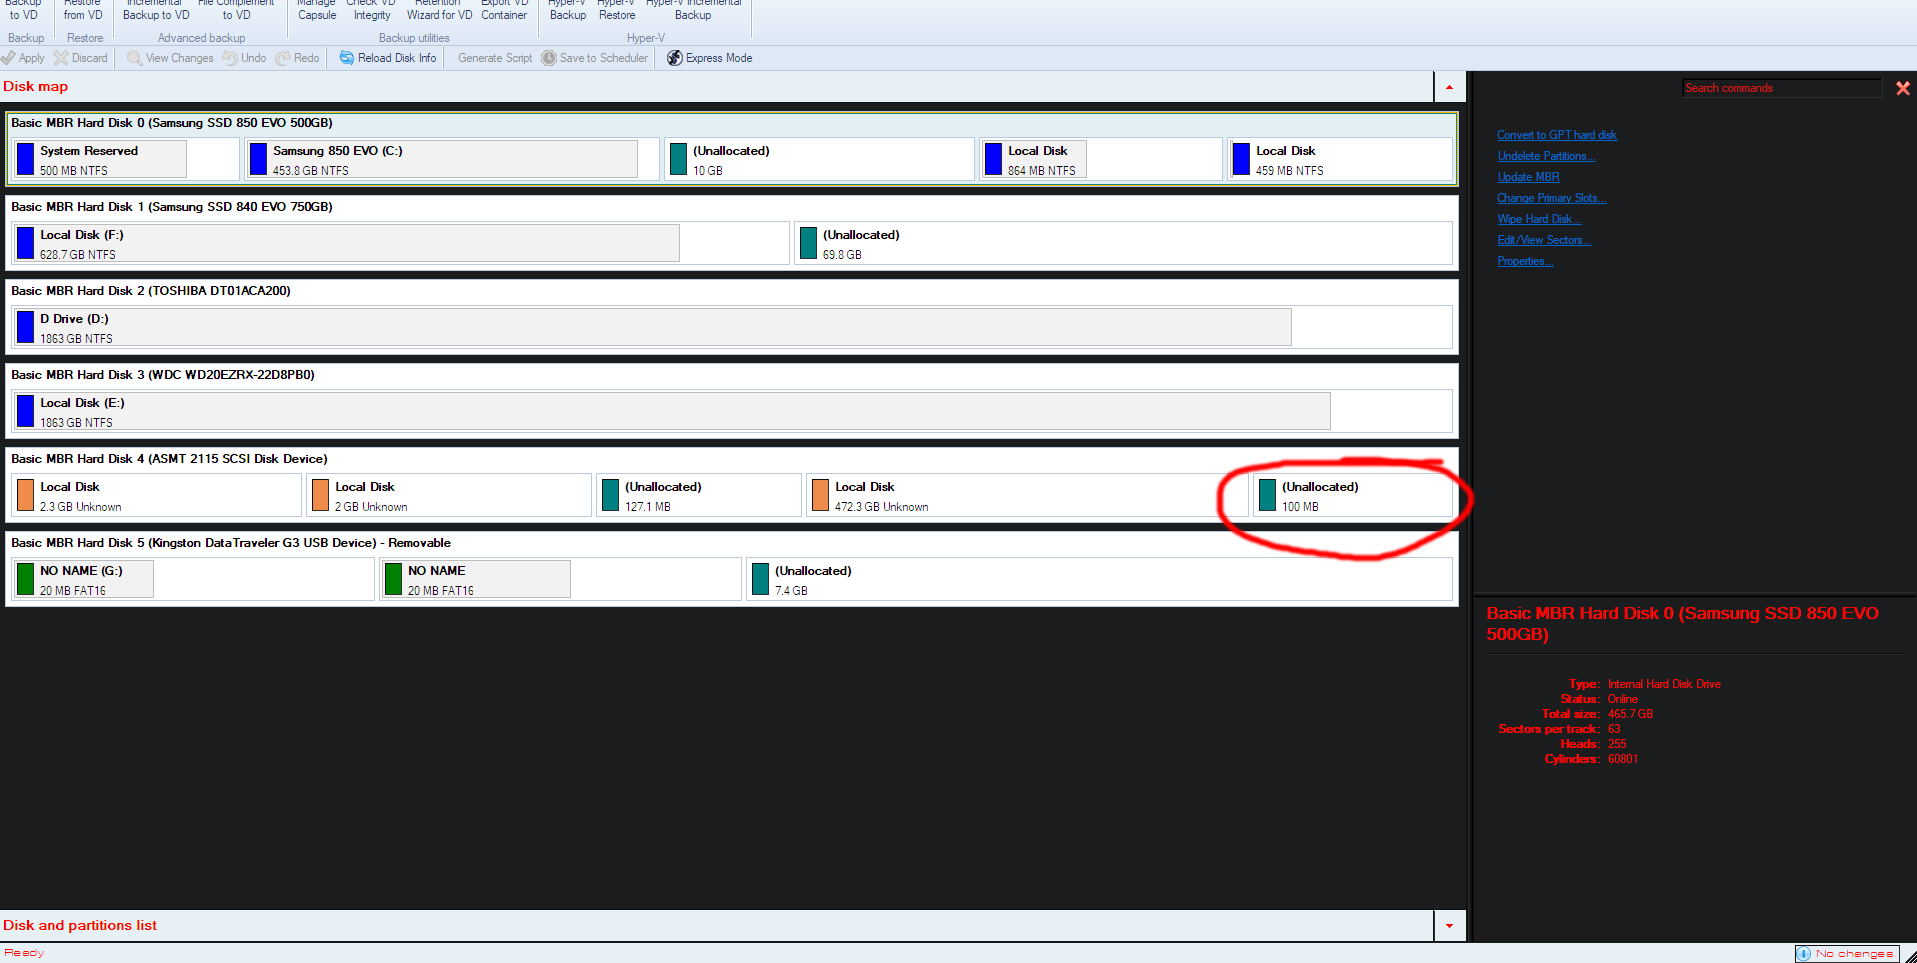
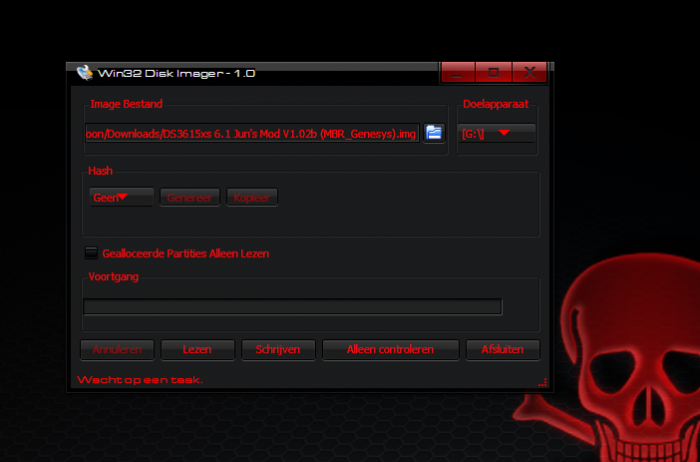
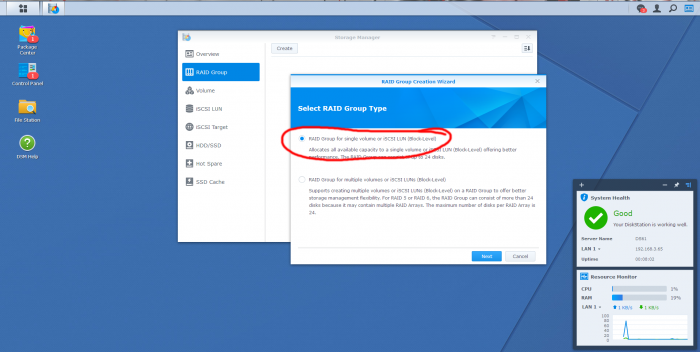
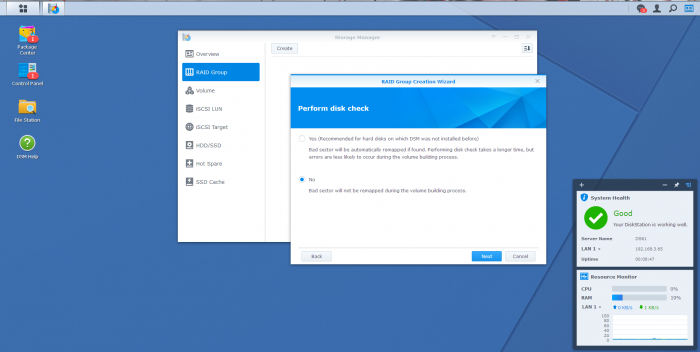
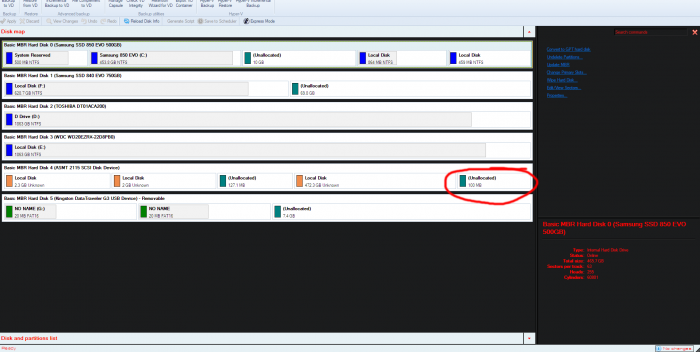
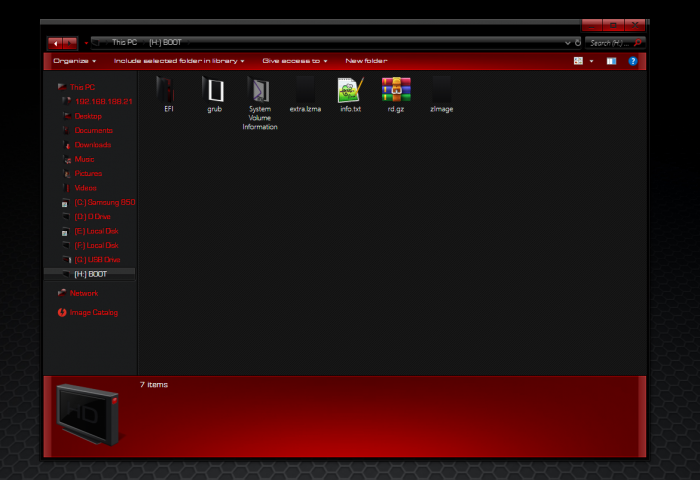
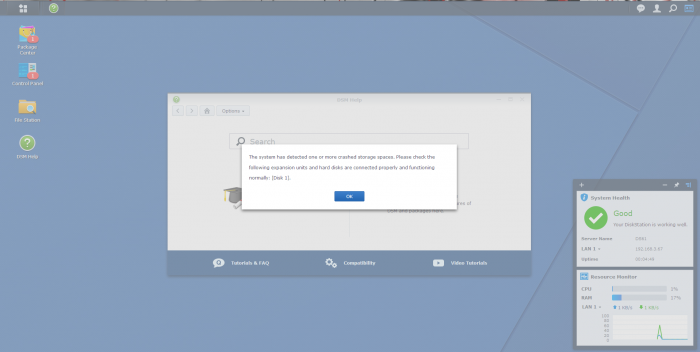
In this tutorial we are going to place the bootloader alongside the DSM OS and the remaining storage Keep in mind that i use DSM 6.1 and not 6.2! What you need: Win32DiskImager Jun's loader v1.02b DS3615xs with MBR partition DSM 6.1 (15047) grub2 (i used grub2-for-windows) partition/hard disk manager (i used Paragon Hard Disk Manager 15) USB stick for the bootloader empty SSD First we are going to put the bootloader on a USB stick using Win32DiskImager Then we are going to install DSM normally After the installation of DSM and configuring your device name, username, etc goto the Storage Manager and create a RAID Group for only the SSD in Basic then click Apply and goto Volume and create one (doesn't matter what File system you used, but i use ext4) then click OK and shutdown the server Now we are going to do some fun things with the SSD drive where DSM and the storage are installed on put the SSD drive and the USB stick with the bootloader on it (we need some files later) out of the DiskStation machine and put them in your main PC Start up your partition/hard disk manager and look for the SSD that you installed DSM on it should look like this: Look at the last Unallocated partition, it should be 100MB big thats plenty for the loader so we are going to make a new partition (50MB is enough) and make sure you put it at the very end of the drive dont forget to put the drive as Active and assign a drive letter to it Now we are going to install grub2 on that 50MB partition i used this website to make one (because i use Windows) After you have install grub2 on that partition that we need to copy all the files from the 2nd partition of the usb drive and place them in the root directory of the 50MB partition don't forget to place the grub.cfg (from the 1st partition) in the /grub folder of 50MB partition Now unplug the SSD from your PC and place it in your DiskStation pc and boot it up (you dont need to edit anything just let it boot) you can use Synology Assistant to find your DiskStation pc and you should see a normal welcome page were you can login After you have logged in you should see an error message, that is because of the small FAT16 partition you will get that everytime you startup that machine Storage Manager should say that your system is healthy. Thats it, you can now use it normally without an USB bootloader also you can update to the latest 6.1 version if you want (make sure you don't install 6.2, haven't tested that one)


 1 point
 -
it DOES, if someone is impatient he can create his own extra/extra2 until i upload 0.11 (later this evening) you will get the new mpt3sas.ko with 0.111 point
-
create new vm and attache rdms to it configuration might be lost1 point
-
Ich glaube, @IG-88 war da längere Zeit nicht im Borg-Kubus 😂 Wahrscheinlich meint er DSM 6.2.3. Auf jeden Fall sollte es mit dem 1.04er (918+) bei Deiner Hardware funktionieren.1 point
-
as a newer mpt3sas.ko made no difference and jun's mpt3sys did not work i assumed the difference might be on level lower so i kept the new mpt3sas v27.0.0.1 and replaced my own new complied version (synology kernel source 24992) of scsi_transport_spi.ko, scsi_transport_sas.ko, raid_class.ko with the files from jun's original extra/extra2 test looks good, no problems loading mpt3sas and there are smart infos now1 point
-
Luego puedes subir hasta 6.2-24922 update 4 creo Enviado desde mi Mi A2 mediante Tapatalk1 point
-
Thank you, sir! It works great again! You're awesome!
 1 point
 -
Thanks for your effort! Now everything works1 point
-
Actually the package that is cross compiled to do this was authored by VMWare, is called vmtools and it is available on most guest OS’s. I can understand the confusion if you are not familiar with it (but somehow familiar with the function). No sarcasm here either. All good!1 point
-
I confirm upgrade to 6.2.3 using original jun's extra lzma on Microserver gen7 Microserver gen8 and Microserver gen10 I see I was not clear in my last post, no extra.lzma I mean I used original extra.lzma from jun's bootloader1 point
-
IG-88, I just wanted to say that you are GOD when it comes to trying to keep compatibility with older hardware and I cannot express enough my gratitude and appreciation for all the work you have been doing and the time invested in this! I am sure I am not the only one appreciating all your work, time and dedication. Hats off in front of you and thanks a million, my friend! YOU ROCK!1 point
-
Hey there, this has been asked a couple of times but the only answers (if someone answered at all) were like, "Why bother? It works." In the picture above, both installations work. My inner monk (as well as my boss) prefer the right cabinet, however. In the following example I'll refer to a 10-bay system, if your setup is different, you can easily edit the numbers. I assume, you have successfully installed XPEnology on your box, following Polanskiman's tutorial. If you encountered any problems with drives not being recognized, or displayed as eSATA, etc. you checked Hedii's guide, as well. Still, your drives show up like this, maybe because your chipset would support 6 drives but your mainboard only offers 4 connectors. Drives 1,3,5,6 are connected to the mainboard, drives 7-10 to an additional 4-port controller, drives 11 and 12 to another 2-port controller. Drives 2 and 4 look like this in your dmesg: [ 1.835796] ata1: SATA max UDMA/133 abar m2048@0xfe525000 port 0xfe525100 irq 47 [ 1.835802] ata2: DUMMY [ 1.835806] ata3: SATA max UDMA/133 abar m2048@0xfe525000 port 0xfe525200 irq 47 [ 1.835807] ata4: DUMMY [ 1.835812] ata5: SATA max UDMA/133 abar m2048@0xfe525000 port 0xfe525300 irq 47 [ 1.835813] ata6: SATA max UDMA/133 abar m2048@0xfe525000 port 0xfe525400 irq 47 Playing around with internalportcfg (Hedii's guide) did not help you, getting rid of these "DUMMY" ports. Luckily Jun's loader has a feature called "sata_remap", mentioned here and here, that - well - does what it says. To fill the gaps, you can remap the drives from your 2-port controller. Reboot and press "C" in the GRUB menu. (See Polanskiman's guide "Step 7" and "Note 4" if you need help). At the command line enter: append "sata_remap=10>1:11>3:1>10:3>11" Be aware, that counting starts at 0, here. 10>1 will remap drive 11 to 2, 11>3 will remap drive 12 to 4, etc. After the next reboot, it will look like this: As you can see, the drives are now numbered sequentially from 1 to 10 with the two DUMMYs on ports 11 and 12. Now it's easy to hide them. Like in Hedii's guide open an SSH connection to your NAS and edit as follows: # first file to modify vi /etc/synoinfo.conf # second file to modify vi /etc.defaults/synoinfo.conf # In each file look for the line maxdisks="12" # and change it to maxdisks="10" Reboot and you finally have a 10-bay box displaying 10 sequentially numbered drives: Hope, this will help one or the other. Best Regards, The_Mole


 1 point
 -
No attack so far, but I remember a time when I could see those many bots knock at the door and be blocked in real time thanks to the DSM notifications, it was very frightening. Now I try to be less naive, there's surely room for improvement but here's what I did. - admin account is disabled - I changed the default 5000/5001 DSM ports - disabled http access outside my local network, it's https only with let's encrypt certificate. - added two-factor authentication to all accounts - enabled auto block after 2 failed attempts within 20 minutes (well, this one is a bit excessive...) - allowed DSM access to my own country only in DSM firewall. Good luck guys!1 point