Leaderboard


Popular Content
Showing content with the highest reputation on 06/14/2023 in all areas
-
Очистка модулей происходит только после того как вы заходите в sysinfo. Не заходите в этот раздел и не не нужно будет модули заново добавлять.2 points
-
after 7.2 release they made 7.1 source available https://archive.synology.com/download/ToolChain/Synology NAS GPL Source/7.1.1-429621 point
-
Мда уж, нашел причину, помог Security Advisor, со старой системы 6,2 остался исполняемый скрипт (помнится как то давно, было решение, чтоб обновлялась система без заморочек, не помню уже каких, но скрипт был добавлен вручную), так вот он все это дело и "хоронил" на новой системе 7.1.1. Полет нормальный, всем откликнувшимся Благодарность!1 point
-
В виртуальной машине нужно пробросить донгл в настройках. Вкладка «другие». В докер чуть сложнее, сейчас уже и не вспомню как именно. Отправлено с моего NE2211 через Tapatalk1 point
-
Да. Нормально.1 point
-
Доброго и вам ..... Да1 point
-
Был когда-то работало нормально. Сейчас в одной локации белый IP, доступ к остальным через WG. Все на OpenWRT.1 point
-
Как вариант, если есть другой ресурс с белым IP (а я так себе на даче камеру подключил): Дома - роутер TP-LINK Archer C7, белый статический IP, основная рабочая DSM. На роутере поднят OpenVPN сервер. На даче стоит роутер TP-LINK TL-MR150 с подключением к мобильному оператору (только серый IP) К роутеру подключены камера и "маленький" Xpenology (Intel NUC6 DS918+) В дачном DSM создано OpenVPN соединение с домашним роутером. Соответственно, как минимум из домашней сети я дачный DSM вижу (IP 10.8.0...) Для попадание на него "извне" можно просто настроить проброску портов на домашнем роутере или (если есть ещё необходимость https в http превратить) добавить в домашнем DSM обратный прокси и указать его в настройках маршрутизатора. В итоге, например, я вхожу извне на домашний DSM - https://my-domain.ru:5001, а на дачный - https://my-domain.ru:9443 (который пробрасывается на http://10.8.0...:5000)1 point
-
ams for DSM 7.2 ds3622xs+ hp-ams ds3622xsp 4.4.302.zip1 point
-
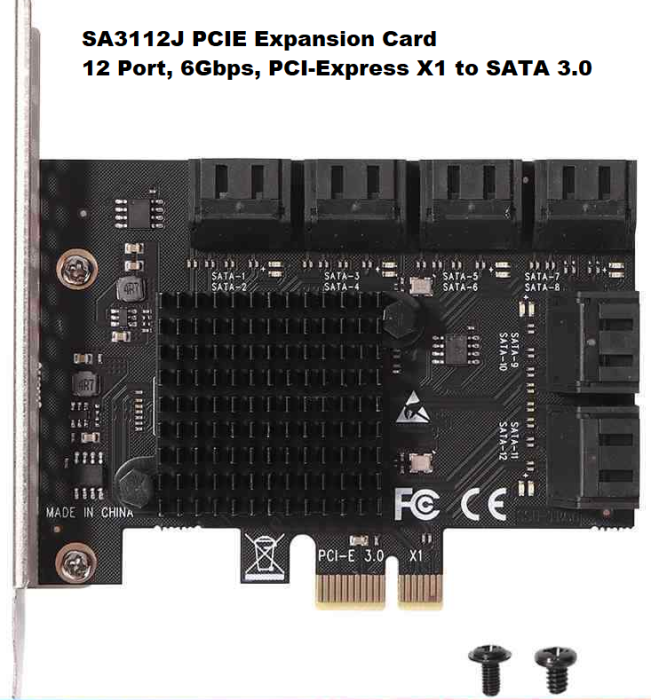
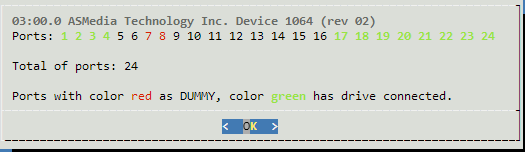
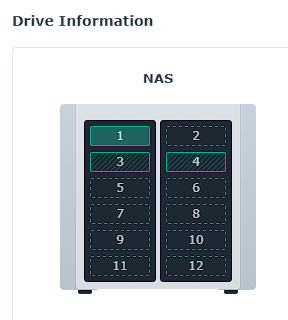
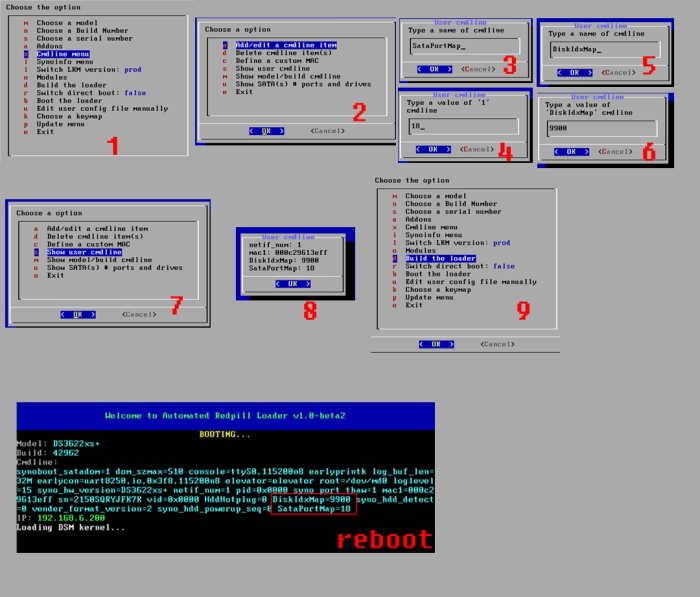
I was in the process of upgrading my DSM 6.2 NAS with 2 TB drives to DSM 7.1 using 16 TB drives. I figured that my SAS card was not compatible with drives that size and I needed to have 12 ports. I also learned that DSM 6 was not capable of properly handling large drives. I got me one of these: It was plug and play. It was immediately recognized by my system and ARPL. However, I noticed a problem with it. ARPL reported the 12 ports not contiguously used. It reported ports 1-4, and 17-24 as the ports assigned to the actual physical ports. I am a bit anal with things like this. I need the ports in the DSM Interface to match the actual ports of my drives in case I need to replace them. I even noticed that some of the assigned ports didn't even follow the proper order. I would have expected all the ports to be contiguous using the sequential numbers. So here's how I fixed it: Step 1. Identify which SATA port is mapped to which physical port 1. I plugged a drive to every physical port 2. I made a list of all the Serial Numbers of each disk and their physical location 3. Loaded DSM and checked in the Storage Manager > HDDs to identify the port actually assigned to each disk I ended up with the following list: SATA PHYSICAL 1 1 2 2 3 3 4 8 5 4 6 5 7 6 8 7 9 9 10 10 11 11 12 12 This helped me identify which ports I needed to switch in order for it to be shown contiguously with the proper numbers that correspond to the actual physical ports. Step 2. Rebuild the ARPL loader 1. I restarted the NAS and made sure to use the option to make changes to the loader 2. Went into the Command Line options by following this: 3. Added the following as the sata_remap command line option: sata_remap: 16>3:17>4:18>5:19>6:3>7:20>8:21>9:22>10:23>11 This translates to: Make port 16 be port 3. Make port 17 be port 4. Make port 18 be port 5. Make port 19 be port 6. Make port 3 be port 7. Make port 20 be port 8. Make port 21 be port 9. Make port 22 be port 10. Make port 23 be port 11. ---- NOTE THAT: The SATA ports are given values that start at 0. So, if I had 24 ports, it actually meant ports values were 0-23. That means that 16>3 is actually changing the DSM reported Drive 17 to be the Drive 4. ---- 4. Built the loader 5. Booted the loader Step 3. Confirm Changes After booting, I checked the reported drives and their serials and that they matched the order in which the physical ports were put. Hope you find this useful.
 1 point
 -
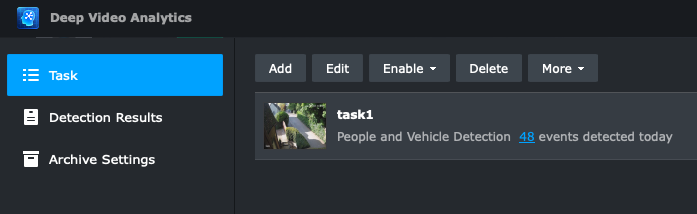
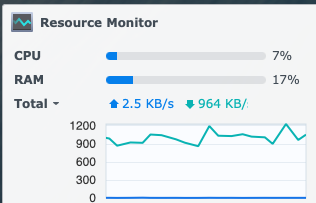
Confirming Redpill DVA1622 DSM 7.2-64561 image working fine with both bare metal and under ESXi. Used standard tutorials although on ESXi I had no suitable GPU for local display so I did some mods to silence all the error reports in the system logs. Kudos to team. Details: ESXi 7 running on HP Microserver Gen 8 - Xeon E3-1265Lv2, 6GB VM (also worked fine with only 2GB) Didn't have suitable GPU for passthrough so no local display or deep analytics Flies, stays under 2% CPU most of the time Mem usage stays very low 5 cameras HP ProDesk 400 G4, i5-7500, 12GB 100% working, local display (Intel 630 native) and AI CPU sitting at ~7% with one AI task running on a 1080p/20fps feed Also feels responsive Disable secure boot in BIOS to boot redpill USB Edited scemd.conf and kernel.conf to remove usual log noise (complaints about synbios writes, iotcl, invalid parameters) - most of those the usual reasons like lack of LEDs, fans and serial port and easy to quench with filters in /etc.defaults/syslog-ng/patterndb.d. On ESXi due to lack of GPU, I saw deep video analytics (dvad) and face analytics (faced) kept crashing, and restarting every second - these were flooding the logs. Disabling the daemons doesn't really help since the watchdog keeps trying to restart them and will complain if it can't. The watchdog seems hardcoded with the process names to look for (the /tmp/*.pids actually) so there wasn't an obvious config file to tell it to ignore dvad and faced. A trick that worked was (at boot) run a script that fools the watchdog that the daemons were running - my script copies /tmp/dvaadapter.pid to /tmp/dvad.pid and /tmp/faceadapter.pid to /tmp/faced.pid, which is sufficient to make their watchdog think the AI daemons are up and stop complaining. That gets ESXi without Intel GPU happy with no log or crashing churn. The bare metal HP is running sweet. Nothing much to do there except filter out 'get empty ttyS' and some led_brightness messages due to lack of serial port.
 1 point
 -
Hello, this is normal misconduct by the manufacturer. I'll take a look at the workaround description. Here you are: First upgrade the 6.2.4 to 7.0.1. Then comes the trick from grisu: I found a way to get to 7.1. You simply change the contents of the /etc/VERSION file to an old version. Then restart and the message migration appears in the web client. Import the DSM version specified in the migration path and then after the migration to version 7.1 update 2. But then you have to adapt the /etc/defaults/synoinfo.conf file again with the parameters mentioned. Best regards1 point
-
- Outcome of the update: SUCCESSFUL - DSM version prior update: ARPL Script DSM 7.1.1-42661 - Loader version and model: Automated RedPill Loader ARPL 1.1-beta2a - DS3622xs+ - Using custom extra.lzma: NO - Installation type: Baremetal - HP Microserver N54L Gen7 + Intel 10GB X520-T2 - Additional comments: Updated manually .pat on the first inital setup page of DSM1 point
-
+1 for the patch for DSM 7.1.1 42962-1 (DS920+) Accidentally updated while migrating.1 point
-
I know this is totally useless... but if like me you don't want to have this new C2 cloud bullshit icon in Surveillance Station, you can hide it. sudo vi /var/packages/SurveillanceStation/target/ui/modules/C2Vue/config search for "hidden":false replace with "hidden":true save and reload your SS window.1 point