Leaderboard


Popular Content
Showing content with the highest reputation on 05/27/2020 in all areas
-
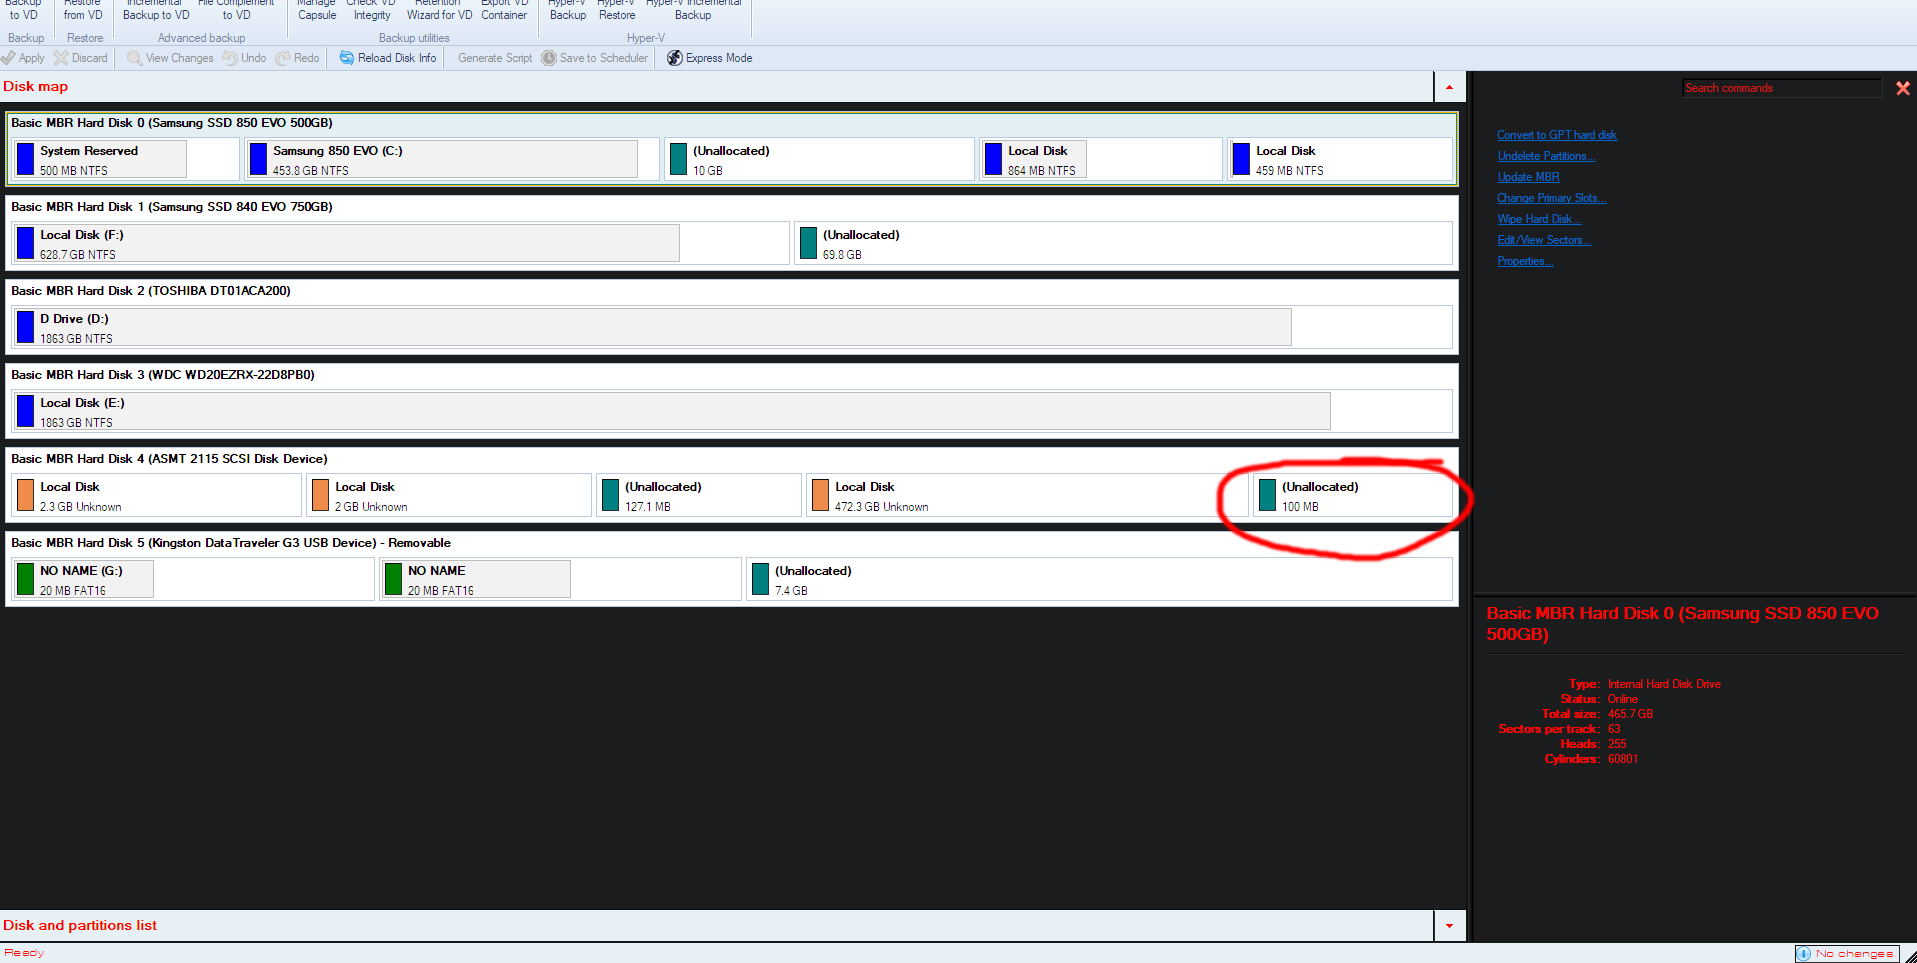
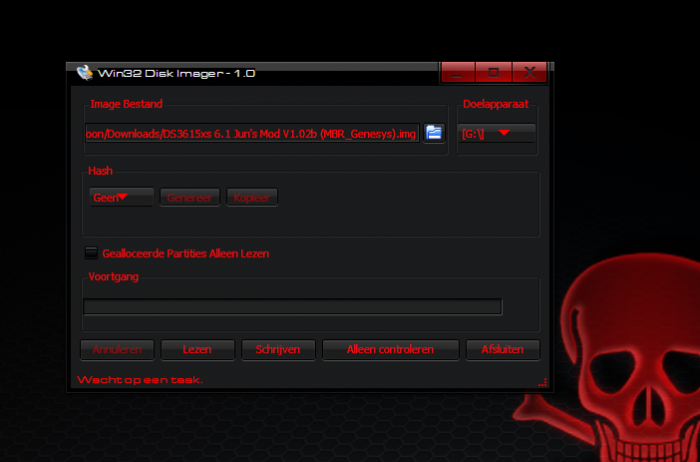
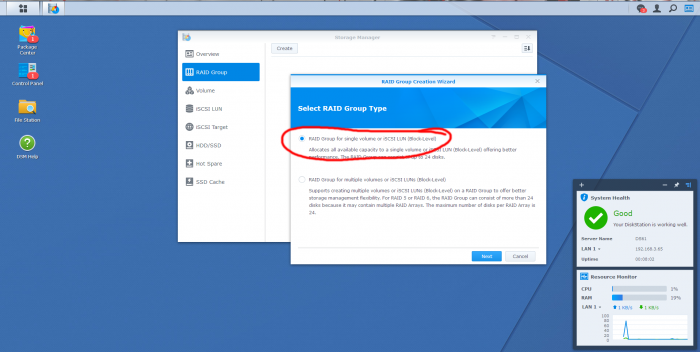
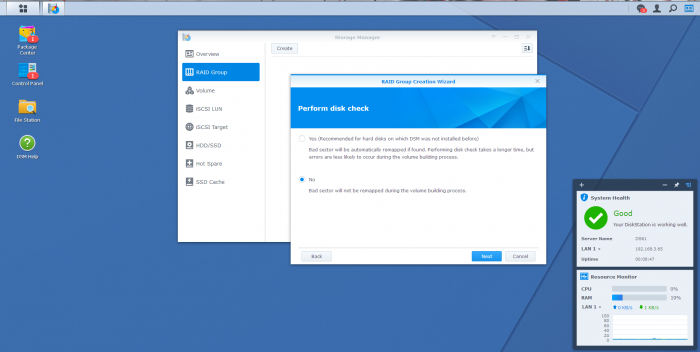
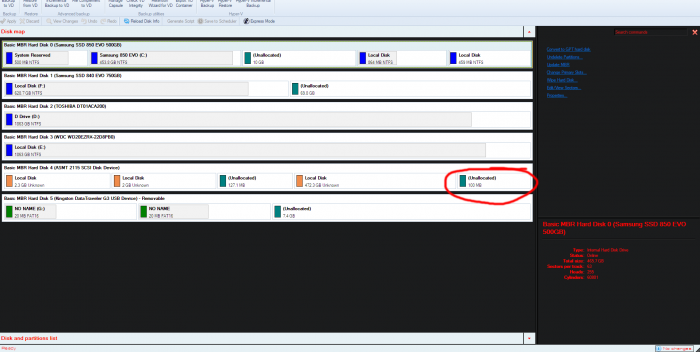
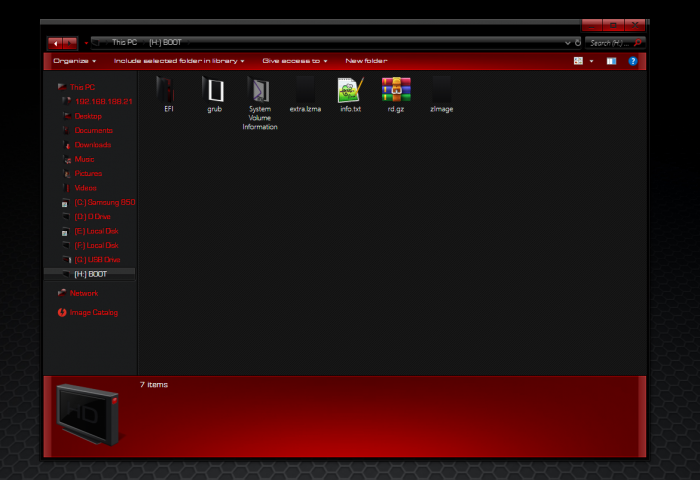
In this tutorial we are going to place the bootloader alongside the DSM OS and the remaining storage Keep in mind that i use DSM 6.1 and not 6.2! What you need: Win32DiskImager Jun's loader v1.02b DS3615xs with MBR partition DSM 6.1 (15047) grub2 (i used grub2-for-windows) partition/hard disk manager (i used Paragon Hard Disk Manager 15) USB stick for the bootloader empty SSD First we are going to put the bootloader on a USB stick using Win32DiskImager Then we are going to install DSM normally After the installation of DSM and configuring your device name, username, etc goto the Storage Manager and create a RAID Group for only the SSD in Basic then click Apply and goto Volume and create one (doesn't matter what File system you used, but i use ext4) then click OK and shutdown the server Now we are going to do some fun things with the SSD drive where DSM and the storage are installed on put the SSD drive and the USB stick with the bootloader on it (we need some files later) out of the DiskStation machine and put them in your main PC Start up your partition/hard disk manager and look for the SSD that you installed DSM on it should look like this: Look at the last Unallocated partition, it should be 100MB big thats plenty for the loader so we are going to make a new partition (50MB is enough) and make sure you put it at the very end of the drive dont forget to put the drive as Active and assign a drive letter to it Now we are going to install grub2 on that 50MB partition i used this website to make one (because i use Windows) After you have install grub2 on that partition that we need to copy all the files from the 2nd partition of the usb drive and place them in the root directory of the 50MB partition don't forget to place the grub.cfg (from the 1st partition) in the /grub folder of 50MB partition Now unplug the SSD from your PC and place it in your DiskStation pc and boot it up (you dont need to edit anything just let it boot) you can use Synology Assistant to find your DiskStation pc and you should see a normal welcome page were you can login After you have logged in you should see an error message, that is because of the small FAT16 partition you will get that everytime you startup that machine Storage Manager should say that your system is healthy. Thats it, you can now use it normally without an USB bootloader also you can update to the latest 6.1 version if you want (make sure you don't install 6.2, haven't tested that one)


 1 point
 -
No, DSM is installed to all available block storage devices for redundancy (which is another reason not to present a monolithic device to your VM). All you need is the boot loader on the first Virtual SATA controller as device 0:0 Connect your RDM drives in sequence to the second Virtual SATA controller as device 1:0, 1:1, 1:2, etc 2nd virtual disk isn't required if you have RDM devices online Every disk has three partitions, Linux, swap and data. When you run the DSM install it will RAID 1 DSM (Linux and swap) to the first two partitions, respectively. Once DSM is fully installed you can use the data space for whatever array configuration and volume layout you wish.1 point
-
Always use DSM RAID, btrfs self-healing features and advanced disk management are the whole point of the system.1 point
-
- Outcome of the update: SUCCESSFUL - DSM version prior update: DSM 6.2.3-25426 - Loader version and model: Jun's v1.04 - DS918+ - Using custom extra.lzma: extra v10 - Installation type: BAREMETAL - J1900 NAS - Additional Comment: Everything is work (HW and SW transcode is work).1 point
-
Bienvenida! Pues en realidad todo depende que uso le vayas dar al NAS. En mi caso monté algunos con i7 pues tengo Plex instalado en ellos y son capaces de procesar hasta 12 o 13 reproducciones simultaneas de Plex. El problema principal con el ahora mismo es la imposibilidad de pasar a la version 6.2, por problemas de compatibilidad con la tarjeta de red y la configuración modificada del número de discos máximos admitidos. Sobre tu caso en concreto que funcione o no el M.2 dependerá de la controladora que utilice la placa base y del loader que vayas a utilizar, los últimos requieren de inclusión de modulos de drivers para hacerlos compatibles con ciertas controladoras. Mi consejo, casi cualquier placa base será compatible con la última version de DSM 6.1.7, además de tarjetas de red Realtek (que suelen ser las integradas en casi todas las placas base actuales). Además puedes añadir adaptadores SATA adicionales en el futuro para añadir discos duros según necesites. Eso sí busca una buena caja que admita gran número de discos en caso de que pienses ir añadiéndolos. Espero que te sirva para empezar...1 point
-
Con lo de la tarjeta M2 no te puedo ayudar, ¿pero te refieres a instalar el arranque ahí o ya el sistema operativo DSM? Y en cuanto al i3 yo tengo mi servidor xpenology con ese procesador, aunque es antiguo un 3220T con solo 2 núcleos y va muy sobrado, entiendo que el tuyo irá aún más holgado. Pero también depende del nº de discos que vayas a meter y cuantas personas van a tener acceso al servidor al mismo tiempo. En el mio la placa base es una Asrock H77M (6 puertos sata),, vendí la tarjeta gráfica Geforce 1030 y con el dinero me compré dos tarjetas SATA de 2 y 4 puertos, fuente de alimentación ENERMAX Platimax D.F. 600 (la anterior se me quemó y ya aproveché) y la caja una Silverstone GD04, todo heredado de un HTPC que tenía ya poco uso. Primero compré 3 discos duros de 6 Tb. Seagate Ironwolf reacondicionados con 2 años de garantía pero aquello hacía mucho ruido y se calentaban a lo bestia. Como no hay mucho sitio en la caja los sustituí por 7 discos duros externos Maxtor M3, de 2.5 pulgadas (les he quitado la caja) y el SSD que ya tenía para Windows 10 por si lo necesito para otras cosas, con un menú de GRUB al arrancar para elegir entre DSM y Windows, Los Maxtor llevan dentro un Seagate de 4 Tb (salen más baratos externos con caja que internos sueltos, una cosa extraña a descubrir, aunque eso sí te quedas sin garantía). y luego me he comprado esto: https://es.aliexpress.com/item/32778843469.html?spm=a2g0s.9042311.0.0.268d63c05zIYFI&cv=12_Deeplink&af=179029&aff_platform=aaf&sk=Y7bAZbY&aff_trace_key=332e9094fa05457c9f27ea8faa343dae-1590299154135-02277-Y7bAZbY&cn=15716&dp=12%3A%3A179029%3A%3A%3A%3A%3A%3A1590299153&terminal_id=030ee5a389464578aceba83dad9364e8&tmLog=new_Detail&aff_request_id=332e9094fa05457c9f27ea8faa343dae-1590299154135-02277-Y7bAZbY (para en un futuro añadir 4 discos más para un total de 11 discos, 44 Tb) + el SSD, en mi caso iría externo conectado al ordenador.1 point
-
Es que como te esta contestado el gurú IG-88, cualquier cosa q te digamos, seguro q el lo explica mejor.... Suerte con la placa! Enviado desde mi iPhone utilizando Tapatalk1 point
-
- Outcome of the update: SUCCESSFUL (but see comments) - DSM version prior update: DSM 6.2.2-24922 Update 6 - Loader version and model: Jun's v1.04b - DS918+ - Using custom extra.lzma: YES - real3x mod (but see comments) - Installation type: BAREMETAL - ASRock J4105-ITX - Comments: no /dev/dri (missing Gemini Lake firmware) NVMe code is new. The original NVMe patch does not work. I uninstalled NVMe cache as a prerequisite prior to upgrade and recommend that you do too. NVMe cache is reinstalled and working fine after applying the updated patch here. ASRock J/Q-series motherboards require extra.lzma or real3x mod to boot DSM 6.2.2. 6.2.3 is verified to install on J4105-ITX with no mods. So I chose to revert real3x mod immediately prior to invoking the upgrade with the following procedure:1 point