Leaderboard


Popular Content
Showing content with the highest reputation on 12/13/2018 in all areas
-
When setting up an XPEnology system, you must first select a DSM platform and version. XPEnology supports a few specific DSM platforms that enable certain hardware and software features. All support a minimum of 4 CPU cores, 64GB of RAM, 10Gbe network cards and 12-disk arrays. When you choose a platform and the desired DSM software version, you must download the correct corresponding loader. That may not be the "newest" loader available. The last 6.x version (6.2.4-25556) is functional only with the TCRP loader. TCRP is very different than the Jun loader. If you want to learn more, or if you are interested in deploying the latest 7.x versions, see the 7.x Loaders and Platforms thread. Be advised that installing 6.2.4 with TCRP is basically the same procedure as installing 7.x. Each of these combinations can be run "baremetal" as a stand-alone operating system OR as a virtual machine within a hypervisor (VMWare ESXi is most popular and best documented, but other hypervisors can be used if desired). Review the table and decision tree below to help you navigate the options. 6.x Loaders and Platforms as of 16-May-2022 Options Ranked DSM Platform DSM Version Loader Boot Methods*** Hardware Transcode Support NVMe Cache Support RAIDF1 Support Oldest CPU Supported Max CPU Threads Notes 1,3a DS918+ 6.2.0 to 6.2.3-25426 Jun 1.04b UEFI, BIOS/CSM Yes Yes No Haswell ** 8 6.2.0, 6.2.3 ok, 6.2.1/6.2.2 not recommended for new installs* 2,3b DS3617xs 6.2.0 to 6.2.3-25426 Jun 1.03b BIOS/CSM only No No Yes any x86-64 16 6.2.0, 6.2.3 ok, 6.2.1/6.2.2 not recommended for new installs* DS3615xs 6.2.0 to 6.2.3-25426 Jun 1.03b BIOS/CSM only No No Yes any x86-64 8 6.2.0, 6.2.3 ok, 6.2.1/6.2.2 not recommended for new installs* DS918+ 6.2.4-25556 TCRP 0.4.6 UEFI, BIOS/CSM Yes Yes No Haswell ** 8 recommend 7.x instead DS3615xs 6.2.4-25556 TCRP 0.4.6 UEFI, BIOS/CSM No No Yes any x86-64 8 recommend 7.x instead DS916+ 6.0.3 to 6.1.7 Jun 1.02b UEFI, BIOS/CSM Yes No No Haswell ** 8 obsolete, use DS918+ instead DS3617xs 6.0.3 to 6.1.6 Jun 1.02b UEFI, BIOS/CSM No No Yes any x86-64 16 6.1.7 may kernel panic on ESXi 4 DS3615xs 6.0.3 to 6.1.7 Jun 1.02b UEFI, BIOS/CSM No No Yes any x86-64 8 best compatibility on 6.1.x * 6.2.1 and 6.2.2 have a unique kernel signature causing issues with most kernel driver modules, including those included in the loader. Hardware compatibility is limited. ** FMA3 instruction support required. All Haswell Core processors or later support it. Only a select few Pentium, and no Celeron CPUs do. ** Piledriver is believed to be the minimum AMD CPU architecture to support the DS916+ and DS918+ DSM platforms. *** If you need an MBR version of the boot loader because your system does not support a modern boot methodology, follow this procedure. CURRENT LOADER/PLATFORM RECOMMENDATIONS/SAMPLE DECISION POINTS: 1. DEFAULT install DS918+ 6.2.3 - also if hardware transcoding or NVMe cache support is desired, or if your system only support UEFI boot Prerequisite: Intel Haswell (aka 4th generation) or newer CPU architecture (or AMD equivalent) Configuration: baremetal loader 1.04b, DSM platform DS918+ version 6.2.3 Compatibility troubleshooting options: extra.lzma or ESXi 2. ALTERNATE install DS3617xs 6.2.3 - if RAIDF1, 16-thread or best SAS support is desired, or your CPU is too old for DS918+ Prerequisite: USB key boot mode must be set to BIOS/CSM/Legacy Boot Configuration: baremetal loader 1.03b, DSM platform DS3617xs version 6.2.3 Compatibility troubleshooting options: extra.lzma, DS3615xs platform, or ESXi 3. ESXi (or other hypervisor) virtual machine install - generally, if hardware is unsupported by DSM but works with a hypervisor Prerequisites: ESXi hardware compatibility, free or full ESXi 6.x or 7.x license Use case examples: virtualize unsupported NIC, virtualize SAS/NVMe disks and present as SATA, run other ESXi VM's instead of Synology VMM Option 3a: 1.04b loader, DSM platform DS918+ version 6.2.3 Option 3b: 1.03b loader, DSM platform DS3617xs version 6.2.3 (VM must be set to BIOS Firmware) Preferred configurations: passthrough SATA controller and disks, and/or configure RDM/RAW disks 4. FALLBACK install DS3615xs 6.1.7 - if you can't get anything else to work Prerequisite: none Configuration: baremetal loader 1.02b, DSM platform DS3615xs version 6.1.7 SPECIAL NOTE for Intel 8th generation+ (Coffee Lake, Comet Lake, Ice Lake, etc.) motherboards with embedded Intel network controllers: Each time Intel releases a new chipset, it updates the PCI id for the embedded NIC. This means there is a driver update required to support it, which may or may not be available with an extra.lzma update. Alternatively, disable the onboard NIC and install a compatible PCIe NIC such as the Intel CT gigabit card.1 point
-
Using both the binary file and the bash script the errors are displayed. ☹️1 point
-
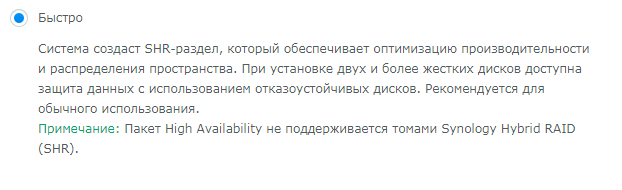
Разобрался, мой косяк Выбирал первый пункт "Быстро", а он создает как раз SHR
 1 point
 -
Hello I have run the send command and no errors displayed. I have also relunched ch_cpuinfo : DSM CPU Information Change Tool ver. 5.2 - made by FOXBI Your version of DSM is DSM 6.1 continue... 1) First run 2) Redo 3) Restore - Select Number : 2 Do you want to proceed again? Restore to original file backup and proceed.(Cancel : q) [y/n] : y You have verified and installed the previous version. Contiue... Auto Excute, If you select n, proceed interactively (Cancel : q) [y/n] : y Restore to source and continue. sed: -e expression #1, char 37: unterminated `s' command sed: -e expression #1, char 91: unterminated `s' command The operation is complete!! It takes about 1-2 minutes to reflect, (Please refresh the DSM page with F5 or after logout/login and check the information.) ash-4.3# Nothing changed....1 point
-
Чтобы сделать онлайн кинотеатр для всех знакомых на пиратском контенте. На пиратском же DSM с ворованными мак адресом и серийником. В половину стоимости оригинального сино без каких либо преимуществ в функционале. Что тут непонятного?1 point
-
Что-то вы противоречите сами себе, то прироста скорости не будет, то упирается в скорость винтов, которая явно больше 1 гига, вообщем, не порите чучь, что почитать я вам написал выше. В хрени 3 вида бонда, один из которых как раз 802.3ad или lacp, который позволяет как увеличить отказоустойчивость, так и скорость, но скорость не будет увеличиваться кратно количеству сетевых карт (коих может быть не обязательно 2, это минимум), объединенных в бонд. В этом как раз и есть смысл, если сервер это не файлопомойка для одного клиента, а действительно многозадачная среда с несколькими клиентами.1 point
-
Hi, I'm new, and a real Linux noob, but after reading the complete thread carefully and trying over and over again i have found the correct way to control the fans on boot. I have tested it more than once on my "spare" ReadyNAS Pro 4. Make sure you have setup your NAS and that it is working. After that enable SSH and login with ie Putty. Issue the following commands in the correct order mkdir /volume1/@tmp cd /volume1/@tmp wget http://ipkg.nslu2-linux.org/feeds/optware/syno-i686/cross/unstable/syno-i686-bootstrap_1.2-7_i686.xsh chmod +x syno-i686-bootstrap_1.2-7_i686.xsh sh syno-i686-bootstrap_1.2-7_i686.xsh ipkg update ipkg upgrade ipkg install perl ipkg install bash ipkg install mktemp ipkg install lm-sensors Than edit the file .profile located in /root as shown below (PATH is extended and at the bottom a code is added to boot into bash) umask 022 PATH=/opt/bin:/opt/sbin:/sbin:/bin:/usr/sbin:/usr/bin:/usr/syno/sbin:/usr/syno/bin:/usr/local/sbin:/usr/local/bin export PATH #This fixes the backspace when telnetting in. #if [ "$TERM" != "linux" ]; then # stty erase #fi HOME=/root export HOME TERM=${TERM:-cons25} export TERM PAGER=more export PAGER PS1="`hostname`> " alias dir="ls -al" alias ll="ls -la" if [[ -x /opt/bin/bash ]]; then exec /opt/bin/bash fi Now create a startup script S99fancontrol.sh in /usr/syno/etc/rc.d/ containing the following code #!/opt/bin/bash # Use the same head in fancontrol script # # S99fancontrol.sh - startup script for fancontrol # # This goes in /usr/syno/etc/rc.d and gets run at boot-time. FANCONTROL=/opt/sbin/fancontrol case "$1" in start) if [ -x "$FANCONTROL" ] ; then echo "start fancontrol" $FANCONTROL & fi ;; stop) echo "stop fancontrol" kill -TERM `cat /var/run/fancontrol.pid` > /dev/null 2>&1 logger -p daemon.error "$0 stop fancontrol" sleep 1 ;; *) echo "usage: $0 { start | stop }" >&2 exit 1 ;; esac Set permissions to 755 with chmod 755 /usr/syno/etc/rc.d/S99fancontrol.sh Now test your sensors with sensors It will give an output similar to the code below coretemp-isa-0000 Adapter: ISA adapter Core 0: +37.0°C (crit = +100.0°C) it8721-isa-0a10 Adapter: ISA adapter in0: +3.06 V (min = +2.20 V, max = +3.06 V) ALARM in1: +2.86 V (min = +0.00 V, max = +2.08 V) ALARM in2: +2.22 V (min = +2.12 V, max = +1.42 V) ALARM +3.3V: +3.34 V (min = +2.69 V, max = +4.01 V) in4: +2.76 V (min = +2.05 V, max = +1.91 V) ALARM in5: +1.16 V (min = +1.46 V, max = +1.40 V) ALARM in6: +2.80 V (min = +0.08 V, max = +1.52 V) ALARM 3VSB: +3.29 V (min = +5.93 V, max = +6.05 V) ALARM Vbat: +3.31 V fan1: 2033 RPM (min = 10 RPM) fan2: 0 RPM (min = 14 RPM) ALARM temp1: +49.0°C (low = +112.0°C, high = -5.0°C) ALARM sensor = thermal diode temp2: +33.0°C (low = -53.0°C, high = +61.0°C) sensor = thermal diode temp3: -128.0°C (low = +79.0°C, high = -7.0°C) sensor = disabled intrusion0: ALARM If everything is ok we have to build the default config files sensors -s Now we are ready to build /etc/fancontrol bash pwmconfig Follow the steps, but in general you can use the following as a guide Select 1) hwmon/device/pwm1 Select 4) hwmon/device/temp2_input Low temperature is default at 20 High temperature is default at 60 Minimum PWM value is 8 (check this, it is tested before) Minimum PWM value when fan starts spinning is 8 (30 are added) PWM value when below low temperature = 8 PWM value when over the high temperature limit = 165 (check this, it is tested before ans should be about 3000/3100 rpm) After you saved it, it will create a config file /etc/fancontrol and it will look like this: # Configuration file generated by pwmconfig, changes will be lost INTERVAL=2 DEVPATH=hwmon0= hwmon1= DEVNAME=hwmon0=coretemp hwmon1=it8721 FCTEMPS=hwmon1/device/pwm1=hwmon0/device/temp2_input FCFANS= hwmon1/device/pwm1=hwmon1/device/fan1_input MINTEMP=hwmon1/device/pwm1=20 MAXTEMP=hwmon1/device/pwm1=60 MINSTART=hwmon1/device/pwm1=38 MINSTOP=hwmon1/device/pwm1=8 MINPWM=hwmon1/device/pwm1=8 MAXPWM=hwmon1/device/pwm1=165 Now you can test your setup bash fancontrol If things are right the fans should spin-down immediately. Exit with ctrl-c and fans will spin-up again. We have to edit /opt/sbin/fancontrol change the header to #!/opt/bin/bash Time to shutdown and restart your ReadyNAS shutdown -h now When your NAS is really off, power it on again. If all is fine, the fan will spin-down after the boot sequence is completed. If you still boot from an USB stick, maybe it is time to replace the original Netgear bootcode. First make a backup and copy it to a save place dd if=/dev/sdu of=/dev/backup_netgear Copy your image to ie /dev, after that unmount your USB volumes (if your USB stick is still present it is safe to unmount that also) umount /dev/sdu1 Your USB is probably sdu2 umount /dev/sdu2 Now write the bootcode to sdu1 dd if=/dev/insert_the_name_of_your_image_here.img of=/dev/sdu Reboot! Hope this helps those who had problems before.... Now find a way to control the LCD!!!1 point

