allex
-
Posts
24 -
Joined
-
Last visited
Everything posted by allex
-
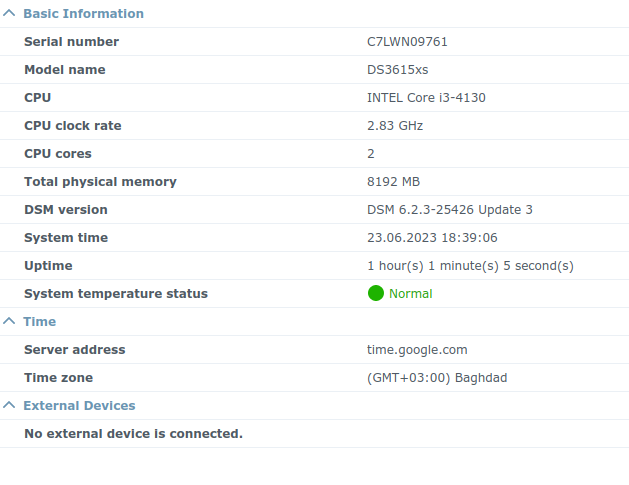
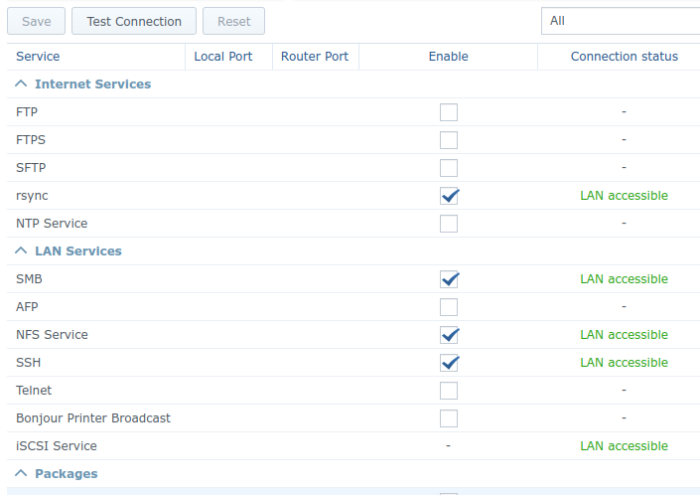
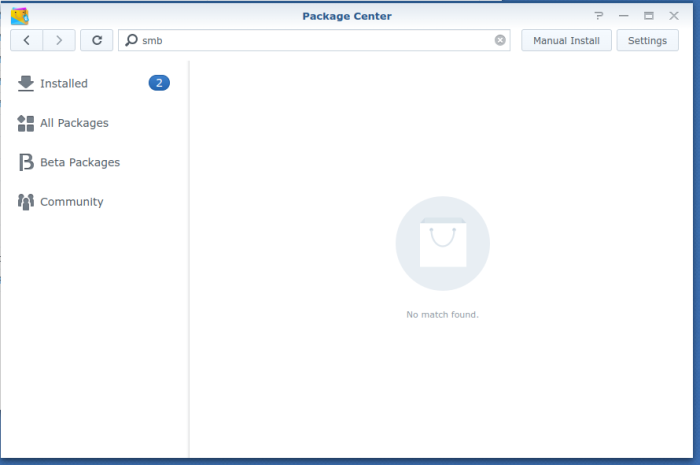
After the next update of the SMB package, it disappeared from the package list. It is not in the installed or in all packages. Interestingly, the SMB service continues to work. However, it is not possible for new users to set rights to the SMB service in the control panel. All new users cannot access the server via SMB. The service can be enabled and disabled. Including via the command line. ash-4.3# samba --version Version 4.4.16 ash-4.3# synopkg list | grep SMBService ash-4.3# ash-4.3# ls -l /var/packages total 100 drwxr-xr-x 5 root root 4096 Jan 10 16:22 ActiveBackup drwxr-xr-x 5 root root 4096 Jan 10 16:23 ActiveBackup-Office365 drwxr-xr-x 5 root root 4096 Jan 29 2022 CardDAVServer drwxr-xr-x 5 root root 4096 Oct 17 2022 CloudSync drwxr-xr-x 5 root root 4096 Jan 29 2022 Docker drwxr-xr-x 4 root root 4096 Jan 29 2022 DocumentViewer drwxr-xr-x 4 root root 4096 Jan 29 2022 FileStation drwxr-xr-x 5 root root 4096 Nov 14 2022 HyperBackup drwxr-xr-x 4 root root 4096 Jan 29 2022 LogCenter drwxr-xr-x 4 root root 4096 Dec 5 2022 Node.js_v12 drwxr-xr-x 4 root root 4096 Jan 29 2022 OAuthService drwxr-xr-x 4 root root 4096 Jan 29 2022 powerbutton drwxr-xr-x 4 root root 4096 Feb 1 2022 python drwxr-xr-x 4 root root 4096 Jan 29 2022 PythonModule drwxr-xr-x 4 root root 4096 Aug 11 2022 ReplicationService drwxr-xr-x 5 root root 4096 Aug 11 2022 SnapshotReplication drwxr-xr-x 4 root root 4096 Jan 29 2022 StorageAnalyzer drwxr-xr-x 4 root root 4096 May 17 2022 synocli-disk drwxr-xr-x 4 root root 4096 Jan 10 16:23 synocli-file drwxr-xr-x 4 root root 4096 Jul 28 2022 synocli-monitor drwxr-xr-x 4 root root 4096 Mar 22 2022 SynoFinder drwxr-xr-x 5 root root 4096 Jan 29 2022 SynologyApplicationService drwxr-xr-x 5 root root 4096 Jan 29 2022 SynologyDrive drwxr-xr-x 4 root root 4096 Feb 17 2022 TextEditor drwxr-xr-x 4 root root 4096 Feb 14 2022 WebStation ash-4.3# I understand that I need to roll back the SMB Service package to version 4.10.18-0548, but I can't do it. I'm stopping the service: ash-4.3# synopkg stop SMBService package SMBService stop successfully Trying to delete it: ash-4.3# synopkg uninstall SMBService ash-4.3# Then I downloaded version 4.10 and tried to install it manually via DMS. I get a message all the time: "Invalid file format." I tried to install it through the terminal: ash-4.3# ls -l /tmp/111 total 10776 -rw-r--r-- 1 root root 11034383 Dec 29 21:25 SMBService-x86_64-4.10.18-0548.spk ash-4.3# synopkg install /tmp/111/SMBService-x86_64-4.10.18-0548.spk Failed to install package /tmp/111/SMBService-x86_64-4.10.18-0548.spk, error = [150] I tried to install the package directly from the server, but even here the error: ash-4.3# synopkg install_from_server SMBService Failed to query package list from server ash-4.3# I do not know how to return a normal SMB packet. What else can be done? I ask for help. This is the situation on 3 machines (DSM 6.2.3-25426 Update 3: DS3615xs, DS918+ (2pc.))

-
- Результат: УСПЕШНО (DS918+) - Версия загрузчика (чистая установка): Jun's Loader v1.04b - Версия DSM: DSM 6.2.3-25426 - Дополнительные модули extra.lzma, extra.2lzma: НЕТ - Аппаратное обеспечение: GIGABYTE B560M DS3H V2, BIOS F7, RAM 16GB, Intel Core i5-11400 - ОЗУ: 2 x 8Gb DDR4, 3200 МГц, AMD Radeon R9 Gamer - LAN: internal Realtek RTL8118, и внешняя сетевая PCI-E ORIENT XWT-R81PEL, chip RTL8111E BIOS настройки: - Use CSM - UEFI - Отключить все неиспользуемые опции, виртуализация и т.д. ВАЖНО! - Если переустанавливаете DSM несколько раз, например, эксперементируете, каждый раз удаляйте все разделы со всех дисков, в противном случае получите ошибку 13 в процессе установки.


-
- Result: SUCCESSFUL (DS918+) - Loader version and model (clean install): Jun's Loader v1.04b - Version DSM: tried DSM 6.2.3-25426 - Additional module extra.lzma, extra.2lzma: NO - Hardware: GIGABYTE B560M DS3H V2, BIOS F7, RAM 16GB, Intel Core i5-11400 - RAM: 2 x 8Gb DDR4, 3200 МГц, AMD Radeon R9 Gamer - Ethernet: internal Realtek RTL8118, and also external PCI-E ORIENT XWT-R81PEL, chip RTL8111E BIOS settings: - Use CSM - UEFI - Disable all unnecessary things, virtualization, and etc. IMPORTANT! - If you reinstall DSM several times (for example, you are experimenting), be SURE to delete all partitions from all disks, otherwise you will get error 13 during installation.


-
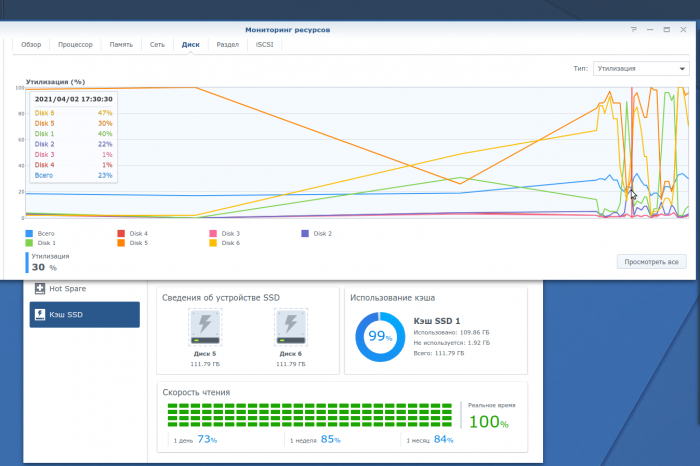
Информация для архива, если вдруг кому тоже нужно будет. Давеча понадобилось мне заменить практически вышедший из строя один из ЖД в массиве JBOD с сохранением данных. Делается это вполне легко, при соблюдении некоторых условий. Далее описаны условия и алгоритм замены. Основные условия: 1. Исходный диск должен быть живым. Т.е. нужно чтобы все смогло прочитаться, а это значит постоянно нужно мониторить SMART, на бэды и на "повторные подключения" и реагировать быстро, если начались неисправности. Повторные подключения вообще беда, когда диск не может запуститься. Мои две недели (когда это нужно было сделать, а не откладывать в долгий ящик) как то немного затянулись и руки дошли только сейчас. Исходный диск удалось все же запустить. Кроме того, важно, конечно, чтобы диски были одинаковой емкости или, чтобы диск назначения был больше (но в этом случае на нем останется неразмеченная область). 2. Ничего не трогать на NAS, заранее знать какой диск где физически расположен в корпусе, какому порту SATA соответствует и за каким номером числится в НАС (т.е. заранее их пометить). В моем случае был диск номер 4. 3. Процедура восстановления не хитра. Загружаемся live cd linux (в моем случае linuxmint). 4. Ставим пакет gddrescue. 5. Выясняем где и какой диск, например, с помощью gaprted. 6. Запускаем процесс блочного копирования командой: sudo ddrescue -f -n /dev/sdc /dev/sda /media/mint/Zalman_prog/mapfile где, sdc - исходный диск, sda - диск назначения, mapfile - полное имя лог файла. ddrescue - копирует буквально все, включая UUID - это важно. Можно использовать православную dd, однако ddrescue имеет хорошие преимущества. 7. Ждем. В моем случае 12 часов на 3ТБ. В процессе видны были затыки через равные промежутки, т.е. винчестеру плохо было. 8. Вставляем новый винчестер в НАС. Загружаемся. НАС скажет, что системные раздел разрушен на этом винчестере. Восстанавливаем его в Диспетчере хранения, вкладка Обзор. 9. Собственно все. Вероятно, на время замены диска не следует включать НАС с неполным набором винчестеров. Если момент будет упущен и диск скопировать не удастся, вероятно собрать JBOD в первоначальном виде уже не получится, однако, подключив исправные диски к компьютеру с linux, теоретически их можно смонтировать и вытащить информацию которая на них записана. Разумеется, та информация которая была на неисправном HDD будет потеряна. Полная версия замены диска в JBOD здесь. Там же есть алгоритм по-сложнее, если наскоком заменить диск не получилось. ---- ЗЫ: На счет использования JBOD, правильно это или не правильно. У каждого свои задачи и предпочтения. В моем случае JBOD был выбран умышленно, потому как очень легко масштабируется + за счет количества дисков (данные разбросаны) увеличивается скорость чтения в определенных случаях. Кстати, на счет того, что в JBOD данные записываются последовательно - по-моему это не совсем так, мониторя графики видно, что диски работают в том числе и одновременно. На картинки 5 и 6 диски - кеш SSD - тоже офигенная штуковина как оказалось. Пользователей 200+.
-
I would like to continue experimenting. I can buy another card if you tell me which one you want to test. I can buy from aliexpress or ebay sites.
-
I was finally able to test the AX99100 card that came to me from China. The result is negative. I couldn't run it on either 3615 or 918+. I am very sorry. I attach photos of the card and packaging. I also attach the lspci and dmesg files, located in the AX99100 folder. https://nextcloud.data-netsoft.ru/index.php/s/RyQQNg9CNFcdCXg?path=%2FAX99100 Confirm. Does not work.
-
I got the card I ordered yesterday. I'll try to get to my computer next week and test this card. I'll report the results and take a photo of the card.
-
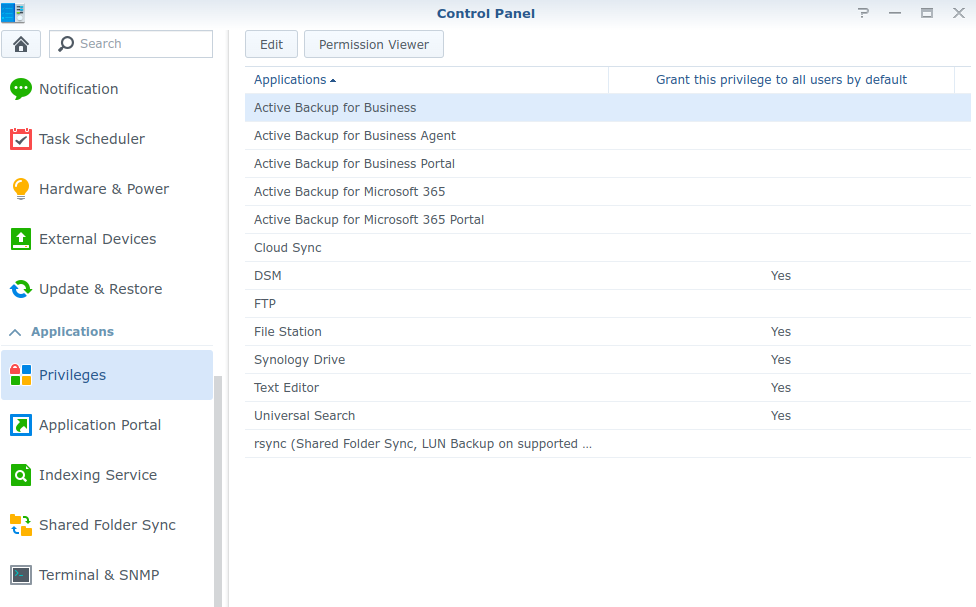
Новую тему не стал создавать. Инструкция по активации приложений Active Backup for Business, Active Backup for G Suite и Active Backup for Microsoft 365. Описывает где взять код активации без серийного номера и регистрации на сайте синолоджи. Активация приложений Backup, Office365 и тд.pdf
-
I already ordered. Let me have it. Suddenly it will work.
-
I found the following in China: Asix AX99100 (Specified chip ASIX/AX99100b) Asix MCS9922CV-AA (Specified chip MCS9922CV. Support for the Linux kernel 2.6.11 and higher is explicitly specified here.) Interestingly, the second one costs almost three times as much. I don't know why. He probably still knows how to make hot cakes in the morning. 😄 I will order the Board on the AX99100 chip for now. For the experiment. The PCI-e Board will come to me in about a month. Then I'll let you know what happened. If it doesn't work out, then I will order an expensive Board on the MCS9922CV chip. But I think the community should support cheap device drivers. We're here mainly because we can't afford expensive devices.
-
Interesting conclusion. I'll try looking for cards on these chips and buy some. This will be an interesting experiment. I'll keep you posted.
-
Вроде как разобрались в буржуйской ветке. Не поддерживается PCI-e ядром в старых загрузчиках.
-
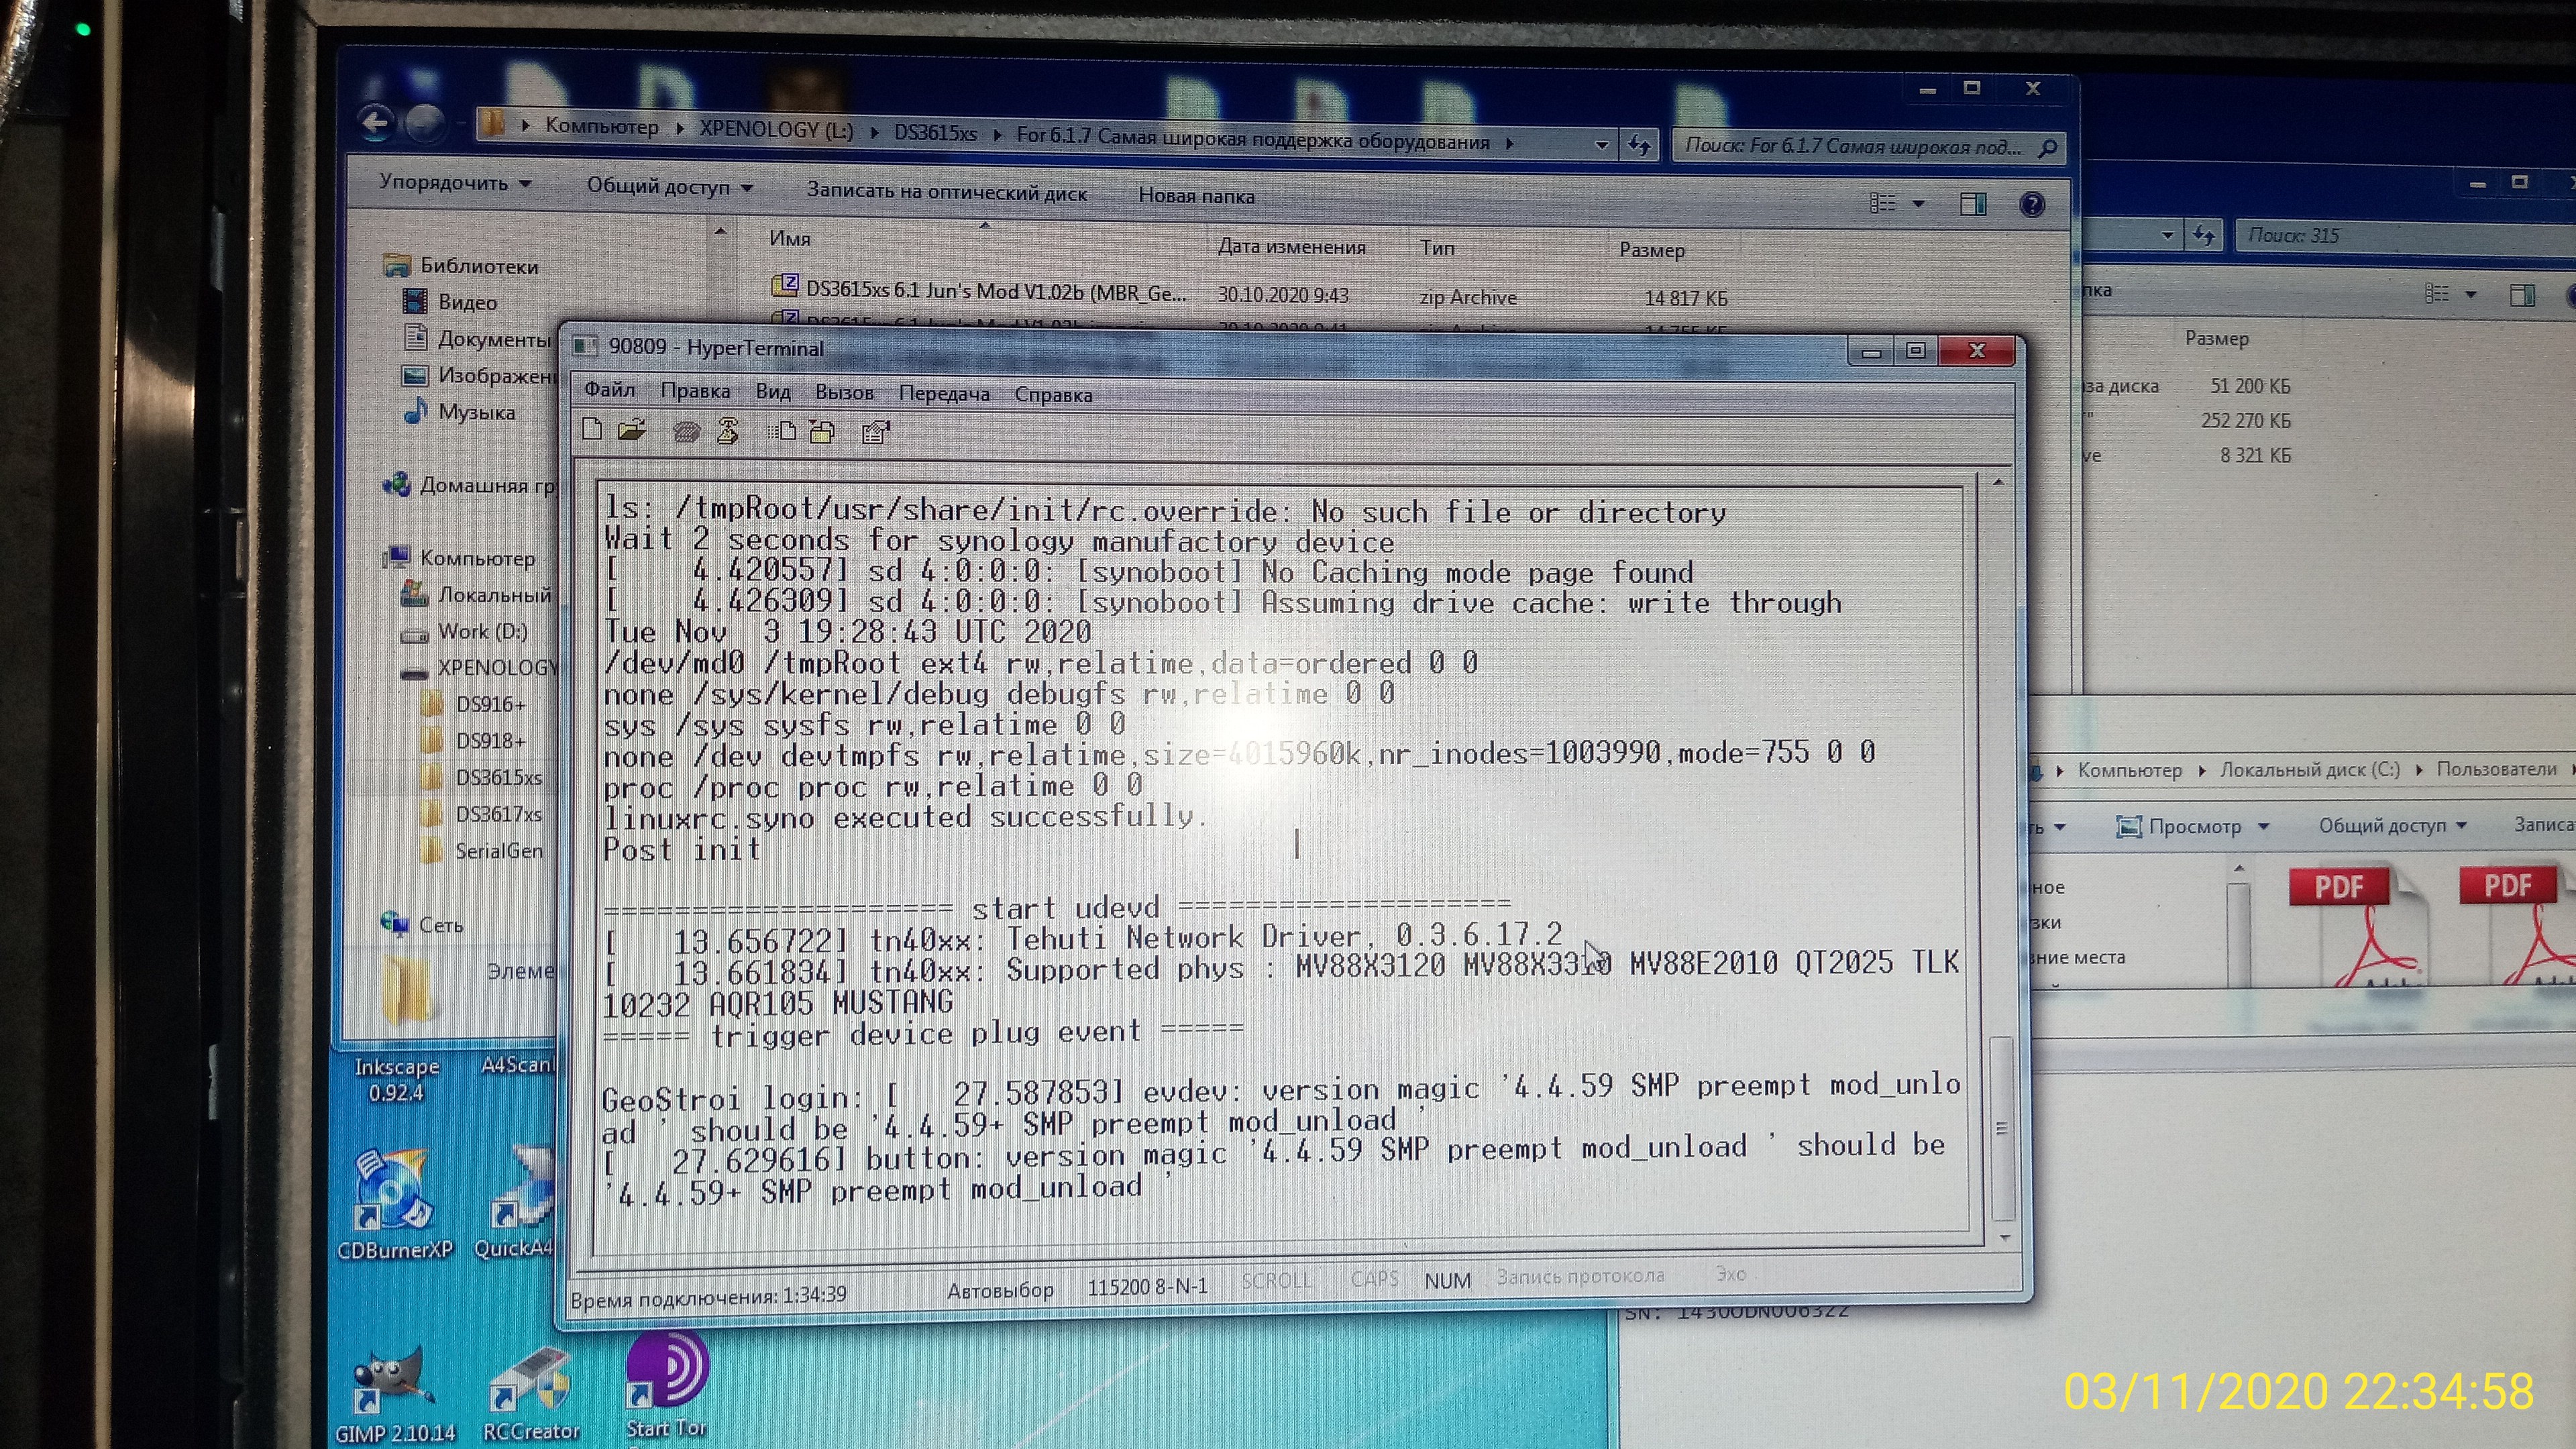
UPDATE: too working - DS3615xs 6.1 Jun's Mod V1.02b + extra3615_v4.9_test + rd.gz+zimage from pat file 6.1.7
-
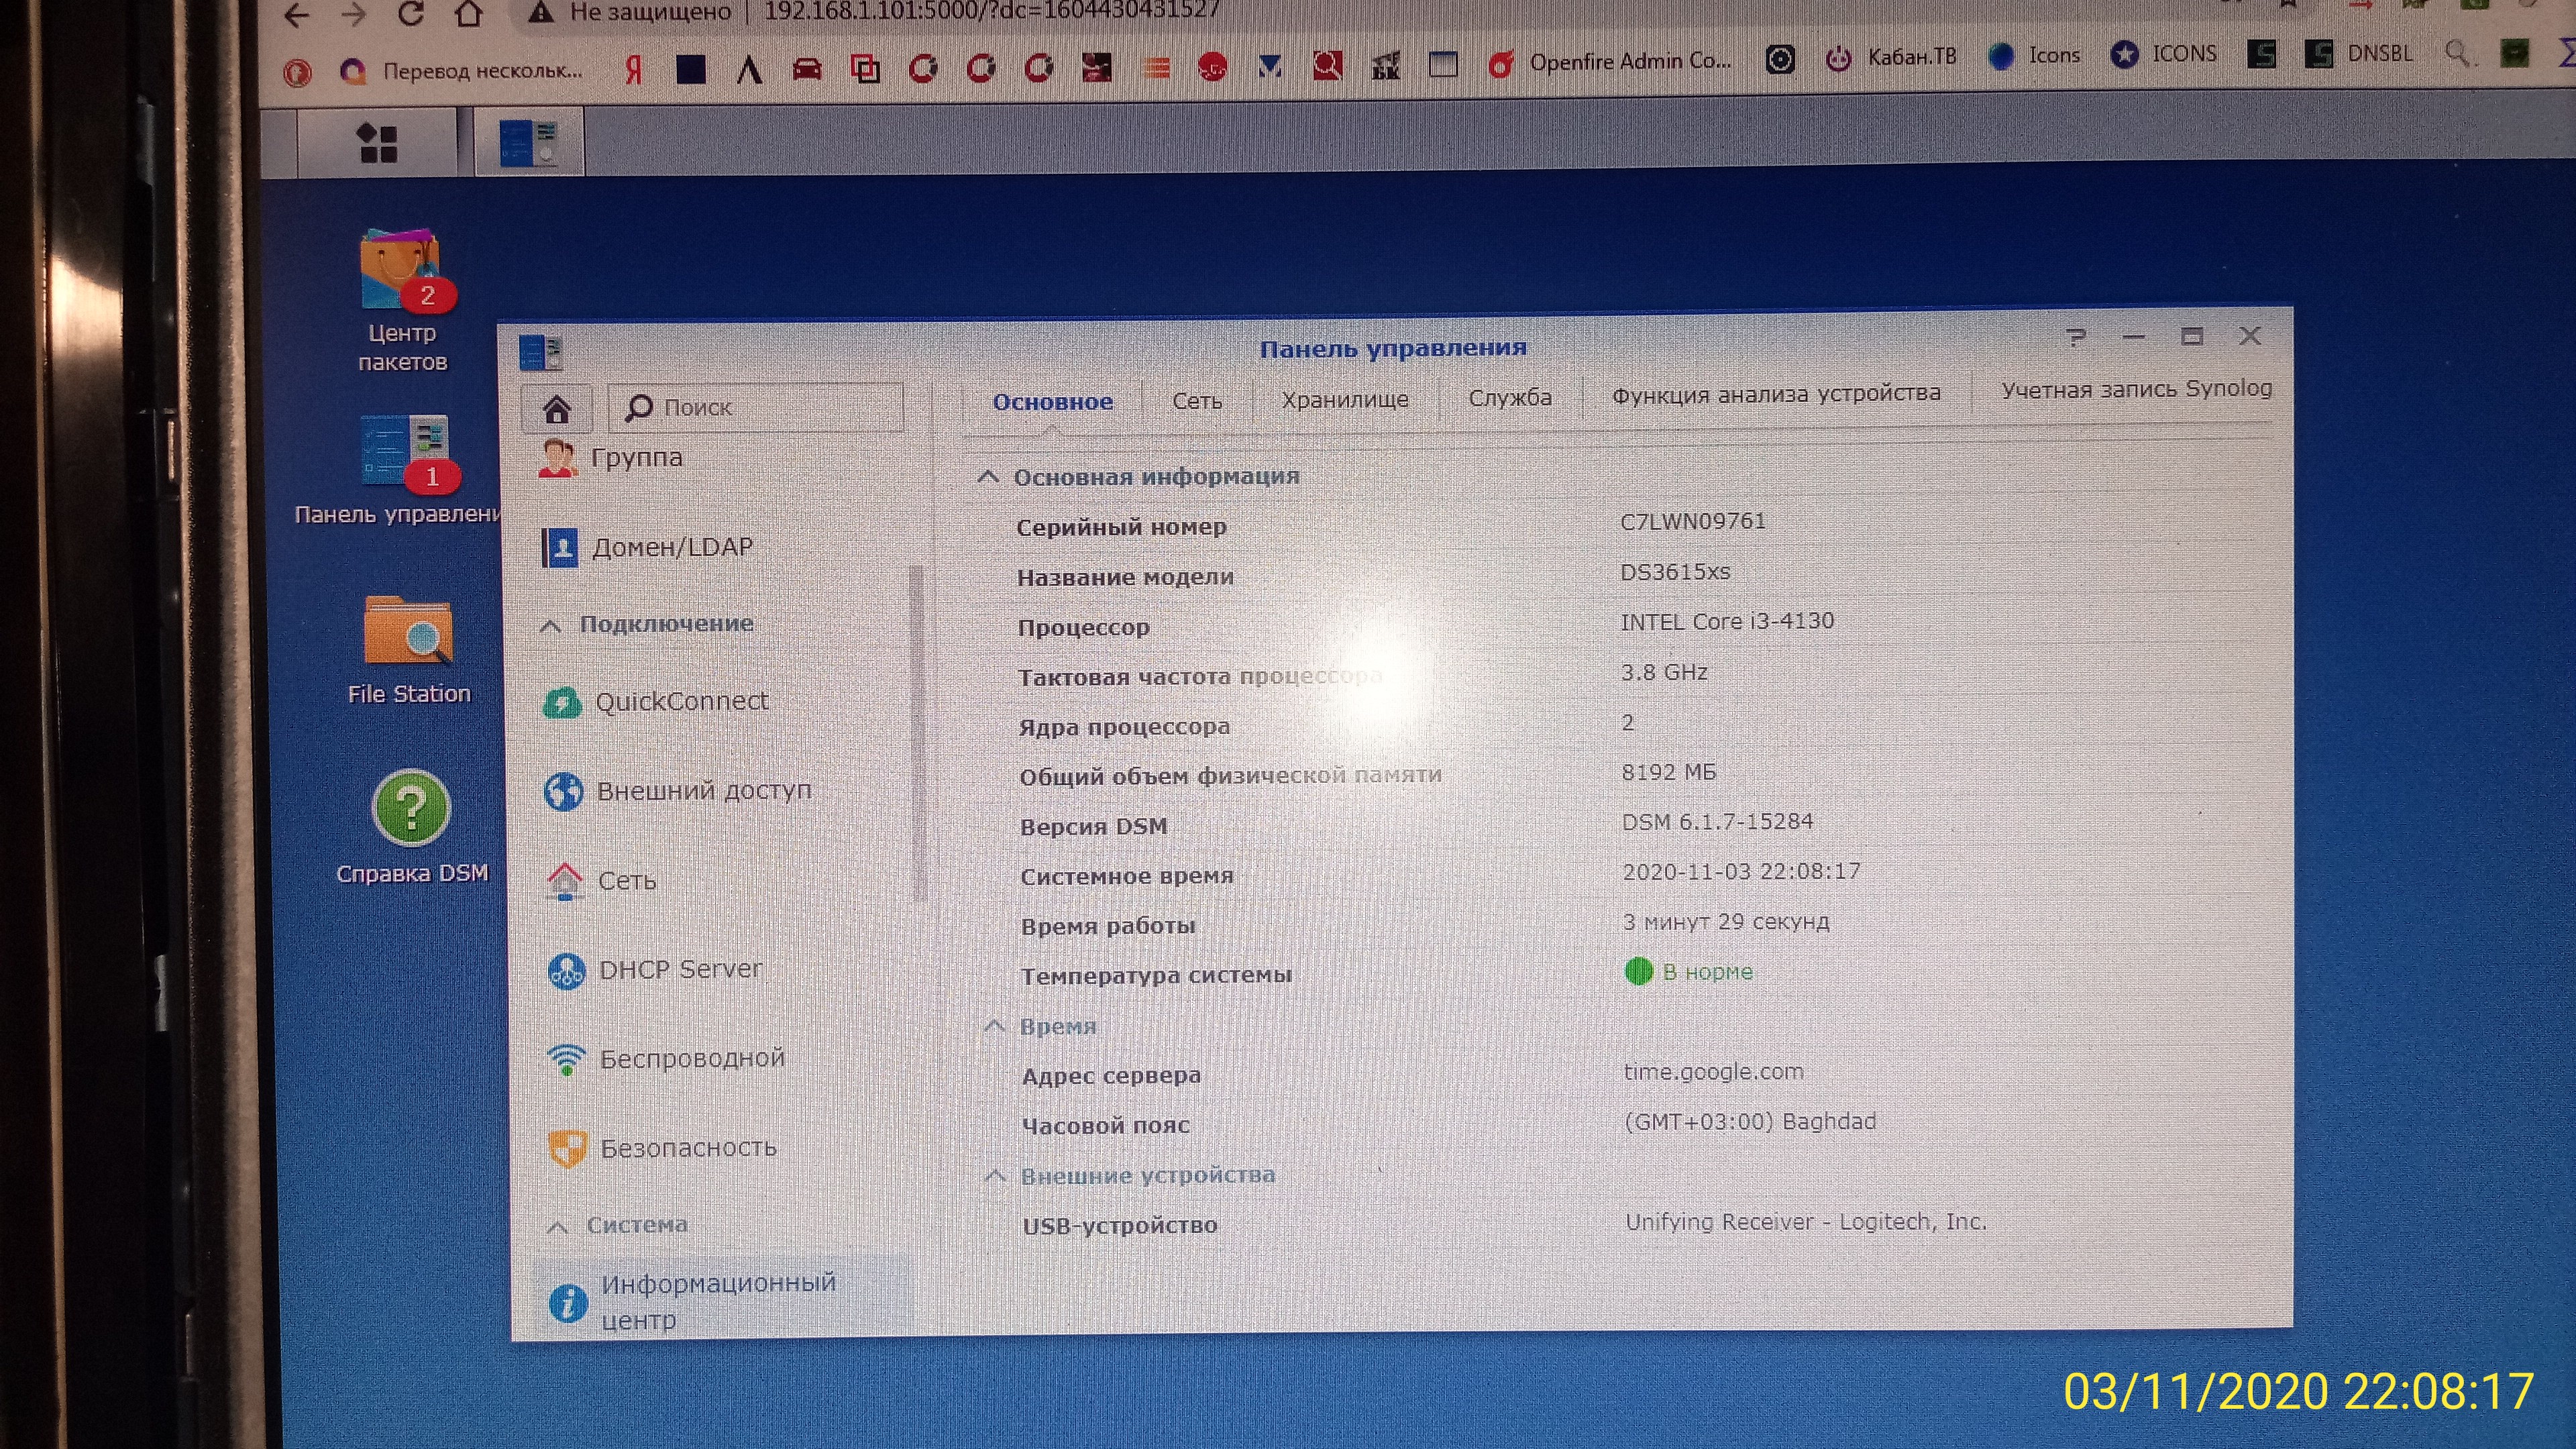
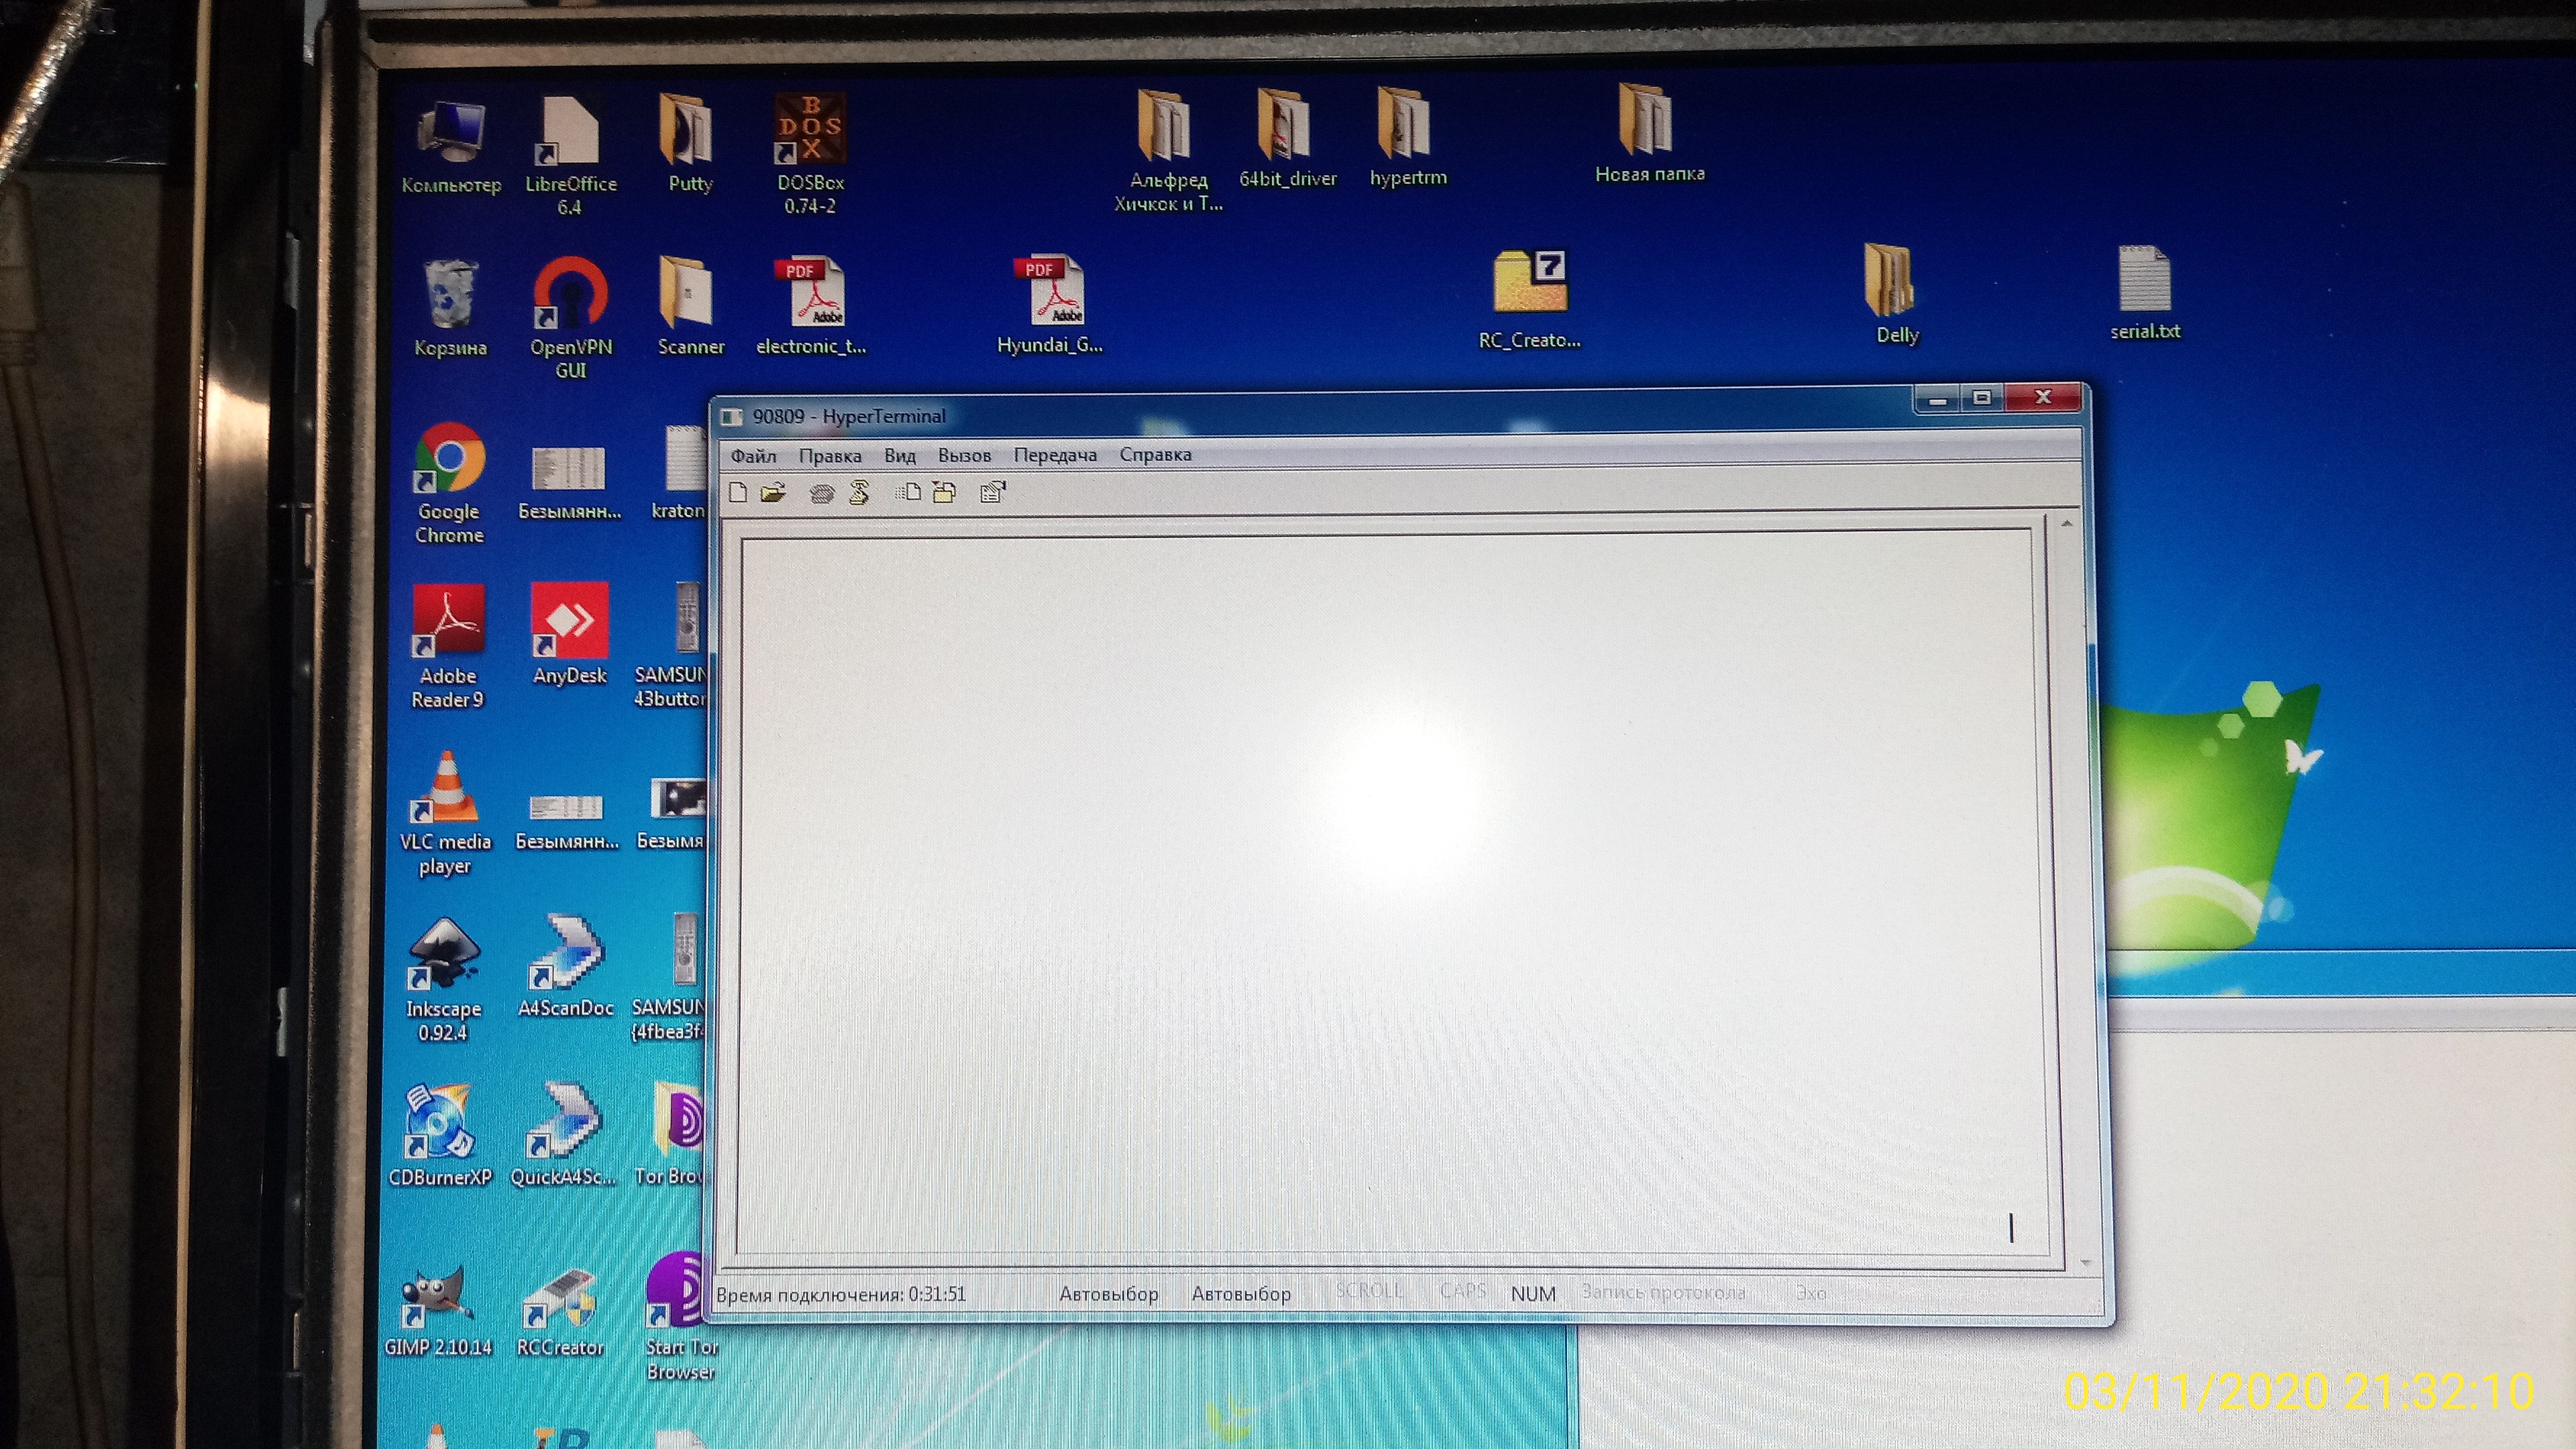
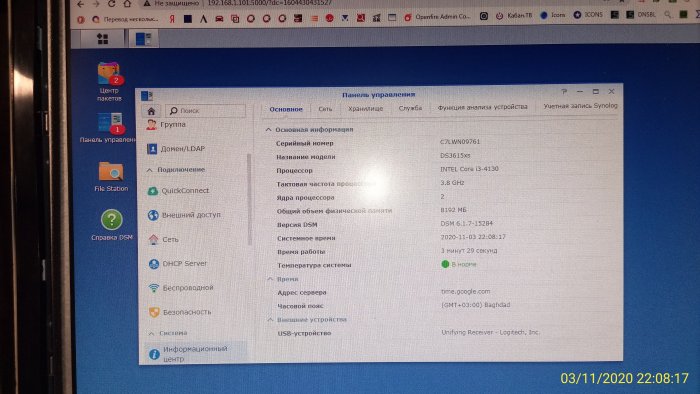
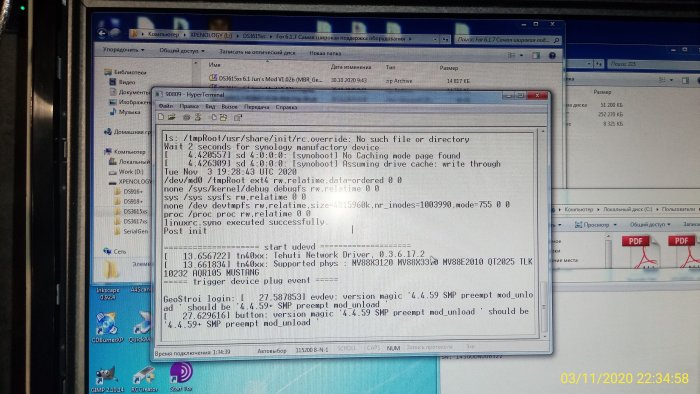
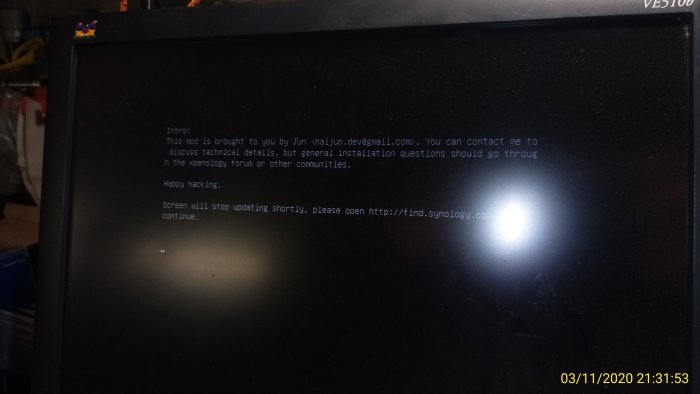
Ahaha))) I decided to scan the network and I found my xpenology!!! I used: DS3615xs 6.1 Jun's Mod V1.02b + extra3615_v4.9_test + rd.gz+zimage from pat file 6.1.7 I put DSM6. 1. 7 on a test hard drive and it all works. But I will use DS918+ in my work. But I still haven't received a single character on the serial port. Nowadays, the serial port is less and less common. Can't I add drivers to the bootloader for serial ports on PCI-e? It's very hard to work blindly I don't know what errors the kernel displays... PS Bootloader 1.04 for DS 918+ correctly outputs all data to the serial port so far (last photo)!
-
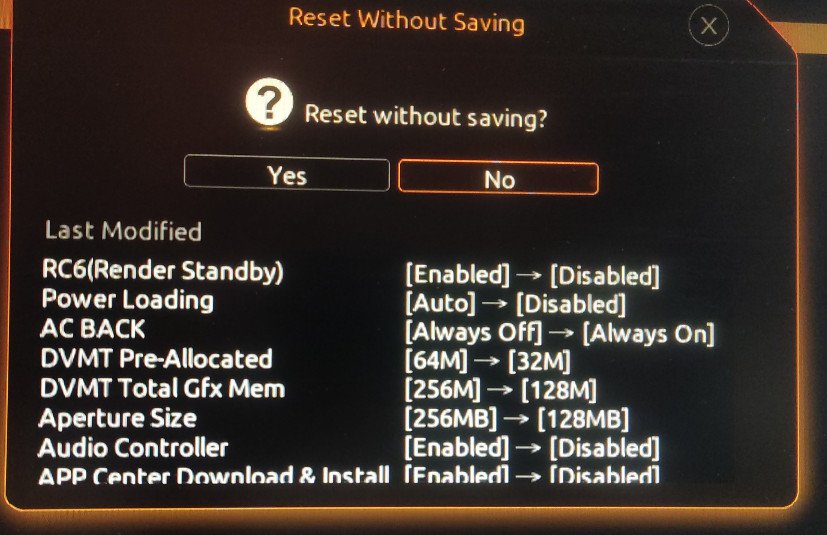
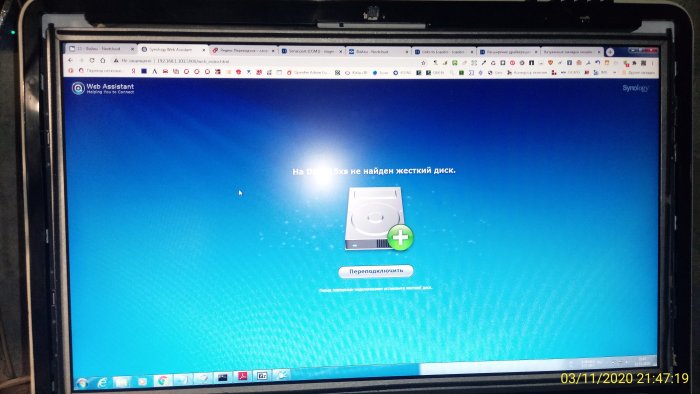
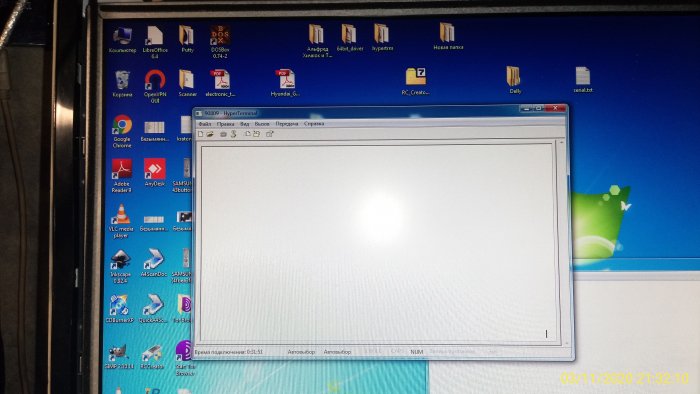
I tried running 3615 again. I tried the bootloader 1.03b and 1.02b. I also copied the extra (and rd.gz+zimage from pat file). But I always get a picture on the monitor as in the photo and not a single character on the serial port. I changed the BIOS settings, but it didn't lead to anything. I think the kernel in these loaders doesn't support (?) my PCI-e serial card. I don't know what else I can do.
-
This is my pci-e serial adapter (01:00.0 Serial controller: Device 1c00:3253 (rev 10)). I used a bundle: SERIAL PCI-E --> Null modem cable --> COM2USB --> terminal (Windows 7) In the photos, I took a picture of the pci-e board itself and the chip, as well as a photo of the COM2USB adapter and its ID (Windows 7). I added another photo of the data output to the terminal so that you don't think I'm deceiving you. This is the data output when loading DS 918+. https://nextcloud.data-netsoft.ru/index.php/s/RyQQNg9CNFcdCXg There is a similar adapter on the same chip. Write me a message before Saturday if you need any more information about the configuration of the computer I'm setting up (running 918+). On Saturday, I put it into operation in the company and then it will be difficult to read information about its hardware from it.
-
I'll write the model tonight. If it is suitable for you and you can not find it on sale, I am ready to send it to you as a thank you for the development. Free of charge, of course.
-
I understood. I will write a model of my serial port Board today. I will try again today to run 3615 or 3617. Although I have already set up 918+ and it works fine. But for the community, I will conduct experiments.
-
- Result: SUCCESSFUL (ONLY DS918+) - Loader version and model (clean install): Jun's Loader v1.04b - Version DSM: tried DSM 6.2.2-24922 and 6.2.3-25426 - Additional module extra.lzma, extra.2lzma: YES (also replace the zImage and rd.gz from the installed DSM for 6.2.3-extra918plus_v0.13.3, for 6.2.2 extra918plus_loader_1.04b_DSM 6.2.2.v0.8_std_mod) - Hardware: ASRock H310CM-HDV, BIOS P4.20 05/14/2019, RAM 8GB, Intel Pentium Gold G5420 - RAM: 2 x 4Gb DDR4, 2666 МГц, PC21300 - Ethernet: internal RTL8168h/8111h, and also tried external PCI-E DEXP ZH-GE1P, chip RTL8111E BIOS settings: - Use CSM - UEFI Only - Disable all unnecessary things, virtualization, and etc. IMPORTANT! - If you reinstall DSM several times (for example, you are experimenting), be SURE to delete all partitions from all disks, otherwise you will get error 13 during installation. DMESG list
-
- Результат: УСПЕШНО (ТОЛЬКО DS918+) - Версия и модель загрузчика (чистая установка): Jun's Loader v1.04b - Версия DSM: DSM 6.2.2-24922 и 6.2.3-25426 - Дополнительные модули extra.lzma, extra.2lzma: ДА (так же заменить zImage и rd.gz из устанавливаемого DSM для 6.2.3 - extra918plus_v0.13.3, для 6.2.2 extra918plus_loader_1.04b_DSM 6.2.2.v0.8_std_mod) - Аппаратное решение: ASRock H310CM-HDV, BIOS P4.20 05/14/2019, RAM 8GB, Intel Pentium Gold G5420 - Память: 2 x 4Gb DDR4, Тактовая частота 2666 МГц, Пропускная способность PC21300 - Сеть: Встроенная RTL8168h/8111h, а так же пробовалась внешняя PCI-E DEXP ZH-GE1P, чип RTL8111E Настройки БИОС: - Использовать CSM - UEFI Only - Отключить все лишнее, виртуализацию и прочую ерунду. ВАЖНО! - Если переустанавливаете несколько раз DSM (например экспериментируете), ОБЯЗАТЕЛЬНО удалять все разделы со всех дисков иначе получите ошибку 13 при установке. DMESG оборудования (длинный, сюда не вставляется.)
-
В загрузчиках по COM порту, есть только такая информация: #set extra_args_918='earlycon=uart8250,io,0x3f8,115200n8 earlyprintk loglevel=15 memmap=0x1000$223515000' set extra_args_918='' set extra_args_3615='' #set extra_args_3615='earlycon=uart8250,io,0x3f8,115200n8 earlyprintk loglevel=15' #set extra_args_3617='earlycon=uart8250,io,0x3f8,115200n8 earlyprintk loglevel=15' set extra_args_3617='' Видно, что строки с аргументами для uart закомментированы. В 918+ все выводится как есть по умолчанию в grub.cfg, а вот в 17 и 15 - нет. Я пробовал раскомментировать строки с настройками, но ни к каким дополнительным результатам это не привело.
-
Ребята, привет. Прошу объяснить знающих... На каком этапе начинается вывод данных на COM порт? При загрузке загрузчика 1.03b (для DS3617xs или для DS3615xs) выводится стандартный экран об успешной загрузке. Флэшка мигает еще немного, и все останавливается. Никакие данные не выводятся на последовательный порт. Ни единой буквы. Мне интересно, если загрузчик не находит сетевую карту, должен ли он выводить данные на последовательный порт? Или, если есть проблемы с сетью, никакие данные не будут выводиться? Я пробовал разные варианты, включая различные загрузчики и настройки BIOS - на последовательном порту ничего нет. Сначала я грешил на сам порт (или кабель), но нет, потому что на загрузчике 1.04 b для DS918+ все данные последовательный порт сыпятся. Я вижу все сообщения При загрузке. Тут надо сказать, что 918+ запустилась сама с пол пинка. Однако мне очень интересно по какой причине я не могу запустить DS3617xs или DS3615xs, в том плане, что хотя бы посмотреть ошибку. Влияют ли на это настройки последовательного порта в grub.cfg? Я заметил, что параметры последовательного порта в grub.cfg для 1.04b и 1.03b различны закоментированы. Может ли это быть проблемой? Есть один момент: моя материнская плата не имеет последовательного порта на борту, поэтому я использую внешний контроллер последовательного порта PCI-E, однако я не уверен, что это может быть проблемой, т.к. такие платы обычно на стандартных чипах идут.
-
Please explain to knowledgeable people at what stage data output to the serial port begins. When loading the 1.03b loader (for DS3617xs or for DS3615xs), it comes to the standard screen about successful loading. The flash drive flashes a little more and everything stops there. No data is output to the serial port. Not a single letter. I'm wondering if the bootloader doesn't find the network card, should it output to the serial port? Or, if there are problems with the network, no data will be output? I tried different options, including different boot loaders and BIOS settings - I couldn't see anything on the serial port. You may think that it doesn't work for me, but it doesn't, because on the 1.04b bootloader for DS918+, all data is output correctly to the serial port. I see all the messages when loading. I'm not asking about my specific problem right now, I'm asking you to explain under what conditions output to the serial port is not possible. Does the serial port settings in grub.cfg affect this? I noticed that the serial port parameters for 1.04b and 1.03b are different. Could this be a problem? Why do I need this? I want to see the reason why I can't run DS3617xs or for DS3615xs. There is one point: my motherboard does not have a built-in serial port, so I use an external PCI-E serial port controller, however, I am not sure that this could be a problem.
-
- Результат: УСПЕШНО - Версия и модель загрузчика: Jun's Loader v1.03b DS3615xs - Версия DSM: DSM 6.2-23739 (!!! DSM 6.2.1 - 23824 - все рушит, не может найти сетевые интерфейсы.) - Дополнительные модули extra.lzma: Нет - Аппаратное решение: ASUS P5Q-E, INTEL Core i3-4130, RAM 8GB чипсет: Intel P45 память: 4 x 2Gb DDR2 сеть: Marwell на борту. 2 штуки. Только Jun's Loader v1.03b DS3615xs и DSM 6.2-23739. Остальные варианты отправляют ядро в панику.