

flyride
-
Posts
2,438 -
Joined
-
Last visited
-
Days Won
127
Posts posted by flyride
-
-
On 2/1/2019 at 12:50 AM, bagheera said:
If I do sudo vgdisplay nothing appears.
That's a pretty good sign that the Storage Pool is not using LVM. Also when you df the volume and see that the host device is the /dev/md2 array and not the logical volume, you may conclude the same thing. Therefore you can just follow the plan from the very first post in this thread - in other words, the only step left should be to expand the filesystem. Do you know if you are running btrfs or ext4? If it is btrfs, the command is different and it is preferable to have the volume mounted:
$ sudo btrfs filesystem resize max /volume1 -
This is well documented, connect a serial port
-
 1
1
-
-
Which DSM version shall I use? This is an oft-repeated question, complicated by the fact that different loaders support different DSM versions AND hardware platforms.
In simple terms, DS3615/DS3617 has the widest support for hardware and packages, and DS916/DS918 has support for newer, low-cost CPU's, transcoding and NVMe cache (DS918 only).
But the real questions are, what hardware do you have? What hardware do you want to buy in order to support what you want to do? And how does a DSM loader and platform support this? In order to answer, it's useful to understand what hardware is natively supported by DSM. Each DSM version is different as Synology does not need to support many types of hardware, as they build up a specific DSM for each hardware platform they sell. Fortunately, the base Linux kernel has much broader support for hardware than they intend.
Most of us guessed at the hardware requirements and made (hopefully) intelligent selections on DSM versus hardware. Some build systems and then are distressed when the hardware isn't fully supported by the DSM platform they choose. Unfortunately, Synology hardware knowledge is often imperfect, as the main boards are custom designed. Refer to the example below for DS918:
DS918 Reference Hardware: CPU: Intel J3455 (Apollo Lake) GPU: Intel HD Graphics 500/505 Chipset: Intel SOC 2x1Gb Ethernet: Intel i211 SATA: 88SE9215 PCIe SATA 6.0 Gb/s controller
With even this information, we can make some good guesses on what hardware might be supported. Wouldn't it be great if we knew ALL the different drivers that are natively supported? Unfortunately this is a fairly difficult process if you are not a Linux guru (and a bit laborious even if you are).
There are "user-reported" hardware compatibility threads out there, but many don't understand that those reports are both DSM version and platform specific. Furthermore, with the way hardware manufacturers reissue hardware with the same name but new PCI device number (such as the Intel PHYs on desktop motherboards), often not enough information is reported to confirm whether a specific piece of hardware is suitable for use.
If you aren't sure if your hardware is supported, this post and the complementary DS3615 driver guide aims to help you. Download the attached Excel spreadsheet to see key driver support in the DS918 6.2.1 Synology custom kernel, and via loadable modules supplied with DSM. Hopefully it will help you select the best DSM platform for your purposes, and possibly inform your hardware purchases.
Certain popular drivers missing from this platform, or newer driver versions that support the latest silicon may be available by installing additional compiled modules.
2021-Sep update: Now that folks are testing RedPill loader, they are finding that drivers working in 6.2.3 and earlier are missing in 6.2.4 or 7.0. This is because many of the drivers are part of the Jun loader and not truly native to DSM. Yes, the title of this post says NATIVE but for the purposes of the analysis, Jun's injected drivers are considered along with the actual embedded native drivers.
-
5
-
 1
1
-
-
Try 1.03b and DS3615 instead of DS3617
-
This link is discussing 6.1.x but it will give you some things to look at and try.
-
The "System Partition" is the DSM generic term for the reserved space for DSM itself and its swap area.
This is actually manifested as an "n-disk RAID 1" across all disks in your system. In other words, you have a mirrored array across all disks for the DSM partition and another one for the swap partition.
Anytime something happens to break either array, DSM will report that the "System Partition" has failed, and will immediately remirror it. As long as you have one array member that is intact, it will rebuild successfully. And if you don't have at least one array member intact, DSM will already have irrevocably crashed.
So it's a bit of a noise about nothing. Just click the button to repair, or let it fix itself. Your data is not at risk, but make sure the error is corrected prior to replacing another drive.
-
L5630 won't support the processor extension required by 1.04b/DS918+
Try using 1.03b/DS3615 instead of DS3617
-
1
-
-
On 1/29/2019 at 1:29 PM, Jamzor said:
Wait a minute.. Doesnt NVMe cache work with xpenology?
I just put in a samsung 970 evo in the m.2 slot to use as read cache. But it is not detected in DSM.
I thought this would work all along... Because it do work on a real 918+ right?
I also put in a SSD that I wanted to use as a single volume. However that one pops up when I want to create cache drive. I thought u couldnt create cache drives with normal SATA SSD's?
- DS918 DSM has the software hooks to use NVMe as cache. DS3615/17 does not.
- NVMe is NOT SUPPORTED by DSM as a regular disk device - therefore you cannot use it in a Storage Pool on a barebones install
- Your hardware must also support NVMe and DSM must recognize your SSD.
- A regular SATA SSD can definitely be used as cache, and it will show up as a device in Disk Manager and when creating a cache
On 1/30/2019 at 12:11 PM, Jamzor said:One of you experts please if u know comment for me.. I input my 500GB samsung 970 EVO in my motherboard thinking it would work..
Its such a pain because I had to unscrew my entire m-itx box and the motherboard to get to the slot underneath the motherboard.. And now I put the m2 disk there..
Now it wont work as cache drive? Can I do anything with it? Or do I have to either leave it there and hope for future compatibility or unscrew everythign again, remove it and sell it on 2nd hand market?
Im running on barbone 918+ latets loader latest firmware updates for synology..
Restating the above in another way: Running a barebone DS918 image, you might be able to use NVMe cache. I don't think anyone has tracked which motherboards and NVMe SSDs work and which don't.
You can definitely use your NVMe drive if you run DSM as an ESXi virtual machine. In that circumstance, you have several options:
- Configure your NVMe as an ESXi datastore, and build a large virtual disk out of the free space. Attach that to a virtual SATA controller. The device will appear to DSM as a SATA disk but at NVMe speed. The virtual disk can be used as a regular disk (you can create a Storage Pool with it) or as cache. There is some minor overhead for ESXi to fully virtualize the disk, and you lose a little bit of storage because of the VMFS filesystem and whatever else you might be keeping on the datastore.
- Configure your NVMe with a physical Raw Device Mapping (physical RDM, or pRDM). This is a pointer to the NVMe drive that you can then attach to the virtual SATA controller. ESXi will then translate SATA/SCSI to NVMe but the disk in its entirety appears to DSM. Again, this will work as a regular disk or cache, and is theoretically faster than a virtual disk.
- The NVMe SSD could be passed through directly to the VM for native access. This wouldn't be any better than baremetal, but since we don't understand exactly why it may or may not work, it could be worth a try. However, it would be limited to NVMe cache only just like baremetal.
My signature links to a tutorial that talks about how to set up the first two options above.
-
1
-
On 11/16/2017 at 1:16 PM, Balrog said:
It is possible that the serial port function is only available with a licensed esxi-host but I am not sure about this.
Sent from my SM-T810 using Tapatalk
Reviving an old thread - the free ESXi license does not allow redirection of a virtual serial port to a network daemon. Virtual serial ports are in fact supported, however.
If you happen to have a motherboard with a BMC (baseboard management controller) that supports SOL (serial over LAN), it is trivial to set up the ESXi virtual serial port to be serviced by the system physical serial port, which is then redirected via SOL to a BMC-based terminal application.
The other option is to run ESXi in demo mode and renew the demo license every 60 days.
-
5 hours ago, sstyle said:
Hi! I have a VM (Vmware) with 6.1.7 version based on DX3615xs. What steps I have to do to update it without loosing data?
Step #1, make a backup
-
15 minutes ago, munchgeil1 said:
How can I make wi-fi/bluetooth adapter available for synology?...
I have ESXI 6.5 U2 installed bare-metal on Motherboard with:
- Intel Gigabit Ethernet ( Intel® I219V)
- Integrated 2x2 802.11ac Wi-Fi with MU-MIMO support.
These are the physical devices in your computer. The I219V is currently connected to ESXi. I suspect that ESXi is totally ignoring your WiFi card.
15 minutes ago, munchgeil1 said:In ESXI 6.5, I can see Physical adapter " vmnic0 , 1000 Mbps, Full"
In VM setting, I added: E1000e
If I want to add new Network Adapter, I have following adapter types:
- E1000
- E1000e
- VMXNET 3
These are not physical adapters, this is a virtual network card that ESXi is presenting to your VM. Basically, it's emulating an Intel 82576 card that is compatible with the e1000e driver in DSM. ESXi maps requests to the vNIC out to the physical I219V NIC automatically.
You state that you want DSM to be able to access your WiFi card. The best chances for doing that will be to "pass through" the WiFi card into your VM. This is done by identifying the card in ESXi, setting it up for passthrough, then adding the passthrough device to your VM. There isn't an exact step-by-step plan on how to do this (it's dependent upon whether the device is recognized by ESXi), so you will need to do some research.
Additionally, DSM will need to have a native, internal driver that supports your WiFi card. So you may want to provide some information about the WiFi card (manufacturer, model, etc) to see if it is supported prior to going to all this trouble.
I'm not sure what Bluetooth support exists in DSM at all, but maybe you know of something I don't. Just out of curiosity, why do you need WiFi and Bluetooth, since you already have connectivity via vNIC?
-
These compatibility comments and questions probably belong in either the loader thread or the "user-reported compatibility" thread.
-
1
-
-
Ok, I think this will do it for you.
You grew the partition on your host disk and extended the /dev/md2 array that sits on top of that.
We still need to tell lvm that its "physical" device (/dev/md2) has changed.
We need to extend the logical volume
and we need to resize the filesystem.
The good news is that all this can be done without shutting down services.
Right now a vgdisplay will show all the space available to the volume group is completely used even though we have space free on /dev/md2
So, we resume essentially at step #9 of the prior guide.
9. Inform lvm that the physical device got bigger.
$ sudo pvresize /dev/md2
  Physical volume "/dev/md2" changed
  1 physical volume(s) resized / 0 physical volume(s) not resized
If you re-run vgdisplay now, you should see some free space.
10. Extend the lv
$ sudo lvextend -l +100%FREE /dev/vg1/volume_1
  Size of logical volume vg1/volume_1 changed from 15.39 GiB (3939 extents) to 20.48 GiB (5244 extents).
  Logical volume volume_1 successfully resized.
11. Finally, extend the filesystem (this is for ext4, there is a different command for btrfs)
$ sudo resize2fs -f /dev/vg1/volume_1
resize2fs 1.42.6 (21-Sep-2012)
Filesystem at /dev/vg1/volume_1 is mounted on /volume1; on-line resizing required
old_desc_blocks = 2, new_desc_blocks = 3
The filesystem on /dev/vg1/volume_1 is now 5369856 blocks long.
12. And reboot one last time (sudo shutdown -r now)
-
From this posting, your array does not appear corrupt. You have extended the base host disk partition and your array, but nothing else has been done. You should be able to use the system with no ill effect as it is now.
I'll try to simulate your exact scenario later today and post an updated command list.
-
What you describe is exactly what I personally run, with DSM wrapped by ESXi only. Docker on DSM is very useful because it gets direct fast I/O to the NVMe drives.
-
After my earlier posts on this thread, I attempted to hack the NVMe vs. SATA logic present in DSM and was not successful. The device configuration is set up by a completely customized udev which deliberately separates NVMe from SATA, and all their tools and utilities work quite hard to enforce this.
Similar to the reddit poster, I was able to manually create arrays with NVMe members, but any change to the array using Syno tools (as I recall, even a resync) caused it to break.
The only solution I have found to reliably use NVMe drives is to use ESXi, set up physical RDM pointers to the NVMe devices and present them to DSM with a virtual controller. They appear to DSM as SAS/SATA, but the hardware interface is still NVMe with ESXi providing translation services in between. Performance is essentially unaffected (RAID 1 of enterprise-class NVMe drives configured in this way resulted in well over 1 gigabyte per second throughput).
-
With LVM, the procedure you need to use to access the additional physical storage is different.
It looks like this:
/dev/sdb3 -> /dev/md2 -> /dev/vg1 -> filesystem
So you must resize the partition on the physical device sdb3, then the array, then the lvm, then the filesystem
After step 8, follow the instructions in this link to "pvresize" and "lvextend"
https://ma.ttias.be/increase-a-vmware-disk-size-vmdk-formatted-as-linux-lvm-without-rebooting/
Once you get to resizing the filesystem (resize2fs), resume with step #9 above.
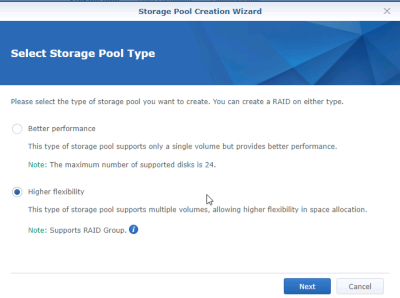
Just to explain what is happening: in DSM 6.2.1, Synology now allows you to choose whether to use the LVM (logical volume manager) or not when a Storage Group is created. It's actually the setting where you choose "performance" (native) vs "flexibility" (LVM) and that will also enable or disable the option for RAID or SHR as your redundancy mode.
-
Actually, based on the output from your df command, you seem to have the logical volume mapper in play. So you will have some extra steps to do. Standby.
-
syno_poweroff_task -d is a Synology script that runs at shutdown, and something in the script generated an internal error. I've seen that message on occasion, but it doesn't matter as long as the services are shut down and the volumes are unmounted.
You could run the df | fgrep volume1 command again to verify that the volume is unmounted, and if it is, move on to the next step. You could also repeat the syno_poweroff_task -d command and it would probably run without error.
-
The only way you will be able to run 6.2.1 then will be to run DS918 and compiled drivers to support your cards (which may not exist at this point).
What's wrong with the security fixes in 6.1.7 U3?
-
15 hours ago, unmesh said:
The tutorial reference link says I should be using e1000e and not e1000! Is it safe to shut down the VM and change network adapters or do I need to do something else?
Assuming this works, is it then OK to install 6.2.1 from the DSM 6.1.7 GUI?
(I will switch from EFI to BIOS too)
Yes, you can change vNIC when you want, same with Legacy Boot vs. EFI.
-
6 hours ago, rony said:
Good morning,
thank you for your answer.So I installed a 3617xs.
There is no 1.04 loader for that - or do I see it wrong?I have a Skylake CPU (5th generation?)
A LSI RAID controller in IT mode.
and a Mellanox Connect-X 3 10Gbit NIC.I only use the onboard SATA controller for the SSD cache.
I use 8 HDDs, 2 SSD as cache and one SSD as system drive - no virtualization.
DS918 probably will not properly support your add-in cards.
You should also be able to use 1.03b and DS3615xs
You must also use the Intel NIC for it to boot. But ask yourself why you want to upgrade, and if you still must, test compatibility thoroughly before you commit your data.
-
The issue is that DSM only does an automatic expansion when a drive add/replace event occurs. This isn't triggered when you deliberately expand a basic volume using virtualized storage - a user action that would never occur on a "real" Synology hardware system. It also underscores the fact that DSM is really intended to manage the drives directly instead of ESXi or a RAID controller providing disk redundancy.
EDIT: One limitation of this strategy is if the disk was initially partitioned as MBR, which is possible if the initial size of the disk was less than 2TB. In order to increase the size of an MBR disk to more than 2TB, the partition type will need to be changed to GPT, which is beyond the scope of this advice.
To grow a volume manually, the general tasks are: expand the partition(s) on the drive(s) hosting the array, expand the array, and then expand the volume on the array. This has varying levels of complexity depending upon the array type, whether you are using LVM, whether you are using SHR, and whether you are using btrfs or ext4. Your situation is probably the least complicated - a Basic, single disk ext4. Note that even that configuration is implemented within DSM as an array - in your case a 1-disk RAID1.
Needless to say, have a backup before you try this. A lot of things can go wrong.
The sequence is thus:
1. Sign in via SSH, and determine your volume array device (should be /dev/md2 using your example screenshots)
$ df | fgrep volume1
/dev/md2       22490509088 16838480532 5652028556  75% /volume1
NOTE: If df returns something like /dev/vgX/volume_X instead of a /dev/md device, then your system is using LVM. Verify the /dev/mdX array device under the LVM with the pvdisplay command, and use that for the commands below. If multiple devices are returned for the specific volume to be resized, you have a multi-disk SHR array and should stop now.
2. Determine the host disk servicing the array (might be /dev/sda or /dev/sdb given your specific example).
Note example below, /dev/sda3 is the 3rd partition on /dev/sda
$ sudo mdadm --detail /dev/md2 | fgrep /dev/
/dev/md2:
       0       8        3        0      active sync   /dev/sda3
3. Stop Synology services.
This also unmounts the array volumes, but does not stop the arrays.
$ sudo syno_poweroff_task -d4. Stop the array (reference array device from step #1)
$ sudo mdadm --stop /dev/md25. Delete partition 3 from array host disk and create a new one to use all the available space (referencing array host device from step #2).
IMPORTANT: The start sector of the new partition must be the same as the old one.
$ sudo fdisk /dev/sda

Welcome to fdisk (util-linux 2.26.2).
Changes will remain in memory only, until you decide to write them.
Be careful before using the write command.

Command (m for help): p
Disk /dev/sda: 20 GiB, 21474836480 bytes, 41943040 sectors
Units: sectors of 1 * 512 = 512 bytes
Sector size (logical/physical): 512 bytes / 512 bytes
I/O size (minimum/optimal): 512 bytes / 512 bytes
Disklabel type: dos
Disk identifier: 0xa60f300d

Device     Boot   Start      End Sectors  Size Id Type
/dev/sda1          2048  4982527 4980480  2.4G fd Linux raid autodetect
/dev/sda2       4982528  9176831 4194304    2G fd Linux raid autodetect
/dev/sda3       9437184 16572415 7135232  3.4G fd Linux raid autodetect   <<-- this is the one we are interested in, note the start sector

Command (m for help): d
Partition number (1-3, default 3): 3

Partition 3 has been deleted.

Command (m for help): n
Partition type
   p   primary (2 primary, 0 extended, 2 free)
   e   extended (container for logical partitions)
Select (default p): p
Partition number (3,4, default 3): 3
First sector (9176832-41943039, default 9177088): 9437184
Last sector, +sectors or +size{K,M,G,T,P} (9437184-41943039, default 41943039):

Created a new partition 3 of type 'Linux' and of size 15.6 GiB.

Command (m for help): p
Disk /dev/sda: 20 GiB, 21474836480 bytes, 41943040 sectors
Units: sectors of 1 * 512 = 512 bytes
Sector size (logical/physical): 512 bytes / 512 bytes
I/O size (minimum/optimal): 512 bytes / 512 bytes
Disklabel type: dos
Disk identifier: 0xa60f300d

Device     Boot   Start      End  Sectors  Size Id Type
/dev/sda1          2048  4982527  4980480  2.4G fd Linux raid autodetect
/dev/sda2       4982528  9176831  4194304    2G fd Linux raid autodetect
/dev/sda3       9437184 41943039 32505856 15.5G 83 Linux

Command (m for help): w
The partition table has been altered.
Calling ioctl() to re-read partition table.
Re-reading the partition table failed.: Device or resource busy

The kernel still uses the old table. The new table will be used at the next reboot or after you run partprobe(8) or kpartx(8).
6. Reboot (sudo shutdown -r now)
7. OPTIONAL: Verify that your array is still intact
alternatively, cat /proc/mdstat
$ df | fgrep volume1
/dev/md2       22490509088 16838480532 5652028556  75% /volume1
8. Expand the array to use all the new space in the host disk partition
$ sudo mdadm --grow /dev/md2 --size=max9. If your system is using LVM, follow the steps in post #10:
10. Otherwise, expand the volume to use all the new space in the array (this is for ext4, btrfs has a different command)
$ sudo resize2fs -f /dev/md211. And reboot one last time (sudo shutdown -r now)
-
2
-
-
Just to be clear:
Loader 1.03b required with 6.2.x (DS3615 only), Legacy boot
Loader 1.02b required with 6.1.x, Legacy or EFI boot
https://xpenology.com/forum/topic/13333-tutorialreference-6x-loaders-and-platforms/
-
1
-
Trouble with install on HP Compaq 8300 SFF
in DSM 6.x
Posted
There is nothing wrong with 6.1.7, it's fully supported by Synology and will be for some time. I'm sure you understand you cannot upgrade the DSM to 6.2 without using 1.03b loader.
That said, I can't see any reason you cannot use 1.03b and DS3615 as your chipset NIC (Q77 Intel 82579LM/82579V Gigabit Ethernet) is supported by e1000e which is what is required.
I actually have one of these in my office that I was making ready to sell... I might try to do an install on it just to prove it works. But I think you might be making a mistake somewhere.