

FOXBI
-
Posts
159 -
Joined
-
Last visited
-
Days Won
14
Posts posted by FOXBI
-
-
On 6/18/2022 at 7:18 AM, noxios said:
apparently for me with an HP microserver Gen8
It's been a long time, so I don't know if my old script still works, but it seems possible if you add Broadcom's driver (tg3).
I also have microserver gen8, so this part has already been confirmed.

-
12 hours ago, pocopico said:
I have the impression that it’s a CPIO format and not gzip at all, but I need to dig into my notes. The reason for having the format in that certain way has to do with the kernel capabilities of each platform. It could have been a simple directory though but TTH decided to go the other way. A more controlled and user targeted way
Today, through your source analysis,
I was able to see how you used to handle encrypted pats after version 42281 and how to import zImage, rd.gz , GRUB_VER, grub_cksum.syno through it.
Also, I was able to check how to create custom.gz.
I think your method and the ideas you have developed are amazing!!
If you allow it, I would like to use that method and reflect it in the process of creating a multiloader.
However, since rploader is in charge of the build process, I will try to apply only the part that proceeds after the build.
-
 1
1
-
-
38 minutes ago, pocopico said:
Do you thing that If I could export a custom gz you could use it on your multi boot ?
I haven't tried everything, but custom.gz I just updated and confirmed that the driver was applied properly.
I first thought about making a multi-loader base with images built by default in RedPill
and building and importing only the necessary custom.gz in RedPill. If only custom.gz can be controlled separately,
I also thought that it would be possible to skip the build.
As with all my scripts, I don't want to touch the main features of RedPill. Currently,
I think the best way is to use the auxiliary role in which RedPill runs or to utilize the results created through RedPill.
It's a pleasure to see so many things I can create with your wonderful results.
")
-
On 4/26/2022 at 12:02 PM, FOXBI said:
1. It is built by default for EXSi and can be modified after additional builds if necessary.
(I'll update the method further.)
Added a video on how to add an extension driver to Topic.
Please refer to it for use.
-
5 hours ago, apriliars3 said:
Other question. How can add tg3.ko to rd.gz by DS3622xs+ or other?
I think without tg3.ko not works HP Microserver Gen 8.
I don't think you need to update rd.gz.
Instead, if you import custom.gz from the build including the driver and overwrite it, you can boot with the driver applied loader.
I succeeded in this test and I will post a related method soon.
-
1
-
-
4 minutes ago, apriliars3 said:
Tested with VMWare only works with option USB Redpill Bootloader, not works with sata option.
As mentioned in the topic, the default setting for the ESXi environment is SATA1 (1:0).
Change
#====================================================================================
## SATA Boot Priority (default : loader (1:0), data (0:0) )
#====================================================================================
set shd=hd1
To
#====================================================================================
## SATA Boot Priority (default : loader (1:0), data (0:0) )
#====================================================================================
set shd=hd0
in grub.cfg
-
On 4/26/2022 at 12:02 PM, FOXBI said:
A new version can be downloaded.
Thank you to nemesis122 and RICARDO MELO for reporting the error.
Thanks to you, I was able to add more features and see if it works.
-
1
-
 1
1
-
-
1 hour ago, BartAcid said:
First of all great job.
I head problem with error 'disk msdos1 not exist' but manually change in grub.cfg (root=(hd0,msdos1) for test and is working (for test just DS918+), using UEFI (CMS - used to work, but now is error from post above).
I put my stic pid, vid, mac, eave old sn.
I have menu, can start from USB, but looks like no RTL8111/RTL8211 drv. I see 'starting kernel with USB boot on the screen'. I search from find.synology.com, syno assistant, put ip in the browser, nothing.
As mentioned in Topic, this material is made with ESXi basic base. Of course, no other drivers exist.
I will guide you on how to add drivers in the next version.
In addition, the use of the above mentioned Baremetal is not currently normal, so please use the next released version.
Good news soon.
-
2
-
-
9 hours ago, nemesis122 said:
But it is not booting
8 hours ago, RICARDO MELO said:When I tried boot with USB I received the same message
I'm so sorry..
Since I mainly use ESXi and it works well on ESXi, I guess I didn't pay attention to USB booting.
I have confirmed the phenomenon that does not work in baremetal, and I'll try to solve the problem.
This is a temporary way to do it.
rufus -> grub2.06 select -> USB adjust
OSFmount -> img mount 1st partition -> copy all > USB open > paste
I have confirmed that the grub menu appears.
I will fix it so that baremetal can work well as soon as possible.
thank you
-
3
-
-
21 minutes ago, nemesis122 said:
how you have created the usb stick when the gen8 has sucessfully bootet ?
In my case, TC made a USB with dd.
-
3 minutes ago, nemesis122 said:
I have checked on the Serial Port the message :please remove the usb key and press a key
Is this only for uefi bios because Gen8 microserver have not a uefi bios only mbr booting
I know that redpill supports both efi and mbr.
The USB side has not yet been fully tested, but it was carried out when trying to boot from microserver gen8
with a USB made with the redpill image as the base. I'll check the USB boot some more.
-
1
-
-
4 minutes ago, nemesis122 said:
Hi Foxbi thank you for the image i have tried on my Gen8 Baremetal not ESXI the stick is not booting is this only for ESXI ?
It is optimized for ESXi environment.
In Baremetal state, it seems to be booted by moving to the USB submenu rather than SATA.
Basically, since the nic driver is set to vmxnet3, it seems that Baremetal's nic driver will also need to be added.
(Probably the nic side driver of the gen8 board is most likely tg3 which is broadcom.) -
Hello~!
I am xpenology user. And I am an IT engineer who creates shell scripts as hobbies.
Please understand that it is written by a google translate site. because i’m korean who is not fluent in English.
I created built Redpill Multi boot loader. Multiple DSMs can be used as one loader
Requirement
=============================================================1, Redpill-Multiloader_7.1-42661.img file Download
Please understand that Google Drive is used because of its large capacity. There is a link below.2. It is the same as using the existing Redpill Tinycore or a separately made loader.
3. ESXi Enviroment
(Bootloader SATA1 (1:0), DataDisk SATA0 (0:0))or
Baremetal Enviroment
(It can be used by making a USB with rufus or dd, etc.)How to RUN Redpill Multiloader
=============================================================1. Redpill-Multiloader_7.1-42661.zip decompression
2. Modify /boot/grub/grub.cfg by mounting the first partition on OSFmount or TC
#====================================================================================
## User config - Your values Change
#====================================================================================
set sn=1234SQRDD5678
set netif_num=1
set mac1=001122334455
set SataPortMap=9
set DiskIdxMap=0
set SasIdxMap=0
The USB or Boot oder part is an additional setting and does not necessarily need to be modified.
3. Convert Redpill-Multiloader_7.1-42661.img to Redpill-Multiloader_7.1-42661.vmdk, Redpill-Multiloader_7.1-42661-flat.vmdk
4. Register as boot disk in ESXi VM (default SATA1 (1:0))
5. Enter GRUB and use the desired DSM version
How to ADD Ext Driver (for Baremetal & ESXi, How to make USB Stick include)
=============================================================
Additional notes
=============================================================
1. It is built by default for EXSi and can be modified after additional builds if necessary.
(I'll update the method further.)
2. Due to variable processing for sn, mac, etc., it is temporarily modified in GRUB state and cannot be used.
3. The video has been processed only with the popular DS918+, DS920+, DS1621+, DS3622xs+, and DVA3221,
and DS3615xs and DS3617xs are also available.
4. USB is handled as a submenu, and pressing ESC will return to the upper menu.
5. In the future, we plan to make Multiloader production possible directly on TC through tr_cb.sh.
https://xpenology.com/forum/topic/60469-tinycore-redpill-create-boot-image-usb-tr_cb-v099-r01/
Quote## Update v2.0.0-r01 - 2022.04.28
- USB multiloader Support for Baremetal(mbr error fix)
- Automatic support when writing up to 4 nic/mac
- Add setting value variable processing item(com port)
- Set to enable serial console connection when writing com port
- A guide on how to add drivers(as soon as possible)
- You can change the Ubuntu style of the GRUB menu by removing comments.
- Update & Change Download Link
- Fixed some errors
## Update v2.0.0-r02- 2022.04.29
- Modification of efi classification conditional statement and redistribution of images
- How to add Ext Driver Video production
Attachement
=============================================================
Download : (Google drive link - 400MB) - Please understand that Google Drive is used because of its large capacity
https://drive.google.com/file/d/1t1cOPMmlSg3c65mXJBeI_44yor_sp9Xl/view?usp=sharing
Finally comment
=============================================================
I'm an ESXi user, so the Native test is lacking.(Check only basic bootability)
Please note that there may be errors.
If you tell me the test results and points for improvement, I'll reflect them.
Have Nice Day!! Thank you~!!!
-
4
-
6
-
-
11 hours ago, Rayqusa said:
ah, nevermind. too hassle handling cosmetic stuff
Sorry, ch_cpuinfo has not been updated because there are no major fixes.
Please take a screenshot of how the currently used CPU ( Intel(R) Pentium(R) Gold G5420 CPU @ 3.80GHz) looks in DSM after performing ch_cpuinfo.
In terms of name structure, it doesn't look like it's going to work.
-
Hello~!
This is a topic I have been writing for a long time since I wrote the ch_cpuinfo topic.
I am xpenology user. And I am an IT engineer who creates shell scripts as hobbies.
Please understand that it is written by a google translate site. because i’m korean who is not fluent in English.
I created a tool to help image or USB creation After Tinycore + Redpill build.
Requirement
=============================================================Tinycore, Build completion status
Howto Run
=============================================================
1. Download attached file on your PC (tr_cb.tar)
or See the source page on github -> http://github.com/FOXBI/tr_cb
2. Start up your Tinycore and upload it. (using sftp....)
Alternatively, you can paste the source directly from the shell.
or wget, gitclone ...
3. Connect to ssh by tc account.
4. Progress as tc user.
5. Build (rploader or tr_st, ....)
6. Check Directory location
# pwd /home/tc
7. Decompress file & check file:
# tar xvf tr_cb.tar
# ls -lrt
# chmod 755 tr_cb.sh
8. Run to Source file
# ./tr_cb.sh
When you execute it, proceed according to the description that is output.
Additional notes
=============================================================
1. You can proceed only when the build has been completed.
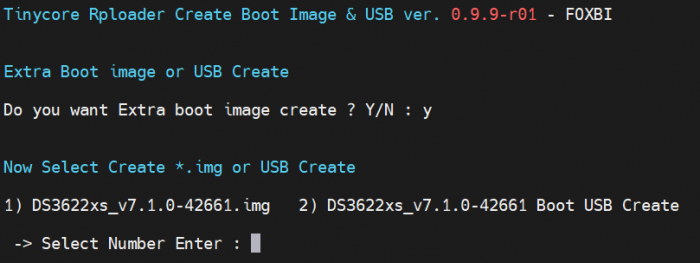
2. In the case of USB, it will not proceed unless the USB is plugged in.
3. Please note that all data will be deleted in the case of USB.
4. In case of USB, it may take some time depending on the capacity.
5. In case of USB, VID and PID are automatically put in grub.cfg.
6. In the case of USB, the default is hd0, which is the default boot order.
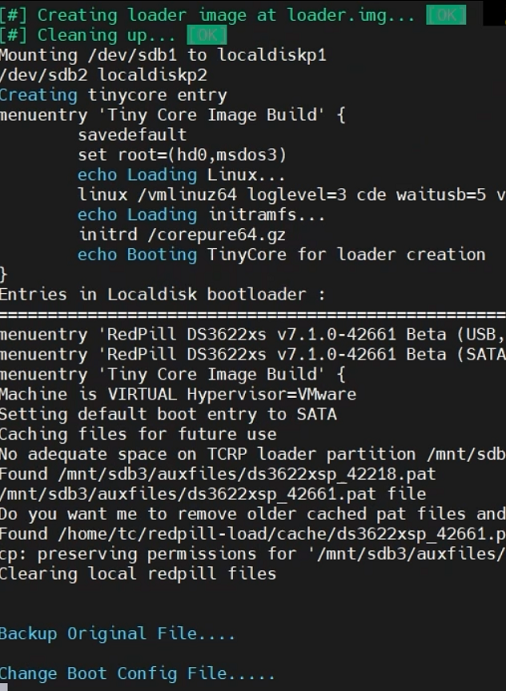
7. Image is created in /home/tc/ in the form of model name_version.img and is quickly created in 150MB.
8. Image is changed to hd0 -> hd1 according to the boot order based on the environment being built.
Changelog
=============================================================
Update v0.9.9-r02 - 2022.04.27
- A typo was identified and corrected in the USB creation function
Attachement
=============================================================
Download : tr_cb.tar
Finally comment
=============================================================
I'm an ESXi user, so the Native test is lacking.(Check only basic bootability)
Please note that there may be errors.
If you tell me the test results and points for improvement, I'll reflect them.
Have Nice Day!! Thank you~!!!
-
3
-
1
-
-
2 hours ago, Peter Suh said:
Please check my PM in serverforum.
I think the multiple choice function of ext that I requested here last time will be very useful.
I replied.
You can use it comfortably.
That function was created after thinking through your request.
-
17 hours ago, pvlier said:
I cannot mount SDB1
I'm sorry for any inconvenience. I didn't think I did it wrong.
I re-edited the script to be able to react even if the boot disk changes.
## update Update v2.2.1-r01 - 2022.04.16
- When modifying GRUB, the value fixed to /dev/sdb for the boot partition is modified
so that it can be changed automatically depending on the execution environment. -
7 hours ago, gericb said:
Just checking here..your new scripted tool is for new both baremetal installs/upgrades, as well as VM/ESXi and not just for the VM environments, correct? Thanks
It is not made only for the VM environment, but it is true that the script was created for use with ESXi.
Dedicated environments are more complex, so there may be a lot of things that can't be done. Thanks
-
5 hours ago, pvlier said:
'information about this device' it shows status 'uninstalled
Most of the problems that occur during DSM installation are affected by the SataportMap and DiskIdxMap values.
In particular, I know that the dedicated environment has a greater impact on low values due to the controller, etc.
For reference, ESXi is simple. SATAportMap=9 DiskIdxMap=0
-
6 hours ago, pvlier said:
'mount: /dev/sdb1: can't find in /etc/fstab'. Then 'sed: can't read /mnt/sdb1/boot/grub/grub/cfg: no such file or directory'.
As mentioned earlier, variables may occur because it is optimized for ESXi and uses various drives in the case of dedicated. For the mount: /dev/sdb1 error,
if you are using USB as sdc, you will need to change mount /dev/sdb1 at the end of the source to mount: /dev/sdc1 .
-
17 minutes ago, pvlier said:
I confirm all steps according to the but it seems there are several downloads repeated and I get questions that aren't in the video or text description. I can see the disks as SDA and SDB when running "fdisk -l". At the end I reboot the server and boot the USB option from the grub menu. I can then load the webpage and view the setupscreen. I choose to install the .pat file but when it completes and reboot I get to the setupscreen again. Installing again files, I have to clear partitions on the disks to continue.
The script is based on ESXi. Native environment may be different as I haven't tested it yet.
After completion of tr_st.sh execution mount /dev/sdb1 and
Open /mnt/sdb1/boot/grub/grub.cfg with vi
Please try rebooting after changing the three items changed to hd1 to hd0.
-
On 4/9/2022 at 7:47 PM, NotHere said:
I think it was maybe that I dont have the SATA drives correct? I dont know really
I do not know how to set proxmox, but in ESXi, it is ideal to allocate Tinycore image to SATA 1:0 and Data Disk to SATA 0:1. If a similar setting is possible, please try it.
Also, try setting SataportMap to 9 and DiskIdxMap to 0.
-
2 hours ago, NotHere said:
How can I get this script to load on Proxmox?
This script is a tool that runs on tinycore.
I don't know how Proxmox works, but it seems to be available if you run tinycore.
-
On 3/21/2022 at 2:52 AM, Peter Suh said:
If possible, it would be better if multiple selection of extension drivers is possible in menu 6.
It took some time, but the part you requested was reflected in a simpler way than I thought.
I was been reflected in version v1.7.0-r01
Thanks for your ideas.

DSM 5.x/6.x/7.x CPU name & cores infomation Change tool
in Software Modding
Posted
ch_cpuinfo does not get the value of the cpu frequency.
In DMS for each model, it seems that the cpu name is expressed as a fixed value, but the rest of the values are called flexibly.