

viettanium
-
Posts
21 -
Joined
-
Last visited
Posts posted by viettanium
-
-
-
-
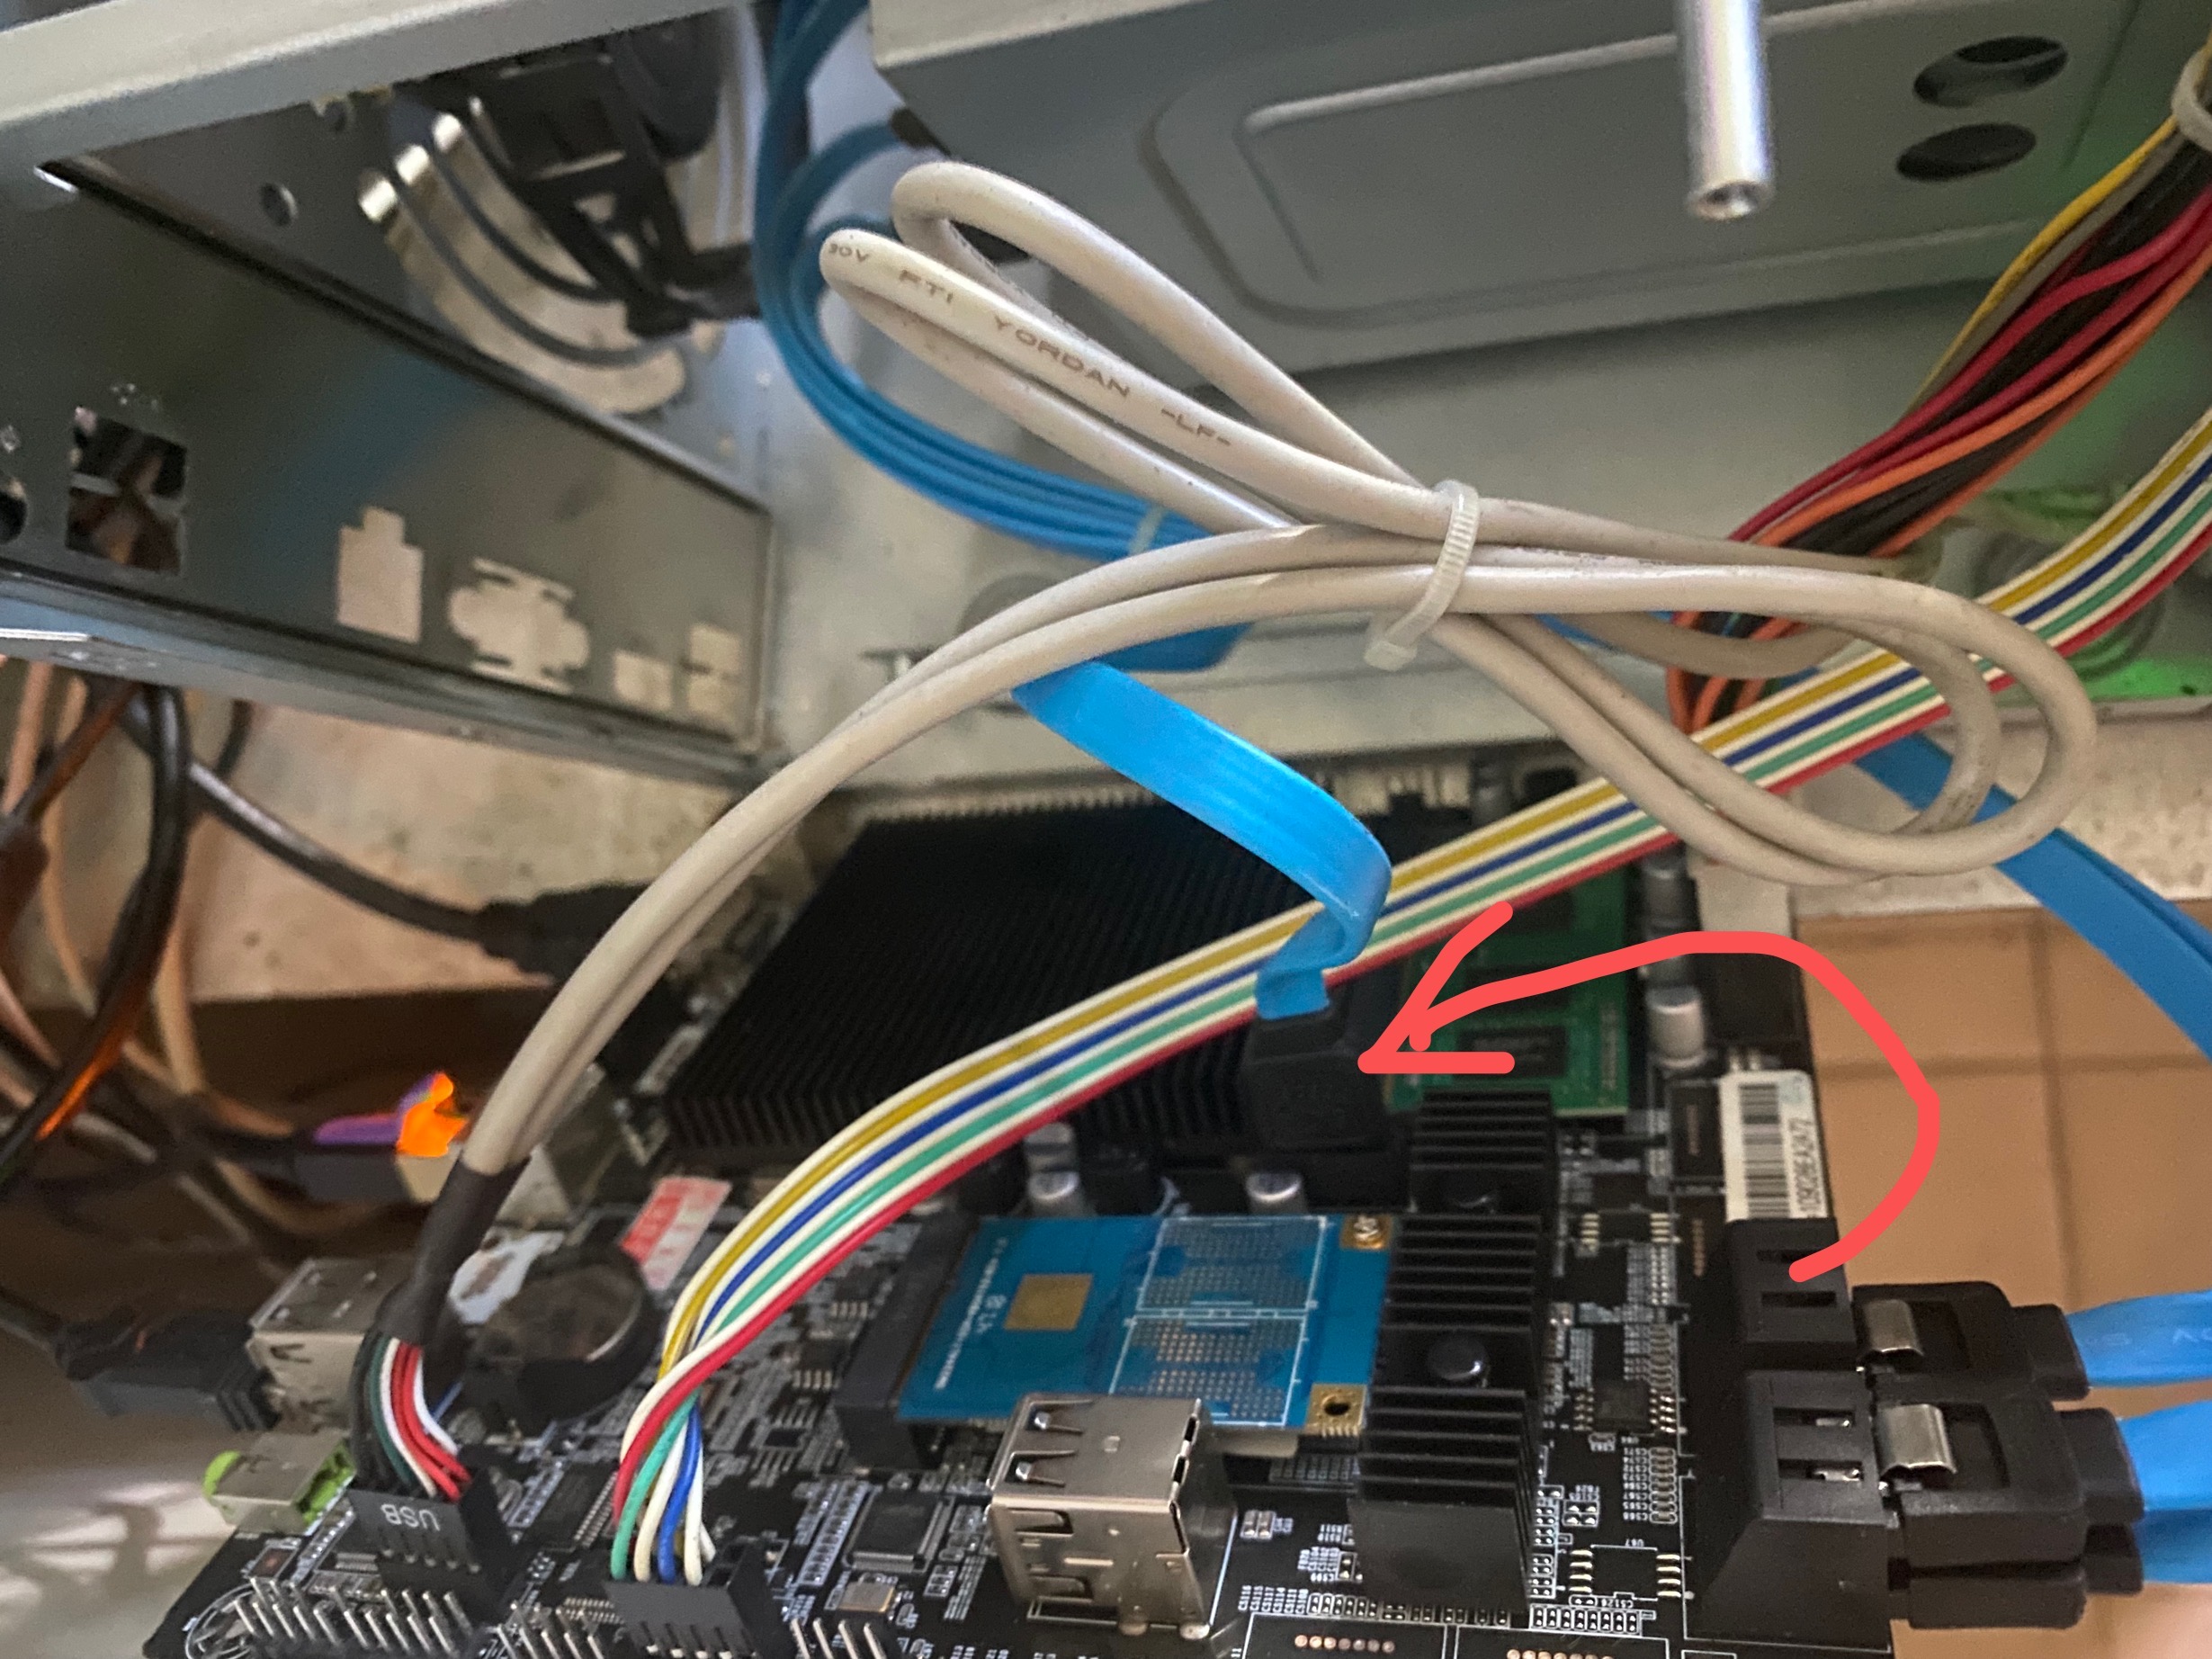
2 hours ago, kennysino said:
ok,i have fixed it,all you have to do is change the sata cable like the photo below

not work for me!
update: after Enable SATA Hot Plug in BIOS, working now!
-
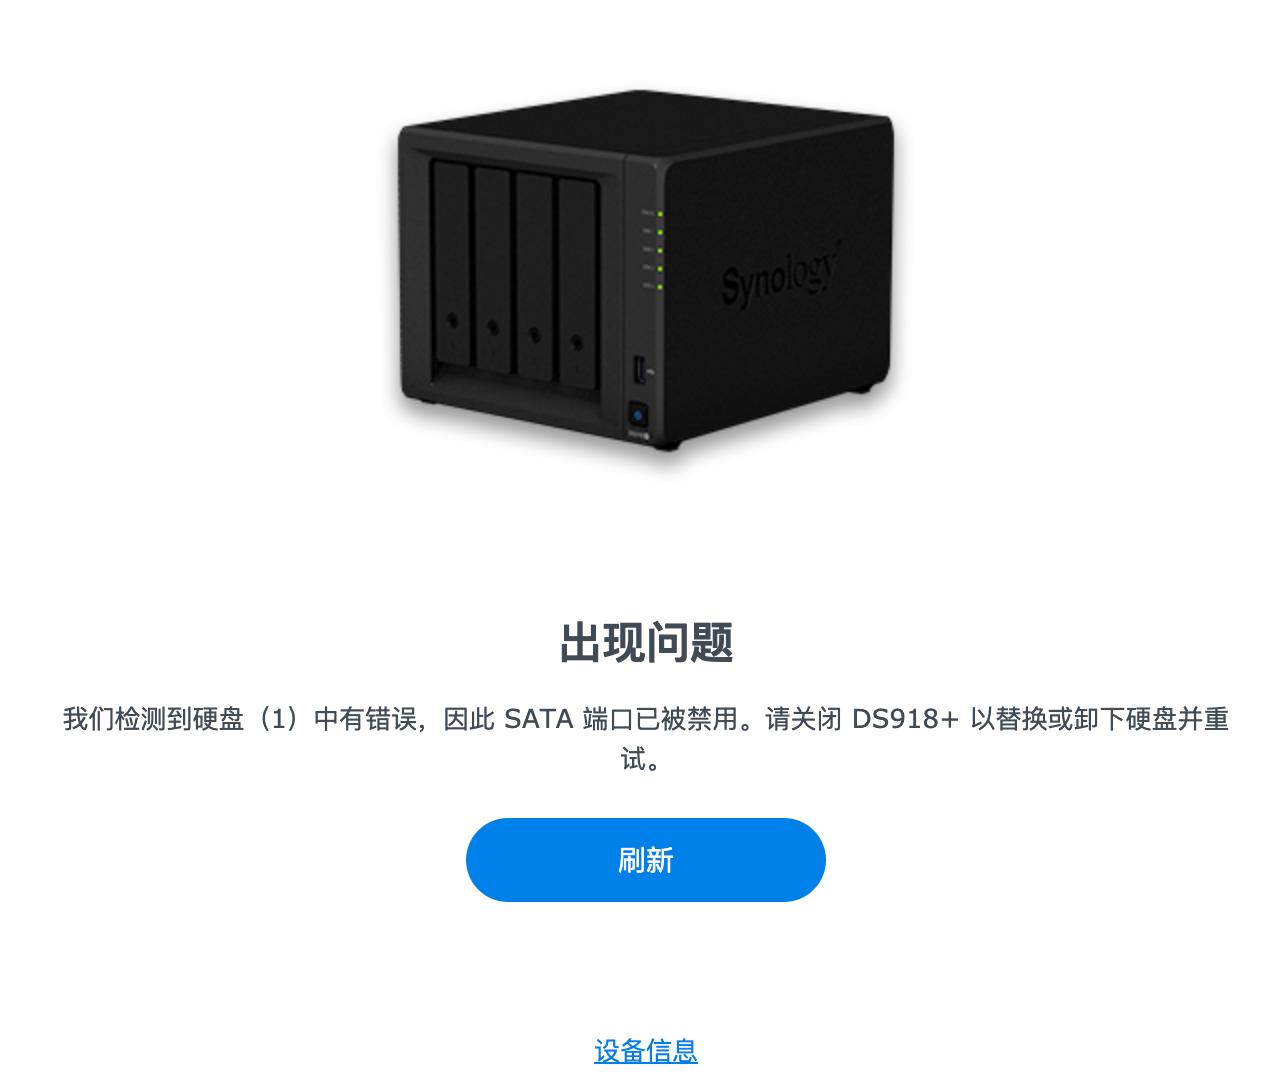
4 hours ago, kennysino said:
there is an sata error and i don't know how to fix it

same issue, how to fix it
i can not see sataportmap value in grub
-
Outcome of the update: SUCCESSFUL
- DSM version prior update: DSM 6.2.2-24922 Update 4
- Loader version and model: Jun's v1.04b - DS918+
- Using custom extra.lzma: YES - real3x mod
- Installation type: BAREMETAL - ASRock Q1900B-ITX
-
Outcome of the update: SUCCESSFUL
- DSM version prior update: DSM 6.2.2-24922 Update 3
- Lo ader version and model: Jun'S Loader v1.04b - DS918+
- Using custom extra.lzma: YES (stills using the last one)
- Installation type: BAREMETAL - Realan LR-J1900T2 Motherboard
- Additional comments: Reboot and installed in 2 minutes, so fast!
-
2 hours ago, FOXBI said:
Yes. you can do it.
thanks you, work like a charm!
-
 1
1
-
-
does it work with DSM 6.2.2 Update 3?
-
1
-
-
6 hours ago, Trauma said:
Long answer :
Your CPU don not have only 3 modes, synology kernel for DS918+ provides only three cpufreq governors :
- powersave > set the cpu to its minimal freq
- performance > set the cpu to its maximal freq
- userspace > allow you to specify the desired frequency. This script use this governor to modulate the frequency according to system load (that's basically whats explained in the README).
Short answer :
no need to "modify some text", just RTFM
")
thank you very much, just put this on Triggered Task at Boot-up and this work like a charm!
from 26W Idle now at 23W.
-
35 minutes ago, Trauma said:
Installation in rc.d will not work since this script do not provide start and stop args. As @Olegin spotted you can launch it form the task manager, that's the way i use it.
Installation example (from your nas cli) :
sudo curl https://raw.githubusercontent.com/Trauma/cpufreq-userspace-scaler/master/scaler.sh -o /usr/local/bin/scaler.sh && sudo chmod +x /usr/local/bin/scaler.sh
Then run it through a startup triggered task, as root, in your DSM, with the following command :
/usr/local/bin/scaler.sh &
or with parameters :
lowload=100 highload=200 scalingmaxfreq=2000000 scalingminfreq=1500000 /usr/local/bin/scaler.sh &
my CPU is J1900 (2.0GHz 4 core) which had only three mode:
powersave performance userspace
does this script work or I must modify some text?
-
how to install this script?
just put it to rc.d folder?
-
Just now, singhsnet said:
he had 6.2.2 update 2 earlier, no detail how he had that earlier. in my case the network is blacked out and I am not sure how to get full log to know more whats wrong.
let try extra.lzma from real3x. i'm OK with both Update 2 and now Update 3!
-
- Outcome of the installation/update: SUCCESSFUL
- DSM version prior update: DSM 6.2.2-24922 Update 2
- Loader version and model: Jun v1.04b - DS918+
- Using custom extra.lzma: YES (from real3x somewhere in this forum)
- Installation type: BAREMETAL - ASRock Q1900B-ITX with enabled Realtek 8111GR onboard NIC
- Additional comments: After reboot everything recognised and working!
-
the guy in this post says the Realtek GbE now working again in DSM 6.2.2 Update 3, no need for extra.lzma modding? https://xpenology.com/forum/topic/20031-dsm-622-24922-update-3/?do=findComment&comment=119196
-
the guy in this post says the Realtek GbE now working again in DSM 6.2.2 Update 3, no need for extra.lzma modding?
https://xpenology.com/forum/topic/20031-dsm-622-24922-update-3/?do=findComment&comment=119196
update: installed and working!
-
On 8/19/2019 at 7:00 PM, singhsnet said:
I am trying to upgrade from a Gigabyte motherboard with B75M chipset.
it has Reltek GbE lan. I see that 6.2.1+ needs intel nic. How do I add realtek driver with this?
I am using 1.03b loader
when I uncomment the extra.lzma section, it gives me error that file '/rd/gz' not found. it also seems that it can not locate $img/$extra_initrd
I tried searching all over but not sure why the 2nd partition content is not read.
any pointers?
try using real3x extra.lzma mod, search in this forum
-
On 8/8/2019 at 9:04 AM, flyride said:
Tested functional with my J4105-ITX, except I did not check transcode which I don't use. Well done!
does onboard LAN work? (Realtek 8111)
-
On 8/10/2019 at 6:33 PM, dedmsk said:
Successful update!!!
Replace extra.lzma but not delete extra2.lzma
THANKS!!!!
does the onboard NIC is the same as ASRock boards? (Realtek 8111)
-
On 8/3/2019 at 1:27 AM, real3x said:
The jun's r8168 driver panic > [ 5.449298] in your boot log
Since there's no new compiled driver for realtek and most of the realtek NIC stop to work since the 6.2.2-24922 update, you have to attach another NIC to your motherboard.
For note : In your boot log, DSM is booting fine (but no lan)
hope for new realtek driver.
HDD fail to hibernate after upgrade from 6.2.2 to 7.1[RedPill DS3615xs v7.1]
in Packages & DSM Features
Posted
anyone tried the DSM 7.1.1-42951RC?