Search the Community
Showing results for tags 'lancache'.
Found 1 result
-
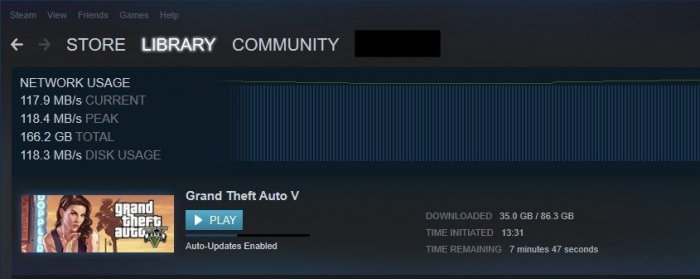
My curiosity to look for further applications for my Xpenology NAS led me to lancache, which enables content (such as games, windows and mac updates) that was downloaded once from the Internet to be available locally (via my NAS) the second time and save internet bandwidth. Further information regarding lancache can be found here: http://lancache.net However, since I already have a Pihole (tracking and advertising blocker) in use, I had to find a way to let them communicate with each other. In order to save resources, I decided against operating the Lancache in a virtual machine and using docker. Therefore, below I share my approach for those who are interested. ATTENTION, with this procedure the ports 80 and 443 in DSM are assigned to another port, since the two ports are required for the lancache. This means that if you host a website it will no longer be accessible via "yourdomain.com" but in the future via "yourdomain.com:81". Furthermore, I do not accept any liability for any data loss or damage caused by using this tutorial(s). So let's start. First, ports 80 and 443 must be released. Thanks to Tony Lawrence's instructions (see tonylawrence.com), this is relatively easy. Connect to the NAS via SSH. In macOS you can do this via the terminal app with this line for example ssh -p 22 tim@192.168.0.100 Check which applications are currently using the port with the command sudo netstat -lntup | grep ":80" sudo netstat -lntup | grep ":443" Now three files have to be edited. The vi editor is used for this purpose Enter the command sudo vi /usr/syno/share/nginx/server.mustache Press i once (for insert) and replace the values 80 and 443 with 81 and 444, respectively. It should look like this afterwards. listen 81{{#reuseport}} reuseport{{/reuseport}}; listen [::]:81{{#reuseport}} reuseport{{/reuseport}}; and listen 444 ssl{{#https.http2}} http2{{/https.http2}}{{#reuseport}} reuseport{{/reuseport}}; listen [::]:444 ssl{{#https.http2}} http2{{/https.http2}}{{#reuseport}} reuseport{{/reuseport}}; Then write :wq (for write and quit) and confirm with enter. Do the same with those two files: sudo vi /usr/syno/share/nginx/DSM.mustache sudo vi /usr/syno/share/nginx/WWWService.mustache Next, nginx must be restarted with the command: sudo -i synoservice --restart nginx Now you can check whether the ports are really no longer in use with sudo netstat -lntup | grep ":80" sudo netstat -lntup | grep ":443" If nothing shows up anymore, then we successfully freed the ports and this means the first of three steps is done. Then docker must be installed from the package center in DSM. Pihole has to be downloaded, adjusted and started as shown in the attached "Install-pihole.pdf" file. Thanks to Marius Bogdan Lixandru (see https://mariushosting.com ) for his instructions, which were slightly adapted for installing pihole with lancache. It is important that you create the following folder structure on your NAS. We need the folder /etc/dnsmasq.d later on to put some .conf files in there. Take the password from the protocol of the Docker container (as described in the pdf) and login as admin to Set the Interface listening behavior in Settings/DNS to IMPORTANT, DO NOT FORWARD THE PORTS 53 AND 80 FROM YOUR ROUTER TO YOUR NAS!!!! Now we have to download the domain lists, which should be cached afterwards. Download the folder from https://github.com/uklans/cache-domains and copy the folder to your NAS. (e.g. /volumes2/lancache) Then use ssh and change the directory to scripts cd /volumes2/lancache/cache-domain-master/scripts Run the script create-dnsmasq.sh which creates .config files for your pihole sudo ./create-dnsmasq.sh copy the created files from to your pihole dnsmasq.d-configs folder (which is in my case as follows) Finally, Lancache must be installed. The folder has to be downloaded from https://github.com/lancachenet/docker-compose and moved, for example, to on your NAS. Change to the /volume2/lancache/docker-compose-master folder via SSH cd /volume2/lancache/docker-compose-master Edit the .env file within the folder vi .env Set the three variables: Next login as root in SSH via sudo -i Change the directory to your docker-compose-master folder, which is in my case cd /volume2/lancache/docker-compose-master Run docker-compose up -d You will get two successfully installed docker container and one error. This is because the pihole already occupies the port 53. We can ignore this message and move on. exit exit Due to the fact that we use pihole as DNS service you can now delete the docker container lancache-dns. Now change the DNS server on your router to the IP address of your NAS. Flush DNS entries of running PCs or reboot them and you should get a decent lancache performance, depending on your xpenology / network setup. Feel free to correct me if I wrote something incorrectly or didn't explain it well enough. Install-pihole.pdf