Search the Community
Showing results for tags 'installation'.
Found 14 results
-
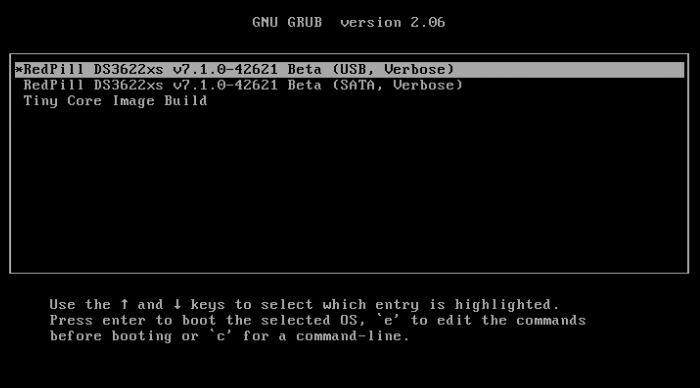
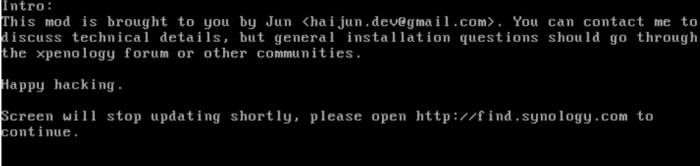
 This guide is dedicated to installing DSM 7.0.1 BareMetal. It is a translation from Korean to English using a translator. Please understand if there is a slight misunderstanding. Existing RedPill, which has been released since last year, can generate IMG files directly through the bootloader compilation process only if Linux is available separately. This tinyCore RedPill provides a USB boot image with tinyCore Linux. It's much easier to work without having to install Linux separately. As usual, you can add the desired driver directly from the selection header and build it. Tinycore supports the following platforms (DS918+/DS3615xs/DS3617xs/DS3622xs+/DS1621+/DV3221/DS920+). You can continuously change the bootloader without re-creating the image (model/sn/mac, etc.) Tinycore supports both legacy versions for baremetal and virtual environments. 1. Prepare bootloader IMG file With the Download button in the middle of the GITHUB link below.Download the gz file. In it, 0.4.6 version img.You can unzip the gz file again and use the img file. (All files) https://github.com/pocopico/tinycore-redpill (for LEGACY) https://github.com/pocopico/tinycore-redpill/raw/main/tinycore-redpill.v0.4.6.img.gz (for UEFI) https://github.com/pocopico/tinycore-redpill/raw/main/tinycore-redpill-uefi.v0.4.6.img.gz (for VMWARE) https://github.com/pocopico/tinycore-redpill/raw/main/tinycore-redpill.v0.4.6.vmdk.gz 2. Bootloader IMG file USB recording Use the above tinycore-redpill.v0.4.6.img file to burn to USB with convenient image tools such as WinImage and Rufus. There is no need to pre-adjust the configuration file to modify the VID/PID/Serial/MAC/SATAPortMap like JUN loader. If you want to create a USB image on Mac or Linux, you can use the following DD command at the terminal. (Suppose the USB DEVICE ID identified by diskutil is disk4) sudo diskutil unmountDisk /dev/disk4 sudo dd if=/Users/MyAccount/Downloads/tinycore-redpill.v0.4.6.img of=/dev/disk4 bs=4m agree eject. 3.tinyCore Linux Boot USB boot by plugging into the PC you want to use as XPENOLOGY (you can start using UEFI 1 partition or USB CSM) Only TinyCore Linux menu appears and runs automatically Start the terminal app on the far right icon. Use the ifconfig command to verify the ip address where the en0 LAN card is automatically allocated. 4. CONFIG adjustment after SSH connection Connect ssh from another PC, such as putty. ( id:tc / pass : P@ssw0rd ) After connecting, update to the latest version with the following command. tc@box:~$ ./rploader.sh update now Tinycore Redpill is still in a stable state of stabilization. PocoPico, the developer of this program, will frequently fix bugs and announce rebuilding. There's a possibility that this rebuild will happen from time to time. Even if you use the first IMG file version of 0.4.6, you can continue to receive real-time updates of changes through the Internet. Therefore, before using it for the first time, please make sure to download the final patch status with the update option. If you've continued to migrate from JUN's XPhenology, tc@box:~$vi user_config.json The user_config.json file's VID/PID/Sn/Mac/SataPortMap, etc. are existing grub.Please refer to the cfg and insert it as it is. For new installers, perform serial GEN/USB VID, PID auto detect, SataPortMap auto detect, etc. as follows. The next process is DS3622xs+, which is currently undergoing the most stable session first. I will focus on explaining. tc@box:~$ ./rploader.sh serialgen DS3622xs+ tc@box:~$ ./rploader.sh identifyusb now tc@box:~$./rploader.sh satamap now (HBA card users are not required) You can see that the contents of user_config.json are changed automatically. Finally, it is common for existing users and new installers. tc@box:~$catuser_config.json, assuming there are 4 built-in sata ports. SataPortMap = "4", DiskIdxMap = "00" Please check if it is changed to the back. After find.synology.com, you may not be able to find the SATA HDD during DSM installation. The following is an example when a 6-port SATA expansion card is installed. SataPortMap = "46", DiskIdxMap = "0000" (For those who use cards such as H200, H310, H710, etc., exceptional, you do not need to erase the option of this SataPortMap and DiskIdxMap itself. Please erase the lines of the above two options in the vi editor and organize them well so that they don't end with Syntex errors. Of course. ./rploader.sh satamap now command is not required.) 5.BIOS built-in SATA port Hot Plug disable -> enable (important) To avoid temporarily reducing the SataPortMap value set above by the number of HDD physically connected by Sata cable during DSM installation, Be sure to turn on the Hot Plug function. This reduces the probability of encountering an error message saying that the HDD cannot be found because the number of SataPortMap automatically above is recognized as normal recognized. However, if M.2 and Sata ports are Muxed Sata ports that share Lane, it should be considered unusable. 6. Build bootloader after SSH connection When you have finished adding the above extension driver, you will finally build the bootloader. tc@box:~$ ./rploader.sh build broadwellnk-7.0.1-42218 The list of supported platforms can only be found in Help with the following commands: tc@box:~$ ./rploader.sh 7. backup and reboot for bootloader use After successfully completing the build, back up the configuration with the following command and restart the genology with USB. tc@box:~$ filetool.sh -b &&/usr/bin/exitcheck.sh Or tc@box:~$ ./rploader.sh backup now tc@box:~$ sudo reboot It has the same effect. The backed up settings and ext drivers remain the same. The next time TinyCore Linux starts for correction, the setting value will be restored from the mydata.tgz file. 8. Launch the Grub Menu BareMetal must select the first USB boot menu. The first USB menu will be automatically selected. The last selected menu will be stored and used for the next boot. 9. Installing DSM with find.synology.com On an XPhenology PC, There is a delay of about 1 to 2 minutes for IP allocation, so please wait a little longer. There is nothing more to do on this XPhenology PC once you have checked the Kernel boot message. Now look for XPhenology on another PC at find.synology.com. If found successfully, proceed with the initial installation of DSM or the expected migration DSM installation process.
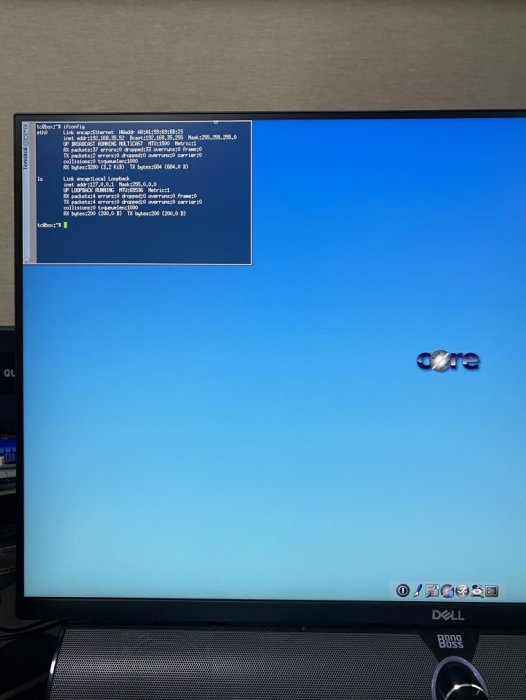
-
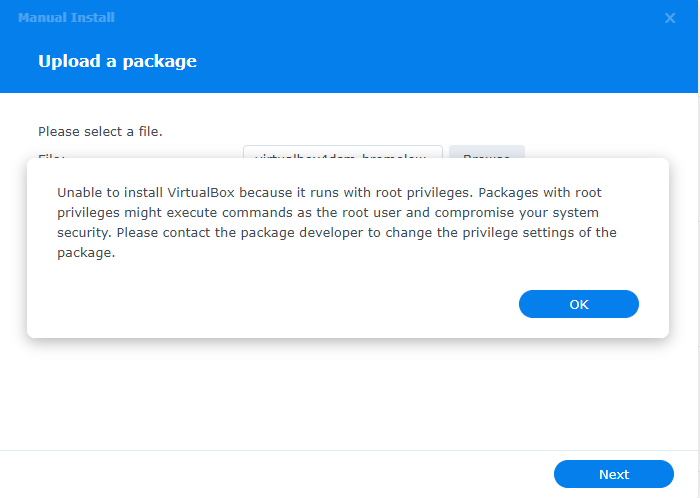
Does anyone know a workaround for this? The same spk runs fine in 6.2.3
-
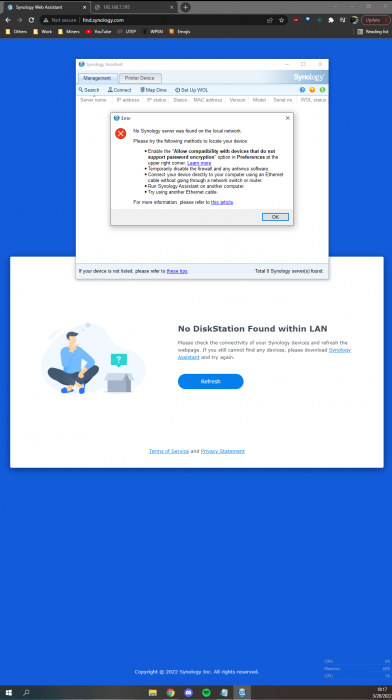
 Howdy! I am following the tutorial here : https://www.youtube.com/watch?v=uXdcZXSQ9LQ&t=565s but am having trouble. After reaching the 9:11 point of the video neithe rSynology Assistant nor find.synology.com can find my custom setup. I am able to flash the drive with the software and find.synology is able to find my setup initially to allow initial connection, setup, and installation of DSM_DS918+_24922, but after restarting it can no longer find my setup. I am met with a "No DiskStation Found within LAN" on the web interface and "No Synology server was found on the local network" on Synology Assistant. Here are my specs: MSI B250M Bazooka intel i5 7400 8gb (4gbx2) 2400 mhz RAM, some OEM ram that came with the board (cyberpower prebuilt) 4x4tb enterprise HDDs recognized through bios and linux Please any input is apprecaited as I have been trying to get this to work the past couple of days Update: after watching a couple other tutorials, I have found that other people used a "Synology Serial Number Generator" and realized I kept the serial number the same on the grub file as what it was default, should I have changed it? Initial Connection/Recognition: Post Install and Restart:
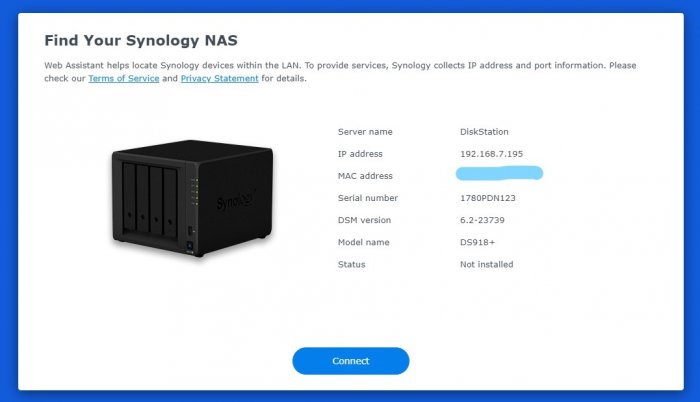
-
Bonjour à tous, Voulant essayer la version 6 oui, je suis toujours en 5.2 Le passage d’une version à l’autre me donne des sueurs ! Bref, j’ai voulu voir à quoi ressemblait DSM 6. J’ai donc créé une VM avec VMware Workstation. J’ai récupéré dans ce fil https://xpenology.com/forum/topic/9788-config-toute-prete-pour-esxi-ça-serai-le-pied/ Le fichier « synoboot » de Nicoueron et le fichier .pat « DSM_DS3615xs_15217.pat » sur le site de synology Ensuite j’ai mis le vmdk synoboot en Sata et j’ai ajouté un vmdk en Scsi. Au lancement de la VM J’ai ceci : je lance donc « Synology Assistant » qui trouve le nouveau DiskStation en mode DHCP et Non installé. Jusque là tout va bien. Ensuite je me connecte dessus avec un browser et lance la configuration. Apres avoir in traduis le chemin du fichier pat. J’ai une erreur (35) ! Quelqu’un à une idée ? Merci pour votre aide. Bon week-end
-
Good eveninng during 2 weeks i try to install a xpenology in new pc, configuration Amd Athlon 3000g Gigabyte B450M s2H Intel EXPI9402PTBLK net card any loader 6.x can see from network with find.synology.com or synology assitant i try 5.2 loaders and synology assistant and find.synology can see and start to install but at 40% stop during upload files (i try many diferents) in the begining i try with the netcard from mother board but is a realtek and i read can be some problems so i buy a Intel EXPI9402PTBLK that i read can work perfect with xpenolgy 6.x but too have the same problem. anybody can help me? Thanks in advance
-
 Bonjour, Mon NAS est en version 3615XS en DSM 6.1.3 avec juns 1.02 alpha. J'ai un HDD de 4 TO (plein) que je souhaite récupérer... enfin j'espère pouvoir... Pas de raid car c'est avant un media center. J'avais crée les volume en "basic" je ne me souviens pas du type de système de fichier. Suite à une mésaventure avec ma clés usb, j'ai donc tenté de la recréée avec juns 1.02 b (j'ai pas trouvé la alpha) Avec le syno assistant, j'ai remarqué que le NAS avait changé d'ip, une fois connecté dessus il à travaillé durant 10 minutes pour "récupération".... Actuellement quand je me connecte j'ai le message suivant. Aie 😕 donc, DSM ne semble plus présent. Quoi faire ? Quelle procédure suivre pour accéder au données et les récupérer ? Merci d'avance pour vos réponses. Bonne soirée
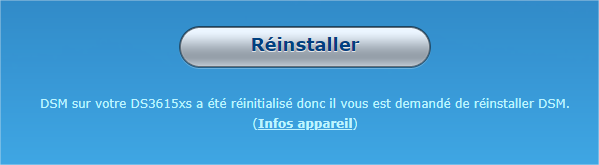
-
 Hello, I am looking to build a Xpenology but am hesitating on installing on bare metal or VMware ESXI 6.7 to replace my DS916+. I would like to use at all time as a NAS as a massively used file server where Moments will be running and casually use VMs (Win10, WinServer & Ubuntu). I know we can use VMs on Synology. That is why I am hesitating. My specs: Intel Xeon E5-2630LV3 (8cores 16threads) Fujitsu 32GB DDR4 ECC 2400mhz Kllisre X99 LGA2011-3 motherboard from Aliexpress 2x WD Red 8TBs (Dedicated for the storage) 2x WD Red 6TBs (Dedicated for the storage) 2x Samsung NVME 256GB SSD PM981 (for the cache) 1x Toshiba Sata 256gb SSD (for the VMware ESXI installation) 1x 2.5 GBE Network interface 1x 1GBE Network interface 1x APC Back up UPS My aim is to have the less problem as possible while the best stability, security, and performance as possible. Requirements: Have at least 18TB with, for example, SHR Have redundancy SSD Cache (NVME maybe?) PS: All my data will be backed up to my GSuite account with HyperBackup. Many thanks for your precious advice!
 -
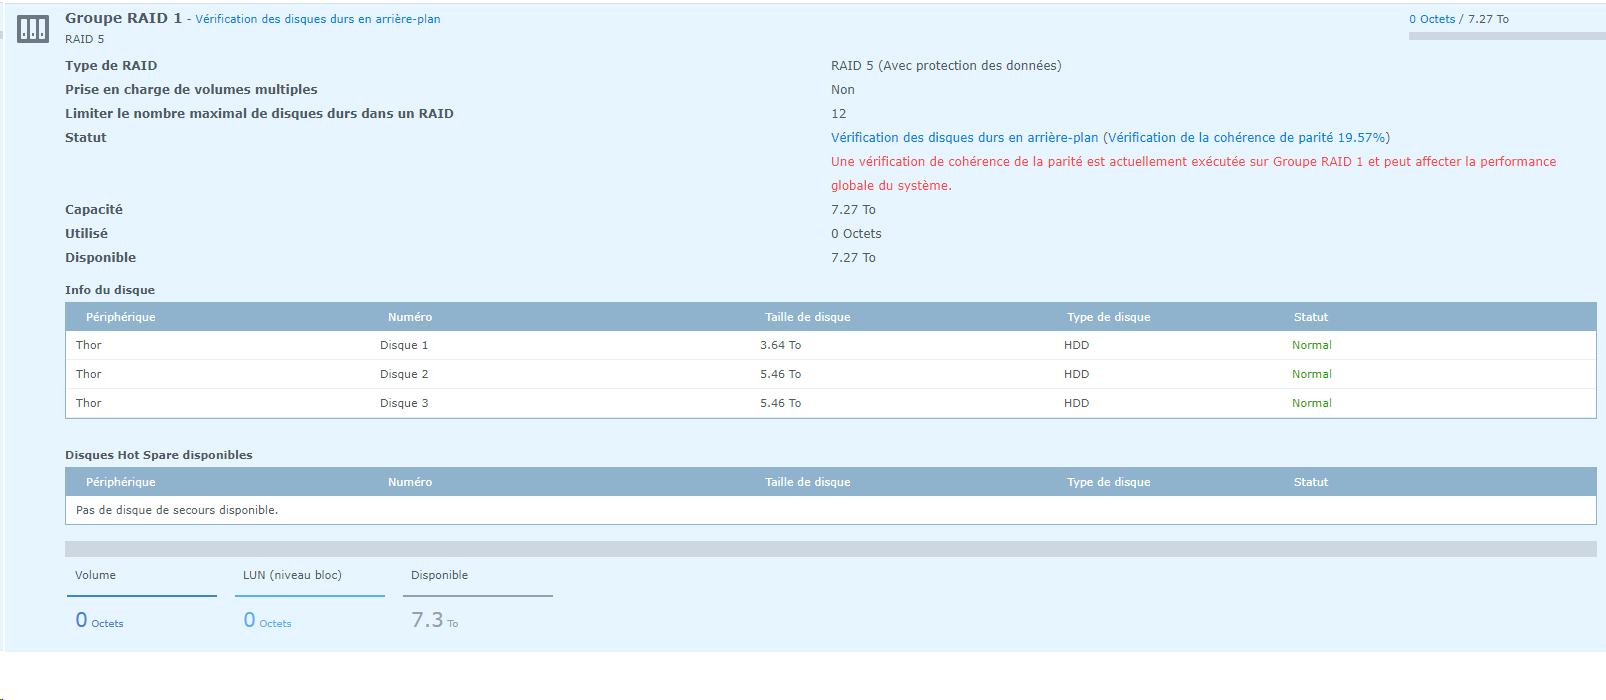
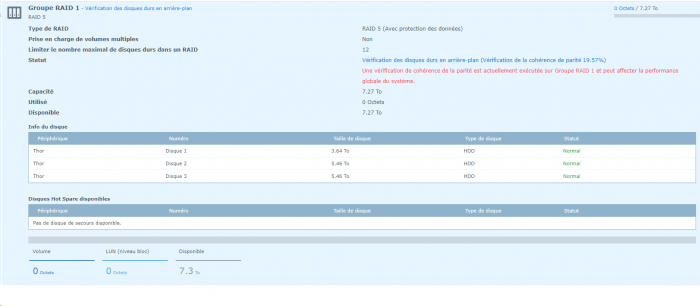
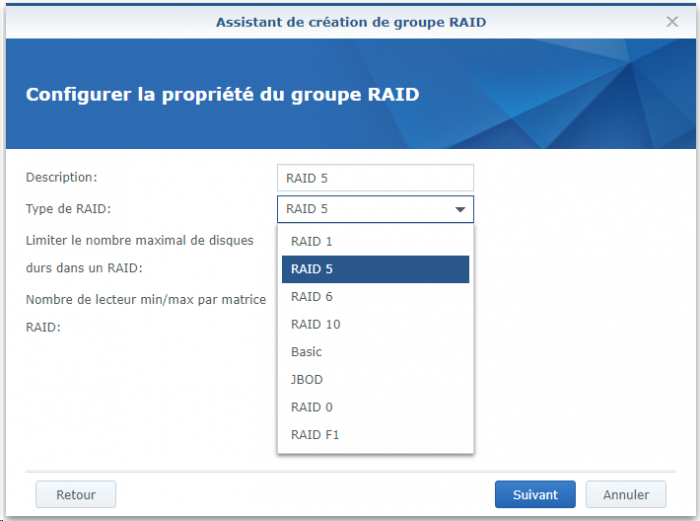
Bonjour à tous. Je viens de repartir sur une version toute neuve en VM sur Esxi. Mais au moment de créer mon Raid, je m’aperçois que je ne retrouve plus le SHR ! Ce qui est fou, c'est que j'ai 3 disques. 4To - 6To et 6To. Pourtant il me propose de créer un raid 5 ! ce qui à ma connaissance n'est pas possible. Normalement, en Raid 5 les 3 disques devraient être de la même taille. Seul le Shr peut créer un Raid avec des disques de tailles différentes ! ? Si quelqu'un peut confirmer. De plus, je devrait avoir un volume total de 10To alors que là, je n'ai de 7To. Une idée ? Peut être ai-je mal fait mon install ? Merci pour vos idées.
-
Hi everybody... I'm used to DSM and synology NAS, as I use one at home (but for my work). I want to give a try to XPEnology... I got a ACER with a i5-4440, 4 gb ram, 1To ... I just want to try it before eventually use it on a stronger hardware. I got some experiences with linux and bootloader (built some hackintoshes these last few years)... I've followed the tutorial, dl-ed the bootloader for DSM6.2, burned the image on the USB drive and ok, my acer is booting on the USB Key, I'm here: So, I go to find.synology.com (after I shutdown my regular Synology, of course, otherwise it would find it at first) annnnnd... nothing. My internet box got a DHCP, everything is properly addressed with it (wired machines got the same IP linked to their MAC adress, wifi ones don't)... What can I do ?? Thanks for help.
-
Hello Forum Board, I am having Issues finding the right files for my HP Pro Liant N54L. The Board is really hard to find out where I could find the Files and Something. I got a HP Pro Liant N54L and now i am searching for the files to Install the new 6.X on it. Can someone please help me out?
-
Anyone able to install tvheadend on 3615xs? I tried the bromolow package linked here (https://tvheadend.org/boards/5/topics/27780?page=1&r=32060) but I keep getting a "Failed to run the package service." at the end of the installation. Of course I have tried installing the version available from the Package Center from the SynoCommunity but that one seems to be old (v3.4.27-6). Thanks.
-
Bonjour à toutes et à tous. J'ai un HP proliant ml150 g5. Lors de l'installation de dsm avec le loader 1.02b + extra lzma il apparaît au bout d'1 minute sur le syno assistant je fais l'install qui se termine normalement et au redémarrage il n’apparaît plus. Création de la clef avec vid, pid, syno sn et mac de la carte reseau. carte réseau tg3 avec la commande lspci -k | grep 'Kernel driver' sous ubuntu je ne comprends plus Aidez moi svp Merçi
-
 Bonjour à tous, un besoin d'aide j'ai deux N54L PROD: un en production avec la dernière version du DSM 5.2 TEST : un qui me sert de test donc je peux tout faire avec J'ai suivi scrupuleusement le tuto d'installation présent sur le site sur TEST pour une fraiche installation. Une fois tout suivi , a clef usb construite, je démarre. J'arrive sur le même écran que sur le tuto où il est demandé de lancer le Synology Assistant. Mais Synology Assistant ne trouve pas mon DSM6 SI je mets la clef USB DSM 5.2 de PROD sur TEST, le synology assistant le trouve immédiatement Celui de test a une particularité c'est qu'il possède une carte réseau Gigabyte supplémentaire. Je ne sais pas comment récupérer l'adresse MAC de cette carte pour la rajouter. Je suis donc bloqué , une petite idée ? Merci par avance.
 -
Hi, wie der Prefix es schon verrät bin ich ein neuling bei XPEnology und hoffe hier mal auf eure Hilfe. Also ich habe hier nen alten Server mit OMV am laufen, würde nun aber gerne XPEnology installieren. Laut einigen nicht aktuellen guides brauche ich nur diese drei Dateien: Boot Image DSM Software Synology Assistant Die links die ich dazu gefunden Habe sind alle down... Bei der Installation würde ich ganz normal vorgen, zuerst den Boot USB mit der .ISO Datei erstellen, darüber booten und installieren. Dann den Assistant starten und somit dann die DSM Sotfware installieren. Jetzt meine Frage: Ist das so überhaupt richtig oder verläuft die Installation inzwischen anders? MFG Konix