Search the Community
Showing results for tags 'install'.
Found 19 results
-
Hello, I came across a Barracuda Terastation TS5600D that did not have disks. On this platform you have to go through a hell hole of problems to get it running again with its original software. So I thought I would give it a try to install the redpill tiny loader. So I downloaded the latest image from: https://github.com/pocopico/tinycore-redpill/releases/tag/v0.9.2.9 Burned it to a usb stick with Rufus. On the back of this NAS there is a mechanical button that will let you select the boot source. I went for USB boot option. Inserted the USB stick and booted the NAS. I also had a monitor connected to the frontal VGA port present on the NAS. It boots in tinycore I went through the install process with the usual commands: From my PC connected via SSH to the ip address configured by my DHCP. Used the following access info: tc/P@ssw0rd Launched: ./rploader.sh update now ./rploader.sh fullupgrade now ./rploader.sh serialgen DS3622xs+ realmac ./rploader.sh identifyusb now ./rploader.sh satamap now (accepted the 6 disk proposed config) ./rploader.sh build dsm-7.1.1-42962 sudo reboot Waited for reboot and fired up Synology assistant, soon the Synology NAS appeared and I connected to it. Selected the relative PAT file and installed. On reboot, reconnected via web and configured the NAS (name password etc.) and the volume. It is working Fine. Tried a file transfer on a SMB share and go 60 Mb/sec on two big files (over 5GB) So terastation can be a cheap option for a good NAS platform. Cheers.
-
 How to fix Error. Thank you.
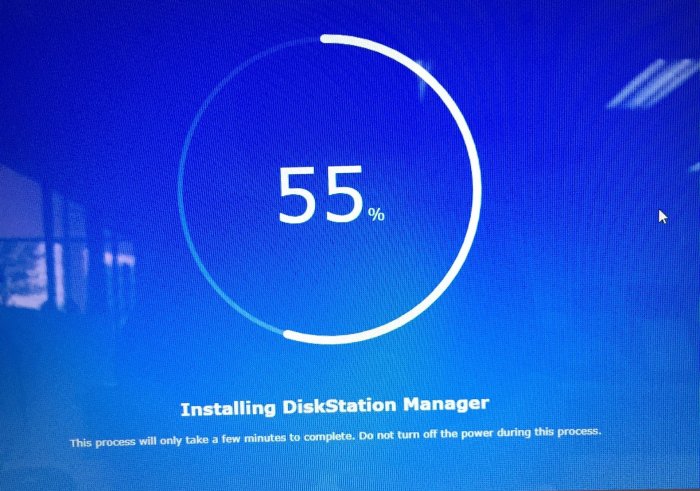
-
This tutorial is a supplement to the ESXi TCRP installation tutorial located here: https://xpenology.com/forum/topic/62547-tutorial-install-dsm-7x-with-tinycore-redpill-tcrp-loader-on-esxi/ Installing DSM 7.1.0.-42661 on UNRAID 6.10.3 I have been trying to install DSM 7.1 on my unraid server for the last night. After some problems and testing I have created this guide to install DSM 7.1 on UNRAID working perfectly. This is my vm config: STEP 1-Virtual machine creation: Download tiny core from https://github.com/pocopico/tinycore-redpill Select CentOS VM Template and apply correct options from the attached image. Select Q35-6.2 Select 3.0 (qemu XHCI) Load tiny red core as vdisk1 USB by selecting manually (you can create previously the name of the folder for the VM inside /domains and upload the tinycore img ) Create secondary disk 50G or whatever you want (this is your data storage for synology) as vdisk2 SATA Select Network model: e1000 Save. Uncheck "Start VM after creation" Edit again vdisk2 in the advanced xml template (top right corner) to controller='1' (if we don't do this tiny red core will not detect the disk properly when doing the satamap and will not install DSM correctly and will ask you to reinstall the *.pat infinitely) STEP 2-Start VM and connect via SSH Start VM and load tiny red core Once the OS is loaded, open the terminal and enter ifconfig to find out the ip of the machine Connect via ssh (with Putty) to the obtained IP address. user: tc password: P@ssw0rd STEP 3-Run the following commands: To update tiny red core with the latest data ./rploader.sh update now ./rploader.sh fullupgrade now To generate random mac and serial numbers (copy mac address generated to set on unraid vm template later) ./rploader.sh serialgen DS918+ (or whatever version you want, you can see all versions available with command info ./rploader.sh) To map the connected disks ./rploader.sh satamap now To record the vid/pid from usb ./rploader.sh identifyusb now To install NIC drivers (sometimes it loads the e1000e module instead of the e1000 and it doesn't work, adding this command will make sure that the e1000 module for the NIC is loaded correctly) For e1000 Network Card run: ./rploader.sh ext apollolake-7.1.0-42661 add https://raw.githubusercontent.com/pocopico/rp-ext/master/e1000/rpext-index.json NOTE: change version according your selection for CPU and DSM version For virtio-net Network Card run: ./rploader.sh ext apollolake-7.1.0-42661 add https://raw.githubusercontent.com/pocopico/rp-ext/master/v9fs/rpext-index.json NOTE: change version according your selection for CPU and DSM version To build the image ./rploader.sh build apollolake-7.1.0-42661 STEP 4-Download your .pat for your correct cpu architecture from official repo or mega download for this version apollolake , we will need it to install DSM later. https://global.download.synology.com/download/DSM/release/7.1/42661-1/DSM_DS918%2B_42661.pat - Offical repo STEP 5-Edit VM settings on advanced xml mode and install *.pat After doing all the above we shut down the machine. Edit the virtual machine on xml advanced mode (if we change mac address in normal editing mode you will lose controller="1" option set for vdisk2 we did previously so you will have to set it again everytime you change and/or save a setting from normal mode, try to edit always in xml advanced mode), look for MAC address and set the MAC generated by tiny red core. Save Start VM Select the first option USB and leave it a few minutes until we find it with synology assistant Open WebGui and install *.pat We now have DSM 7.1 working on unraid. There is other method with SATA boot but I have to test it better. Hope this guide help someone. Regards.
-
 @flyride Since the first TinyCore release I have my DS918+ up and running. Recently I came into the possession of a X550-T2 (2 ports) and I would like to use it. My DS918+ it's not a baremetal but a VM. I know how to pass-through 1 of the ports. The question here is how do add the ixbe driver to loader in order to identify the new network card without messing everything up. Any particular commands that I need to run? I prefer not to rebuild the loader because a lot of stuff have change in TCRP since then... for example Jumkey's ACPI used to work on DS918+ not it does not. Any advice is much appreciated...
 -
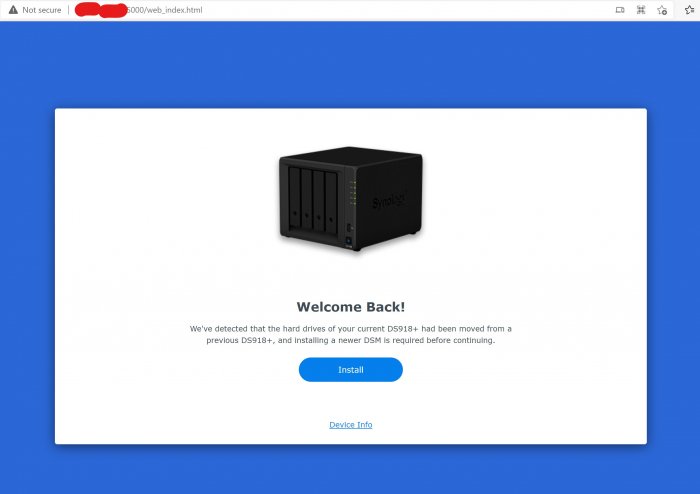
 Dear all, today I tried to install from scratch a new DSM_DS918+ 7.1-42661. Just one Harddisk connected to SATA0 and did the steps (I did this already several times with other hardware). But today I have a new issue. The first *.pat file installation seems to be successful, but after reboot I always get the "Welcome Back" Message, and I have to re-install it several times... now Idea what is wrong
 -
 I build DVA3221 under PVE 7. Hope to Turn off the kvm. I used the following command to add ACPI. But it doesn't seem to work. Where did I do something wrong? ./rploader.sh ext denverton-7.1.0-42661 add https://github.com/pocopico/redpill-load/raw/develop/redpill-acpid/rpext-index.json I see someone suggesting that you use https://github.com/jumkey/redpill-load/tree/develop/redpill-acpid/rpext-index.json. Is there any difference between them?
 -
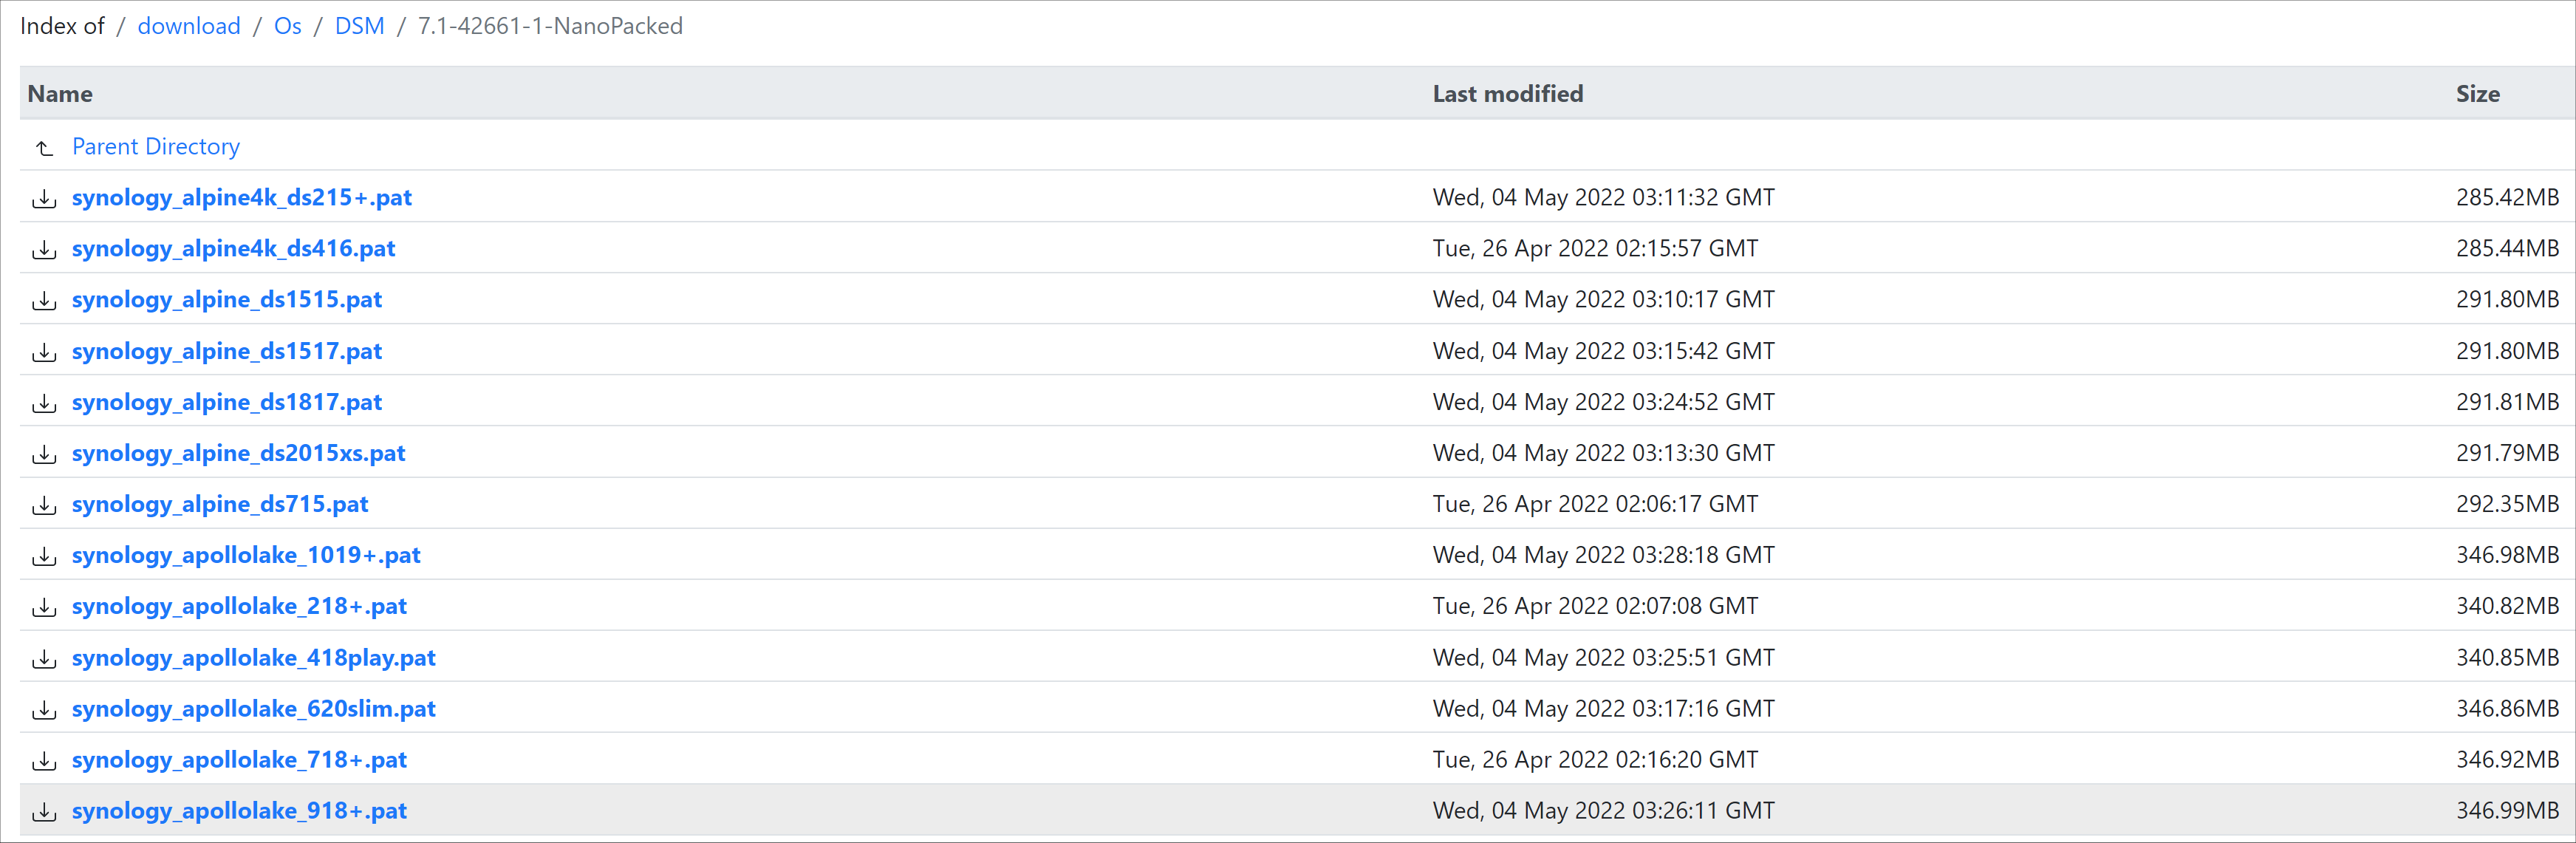
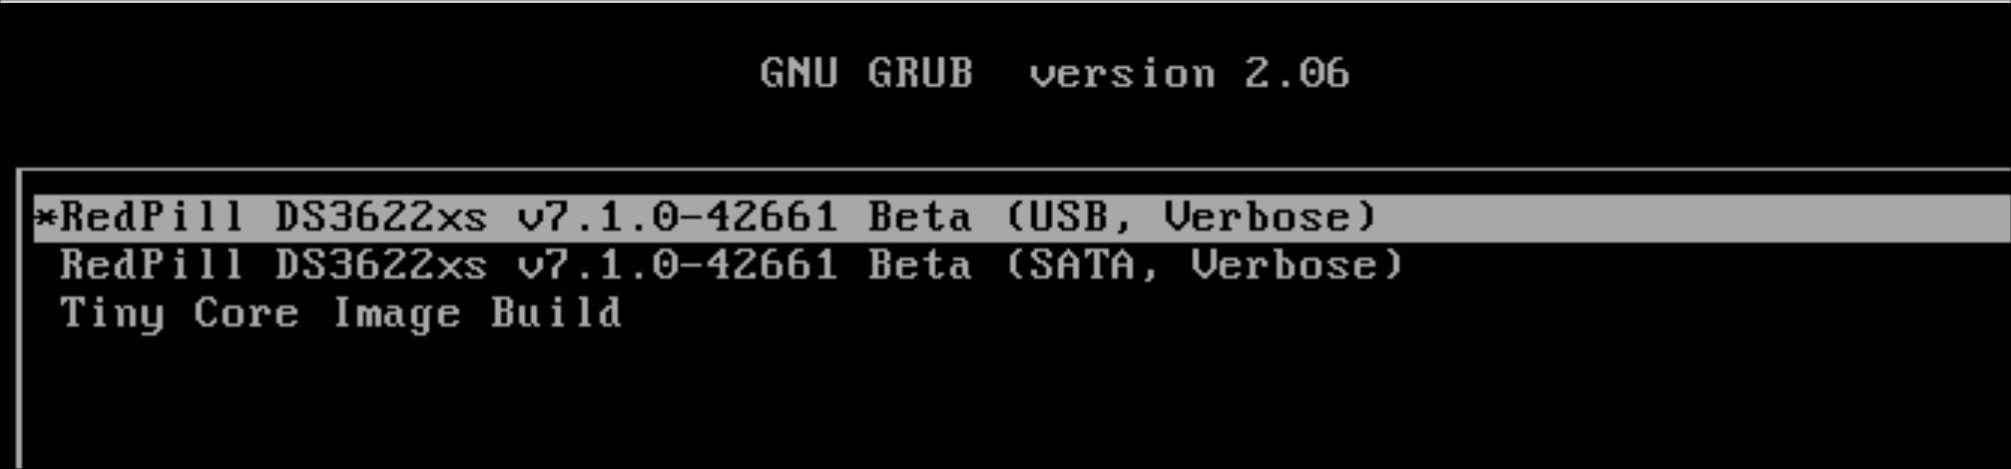
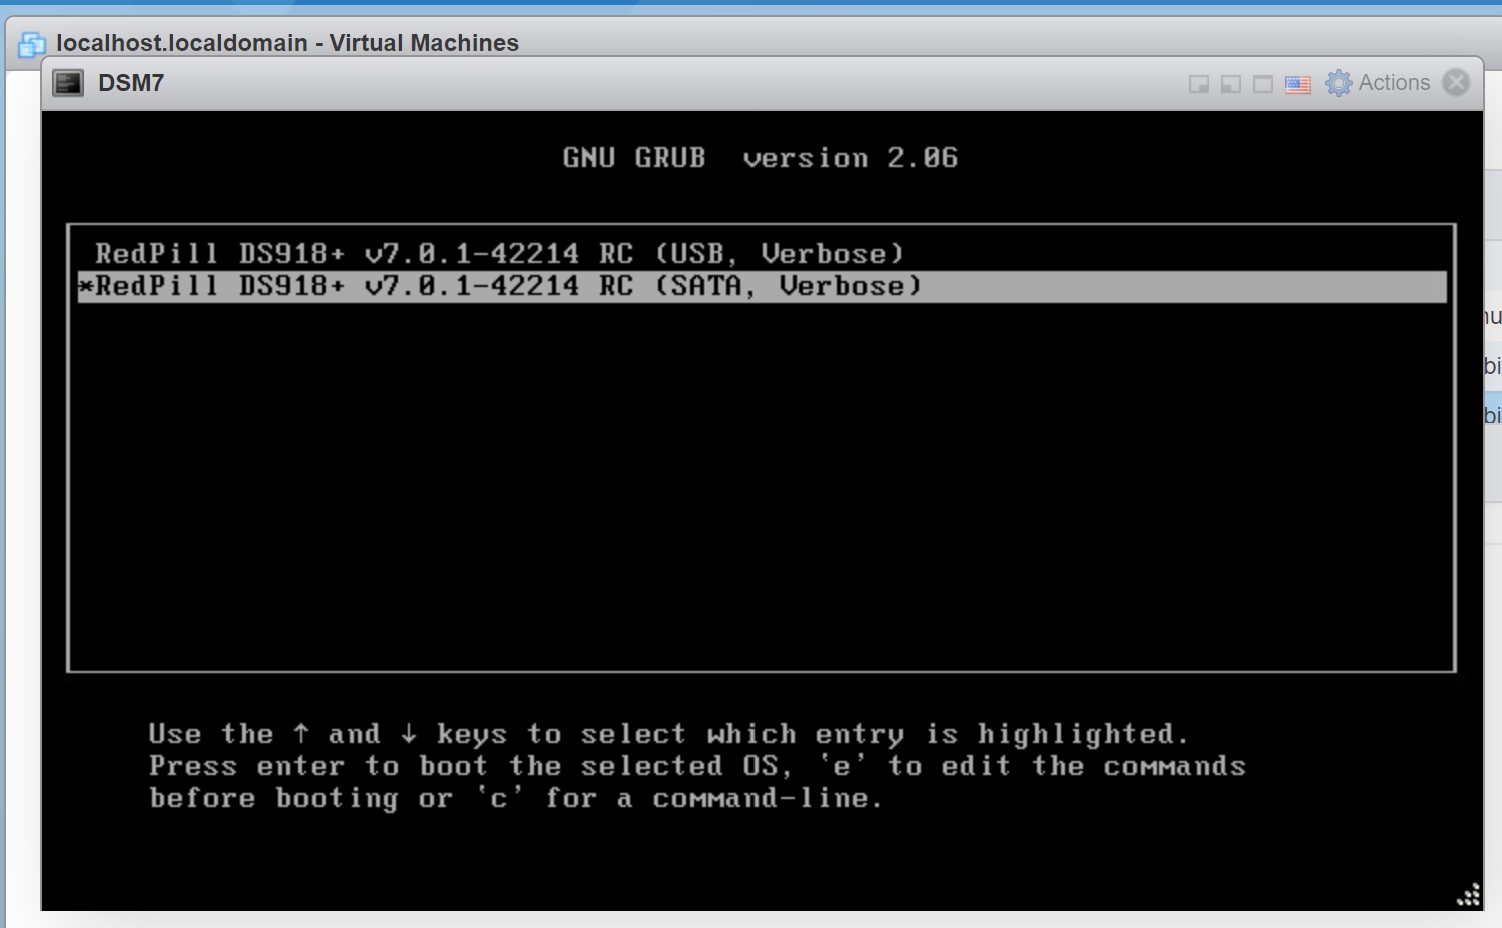
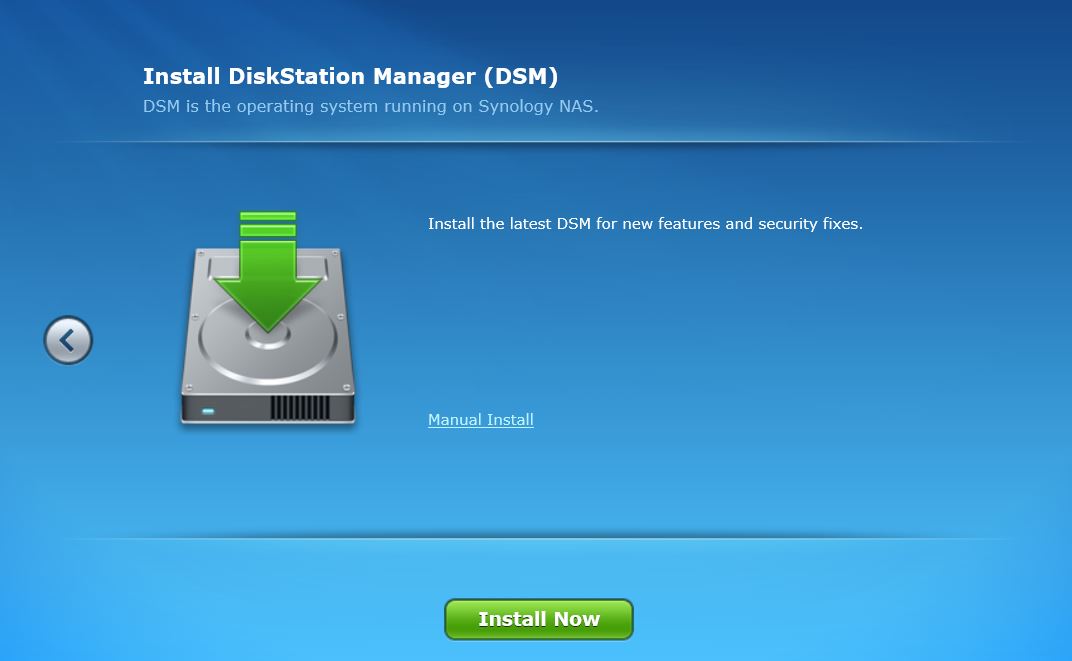
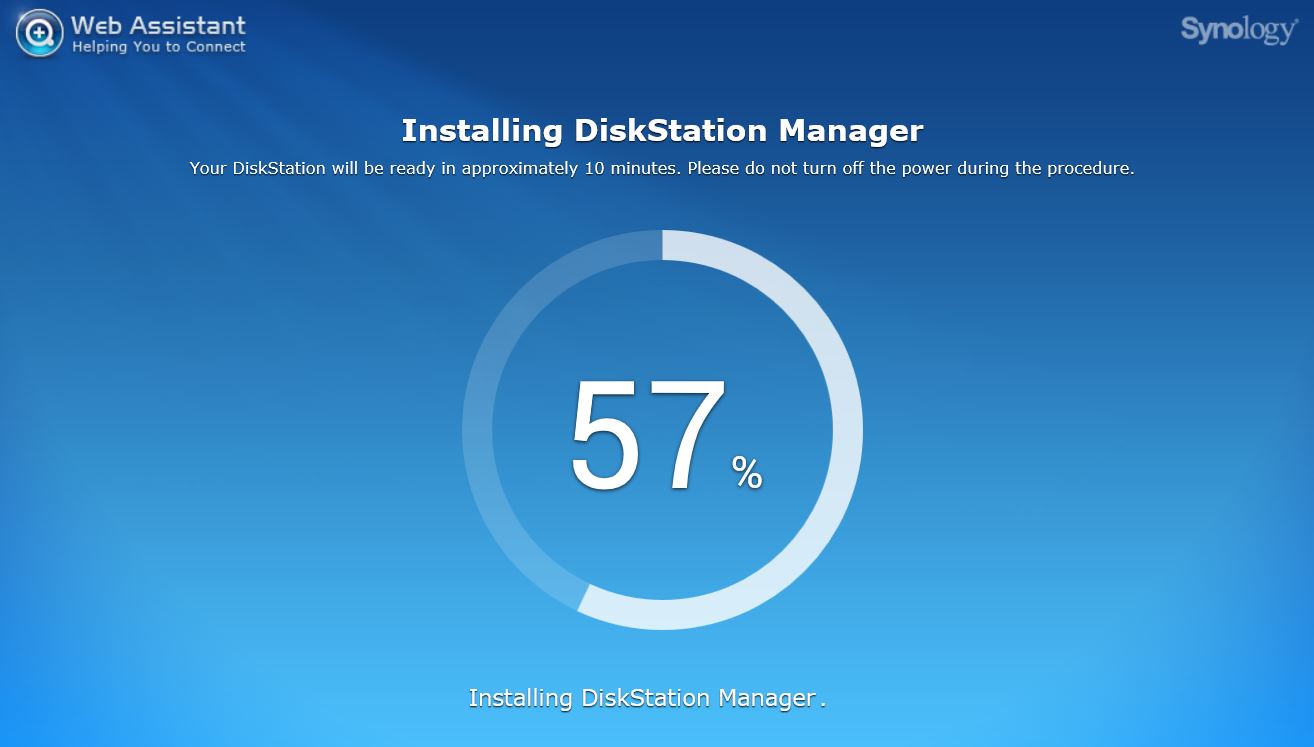
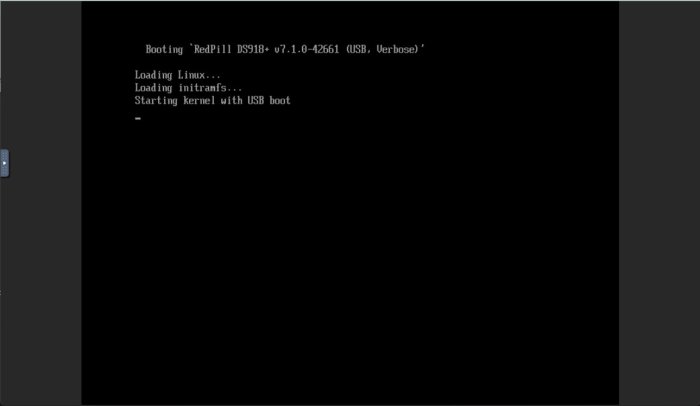
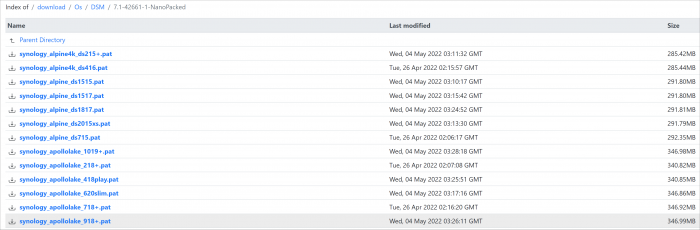
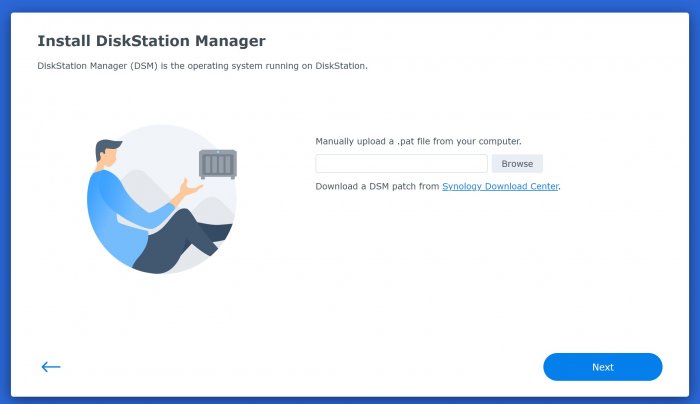
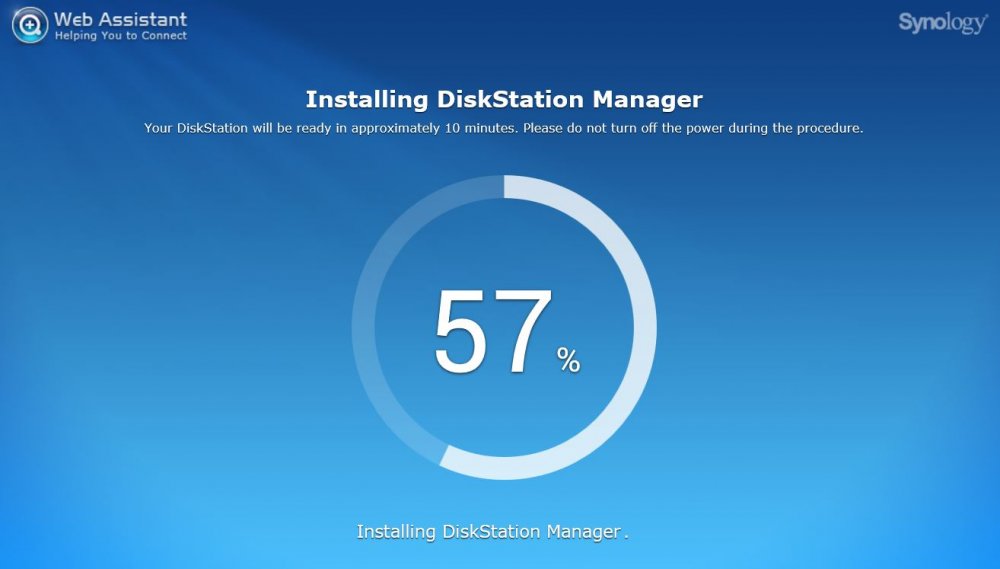
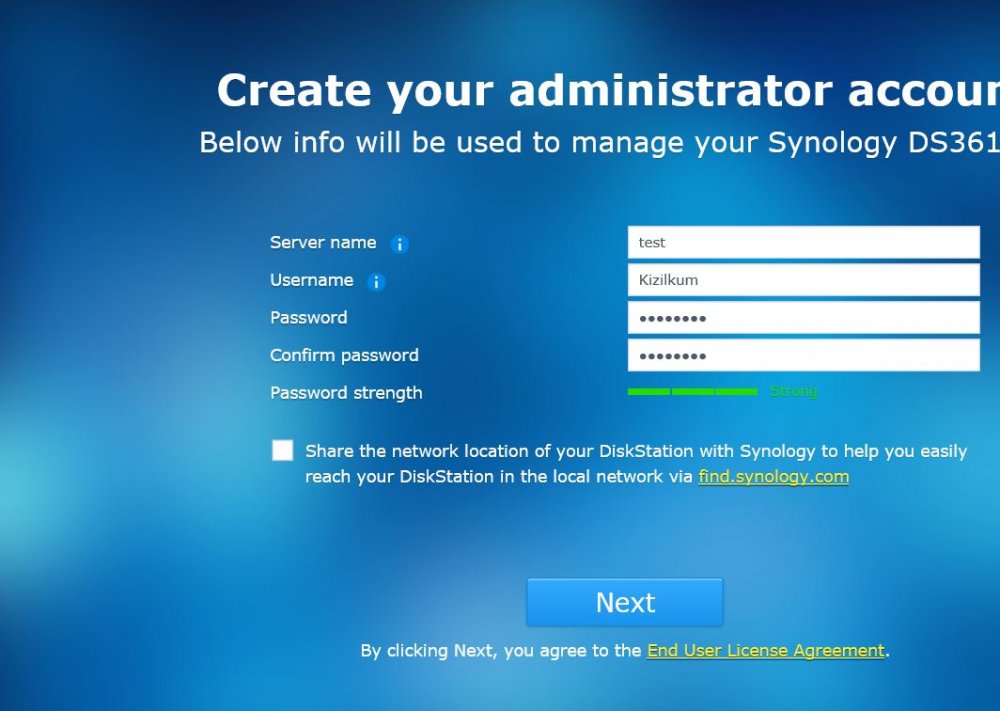
 Loader Information and Background RedPill is the core technology that enables DSM 7.x to run on non-Synology hardware. This post is intended to serve as a definitive tutorial/reference for configuring @pocopico's TinyCore RedPill (TCRP) loader. It explains how to install TCRP on baremetal, i.e. with DSM as the only operating system on your NAS hardware. A tutorial to install TCRP using the ESXi hypervisor is located here. There are other hypervisor tutorials in the Tutorials and Guides forum. TCRP uses a two step-process. First, a Linux OS (TinyCore) boots and evaluates the NAS hardware configuration. Therefore, it is best to have the hardware you plan to use (disk controllers and network cards in particular) installed prior to starting the TCRP setup. Then, an individualized loader (RedPill) is created. This loader is used to install and run DSM. After that, you can switch between starting DSM with RedPill, and booting back into TinyCore to adjust and rebuild the loader as needed. Basic Linux command line skills are needed to complete the installation. The tutorial provides examples of the commands that are needed, but exact syntax and capitalization are critical. If unfamiliar, research and review the following minimal list of commands: ls show the files in the current directory cat <file> show the contents of the specified file pwd show the current directory name cd <directory path> change to the specified directory (same rules as Windows, except with forward slashes instead of backslashes). With no argument, it returns to the “home” TCRP directory vi <file> a file editor, for manual editing of configuration files if required Ongoing Development This tutorial is maintained for consistency with the pocopico stable repository. Since TCRP is completely open-sourced, anyone can fork their own repo and contribute to development, and pocopico now maintains a separate development repo. As the best features and ideas are fully vetted and tested, they may be incorporated into the stable repo over time. If you use a repo, script or shell other than the pocopico stable repo, the loader may behave quite differently and the instructions and troubleshooting steps in this tutorial might no longer apply. In an open-source community, you can use any development resource you want, but you add the additional responsibility of understanding, vetting and testing that code on your system. Migration Step 1. Choose a DSM Platform/Architecture Evaluate your intended NAS hardware and your the intended use of DSM, and select a platform that best meets your needs. Reference information here: https://xpenology.com/forum/topic/61634-dsm-7x-loaders-and-platforms/ Write down the selected platform (e.g. DS918+), the corresponding architecture (e.g. apollolake) and whether the platform uses SataPortMap/DiskIdxMap or Device Tree for slot mapping. This information will be needed later. Now, make sure the NAS hardware is compatible, and prepare it correctly: x86-64-compatible CPU with two cores or more Each platform have maximum threads support! Any threads in excess will be ignored For certain platforms, Intel CPUs must be 4th generation “Haswell” or newer with FMA3 instruction set The corresponding AMD CPU architecture is “Piledriver” or newer AMD-based systems may require deactivation of the C1E option in the BIOS 2GB of RAM or more 2GB or larger USB flash drive Configure the BIOS to boot from the USB flash drive ONLY SATA disk controllers are preferred, but SCSI/SAS are compatible IMPORTANT: All SATA controllers must be configured to AHCI mode SATA controllers with port multipliers are not compatible ATA controllers are not compatible (disable embedded ATA in BIOS if possible) At least one SATA/SCSI/SAS drive (HDD or SSD), minimum size 21GB IMPORTANT: Enable SATA port hotplug on each disk port, if hotplug is supported by the BIOS/controller IMPORTANT: Disable M.2 SATA ports that are not in use, if supported by the BIOS/controller NVMe drives are not usable except as dedicated cache devices Host Bus Adapters are not currently compatible with Device Tree platforms Install any NVMe drives intended as cache devices On Device Tree platforms, NVMe drives must be installed prior to loader installation in order for them to be recognized Step 2. Download TCRP and Write Image to the USB Flash Drive The latest pocopico stable loader code is always linked here: https://xpenology.com/forum/topic/7848-links-to-loaders/ Download the tinycore-redpill 7.x loader and save it to your personal computer. Then, open it with a zip manager to show the boot images: tinycore-redpill.vX.X.X.img.gz (for BIOS/CSM/Legacy boot from USB flash drive) tinycore-redpill-uefi.vX.X.X.img.gz (for UEFI/EFI boot from USB flash drive) tinycore-redpill.vX.X.X.vmdk.gz (for virtual machine SATABOOT from disk image) Select the boot image that matches the boot capability of the NAS motherboard. If unsure, choose BIOS/CSM/Legacy boot. Save the gzip file to your personal computer, then open it with a zip archive manager and save the uncompressed version. Write the uncompressed image to the USB flash drive using Win32DiskImager or other appropriate tool. The USB flash drive is used to store TinyCore and the RedPill loader that it generates. It is a permanent component of an operational XPEnology system. Do not remove it, even after the DSM installation is complete and the NAS is fully up and running. Step 3. Boot into TinyCore and Complete Pre-Configuration Updates Start your NAS with the USB flash drive installed and TinyCore will boot. Then, launch a command-line session with either of these methods: Click the Terminal icon at the bottom right of the TinyCore desktop to launch a console window Use a ssh client (e.g. PuTTY) on your computer to connect a network-based console Consult your DHCP server/router for the IP address assignment (TinyCore's host name is "box") Login credentials: tc/P@ssw0rd When the Linux command line prompt ($) is displayed, update the TCRP script ./rploader.sh update Checking Internet Access -> OK Checking if a newer version exists -> There is a newer version on the repo should we use that ? [yY/nN] Y OK, updating, please re-run after updating Updating tinycore loader with latest updates Backing up files to /mnt/sda3//mydata.tgz Then, update the TCRP support files ./rploader.sh fullupgrade <downloads snipped> Current /home/tc size is 114M , try to keep it less than 1GB as it might not fit into your image Should i update the sda with your current files [Yy/Nn] Y Backing up home files to sda : Backing up files to /mnt/sda3//mydata.tgz Finally, choose a DSM release number Each DSM build as provided by Synology has a release number. You can display the combinations of platforms and releases supported by TCRP by just running the script with no arguments ./rploader.sh <command help snipped> Available platform versions: ---------------------------------------------------------------------------------------- apollolake-7.0-41890 apollolake-7.0.1-42218 apollolake-7.1.0-42661 broadwell-7.0.1-42218 broadwell-7.1.0-42661 broadwellnk-7.0.1-42218 broadwellnk-7.1.0-42661 bromolow-7.0.1-42218 bromolow-7.1.0-42661 denverton-7.0.1-42218 denverton-7.1.0-42661 geminilake-7.0.1-42218 geminilake-7.1.0-42661 v1000-7.0.1-42218 v1000-7.1.0-42661 Step 4. Configure System-Specific Parameters Custom system parameters are stored in the user_config.json file. This can be manually edited, or TCRP can help determine appropriate values for the hardware. USB flash drive VID/PID: TCRP can query the USB flash drive for the hardware vid/pid values that DSM uses to identify the loader during bootup ./rploader.sh identifyusb Found: Superdisk Flash SerialNumber: 123456 Vendor ID: 0x1234 Product ID: 0x0001 Should i update the user_config.json with these values ? [Yy/Nn] Y Serial number/MAC: TCRP can automatically generate a serial number for the platform selected in step 1. Additionally, it will generate a random MAC address for the NAS network card. If you prefer to use the actual hardware MAC address instead, append "realmac" to the command. Example 1: random MAC address ./rploader.sh serialgen DS3622xs+ Serial Number for Model : 20C0SQRLR47QM Mac Address for Model DS3622xs+ : 00:11:32:80:B2:36 Should i update the user_config.json with these values ? [Yy/Nn] Y Example 2: real MAC address ./rploader.sh serialgen DS3622xs+ realmac Serial Number for Model : 2150SQRGS7N5T Mac Address for Model DS3622xs+ : 00:11:32:57:3A:9B Real Mac Address : 00:0C:24:62:3E:3D Notice : realmac option is requested, real mac will be used Should i update the user_config.json with these values ? [Yy/Nn] Y Drive Slot Mapping: TCRP can try to determine how to map the NAS disk controller ports to DSM slots. If the chosen platform uses SataPortMap/DiskIdxMap for port mapping, the command below will do this. If it uses Device Tree for slot mapping, the command may be skipped, as the Device Tree is configured automatically during the loader build. ./rploader.sh satamap Found "02:02.0 SATA AHCI controller" Detected 4 ports/2 drives. Override # of ports or ENTER to accept: <4> Recommended settings: SataPortMap=4 DiskIdxMap=00 Should I update the user_config with these values ? [Yy/Nn] Y If the port count is not what you expect, it may be due to the motherboard design servicing physical ports with multiple controllers, or because of M.2 SATA slot support. If necessary, the port count can be overridden with whatever you like. NOTE: If you see a WARNING message, it is certain that either some of your drives are inaccessible or the DSM install will encounter problems. Evaluate and investigate the issue. The satamap command can be rerun as many times as needed to understand the system. Manual Review: With prior loaders (such as Jun's), the configuration of these parameters was completely manual. There is no single setup that works for all hardware. Even after using the tools above, please review and verify the parameters, understand what they do, and manually edit if needed. Whatever changes rploader.sh makes to the user_config.json file can be reviewed by displaying the file contents cat user_config.json and overridden by editing the file vi user_config.json You can also add a simpler editor, nano tce-load -iw nano nano user_config.json And there is also a graphical editor accessible from the TinyCore desktop Step 5. Optional: Manually Add Driver Extensions While TCRP can automatically add drivers based on the detected NAS hardware, it isn’t foolproof. You might want to build a loader for a device you don’t actually have yet. And there are features that are "opt-in" only. So, a process exists to manually add drivers and other functionality. Extensions are stored in repositories hosted on the web. All the extensions in the main repository are viewable here: https://github.com/pocopico/rp-ext To list all the extensions recommended by TCRP's hardware detection algorithm, use ./rploader.sh listmods <architecture>-<version>-<DSMreleasenumber> ./rploader.sh listmods apollolake-7.1.0-42661 To add a specific extension, choose from the list and reference the architecture from Step 1. ./rploader.sh ext <architecture>-<version>-<DSMreleasenumber> <extensionurl> ./rploader.sh ext apollolake-7.1.0-42661 add https://raw.githubusercontent.com/pocopico/rp-ext/master/redpill-acpid/rpext-index.json ./rploader.sh ext denverton-7.1.0-42661 add https://raw.githubusercontent.com/pocopico/rp-ext/master/v9fs/rpext-index.json The examples illustrate adding ACPI and VIRTIO support. These are often chosen enhancements to a basic installation. Step 6. Build the Loader When all preparation steps are complete, build the loader using the command structure ./rploader.sh build <architecture>-<version>-<DSMreleasenumber> Example #1: DS3622xs+, auto detect hardware ./rploader.sh build broadwellnk-7.1.0-42661 Example #2: DS918+, use preselected drivers ./rploader.sh build apollolake-7.1.0-42661 manual TCRP will download resources from the Internet to complete the complex process of the loader build. When finished, it will write it to the USB flash drive and add new items to the GRUB boot menu. Review the output for any errors and make corrections if necessary. Step 7. Optional Backup Tasks Save the TinyCore configuration state as the default, so that the next boot of TInyCore starts with all your settings ./rploader.sh backup Back up the generated RedPill loader partition to available space on the USB flash drive ./rploader.sh backuploader Step 8: Restart and Boot DSM Using the Grub USB Option Cleanly shutdown and reboot with the TinyCore command exitcheck.sh reboot First, the GRUB Menu is displayed. If necessary, use the arrow keys to ensure that USB is selected and press ENTER. The loader will show some initialization information and silently boot DSM. Nothing else will be displayed unless a serial console is attached (see the Troubleshooting section below). Wait a few minutes, then launch either https://find.synology.com or the Synology Assistant desktop utility. If the loader is working properly, a new "SynologyNAS" will be displayed as Not installed (for a new build) or the name of your existing Migratable NAS (if upgrading from a previous version). Use your browser to connect to the NAS. If "Something went wrong" is displayed, jump to the Basic Troubleshooting section below. Otherwise, browse to the Synology Download Center and download the DSM install PAT file that matches the platform and release number specified in the loader build. Do not use the PAT file stored in TinyCore. It has modifications that are incompatible with DSM installation. However, its name may help identify the correct PAT file to download below. There can be several files that appear to be candidates. PAT files marked VirtualDSM will not work. Also there can be patch PAT files with the same numbering. These will not work and will usually be smaller than 50MB. The correct PAT file is 300MB or larger. Once the correct DSM PAT file is saved to your personal computer, upload it to the NAS. Follow the prompts to complete the installation. FOR UPGRADES ONLY: If Synology Assistant shows Not installed, or if prompted to erase the disks during the upgrade, STOP! Some or all of your array disks are not visible to DSM. This must be resolved via troubleshooting and reconfiguration before installing DSM 7.x. IMPORTANT: During the install, always select DSM manual updates. If a new install completes normally, but then fails after the reboot, it may be that DSM has attempted to auto-update itself with incompatible code. Basic Troubleshooting Where to Post for Help It’s easy for requests for installation help to get lost in various unrelated forum threads. Post requests for help as a new topic in the DSM Installation Forum. At a minimum, state the hardware configuration, selected platform, DSM version, user_config.json information (delete or redact the serial number and configured MAC address) and any information from debugging analysis that you have done. DON’T post general requests for help on this thread. Please DON’T post general requests for help on TCRP or RedPill development threads unless providing feedback on a dev issue.


- 156 replies
-
- 40
-

-

-
Voici ma méthode sur Proxmox [DS3622xs+] Pré-requis : 1 - Être sur Promox 2 - Mettre Sa carte Réseau en Intel e1000 (Ce qui voudrait dire que le pilote que vous aller installer est celui de intel et non virtio.) Sur Tiny Core en Ssh : sudo su (important pour ajouter le pilote Intel) ./rploader.sh update now ./rploader.sh fullupgrade now ./rploader.sh serialgen DS3622xs+ ./rploader.sh satamap now ./rploader.sh ext broadwellnk-7.0.1-42218 add https://raw.githubusercontent.com/pocopico/rp-ext/master/e1000/rpext-index.json ./rploader.sh build broadwellnk-7.0.1-42218 ./rploader.sh backup now ( Pour Sauvegarder tous ce que vous venez de faire) Pour Passer de DSM 7.0.1 à 7.1.0-42661 enchaîner avec cette commande (ça peut ne pas marcher): ./rploader.sh clean now ./rploader.sh build broadwellnk-7.1.0-42661 ./rploader.sh clean now rm -rf /mnt/sdb3/auxfiles rm -rf /home/tc/custom-module ./rploader.sh backup now N'oubliez pas de vérifier le Vid et le Pid dans User config json avant chaque build voir la video de @Sabrina

-
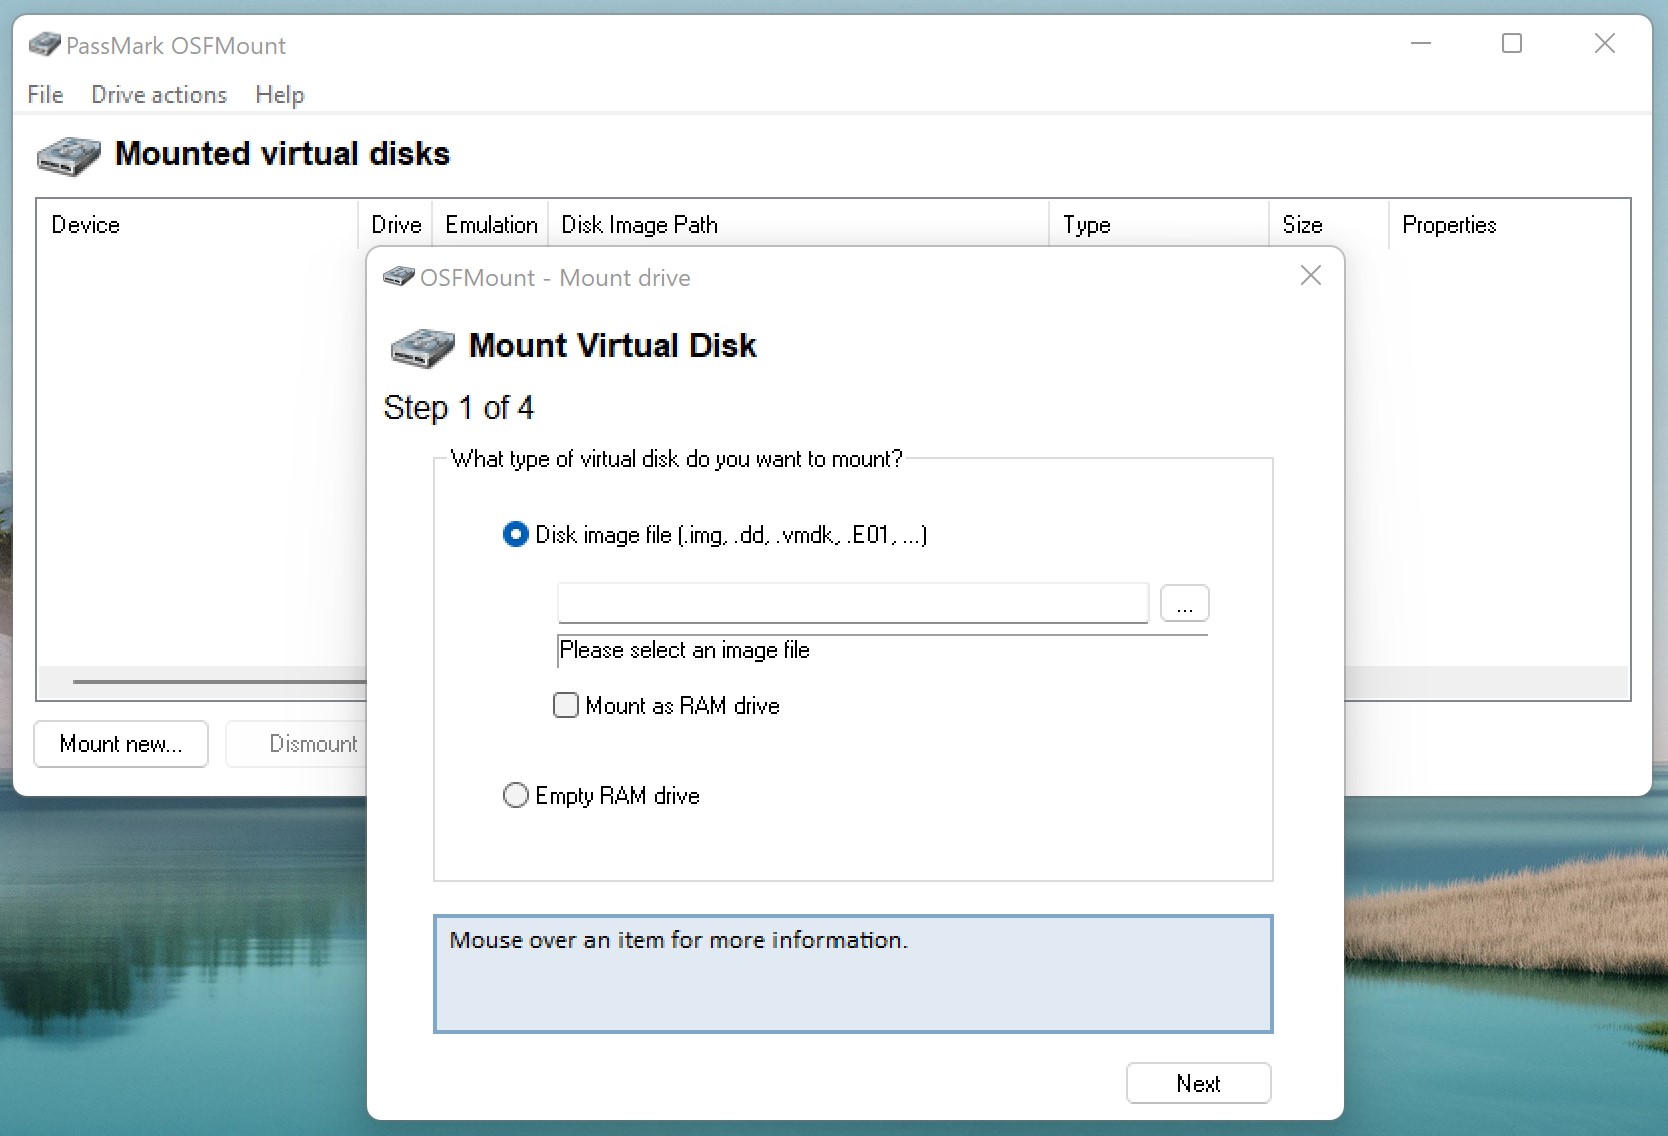
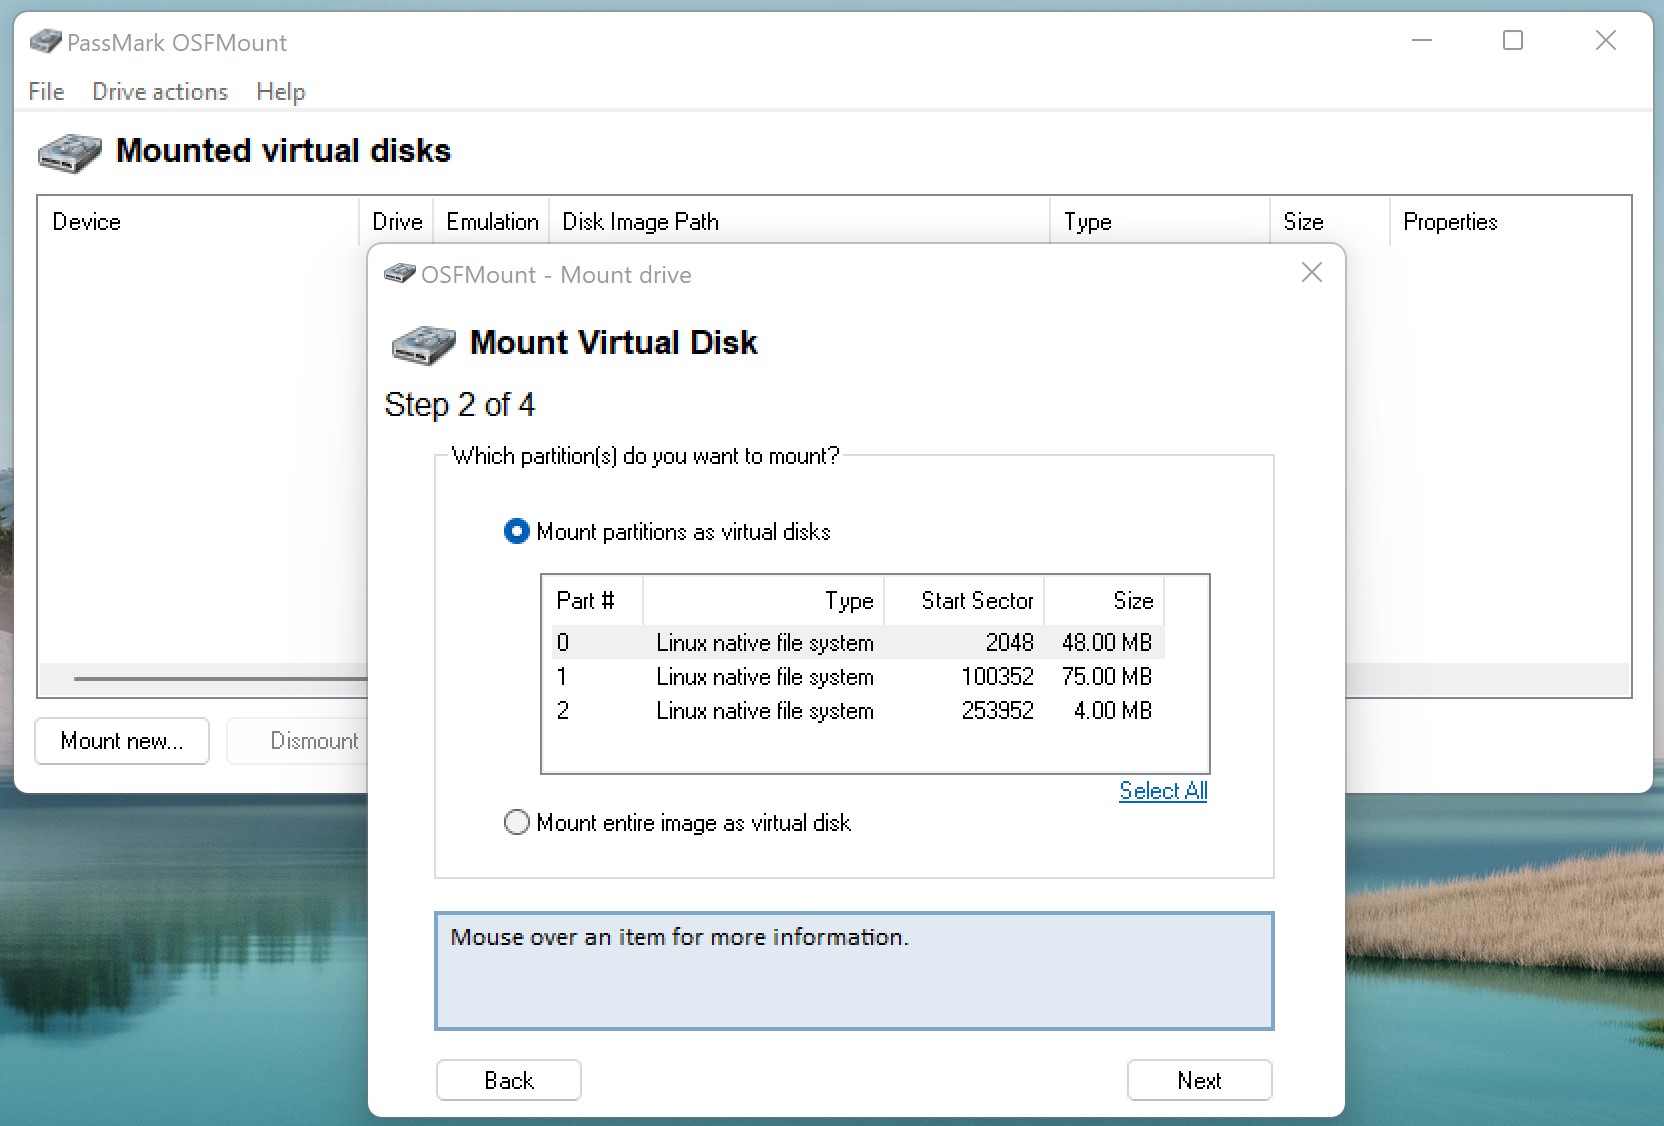
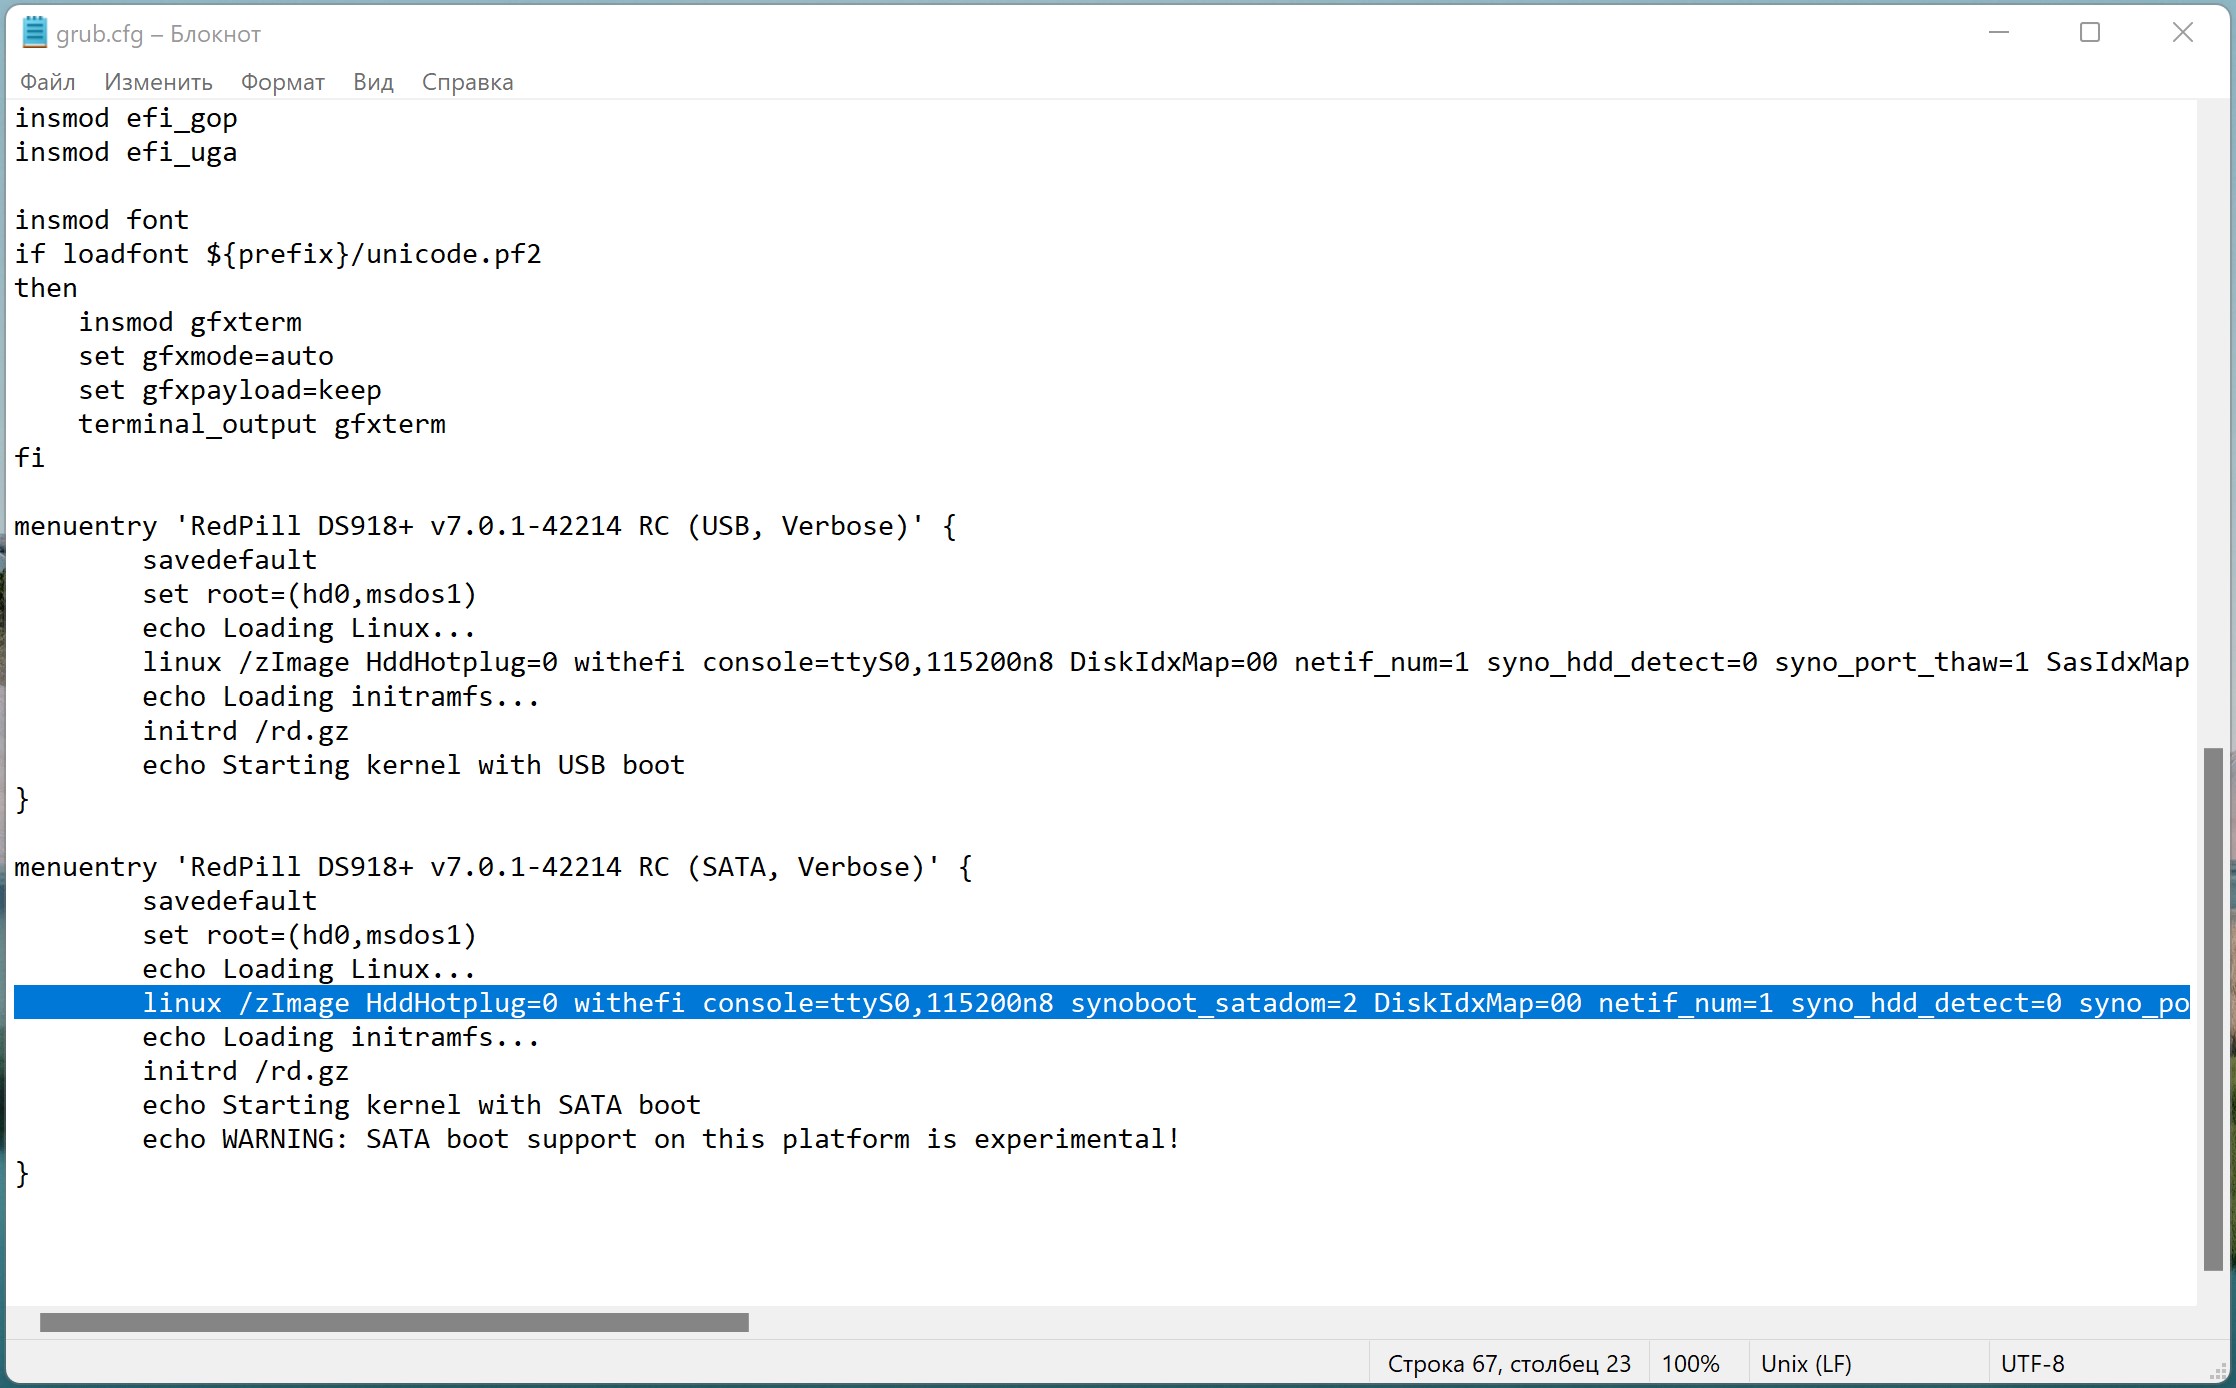
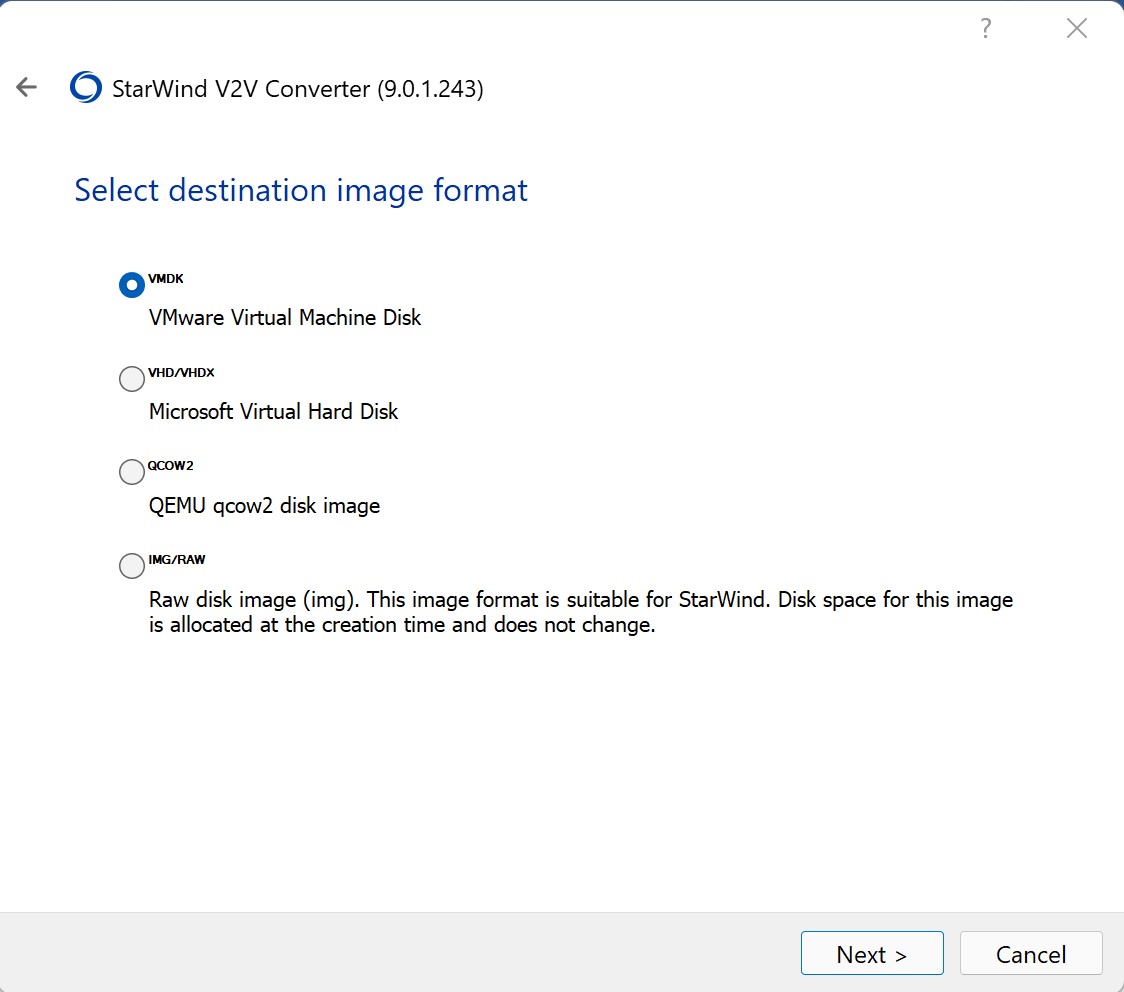
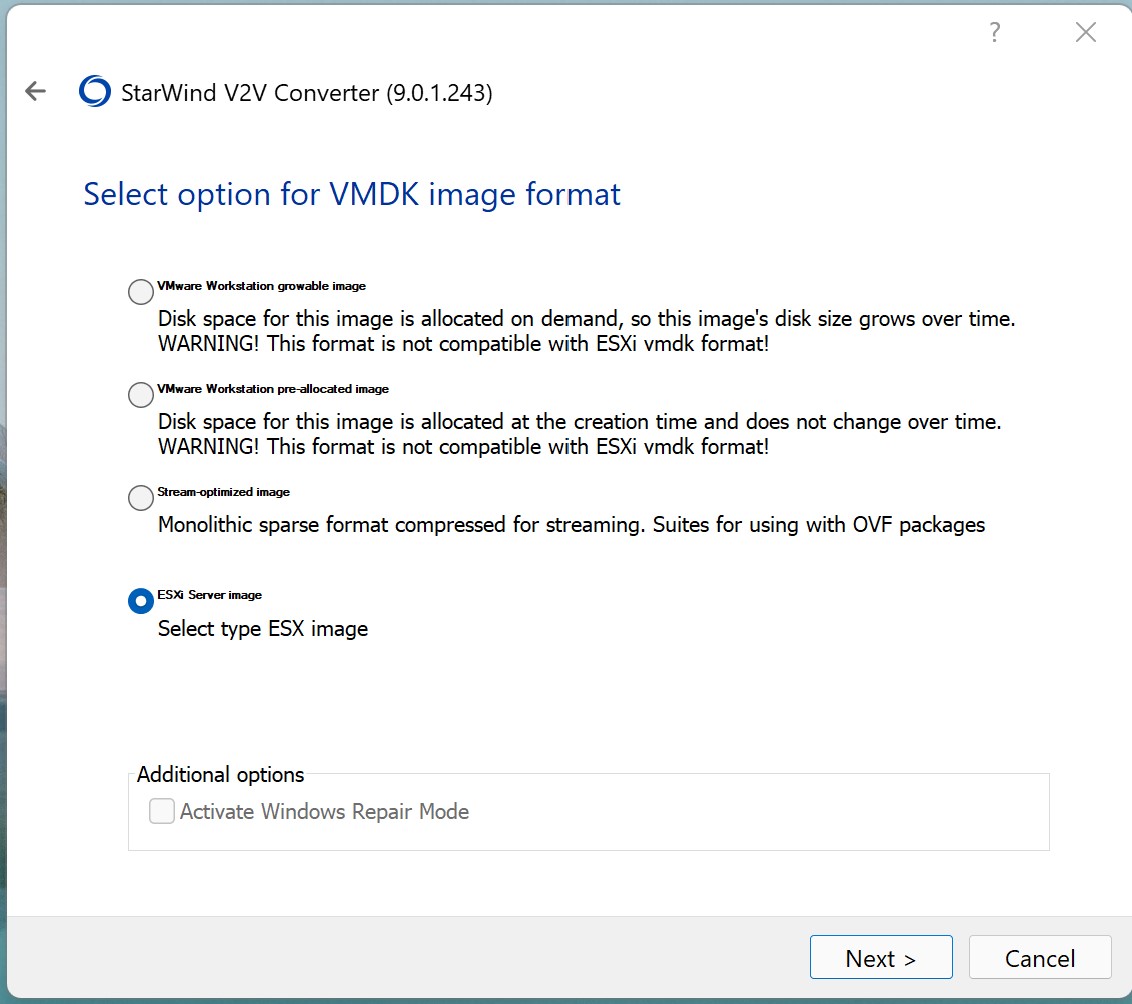
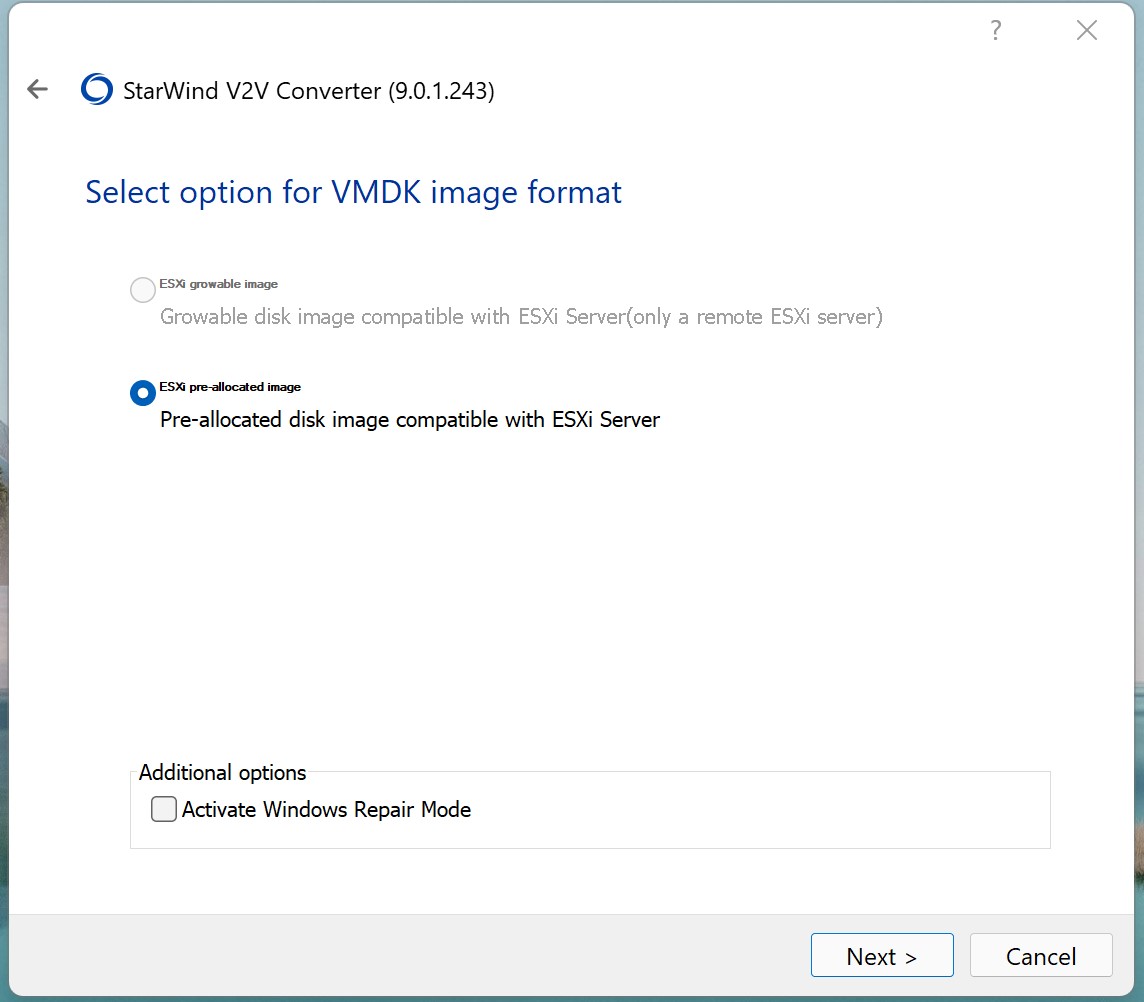
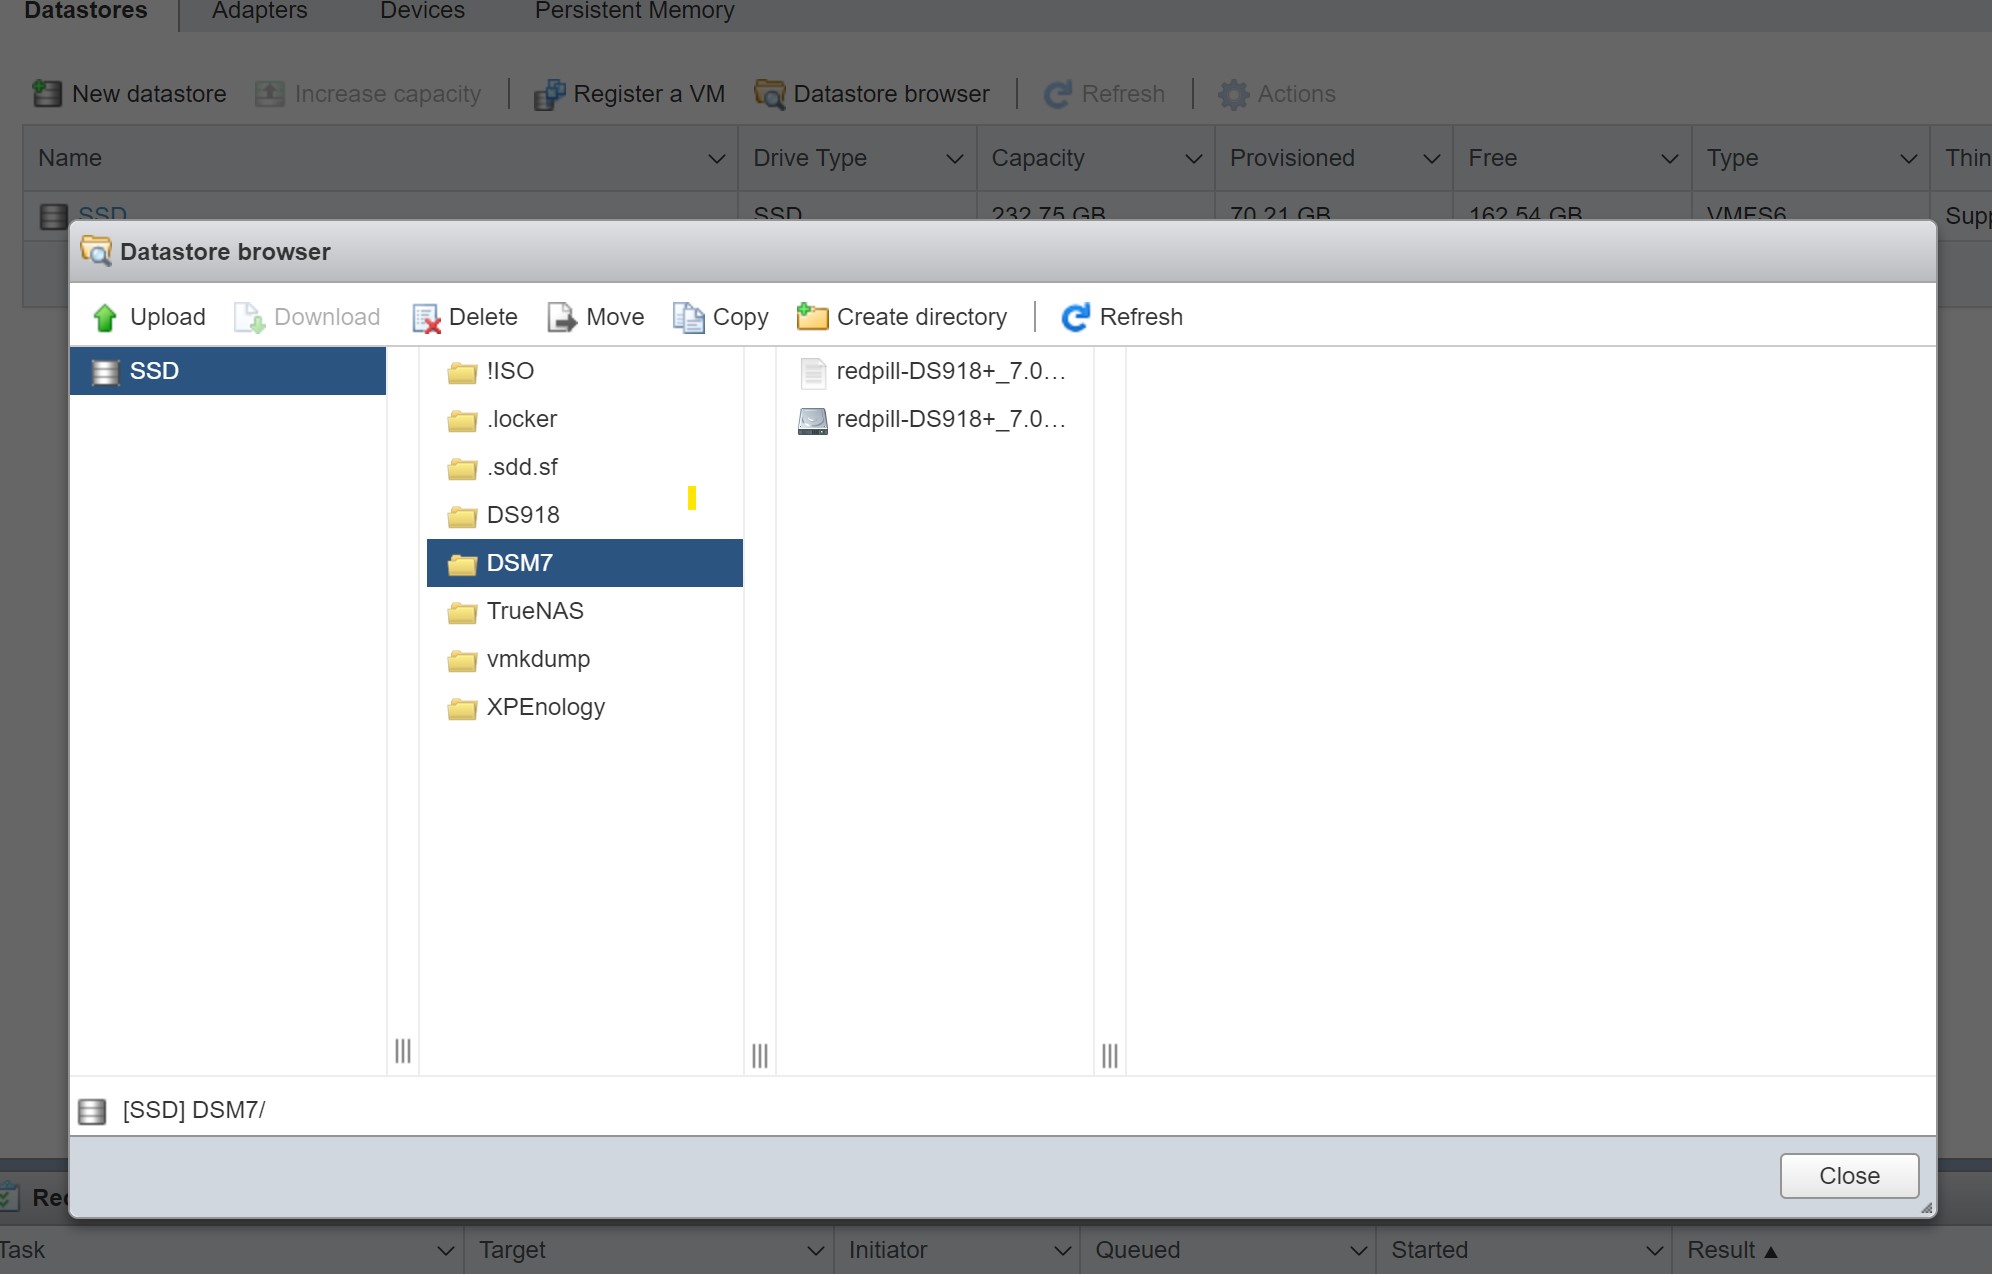
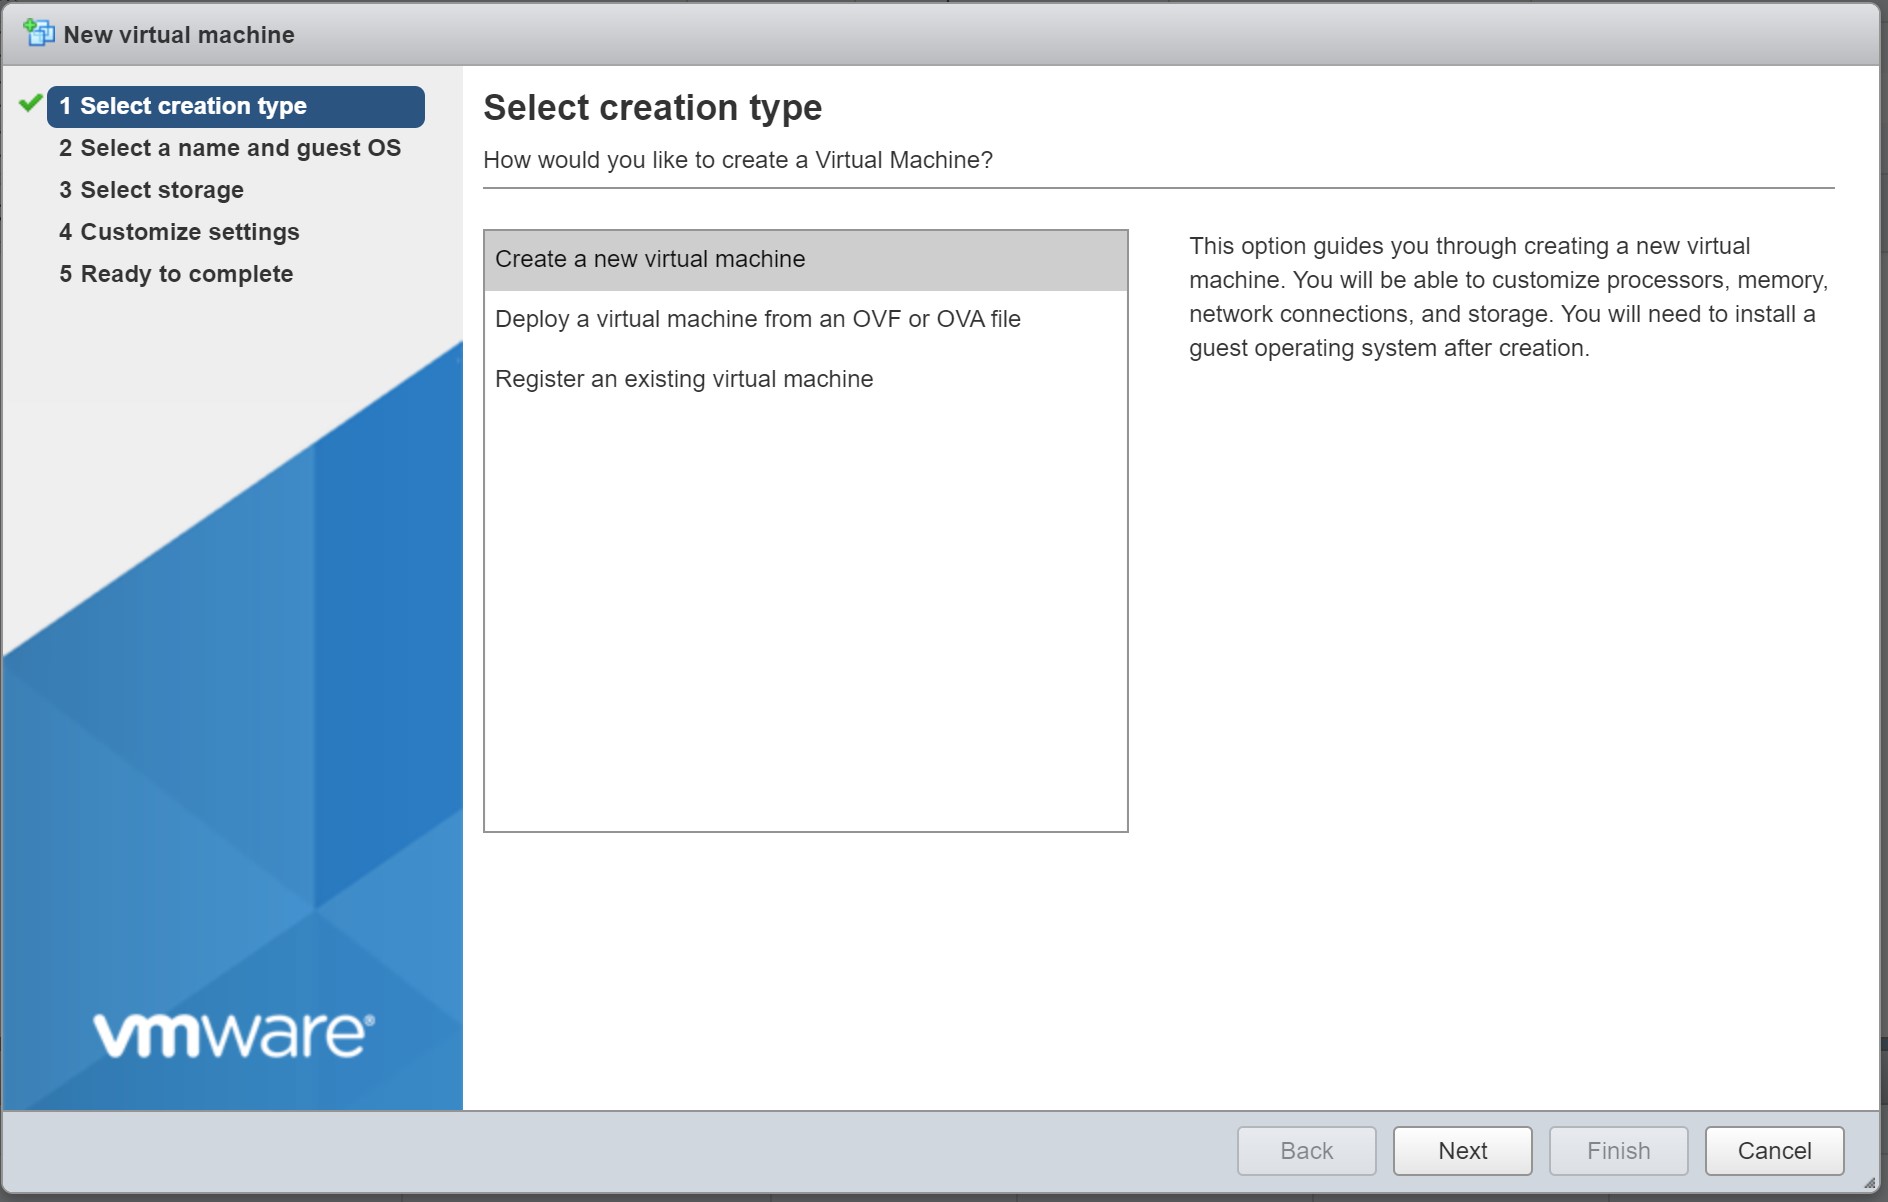
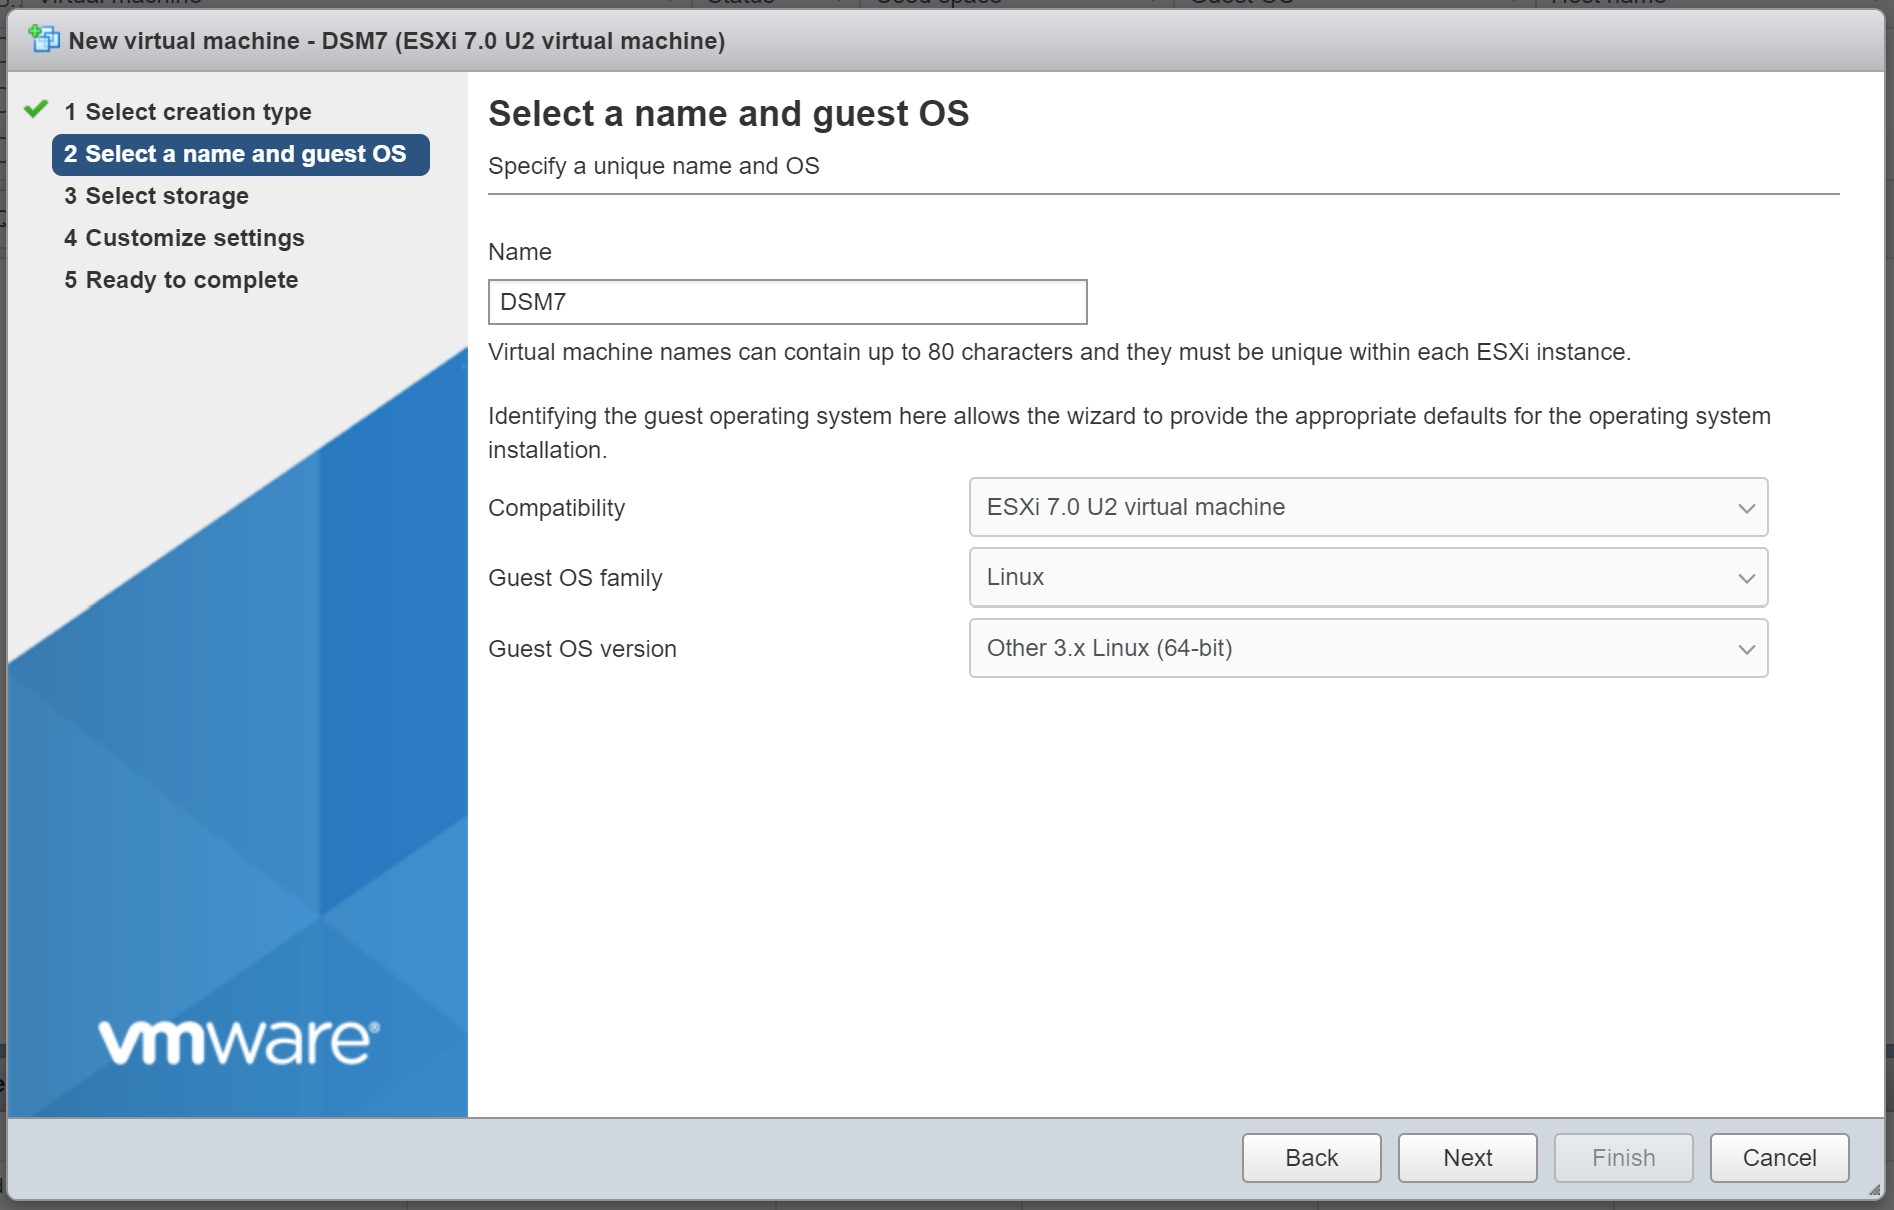
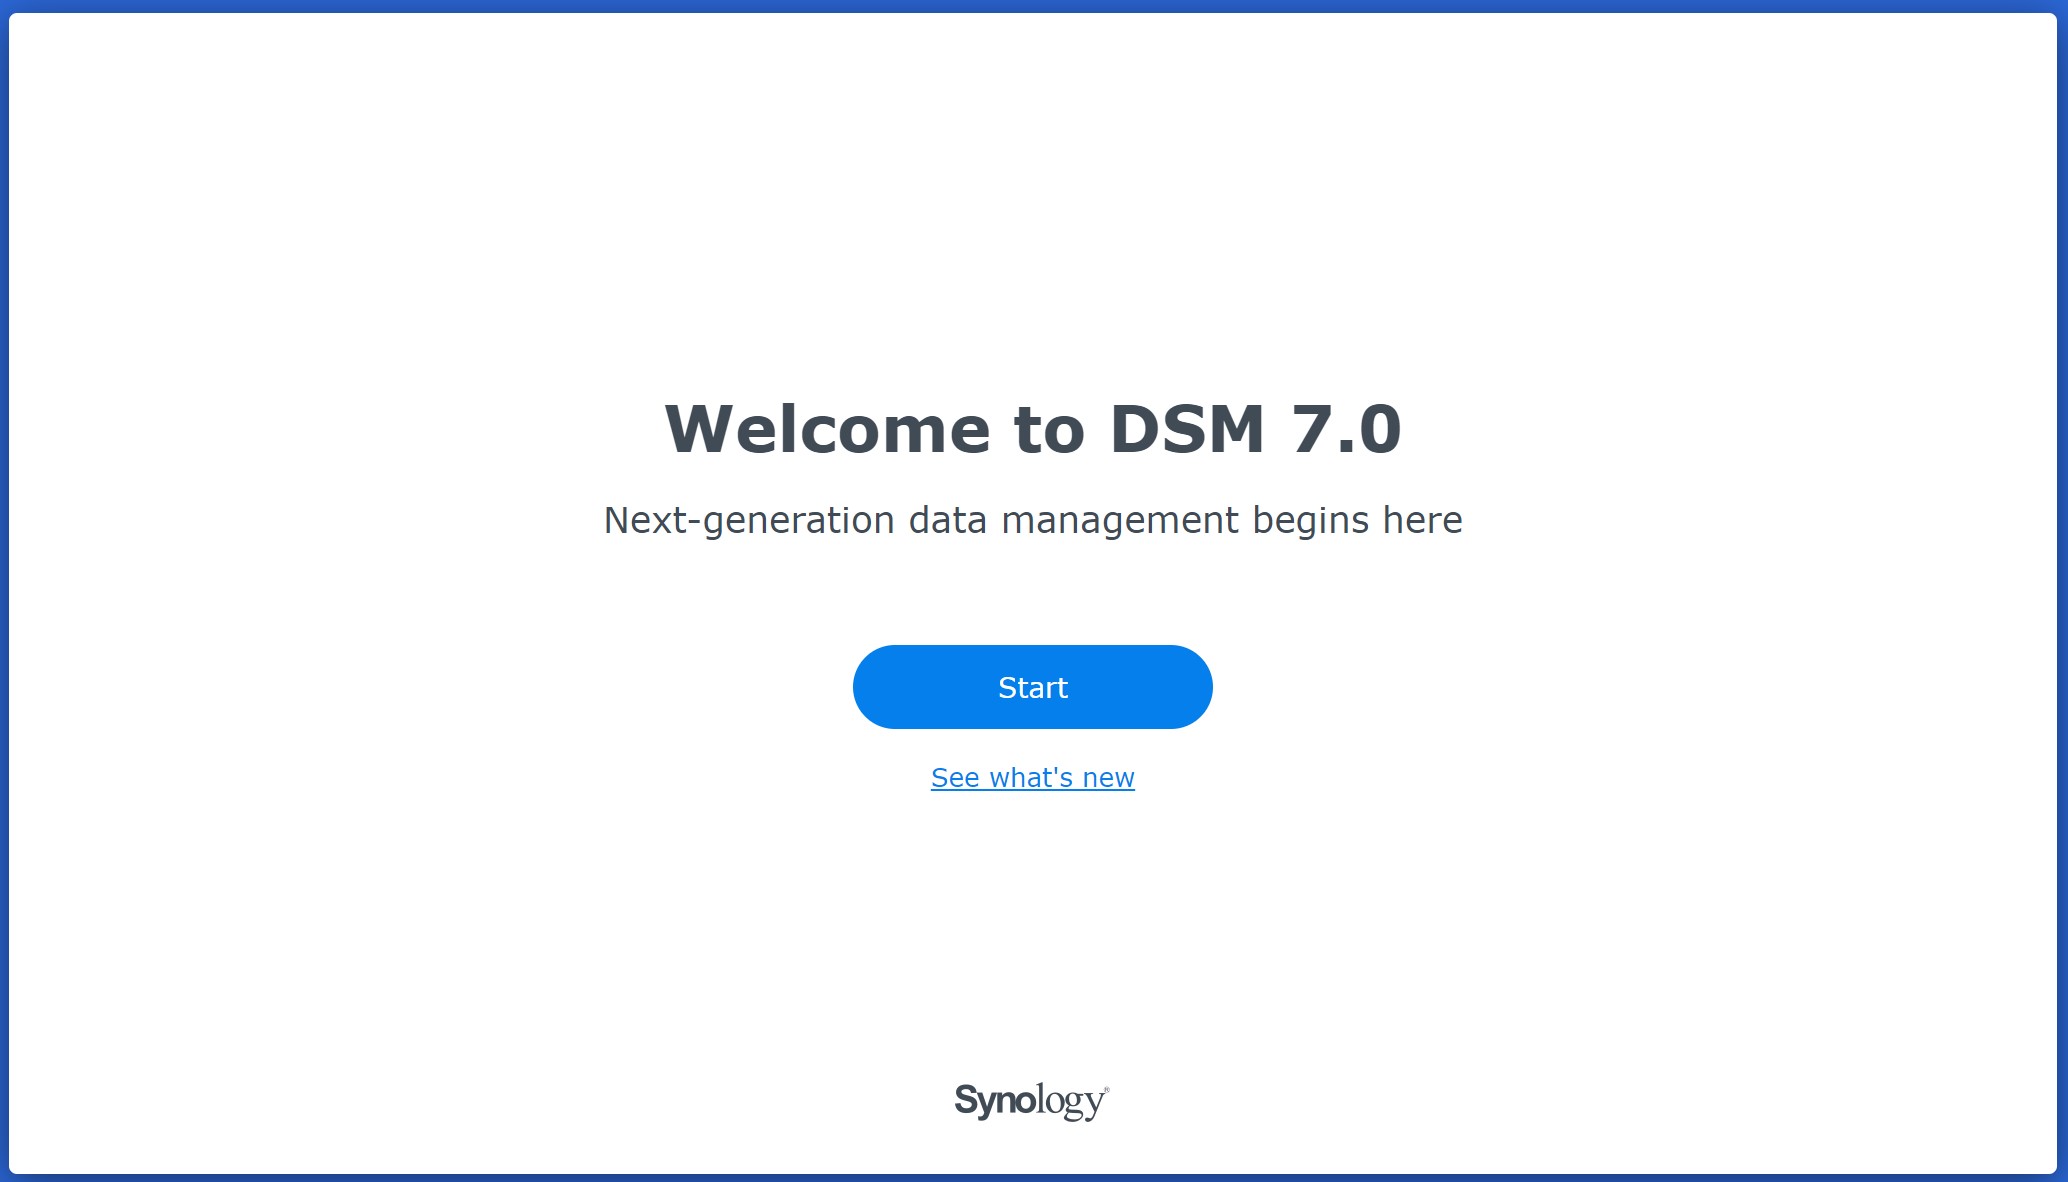
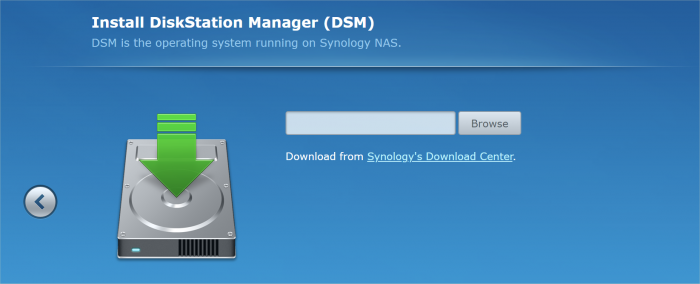
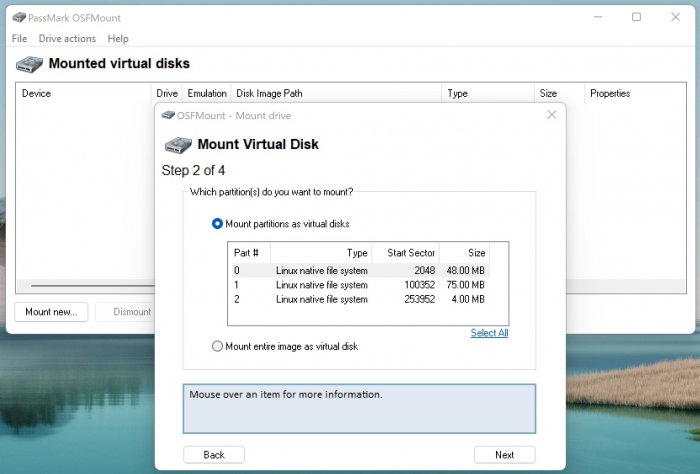
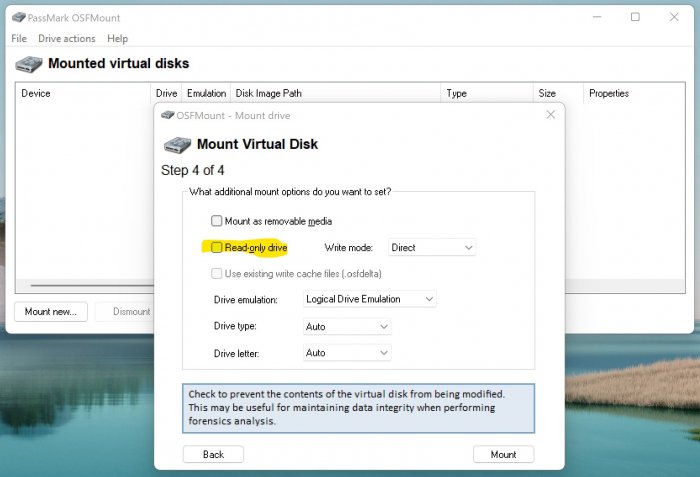
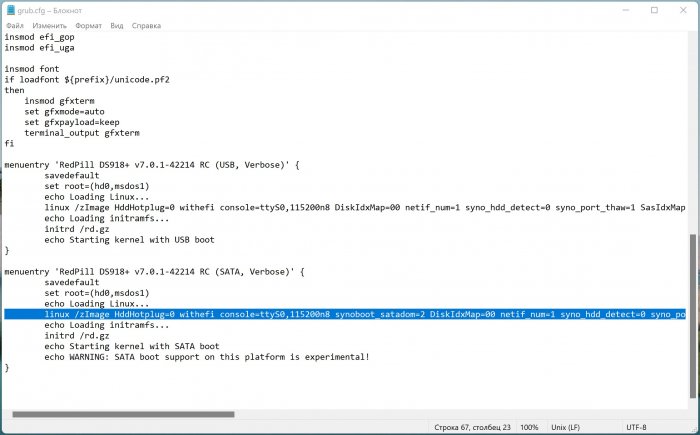
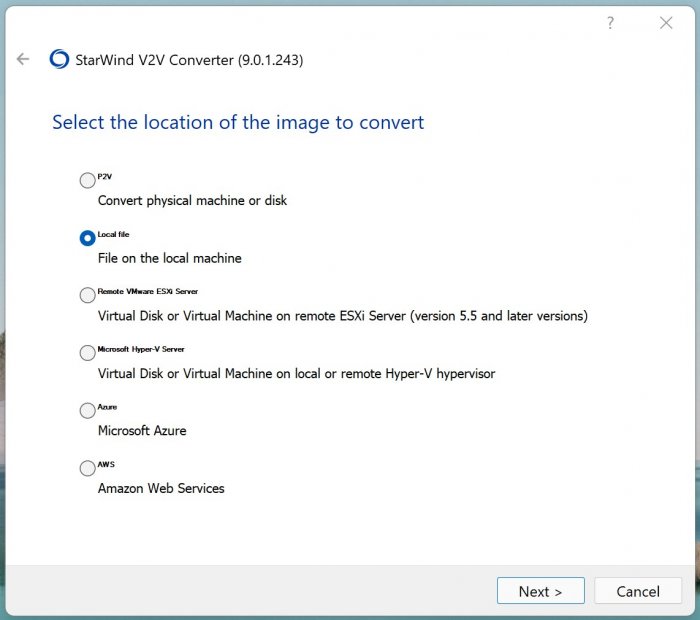
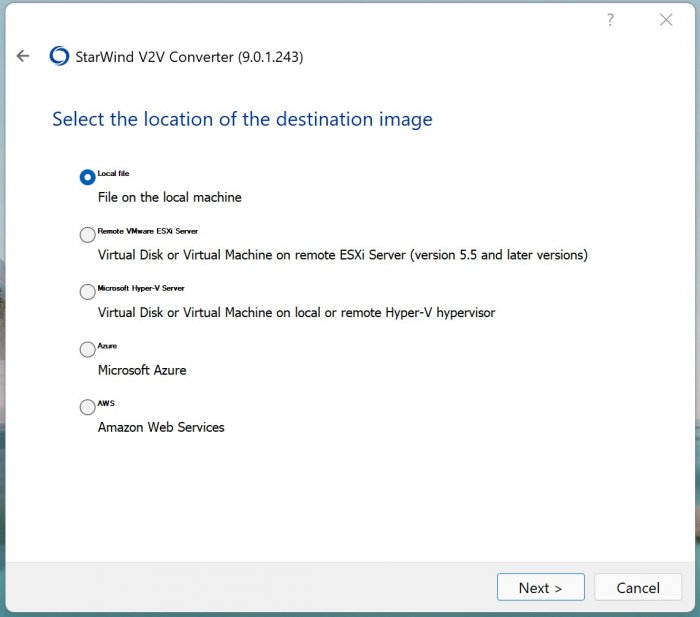
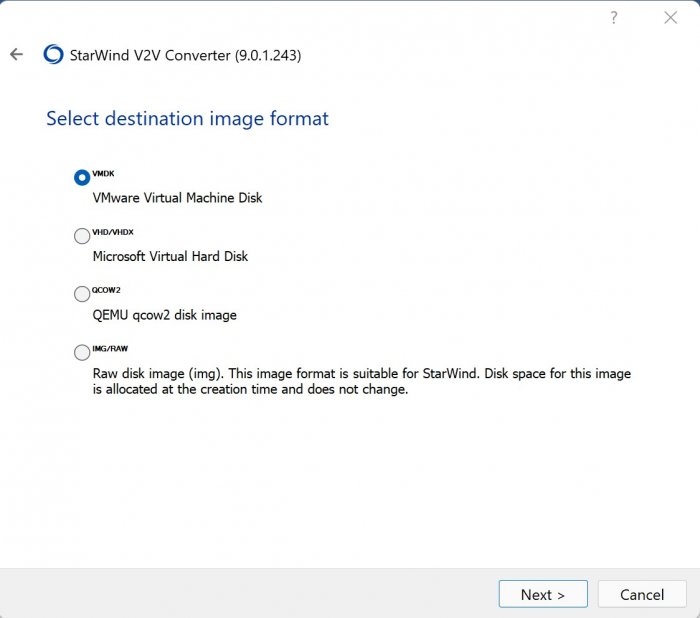
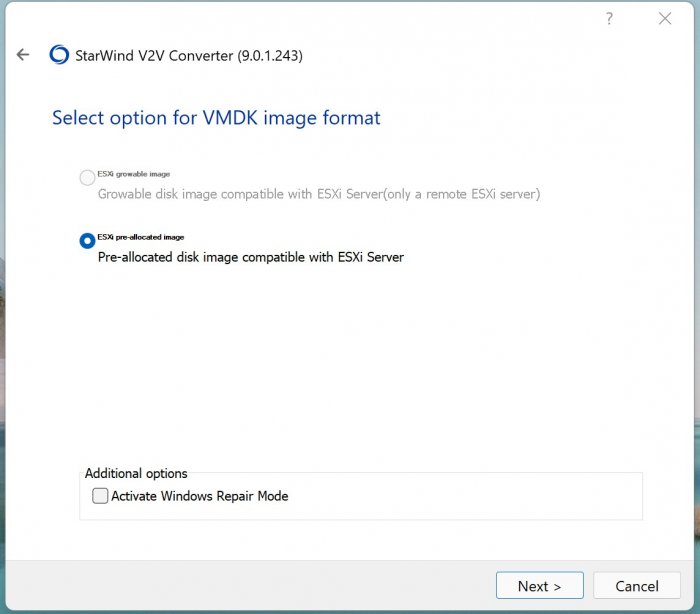
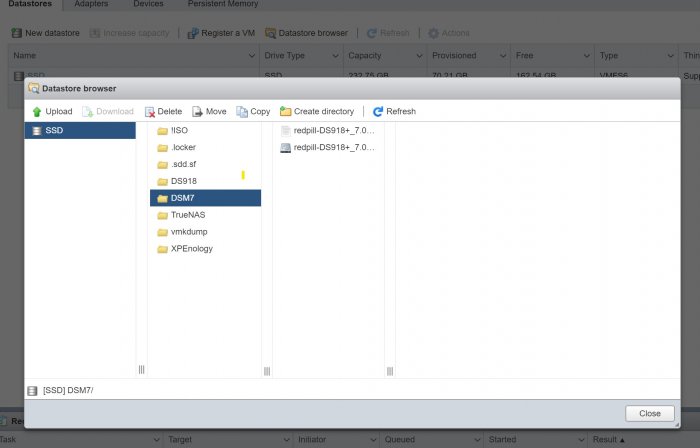
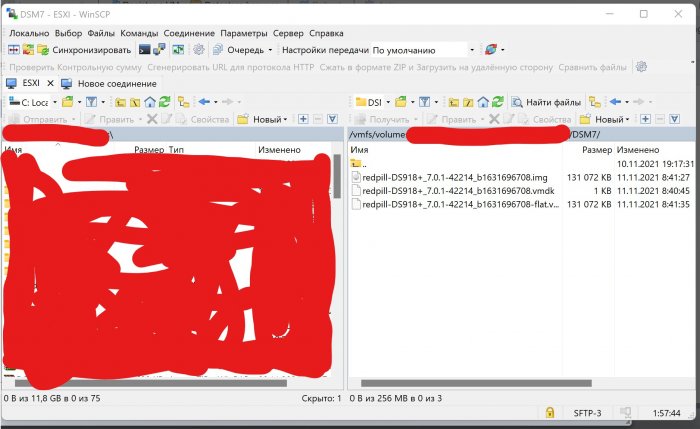
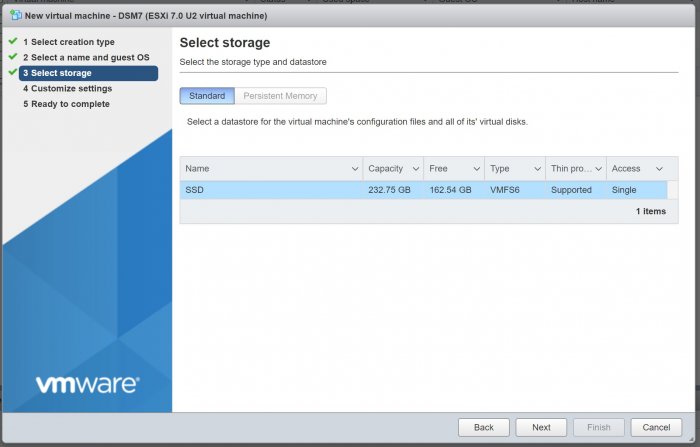
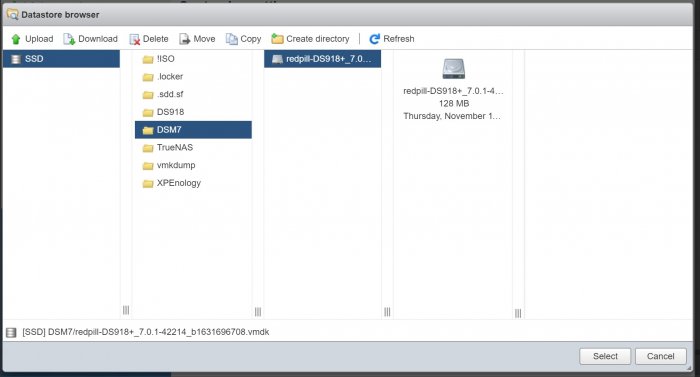
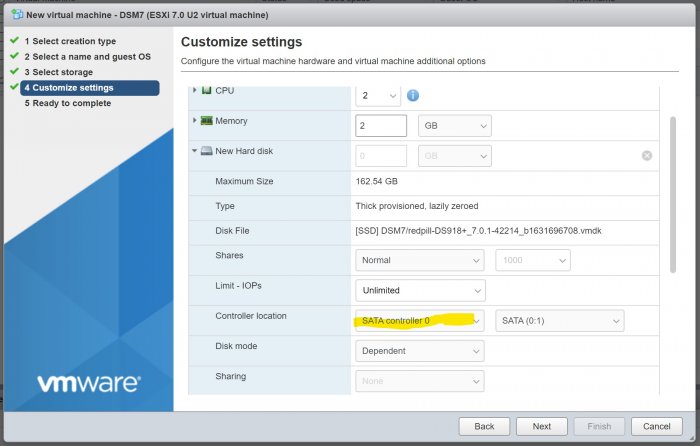
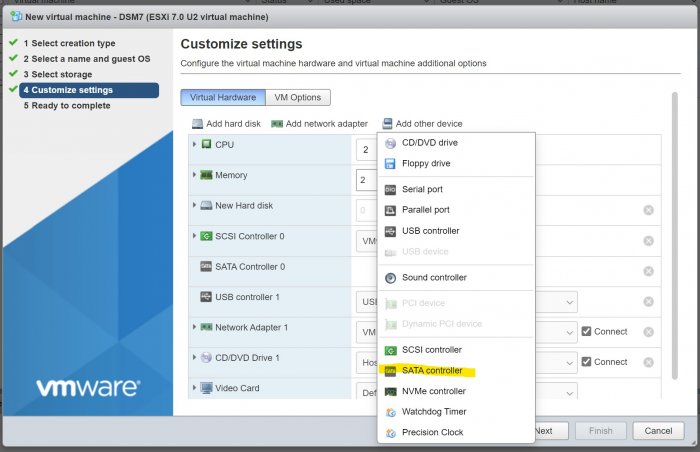
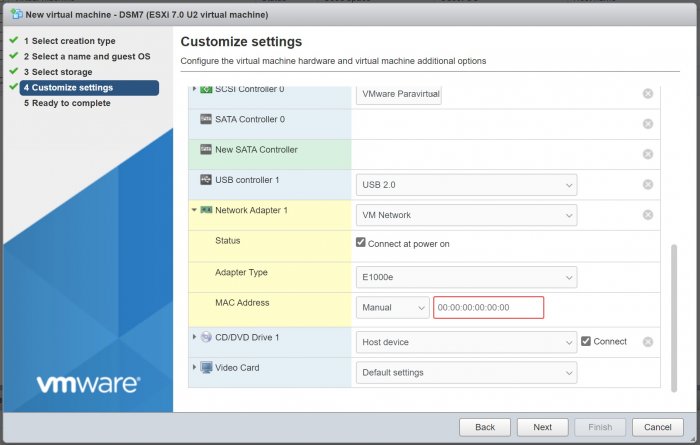
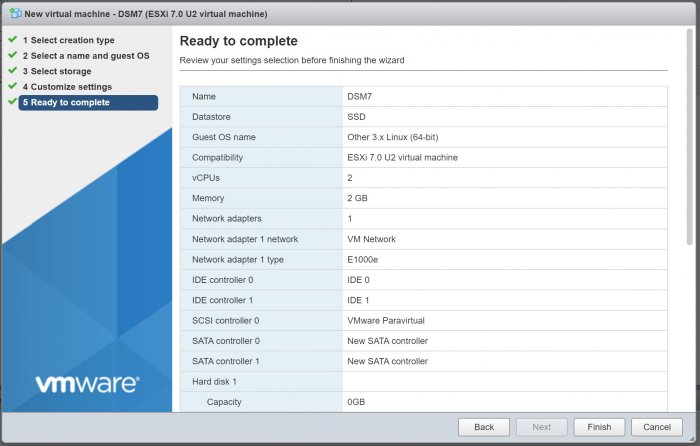
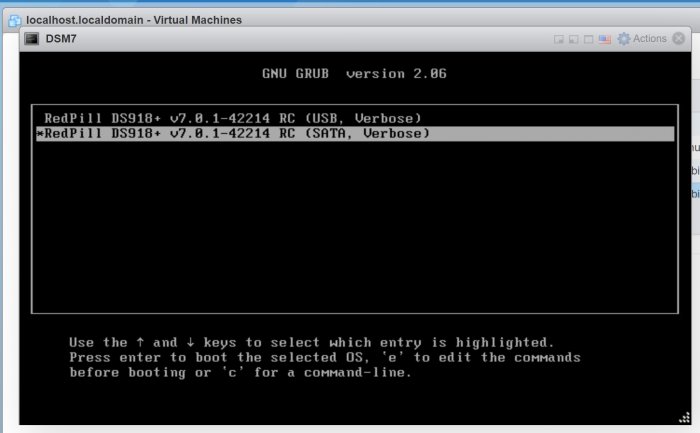
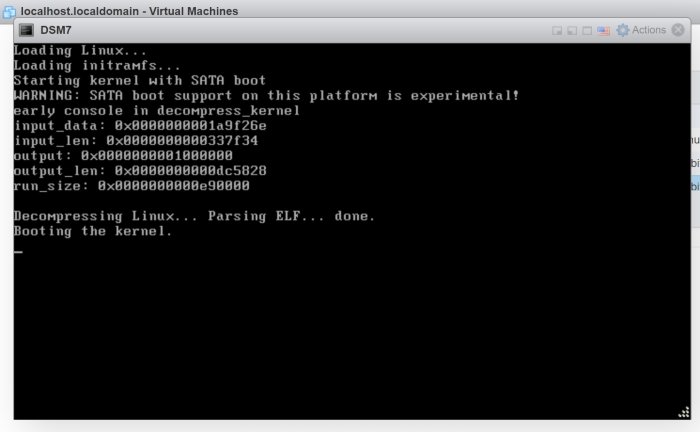
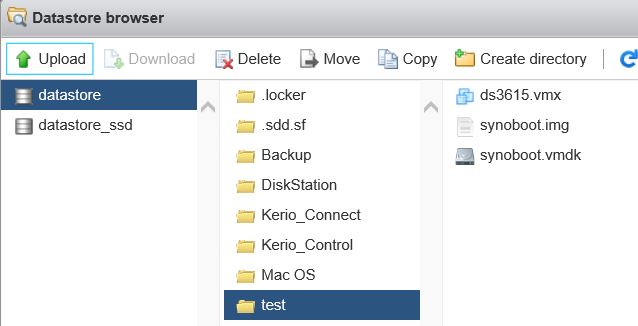
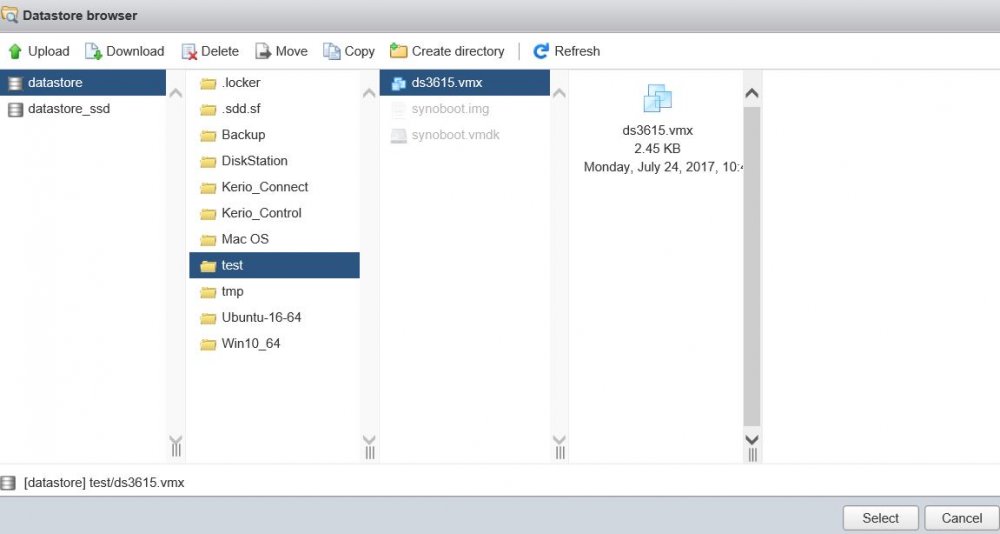
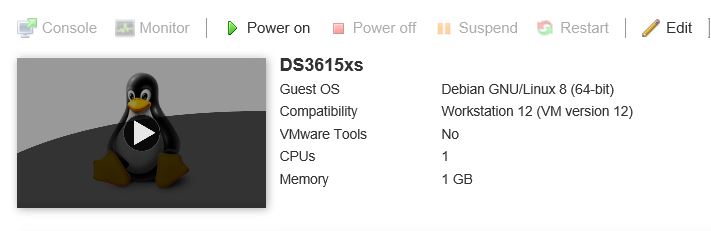
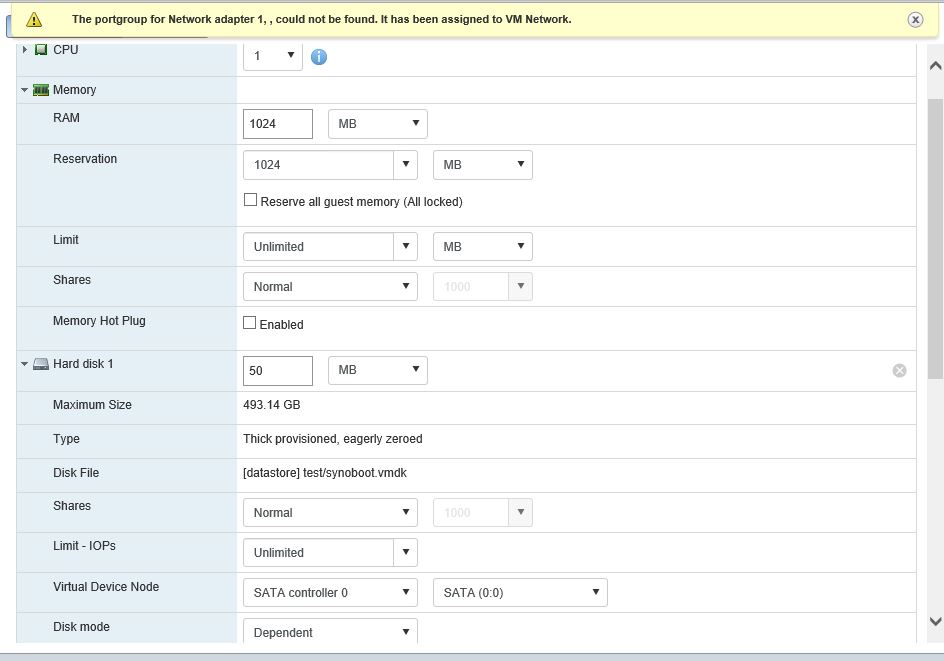
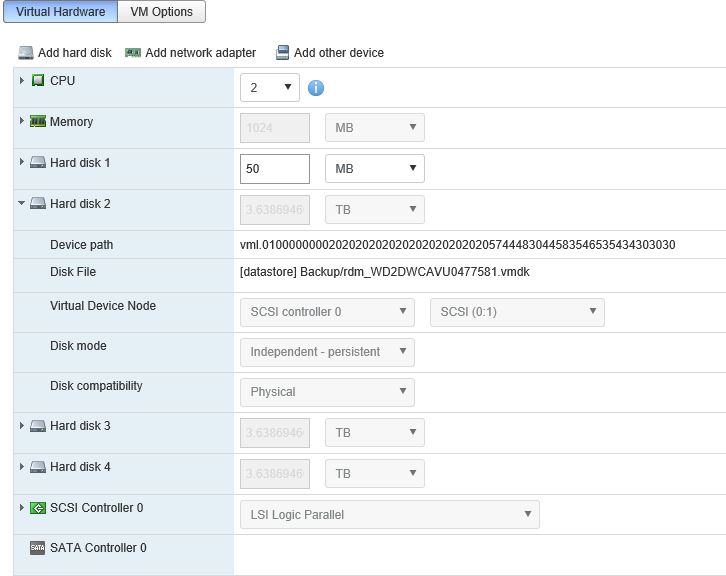
Здравствуйте, недавно я установил ESXI и пробовал устанавливать различные версии XPEnology. Есть много информации по установке DSM6, однако про DSM7 информации существенно меньше, а пошаговой инструкции по установке на ESXI я вообще не нашёл. После прочтения этой темы решил сделать инструкцию по установке DSM7 на ESXI, в первую очередь для себя, чтобы потом не забыть Для редактирования ISO образа и его конвертации понадобятся программы OSFMount и StarWind V2V Converter соответственно. Образ redpill-DS918+_7.0.1-42214 загружаем здесь. Открываем образ redpill-DS918+_7.0.1-42214_b1631696708.img в OSFMount. Выбираем 0 раздел. Снимаем галочку только для чтения. Заходим на смонтированный диск и открываем файл grub.cfg, расположенный по пути \boot\grub. В данном файле меняем mac1=D050997C770C на мак адрес своей сетевой карты. Мак адрес сетевой карты можно посмотреть в сетевых настройках ESXI. Мак адрес прописывается без символов двоеточия. Также в файле grub.cfg прописан серийный номер устройства sn=1230NZN018654, нужно ли его менять не знаю, я сменил серийник воспользовавшись генератором Xpenology_Tool_V142. Как мне известно подбор валидных мака и серийника требуется только для работы QuickConnect, мне он не нужен, поэтому не морочился. В файле grub.cfg мак адрес и серийный номер прописан дважды, в блоках RedPill DS918+ v7.0.1-42214 RC (USB, Verbose) и (SATA, Verbose), я исправил в двух местах, хотя по идеи требуется только в SATA. Сохраняем изменения и размонтируем образ. Далее правленный образ открываем в программе StarWind V2V Converter, выбираем место назначения свой компьютер, формат VMware Virtual Machine Disk, тип ESX image, вариант Pre-allocated disk image, затем завершаем конвертацию и получаем два файла redpill-DS918+_7.0.1-42214_b1631696708.vmdk и redpill-DS918+_7.0.1-42214_b1631696708-flat.vmdk Два вышеуказанных файла вместе с правленным образом redpill-DS918+_7.0.1-42214_b1631696708.img копируем в созданную папку на DataStore. При копировании через интерфейс ESXI видно только два файла, хотя по факту их три, если зайти на DataStore через WinSCP. Далее создаём новую виртуальную машину. Придумываем ей название, выбираем операционную систему Other 3.х Linux (64-bit). Пробовал версии 4.х и 5.х, но на них система не запустилась. Далее выбираем место установки, в моём случае это SSD диск. Настройки виртуальной машины следующие: 1. CPU – 2 2. Память – 2гб 3. Удаляем созданный по умолчанию жесткий диск 1 на 16 гб. 4. Добавляем существующий жесткий диск и выбираем на Datastore ранее скопированный файл redpill-DS918+_7.0.1-42214_b1631696708.vmdk, в настройках которого выбираем SATA контроллер 0. 5. Добавляем еще один SATA контроллер 6. Добавляем новый стандартный жесткий диск, в настройках которого выбираем SATA контроллер 1. Объем жесткого можно оставить по умолчанию, у меня это 16гб, если нужно больше, делаем больше. Имеется ещё другой вариант - вместо стандартного диска добавить RDM диск, в настройках которого также выбрать SATA контроллер 1. Как подключить локальный SATA-диск в качестве хранилища RDM для виртуальных машин читать здесь. 7. В настройках сетевой карты в качестве адаптера выбираем E1000e, вручную вбиваем мак адрес своей сетевой карты, которую ранее прописывали в grub.cfg, только в этот раз разделяем каждые два символа двоеточием. 8. Завершаем создание виртуальной машины. Далее запускаем созданную виртуальную машину. В появившемся меню выбираем RedPill DS918+ v7.0.1-42214 RC (SATA, Verbose). Если всё правильно сделать, то система запустится. Через приложение Synology Assistant находим запущенную DSM и открываем. Можно также искать, вбив в браузере http://find.synology.com/ , но через приложение находит лучше. Затем устанавливаем систему, вручную выбрав DSM_DS918+_42214.pat Данный релиз почему-то удален на официальном сайте, поиски в интернете мне ничего не дали, однако мир не без добрых людей, спасибо формучанину stefauresi, который поделился данной версией DSM, качаем здесь. Попытки установки версий DSM_DS918+_41890 и DSM_DS918+_42218, к успеху не привели. Всем добра!


-
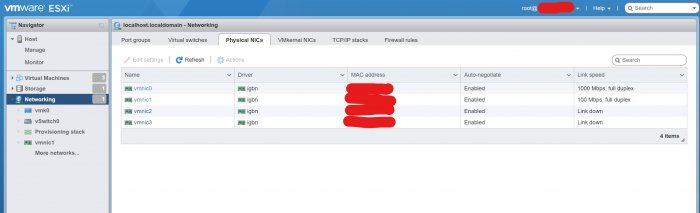
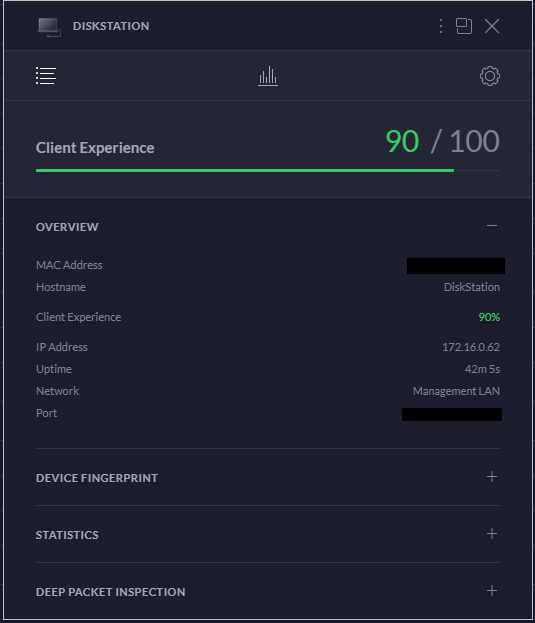
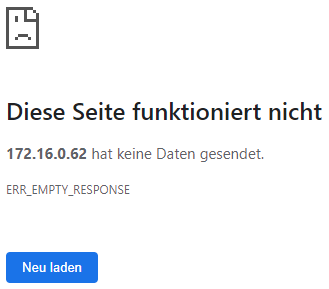
Hi everybody, maybe I can get some help here... I've bought a new mainboard (https://www.reichelt.com/gb/en/fujitsu-d3543-s3-intel-pentium-silver-j5005-mini-itx-fujitsu-d3543-s3-p251627.html?r=1) because my old one is damaged. Details: Intel® Pentium® Silver Processor J5005 (QC @1.5GHz / 2.8GHz), integrated Intel® UHD Graphics 605 (18EUs @800MHz) 10W TDP No legacy OS support, no MBR installation (UEFI only due to Intel restrictions) 1 x Intel i210 with 10/100/1000MBit/s 1 x Realtek RTL8111G with 10/100/1000 MBit/s I want to install DSM6.2 with juns loader 1.04b My problem is: i cant get it to work I've used about five or six different types of usb-stick - no success. Yes!, I have edited the grub.cfg. I have changed the vid/pid everytime i use an new stick... When I take a look at my UniFi-Controller, I can see, that the "Diskstation" is noticed in Network and got an IP: I can successful ping the Diskstation: Synology-Assistant doesn't find my Diskstation and if I want to access the Web GUI/Webinterface: I think it's a bios settings failure at my side but i don't know where. I've already turned off iGPU and tryed every extra.lzma i could find in the forum - no success. Maybe the board is incompatible? Thanks for helping me

-
hello guys, i need help to install dsm 6 on HP Compaq 8000 Elite Ultra-slim Desktop
-
I'm looking to purchase a 12-bay Dell R720XD Server with 2x Intel Xeon E5-2630 2.30GHz - 6 Core processors & 16GB RAM. it includes a H710. This system will primarily be my iSCSI data store for my VMware Cluster test lab. I want speeds around 2000 read/write or higher if possible. I plan on having: 8-10 drive sata SSD raid 0 array for my data store (may go with a raid 10) 2 drive raid 1 (backup target for my other xpenology system in case of catastrophic failure on that one) My Question(s): 1. Has anyone gotten this system to work without major issues? 2. Can I use the h710 or should I look into an adaptec 1000-8i (or 2) 3. is there another card that will achieve the speeds I'm looking for? - Ive currently got an LSI card in my other machine but I do not like how the drive ordering doesn't function properly. 4. Are these speeds possible on this machine? Synology has the new high end flash storage servers I hope to mimic that with this system.
-
 Hi Guys, I picked up some old hardware from my work, and I wanted to try out Xpenology on the system. I'm running into a hiccup when trying to install it on an old HP xw8400 system. I'm using a USB to install the DSM and using Rufus to write the .iso or .img file to the USB. When I go to install it I'm greeted with a lovely "no system disk or disk error" message when I go to boot from the USB (The option is available under the boot menu). I've scoured the BIOS settings, but I'm still unsure what the issue could be. Following many attempts of different Rufus settings, and trying both the .iso and .img files created by JUN version 6.2 I'm still unable to get past that point. I then tried a copy of UNRAID to see if it was an issue with the USB boot, but it loaded up just fine. I also took the same .img file and used Rufus on the same exact USB I've been attempting the install with, and it worked without a hiccup on a Supermicro system that is from the same era (within 2 years of the HP workstation). If someone has some knowledge of what has worked for them, or if there is a BIOS setting I'm missing please let me know. I did see that there is a BIOS update, but according the release notes there isn't any changes made to booting or USB. The latest build is 2010, and I have the 2008 version currently. My system is HP xw8400 2x xeon 5150 16GB RAM 12 port LSI RAID Card Quadro Graphics Card 14 Hard drives of various sizes ranging from 3, 2, and 1 TB in size (4 of which are plugged into the motherboard, but I tried with them plugged in and with them not) Dual Redundant power supplies Any help is appreciated!
 -
 Hi guys Just curious. so I download the synology boot img onto a USB stick, which is the boot loader. this then the first time ask me to upload the pat file. Question, how where does it install the pat file if I have multiple drives in the host. I'm going to have the usb thumb drive internal for the boot loader, I'm installing a 128GB M.2 SSD device which I want to use for the XPenology software install, this will also be my Flex Media Server Cache and meta data storage space. And then Installing X large drives, was thinking easiest to make sure it all gets installed on the M.2 SSD is to not install the large drives until XPenology is installed. ? G
 -
Hi everybody sorry for my english as requested by IG-88 i m posting my problem with jun's loader 1.02b and the extra lzma 4.5 my hardware for my nas is a proliant ML150 g5 with a hp NC105i gigabit ethernet (its a tg3.ko module). Follow the tutorial with vid/pid, sn and mac on usb drive 1 - boot the usb drive launch syno assistant my nas is recognize and install the 15217 pat file on drive (crucial ssd 128 Go for testing) 2 - reboot automatically and then no dsm in syno assistant !!?!!?? 3- recreate the usb drive but same thing By the way dsm 5.2.5967 is a flawless installation with no problems Please any idea ???
-
Hello, Can someone help me how to install 6.1 dsm on my mac pro? Spec: Mac Pro 3.1 intel 8 core, 16gb memory. 4tb hdd. I like to install without virtual programs.
-
Hi, wie der Prefix es schon verrät bin ich ein neuling bei XPEnology und hoffe hier mal auf eure Hilfe. Also ich habe hier nen alten Server mit OMV am laufen, würde nun aber gerne XPEnology installieren. Laut einigen nicht aktuellen guides brauche ich nur diese drei Dateien: Boot Image DSM Software Synology Assistant Die links die ich dazu gefunden Habe sind alle down... Bei der Installation würde ich ganz normal vorgen, zuerst den Boot USB mit der .ISO Datei erstellen, darüber booten und installieren. Dann den Assistant starten und somit dann die DSM Sotfware installieren. Jetzt meine Frage: Ist das so überhaupt richtig oder verläuft die Installation inzwischen anders? MFG Konix
-
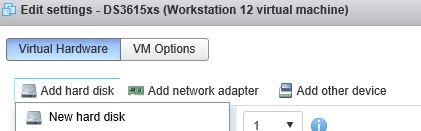
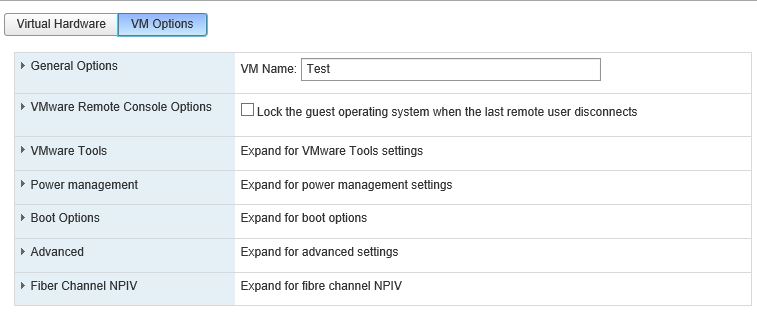
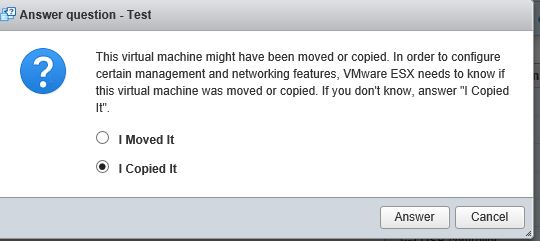
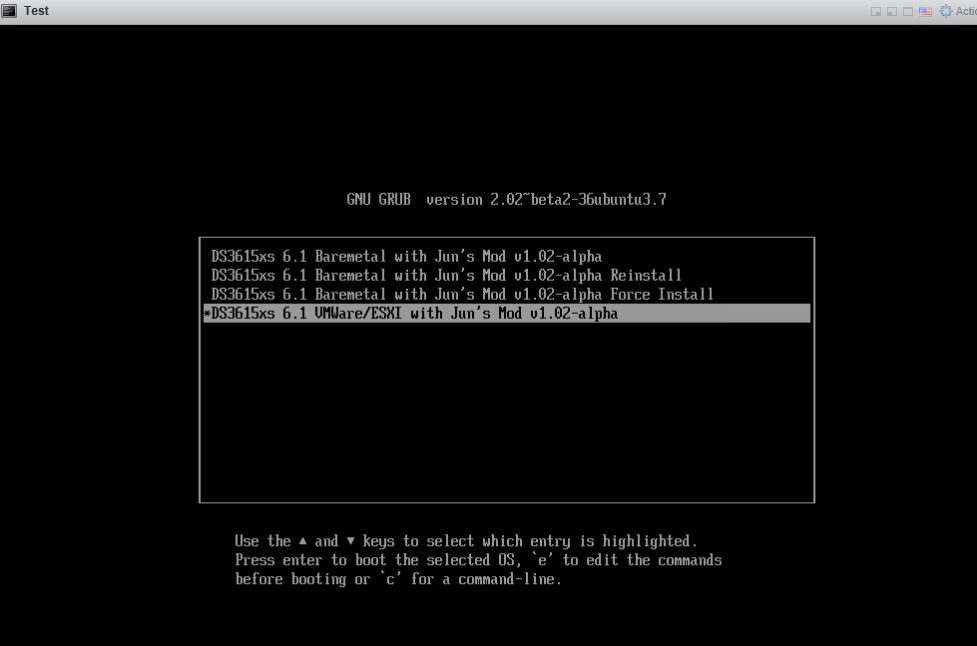
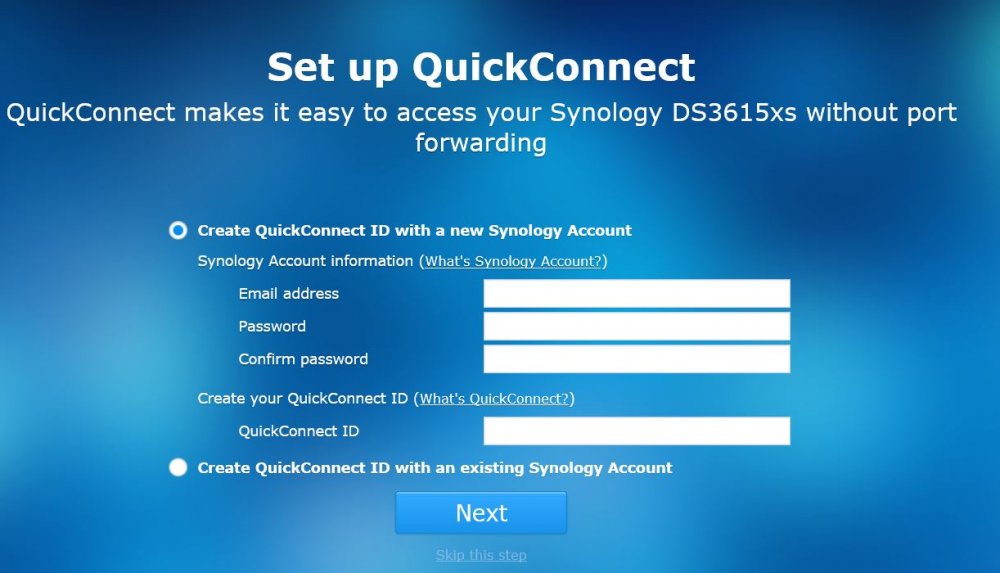
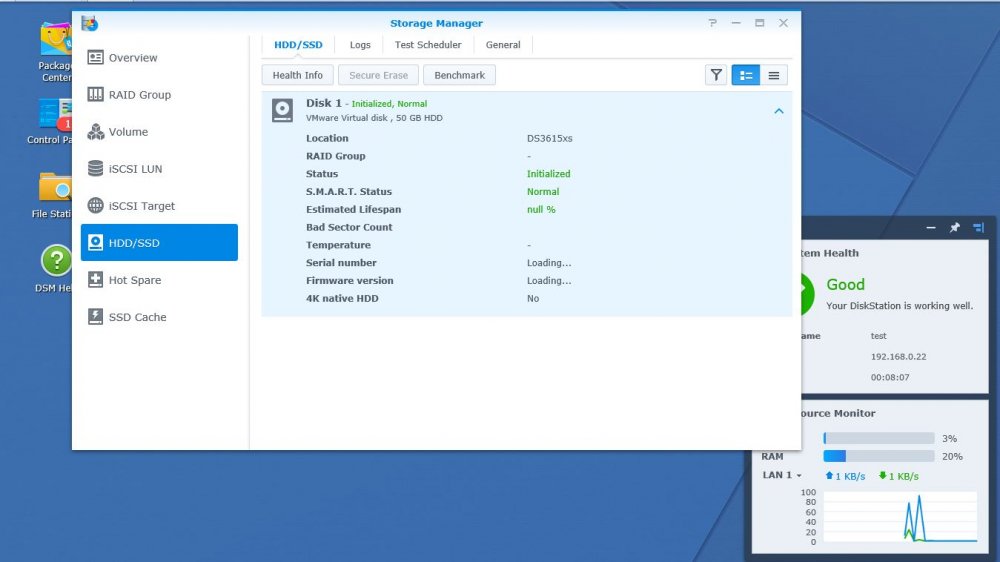
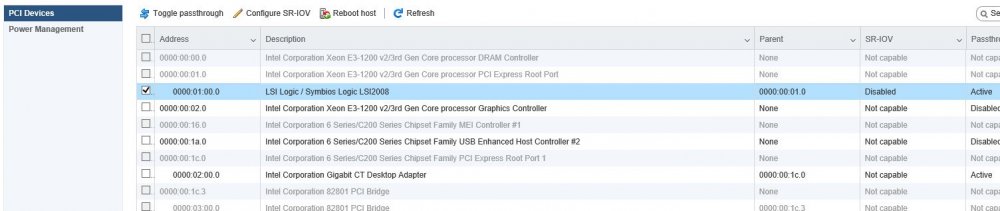
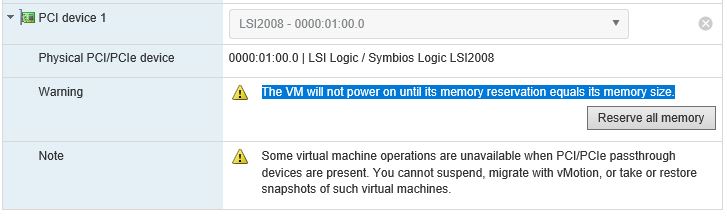
Как оказалось, у новичков возникают сложности с инсталляцией Хренологии на ESXI. поэтому решил написать краткий мануал, призванный облегчить жизнь. дополнения и уточнения приветствуются. 1. подключаемся к ESXI и создаем на датасторе директорию 2. далее в созданную директорию копируем 3 файла вот от сюда 3. после окончания копирования регистрируем нашу машину в ESXI указав на наш .vmx файл собственно доходим до финиша и жмем его все! машина установлена. но ее необходимо настроить перед запуском. 4. в настройках рекомендую задать необходимые параметры процессора и памяти, и обязательно указать размер резервируемой памяти. при недостаточном объеме зарезервированной памяти машина может не запуститься. далее необходимо создать виртуальный жесткий диск и указать его объем. после чего можно перейти на вкладку VM Options и поменять название машины на то которое нравится вам в принципе наша машина уже работоспособна. это простейший способ создания виртуальной машины. Лично я поступил немного иначе: можно или пробросить целиком дисковый контроллер в вашу виртуальную машину и подключить диски к контроллеру поставив крыжик и нажав на Toggle Passthrough после перезагрузки добавив в настройках новый PCI девайс. если у вас нет возможности пробросить целиком контроллер, можно подключить целиком физические диски, не пробрасывая весь контроллер называется это pRDM, как это делается подробно расписано здесь. данный способ хорош еще и тем, что диски целиком можно выдернуть и вставить в физическую машину, без лишних плясок с бубном, если вдруг ваши планы изменятся, а данные скопировать не куда. 5. запускаем машину. при первом запуске говорим: "я скопировал это" после чего стараемся успеть выбрать правильную загрузку далее выжидаем пару минут и начинаем искать свою машину в сети или через сервис http://find.synology.com, если вдруг сервис машину не найдет, то не паникуем и ищем через Синолоджи Ассистента. далее подключаемся к найденной машине и устанавливаем ОС просто нажав на Install Now и спокойно наблюдаем за процессом вводим свои данные, и желательно отключаем крыжик на следующем окне в самом низу говорим "пропустить данный шаг" вот и все, заходим в панель управления и в диспечере хранения радостно видим свои диски. ну и думаем как рачительно распорядиться этим богатством ну и в конце рекомендую установить vm-tools вопросов ввода серийного номера и МАК адреса касаться не стал, все это многократно расписано на форуме можете кидаться тапками, спасибами, кому что нравится.


-
 Hallo! Danke für die Aufnahme im Forum. Vorerst, ich bin neu auf diesem Gebiet und kenne mich kaum aus also seit bitte nachsichtig mit mir. Ein Kollege zeigte mir das XPENOLOGY und ich war begeistert. Nun zur meiner Frage: Ich bin gerade dabei meinen Heimserver von Windows auf Synology umzurüsten da mir die Funktionen von diesem reichen. Ich habe aber bereits Daten auf meiner 2. Festplatte. Diese will ich auf keinem Fall löschen. Wie kann ich vorgehen ohne diese zu löschen? Jemand eine Idee? Danke schon mal! LG Smash3333