Search the Community
Showing results for 'SataPortMap'.
-
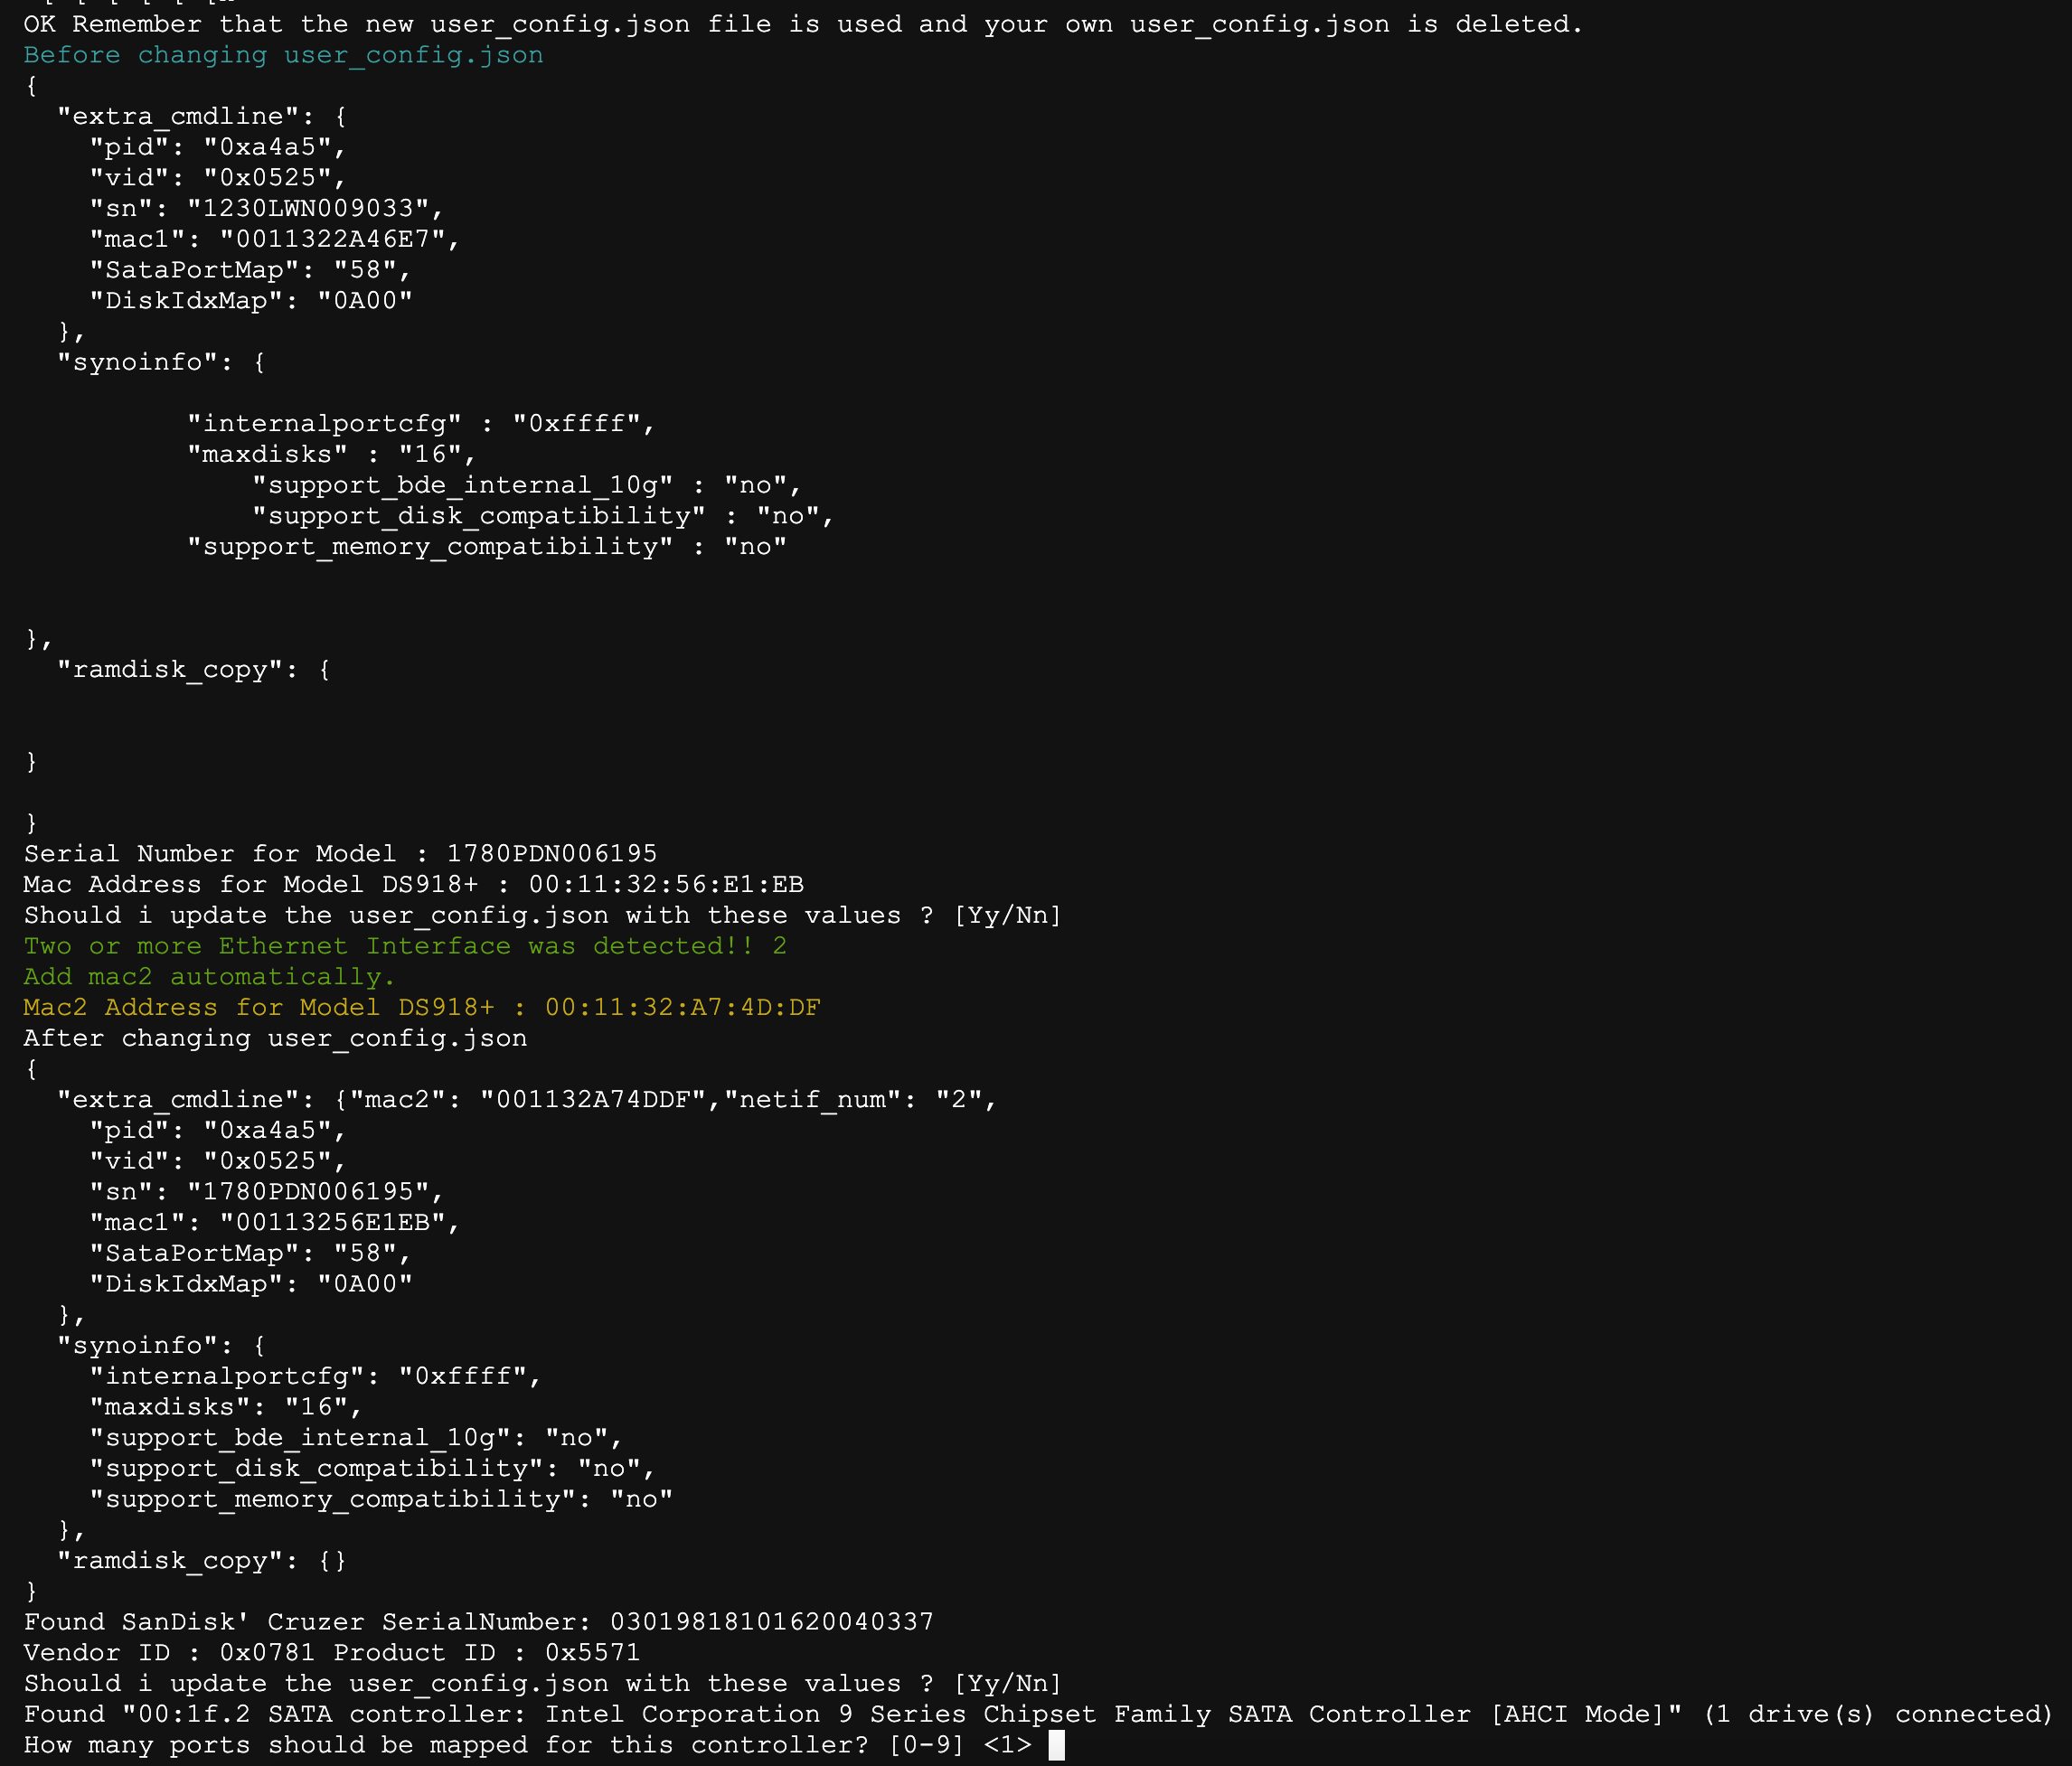
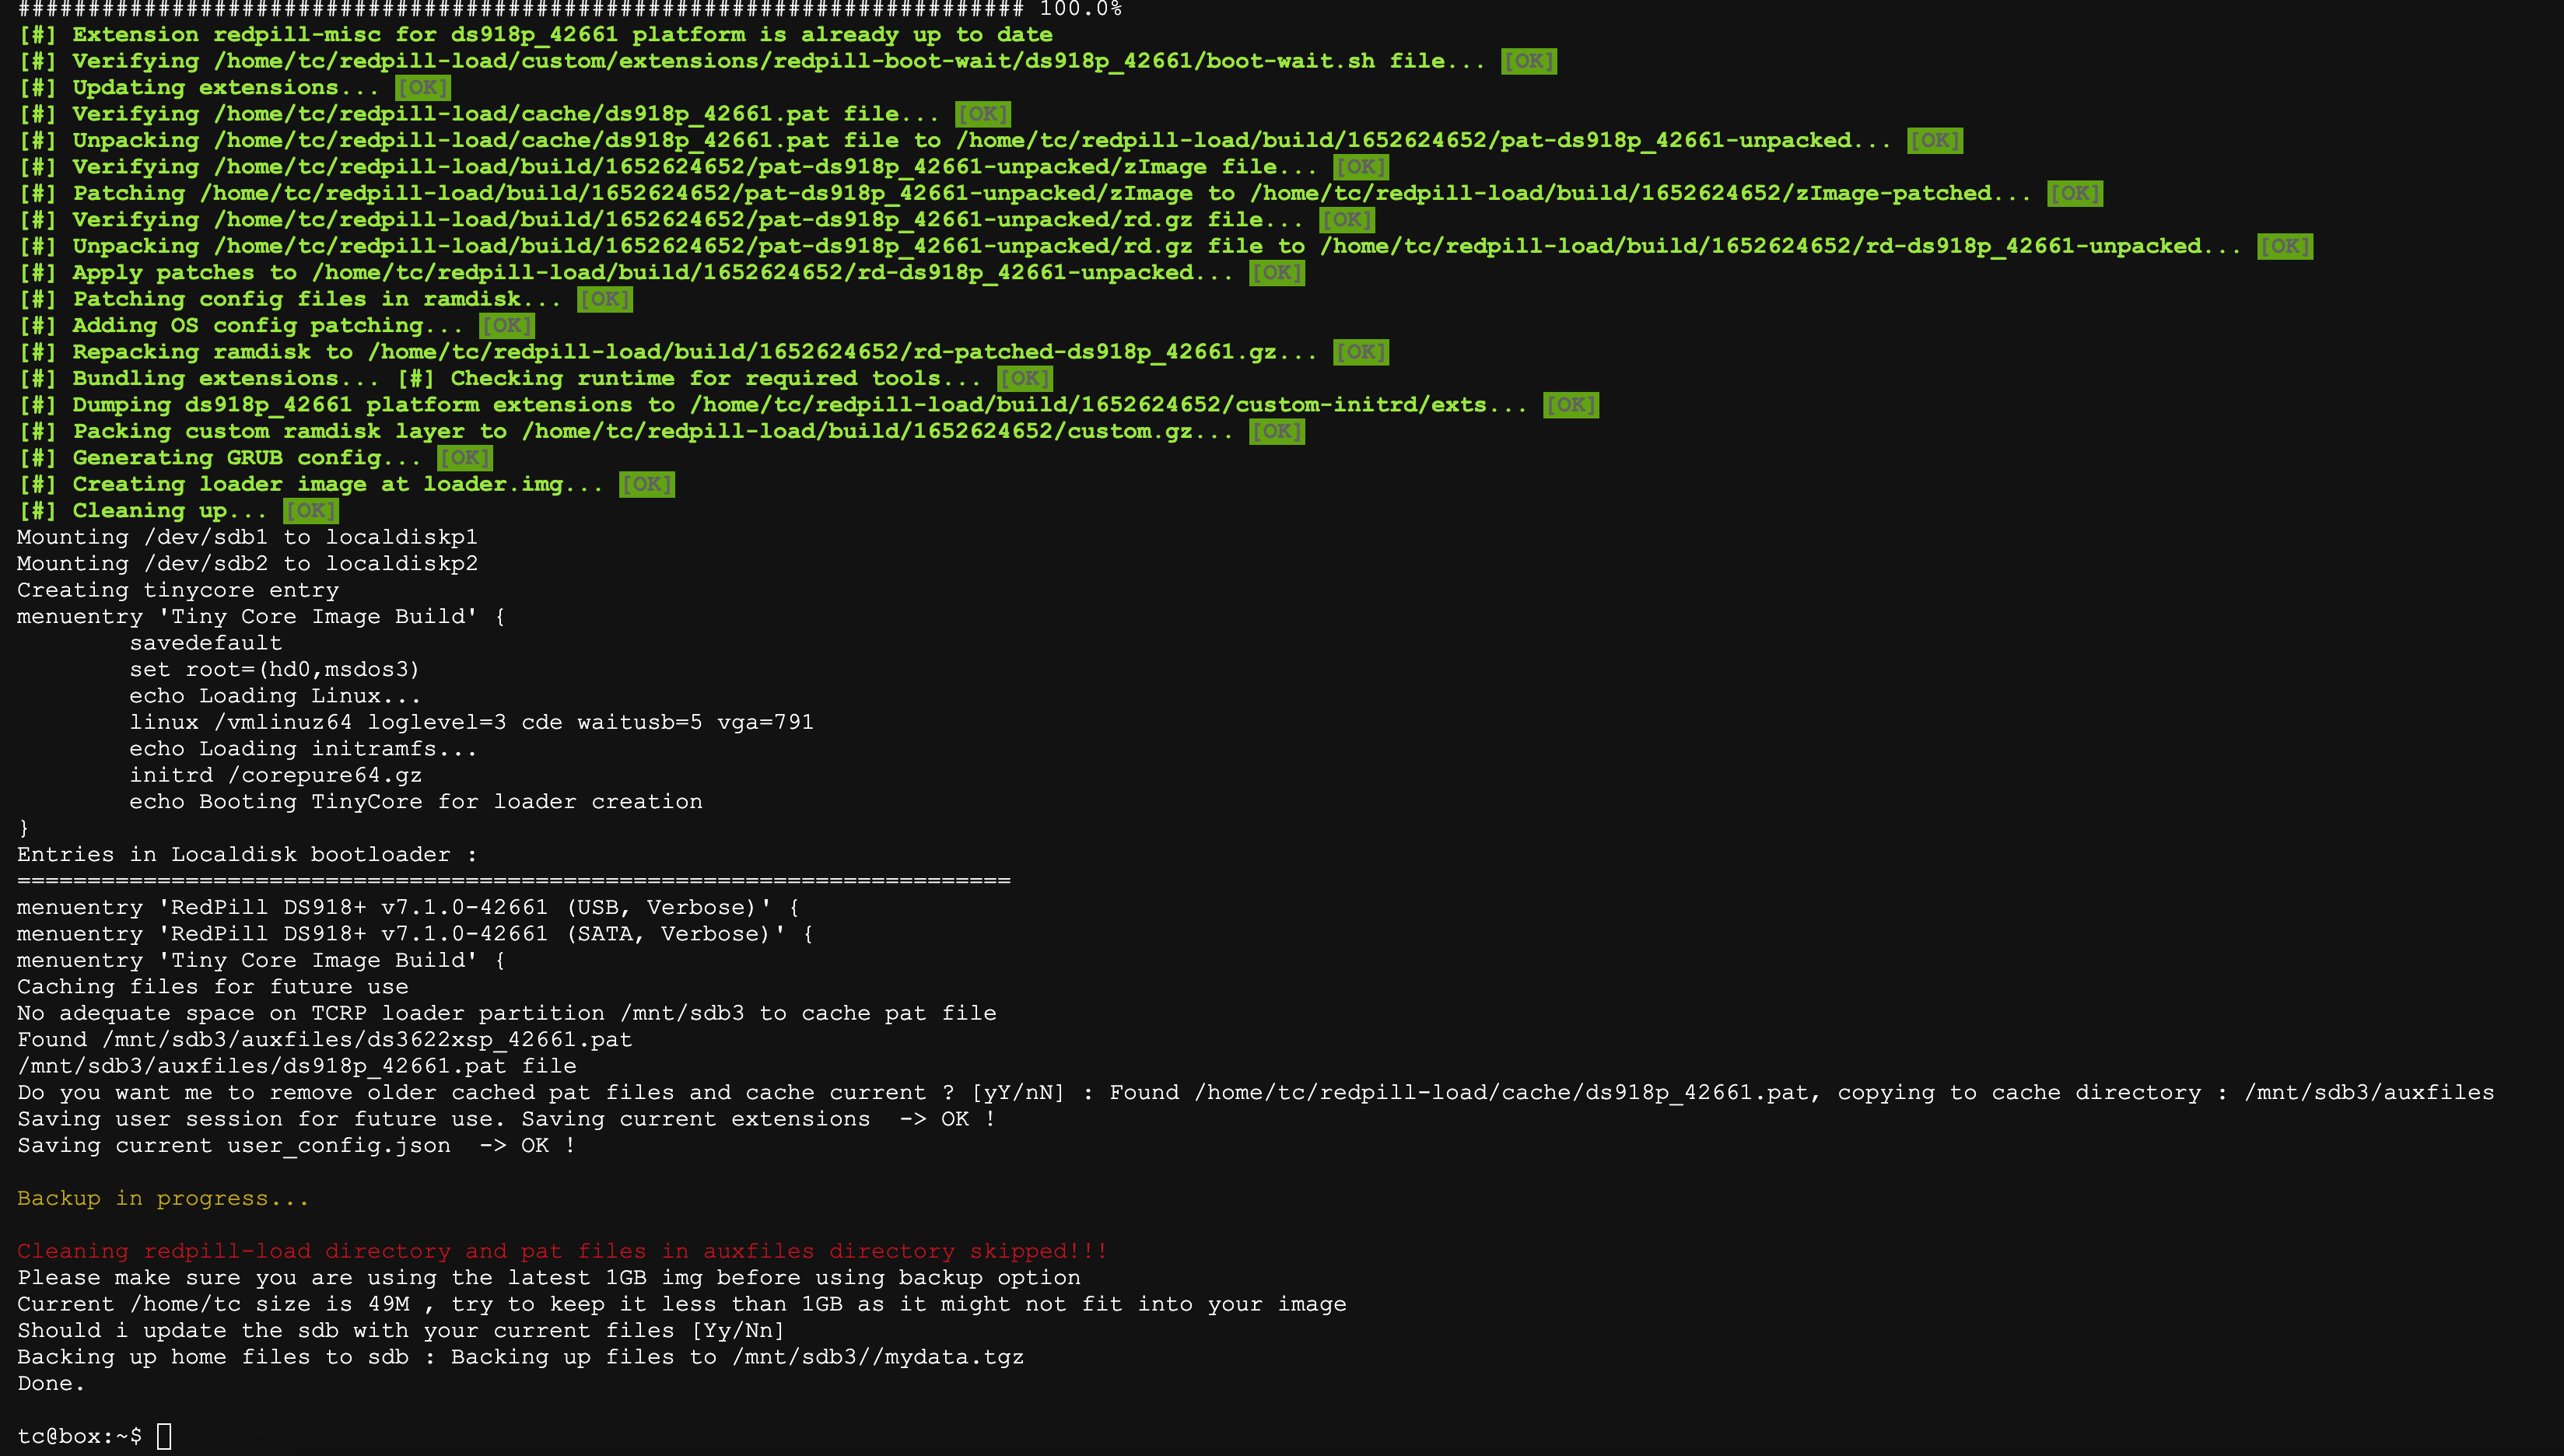
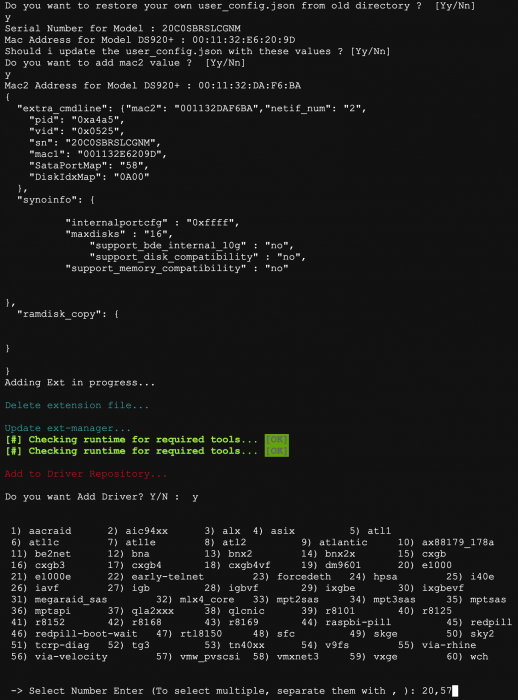
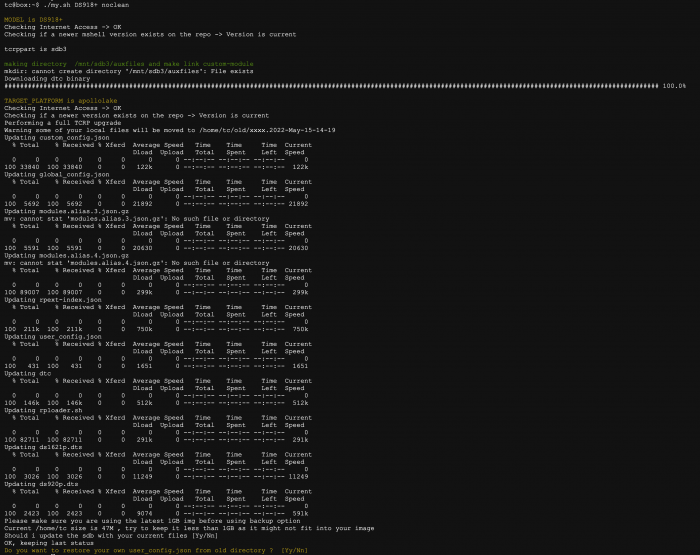
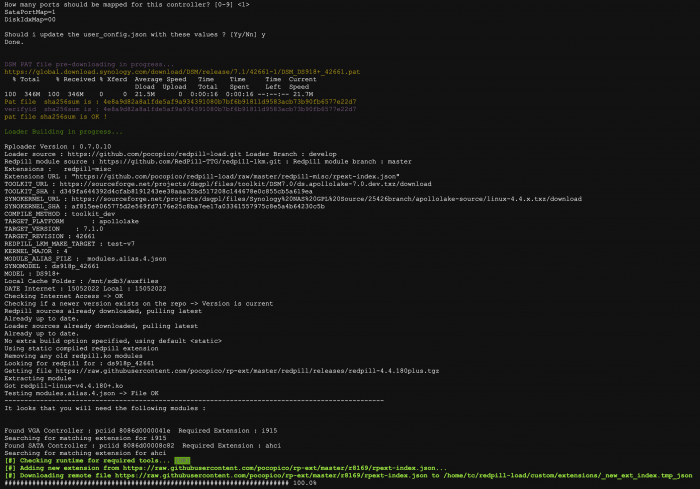
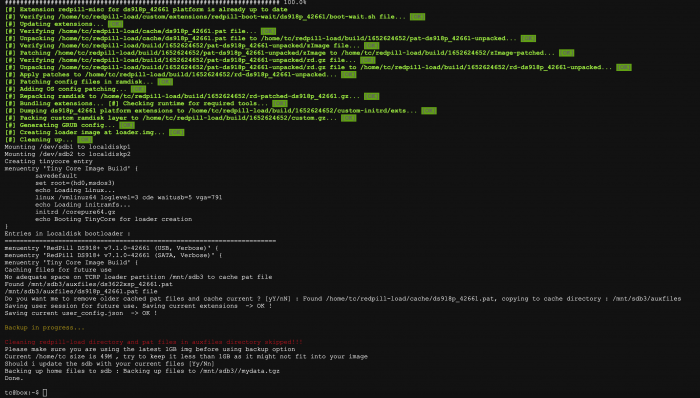
1.This is a shell script that executes several commands at once as described in the "Redpill Tinycore Loader DSM 7.1 Build" guide. To use, you can download and untar it as follows and use it in the /home/tc directory. Helps build DSM 7.1 by managing the PAT file directory required for decryption. ( It currently supports the latest version of the DSM, 7.1.0-42661 update 1 nanopack version. ) Automatically add mac2 to user_config.json file for dual NIC, a feature that TC doesn't have. ( Manual Response Version ) wget https://github.com/PeterSuh-Q3/tinycore-redpill/raw/main/m.sh.gz; tar -zxvf m.sh.gz; ( Auto Answer Version with y ) wget https://github.com/PeterSuh-Q3/tinycore-redpill/raw/main/my.sh.gz; tar -zxvf my.sh.gz; Where y is unnecessarily asked, it automatically responds. Usage: ./my.sh <Synology Model Name> <Option> <Option> <Option> Options: noconfig, noclean, manual - noconfig: SKIP automatic detection change processing such as SN/Mac/Vid/Pid/SataPortMap of user_config.json file. - noclean: SKIP the 💊 RedPill LKM/LOAD directory without clearing it with the Clean now command. However, delete the Cache directory and loader.img. - manual: Options for manual extension processing and manual dtc processing in build action (skipping extension auto detection) Please type Synology Model Name after ./my.sh ./my.sh DS918+ ./my.sh DS3617xs ./my.sh DS3615xs ./my.sh DS3622xs+ ./my.sh DVA3221 ./my.sh DS920+ ./my.sh DS1621+ # Update : add noconfig, noclean, manual combination options # 2022.05.06 You can use it like this. ./my.sh DS918+ noconfig noclean manual ----------------------------------------------------------------------------------------------------- 2. Deploy scripts that you can leverage if you need to add a separate ext manually for VM users. It includes the fuction to add exts created by @FOXBI with multiple selections like capture. For the instructions on how to use, you can download and decompress as below and use it in /home/tc directory. ( Auto Answer Version with y ) wget https://github.com/PeterSuh-Q3/tinycore-redpill/raw/main/myv.sh.gz; tar -zxvf myv.sh.gz; The way to use it is existing same as my.sh. Where y is unnecessarily asked, it automatically responds. ---------------------------------------------------------------------------------------- Usage: ./myv.sh <Synology Model Name> <Options> Options: noconfig, noclean, manual - noconfig: SKIP automatic detection change processing such as SN/Mac/Vid/Pid/SataPortMap of user_config.json file. - noclean: SKIP the 💊 RedPill LKM/LOAD directory without clearing it with the Clean now command. However, delete the Cache directory and loader.img. - manual: Options for manual extension processing and manual dtc processing in build action (skipping extension auto detection) Please type Synology Model Name after ./myv.sh ./myv.sh DS918+ ./myv.sh DS3617xs ./myv.sh DS3615xs ./myv.sh DS3622xs+ ./myv.sh DVA3221 ./myv.sh DS920+ ./myv.sh DS1621+ CAUTION) Not all exts correspond to 7.1.0-42661. Please check @pocopico's ext GITHUB in advance and use it. We do not respond to errors caused by unsupported revisions.

-

From Intel 8th gen to Intel 12th/13th/14th gen in DSM 6.2.3
ed_co posted a question in General Questions
Hello guys, I need your help. I was using a xpenology build since fall of 2018 and was working AMAZING!! The configuration was: - Asrock H370M-ITX/ac (6 SATA, 2 x NIC: i211V and i219V) - i3 8700 - 32Gb DDR4 RAM - SATA card SYBA SI-MPE40125 4 SATA ports -with Marvell 88SE9215 controller-, installed via M.2 e-key to mini pic-e adapter. So with the 6 ports of the motherboard have a total of 10 SATA ports. - 5x8Tb disks - Using Jun's loader 1.04b 918+ BAREMETAL (with extra.lzma for the second NIC) with DSM 6.2.3 I was completely in love with the build, I thought it was almost perfect for my needs (well, never had enough space ). I was always updating until I couldn't do it more in DSM 6.2.3. It was working so well, that even that I was tempted numerous of times to update to DSM 7 (but I was not confident enough), I kept locked to DSM 6.2.3 because I was not sure if there was anything I could do better with DSM 7, at least for my needs, and I wanted to wait until I buy new disks in summer, to do an update to DSM 7.2. It was working rock solid almost 24/7 for almost 5.5 years!! Sadly, a couple of weeks ago, the motherboard died (with no explanation), and there was no way to find a motherboard to replace it, at least in this form factor. So I had to find a replacement board (with obviously a new processor) to match the needs (and seriously there are really few possibilities, the world shortage is huge, at least in mini-ITX boards), thinking I would be able to make it work straight away with my build with few changes in the config, so I found the following: - Asrock H610M-ITX/AC (4 SATA, 1 x NIC: i219V) - i3 12100 - Same 32GB DDR4 RAM Using the mentioned SYBA card in the M.2 port, still have 8 SATA ports, and is fine for my needs even losing 2 ports, as have just 5 disks. I can see the disks in the EFI BIOS, so are being recognised, which is great as was one of my fears. So, I changed the grub.cfg of the USB with the Jun's loader of the previous configuration, and modified: - The mac address of my NIC, I got the mac address of the new board via USB with Ubuntu LTS (NOTE ABOUT MAC ADDRESSES IN THE PREVIOUS BUILD: "strangely" I was using in the previous build a "well known" mac addresses with a serial number that you can find in the forum, and it was working beautifully even with transcoding, and I don't think I was using the real mac addresses of the board!! Don't remember seriously... unless I changed the NIC mac addresses permanently to these ones, which I am not sure if it is even possible). - The SataPortMap configuration to 44 (means first 4 ports of 1st controller and first 4 ports of 2nd controller), instead the previous 64 As the previous build was using the extra.lzma for the i219V, I chose this motherboard because it had the same NIC, and I thought it would work straight away. So I booted the computer with the USB, and I am not not able to run the previous DSM installation nor able to find any Synology device with the web or the Synology assistant. Not sure if I have to use the reinstall option of the Jun's loader because of the new configuration (or is just if you want to install again DSM), and just used it with the default option of the loader (the first BAREMETAL one). I have the feeling that maybe the NIC is not being recognised and I don't understand why. Being headless I don't see any message when connected to my monitor via DisplayPort about if the loader is having any problem. Not sure what to do nor debug. Don't remember if I changed any BIOS settings in the past that maybe could matter. Just changed the hot plug of the SATA and few things more... Obviously, as I want to recover all the disks and see that everything is correct, I would like to avoid installing the DSM 7 for now (as I don't want to risk the existent disks and I have no other backups), and would love to first having DSM 6.2.3 working, and not have any problem afterwards to updated. But now I just want to see everything is correct and the DSM 6.2.3. Can anyone help me with that? I am very desperate and I don't know what more to do. Find attached the grub.cfg just in case there is any error. Thank you very much. grub.cfg -
Before installing XPEnology using DSM 7.x, you must select a DSM platform and loader. XPEnology supports a variety of platforms that enable specific hardware and software features. All platforms support a minimum of 4 CPU cores, 64GB of RAM, 10Gbe network cards and 16 drives. Each can run "baremetal" as a stand-alone operating system OR as a virtual machine within a hypervisor. A few specific platforms are preferred for typical installs. Review the table and decision tree below to help you navigate the options. NOTE: DSM 6.x is still a viable system and is the best option for certain types of hardware. See this link for more information. DSM 7.x LOADERS ARE DIFFERENT: A loader allows DSM to install and run on non-Synology hardware. The loaders for DSM 5.x/6.x were monolithic; i.e. a single loader image was applicable to all installs. With DSM 7.x, a custom loader must be created for each DSM install. TinyCore RedPill (TCRP) is currently the most developed tool for building 7.x loaders. TCRP installs with two step-process. First, a Linux OS (TinyCore) boots and evaluates your hardware configuration. Then, an individualized loader (RedPill) is built and written to the loader device. After that, you can switch between starting DSM with RedPill, and booting back into TinyCore to adjust and rebuild as needed. TCRP's Linux boot image (indicated by the version; i.e. 0.8) changes only when a new DSM platform or version is introduced. However, you can and should update TCRP itself prior to each loader build, adding fixes, driver updates and new features contributed by many different developers. Because of this ongoing community development, TCRP capabilities change rapidly. Please post new or divergent results when encountered, so that this table may be updated. 7.x Loaders and Platforms as of 06-June-2022 Options Ranked 1a 1b 2a 2b 2c 3a 3b DSM Platform DS918+ DS3622xs+ DS920+ DS1621+ DS3617xs DVA3221 DS3615xs Architecture apollolake broadwellnk geminilake v1000 broadwell denverton bromolow DSM Versions 7.0.1-7.1.0-42661 7.0.1-7.1.0-42661 7.0.1-7.1.0-42661 7.0.1-7.1.0-42661 7.0.1-7.1.0-42661 7.0.1-7.1.0-42661 7.0.1-7.1.0-42661 Loader TCRP 0.8 TCRP 0.8 TCRP 0.8 TCRP 0.8 TCRP 0.8 TCRP 0.8 TCRP 0.8 Drive Slot Mapping sataportmap/ diskidxmap sataportmap/ diskidxmap device tree device tree sataportmap/ diskidxmap sataportmap/ diskidxmap sataportmap/ diskidxmap QuickSync Transcoding Yes No Yes No No No No NVMe Cache Support Yes Yes Yes Yes Yes (as of 7.0) Yes No RAIDF1 Support No Yes No No Yes No Yes Oldest CPU Supported Haswell * any x86-64 Haswell ** any x86-64 any x86-64 Haswell * any x86-64 Max CPU Threads 8 24 8 16 24 (as of 7.0) 16 16 Key Note currently best for most users best for very large installs see slot mapping topic below AMD Ryzen, see slot mapping topic obsolete use DS3622xs+ AI/Deep Learning nVIDIA GPU obsolete use DS3622xs+ * FMA3 instruction support required. All Haswell Core processors or later support it. Very few Pentiums/Celerons do (J-series CPUs are a notable exception). Piledriver is believed to be the minimum AMD CPU architecture equivalent to Intel Haswell. ** Based on history, DS920+ should require Haswell. There is anecdotal evidence gradually emerging that DS920+ will run on x86-64 hardware. NOT ALL HARDWARE IS SUITABLE: DSM 7 has a new requirement for the initial installation. If drive hotplug is supported by the motherboard or controller, all AHCI SATA ports visible to DSM must either be configured for hotplug or have an attached drive during initial install. Additionally, if the motherboard or controller chipset supports more ports than are physically implemented, DSM installation will fail unless they are mapped out of visibility. On some hardware, it may be impossible to install (particularly on baremetal) while retaining access to the physical ports. The installation tutorial has more detail on the causes of this problem, and possible workarounds. DRIVE SLOT MAPPING CONSIDERATIONS: On most platforms, DSM evaluates the boot-time Linux parameters SataPortMap and DiskIdxMap to map drive slots from disk controllers to a usable range for DSM. Much has been written about how to set up these parameters. TCRP's satamap command determines appropriate values based on the system state during the loader build. It is also simple to manually edit the configuration file if your hardware is unique or misidentified by the tool. On the DS920+ and DS1621+ platforms, DSM uses a Device Tree to identify the hardware and ignores SataPortMap and DiskIdxMap. The device tree hardcodes the SATA controller PCI devices and drive slots (and also NVMe slots and USB ports) prior to DSM installation. Therefore, an explicit device tree that matches your hardware must be configured and stored within the loader image. TCRP automatic device tree configuration is limited. For example, any disk ports left unpopulated at loader build time will not be accessible later. VMware ESXi is not currently supported. Host bus adapters (SCSI, SAS, or SATA RAID in IT mode) are not currently supported. Manually determining correct values and updating the device tree is complex. Device Tree support is being worked on and will improve, but presently you will generally be better served by choosing platforms that support SataPortMap and DiskIdxMap (see Tier 1 below). CURRENT PLATFORM RECOMMENDATIONS AND DECISION TREE: VIRTUALIZATION: All the supported platforms can be run as a virtual machine within a hypervisor. Some use case examples: virtualize unsupported network card virtualize SAS/NVMe storage and present to DSM as SATA run other VMs in parallel on the same hardware (as an alternative to Synology VMM) share 10GBe network card with other non-XPEnology VMs testing and rollback of updates Prerequisites: ESXi (requires a paid or free license) or open-source hypervisor (QEMU, Proxmox, XenServer). Hyper-V is NOT supported. Preferred Configurations: passthrough SATA controller and disks, and/or configure RDM/RAW disks This post will be updated as more documentation is available for the various TCRP implementations.
- 76 replies
-
- 42
-

-

-

From Intel 8th gen to Intel 12th/13th/14th gen in DSM 6.2.3
dj_nsk replied to ed_co's question in General Questions
I would advise you to try update to DSM 7.2.1 right away. Just before that, check if everything will work: do not connect your working disks yet, use some temporary SATA disk (you can try without it, but then you will not be able to fully launch the DSM) write one of the modern automated bootloaders (for example, Arc Loader) to a new USB flash drive start, configure the configuration, try to run the DSM if something doesn't work, try different settings, addons and modules, patches when everything works out, delete the temporary disk, connect the workers and run DCM with the same configuration. you will be asked to migrate - agree to save the settings. Some packages will be updated, and some (incompatible with DSM 7) will be deleted. But this is the lesser of evils. The data on the disks (files) must be saved. Notes: Hardware transcoding will not work on the 12th generation processor. Use the DS920+ - it is suitable for most household needs and allows you to forget about the SataPortMap. -
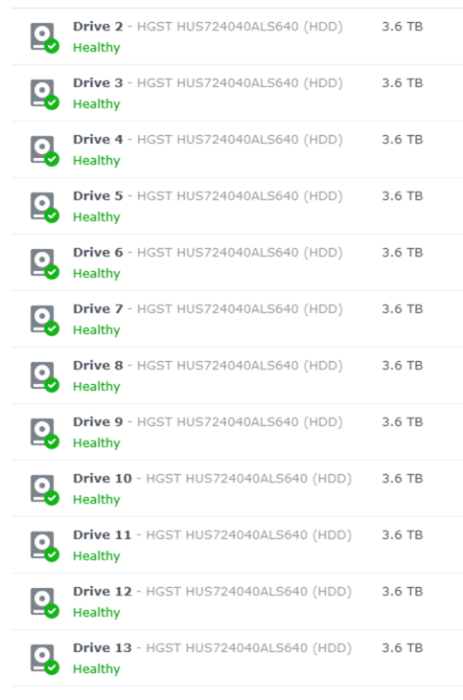
 Hi all, I know this is a well-worn topic, but I have not been able to find a specific answer on my situation. I understand how and why the SataPortMap & DiskIdxMap fields are used, (well, I think I understand it enough...) But my questions is: How does one go about determining what these values should be? I am currently running a: · TinyCore RedPill Loader with M-Shell (Latest as of 20240305) · Asus P11C-M4L with all SATA controllers turned off in the BIOS · ASUS PIKE II 3008 8-port SAS HBA card · 12GB/s SGPIO Expander hot-swap backplane that the connects back to the PIKE II card via 2 MiniHD Cables · 12 SAS disks attached to the this backplane · All 12 disks are being presented to Xpenology as individual disk. With: SataPortMap: 1 DiskIdxMap: 00 I end with DSM detecting all 12 disks, but the disk count starts at 02 and goes through to 13. Like other users I am trying to configure my system to use ports 01-12 I have read some comments suggesting that SAS configurations do not utilise the SataPort Map setting, however I find if I manipulate these settings, does affect the disk layout in DSM. As I have disabled my onboard SATA controllers I believe the PIKE Card is the first control which holds 8 ports, evern though via the SAS backplane it has 12 disks attached. As SataPortMap only uses 1 digit to configure the ports, I assume I need to use: SataPortMap: 8 SataPortMap: 1 DiskIdxMap: 00 Assigns my 12 disks from: sdb through to sdm and SataPortMap: 8 DiskIdxMap: 00 Assigns my 12 disks from: sdd through to sdo So these values are affecting my DSM configuration, what I do not understand is how to calculate the HEX values for the DiskIdxMap. I believe setting DiskIdxMap: 00 means that the first disk detected should be assigned to sda. Ssh-ing into the DSM, there is no sda listed, so I don’t believe there are any other disk controllers at play here. Have I misunderstood a concept here? Is there any glaringly obvious I have missed or misunderstood? Cheers, Leon
-
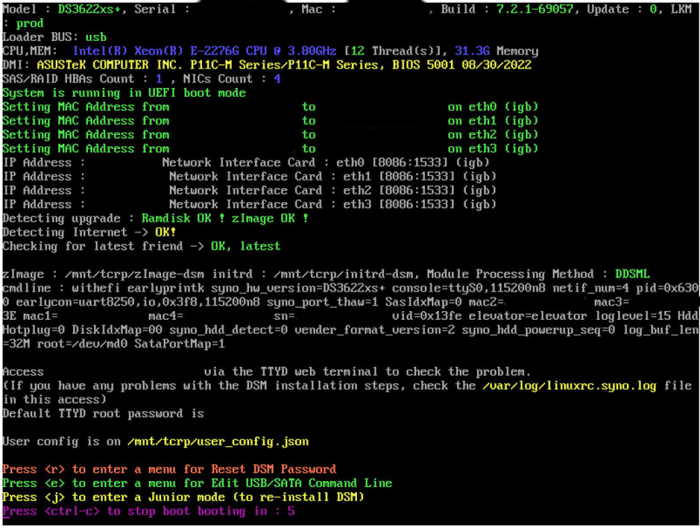
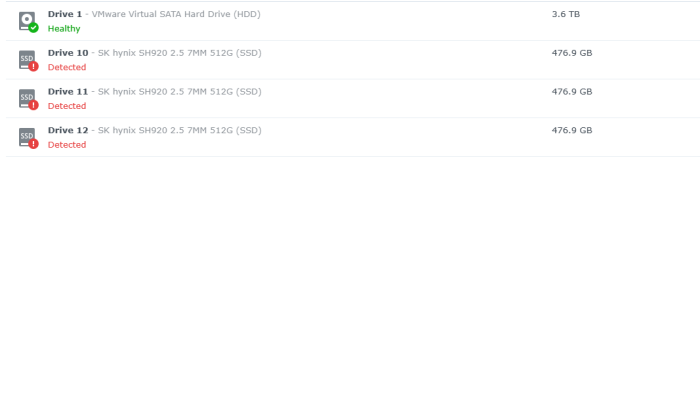
After nearly more than one year I have a problem on my DS3622x (on ESXi-7.0U3o-22348816) Today in the morning I rebooted and Redpill Friend updated to 0.0.6 and I lost three drives. I checked them in the BIOS on the LSI SAS9211-8i IT controller and all are visible. I am not quite sure what could happened. I thought maybe something crashed so I decided to update to DSM 7.2, (I was going to do it anyway ) so I did it and I used new tinycore-redpill.v0.10.0.0.vmdk file and create new bootloader I used the same MAC and SN. I have one physical drive (HDD) connected to SATA port on the motherboard and 6 SSD drives connected to above SAS controller -> pass-through. After I type ./rploader.sh satamap tc@box:~$ ./rploader.sh satamap Machine is VIRTUAL Hypervisor=VMware Found SCSI HBAs, We need to install the SCSI modules scsi-5.10.3-tinycore64 is already installed! Succesfully installed SCSI modules Found "02:00.0 VMware SATA AHCI controller" Detected 30 ports/1 drives. Mapping SATABOOT drive after maxdisks Found "02:01.0 VMware SATA AHCI controller" Detected 30 ports/1 drives. Defaulting 8 virtual ports for typical system compat ibility Override # of ports or ENTER to accept <8> Found SCSI/HBA "03:00.0 LSI Logic / Symbios Logic SAS2308 PCI-Express Fusion-MPT SAS-2 (rev 05)" (0 drives) Computed settings: SataPortMap=18 DiskIdxMap=1000 Should i update the user_config.json with these values ? [Yy/Nn] y Done. I created bootloader and proceed with installation and upgrade. In the new system I still cannot see these three drives: ( I attached pictures) I would like ask for the advice or help what I can do. Thanks M

-
What is this? tc@box:~$ ./rploader.sh satamap now usb Loader BUS: usb Found SCSI HBAs, We need to install the SCSI modules scsi-5.10.3-tinycore64 is already installed! Succesfully installed SCSI modules Found "00:1f.2 Intel Corporation 8 Series/C220 Series Chipset Family 6-port SATA Controller 1 [AHCI mode] (rev 05)" Detected 6 ports/5 drives. Override # of ports or ENTER to accept <6> Found SCSI/HBA "01:00.0 LSI Logic / Symbios Logic SAS2008 PCI-Express Fusion-MPT SAS-2 [Falcon] (rev 02)" (0 drives) lspci: -s: Invalid slot number Found SCSI/HBA "" (0 drives) lspci: -s: Invalid slot number Found SCSI/HBA "" (0 drives) lspci: -s: Invalid bus number Found SCSI/HBA "" (0 drives) lspci: -s: Invalid slot number Found SCSI/HBA "" (0 drives) lspci: -s: Invalid slot number Found SCSI/HBA "" (0 drives) lspci: -s: Invalid slot number Found SCSI/HBA "" (84 drives) lspci: -s: Invalid slot number Found SCSI/HBA "" (0 drives) lspci: -s: Invalid slot number Found SCSI/HBA "" (0 drives) lspci: -s: Invalid slot number Found SCSI/HBA "" (0 drives) lspci: -s: Invalid slot number Found SCSI/HBA "" (0 drives) lspci: -s: Invalid slot number Found SCSI/HBA "" (0 drives) lspci: -s: Invalid slot number Found SCSI/HBA "" (0 drives) lspci: -s: Invalid slot number Found SCSI/HBA "" (0 drives) lspci: -s: Invalid slot number Found SCSI/HBA "" (0 drives) lspci: -s: Invalid slot number Found SCSI/HBA "" (0 drives) Computed settings: SataPortMap=6 DiskIdxMap=00 Should i update the user_config.json with these values ? [Yy/Nn] n OK remember to update manually by editing user_config.json file tc@box:~$ exit In fact, the model is Controladora Fujitsu Lsi 9211-8i Model: D2607-a21. Is that error means that my HBA is not been recognised? 5 of 6 HDD on HBA is been shown on DSM.
-
 Is there an in-depth tutorial on how DSM/Xpen responds to changes in SATA disks? (perhaps also covering USB). I ask because so far all I can find are forum responses "do this", "edit sataportmap/DiskIdxMap values", "I did this..." Do I have to reinstall/recover whenever I rearrange drives? I'm hoping for an in-depth planning guide that covers a lot of general info, AFTER INSTALL, on what happens / what-to-do when adding/rearranging SATA drives, controllers, swapping out drives (e.g. for single-disk volumes), covering all scenarios. And perhaps about attaching/removing USB dives too. Again, so all I've found are posts that address specific issues when somebody is migrating a drive, or adding a new drive... I'm hoping to find a broad tutorial that answers questions I don't have yet. More... Rather than one-time build a reasonably spec'd box, I'm using misc leftover hardware, so I expect to have a lot of sata drive changes over time (tho I expect that's not ideal, I'm just the type that will tweak-as-I-go.) My choice hardware is very limiting (Lenovo M900 tiny), and I know I should just use more suitable stuff, but... I'm still in discovery mode, and when I get far along then I'd like to avoid having to rebuild from scratch. So what's specifically eluding me is... Using ARC loader, I seem to need at least one Sata drive to install -- I can't install on NVMe? Even tho I thought I'm installing on the USB stick, is it really installing on a base sata drive? What happens if I wish to remove the 1st (only) sata drive at a later time to upgrade it? Does this 1st sata drive get used for core DSM apps, so it's required and can't be removed? Is rearranging SATA drives a matter of "edit config file and cross fingers"? No dynamic behavior by DSM? If I were to use a JBOD sata box (my sata port supports port-multiplier), and occasionally pop in a drive, or delete a volume and remove a drive, whether I'll have to edit the If I were to add an ASMedia or JMB585 secondary sata controller, then could I jockey sata drives on those? I've been monkeying with DS920+, which doesn't seem to have satamap command ... should I switch to DS3622xs+? So with this external sata JBOD 5-bay drive rack, if it's so much trouble to swap drives, I could instead connect it with a USB-SATA bridge (instead of attaching it to an add-on sata controller), and use via File Station(?) That would be quite limiting -- no software DSM-based RAID (I'm fine with that), but would I otherwise be able to share files via apps like Plex Server off of those USB-attached drives? Any links to tutorials that address these topics? Thanks!!!
 -
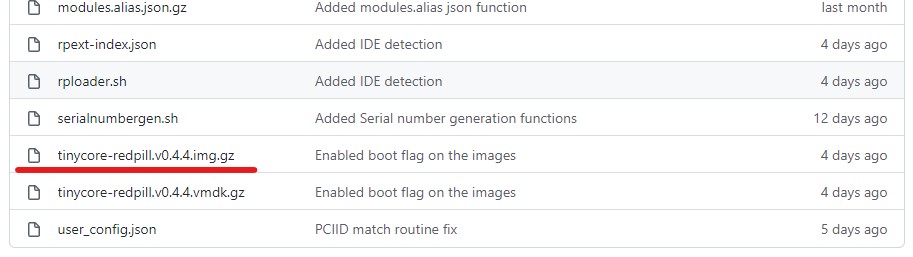
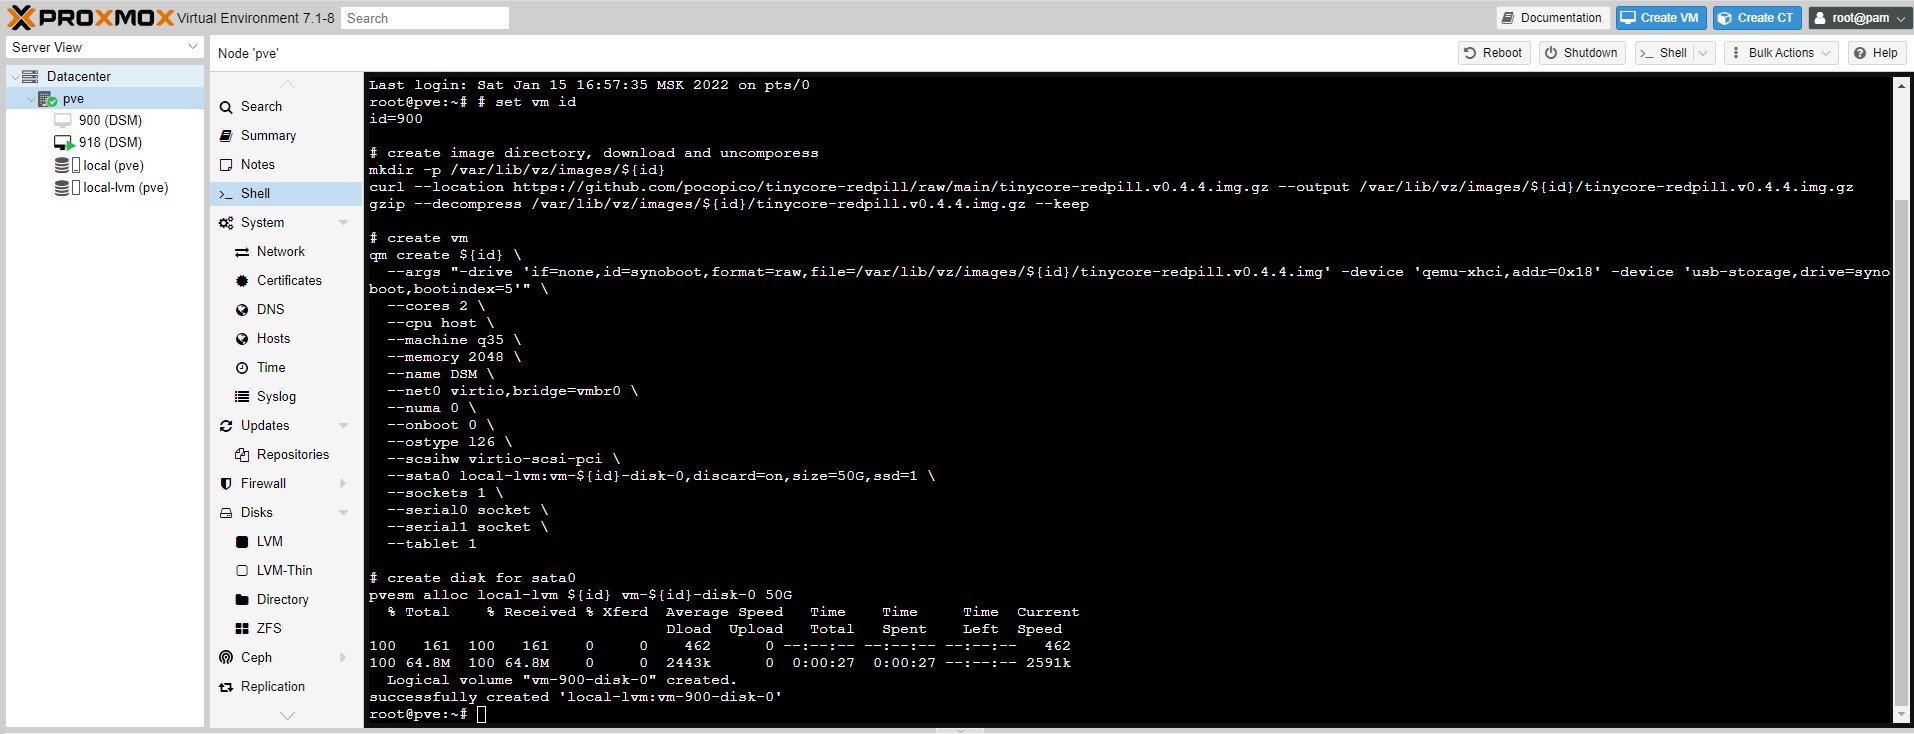
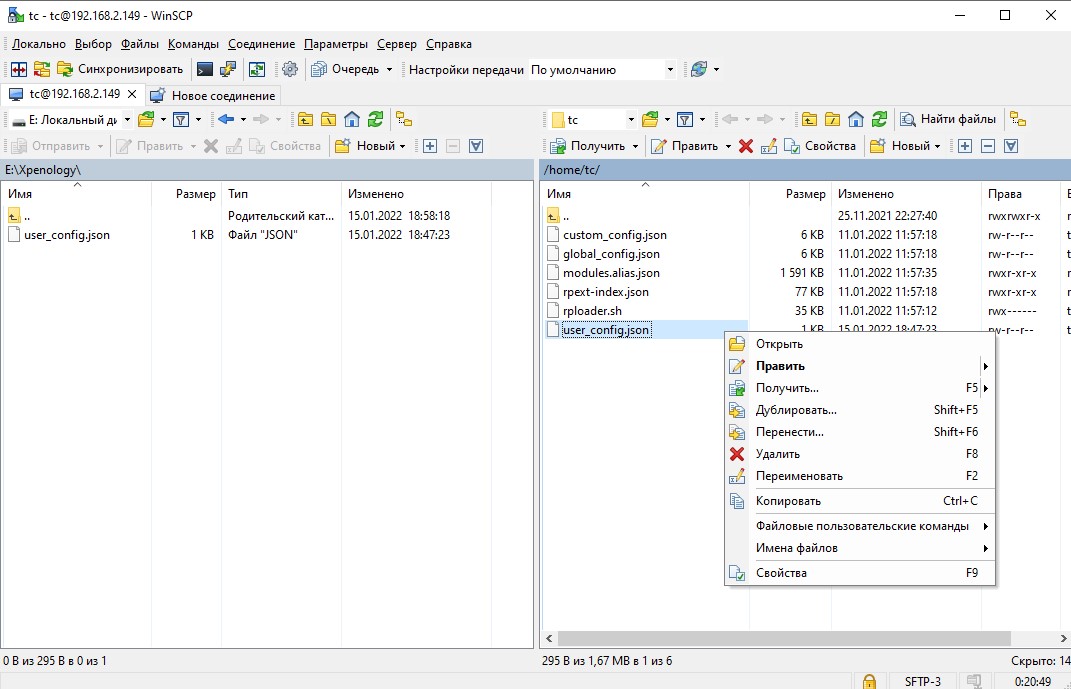
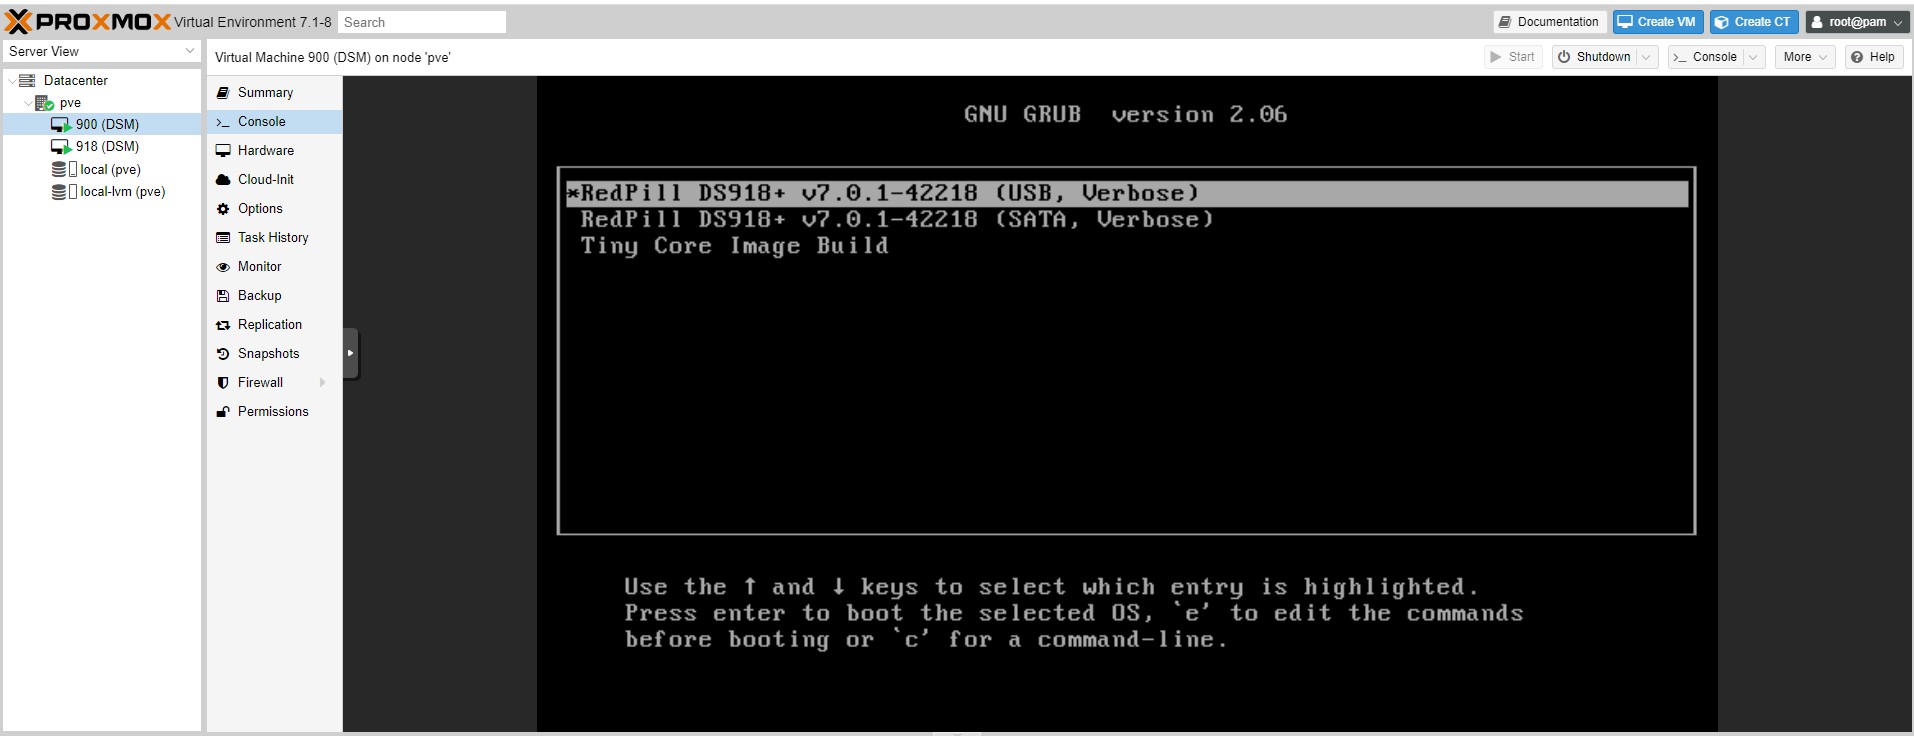
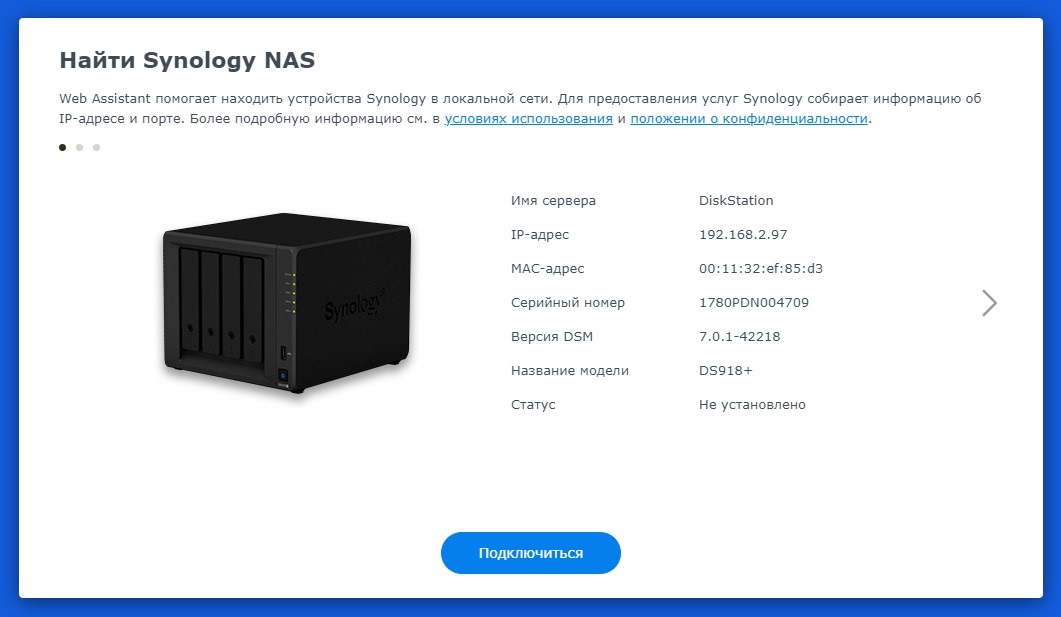
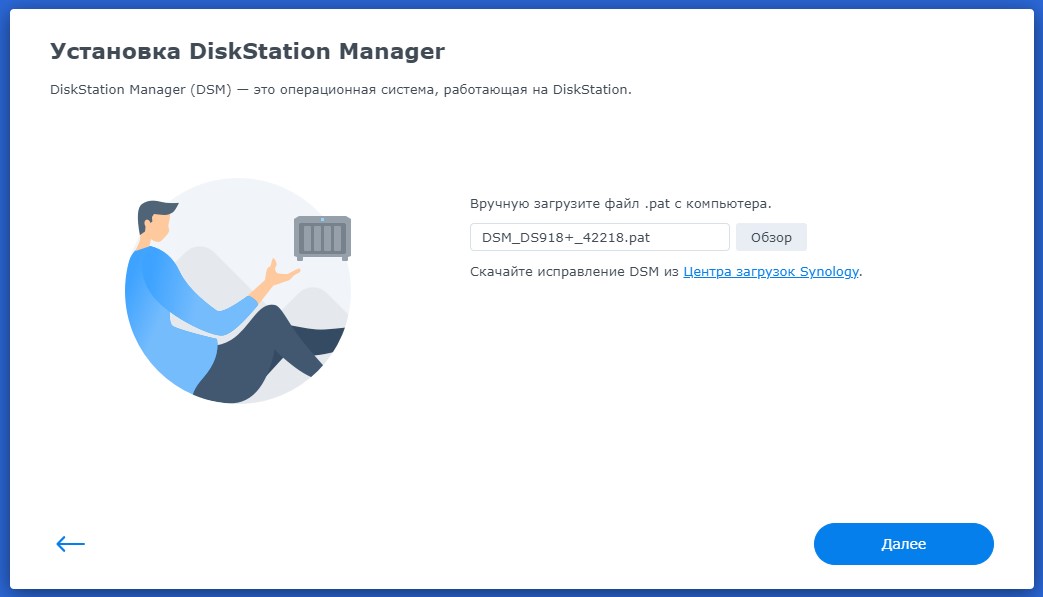
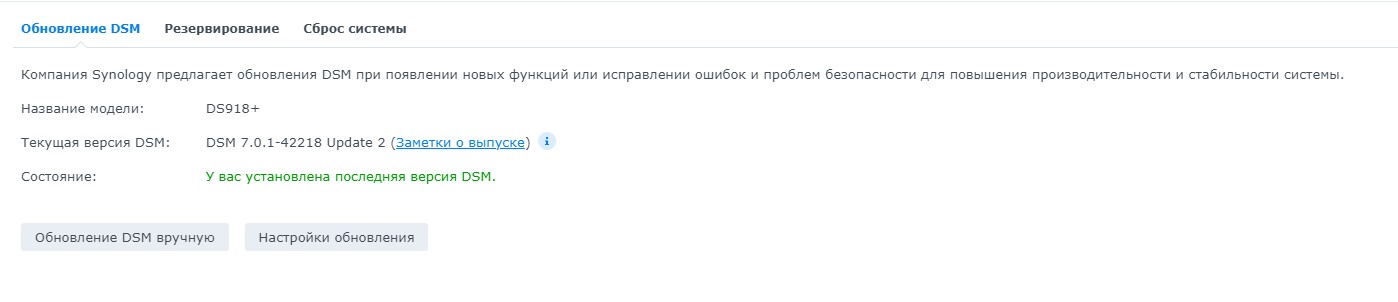
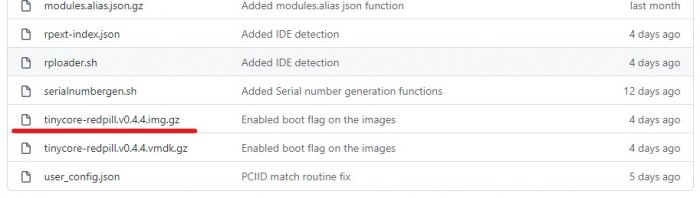
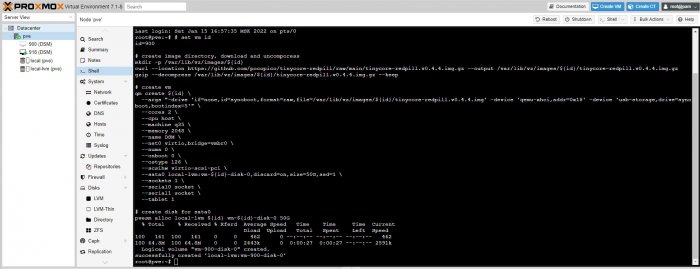
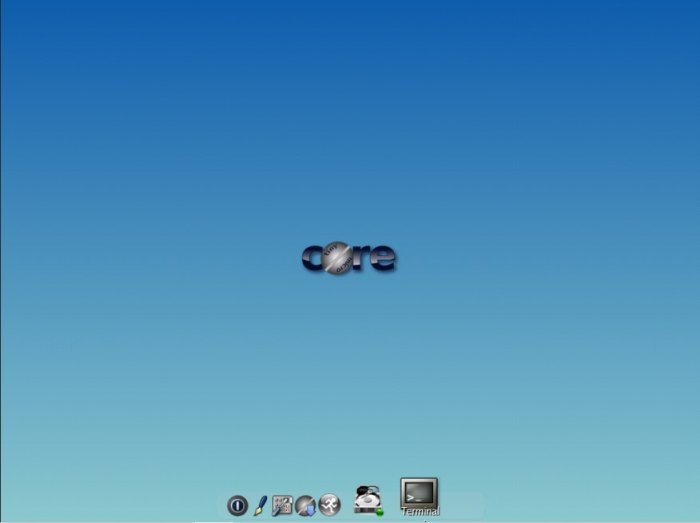
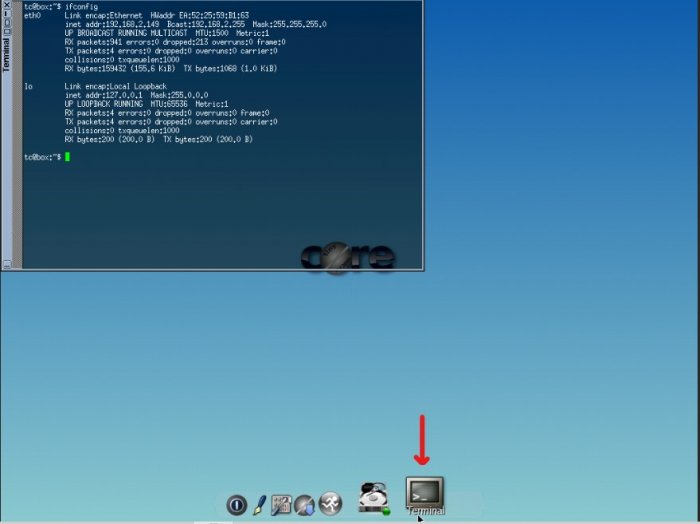
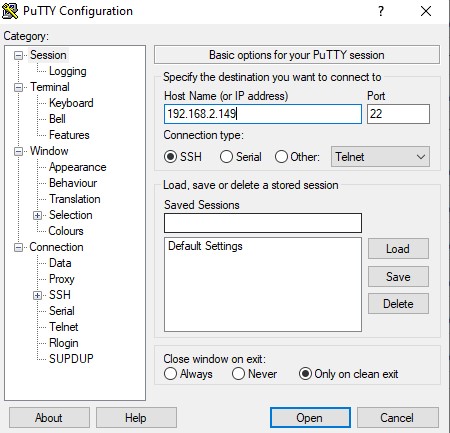
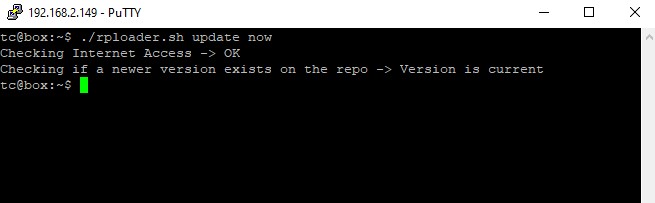
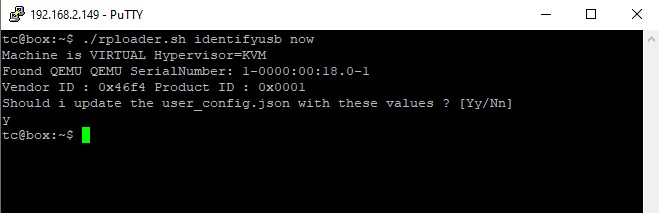
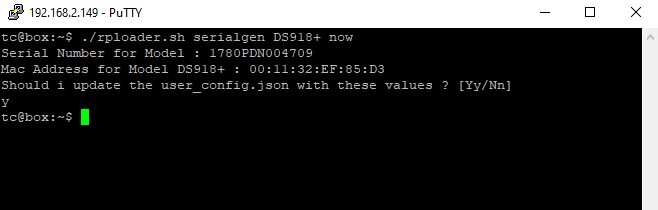
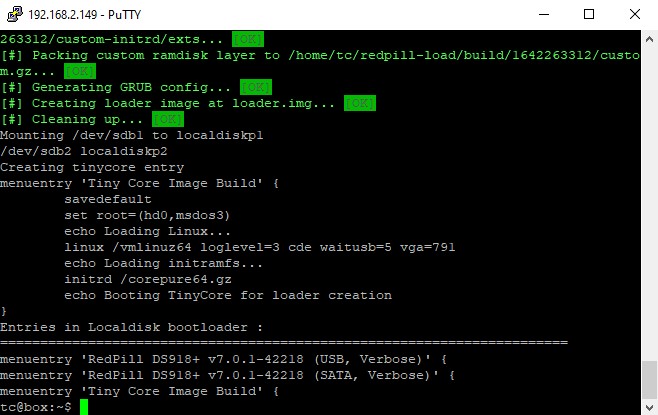
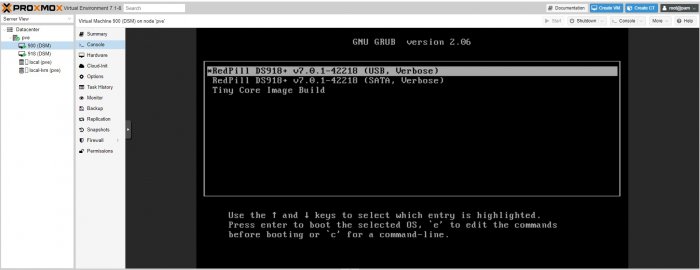
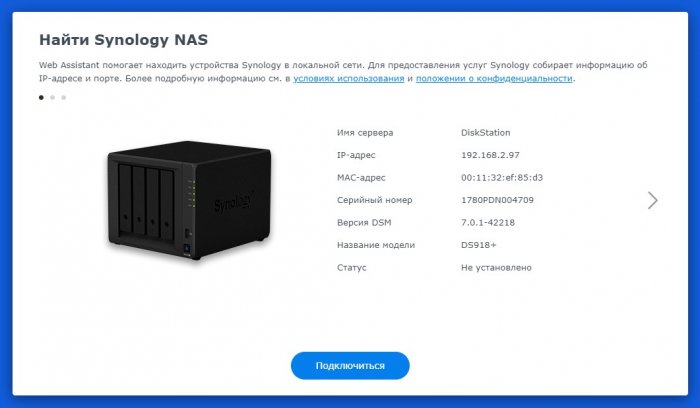
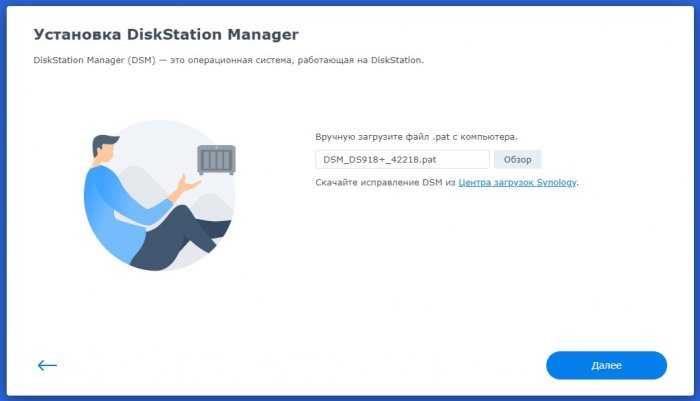
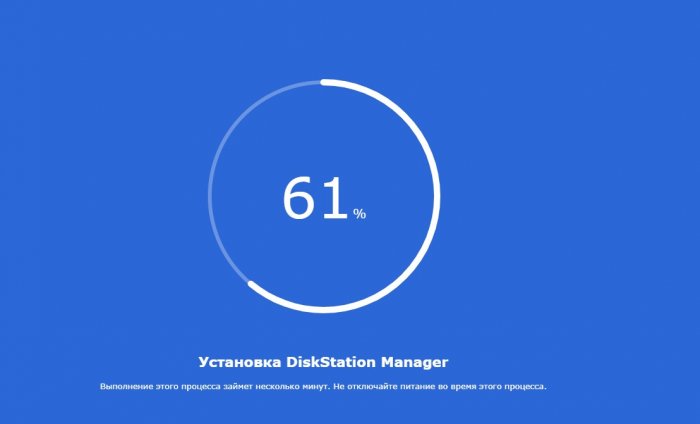
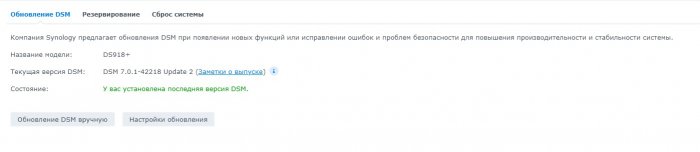
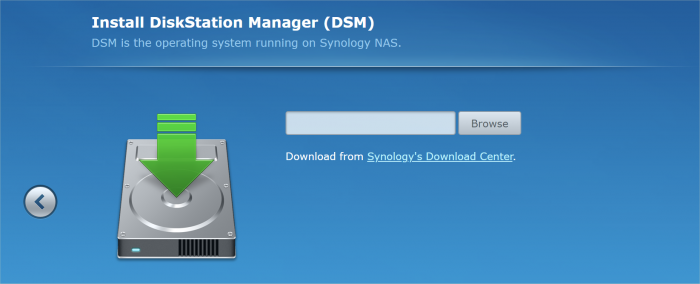
Решив пощупать Xpenology и покопавшись на форуме, то для теста остановил свой выбор на Proxmox, тем более что DSM 7 в этой виртуалке сейчас можно установить довольно просто. Для установки в полуавтоматическом режиме будем использовать RedPill Tinycore loader от pocopico и скрипт от haydibe. Создание виртуальной машины Для создания виртуальной машины я использовал шаблон скрипта от haydibe и использовал последний на данный момент имидж tinycore-redpill.v0.4.4 Под себя в скрипте можете исправить id для виртуальной машины, которую будете создавать и ресурсы, которые хотите выделить для NAS (cores, memory и в двух местах размер диска sata0) Обязательно проверьте в GitHub какая версия имиджа актуальна на данный момент и исправьте это в скрипте. # set vm id id=900 # create image directory, download and uncomporess mkdir -p /var/lib/vz/images/${id} curl --location https://github.com/pocopico/tinycore-redpill/raw/main/tinycore-redpill.v0.4.4.img.gz --output /var/lib/vz/images/${id}/tinycore-redpill.v0.4.4.img.gz gzip --decompress /var/lib/vz/images/${id}/tinycore-redpill.v0.4.4.img.gz --keep # create vm qm create ${id} \ --args "-drive 'if=none,id=synoboot,format=raw,file=/var/lib/vz/images/${id}/tinycore-redpill.v0.4.4.img' -device 'qemu-xhci,addr=0x18' -device 'usb-storage,drive=synoboot,bootindex=5'" \ --cores 2 \ --cpu host \ --machine q35 \ --memory 2048 \ --name DSM \ --net0 virtio,bridge=vmbr0 \ --numa 0 \ --onboot 0 \ --ostype l26 \ --scsihw virtio-scsi-pci \ --sata0 local-lvm:vm-${id}-disk-0,discard=on,size=50G,ssd=1 \ --sockets 1 \ --serial0 socket \ --serial1 socket \ --tablet 1 # create disk for sata0 pvesm alloc local-lvm ${id} vm-${id}-disk-0 50G В Proxmox В консоли вставляем и запускаем созданный скрипт. После создания виртуальной машины запускаем ее и дожидаемся загрузки. Все дальнейшие действия можно делать в веб интерфейсе консоли виртуальной машины, но это будет очень неудобно и довольно криво. Я использовал Putty и WinSCP. В виртуальной машине запускаем Terminal и командой ifconfig смотрим IP У меня это 192.168.2.149 Putty Подключаемся к виртуальной машине Login: tc Password: P@ssw0rd Последовательно выполняем несколько команд ./rploader.sh update now ./rploader.sh satamap now ./rploader.sh identifyusb now Далее нужно сгенерировать серийный номер и mac под нужную платформу (DS3615xs, DS3617xs или DS918+). Если вы используете свою связку sn+mac, то пропускаем этот пункт. Например, для DS918+ указываем: ./rploader.sh serialgen DS918+ now Переходим в WinSCP Подключаемся к виртуальной машине Нам нужно будет проверить и возможно отредактировать файл user_config.json Проверяем, что все пункты соответствуют тому, что были сгенерированы ранее. Иногда почем то скрипт не с первого раза записывает полученные данные в файл. Если используете свою связку sn+maс, то исправляем нужные пункты. "pid": "0x0001", "vid": "0x46f4", "sn": "1780PDN004709", "mac1": "001132EF85D3", "SataPortMap": "66", "DiskIdxMap": "0006" Возвращаемся в Putty В зависимости от выбранной ранее платформы выполняем команды: для DS918+ ./rploader.sh build apollolake-7.0.1-42218 static для DS3615xs ./rploader.sh build bromolow-7.0.1-42218 static для DS3617xs ./rploader.sh build broadwell-7.0.1-42218 static Перегружаем виртуальную машину sudo reboot Обратите внимание, что сейчас при загрузке виртуальной машины выбирать надо загрузку с USB Ждем пару минут и в браузере открываем http://find.synology.com/ или используем Synology Assistant Скачиваем с сайта Synology образ DSM_DS918+_42218.pat или другой под нужную вам платформу. Указываем загруженный файл для продолжения установки. После полной установки новый NAS уедет в очередную перезагрузку и порадует окном приветствия. Обновление 42218 Update 2 так же устанавливается без проблем.


-
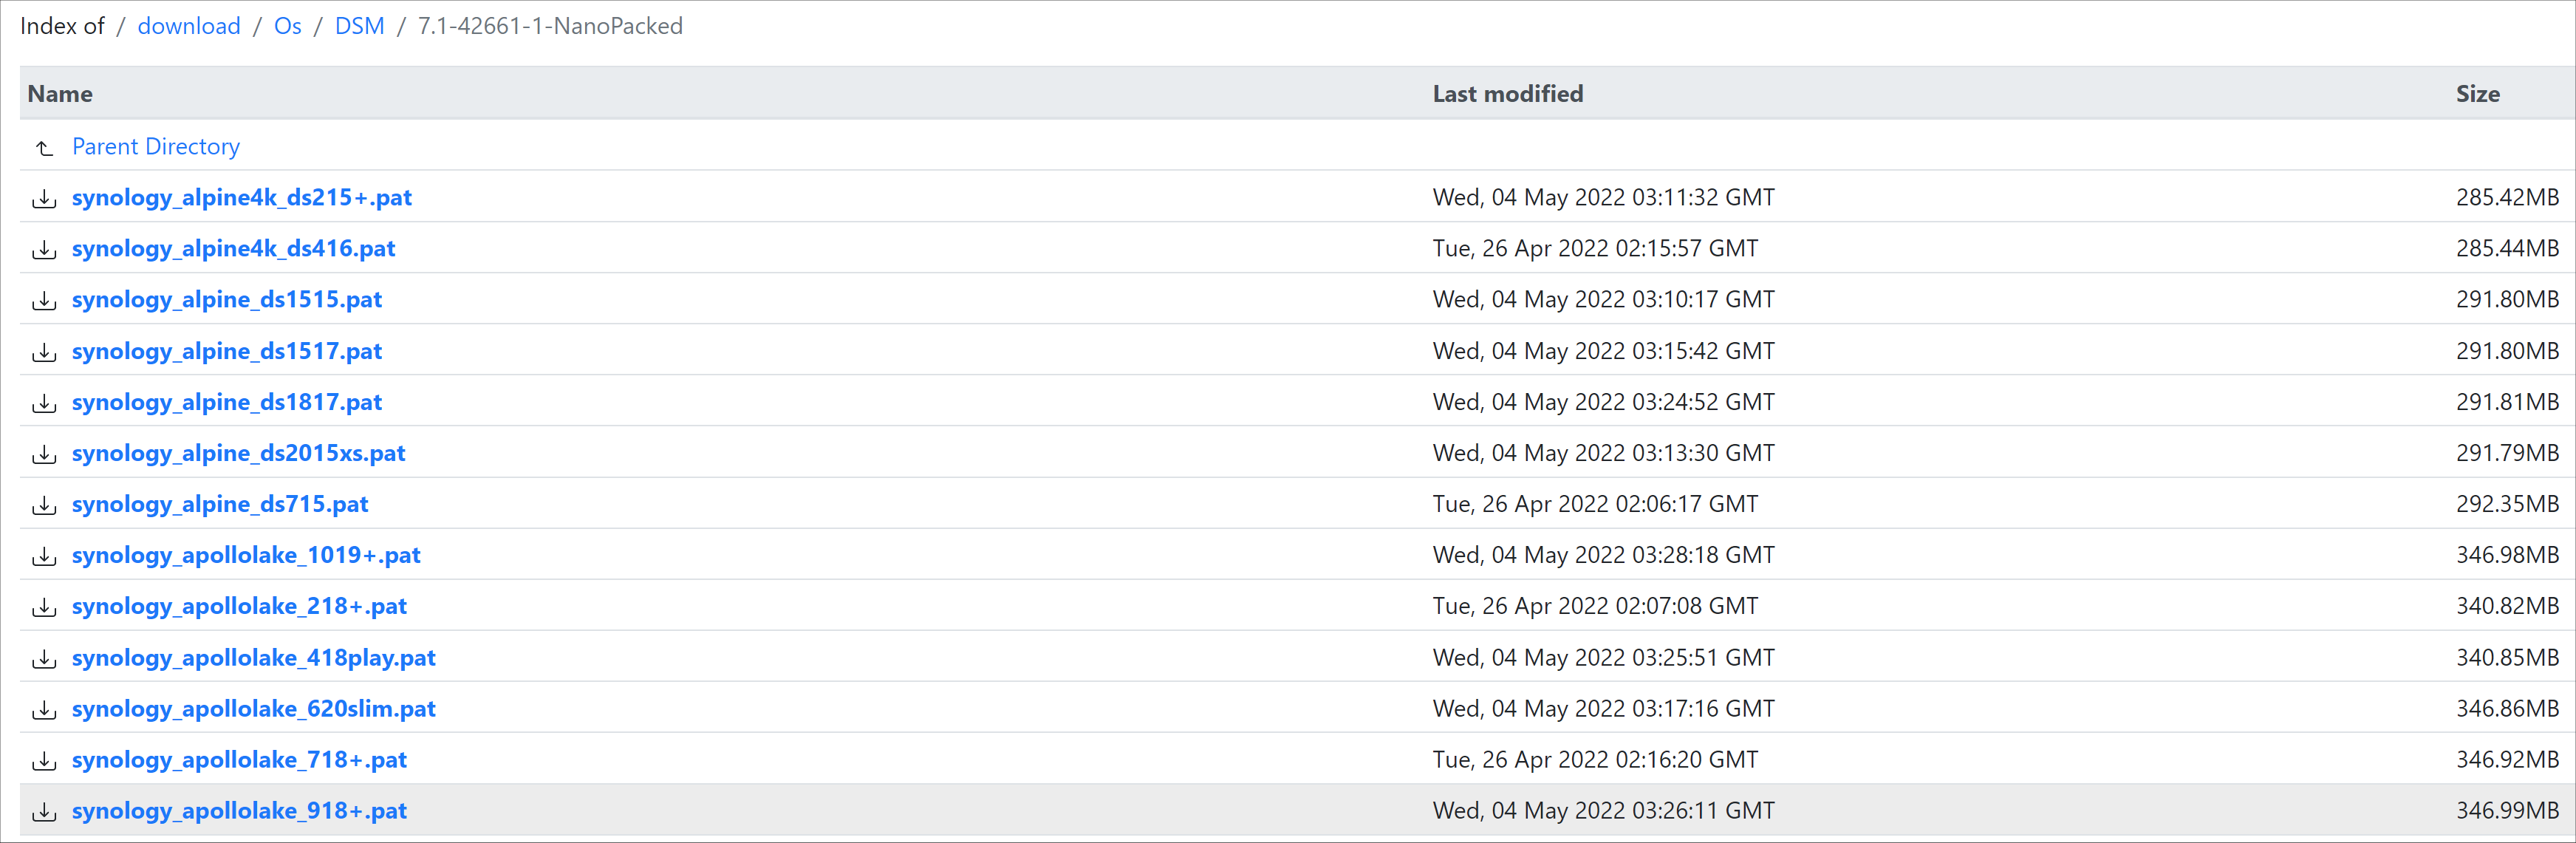
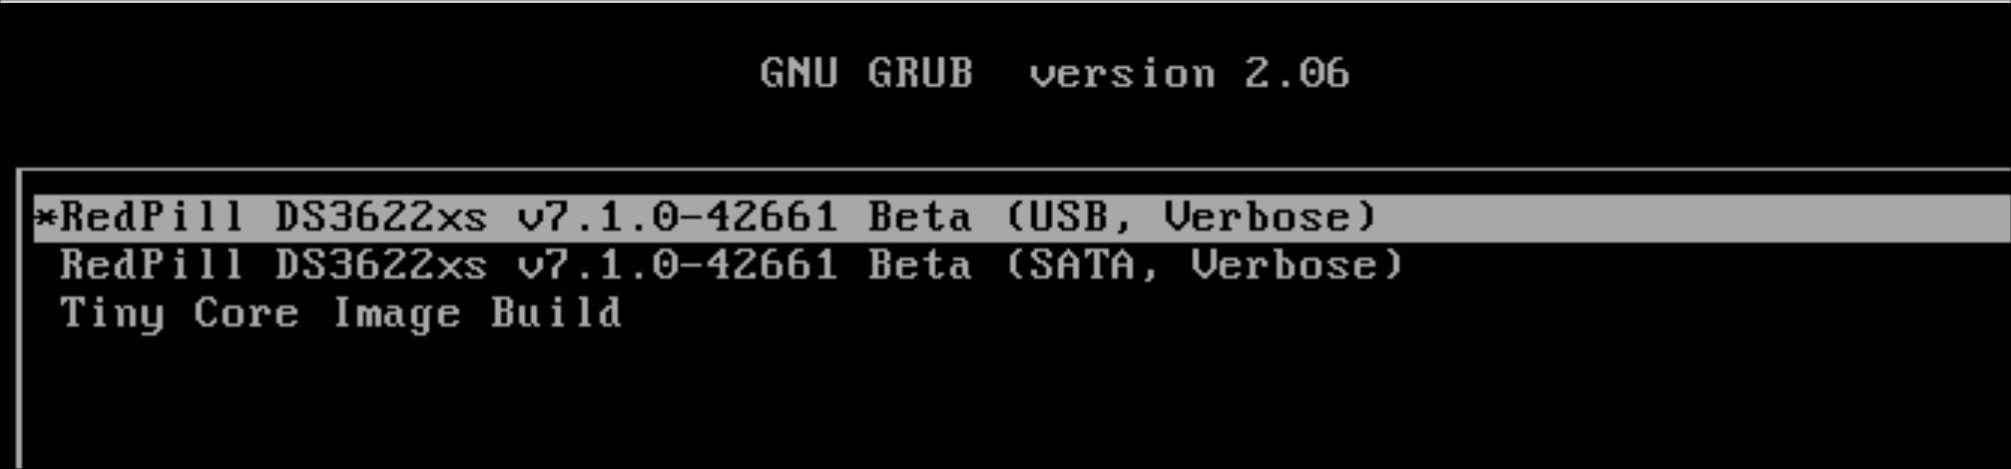
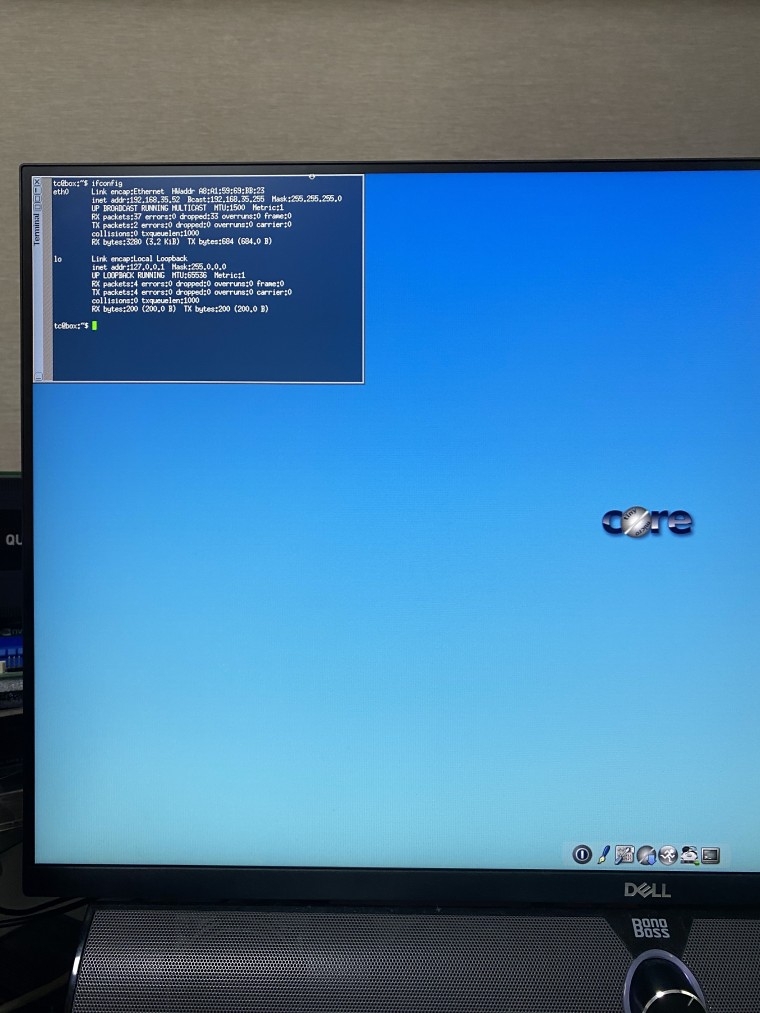
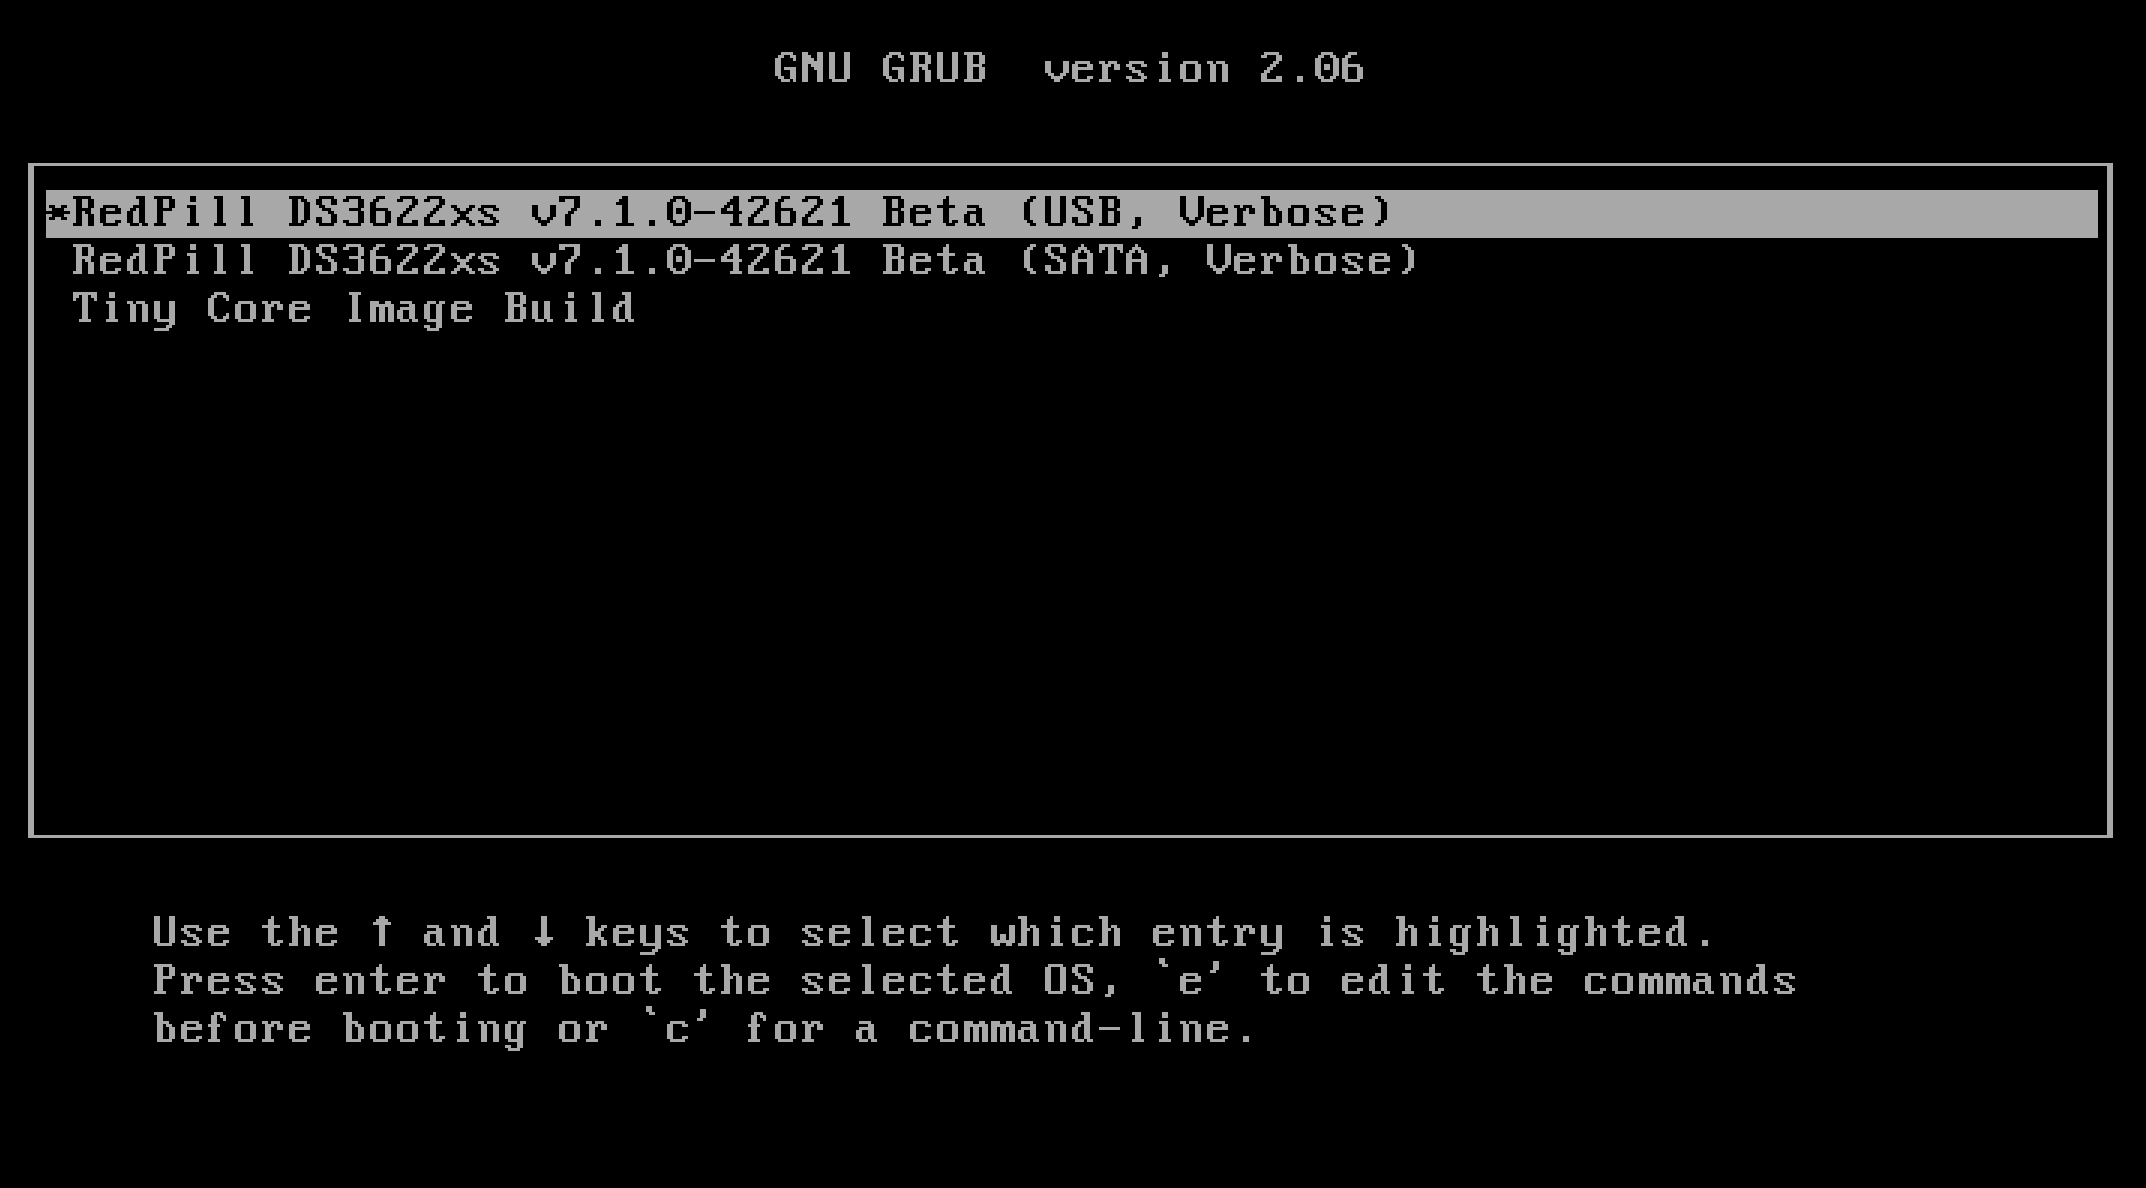
 Loader Information and Background RedPill is the core technology that enables DSM 7.x to run on non-Synology hardware. This post is intended to serve as a definitive tutorial/reference for configuring @pocopico's TinyCore RedPill (TCRP) loader. It explains how to install TCRP on baremetal, i.e. with DSM as the only operating system on your NAS hardware. A tutorial to install TCRP using the ESXi hypervisor is located here. There are other hypervisor tutorials in the Tutorials and Guides forum. TCRP uses a two step-process. First, a Linux OS (TinyCore) boots and evaluates the NAS hardware configuration. Therefore, it is best to have the hardware you plan to use (disk controllers and network cards in particular) installed prior to starting the TCRP setup. Then, an individualized loader (RedPill) is created. This loader is used to install and run DSM. After that, you can switch between starting DSM with RedPill, and booting back into TinyCore to adjust and rebuild the loader as needed. Basic Linux command line skills are needed to complete the installation. The tutorial provides examples of the commands that are needed, but exact syntax and capitalization are critical. If unfamiliar, research and review the following minimal list of commands: ls show the files in the current directory cat <file> show the contents of the specified file pwd show the current directory name cd <directory path> change to the specified directory (same rules as Windows, except with forward slashes instead of backslashes). With no argument, it returns to the “home” TCRP directory vi <file> a file editor, for manual editing of configuration files if required Ongoing Development This tutorial is maintained for consistency with the pocopico stable repository. Since TCRP is completely open-sourced, anyone can fork their own repo and contribute to development, and pocopico now maintains a separate development repo. As the best features and ideas are fully vetted and tested, they may be incorporated into the stable repo over time. If you use a repo, script or shell other than the pocopico stable repo, the loader may behave quite differently and the instructions and troubleshooting steps in this tutorial might no longer apply. In an open-source community, you can use any development resource you want, but you add the additional responsibility of understanding, vetting and testing that code on your system. Migration Step 1. Choose a DSM Platform/Architecture Evaluate your intended NAS hardware and your the intended use of DSM, and select a platform that best meets your needs. Reference information here: https://xpenology.com/forum/topic/61634-dsm-7x-loaders-and-platforms/ Write down the selected platform (e.g. DS918+), the corresponding architecture (e.g. apollolake) and whether the platform uses SataPortMap/DiskIdxMap or Device Tree for slot mapping. This information will be needed later. Now, make sure the NAS hardware is compatible, and prepare it correctly: x86-64-compatible CPU with two cores or more Each platform have maximum threads support! Any threads in excess will be ignored For certain platforms, Intel CPUs must be 4th generation “Haswell” or newer with FMA3 instruction set The corresponding AMD CPU architecture is “Piledriver” or newer AMD-based systems may require deactivation of the C1E option in the BIOS 2GB of RAM or more 2GB or larger USB flash drive Configure the BIOS to boot from the USB flash drive ONLY SATA disk controllers are preferred, but SCSI/SAS are compatible IMPORTANT: All SATA controllers must be configured to AHCI mode SATA controllers with port multipliers are not compatible ATA controllers are not compatible (disable embedded ATA in BIOS if possible) At least one SATA/SCSI/SAS drive (HDD or SSD), minimum size 21GB IMPORTANT: Enable SATA port hotplug on each disk port, if hotplug is supported by the BIOS/controller IMPORTANT: Disable M.2 SATA ports that are not in use, if supported by the BIOS/controller NVMe drives are not usable except as dedicated cache devices Host Bus Adapters are not currently compatible with Device Tree platforms Install any NVMe drives intended as cache devices On Device Tree platforms, NVMe drives must be installed prior to loader installation in order for them to be recognized Step 2. Download TCRP and Write Image to the USB Flash Drive The latest pocopico stable loader code is always linked here: https://xpenology.com/forum/topic/7848-links-to-loaders/ Download the tinycore-redpill 7.x loader and save it to your personal computer. Then, open it with a zip manager to show the boot images: tinycore-redpill.vX.X.X.img.gz (for BIOS/CSM/Legacy boot from USB flash drive) tinycore-redpill-uefi.vX.X.X.img.gz (for UEFI/EFI boot from USB flash drive) tinycore-redpill.vX.X.X.vmdk.gz (for virtual machine SATABOOT from disk image) Select the boot image that matches the boot capability of the NAS motherboard. If unsure, choose BIOS/CSM/Legacy boot. Save the gzip file to your personal computer, then open it with a zip archive manager and save the uncompressed version. Write the uncompressed image to the USB flash drive using Win32DiskImager or other appropriate tool. The USB flash drive is used to store TinyCore and the RedPill loader that it generates. It is a permanent component of an operational XPEnology system. Do not remove it, even after the DSM installation is complete and the NAS is fully up and running. Step 3. Boot into TinyCore and Complete Pre-Configuration Updates Start your NAS with the USB flash drive installed and TinyCore will boot. Then, launch a command-line session with either of these methods: Click the Terminal icon at the bottom right of the TinyCore desktop to launch a console window Use a ssh client (e.g. PuTTY) on your computer to connect a network-based console Consult your DHCP server/router for the IP address assignment (TinyCore's host name is "box") Login credentials: tc/P@ssw0rd When the Linux command line prompt ($) is displayed, update the TCRP script ./rploader.sh update Checking Internet Access -> OK Checking if a newer version exists -> There is a newer version on the repo should we use that ? [yY/nN] Y OK, updating, please re-run after updating Updating tinycore loader with latest updates Backing up files to /mnt/sda3//mydata.tgz Then, update the TCRP support files ./rploader.sh fullupgrade <downloads snipped> Current /home/tc size is 114M , try to keep it less than 1GB as it might not fit into your image Should i update the sda with your current files [Yy/Nn] Y Backing up home files to sda : Backing up files to /mnt/sda3//mydata.tgz Finally, choose a DSM release number Each DSM build as provided by Synology has a release number. You can display the combinations of platforms and releases supported by TCRP by just running the script with no arguments ./rploader.sh <command help snipped> Available platform versions: ---------------------------------------------------------------------------------------- apollolake-7.0-41890 apollolake-7.0.1-42218 apollolake-7.1.0-42661 broadwell-7.0.1-42218 broadwell-7.1.0-42661 broadwellnk-7.0.1-42218 broadwellnk-7.1.0-42661 bromolow-7.0.1-42218 bromolow-7.1.0-42661 denverton-7.0.1-42218 denverton-7.1.0-42661 geminilake-7.0.1-42218 geminilake-7.1.0-42661 v1000-7.0.1-42218 v1000-7.1.0-42661 Step 4. Configure System-Specific Parameters Custom system parameters are stored in the user_config.json file. This can be manually edited, or TCRP can help determine appropriate values for the hardware. USB flash drive VID/PID: TCRP can query the USB flash drive for the hardware vid/pid values that DSM uses to identify the loader during bootup ./rploader.sh identifyusb Found: Superdisk Flash SerialNumber: 123456 Vendor ID: 0x1234 Product ID: 0x0001 Should i update the user_config.json with these values ? [Yy/Nn] Y Serial number/MAC: TCRP can automatically generate a serial number for the platform selected in step 1. Additionally, it will generate a random MAC address for the NAS network card. If you prefer to use the actual hardware MAC address instead, append "realmac" to the command. Example 1: random MAC address ./rploader.sh serialgen DS3622xs+ Serial Number for Model : 20C0SQRLR47QM Mac Address for Model DS3622xs+ : 00:11:32:80:B2:36 Should i update the user_config.json with these values ? [Yy/Nn] Y Example 2: real MAC address ./rploader.sh serialgen DS3622xs+ realmac Serial Number for Model : 2150SQRGS7N5T Mac Address for Model DS3622xs+ : 00:11:32:57:3A:9B Real Mac Address : 00:0C:24:62:3E:3D Notice : realmac option is requested, real mac will be used Should i update the user_config.json with these values ? [Yy/Nn] Y Drive Slot Mapping: TCRP can try to determine how to map the NAS disk controller ports to DSM slots. If the chosen platform uses SataPortMap/DiskIdxMap for port mapping, the command below will do this. If it uses Device Tree for slot mapping, the command may be skipped, as the Device Tree is configured automatically during the loader build. ./rploader.sh satamap Found "02:02.0 SATA AHCI controller" Detected 4 ports/2 drives. Override # of ports or ENTER to accept: <4> Recommended settings: SataPortMap=4 DiskIdxMap=00 Should I update the user_config with these values ? [Yy/Nn] Y If the port count is not what you expect, it may be due to the motherboard design servicing physical ports with multiple controllers, or because of M.2 SATA slot support. If necessary, the port count can be overridden with whatever you like. NOTE: If you see a WARNING message, it is certain that either some of your drives are inaccessible or the DSM install will encounter problems. Evaluate and investigate the issue. The satamap command can be rerun as many times as needed to understand the system. Manual Review: With prior loaders (such as Jun's), the configuration of these parameters was completely manual. There is no single setup that works for all hardware. Even after using the tools above, please review and verify the parameters, understand what they do, and manually edit if needed. Whatever changes rploader.sh makes to the user_config.json file can be reviewed by displaying the file contents cat user_config.json and overridden by editing the file vi user_config.json You can also add a simpler editor, nano tce-load -iw nano nano user_config.json And there is also a graphical editor accessible from the TinyCore desktop Step 5. Optional: Manually Add Driver Extensions While TCRP can automatically add drivers based on the detected NAS hardware, it isn’t foolproof. You might want to build a loader for a device you don’t actually have yet. And there are features that are "opt-in" only. So, a process exists to manually add drivers and other functionality. Extensions are stored in repositories hosted on the web. All the extensions in the main repository are viewable here: https://github.com/pocopico/rp-ext To list all the extensions recommended by TCRP's hardware detection algorithm, use ./rploader.sh listmods <architecture>-<version>-<DSMreleasenumber> ./rploader.sh listmods apollolake-7.1.0-42661 To add a specific extension, choose from the list and reference the architecture from Step 1. ./rploader.sh ext <architecture>-<version>-<DSMreleasenumber> <extensionurl> ./rploader.sh ext apollolake-7.1.0-42661 add https://raw.githubusercontent.com/pocopico/rp-ext/master/redpill-acpid/rpext-index.json ./rploader.sh ext denverton-7.1.0-42661 add https://raw.githubusercontent.com/pocopico/rp-ext/master/v9fs/rpext-index.json The examples illustrate adding ACPI and VIRTIO support. These are often chosen enhancements to a basic installation. Step 6. Build the Loader When all preparation steps are complete, build the loader using the command structure ./rploader.sh build <architecture>-<version>-<DSMreleasenumber> Example #1: DS3622xs+, auto detect hardware ./rploader.sh build broadwellnk-7.1.0-42661 Example #2: DS918+, use preselected drivers ./rploader.sh build apollolake-7.1.0-42661 manual TCRP will download resources from the Internet to complete the complex process of the loader build. When finished, it will write it to the USB flash drive and add new items to the GRUB boot menu. Review the output for any errors and make corrections if necessary. Step 7. Optional Backup Tasks Save the TinyCore configuration state as the default, so that the next boot of TInyCore starts with all your settings ./rploader.sh backup Back up the generated RedPill loader partition to available space on the USB flash drive ./rploader.sh backuploader Step 8: Restart and Boot DSM Using the Grub USB Option Cleanly shutdown and reboot with the TinyCore command exitcheck.sh reboot First, the GRUB Menu is displayed. If necessary, use the arrow keys to ensure that USB is selected and press ENTER. The loader will show some initialization information and silently boot DSM. Nothing else will be displayed unless a serial console is attached (see the Troubleshooting section below). Wait a few minutes, then launch either https://find.synology.com or the Synology Assistant desktop utility. If the loader is working properly, a new "SynologyNAS" will be displayed as Not installed (for a new build) or the name of your existing Migratable NAS (if upgrading from a previous version). Use your browser to connect to the NAS. If "Something went wrong" is displayed, jump to the Basic Troubleshooting section below. Otherwise, browse to the Synology Download Center and download the DSM install PAT file that matches the platform and release number specified in the loader build. Do not use the PAT file stored in TinyCore. It has modifications that are incompatible with DSM installation. However, its name may help identify the correct PAT file to download below. There can be several files that appear to be candidates. PAT files marked VirtualDSM will not work. Also there can be patch PAT files with the same numbering. These will not work and will usually be smaller than 50MB. The correct PAT file is 300MB or larger. Once the correct DSM PAT file is saved to your personal computer, upload it to the NAS. Follow the prompts to complete the installation. FOR UPGRADES ONLY: If Synology Assistant shows Not installed, or if prompted to erase the disks during the upgrade, STOP! Some or all of your array disks are not visible to DSM. This must be resolved via troubleshooting and reconfiguration before installing DSM 7.x. IMPORTANT: During the install, always select DSM manual updates. If a new install completes normally, but then fails after the reboot, it may be that DSM has attempted to auto-update itself with incompatible code. Basic Troubleshooting Where to Post for Help It’s easy for requests for installation help to get lost in various unrelated forum threads. Post requests for help as a new topic in the DSM Installation Forum. At a minimum, state the hardware configuration, selected platform, DSM version, user_config.json information (delete or redact the serial number and configured MAC address) and any information from debugging analysis that you have done. DON’T post general requests for help on this thread. Please DON’T post general requests for help on TCRP or RedPill development threads unless providing feedback on a dev issue.


- 156 replies
-
- 40
-
-
-
 Hello. I'll start right away in order. I put it here on this guide https://github.com/fbelavenuto/arpl Specifications of my PC ( i5-12400, 16GB, Asus Prime B660M-A D4, 3xSkyhawk 4TB 1xSSD M.2 NVMe 250Gb Kingston NV1 SNVS/250G) Then when I put it using the Arpl method, the bootloader is installed on my USB flash drive, everything is fine. But at the Booting stage.... the computer is not responding. There is no access by IP. But at the boot stage, the IP is obtained via DHCP and it is visible for 3 seconds while there is still no Booting stage.... I tried this guide but all to no avail. On this guide at the stage ./rploader.sh satamap writes me 1 2 3 4 bad ports.https://xpenology.com/forum/topic/62221-tutorial-installmigrate-to-dsm-7x-with-tinycore-redpill-tcrp-loader/ , but all to no avail. On this guide at the stage ./rploader.sh satamap writes me 1 2 3 4 bad ports. Found "00:17.0 Intel Corporation Device 7ae2 (rev 11)" Detected 8 ports/3 drives. Bad ports: 1 2 3 4. Override # of ports or ENTER to accept <8> Computed settings: SataPortMap=8 DiskIdxMap=00 WARNING: Bad ports are mapped. The DSM installation will fail! And I do not know what else to do in this situation because in the Arpl method it freezes there at the loading stage. Here I can't make a flash drive because at the sata stage I have an error, if I make a build, it freezes at the flash drive build stage. Please help me, what can I do?
 -
Hi All, I have 2 baremetal machines who work very well ... as hardware i have intel sata on motherboard with 6 ports + HBA card with 8 sata ports what i need to do to show correct numbering when i preview hdd info page ? disk 7 is not available on both machines sataportmap=6 diskidxmap=00 in both machines. Using latest DSM Thanks @Peter Suh
-
I try to edit config.json, but SataPortMap and DiskIdxMap are blank: SataPortMap = " " DiskIdxMap ->nothing is written So, how can I set more disks to my box without mess things up?
-

new sata/ahci cards with more then 4 ports (and no sata multiplexer)
Kanst replied to IG-88's topic in Hardware Modding
It's a miracle. Today trying ARC-loader 24.3.21 I set again SataPortMap : "6666" and DiskIdxMap : "00060c12" and now it's work!!! (6xSATA on m/b + 2x6ports NVME ASM1166 + 1x6ports PCIe4x ASM1166 as 3622xs+) -
 Hello. If you are using an existing 7.0.1 after the version of the Synology DSM was updated to 7.1, you may want to update to 7.1 or this is a guide for those who want to install 7.1 from the beginning. For those who are new to this article, I will share it with you by adding and subtracting it from the existing 7.0.1 guide. It is a translation from Korean to English using a translator. Please understand if there is a slight misunderstanding. Existing RedPill, released last year, can generate IMG files directly through the compilation process of the bootloader only if Linux is available separately In the case of tinyCore RedPill, it comes completely with tinyCore Linux in the form of a USB boot image It's much easier without having to install and prepare linux separately. You can add the drivers you want to build after you select them and add them directly. The latest version of tinycore supports a total of 7 models (DS3622xs+/DS918+/DS3615xs/DS3617xs/DS1621+/DS920+/DVA3221) You can continuously change the boot loader on your own without re-imaging it (model/sn/mac, etc.) Tinycore supports both img for native installation and vmdk for virtual environments. 1.Preparing Bootloader IMG Use the Download button in the middle of the beam link below.Download the gz file In it 0.4.6 version img.You can decompress the gz file one more time and use the img file. (Full File) https://github.com/pocopico/tinycore-redpill (for LEGACY / EFI) https://github.com/pocopico/tinycore-redpill/raw/main/tinycore-redpill.v0.4.6.img.gz (for VMWARE) https://github.com/pocopico/tinycore-redpill/raw/main/tinycore-redpill.v0.4.6.vmdk.gz 2. Bootloader IMG File USB Recording Use the above tinycore-redfill.v0.4.6.img file to burn it with USB with a convenient image tool such as WinImage or Rufus. You don't need to adjust the configuration file in advance to modify the VID/PID/Serial/MAC/SATAPortMap like the JUN loader. If you want to create a USB image on a Mac or Linux like me, you can use the DD command below in the terminal. (Assuming that the DEVICE ID of the USB verified by diskutil is disk4) sudo diskutil unmountDisk /dev/disk4 sudo dd if=/Users/MyAccount/Downloads/tinycore-redpill.v0.4.5.img of=/dev/disk4 bs=1m sudo diskutil eject /dev/disk4 3.Starting TinyCore Linux USB boot by plugging it into a PC for xpenology (UEFI 1 partition or USB CSM can be booted) The tinyCore Linux (tinyCore Image Build menu) is running and appears. Run the far right icon terminal app here. Check the ip address automatically assigned an en0 LAN card with ifconfig. [tinyCore Linux Screen] 4. Adjust CONFIG after SSH connection Ssh connection with putty etc. from PC other than xpenology. ( id:tc / pass : P@ssw0rd ) I'm connecting. Tinycore Redfill is stabilizing right now PocoPico, the original author of this program, fixes bugs from time to time and announces rebuilding. There's a possibility that this rebuild will happen from time to time Even with the final image version of 0.4.6, changes can still be updated in real time over the Internet. Sometimes the rploader.sh file itself changes if there is a bug. If you've migrated from JUN xpenology, at tc@box:~$user_config.json Existing grub such as VID/PID/Sn/Mac/SataPortMap in user_config.json file.Refer to the cfg and move it as it is. For new installers, perform serial GEN/USB VID, PID auto-detect, SataPortMap auto-detect, etc. as shown below. For the next process, I will share the command focusing on the platform that I have completed the most normal verification. tc@box:~$./rploader.sh serialgen (select one from DS3622x+/DS918+/DS3615xs/DS3617xs/DS1621+/DS920+/DV3221) tc@box:~$ ./rploader.sh identifyusb now tc@box:~$./rploader.sh satamap now (no HBA card user required) You can see that the contents of user_config.json have been changed automatically. Finally, the commonality of existing users and new installers is tc@box:~$catuser_config.json If you assume that there are 4 internal Sata ports, SataPortMap = "4", DiskIdxMap = "00" Please check if it's changed to the back. After find.synology.com, you may not be able to find SATA HDDs during DSM installation. The following is an example of a 6-port SATA additional expansion card. SataPortMap = "46", DiskIdxMap = "0000" (Except for those who use H200, H310, H710, etc. cards, you don't have to clear the options for this SataPortMap and DiskIdxMap itself and use it. Please erase the lines of the above two options with the vi editor and organize them well so that there are no Syntex errors. Of course. ./rploader.sh satamap now command is not required.) 5.BIOS Internal SATA Port Hot Plug disable -> enable Handling (Important) To avoid temporarily reducing the number of SATA PortMap maps set above by the number of HDDs physically connected by the Sata cable during the DSM installation process: Make sure to turn on the Hot Plug function. This reduces the probability of encountering an error message stating that the above automatically recognizes the number of SATAPortMaps and the HDD is not found. Please refer to the link below for the relevant details highlighted by TheSTREET. http://www.2cpu.co.kr/nas/37891 6.Add boot loader extension driver after SSH connection (optional) (You can skip this part. The required expansion driver is automatically discovered and received during BUILD 6 process.) A detailed list of extension drivers can be found below. https://github.com/pocopico/rp-ext The supported platforms are as follows: DS918 apollake, DS3615xs bromolow, DS3617xs broodwell, and ds3622xs+broadwellnk. In my case, I added three types of extension drivers: Realtech, Intel LAN, and DELL PERC as follows. tc@box:~$ ./rploader.sh ext broadwellnk-7.0.1-42218 add https://raw.githubusercontent.com/pocopico/rp-ext/master/r8101/rpext-index.json tc@box:~$ ./rploader.sh ext broadwellnk-7.0.1-42218 add https://raw.githubusercontent.com/pocopico/rp-ext/master/r8125/rpext-index.json tc@box:~$ ./rploader.sh ext broadwellnk-7.0.1-42218 add https://raw.githubusercontent.com/pocopico/rp-ext/master/r8152/rpext-index.json tc@box:~$ ./rploader.sh ext broadwellnk-7.0.1-42218 add https://raw.githubusercontent.com/pocopico/rp-ext/master/r8168/rpext-index.json tc@box:~$ ./rploader.sh ext broadwellnk-7.0.1-42218 add https://raw.githubusercontent.com/pocopico/rp-ext/master/r8169/rpext-index.json tc@box:~$ ./rploader.sh ext broadwellnk-7.0.1-42218 add https://raw.githubusercontent.com/pocopico/rp-ext/master/igp/rpext-index.json tc@box:~$ ./rploader.sh ext broadwellnk-7.0.1-42218 add https://raw.githubusercontent.com/pocopico/rp-ext/master/e1000/rpext-index.json tc@box:~$ ./rploader.sh ext broadwellnk-7.0.1-42218 add https://raw.githubusercontent.com/pocopico/rp-ext/master/e1000e/rpext-index.json tc@box:~$ ./rploader.sh ext broadwellnk-7.0.1-42218 add https://raw.githubusercontent.com/pocopico/rp-ext/master/mpt3sas/rpext-index.json 7.Build Boot Loader After SSH Connection (Two Step Update - TSU) If you are done adding the above extension drivers, build the bootloader at the end. After 7.0.1 build, check if the custom-module -> /mnt/sdb3/auxfiles directory is created well with the ll command. Without this directory, the second 7.1.0 build will fail. If you do not see the custom-module -> /mnt/sdb3/auxfiles directory, Please do the 7.0.1 build again. [DS3622xs+] ./rploader.sh update now ./rploader.sh fullupgrade now ./rploader.sh serialgen DS3622xs+ ./rploader.sh identifyusb now ./rploader.sh satamap now ./rploader.sh build broadwellnk-7.0.1-42218 ./rploader.sh clean now ./rploader.sh build broadwellnk-7.1.0-42661 ./rploader.sh clean now; rm -rf /mnt/sdb3/auxfiles; rm -rf /home/tc/custom-module; ./rploader.sh backup now; [DS918+] ./rploader.sh update now ./rploader.sh fullupgrade now ./rploader.sh serialgen DS918+ ./rploader.sh identifyusb now ./rploader.sh satamap now ./rploader.sh build apollolake-7.0.1-42218 ./rploader.sh clean now ./rploader.sh build apollolake-7.1.0-42661 ./rploader.sh clean now; rm -rf /mnt/sdb3/auxfiles; rm -rf /home/tc/custom-module; ./rploader.sh backup now; [DS3615xs] ./rploader.sh update now ./rploader.sh fullupgrade now ./rploader.sh serialgen DS3615xs ./rploader.sh identifyusb now ./rploader.sh satamap now ./rploader.sh build bromolow-7.0.1-42218 ./rploader.sh clean now ./rploader.sh build bromolow-7.1.0-42661 ./rploader.sh clean now; rm -rf /mnt/sdb3/auxfiles; rm -rf /home/tc/custom-module; ./rploader.sh backup now; The last line doesn't get restored even if you reboot later It is the process of organizing the folders where the pat file exists and reducing the capacity and completing the backup. 8-1.Using the bootloader (update user) tc@box:~$ sudo poweroff Place the 7.1 bootloader on the bottom well In the existing 7.0.1 henol boot state, obtain the DSM 7.1.0-42661.pat file separately from the Sinology Download Center https://www.synology.com/ko-kr/support/download Click the Control Panel -> Update and Restore -> DSM Update -> Manual DSM Update button and proceed with the update to the prepared pat file above. If you are asked to wait 10 minutes after the update, use the telnet connection method that appears in the NAS column by searching for the title telnet I'll power off. -> using putty and telnet it using user=root without password. after you type root then enter, it will goes to linux prompt. By the way, if there are a lot of actual packages installed, it says that you have to wait 20 minutes. Very few packages appear to wait 10 minutes. If you don't want to let me go to the Wi-Telnet connection process, check the monitor to see if you want to power down when rebooting or when rebooting I think you can change it quickly to enter TC Linux. Replace the USB with the 7.1 boot loader prepared above and proceed with the boot You can use it. (There's nothing else I can do for you.) If you want to update from 7.0.1 to 7.1, Process 8-1 in the guide above, and if you're using it, boot from USB and enter Tinycore Linux again You can start from number 3. Tynicore Linux is the third menu, so you have to switch quickly in 4 seconds. This is a method that can be carried out without preparing one more USB memory, but the existing 7.0.1 boot loader may be erased You can use the new functions, backuploader now and restoreloader now action 8-2.Use bootloader (new installer) After successfully completing the build above, reboot the xpenology with USB using the command below. tc@box:~$ sudo reboot The settings or ext drivers that were backed up remain the same The setting values are restored from the mydata.tgz file and remain intact at the next Tiny Core Image Build boot for modification. (The default setting for automatic entry within 4 seconds is USB, Verbose at the top. If you don't touch it with your keyboard, it will automatically enter USB mode.) xpenology On-Screen After PC Boots In the case of the existing RedPill, you will be asked to find it at find.synology.com like the existing Jun loader For this tinyCore: Decompressing Linux... Parsing ELF... done. Booting the kernel. This is the message. There is a delay of 1 to 2 minutes from the IP allocation, so please wait a little bit. In this state, browse to find.synology.com on another PC and you will find the xpenology IP. After that, you can proceed with the installation process of the Synology DSM as you are working on the existing xpenology.

-
 Hello, After several attempts to get all my satas ports to work properly and to preserve my usb ports as an external drive, I decided to write here hoping to find some help ! I have a Xpenology 7.2 DS918+ running a SuperMicro X11SCL-IF motherboard with 4 physical sata ports and a total of 8 USB ports. I recently updated it to version 7.2 (Model DS918+) by following the tutorial => I then added a PCI-e 16x expansion card with 24 sata ports : TISHRIC TSR818 – ASM1812+1064 chip I also added an NVME M2 card with 6 sata ports : Riser - M.2 to SATA 3.0 This gives me a total of 34 satas ports (yes, I know it's a lot, but I wanted to be able to use all my old disks and not be limited in the future). As the DS918+ is limited to 16 disks by default, I made the modifications to support my 34 satas ports by rebooting on tinycore build. To do this, I modified the user_config.json to obtain the following properties: "synoinfo": { "internalportcfg": "0x3FFFFFFFF”, "maxdisks": "34", … "esataportcfg": "0x0", "usbportcfg": "0x3FC00000000" }, I then ran the command ./rploader.sh satamap I was surpised by what it displayed because it wasn't very consistent: For my motherboard with 4 physical ports Found "00:17.0 Intel Corporation Device a352 (rev 10)" Detected 6 ports/0 drives. Override # of ports or ENTER to accept <6> 6 ports found instead of 4 physical ports. No bad ports. So I declared 4 instead of 6. For my PCI-e x16 card with 24 physical ports Found "03:00.0 ASMedia Technology Inc. Device 1064 (rev 02)" Detected 24 ports/0 drives. Bad ports: -139 -138 -137 -136 -133 -132 -131 -130 -129 -128 -127 -126 -125 -124 -123 -122 -121 -120. Override # of ports or ENTER to accept <24> Found "04:00.0 ASMedia Technology Inc. Device 1064 (rev 02)" Detected 24 ports/1 drives. Bad ports: -115 -114 -113 -112 -109 -108 -107 -106 -105 -104 -103 -102 -101 -100 -99 -98 -97 -96. Override # of ports or ENTER to accept <24> Found "05:00.0 ASMedia Technology Inc. Device 1064 (rev 02)" Detected 24 ports/0 drives. Bad ports: -91 -90 -89 -88 -85 -84 -83 -82 -81 -80 -79 -78 -77 -76 -75 -74 -73 -72. Override # of ports or ENTER to accept <24> Found "06:00.0 ASMedia Technology Inc. Device 1064 (rev 02)" Detected 24 ports/0 drives. Bad ports: -67 -66 -65 -64 -61 -60 -59 -58 -57 -56 -55 -54 -53 -52 -51 -50 -49 -48. Override # of ports or ENTER to accept <24> Found "07:00.0 ASMedia Technology Inc. Device 1064 (rev 02)" Detected 24 ports/0 drives. Bad ports: -43 -42 -41 -40 -37 -36 -35 -34 -33 -32 -31 -30 -29 -28 -27 -26 -25 -24. Override # of ports or ENTER to accept <24> Found "08:00.0 ASMedia Technology Inc. Device 1064 (rev 02)" Detected 24 ports/0 drives. Bad ports: -19 -18 -17 -16 -13 -12 -11 -10 -9 -8 -7 -6 -5 -4 -3 -2 -1 0. Override # of ports or ENTER to accept <24> 6 times detected with 24 ports on each with 18 bad ports each time. Knowing that I only have one card with 24 physical ports. I divided 24 by 6 and declared 4 for each. For my M2 NVME board with 6 physical ports Found "0e:00.0 ASMedia Technology Inc. Device 1166 (rev 02)" Detected 32 ports/0 drives. Bad ports: 7 8. Override # of ports or ENTER to accept <32> 32 ports detected with 2 bad ports. Knowing that I only have 6 physical ports. I declared 6 instead of 32. At the end, I get a warning telling me that there are bad ports, but I apply my config anyway and I get this in my user_config.json. "extra_cmdline": { … "SataPortMap": "44444446", "DiskIdxMap": "0004080c1014181c" }, I boot my system and all my sata slots seem to work (modulo the order of the disk numbers which are not consistent). I've read that I can redefine the order with sata_remap in extra_cmdline, is this true? On the other hand, when I plug in an external usb disk, it's detected as an internal device with disk number 17 (whatever USB port I use, I have 8 in total). And that's the subject of my message. How can I preserve my usb ports so that it's considered an external and not an internal disk? It must surely be linked to the wrong ports, but how do I manage them correctly ? If anyone has the right procedure I'm a taker 🙂 Here's the output of my dmesg command dmesg.txt Thank you in advance for your contribution
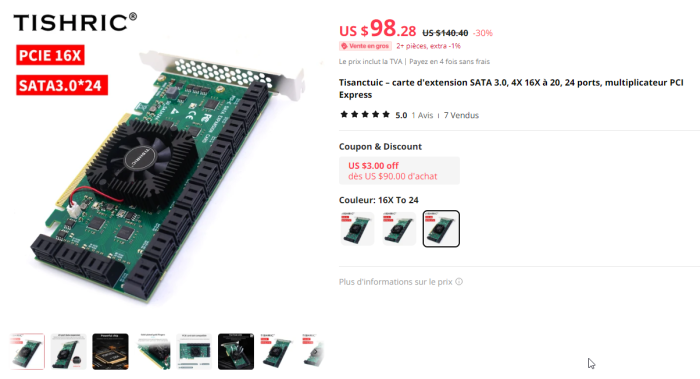
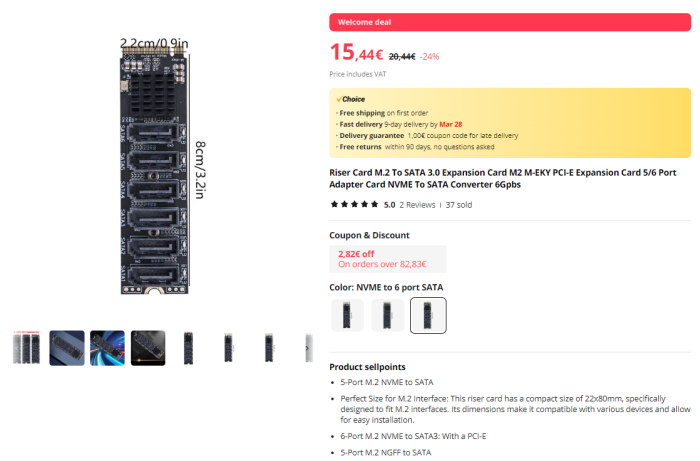
-
Hi I try to install xpnology on my old N40L I have follow thi guide step by step [Tuto] - HP N40L et HP N54L gen7 (DSM 7.1.1) But after the reboot tinycore is presnet and the nas os do not start I can log into tinycore whit putty but no more How I can solve the problem ? Here the commands login as: tc tc@192.168.0.82's password: ( '>') /) TC (\ Core is distributed with ABSOLUTELY NO WARRANTY. (/-_--_-\) www.tinycorelinux.net tc@box:~$ ./rploader.sh serialgen DS3622xs+ Serial Number for Model = 20C0SQRPG0B3H Mac Address for Model DS3622xs+ = 00:11:32:59:2B:30 Should i update the user_config.json with these values ? [Yy/Nn] y tc@box:~$ ./rploader.sh identifyusb now Found USB Flash SerialNumber: FBI1402187000076 Vendor ID : 0x090c Product ID : 0x1000 Should i update the user_config.json with these values ? [Yy/Nn] y tc@box:~$ ./rploader.sh satamap now Found "00:11.0 Advanced Micro Devices, Inc. [AMD/ATI] SB7x0/SB8x0/SB9x0 SATA Controller [AHCI mode] (rev 40)" Detected 6 ports/3 drives. Override # of ports or ENTER to accept <6> Computed settings: SataPortMap=6 DiskIdxMap=00 Should i update the user_config.json with these values ? [Yy/Nn] y Done. tc@box:~$ ./rploader.sh build ds3622xsp-7.1.1-42962 bspatch does not exist, bringing over from repo % Total % Received % Xferd Average Speed Time Time Time Current Dload Upload Total Spent Left Speed 100 10232 100 10232 0 0 48723 0 --:--:-- --:--:-- --:--:-- 48723 Rploader Version : 0.9.4.6 Loader source : https://github.com/pocopico/redpill-load.git Loader Branch : develop Redpill module source : https://github.com/pocopico/redpill-lkm.git : Redpill module branch : master Extensions : all-modules eudev disks misc Extensions URL : "https://github.com/pocopico/tcrp-addons/raw/main/all-modules/rpext-index.json", "https://github.com/pocopico/tcrp-addons/raw/main/eudev/rpext-index.json", "https://github.com/pocopico/tcrp-addons/raw/main/disks/rpext-index.json", "https://github.com/pocopico/tcrp-addons/raw/main/misc/rpext-index.json" TOOLKIT_URL : https://sourceforge.net/projects/dsgpl/files/toolkit/DSM7.0/ds.broadwellnk-7.0.dev.txz/download TOOLKIT_SHA : 0d9edca67d9e7e14c2529bbb58341b623936124d5264f71f1e4acbacf3ea202d SYNOKERNEL_URL : https://sourceforge.net/projects/dsgpl/files/Synology%20NAS%20GPL%20Source/25426branch/broadwellnk-source/linux-4.4.x.txz/download SYNOKERNEL_SHA : d3e85eb80f16a83244fcae6016ab6783cd8ac55e3af2b4240455261396e1e1be COMPILE_METHOD : toolkit_dev TARGET_PLATFORM : ds3622xsp TARGET_VERSION : 7.1.1 TARGET_REVISION : 42962 REDPILL_LKM_MAKE_TARGET : dev-v7 KERNEL_MAJOR : 4 MODULE_ALIAS_FILE : modules.alias.4.json SYNOMODEL : ds3622xsp_42962 MODEL : DS3622xs+ Local Cache Folder : /mnt/sdd3/auxfiles DATE Internet : 27052023 Local : 27052023 Checking Internet Access -> OK Checking if a newer version exists on the main repo -> Version is current Cloning into 'redpill-lkm'... remote: Enumerating objects: 1649, done. remote: Counting objects: 100% (1649/1649), done. remote: Compressing objects: 100% (620/620), done. remote: Total 1649 (delta 1016), reused 1579 (delta 996), pack-reused 0 Receiving objects: 100% (1649/1649), 5.81 MiB | 3.19 MiB/s, done. Resolving deltas: 100% (1016/1016), done. Cloning into 'redpill-load'... remote: Enumerating objects: 4166, done. remote: Counting objects: 100% (998/998), done. remote: Compressing objects: 100% (540/540), done. remote: Total 4166 (delta 519), reused 922 (delta 449), pack-reused 3168 Receiving objects: 100% (4166/4166), 123.43 MiB | 21.21 MiB/s, done. Resolving deltas: 100% (2083/2083), done. No extra build option or static specified, using default <static> Using static compiled redpill extension Removing any old redpill.ko modules Looking for redpill for : ds3622xsp_42962 Getting file https://raw.githubusercontent.com/pocopico/rp-ext/master/redpillprod/releases/redpill-4.4.180plus-broadwellnk.tgz Extracting module Getting file https://raw.githubusercontent.com/pocopico/rp-ext/master/redpillprod/src/check-redpill.sh Got redpill-linux-v4.4.180+.ko Starting loader creation Found tinycore cache folder, linking to home/tc/custom-module Checking user_config.json : Done Entering redpill-load directory Removing bundled exts directories Cache directory OK Found build request for revision greater than 42218 Downloading extractor v2 Extractor already cached Copying to local directory Creating temp folder /tmp/pat Checking for cached pat file Found tinycore cache folder, linking to home/tc/custom-module Found locally cached pat file /home/tc/custom-module/ds3622xsp_42962.pat File /home/tc/custom-module/ds3622xsp_42962.pat, is encrypted Extracting encrypted pat file : /home/tc/custom-module/ds3622xsp_42962.pat to /tmp/pat option -f with value `/home/tc/custom-module/ds3622xsp_42962.pat' option -C with value `/tmp/pat' 0 Creating unecrypted pat file ds3622xsp_42962.pat to /home/tc/redpill-load/cache folder VERSION Pat file sha256sum is : 0d22091bc3f1f707f581839bfd6ec72193a90e16729bf637b7787e23aad42c74 Checking config file existence -> OK Editing config file -> Verifying config file -> config file, os sha256 verify FAILED, check /home/tc/redpill-load/config/DS3622xs+/7.1.1-42962/config.json tc@box:~$
-
new sata/ahci cards with more then 4 ports (and no sata multiplexer)
Kanst replied to IG-88's topic in Hardware Modding
ARC Wiki tell: "SataPortMap & SataRemap only necessary for nonDT Models". Linux documents tell, that DT is a part of Linux kernel (compiled text file) As I understand, for changing device tree I need kernel recompiling (loader's kernel or DSM's kernel? ) at least it's unavaliable for me yet. OK, let it be 1-12, 39-44, 71-76 drives numbers in DT-mode, generally they work well. -

new sata/ahci cards with more then 4 ports (and no sata multiplexer)
IG-88 replied to IG-88's topic in Hardware Modding
arc loaders wiki can also be a good source of information https://github.com/AuxXxilium/AuxXxilium/wiki (the important and limitations part from the start page) https://github.com/AuxXxilium/AuxXxilium/wiki/Arc:-Notice-&-Workarounds https://github.com/AuxXxilium/AuxXxilium/wiki/Arc:-SataPortMap-&-SataRemap -
new sata/ahci cards with more then 4 ports (and no sata multiplexer)
Kanst replied to IG-88's topic in Hardware Modding
Yes, I try it on one controller only (the last 6 ports), because don't understand yet how to backup stock firmwares. Yes, I use all of this in my "main" NAS. But with my 1166 it doesn't work... I has 10 HDDs for tests. 4 connected to m/b sata ports, 6 to "last" 1166 (Disks 71-76 in DeviceTree mode) and create SHR2 on this 6. (user config edited for 24 ports) I try reconnection this RAID to another two 1166 controllers without any problems. Then insert in user_config SataPortMap=6666 and DiskIdxMap=00060c12 and after DSM recovering lost first 2 hdds from 6. But RAID is not degrade!!! Then try autoconfigure (./rploader.sh satamap) 1. 6 ports/4drives connected 2. 32 ports/0 drive connected (-57 -56 is a bad ports) 3. 32 ports/0 drive connected (-25 -24 is a bad ports) 4. 32 ports/6 drive connected (7 8 is a bad ports)... Set SataPortMap=6888 and DiskIdxMap=00060e16, append "ff" for 32 port mode. After DSM recovering again (when it find, "that I insert discs from another Syno") I find in DSM only 2 from 1166 connected discs with "System Partition Damage". PS. sata_remap no work in any variants. Loader with sata_remap has first two boot menu items only Editing grub (pressing "e" in boot menu) unswer, that grub has no sata_remap command.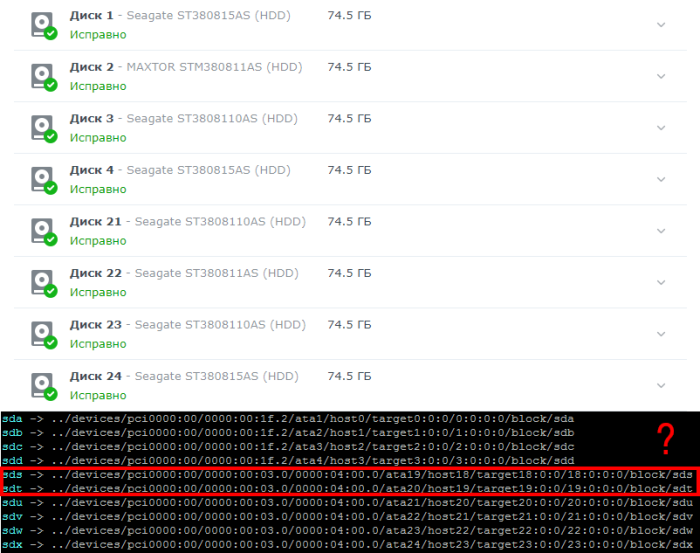
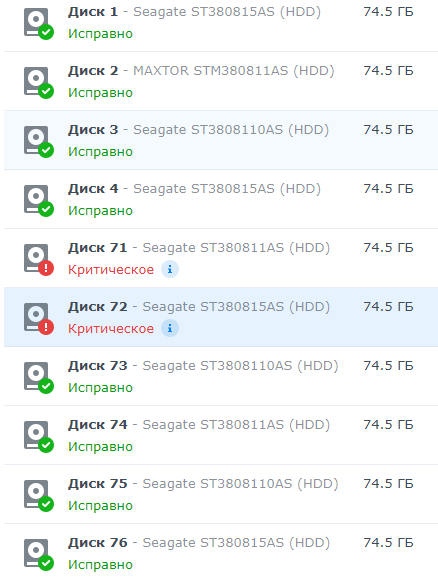
-
new sata/ahci cards with more then 4 ports (and no sata multiplexer)
IG-88 replied to IG-88's topic in Hardware Modding
sata_remap=9>0:0>9 https://xpenology.com/forum/topic/32867-sata-and-sas-config-commands-in-grubcfg-and-what-they-do/ https://gugucomputing.wordpress.com/2018/11/11/experiment-on-sata_args-in-grub-cfg/ did you see this`? https://xpenology.com/forum/topic/52094-how-to-config-sataportmap-sata_remap-and-diskidxmap/ also a possible solution might be to just use one asm1166 and place it as last card, that way the 32 ports are no problem like 6 x sata onbard, 5 x sata with jmb585, 6 x sata with asm1166 if needed another jmb585 or jmb582 card can be placed in the middle to keep asm1166 last, jmb582 will be a pcie1x card but sometime all the good slots are all used but even a 1x slot can be useful (afair there a re even jmb585 with pcie 1x but using to many of the ports might result in some performance degradation) there is also a newer firmware from 11/2022 for asm1166 (at least newer the the one from silverstone) but it does not fix the 32 port problem https://winraid.level1techs.com/t/latest-firmware-for-asm1064-1166-sata-controllers/98543/18 -
new sata/ahci cards with more then 4 ports (and no sata multiplexer)
Kanst replied to IG-88's topic in Hardware Modding
I'm build a test device on 6xSATA m/b + 2x 6ports NVME 1166 3622xs+. It work. With blank ("SataPortMap" : "" and "DiskIdxMap" : "") DSM7.2.1 see drives 1-12 and 39-44. I tried sata_remap in user_config and sata comandline (39\\>13...44\\>18, 39\>13...44\>18, 39>13:13>39...), but in all this cases DSM can see only drive 39. What about a right sintacs? Or its useless in DSM7? How can I remap them and set other ports as dummy? -
Hi all, I have been using a HP G7 N54L Microserver with the standard 4 drives (4x 2TB Seagate SATA NASware, ancient but still working) and embedded NIC, and a SanDisk 16GB USB3.0 flashdrive running DSM5.0 that was setup by a friend around 10 years ago and it has worked flawlessly but given the age of the software I figured it was time to upgrade to DSM7.1.1. I'm a noob to xpenology myself so please be gentle. I've read up a fair bit but I've still got a ways to go. I've been following the well written upgrade guide here https://tomvanveen.eu/installing-synology-dsm-7-x-on-a-hp-n54l-in-2022/ in combination with the excellent post by flyride here: Many people have had success with it but I've run into a problem during the build in TinyCore. First I flashed the BIOS successfully using Kamzata's ROM (https://www.bios-mods.com/forum/showthread.php?pid=75965#pid75965). I didn't realise this reset the BIOS clock which I thought might be the issue but I've since updated it and the issue persists. I've also disabled the C1E Support setting so it's not that. I'm using older TC v0.9.3.0 as recommended in the guide for N54Ls, with the BIOS/CSM/Legacy boot from USB flash drive image. I can run through all the commands successfully but when I boot into RedPill USB option in the GRUB menu I get this "error: file './custom.gz' not found" (pic attached) and my router is not assigning an IP address so I can't find Synology in Synology Assistant (checked the ports/cables so issue is not router related). I noticed these issues following the build command in the TinyCore terminal: menuentry 'RedPill DS3622xs v7.1.1-42962 Beta (USB, Verbose)' { menuentry 'RedPill DS3622xs v7.1.1-42962 Beta (SATA, Verbose)' { Updated user_config with USB Command Line : withefi earlyprintk syno_hw_version=DS3622xs+ console=ttyS0,115200n8 netif_num=1 pid=0x5580 earlycon=uart8250,io,0x3f8,115200n8 syno_port_thaw=1 mac1=9CB65407E0C3 sn=2030SQRH8LJAM vid=0x0781 elevator=elevator loglevel=15 HddHotplug=0 DiskIdxMap=00 syno_hdd_detect=0 vender_format_version=2 syno_hdd_powerup_seq=0 log_buf_len=32M root=/dev/md0 SataPortMap=6 Updated user_config with SATA Command Line : withefi earlyprintk syno_hw_version=DS3622xs+ console=ttyS0,115200n8 netif_num=1 pid=0x5580 earlycon=uart8250,io,0x3f8,115200n8 synoboot_satadom=1 syno_port_thaw=1 mac1=9CB65407E0C3 sn=2030SQRH8LJAM vid=0x0781 elevator=elevator loglevel=15 HddHotplug=0 DiskIdxMap=00 syno_hdd_detect=0 vender_format_version=2 syno_hdd_powerup_seq=0 log_buf_len=32M root=/dev/md0 SataPortMap=6 Generating GRUB entries for model :ds3622xsp_42962 in /home/tc ./rploader.sh: line 2260: /home/tc/include/grubmgr.sh: No such file or directory Failed to generate grub.cfg ./rploader.sh: line 2261: /home/tc/include/grubmgr.sh: No such file or directory Failed to add USB entry ./rploader.sh: line 2262: /home/tc/include/grubmgr.sh: No such file or directory Failed to add SATA entry ./rploader.sh: line 2263: /home/tc/include/grubmgr.sh: No such file or directory Failed to add SATA entry ./rploader.sh: line 2264: /home/tc/include/grubmgr.sh: No such file or directory Failed to add SATA entry cp: cannot create regular file '/home/tc/redpill-load/part1/boot/grub/grub.cfg': Permission denied grep: /home/tc/grub.cfg: No such file or directory Copying grub file /home/tc/grub.cfg to /home/tc/redpill-load/localdiskp1/boot/grub/grub.cfg cp: cannot stat '/home/tc/grub.cfg': No such file or directory menuentry 'RedPill DS3622xs v7.1.1-42962 Beta (USB, Verbose)' { menuentry 'RedPill DS3622xs v7.1.1-42962 Beta (SATA, Verbose)' { Setting next grub entry Setting next grub entry to Friend : sudo: /usr/local/bin/grub-editenv: command not found sudo: /usr/local/bin/grub-editenv: command not found Grub entry has been set to : Ramdisk in not compressed 48778 blocks 42649 blocks 91425 blocks Cleaning up files Caching files for future use No adequate space on TCRP loader partition /mnt/sde3 to cache pat file Found /mnt/sde3/auxfiles/ds3622xsp_42962.pat file Removing older cached pat files to cache current Found /home/tc/redpill-load/cache/ds3622xsp_42962.pat, copying to cache directory : /mnt/sde3/auxfiles Saving user session for future use. Saving current extensions -> OK ! Saving current user_config.json -> OK ! Also worth noting (I think) is that when I attempt to boot into RedPill in the GRUB menu, the TinyCore option is no longer present, which it seems to be on successful installs. Apologies for the long first post. In my rookie status I'm stumped so any advice on what I can look into in order to proceed will be greatly appreciated. If any additional info or part of the command logs will be useful I can include it.
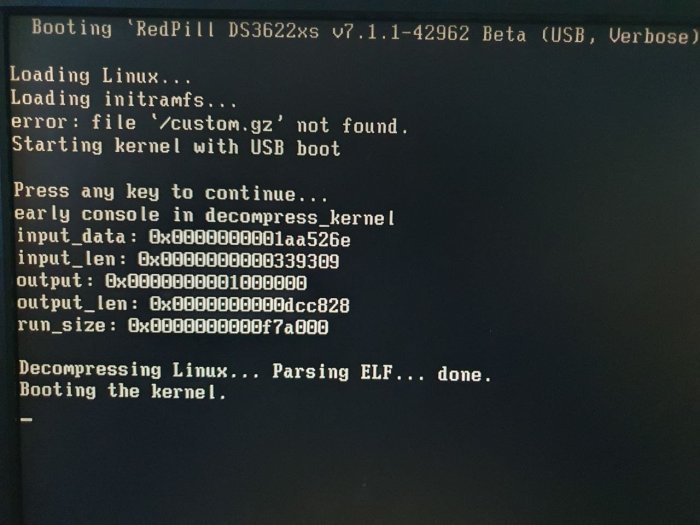
-
 so my psu blew on my gen8 microserver a couple of weeks ago. it took out the first two sata ports on the onboard controller as well (thanksfully not the backplane too!) ive since bought a hp p222 controller and i'm trying to get it working. i have dsm6.2 on there currently, so need to upgrade to DSM7 to get the new card working testing ARPL on a single spare drive to see how i get on, i chose DS3622xs+ compile the bootloader and reboot, im getting "no disks found" i've disabled the onboard controller and set the p222 to the first available controller in bios. checking dmesg on the arpl bootup, i see this: [ 4.939842] HP HPSA Driver (v 3.4.20-200) [ 4.939854] hpsa 0000:07:00.0: can't disable ASPM; OS doesn't have ASPM control [ 4.940768] hpsa 0000:07:00.0: Logical aborts not supported [ 4.940771] hpsa 0000:07:00.0: HP SSD Smart Path aborts not supported [ 4.956915] tg3 0000:03:00.0 eth0: Tigon3 [partno(N/A) rev 5720000] (PCI Express) MAC address b0:5a:da:87:7f:24 [ 4.956921] tg3 0000:03:00.0 eth0: attached PHY is 5720C (10/100/1000Base-T Ethernet) (WireSpeed[1], EEE[1]) [ 4.956923] tg3 0000:03:00.0 eth0: RXcsums[1] LinkChgREG[0] MIirq[0] ASF[1] TSOcap[1] [ 4.956924] tg3 0000:03:00.0 eth0: dma_rwctrl[00000001] dma_mask[64-bit] [ 4.967838] tg3 0000:03:00.1 eth1: Tigon3 [partno(N/A) rev 5720000] (PCI Express) MAC address b0:5a:da:87:7f:25 [ 4.967842] tg3 0000:03:00.1 eth1: attached PHY is 5720C (10/100/1000Base-T Ethernet) (WireSpeed[1], EEE[1]) [ 4.967843] tg3 0000:03:00.1 eth1: RXcsums[1] LinkChgREG[0] MIirq[0] ASF[1] TSOcap[1] [ 4.967845] tg3 0000:03:00.1 eth1: dma_rwctrl[00000001] dma_mask[64-bit] [ 4.977599] scsi host1: hpsa [ 4.977755] hpsa can't handle SMP requests [ 4.984042] hpsa 0000:07:00.0: scsi 1:0:0:0: added RAID HP P222 controller SSDSmartPathCap- En- Exp=1 [ 4.984046] hpsa 0000:07:00.0: scsi 1:0:1:0: added Direct-Access ATA WDC WD100EZAZ-11 PHYS DRV SSDSmartPathCap- En- Exp=1 [ 4.984049] hpsa 0000:07:00.0: scsi 1:0:2:0: masked Enclosure PMCSIERA SRCv8x6G enclosure SSDSmartPathCap- En- Exp=0 [ 4.984085] hpsa can't handle SMP requests [ 4.984172] scsi 1:0:0:0: RAID HP P222 8.32 PQ: 0 ANSI: 5 [ 4.984307] scsi 1:0:0:0: Attached scsi generic sg1 type 12 [ 4.984362] hpsa can't handle SMP requests [ 4.984757] scsi 1:0:1:0: Direct-Access ATA WDC WD100EZAZ-11 0A83 PQ: 0 ANSI: 6 [ 4.985938] sd 1:0:1:0: Attached scsi generic sg2 type 0 [ 4.986829] sd 1:0:1:0: [sdb] 19532873728 512-byte logical blocks: (10.0 TB/9.10 TiB) [ 4.986834] sd 1:0:1:0: [sdb] 4096-byte physical blocks [ 4.987018] sd 1:0:1:0: [sdb] Write Protect is off [ 4.987021] sd 1:0:1:0: [sdb] Mode Sense: 46 00 10 08 [ 4.987378] sd 1:0:1:0: [sdb] Write cache: enabled, read cache: enabled, supports DPO and FUA [ 5.077006] sdb: sdb1 sdb2 sdb5 sdb6 [ 5.078518] sd 1:0:1:0: [sdb] Attached SCSI disk [ 5.355690] udevadm (168) used greatest stack depth: 14056 bytes left [ 5.366430] ip (198) used greatest stack depth: 13832 bytes left [ 5.378070] NET: Registered PF_INET6 protocol family [ 5.378514] Segment Routing with IPv6 [ 5.378519] In-situ OAM (IOAM) with IPv6 [ 5.394258] 8021q: 802.1Q VLAN Support v1.8 [ 6.511541] random: crng init done [ 6.511543] random: 7 urandom warning(s) missed due to ratelimiting [ 7.601324] blkid (256) used greatest stack depth: 13680 bytes left [ 8.157687] EXT4-fs (sda2): mounted filesystem without journal. Opts: (null). Quota mode: none. [ 8.222490] EXT4-fs (sda3): mounted filesystem with ordered data mode. Opts: (null). Quota mode: none. [ 8.525665] ip (352) used greatest stack depth: 13656 bytes left [ 9.004682] tg3 0000:03:00.0 eth0: Link is up at 1000 Mbps, full duplex [ 9.004687] tg3 0000:03:00.0 eth0: Flow control is on for TX and on for RX [ 9.004688] tg3 0000:03:00.0 eth0: EEE is disabled [ 9.004709] IPv6: ADDRCONF(NETDEV_CHANGE): eth0: link becomes ready [ 9.114327] tg3 0000:03:00.1 eth1: Link is up at 1000 Mbps, full duplex [ 9.114332] tg3 0000:03:00.1 eth1: Flow control is on for TX and on for RX [ 9.114333] tg3 0000:03:00.1 eth1: EEE is disabled [ 9.114341] IPv6: ADDRCONF(NETDEV_CHANGE): eth1: link becomes ready [ 11.513738] udevd (158) used greatest stack depth: 13176 bytes left i cant work out what i need to set sataportmap to so i can see the drives on the p222. can someone explain how i translate above output? once i've got this working, im gonna try upgrading my dsm6 setup and putting the 4 SHR drives back in. any tips on the best process to follow to do this so i dont break the array and/or lose my data? (my theory is use arpl to upgrade to 7.0.1 and then to a later version?)
 -
Still, is it compatible? Before I used a q6600 in dsm 6.1.. I follow this tutorial: https://xpenology.com/forum/topic/62221-tutorial-installmigrate-to-dsm-7x-with-tinycore-redpill-tcrp-loader/ When I put "./rploader.sh build broadwellnk-7.1.0-42661" I get this: (I'm trying to install Ds3622xs+) tc@box:~$ ./rploader.sh build broadwellnk-7.1.0-42661 Error: Platform not found: rploader.sh Version: 0.10.0.0 -------------------------------------------------- -------------------------------------- Usage: ./rploader.sh <action> <platform version> <static or compile module> [extension manager arguments] Actions: build, ext, download, clean, update, listmods, serialgen, identifyusb, patchdtc, satamap, backup, backuploader, restoreloader, restoresession, mountdsmroot, postupdate, mountshare, version, monitor, bringfriend, downloadupgradepat, help - build <platform> <option> : Build the 💊 RedPill LKM and update the loader image for the specified platform version and update currentloader. Valid Options: static/compile/manual/junmod/withfriend** (default: withfriend) ** withfriend add the TCRP friend and a boot option for auto patching - ext <platform> <option> <URL> Manage extensions using redpill extension manager. Valid Options: add/force_add/info/remove/update/cleanup/auto . Options after platform Example: rploader.sh ext apollolake-7.0.1-42218 add https://raw.githubusercontent.com/pocopico/rp-ext/master/e1000/rpext-index.json or for auto detect use rploader.sh ext apollolake-7.0.1-42218 auto - download <platform> : Download redpill sources only -clean: Removes all cached and downloaded files and starts over clean -update: Checks github repo for latest version of rploader, and prompts you download and overwrite - fullupgrade: Performs a full upgrade of the local files to the latest available on the repo. It will backup the current filed under /home/tc/old - listmods <platform>: Tries to figure out any required extensions. This usually are device modules - serialgen <synomodel> <option> : Generates a serial number and mac address for the following platforms DS3615xs DS3617xs DS916+ DS918+ DS920+ DS3622xs+ FS6400 DVA3219 DVA3221 DS1621+ DVA1622 DS2422+ RS4021xs+ DS923+ DS1522+ SA6400 FS2500 RS3413xs+ DS1019+ DS1520+ DS 1621xs+ DS723+ Valid Options : realmac , keeps the real mac of interface eth0 - identifyusb : Tries to identify your loader usb stick VID:PID and updates the user_config.json file - patchdtc : Tries to identify and patch your dtc model for your disk and nvme devices. If you want to have your manually edited dts file used convert it to dtb and place it under /home/tc/custom-modules - satamap : Tries to identify your SataPortMap and DiskIdxMap values and updates the user_config.json file - backup: Backup and make changes /home/tc changed permanent to your loader disk. Next time you boot, your /home will be restored to the current state. -backuploader: Backup current loader partitions to your TCRP partition - restoreloader: Restore current loader partitions from your TCRP partition - restoresession : Restore last user session files. (extensions and user_config.json) - mountdsmroot : Mount DSM root for manual intervention on DSM root partition - postupdate: Runs a postupdate process to recreate your rd.gz, zImage and custom.gz for junior to match root - mountshare : Mounts a remote CIFS working directory - version <option>: Prints rploader version and if the history option is passed then the version history is listed. Valid Options: history, shows rploader release history. - monitor : Prints system statistics related to TCRP loader - getgrubconf : Checks your user_config.json file variables against current grub.cfg variables and updates your user_config.json accordingly - bring friend Downloads TCRP friend and makes it the default boot option. TCRP Friend is here to assist with automated patching after an upgrade. No postupgrade actions will be required anymore, if TCRP friend is left as the default boot option. - downloadupgradepat Downloads a specific upgrade pat that can be used for various troubleshooting purposes - removefriend Reverse bringfriend actions and remove TCRP from your loader - help: Show this page -------------------------------------------------- -------------------------------------- Version: 0.10.0.0 tc@box:~$ --------------- Then the sataport map also fails: tc@box:~$ ./rploader.sh satamap Found "00:1f.2 Intel Corporation 6 Series/C200 Series Chipset Family SATA AHCI Controller (rev 05)" Detected 6 ports/1 drives. Bad ports: 2 3 4. Override # of ports or ENTER to accept <6> Computed settings: SataPortMap=6 DiskIdxMap=00 WARNING: Bad ports are mapped. The DSM installation will fail! Should I update the user_config.json with these values ? [Yy/Nn] and Donate. tc@box:~$