Search the Community
Showing results for 'mtu issue login'.
-
hi did you fix this issue? Its april 2024 now. I am looking to buy a N100 NAS and put xpenology on it.
-
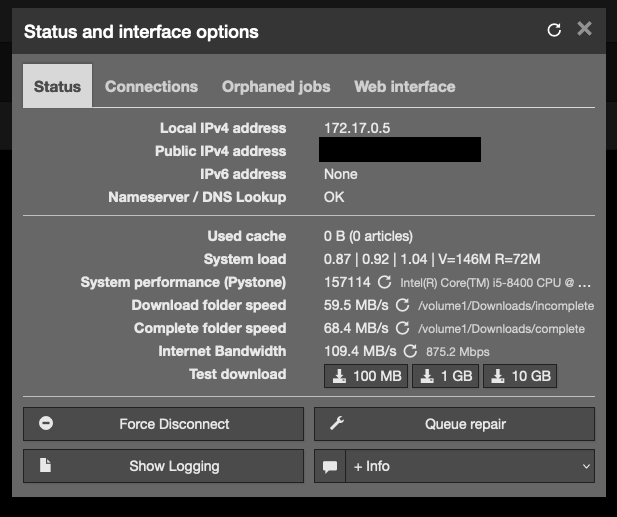
Hi all, I'm been struggling trying to find out what the cause of this issue is. I have Sabnzbd installed in container manager, no resource limits, but my transfer speeds are horrendous. I have a 10x12TB SHR-2 built with Exos X14 and 16's. I also have a small 2x4TB Raid0. It doesnt matter which volume I point Sab to download too, marginal speed difference between the two. I've tried running a sudo dd bs=1M count=256 if=/dev/zero of=/volumeX/share/testx conv=fdatasync and I'm pulling 1.1~1.2Gbps. What else should I be on the look out for?
-
Ждать и терпеть больше не смог и пользуясь праздничным выходным таки перешел на семерку. 😂 Для тех кто хочет повторить, настоятельно рекомендую отключить рабочие диски, взять чистые диск и флешку для загрузчика и попробовать перед переводом рабочей хрени. Я ни к чему не призываю, сами решаете делать вам это или нет. Первоисточник тут. Порядок действий (можно делать и по другому, но мне так привычнее): 1. Качаем образ для создания загрузчика по ссылкам в первоисточнике tinycore-redpill.XXXXXXXXX.img.gz 2. Разархивируем и записываем образ на флешку, я предпочитаю Rufus. Размер образа для создания загрузчика чуть больше гигабайта, я использовал флешку на 2 Гб. 3. Вставляем флешку в хрень, устанавливаем в биосе загрузку с нее, загружаемся. 4. Если есть монитор, клавиатура и мышь, то заходим в терминал из GUI, если нет, то ищем устройство в подключениях роутера или другими удобными вам способами, заходим по ssh и вводим: login: tc pass: P@ssw0rd Далее действия производятся в терминале/ssh, при необходимости не забываем подтверждать их. 5. Обновляем загрузчик до последней версии. ./rploader.sh update now ./rploader.sh fullupgrade now п.п.6-8 можно пропустить и самостоятельно поправить все в конфиге п.9. 6. Считываем и подставляем в конфиг VID и PID флешки. ./rploader.sh identifyusb now 7. Считываем и подставляем в конфиг структуру сата контроллеров. ./rploader.sh satamap now 8. Генерируем и подставляем в конфиг случайные sn и mac (если есть предпочтения по ним, то переходим к п.9). ./rploader.sh serialgen DS918+ now 9. Проверяем, что записалось в конфиг, при необходимости правим. vi /home/tc/user_config.json Переход в режим правки Insert, выход из режима правки Esc. Выход из vi без записи. :q! Выход из vi с записью изменений. :wq 10. Запускаем генерацию загрузчика. ./rploader.sh build apollolake-7.0.1-42218 ИЛИ ./rploader.sh build apollolake-7.1.0-42661 Внимательно! смотрим, что пишется в терминале, если скрипты на гите обновятся, то делаем то, что написано в терминале! 11. По желанию бэкапим созданную конфигурацию. ./rploader.sh backup 12. Перезагружаем хрень. exitcheck.sh reboot 13. Для установки/миграции скачиваем на комп pat нужной версии для соответствующей модели DSM отсюда. 14. Отключаем на время установки хрени доступ в интернет!!! Иначе, весьма вероятно, получите ошибку 13 при установке pat. 15. Далее все как и ранее...находим, ВРУЧНУЮ!!! устанавливаем скачанный pat файл для инсталляции/миграции и наслаждаемся семеркой. Если нужны другие версии, то: - в п. 8 вместо DS918+ подставляем DS3615xs или DS3617xs - в п.10 вместо apollolake подставляем bromolow или broadwell соответственно. Вроде все работает, по ощущениям загрузка и выключение происходят в разы быстрее. P.S. Я решил начать все с чистого листа, поэтому при переходе выбрал только сохранение данных, без миграции настроек и приложений. P.P.S. У кого виртуалки, образ VMDK тут. Порядок действий, думаю сами знаете. 😉 Следим за изменениями в первоисточнике, ссылки для скачивания образов могут поменяться. UPD 05.04.2022 В первоисточнике в скрипты добавлена возможность компиляции загрузчика под 7.1.0-42661 Кто хочет перейти на 7.1 нужно будет перекомпилировать загрузчик и подсунуть pat 7.1. UPD 27.06.2022 Для обновления до 7.1. Update2 выполняем по этой ссылке. UPD 29.06.2022 Если кто-то хочет побаловаться с DVA1622, который еще даже не продается, то качаем загрузчик из dev ветки, а далее все как обычно с новыми кодами, которые я добавил в список выше. Ограничения - не более 2х дисков, нет кодеков для HEVC, и видимо необходимо наличие Intel UHD Graphics 600. Из плюсов: AI раборает на GPU, т.е. видеокарта не нужна, 8 лицензий на камеры и SS выводится на подключенный к хрени монитор (пробовал HDMI и VGA).
-
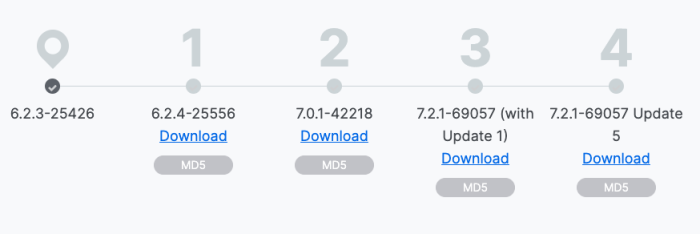
I have now partially working my migration hardware (some problems with the second controller, which disconnect the disks connected to it after a while with the log message "Drive Plugged out"). Thread here: Now let's say that I want to update from Jun's loader 1.04b 918+ BAREMETAL to ARC. I investigated how to do it in the "official way" (meaning, real Synology hardware), and I found this page: https://kb.synology.com/en-ph/DSM/tutorial/How_can_I_update_to_the_latest_DSM_version_from_an_older_version So after having a look how to update the DS918+ to the latest DSM 7.2.1, they advice: Starting from my version: 6.2.3-25426 First update to: 6.2.4-25556 Then update to: 7.0.1-42218 Then update to: 7.2.1-69057 (with Update 1) And finally update to: 7.2.1-69057 Update 5 So I was thinking if could be possible to do it that way: Creating an ARC loader based on 918+ (to match exactly the current installation), and keep installing in sequence all this updates (probably changing the loader in every step of the way), so it will be smooth and with no problems instead of trying to do a migration, like even @AuxXxilium discourages to do it in his wiki, advising: "Upgrade DSM 6 to DSM 7 can cause some Issue, please use clean Disks for DSM 7 (Partition Layout and Size changed)." @AuxXxilium, @Polanskiman, @IG-88, @flyride or anyone else, do you think could be possible to do it? Thank you very much
-
Exactly what we see with the memory bug & I'm not the first to note it - although I don't think anyone has tried on DSM7 with these older CPUs. Between 1 and 4GB of ram, system behaves as expected - transfers are wire speed and the UI is nice and responsive. Applications install and perform just fine, everything is ticketyboo for weeks, if not months - and with my tame application requirements, I fully expect a NAS to operate seamlessly for multiple months on end. The only reason for a reboot is a power outage longer than the UPS can sustain or a firmware upgrade. I'm not quite sure why my 1812 saw the issue with DSM6 on 4Gb and DSM7 doesn't. Going over the 4GB mark has some interesting side effects where the CPU is constantly maxing out with tasks that barely tickle it with <4. This is fully apparent after a fresh boot with a fresh install with nothing more than stock apps. The system is affected to the point where writing to it over the network is severely limited - what was a flatline 110MBps copy is now struggling to hold 40-50 with frequent pauses despite there now being more memory available to the system. Immediate fix is remove memory. Intel did only rate the D2700 for 4Gb of ram so perhaps there's a design flaw or a deliberate performance crippling once you exceed that amount.
-
 Hello, I recently began installing my new Synology RS3618xs. However, I have encountered a problem where the E10G21-F2 card is not visible in the DSM. I assume that this is due to a driver issue. As I am new to the Synology world, could you please guide me on where to go to solve this problem? Thanks a lot in advance. BR
 -
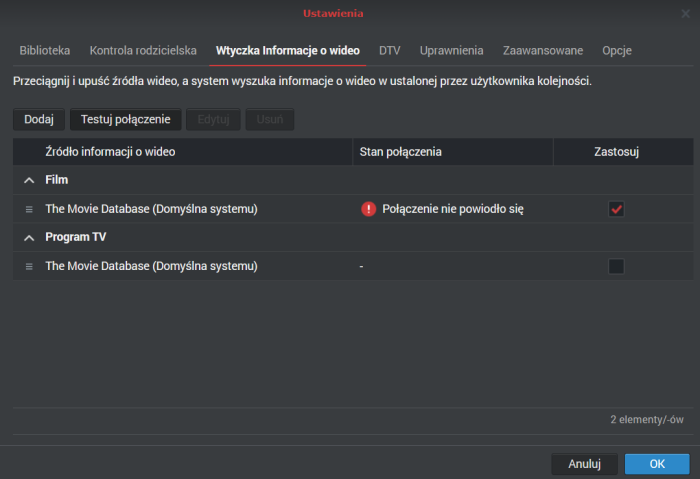
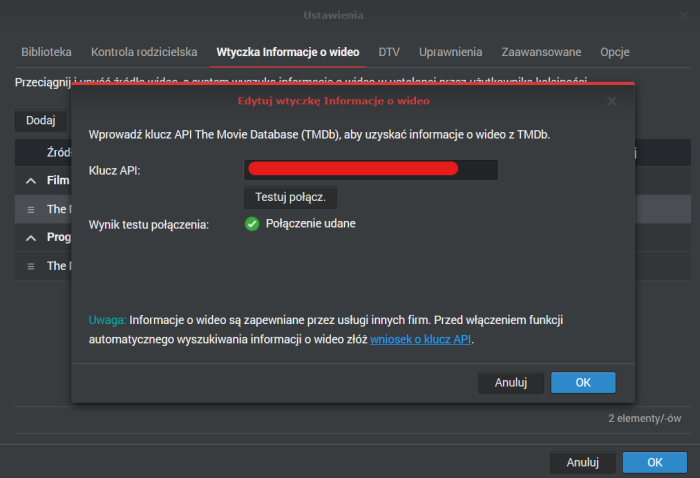
Hello everyone, Wondering if any one has similar issue or it's just me. I've tried many different options, but seems none of that helps. I would apprechate your suggestions and help. Details below: I'm having an issue with my Xpenology DSM 7.2 64570 installed on ESXi. I have used Redpill loader, setup went fine, activated AME codecs. VideoStation started to work all fine, I can watch the movies etc. But... There is one problem with TMDB plugin, which seems to be not working correctly. I've supplied the API key (same as used on my real DS918+) but I cannot get plugin to work on Xpenology. My observations do far: - tried different OS - DSM 7.0, 7.1, 7.2, different Xpenology loaders DS918+, DS920+ - after supplying API key in VideoStation > Settings > TheMovie Database > Edit > Test Connection - it does show connection successful. - Unfortunately from previous view (Video Info Plugin) testing connection fails with a message "Connection fails". - Tried internet recommendations about static DNS settings or preffering IPv4 addresses in resolution but none of that works. - started reviewing logs on my own and found that there are some access denied in script execution, which is responsible for getting data from TMDB. " /var/log/bash_err.log:84353:" -> (23505)"/bin/bash -p /var/packages/VideoStation/target/plugins/syno_themoviedb/loader.sh --type movie --lang enu --input {"title":"Poufne lekcje perskiego (2020)"} /var/log/bash_err.log:84354:" -> (23507)"/bin/bash -p /var/packages/VideoStation/target/plugins/syno_themoviedb/loader.sh --type movie --lang enu --input {"title":"Poufne lekcje perskiego (2020)"} /var/log/bash_err.log:84355:" ] /var/packages/VideoStation/target/plugins/syno_themoviedb/loader.sh: line 8: /sbin/sed: Permission denied /var/log/bash_err.log:84356:2024-03-12T21:21:44+01:00 SynologyMedia bash[23512]: BASH_ERR: report_error [ (23509)"/bin/bash -p /var/packages/VideoStation/target/plugins/syno_themoviedb/loader.sh --type movie --lang enu --input {"title":"Poufne lekcje perskiego (2020)"} "
-
 Yes it does That strange, because it was working before the update. To be sure that this issue is not related to the new 10G NIC which I was add before the update, I put it out again from the server. And the same problem still exists. Unfortunately no, because it is a built-in server card NIC. And I don't have an additional small factor NIC that I could add to the Server, since it has just 1 PCI-e slot. There is no debug mode to accurately determine the error. I mean the sh*t worked perfectly the whole time before.
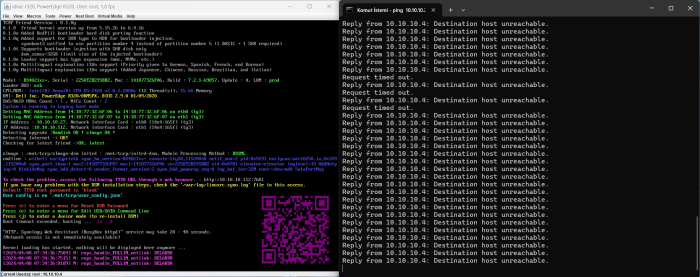
-
 I don't know if there is an issue with the tg3 module. After waiting for 10 to 15 minutes, when port 5000 is accessible, In Whip Browser, you can also connect to port 7681 instead of port 5000. There is also a guide on this connection method available on the console. Please connect to the root account without a password and let us know the results of the command below. cat /var/log/*rc* ll /dev/syno* ll /sys/block
 -
TinyCore RedPill Loader Build Support Tool ( M-Shell )
ULSY replied to Peter Suh's topic in Software Modding
Hey @Peter Suh I have Kernel issues, Network is no longer reachable. How can I solve this issue ? -
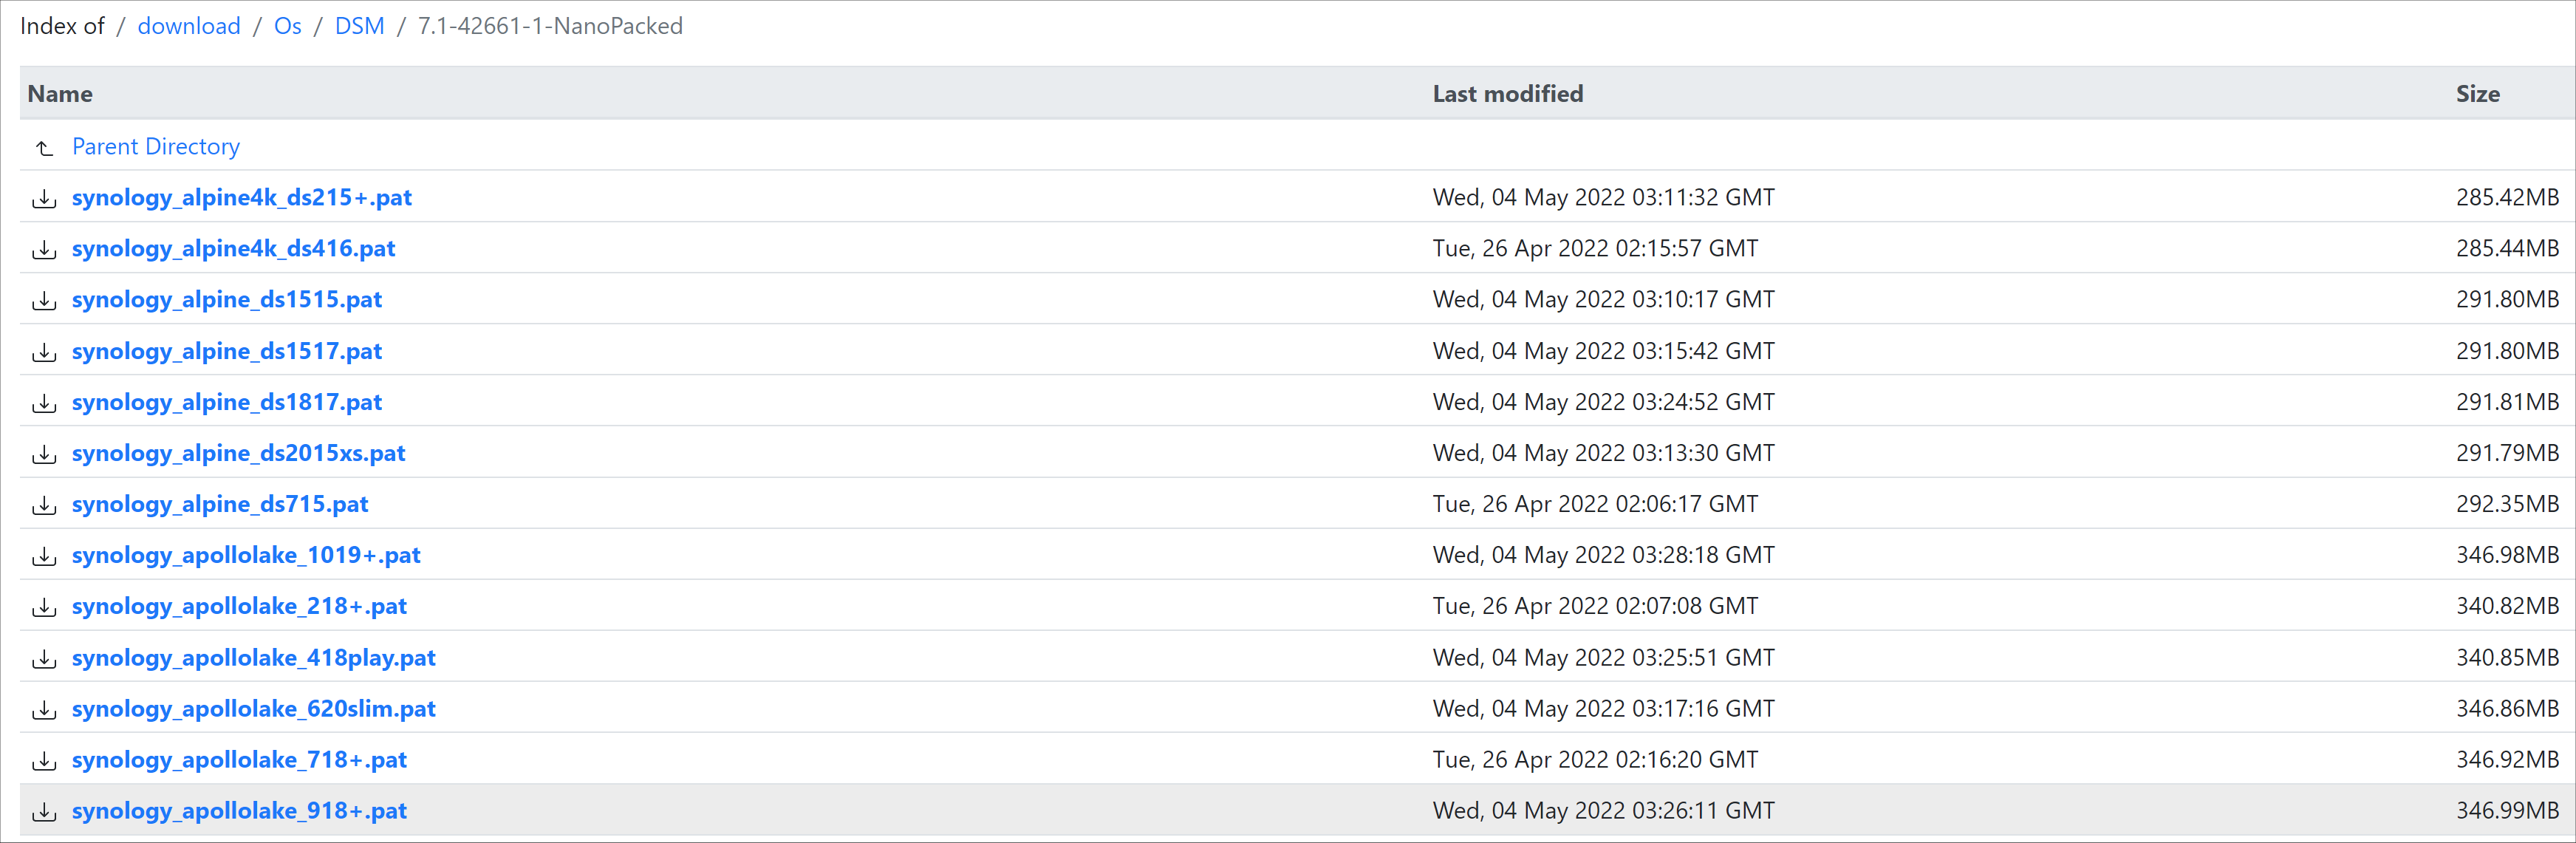
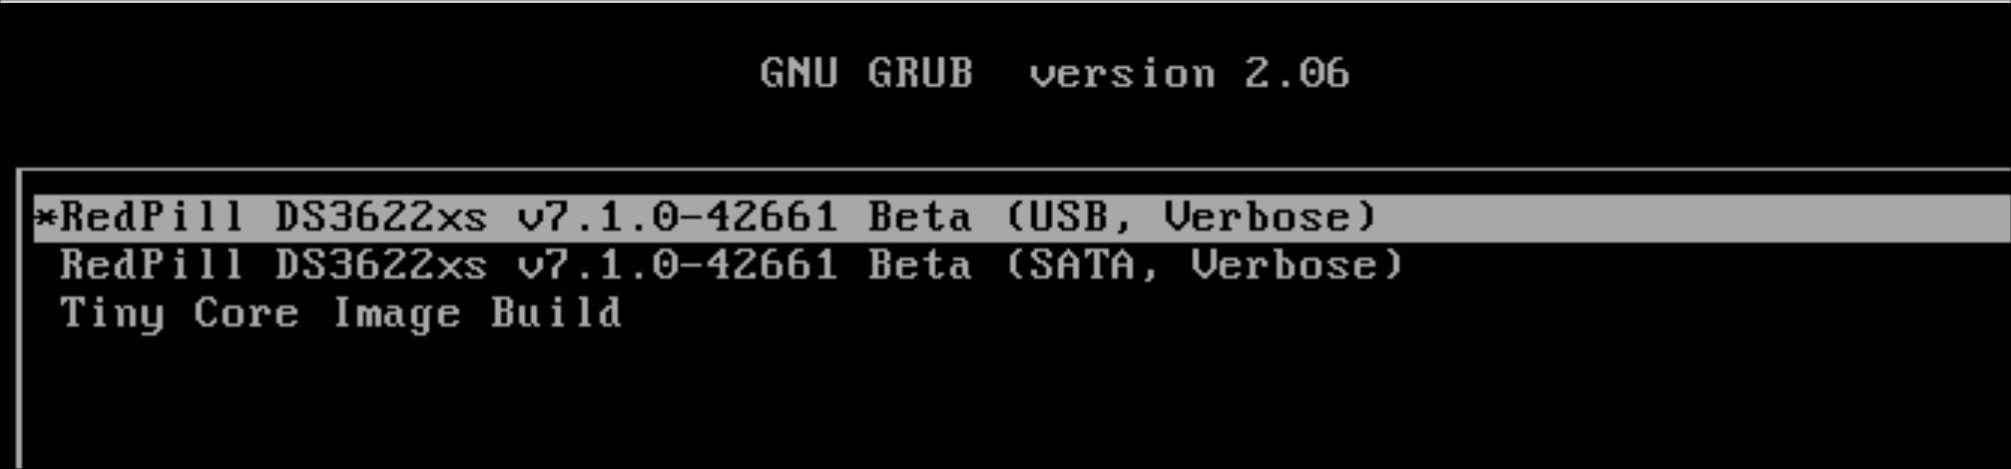
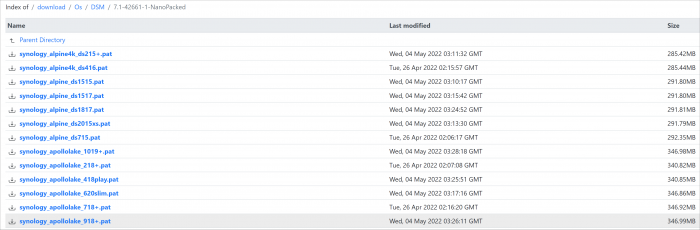
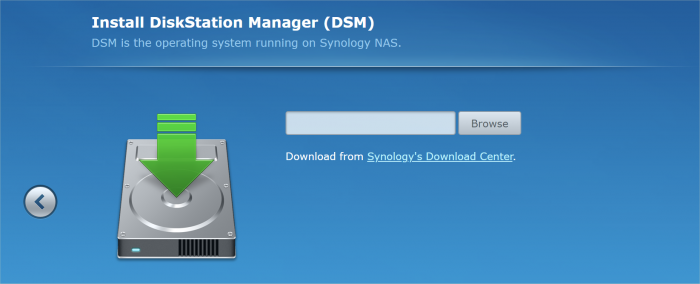
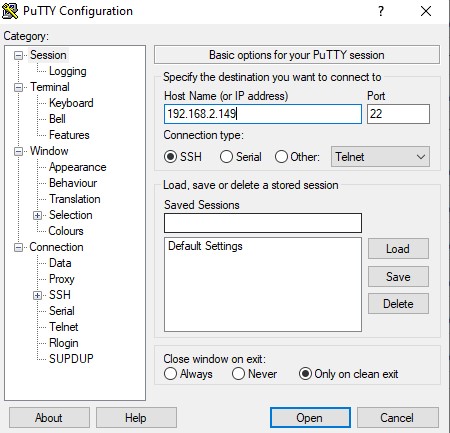
 Loader Information and Background RedPill is the core technology that enables DSM 7.x to run on non-Synology hardware. This post is intended to serve as a definitive tutorial/reference for configuring @pocopico's TinyCore RedPill (TCRP) loader. It explains how to install TCRP on baremetal, i.e. with DSM as the only operating system on your NAS hardware. A tutorial to install TCRP using the ESXi hypervisor is located here. There are other hypervisor tutorials in the Tutorials and Guides forum. TCRP uses a two step-process. First, a Linux OS (TinyCore) boots and evaluates the NAS hardware configuration. Therefore, it is best to have the hardware you plan to use (disk controllers and network cards in particular) installed prior to starting the TCRP setup. Then, an individualized loader (RedPill) is created. This loader is used to install and run DSM. After that, you can switch between starting DSM with RedPill, and booting back into TinyCore to adjust and rebuild the loader as needed. Basic Linux command line skills are needed to complete the installation. The tutorial provides examples of the commands that are needed, but exact syntax and capitalization are critical. If unfamiliar, research and review the following minimal list of commands: ls show the files in the current directory cat <file> show the contents of the specified file pwd show the current directory name cd <directory path> change to the specified directory (same rules as Windows, except with forward slashes instead of backslashes). With no argument, it returns to the “home” TCRP directory vi <file> a file editor, for manual editing of configuration files if required Ongoing Development This tutorial is maintained for consistency with the pocopico stable repository. Since TCRP is completely open-sourced, anyone can fork their own repo and contribute to development, and pocopico now maintains a separate development repo. As the best features and ideas are fully vetted and tested, they may be incorporated into the stable repo over time. If you use a repo, script or shell other than the pocopico stable repo, the loader may behave quite differently and the instructions and troubleshooting steps in this tutorial might no longer apply. In an open-source community, you can use any development resource you want, but you add the additional responsibility of understanding, vetting and testing that code on your system. Migration Step 1. Choose a DSM Platform/Architecture Evaluate your intended NAS hardware and your the intended use of DSM, and select a platform that best meets your needs. Reference information here: https://xpenology.com/forum/topic/61634-dsm-7x-loaders-and-platforms/ Write down the selected platform (e.g. DS918+), the corresponding architecture (e.g. apollolake) and whether the platform uses SataPortMap/DiskIdxMap or Device Tree for slot mapping. This information will be needed later. Now, make sure the NAS hardware is compatible, and prepare it correctly: x86-64-compatible CPU with two cores or more Each platform have maximum threads support! Any threads in excess will be ignored For certain platforms, Intel CPUs must be 4th generation “Haswell” or newer with FMA3 instruction set The corresponding AMD CPU architecture is “Piledriver” or newer AMD-based systems may require deactivation of the C1E option in the BIOS 2GB of RAM or more 2GB or larger USB flash drive Configure the BIOS to boot from the USB flash drive ONLY SATA disk controllers are preferred, but SCSI/SAS are compatible IMPORTANT: All SATA controllers must be configured to AHCI mode SATA controllers with port multipliers are not compatible ATA controllers are not compatible (disable embedded ATA in BIOS if possible) At least one SATA/SCSI/SAS drive (HDD or SSD), minimum size 21GB IMPORTANT: Enable SATA port hotplug on each disk port, if hotplug is supported by the BIOS/controller IMPORTANT: Disable M.2 SATA ports that are not in use, if supported by the BIOS/controller NVMe drives are not usable except as dedicated cache devices Host Bus Adapters are not currently compatible with Device Tree platforms Install any NVMe drives intended as cache devices On Device Tree platforms, NVMe drives must be installed prior to loader installation in order for them to be recognized Step 2. Download TCRP and Write Image to the USB Flash Drive The latest pocopico stable loader code is always linked here: https://xpenology.com/forum/topic/7848-links-to-loaders/ Download the tinycore-redpill 7.x loader and save it to your personal computer. Then, open it with a zip manager to show the boot images: tinycore-redpill.vX.X.X.img.gz (for BIOS/CSM/Legacy boot from USB flash drive) tinycore-redpill-uefi.vX.X.X.img.gz (for UEFI/EFI boot from USB flash drive) tinycore-redpill.vX.X.X.vmdk.gz (for virtual machine SATABOOT from disk image) Select the boot image that matches the boot capability of the NAS motherboard. If unsure, choose BIOS/CSM/Legacy boot. Save the gzip file to your personal computer, then open it with a zip archive manager and save the uncompressed version. Write the uncompressed image to the USB flash drive using Win32DiskImager or other appropriate tool. The USB flash drive is used to store TinyCore and the RedPill loader that it generates. It is a permanent component of an operational XPEnology system. Do not remove it, even after the DSM installation is complete and the NAS is fully up and running. Step 3. Boot into TinyCore and Complete Pre-Configuration Updates Start your NAS with the USB flash drive installed and TinyCore will boot. Then, launch a command-line session with either of these methods: Click the Terminal icon at the bottom right of the TinyCore desktop to launch a console window Use a ssh client (e.g. PuTTY) on your computer to connect a network-based console Consult your DHCP server/router for the IP address assignment (TinyCore's host name is "box") Login credentials: tc/P@ssw0rd When the Linux command line prompt ($) is displayed, update the TCRP script ./rploader.sh update Checking Internet Access -> OK Checking if a newer version exists -> There is a newer version on the repo should we use that ? [yY/nN] Y OK, updating, please re-run after updating Updating tinycore loader with latest updates Backing up files to /mnt/sda3//mydata.tgz Then, update the TCRP support files ./rploader.sh fullupgrade <downloads snipped> Current /home/tc size is 114M , try to keep it less than 1GB as it might not fit into your image Should i update the sda with your current files [Yy/Nn] Y Backing up home files to sda : Backing up files to /mnt/sda3//mydata.tgz Finally, choose a DSM release number Each DSM build as provided by Synology has a release number. You can display the combinations of platforms and releases supported by TCRP by just running the script with no arguments ./rploader.sh <command help snipped> Available platform versions: ---------------------------------------------------------------------------------------- apollolake-7.0-41890 apollolake-7.0.1-42218 apollolake-7.1.0-42661 broadwell-7.0.1-42218 broadwell-7.1.0-42661 broadwellnk-7.0.1-42218 broadwellnk-7.1.0-42661 bromolow-7.0.1-42218 bromolow-7.1.0-42661 denverton-7.0.1-42218 denverton-7.1.0-42661 geminilake-7.0.1-42218 geminilake-7.1.0-42661 v1000-7.0.1-42218 v1000-7.1.0-42661 Step 4. Configure System-Specific Parameters Custom system parameters are stored in the user_config.json file. This can be manually edited, or TCRP can help determine appropriate values for the hardware. USB flash drive VID/PID: TCRP can query the USB flash drive for the hardware vid/pid values that DSM uses to identify the loader during bootup ./rploader.sh identifyusb Found: Superdisk Flash SerialNumber: 123456 Vendor ID: 0x1234 Product ID: 0x0001 Should i update the user_config.json with these values ? [Yy/Nn] Y Serial number/MAC: TCRP can automatically generate a serial number for the platform selected in step 1. Additionally, it will generate a random MAC address for the NAS network card. If you prefer to use the actual hardware MAC address instead, append "realmac" to the command. Example 1: random MAC address ./rploader.sh serialgen DS3622xs+ Serial Number for Model : 20C0SQRLR47QM Mac Address for Model DS3622xs+ : 00:11:32:80:B2:36 Should i update the user_config.json with these values ? [Yy/Nn] Y Example 2: real MAC address ./rploader.sh serialgen DS3622xs+ realmac Serial Number for Model : 2150SQRGS7N5T Mac Address for Model DS3622xs+ : 00:11:32:57:3A:9B Real Mac Address : 00:0C:24:62:3E:3D Notice : realmac option is requested, real mac will be used Should i update the user_config.json with these values ? [Yy/Nn] Y Drive Slot Mapping: TCRP can try to determine how to map the NAS disk controller ports to DSM slots. If the chosen platform uses SataPortMap/DiskIdxMap for port mapping, the command below will do this. If it uses Device Tree for slot mapping, the command may be skipped, as the Device Tree is configured automatically during the loader build. ./rploader.sh satamap Found "02:02.0 SATA AHCI controller" Detected 4 ports/2 drives. Override # of ports or ENTER to accept: <4> Recommended settings: SataPortMap=4 DiskIdxMap=00 Should I update the user_config with these values ? [Yy/Nn] Y If the port count is not what you expect, it may be due to the motherboard design servicing physical ports with multiple controllers, or because of M.2 SATA slot support. If necessary, the port count can be overridden with whatever you like. NOTE: If you see a WARNING message, it is certain that either some of your drives are inaccessible or the DSM install will encounter problems. Evaluate and investigate the issue. The satamap command can be rerun as many times as needed to understand the system. Manual Review: With prior loaders (such as Jun's), the configuration of these parameters was completely manual. There is no single setup that works for all hardware. Even after using the tools above, please review and verify the parameters, understand what they do, and manually edit if needed. Whatever changes rploader.sh makes to the user_config.json file can be reviewed by displaying the file contents cat user_config.json and overridden by editing the file vi user_config.json You can also add a simpler editor, nano tce-load -iw nano nano user_config.json And there is also a graphical editor accessible from the TinyCore desktop Step 5. Optional: Manually Add Driver Extensions While TCRP can automatically add drivers based on the detected NAS hardware, it isn’t foolproof. You might want to build a loader for a device you don’t actually have yet. And there are features that are "opt-in" only. So, a process exists to manually add drivers and other functionality. Extensions are stored in repositories hosted on the web. All the extensions in the main repository are viewable here: https://github.com/pocopico/rp-ext To list all the extensions recommended by TCRP's hardware detection algorithm, use ./rploader.sh listmods <architecture>-<version>-<DSMreleasenumber> ./rploader.sh listmods apollolake-7.1.0-42661 To add a specific extension, choose from the list and reference the architecture from Step 1. ./rploader.sh ext <architecture>-<version>-<DSMreleasenumber> <extensionurl> ./rploader.sh ext apollolake-7.1.0-42661 add https://raw.githubusercontent.com/pocopico/rp-ext/master/redpill-acpid/rpext-index.json ./rploader.sh ext denverton-7.1.0-42661 add https://raw.githubusercontent.com/pocopico/rp-ext/master/v9fs/rpext-index.json The examples illustrate adding ACPI and VIRTIO support. These are often chosen enhancements to a basic installation. Step 6. Build the Loader When all preparation steps are complete, build the loader using the command structure ./rploader.sh build <architecture>-<version>-<DSMreleasenumber> Example #1: DS3622xs+, auto detect hardware ./rploader.sh build broadwellnk-7.1.0-42661 Example #2: DS918+, use preselected drivers ./rploader.sh build apollolake-7.1.0-42661 manual TCRP will download resources from the Internet to complete the complex process of the loader build. When finished, it will write it to the USB flash drive and add new items to the GRUB boot menu. Review the output for any errors and make corrections if necessary. Step 7. Optional Backup Tasks Save the TinyCore configuration state as the default, so that the next boot of TInyCore starts with all your settings ./rploader.sh backup Back up the generated RedPill loader partition to available space on the USB flash drive ./rploader.sh backuploader Step 8: Restart and Boot DSM Using the Grub USB Option Cleanly shutdown and reboot with the TinyCore command exitcheck.sh reboot First, the GRUB Menu is displayed. If necessary, use the arrow keys to ensure that USB is selected and press ENTER. The loader will show some initialization information and silently boot DSM. Nothing else will be displayed unless a serial console is attached (see the Troubleshooting section below). Wait a few minutes, then launch either https://find.synology.com or the Synology Assistant desktop utility. If the loader is working properly, a new "SynologyNAS" will be displayed as Not installed (for a new build) or the name of your existing Migratable NAS (if upgrading from a previous version). Use your browser to connect to the NAS. If "Something went wrong" is displayed, jump to the Basic Troubleshooting section below. Otherwise, browse to the Synology Download Center and download the DSM install PAT file that matches the platform and release number specified in the loader build. Do not use the PAT file stored in TinyCore. It has modifications that are incompatible with DSM installation. However, its name may help identify the correct PAT file to download below. There can be several files that appear to be candidates. PAT files marked VirtualDSM will not work. Also there can be patch PAT files with the same numbering. These will not work and will usually be smaller than 50MB. The correct PAT file is 300MB or larger. Once the correct DSM PAT file is saved to your personal computer, upload it to the NAS. Follow the prompts to complete the installation. FOR UPGRADES ONLY: If Synology Assistant shows Not installed, or if prompted to erase the disks during the upgrade, STOP! Some or all of your array disks are not visible to DSM. This must be resolved via troubleshooting and reconfiguration before installing DSM 7.x. IMPORTANT: During the install, always select DSM manual updates. If a new install completes normally, but then fails after the reboot, it may be that DSM has attempted to auto-update itself with incompatible code. Basic Troubleshooting Where to Post for Help It’s easy for requests for installation help to get lost in various unrelated forum threads. Post requests for help as a new topic in the DSM Installation Forum. At a minimum, state the hardware configuration, selected platform, DSM version, user_config.json information (delete or redact the serial number and configured MAC address) and any information from debugging analysis that you have done. DON’T post general requests for help on this thread. Please DON’T post general requests for help on TCRP or RedPill development threads unless providing feedback on a dev issue.


- 156 replies
-
- 40
-

-

-
Try ARC loader, it's frequently updated, offers comprehensive addons and modules, easy to use gui from yout computer, or keyboad+ monitor, few clicks, and then you can boot loader. It will helps your nvme ssd and lan card issue. Forger another loaders.
-
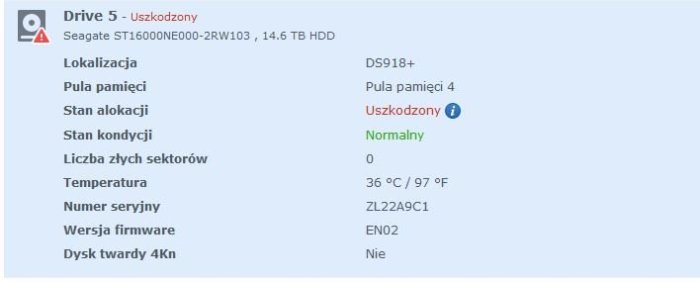
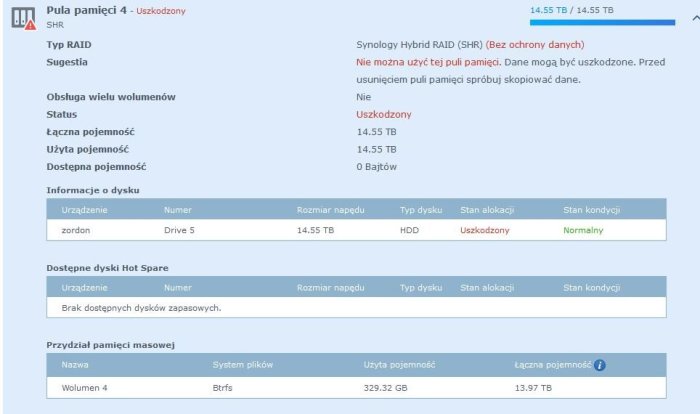
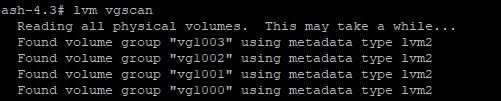
Hello everyone, I am using DSM 6.2.2-24922 update 6 system on my Dell Vostro 3900 MT i5-4460 computer, with four storage pools (Synology Hybrid RAID SHR without data protection) of sizes 2x 926 GB, 1x 3.63 TB and 1x 14.55 TB. Two days ago, one of the 14.55 TB disks had a failure and in the "Storage Manager" module, I received a message saying "Cannot use this storage pool. Data may be damaged. Try copying data before removing the storage pool." The status field shows "Damaged" while the "Health Status" field shows "Normal." Unfortunately, I am not sure what could be causing this issue. In the "HDD/SSD" module, I found the information that "This disk has been removed from the storage pool by the system. Please replace the disk and go to the Storage Pool tab to select the pool that needs repair, then click Actions > Repair" - unfortunately, after following these steps, the "Repair" option is greyed out and cannot be clicked. Using "File Station", I was able to access some of the directories stored on this disk and managed to transfer some of the necessary data - however, I have also lost system applications such as VPN server and others that were installed on this disk. I kindly ask for help from the esteemed members of this forum in solving this challenge - any advice or suggestions would be greatly appreciated. PS Sorry if I raised this topic in a wrong place - if so, please point me where I should post it.


-
Hi, everyone, Thanks for you patience. A new ds918 loader support 6.2/6.21 is uploaded. whats new: uefi issue fixed. i915 driver updated. link https://mega.nz/#F!Fgk01YoT!7fN9Uxe4lpzZWPLXPMONMA (for DS918+) - v1.04b ---Beginning of addition by polanskiman--- link https://mega.nz/#!OV4gVKyZ!dCgfXx1bgAOyvbFwFiov3s7RSNoFuqnAcNmSllLoUiw (for DS3615xs) - v1.03b link https://mega.nz/#!zcogjaDT!qIEazI49daggE2odvSwazn3VqBc_wv0zAvab6m6kHbA (for DS3617xs) - v1.03b Please read this topic to know what loader to chose: ---End of addition by polanskiman---
- 1,971 replies
-
- 100
-
-
-
This is so frustrating.... http://192.168.x.xxx:5000/webapi/auth.cgi?api=SYNO.API.Auth&version=3&method=login&format= cookie&account=Admin&passwd=Admin&otp_code= success true http://192.168.x.xxx:5000/webapi/entry.cgi?api=SYNO.ActiveBackupOffice365&method=set_activation&version=1&serial_number=genuine {"success":true} Task creation wizard, certificate password i create a password. then it gives me a popup Sign in to your account (microsoftonline.com). I try to sign in then it says, You can't sign in here with a personal account. Use your work or school account instead. DS918+ (Genuine) DSM 7.2.1-69057 update 4 Anyone have any ideas Thanks to alxr0101 for using the the links page. I dont know what is happening using chrome incognito mode. -------------------------------------------------------------------------------------- EDIT so i decided to try , i installed back up for business, with the same setup using alxr0101 page and i got this got this {"data":{"activated":true},"success":true} possibly its not going to work with 365...
-
Hello. Its work on DSM 7.2? https://192.168.1.67:5001/webapi/auth.cgi?api=SYNO.API.Auth&version=3&method=login&format=%20cookie&account=user&passwd=123456 {"data":{"did":"aEhem5MhobTxyWki1rDuH9DKdY-K90QD6_-fabowKbZ2g6P1fu7FgHG5FFNiVtWGeb2knI3lAD5Vqb0qeTy6aQ","sid":"KStseq50dAJjdKPq5LWqR0nycGOAWTIBSlfImzkNWfE82kiE0CnHBi5jtcZeXXpzGx0try55iElEZNHFhQbAiI"},"success":true} Step 2 https://192.168.1.67:5001/webapi/entry.cgi?api=SYNO.ActiveBackup.Activation&method=set&version=1&activated=true&serial_number=ADF365 {"error":{"code":1024,"errors":{"params":{}}},"success":false} Wath im do wrong? Sorry im find my false. serial not anyway 😃 seril on in my machine
-
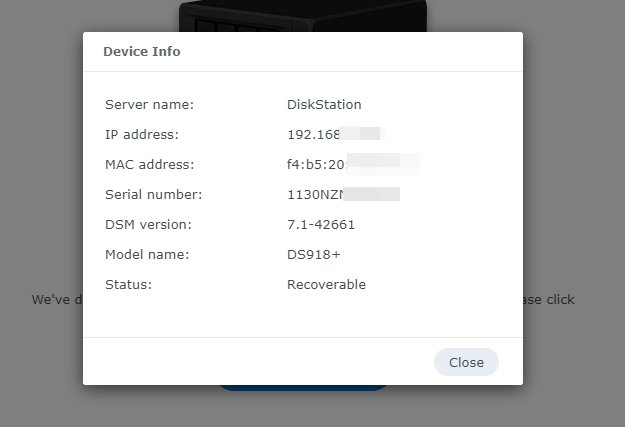
 I am having trouble to bypass into my DSM Recover page after updating to 42962 version via admin GUI of synology. These are the steps I have done: DSM version apollolake-7.1.x 42661 downloaded and updated via GUI to 42962. Syno system rebooted after downloading and updating. Went in bootloader tinycore redpill image build ran these commands in shell: ./rploader.sh update ./rploader.sh fullupgrade ./rploader.sh build ds918p-7.1.1-42962 exitcheck reboot Now it showing recover HDD option but after rebooting still shows recover page. I have 1 WD drive, 1 SSD assigned as Cache, 1 usb Pendrive for tinycore loader. Someone kindly help me out, How can I get into the DSM without losing drive data.
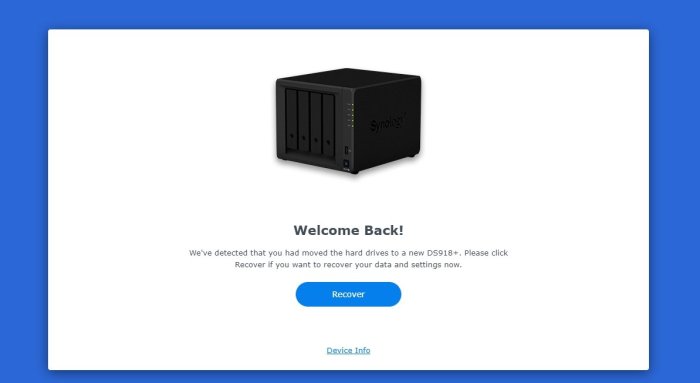
-
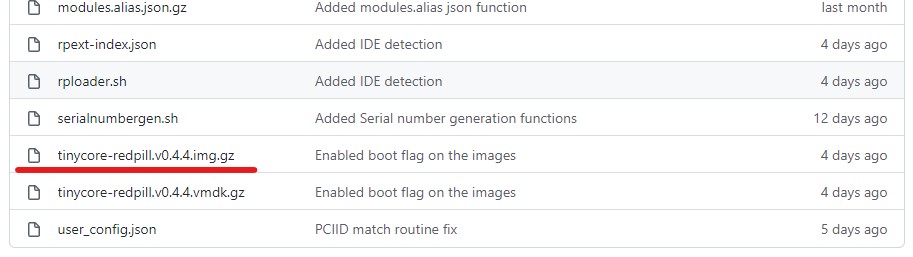
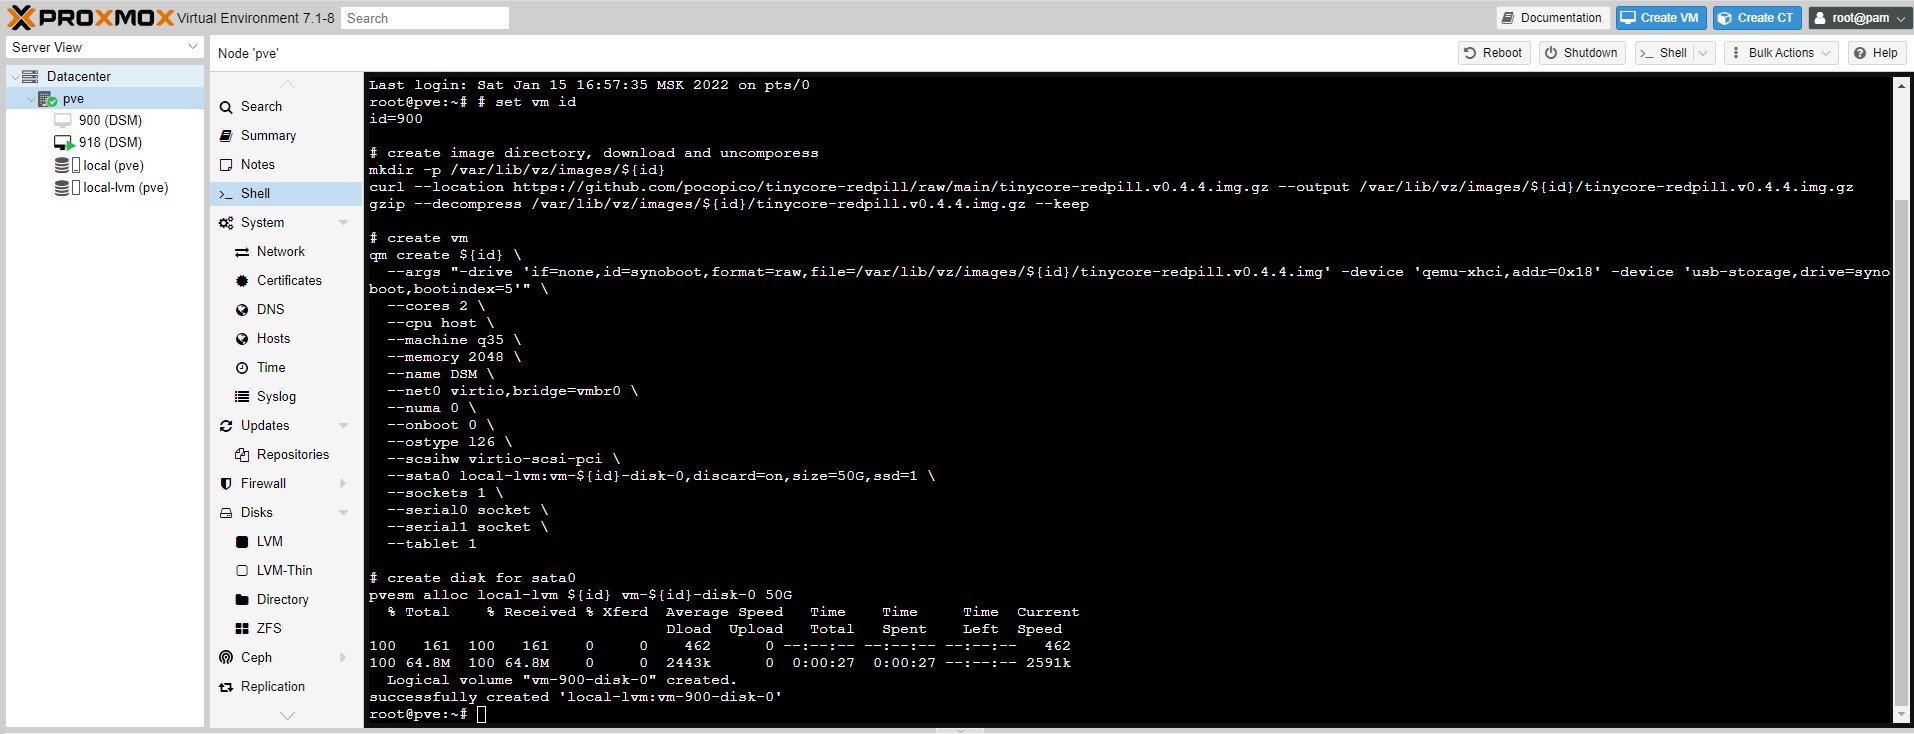
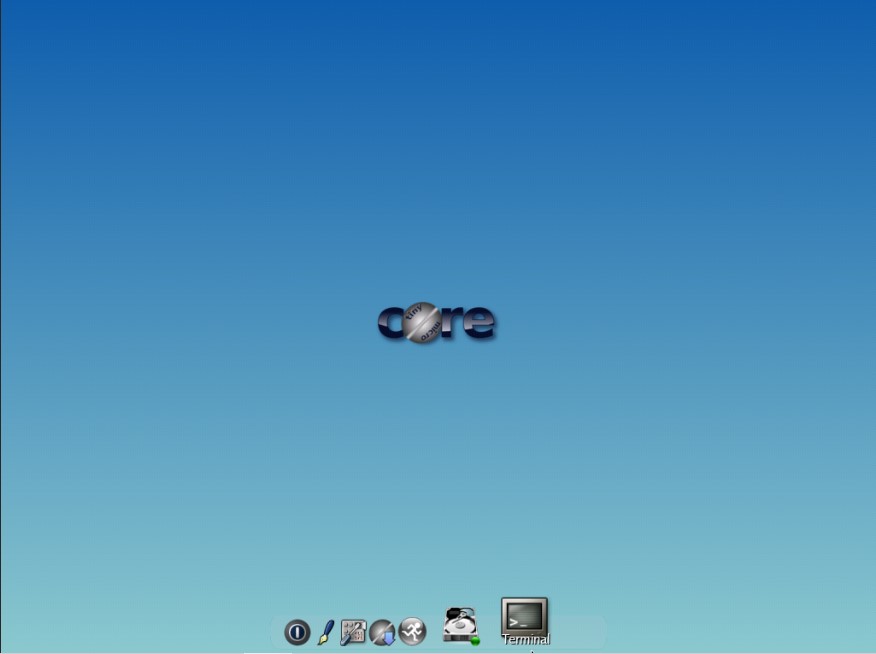
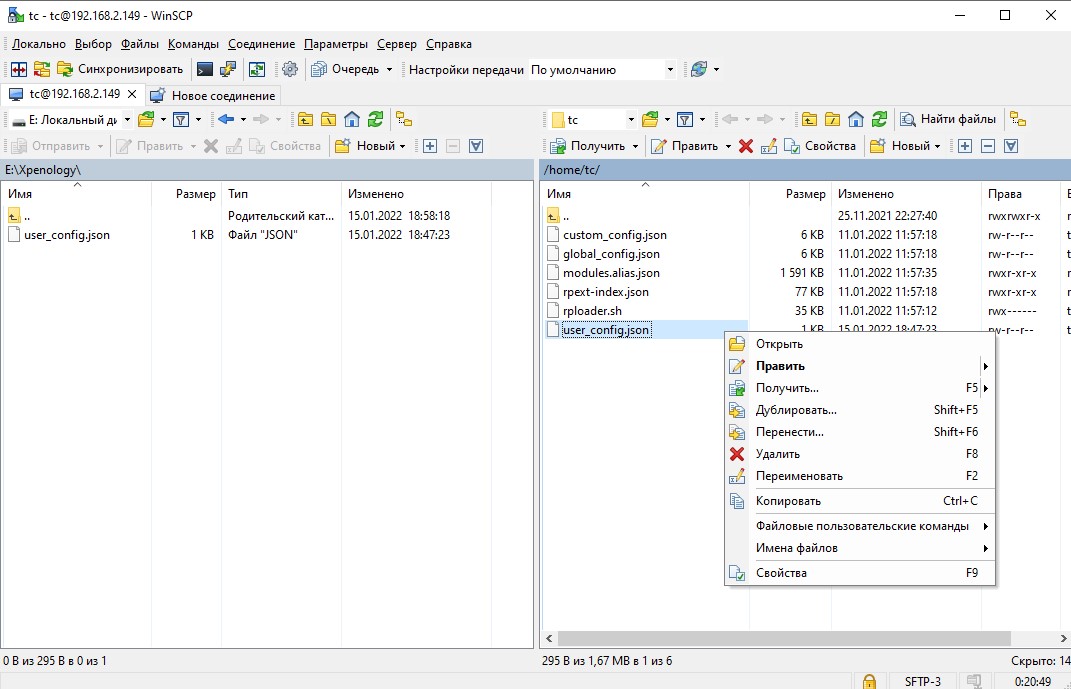
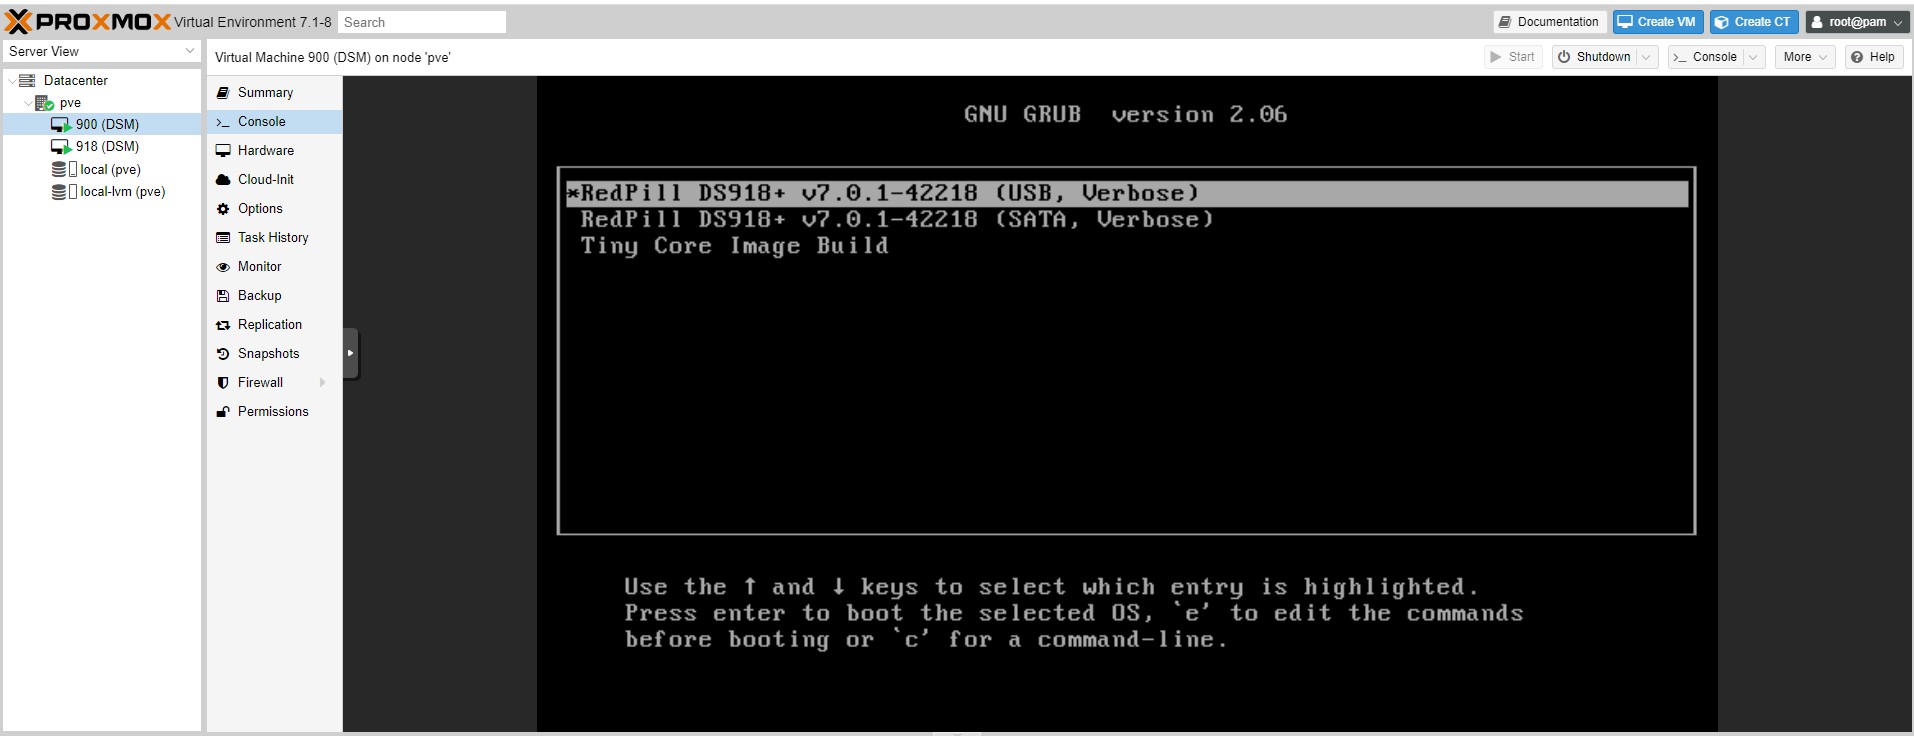
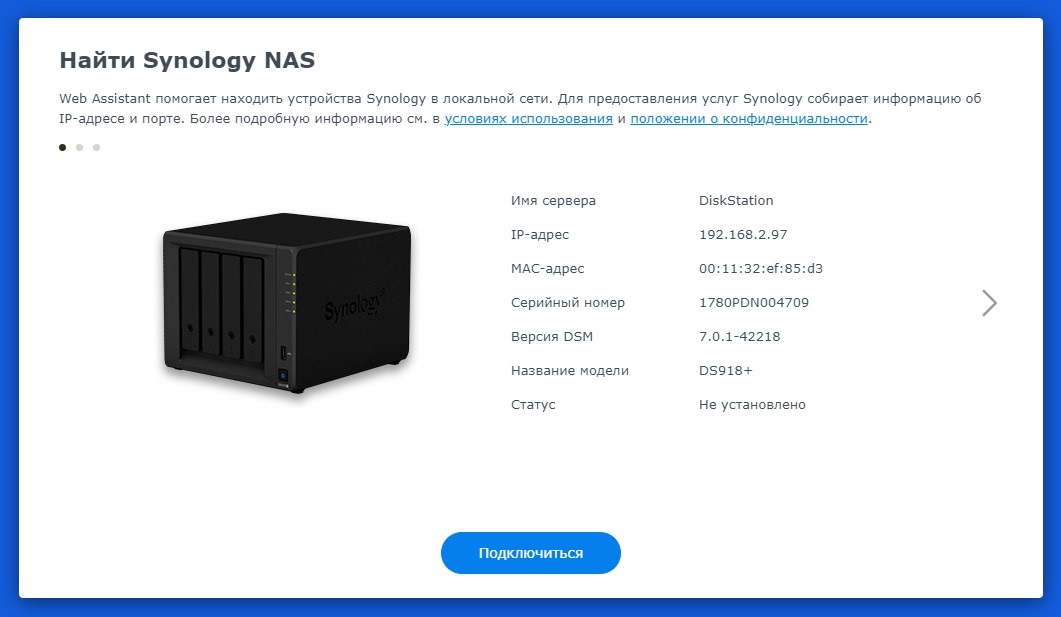
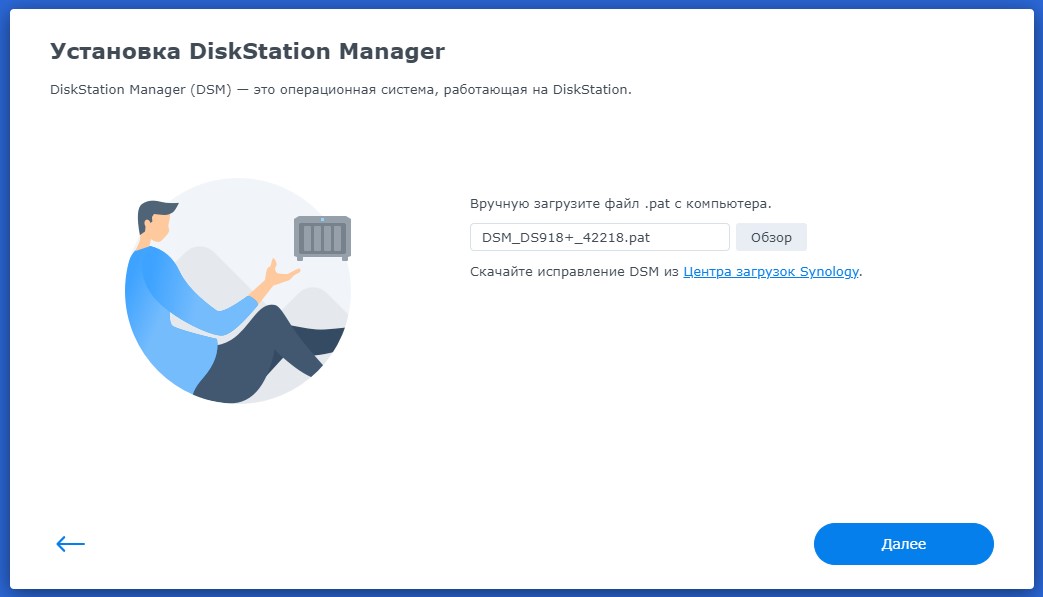
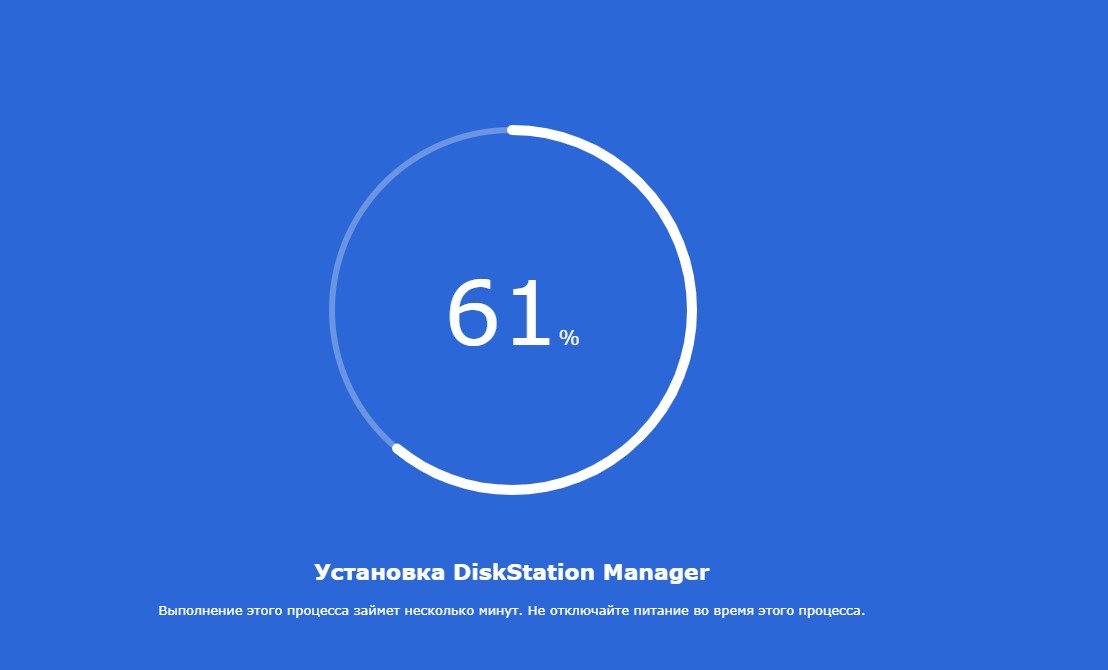
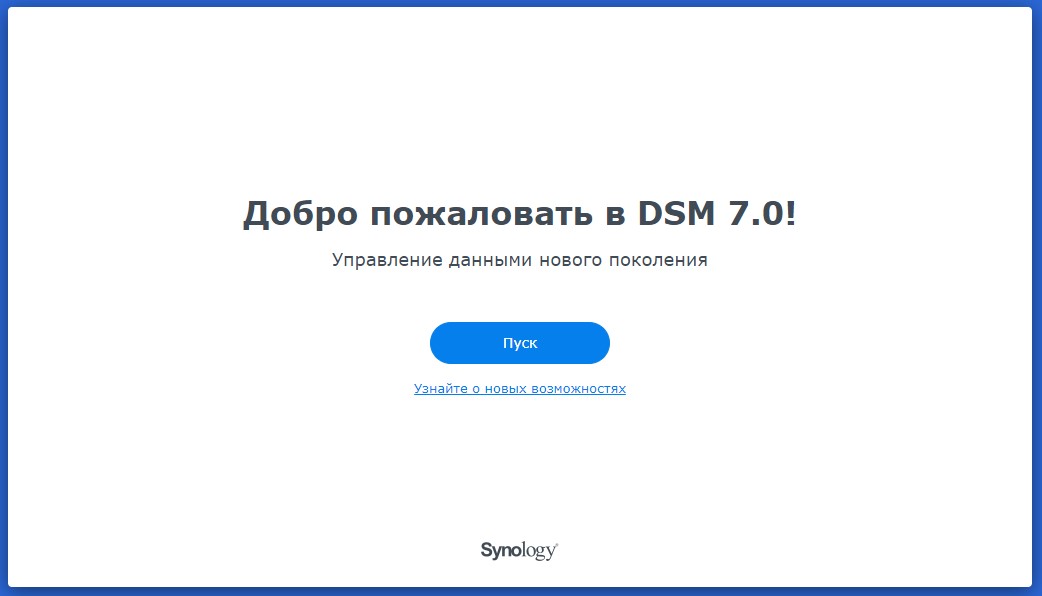
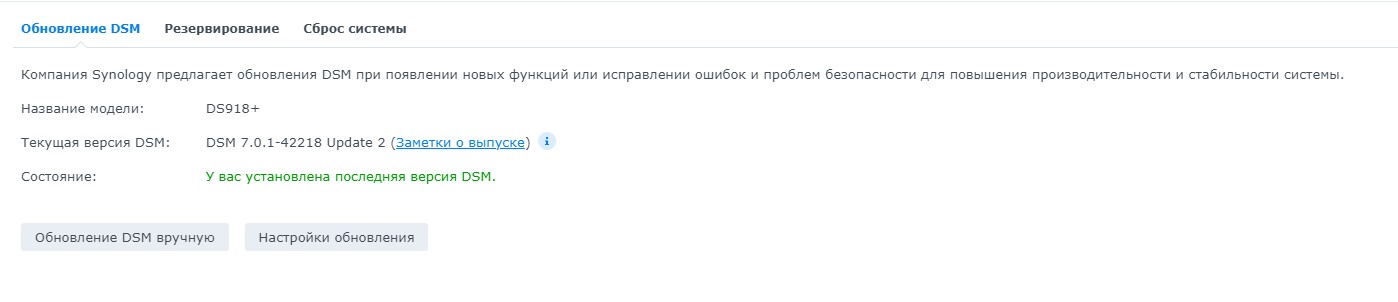
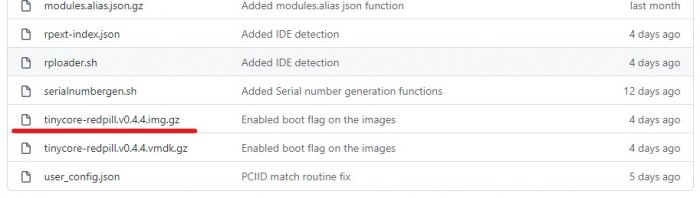
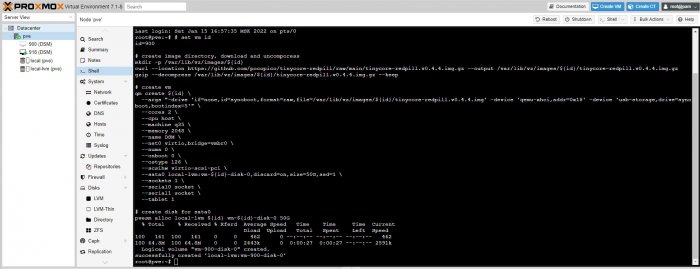
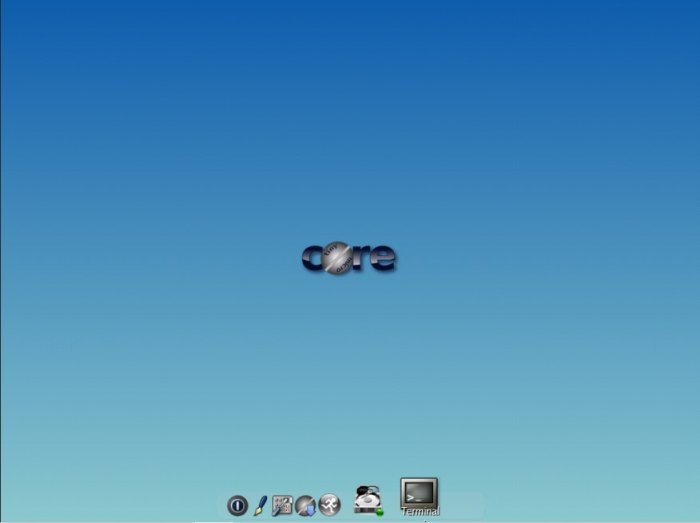
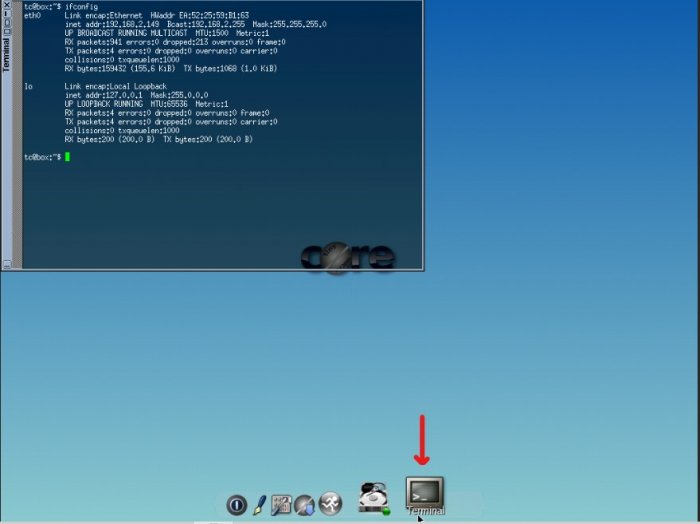
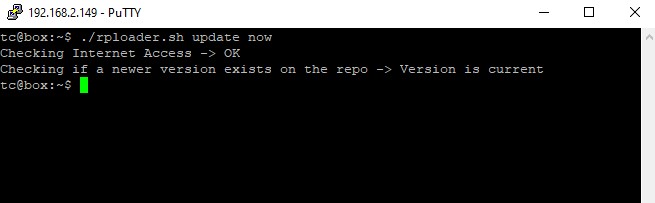
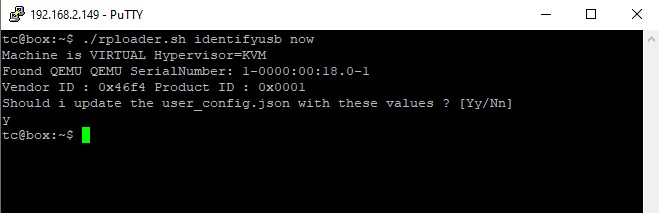
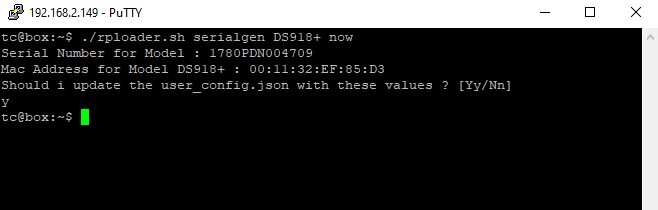
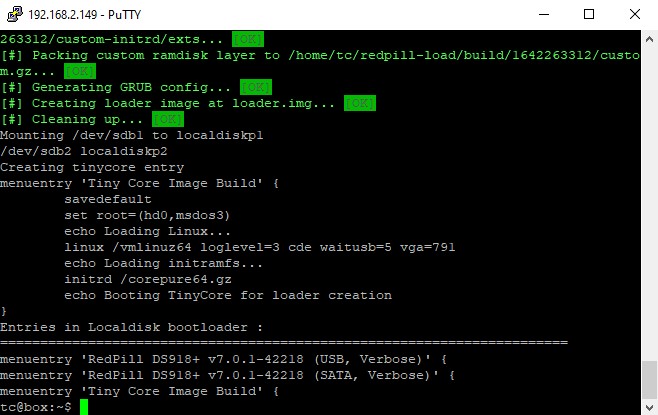
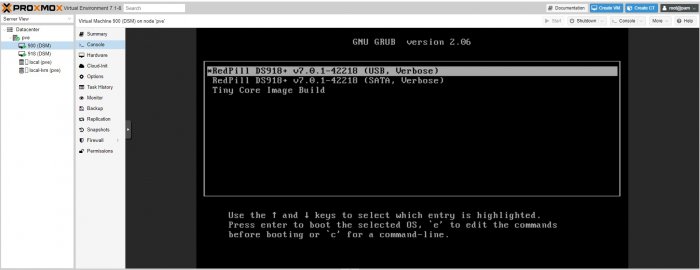
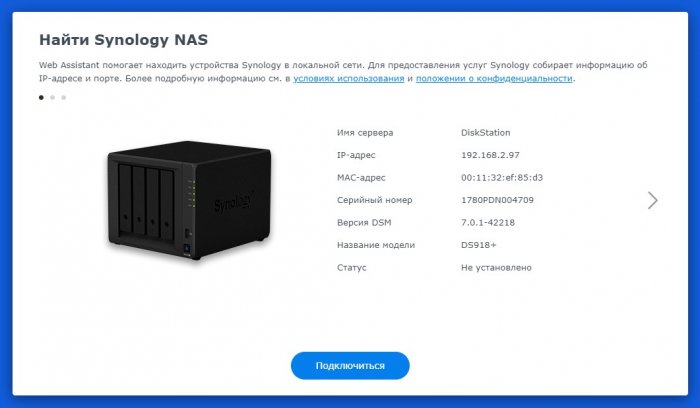
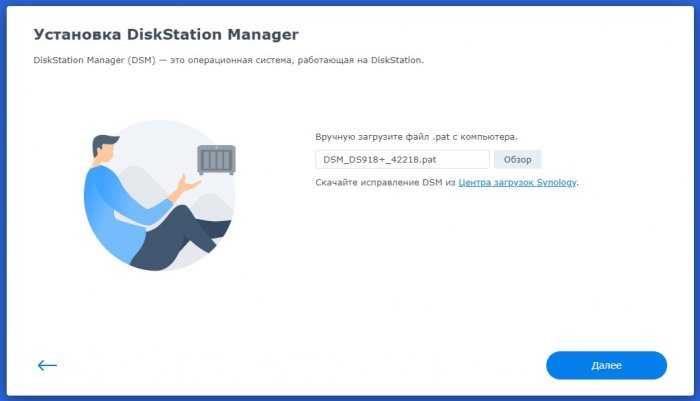
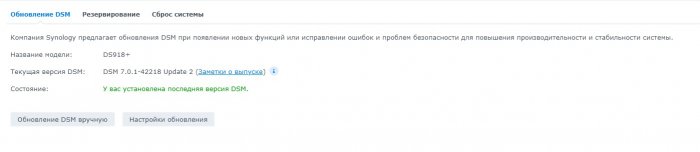
Решив пощупать Xpenology и покопавшись на форуме, то для теста остановил свой выбор на Proxmox, тем более что DSM 7 в этой виртуалке сейчас можно установить довольно просто. Для установки в полуавтоматическом режиме будем использовать RedPill Tinycore loader от pocopico и скрипт от haydibe. Создание виртуальной машины Для создания виртуальной машины я использовал шаблон скрипта от haydibe и использовал последний на данный момент имидж tinycore-redpill.v0.4.4 Под себя в скрипте можете исправить id для виртуальной машины, которую будете создавать и ресурсы, которые хотите выделить для NAS (cores, memory и в двух местах размер диска sata0) Обязательно проверьте в GitHub какая версия имиджа актуальна на данный момент и исправьте это в скрипте. # set vm id id=900 # create image directory, download and uncomporess mkdir -p /var/lib/vz/images/${id} curl --location https://github.com/pocopico/tinycore-redpill/raw/main/tinycore-redpill.v0.4.4.img.gz --output /var/lib/vz/images/${id}/tinycore-redpill.v0.4.4.img.gz gzip --decompress /var/lib/vz/images/${id}/tinycore-redpill.v0.4.4.img.gz --keep # create vm qm create ${id} \ --args "-drive 'if=none,id=synoboot,format=raw,file=/var/lib/vz/images/${id}/tinycore-redpill.v0.4.4.img' -device 'qemu-xhci,addr=0x18' -device 'usb-storage,drive=synoboot,bootindex=5'" \ --cores 2 \ --cpu host \ --machine q35 \ --memory 2048 \ --name DSM \ --net0 virtio,bridge=vmbr0 \ --numa 0 \ --onboot 0 \ --ostype l26 \ --scsihw virtio-scsi-pci \ --sata0 local-lvm:vm-${id}-disk-0,discard=on,size=50G,ssd=1 \ --sockets 1 \ --serial0 socket \ --serial1 socket \ --tablet 1 # create disk for sata0 pvesm alloc local-lvm ${id} vm-${id}-disk-0 50G В Proxmox В консоли вставляем и запускаем созданный скрипт. После создания виртуальной машины запускаем ее и дожидаемся загрузки. Все дальнейшие действия можно делать в веб интерфейсе консоли виртуальной машины, но это будет очень неудобно и довольно криво. Я использовал Putty и WinSCP. В виртуальной машине запускаем Terminal и командой ifconfig смотрим IP У меня это 192.168.2.149 Putty Подключаемся к виртуальной машине Login: tc Password: P@ssw0rd Последовательно выполняем несколько команд ./rploader.sh update now ./rploader.sh satamap now ./rploader.sh identifyusb now Далее нужно сгенерировать серийный номер и mac под нужную платформу (DS3615xs, DS3617xs или DS918+). Если вы используете свою связку sn+mac, то пропускаем этот пункт. Например, для DS918+ указываем: ./rploader.sh serialgen DS918+ now Переходим в WinSCP Подключаемся к виртуальной машине Нам нужно будет проверить и возможно отредактировать файл user_config.json Проверяем, что все пункты соответствуют тому, что были сгенерированы ранее. Иногда почем то скрипт не с первого раза записывает полученные данные в файл. Если используете свою связку sn+maс, то исправляем нужные пункты. "pid": "0x0001", "vid": "0x46f4", "sn": "1780PDN004709", "mac1": "001132EF85D3", "SataPortMap": "66", "DiskIdxMap": "0006" Возвращаемся в Putty В зависимости от выбранной ранее платформы выполняем команды: для DS918+ ./rploader.sh build apollolake-7.0.1-42218 static для DS3615xs ./rploader.sh build bromolow-7.0.1-42218 static для DS3617xs ./rploader.sh build broadwell-7.0.1-42218 static Перегружаем виртуальную машину sudo reboot Обратите внимание, что сейчас при загрузке виртуальной машины выбирать надо загрузку с USB Ждем пару минут и в браузере открываем http://find.synology.com/ или используем Synology Assistant Скачиваем с сайта Synology образ DSM_DS918+_42218.pat или другой под нужную вам платформу. Указываем загруженный файл для продолжения установки. После полной установки новый NAS уедет в очередную перезагрузку и порадует окном приветствия. Обновление 42218 Update 2 так же устанавливается без проблем.


-
 Hello, I installed RedPill TinyCore DSM 7.1, everything works well but DSM is not able to log into Synology account. I do not see any error even. Same with 7.0. How can i resolve this? Thanks
 -
 Hi guys, I'm using DVA 1622 on i5 8500t with ARC. The Face Recognition and Deep Video Analytics randomly turned off, and I only got motion detection. I had to restart the DVA mutiple times until it worked. Anyone have the same issue? I'm running 8 tasks of Face Recognition + 8 tasks of Deep Video Analytics so far.🙂 Here: Only motion detection After some restart, it recognized person, but not Face

-
This is a French section... but normally you set the login & password during the DSM installation
-
Hi there, I installed 7.2 using rr on Lenovo v520s but I have 2 issues. First one is that I don’t see m2 nvme sata drive and 2nd issue is with 10 gig HP 533. It doesn’t detract 10 gig connection. Can anyone suggest dsm model? thank you
-
 Hello all, (tl;dr at bottom) I came across this project searching online. I didn't know such a thing existed! I'm not sure I'll join you all yet, but who knows! My issue is that I have an actual DS1618+ and I thought I did enough research but I didn't and rushed to buy a network card in a sale recently and as you can guess, seems it's not /no longer supported. I though, well maybe I can download the official drivers, run the automake script via ssl and be all good. Nah, seems like make is missing and makes me wonder if more is missing. In looking here, I found a thread in the /Loader Releases & Extras / Additional Complied Modules / section for driver extensions. In this area were people talking about drivers and even one where I believe they were discussing the one I need I also remember a person saying they ran one on Synology hardware. This lead to a github project by pocopico with lots of drivers, json files and so on. I'm wondering if it is generally okay to install these on actual hardware? I see there are many ones like xyz hardware plus other hardware (broadwell, etc) What I guess is take the base driver or the driver plus hardware level, like my 1618+ is a denverton codename CPU, and then I can load right? Details and tl;dr section Actual DS1618+ user Have a RTL8125 based card DSM 7.1.1-42962 Update 6 Card not seen by DSM Can I use the pocopico drivers on actual harware? In this case should I use the 8125Plus-denverton driver or just the base 8125plus driver? Thanks P.S. IT person, not really a Linux person but I can figure out how to do it if it's a yes, any additional help given would be greatly taken though.
 -
Faced with absolutely same issue at 8.1.4 proxmox too (running on hp microserver gen8) Got working case only with ds3622xsp image with changes in vm config - net0 enabled and machine type - q35.
-
This patcher enables Advanced Media Extensions 3.0 for you, without having to login account. Download AME3.0 from store. Put the following Python script to any location. Run it with root. Done.