calimero
-
Posts
11 -
Joined
-
Last visited
calimero's Achievements
Newbie (1/7)
4
Reputation
-
@micgo Check the used network interface. Some friend of mine has the same issue and changed to an intel network card and this error has gone. He used the Synology tool to install and therre the info regarding the network comes up. Additional, install with only 1 test hdd to make sure it is running before adding more hdd regards
-
Bitweise verglichen und keine Änderung gefunden.. nagut, danke Dir
-
Die Datei meinte ich ja.. ich hab die runtegeladen und mit meiner verlinkten von Mega verglichen =100% identisch! Deswegen meine Frage nach was soll daran "neuer" sein. Vielen Dank
-
Hi und schön zu lesen, dass es hier wieder aktiv rund geht Habe nur kurz eine "Verständnisfrage".... ihr redet dauernd von einem "neuen" Boot-Image.. Wenn ich aber das letzte hier lade, ist es das gleiche (nach englisch übersetzte), welches ich in meinem Post auf Mega verlinkt habe oder wurde nur das falsche "neue" Image hochgeladen? Danke euch und viele Grüße1
-
Hi, this is something you can only find out by yourself... check, which QNAP model fits the best to your hardware (CPU, SATA Ports, etc) and try this out. Regards
-
@VauRa & @freakywilli3 Klappt es nun bei euch?
-
Moin zusammen ohne U im Patched Firmware Namen klappts doch MODEL_TYPE="Q0121_Q0160_17_10" PATCHED_FIRMWARE="TS-X72_20211221-5.0.0.1891" DOWNLOAD_URL="https://eu1.qnap.com/Storage/TS-X72/" https://eu1.qnap.com/Storage/TS-X72/TS-X72_20211221-5.0.0.1891.zip https://download.qnap.com/Storage/TS-X72/TS-X72_20211221-5.0.0.1891.zip Wobei, woher hast Du das U VauRa? @freakywilli3 versuch mal eu1 anstatt download Hier noch die Downloadseite vopn QNAP zum Model https://www.qnap.com/de-de/download?model=tvs-872x&category=firmware
-
Which QNAP System have you installed? Does it recognize your cpu correctly? What's about your bios cpu settings? Regards
-
The login is what you configured while running the very first setup of your qnap
-
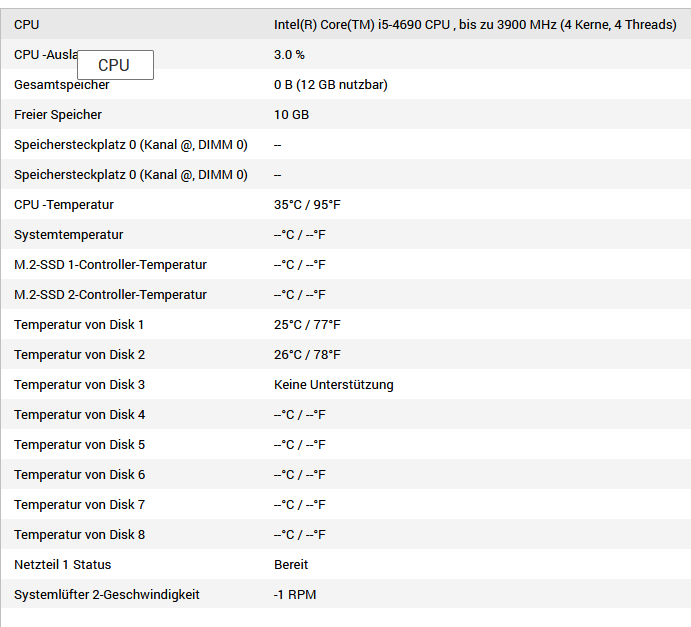
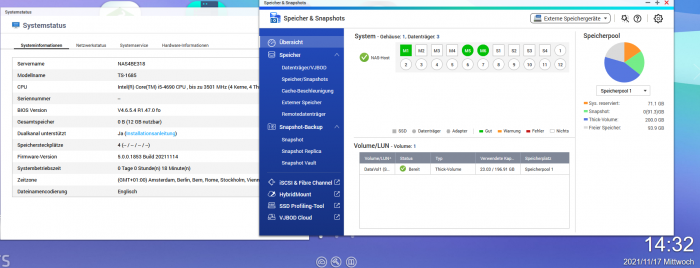
I switched the model and restarted the QNAP again. It took a time to check my raid, but after that, the system was up again with the big model as you can see in the screenshot. External devices via USB will be recognized, but actually not on every port

-
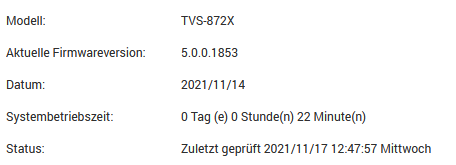
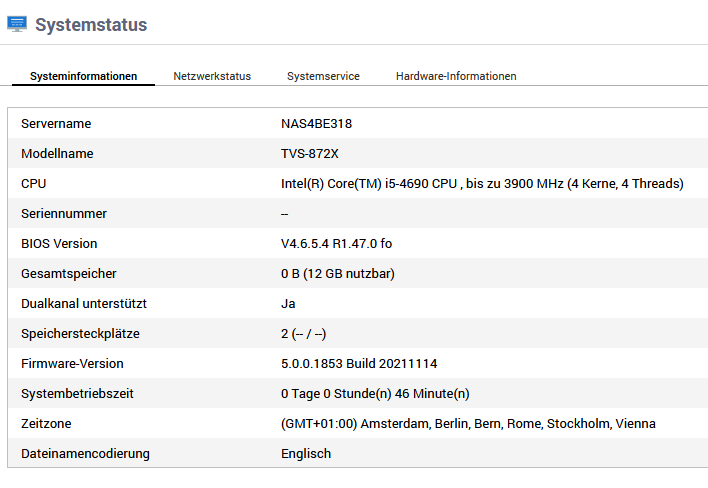
Here is my way to get it to work on an Fujitsu Esprimo P920 with 12GB ram 1.) Download QNAP-BOOT-EN-v1.00.img.zip from https://mega.nz/folder/LJ4wyaDY#MxOC2UgNqC-Y6gQXu-IUFA 2.) I use HDDRawCopyPortable to beam it onto an USB Stick or a small SSD 3.) Place the ssd with the image on SATA Port 5 4.) and 2x 2,5" HDD on port 0 and 1 5.) in the BIOS I switch the sata ports all to hotswap 6.) Boot into the qnap menu while pressing the arrow key "down" to access the correct menuentry for modifying my qnap image 7.) I checked different QNAP Systems for INTEL and they all worked for me. Actually I use these 2 8.) Model Info 8.1) TS-X85 MODEL_TYPE="QY380_QY390_10_11" #PATCHED_FIRMWARE="TS-X85_20200529-4.4.2.1320" #PATCHED_FIRMWARE="TS-X85_20210923-4.5.4.1800" #PATCHED_FIRMWARE="TS-X85_20211029-5.0.0.1837" PATCHED_FIRMWARE="TS-X85_20211114-5.0.0.1853" DOWNLOAD_URL="https://eu1.qnap.com/Storage/TS-X85/" 8.2) TS-X72 TVS-872X MODEL_TYPE="Q0121_Q0160_17_10" #PATCHED_FIRMWARE="TS-X72_20211029-5.0.0.1837" PATCHED_FIRMWARE="TS-X72_20211114-5.0.0.1853" DOWNLOAD_URL="https://eu1.qnap.com/Storage/TS-X72/" 9.) modifying the file my_create_qnap_boot with these infos 10.) sudo ./my_create_qnap_boot 11.) sudo reboot and thats it! 12.) now you can login to the qnap system with your webbrowser and setup the machine. I'm also still failing on vmware workstation and ESXi, but as soon as I am successful, I will post that here If there is a new firmware version for your qnap, you only have to reboot into the QNAP Install menu, and enter the info from point 8. to 11. again with the newer firmware info and thats it again! Hope this helps model.conf my_create_qnap_boot