

Polanskiman
-
Posts
2,734 -
Joined
-
Last visited
-
Days Won
120
Posts posted by Polanskiman
-
-
23 hours ago, dj_nsk said:
test only ==> Arc Loader with Arc Patch
11 hours ago, Peter Suh said:I understand that Arc loader provides various crack tools for violating the license that can irritate Synology.
This is a sensitive matter.
@dj_nsk, @Captainfingerbang I hope you two will no longer mention ARC's license violations in this topic.
I do not agree with ARC's violations.
Please inquire in the ARC section.8 hours ago, Captainfingerbang said:Just doing my due diligence here out of curiousity. I Can see an Arc loader here. https://github.com/AuxXxilium/arc/releases/tag/24.2.10
and i see a LIST of patches here: https://github.com/AuxXxilium/arc-patches
But i dont see an "Arc Loader with Arc Patch" any where. could you please point me to the patch portion or is it included? I'm a lil lost
7 hours ago, dj_nsk said:")
Just install Arc Loader and select "With Arc Patch" when config it !
You have both been asked by Peter Suh not to derail the thread with the ARC loader which is a separate loader.
If you have questions or comments about that loader, create a new thread.
-
Well since I could not figure it out and had no feedback here I decided to nuke the DSM partition (sdx1 of each drive). There it's done. 3 days trying to solve this shit.
At least now it's all clean and new and the box can run again althoug still needs some configuring.
-
Problem got worse. I can't even access DSM through network anymore after a force reinstall. Looking at the console logs after a force reinstallation a get of bunch of errors such as:
[FAILED] Failed to start Adjust NIC sequence.
See "systemctl status SynoInitEth.service" for details.

[FAILED] Failed to start Out of Band Management Status Check.
See "systemctl status syno-oob-check-status.service" for details.

[FAILED] Failed to start synoindex check if ... any synoindex-related packages.
See "systemctl status synoindex-checkpackage.service" for details.
I was able to access DSM by poking around and re-enabling the NICs by command line (through a serial cable>consol) but once I get into DSM GUI I can see DSM is not acting normally. So it looks like something got corrupt somewhere along the process.
Does anyone know how I can recover from this? I would hate to have to nuke the DSM partition. This would force me to have to reinstall all apps and reconfigure everything which would be a major pain.
-
Ok so I solved the "Failed to install DSM. Available system space is insufficient." error.
I deleted entirely the upd@te directory first (which was no enough initially) and then the /var/log. I then ended up with:
SynologyNAS> mount /dev/md0 /tmp/test
SynologyNAS> df -h /dev/md0
Filesystem                Size      Used Available Use% Mounted on
/dev/md0                  2.3G      1.4G    780.3M  65% /tmp/test
which was enough to allow the pat file to be uploaded and deployed without any errors
Something I noticed. Anything bellow 750M/700M is no good because although the pat file size is inferior than the available space you need extra space for the file to be deployed after beeing uploaded.
Below you can see how the space shrinks to 0 after the upload. I was nervous when I saw that the available space reached 0 and I was expecting once again the dreaded "Failed to install the file. The file is probably corrupt." The space was bordeline enough.
SynologyNAS> mount /dev/md0 /tmp/test
SynologyNAS> df -h /dev/md0
Filesystem                Size      Used Available Use% Mounted on
/dev/md0                  2.3G      1.4G    780.3M  65% /tmp/test
SynologyNAS> df -h /dev/md0
Filesystem                Size      Used Available Use% Mounted on
/dev/md0                  2.3G      1.8G    383.7M  83% /tmp/test
SynologyNAS> df -h /dev/md0
Filesystem                Size      Used Available Use% Mounted on
/dev/md0                  2.3G      2.0G    117.4M  95% /tmp/test
SynologyNAS> df -h /dev/md0
Filesystem                Size      Used Available Use% Mounted on
/dev/md0                  2.3G      2.1G    108.0M  95% /tmp/test
SynologyNAS> df -h /dev/md0
Filesystem                Size      Used Available Use% Mounted on
/dev/md0                  2.3G      2.2G         0 100% /tmp/test
SynologyNAS> df -h /dev/md0
Filesystem                Size      Used Available Use% Mounted on
/dev/md0                  2.3G      1.8G    373.3M  83% /tmp/test
SynologyNAS> df -h /dev/md0
Filesystem                Size      Used Available Use% Mounted on
/dev/md0                  2.3G      1.8G    373.3M  83% /tmp/test
SynologyNAS> df -h /dev/md0
Filesystem                Size      Used Available Use% Mounted on
/dev/md0                  2.3G      1.8G    373.3M  83% /tmp/test
SynologyNAS> df -h /dev/md0
Filesystem                Size      Used Available Use% Mounted on
/dev/md0                  2.3G      1.8G    341.4M  85% /tmp/test
SynologyNAS> df -h /dev/md0
Filesystem                Size      Used Available Use% Mounted on
/dev/md0                  2.3G      1.9G    314.6M  86% /tmp/test
SynologyNAS> df -h /dev/md0
Filesystem                Size      Used Available Use% Mounted on
/dev/md0                  2.3G      1.8G    395.2M  82% /tmp/test
SynologyNAS> df -h /dev/md0
Filesystem                Size      Used Available Use% Mounted on
/dev/md0                  2.3G      1.8G    395.2M  82% /tmp/test
SynologyNAS> Connection closed by foreign host.
My problem number 1 where all volumes are crashed after a reboot is still persistent.
Anyone got any clues what is happening here and how I can solve this?
-
Ok so I was able to mount /dev/md0 and delete a .pat file that was in the @autoupdate directory. This said I dont think I still have enought space since the 7.2.1 dsm pat file is over 400MB.
SynologyNAS> df -h /dev/md0
Filesystem                Size      Used Available Use% Mounted on
/dev/md0                  2.3G      1.9G    296.6M  87% /tmp/test
Question is, what else can be removed? I see plenty of data in 3 directories, namely upd@te, usr and var but I am not sure what can safely be deleted:
SynologyNAS> du -hs *
4.0K    @autoupdate
26.8M   @smallupd@te_deb_uploaded
0       bin
4.0K    config
8.0K    dev
4.8M    etc
2.5M    etc.defaults
4.0K    initrd
0       lib
0       lib32
0       lib64
4.0K    lost+found
4.0K    mnt
4.0K    proc
28.0K   root
24.0K   run
0       sbin
0       stopping
4.0K    sys
4.0K    tmp
376.9M  upd@te
1.2G    usr
242.2M  var
9.2M    var.defaults
4.0K    volume1
4.0K    volume2
The upd@te directory contains the following:
SynologyNAS> cd upd@te SynologyNAS> ls -la drwxr-xr-x 3 root root 4096 Jan 1 00:00 . drwxr-xr-x 26 root root 4096 Jan 1 00:01 .. -rw-r--r-- 1 root root 5273600 Sep 23 2023 DiskCompatibilityDB.tar -rw-r--r-- 1 root root 102 Sep 23 2023 GRUB_VER -rwxr-xr-x 1 root root 1010425 Sep 23 2023 H2OFFT-Lx64 -rw-r--r-- 1 root root 5998 Oct 12 2023 Synology.sig -rwxr-xr-x 1 root root 678 Sep 23 2023 VERSION -rw-r--r-- 1 root root 24992123 Oct 12 2023 autonano.pat -rwxr-xr-x 1 root root 8388608 Sep 23 2023 bios.ROM -rw-r--r-- 1 root root 2931 Oct 12 2023 checksum.syno -rw-r--r-- 1 root root 1302 Sep 23 2023 expired_models -rw-r--r-- 1 root root 55 Sep 23 2023 grub_cksum.syno -rw-r--r-- 1 root root 239517368 Sep 23 2023 hda1.tgz -rw-r--r-- 1 root root 6478104 Sep 23 2023 indexdb.txz -rwxr-xr-x 1 root root 917504 Sep 23 2023 oob.ROM drwxr-xr-x 2 root root 4096 Jan 1 00:01 packages -rwxr-xr-x 1 root root 40610 Sep 23 2023 platform.ini -rw-r--r-- 1 root root 7157584 Sep 23 2023 rd.gz -rw-r--r-- 1 root root 22217596 Sep 23 2023 synohdpack_img.txz -rwxr-xr-x 1 root root 16488320 Aug 30 2023 updater -rw-r--r-- 1 root root 3437904 Sep 23 2023 zImage -
Wanted to update to dsm 7.2.1 so I updated the loader first. Currently using the ARC loader.
Once updated, all was find, DSM upgraded fine and I was on DSM 7.2.1 until I rebooted. After the reboot all volumes had crashed. I had already experienced something similar in the past and a force reinstall had fixed it. So I did the same. It fixed it, except when I reboot, all volumes crash again. Did this like 4-5 time with the same outcome each time. The last time I tried I wasn't able to upload the .pat file and I was greeted with the dreaded:
QuoteFailed to install DSM. Available system space is insufficient.
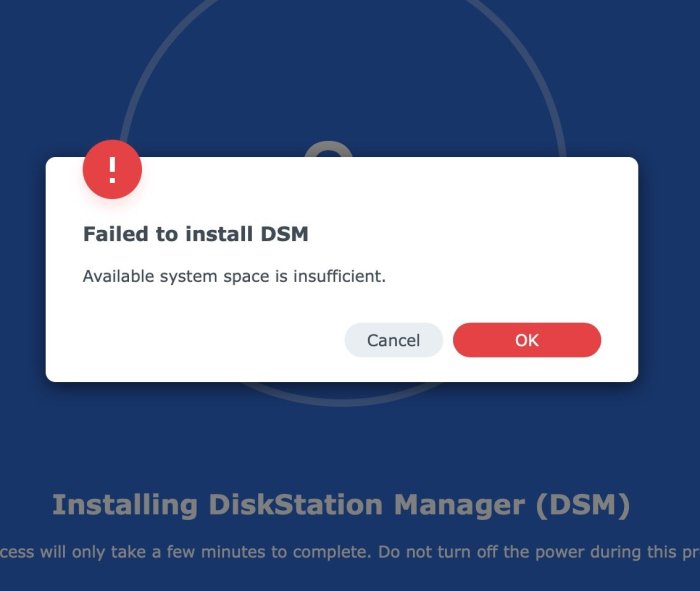
What's the deal here and how can I get out of this pickle?
Thanks all.
-
Multiple threads have been merged into this one.
-
 1
1
-
-
- Outcome of the update: SUCCESSFUL
- DSM version prior update: DSM 7.1.1 42962 UPDATE 5
- Loader version and model: TCRP Friend v.0.9.4.9c withfriend - DS3622xs+
- Using custom extra.lzma: NO
- Installation type: BAREMETAL - Gigabyte H97N-WIFI (rev. 1.0)
- Additional comments: Burned updated loader to usb key. Built loader with DSM 7.1.1. Rebooted. Installed DSM 7.2. Rebooted. Loader detected new DSM version and updated accordingly.
-
7 hours ago, TJemuran said:
Few weeks ago I have similar problem, what I do is, I tried to reinstall using another loader. and the data still safe. that day, I'm use arpl and switch to arc loader. as long as you not touch the partition, the data is still there.
I was able to backup all my data first through SSH as I wanted to make sure it was out of these drives prior trying anything.
I used another loader as you suggested and was able to re-install DSM. Now everything is working as it should!
I am suspecting that during the initial DSM upgrade I did 2 days ago something went wrong when I rebooted and some system files got corrupted some way.
Anyway, now I am back on track.
Thank you all.
-
2
-
-
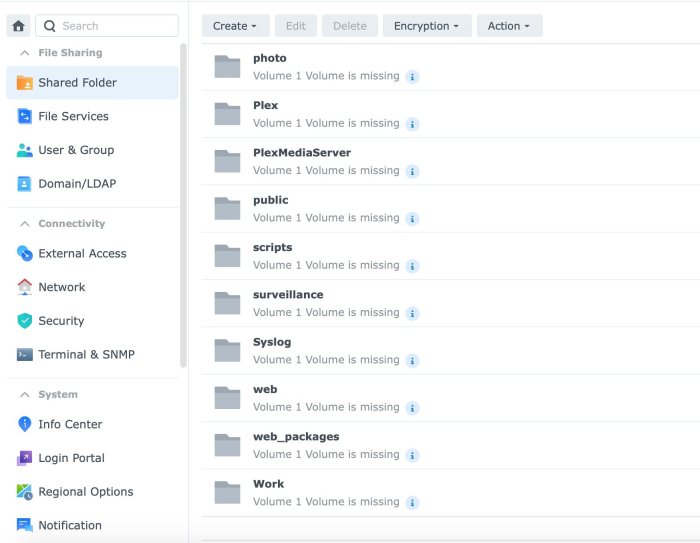
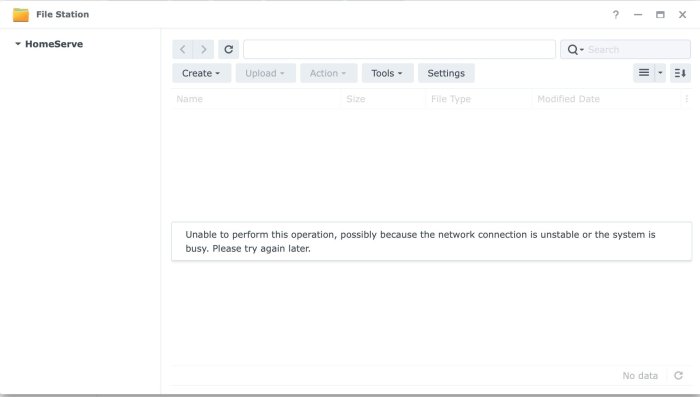
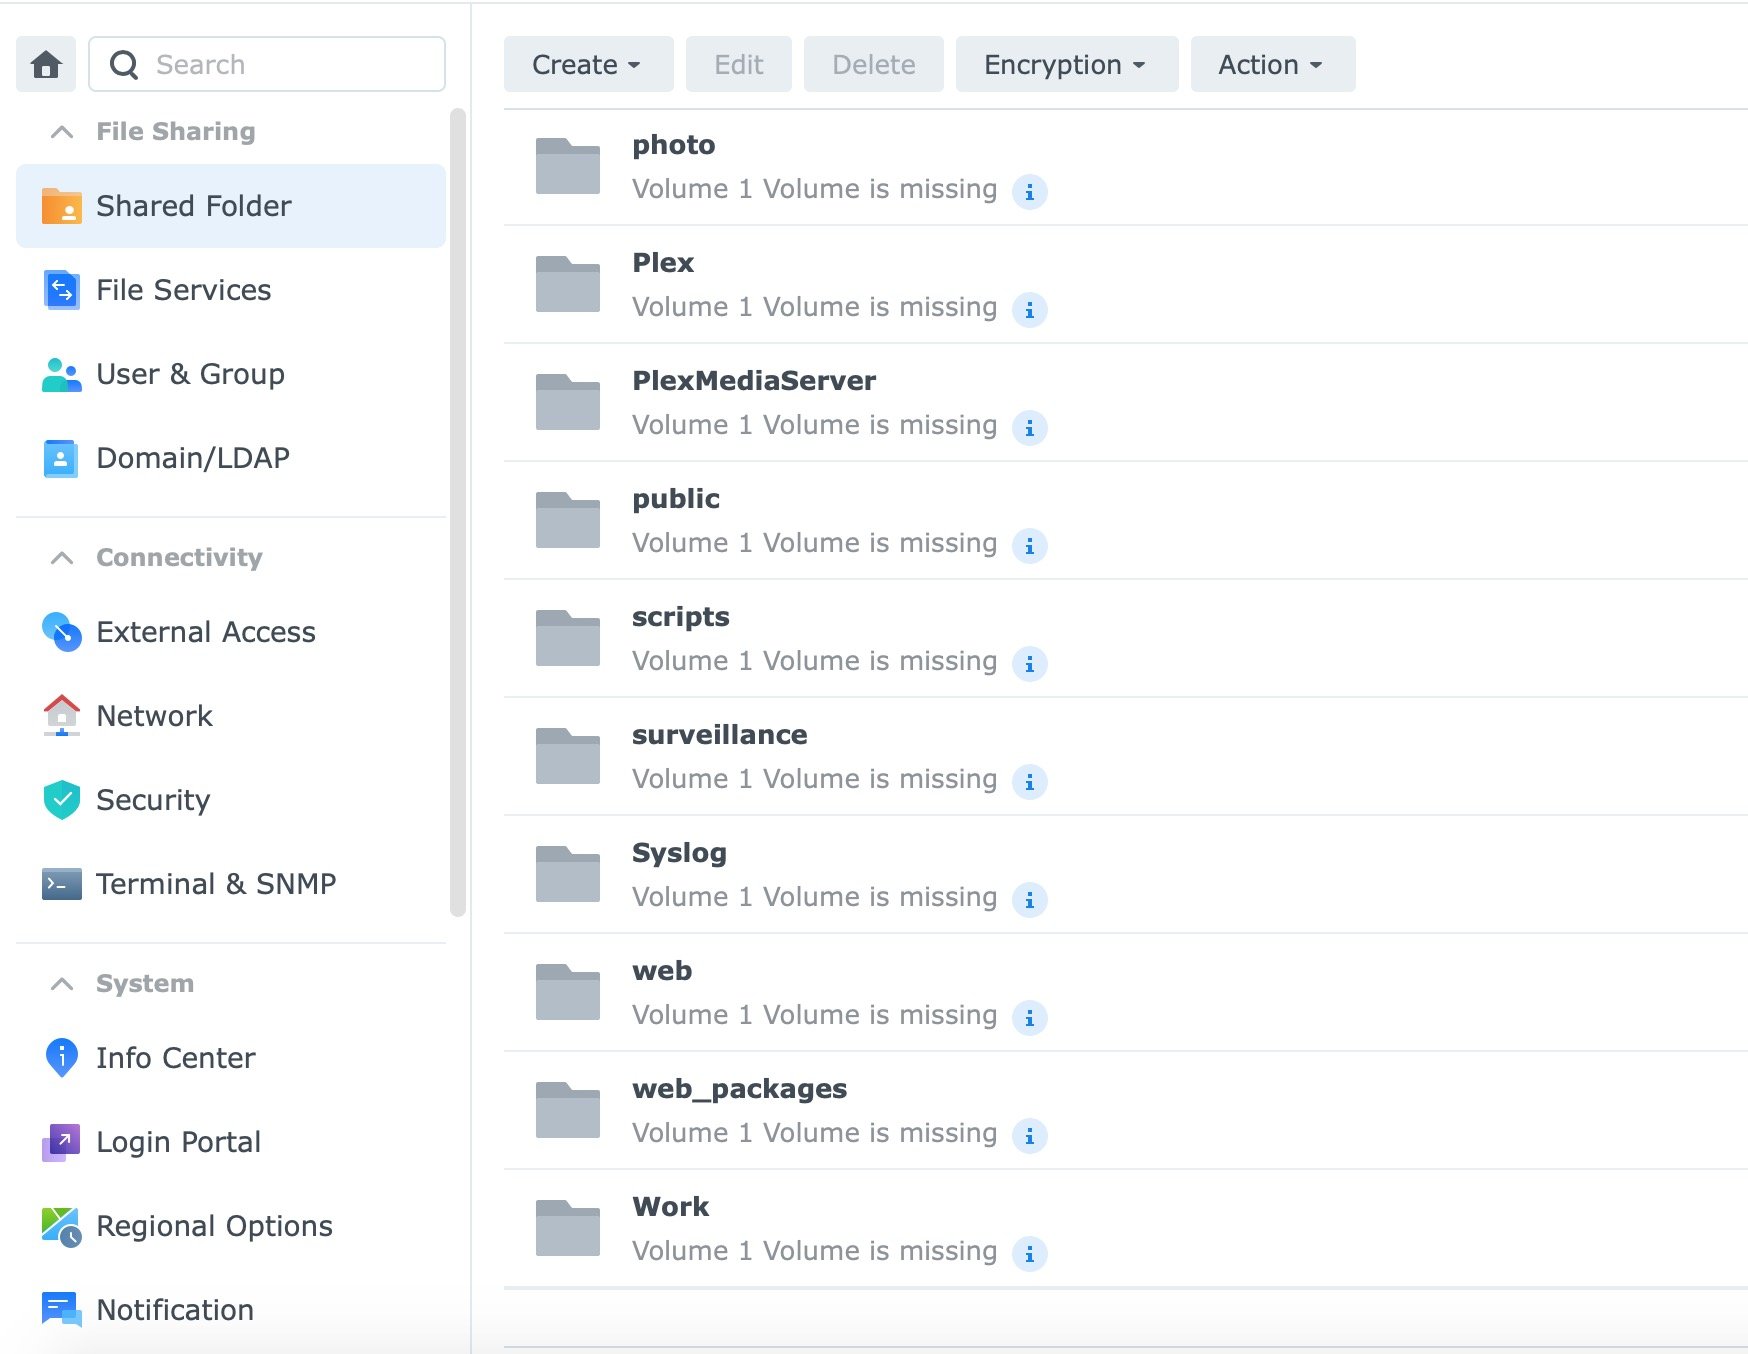
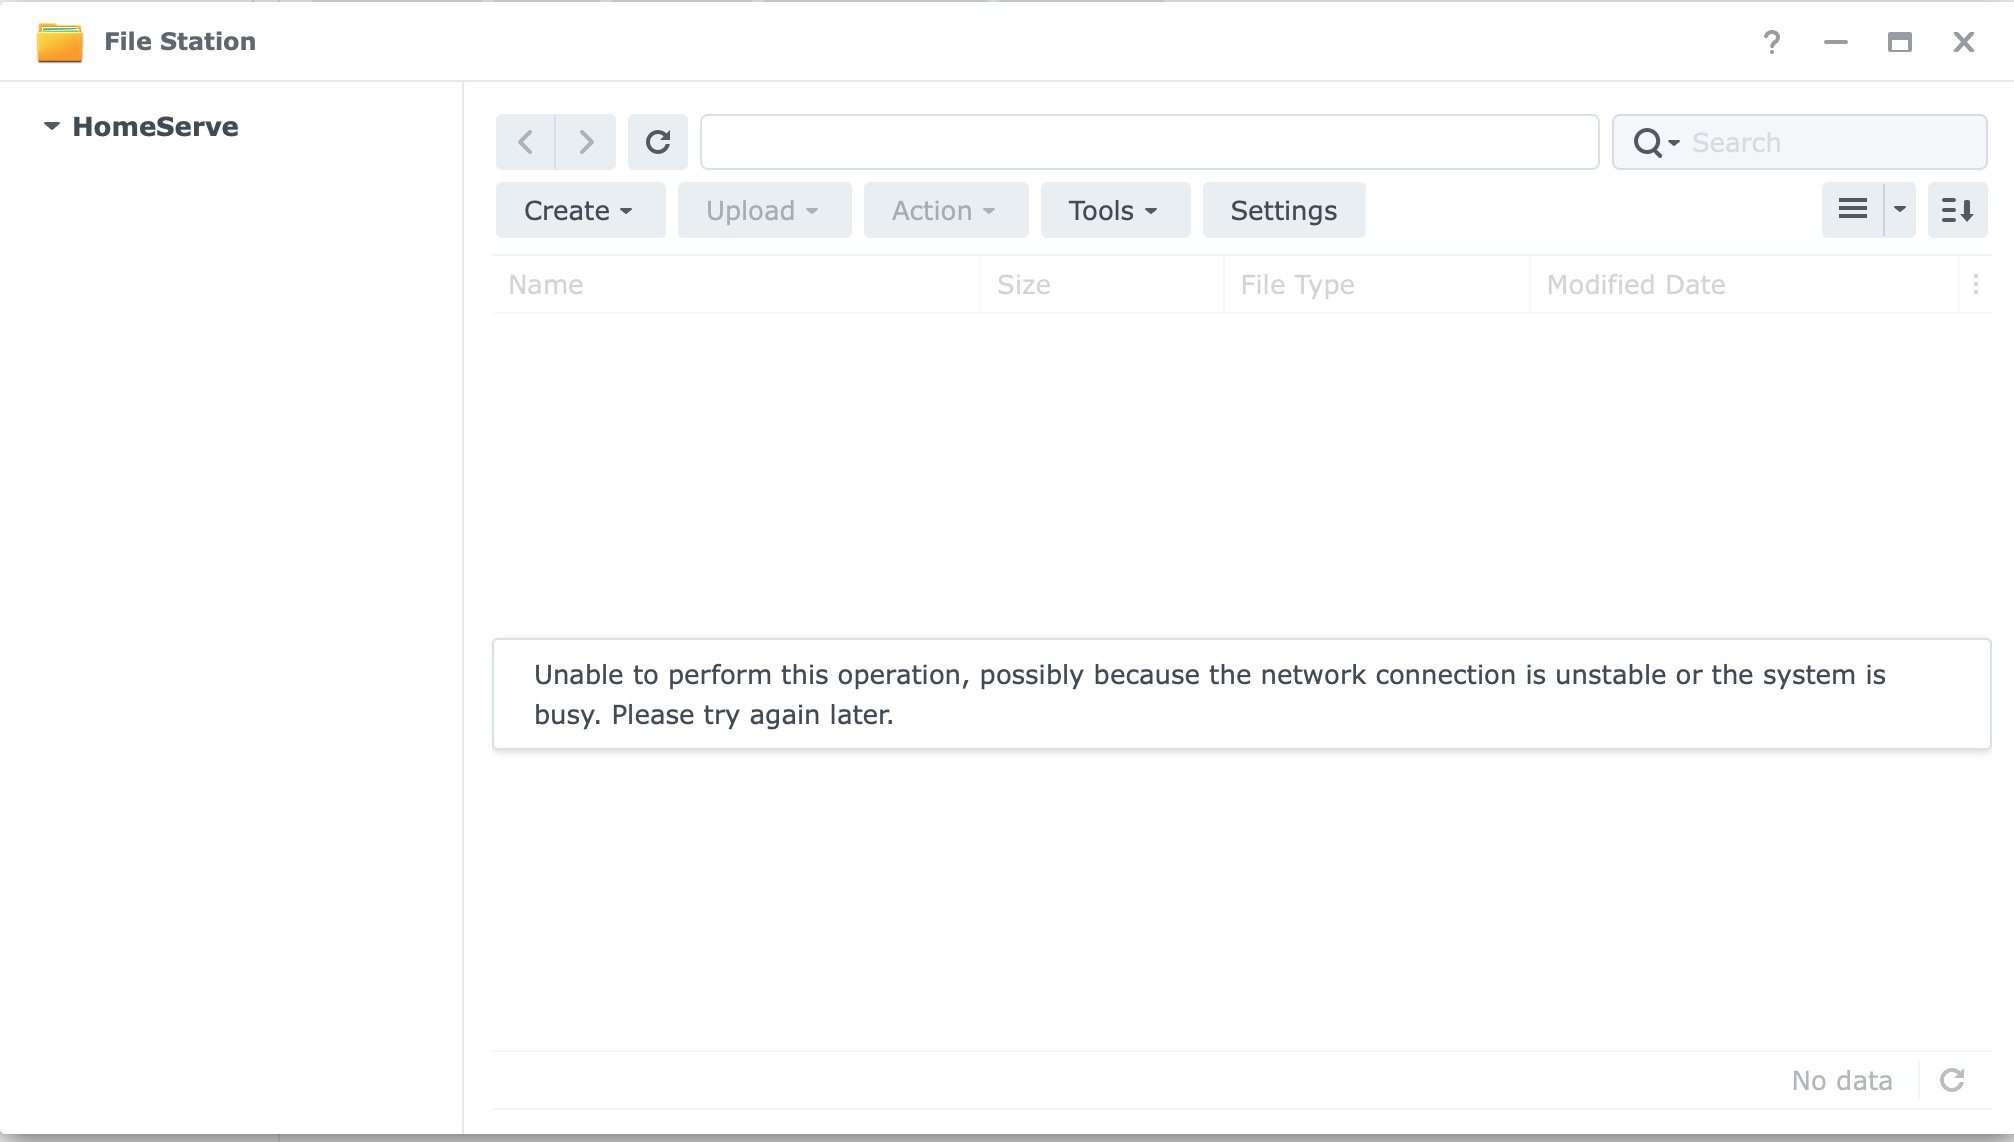
I just realized I was using pre-DSM 7 mount point, reason why it was not working. This time I used:
sudo mount -v /dev/mapper/cachedev_0 /volume1and it worked. The Volume1 and Storage Pool 1 instantly became healthy and all my data re-appeared. Strange thing though is I can only access the data through ssh. Through the GUI, File Station is empty and all Share folders in the Control Panel are greyed out and DSM says Volume1 is missing.
Looks like DSM system files are all screwed up.
-
34 minutes ago, dj_nsk said:
after the words "The repair of the Storage pool just finished", I decided that the data became available to you. If no
 t, then most likely - everything is sad
perhaps someone with knowledge of low-level working with RAID will help
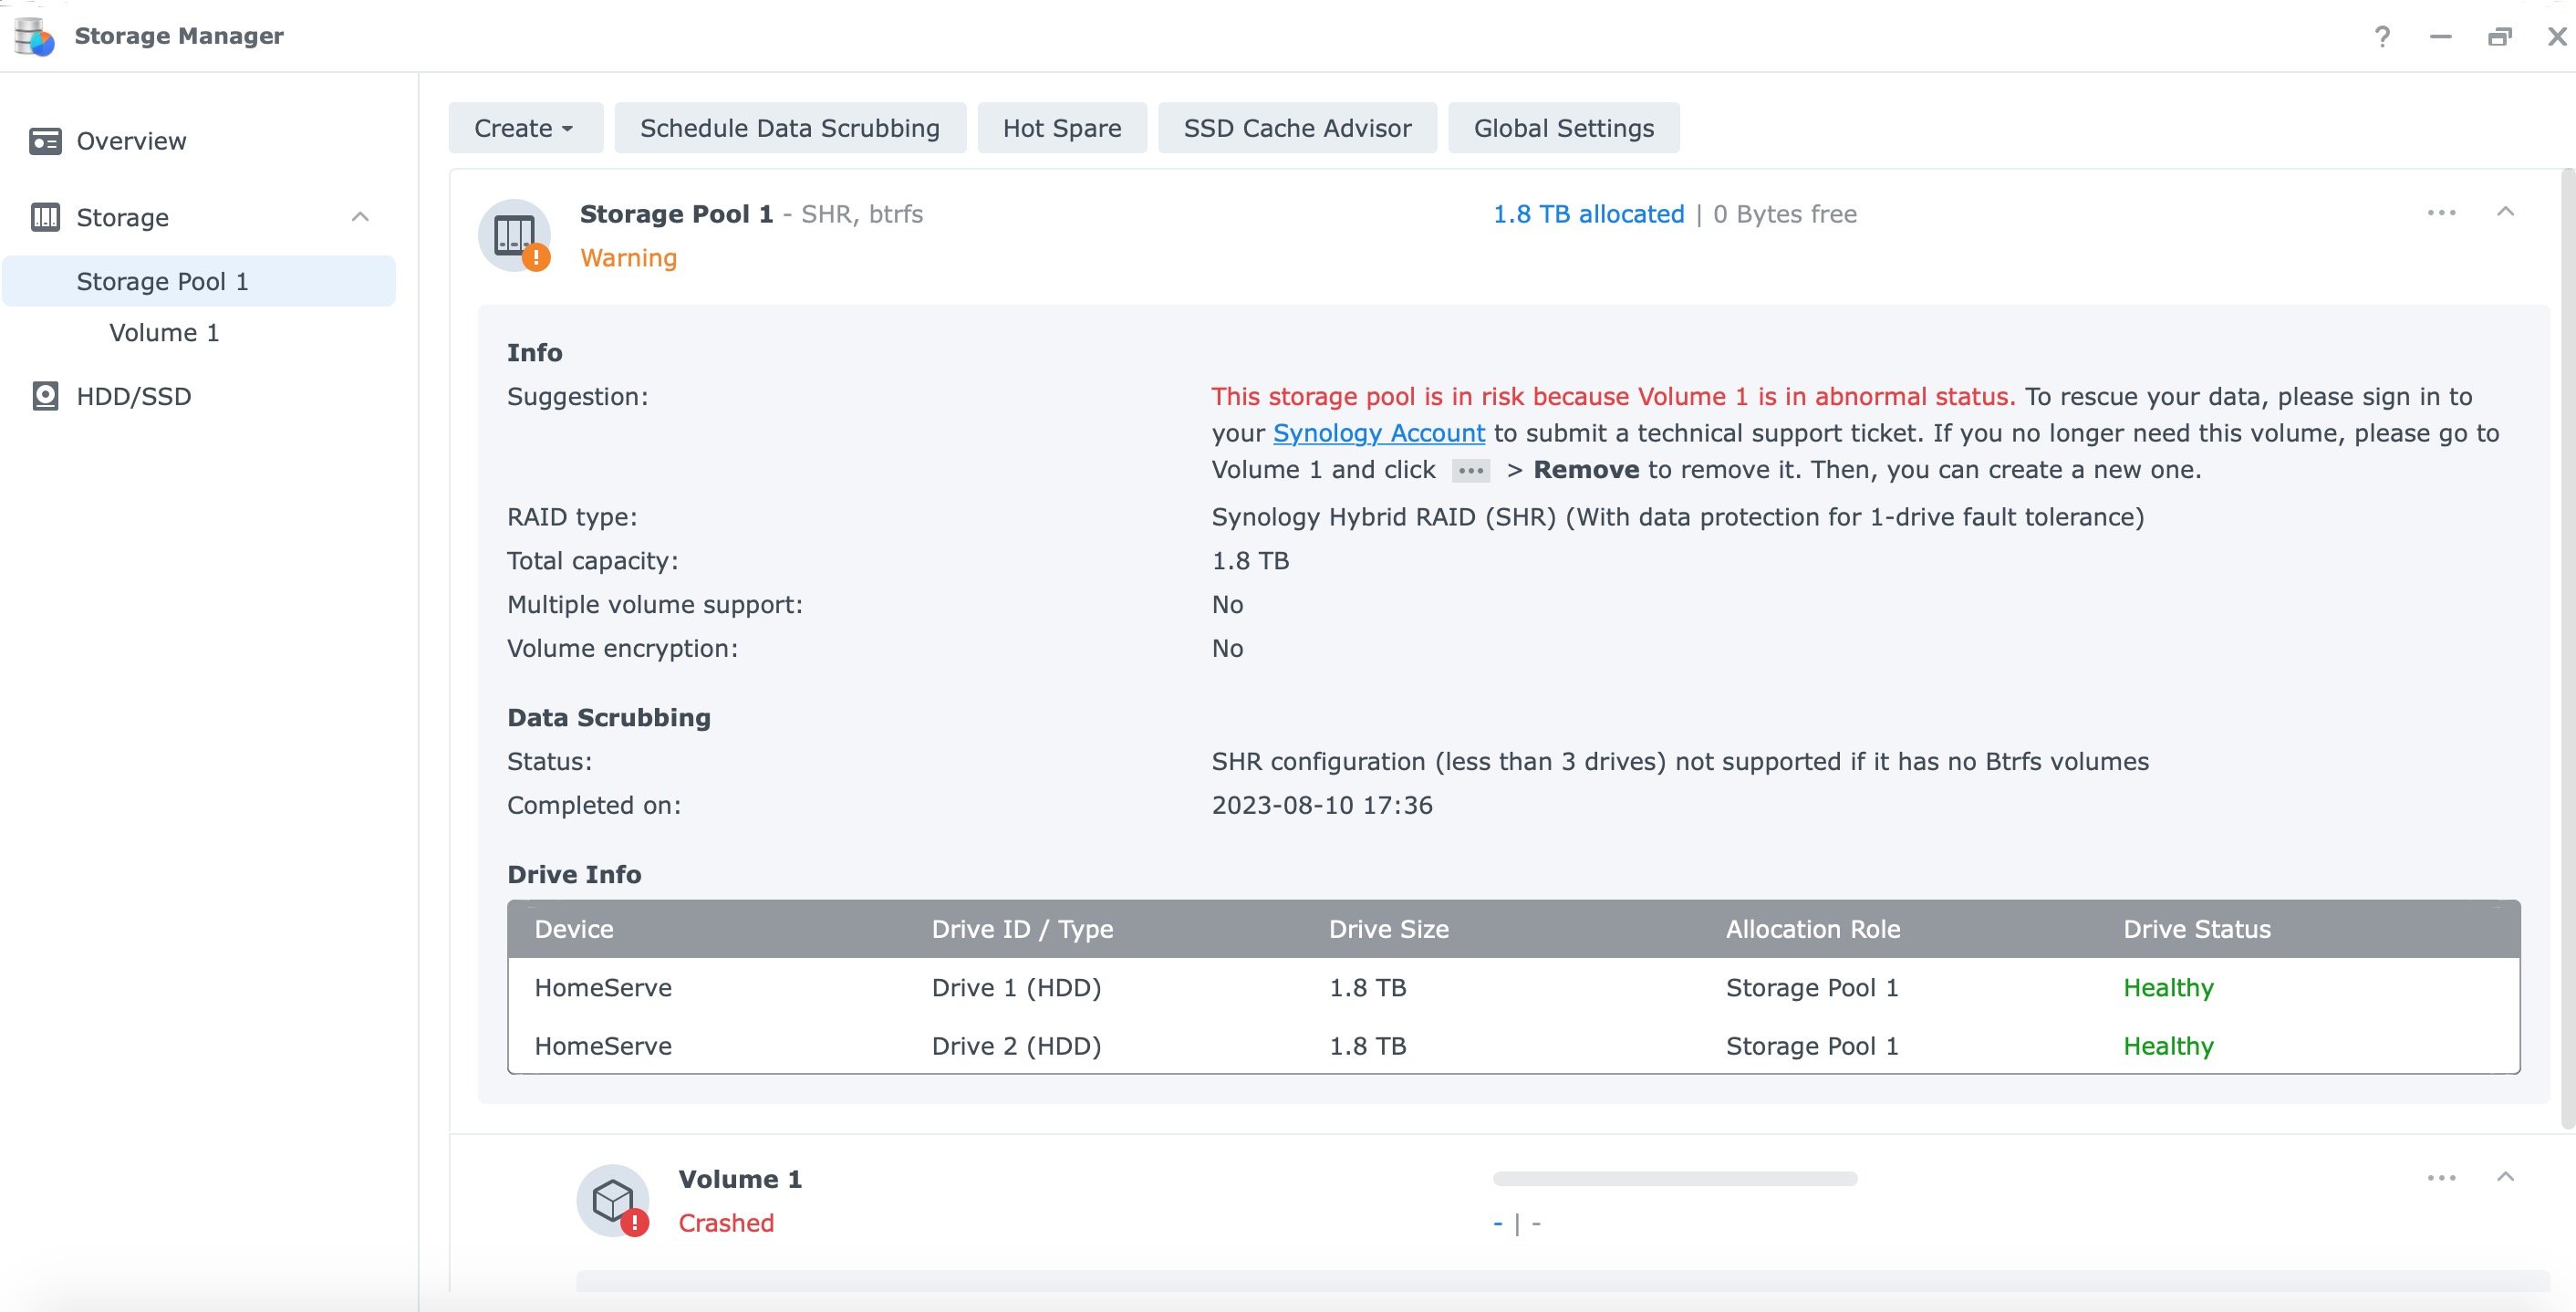
Once the repair was over the Storage pool still showed 'Warning' and the volume still showed 'Crashed'. I am hoping Flyride can give me a hand as he is the godfather in these types of situations!
Thank you for your answer though.
-
14 minutes ago, dj_nsk said:
From which version of the DSM did you upgrade to 7.2? If from version 6, in what way exactly?
Perhaps the simplest and most reliable now will be: to make a full backup (all data and settings) to an external disk using Hyper Backup; delete the Storage pool; install DSM again and restore data and settings from the backup
From 7.1.1.
I can't make any backup. Most packages show an error and DSM is not allowing me to install anything saying there is no volume 😬
As I said I can't even see my data. Volume1 shows empty. As if it wasn't mounted. Tried mounting it, didn't allow me to.
-
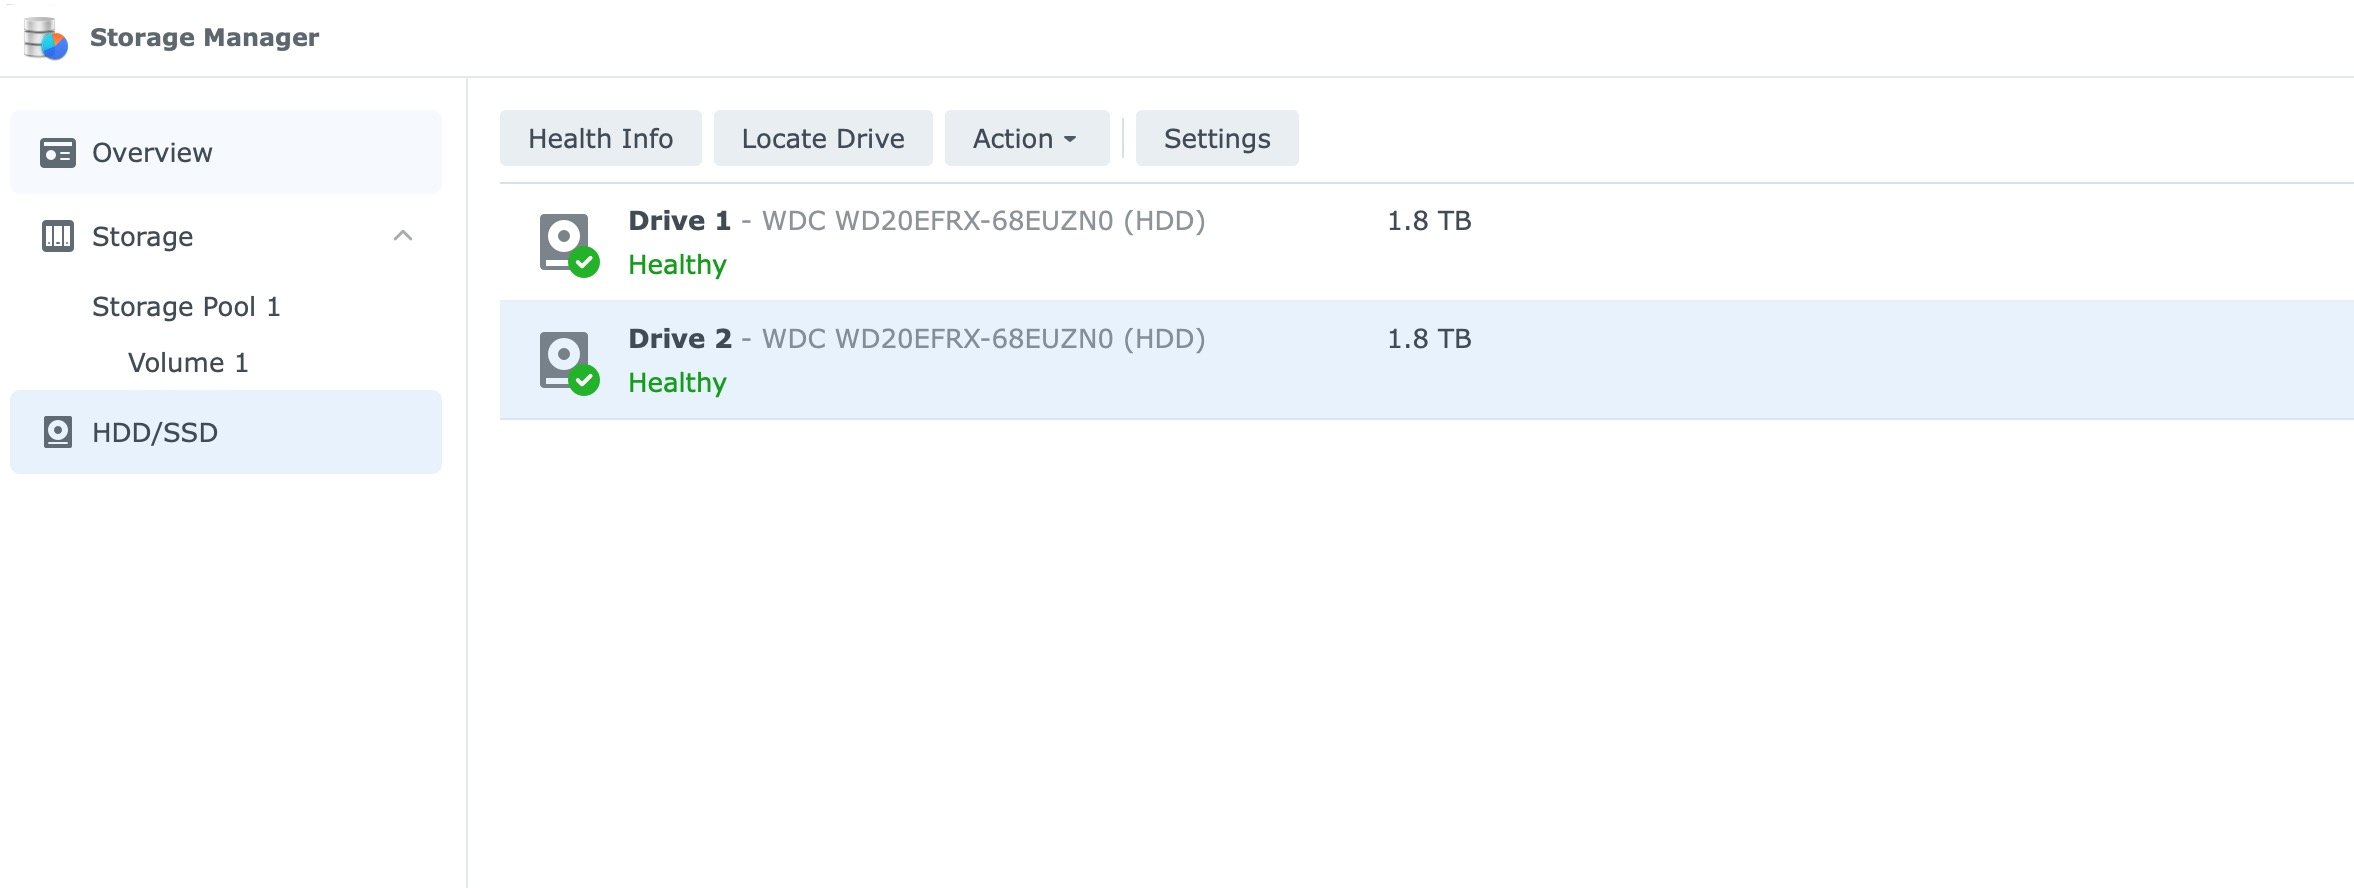
Here are the result of what I have run so far:
root@Home:~# cat /proc/mdstat
Personalities : [raid1]
md2 : active raid1 sda5[0] sdb5[2]
      1948683456 blocks super 1.2 [2/2] [UU]

md1 : active raid1 sda2[0] sdb2[1]
      2097088 blocks [12/2] [UU__________]

md0 : active raid1 sda1[0] sdb1[1]
      2490176 blocks [12/2] [UU__________]

unused devices: <none>
root@Home:~# df
Filesystem     1K-blocks    Used Available Use% Mounted on
/dev/md0         2385528 1490492    776252  66% /
devtmpfs         8097044       0   8097044   0% /dev
tmpfs            8121504       4   8121500   1% /dev/shm
tmpfs            8121504    7816   8113688   1% /run
tmpfs            8121504       0   8121504   0% /sys/fs/cgroup
tmpfs            8121504     316   8121188   1% /tmp
root@Home:~# lvdisplay --verbose Using logical volume(s) on command line. --- Logical volume --- LV Path /dev/vg1000/lv LV Name lv VG Name vg1000 LV UUID iy0Y2t-bn9a-n7iV-fMfg-hijA-LOXz-psaH8c LV Write Access read/write LV Creation host, time , LV Status available # open 1 LV Size 1.81 TiB Current LE 475752 Segments 1 Allocation inherit Read ahead sectors auto - currently set to 384 Block device 249:0root@Home:~# vgdisplay --verbose Using volume group(s) on command line. --- Volume group --- VG Name vg1000 System ID Format lvm2 Metadata Areas 1 Metadata Sequence No 2 VG Access read/write VG Status resizable MAX LV 0 Cur LV 1 Open LV 1 Max PV 0 Cur PV 1 Act PV 1 VG Size 1.81 TiB PE Size 4.00 MiB Total PE 475752 Alloc PE / Size 475752 / 1.81 TiB Free PE / Size 0 / 0 VG UUID VSVCpH-ae5U-h4MG-XaQj-fn8A-BJ88-ckQrxm --- Logical volume --- LV Path /dev/vg1000/lv LV Name lv VG Name vg1000 LV UUID iy0Y2t-bn9a-n7iV-fMfg-hijA-LOXz-psaH8c LV Write Access read/write LV Creation host, time , LV Status available # open 1 LV Size 1.81 TiB Current LE 475752 Segments 1 Allocation inherit Read ahead sectors auto - currently set to 384 Block device 249:0 --- Physical volumes --- PV Name /dev/md2 PV UUID Nonb8L-VX5t-Cg7H-lgKL-Urvn-zJH2-yArTHE PV Status allocatable Total PE / Free PE 475752 / 0root@Home:~# sudo btrfs rescue super /dev/vg1000/lv All supers are valid, no need to recoverroot@Home:~# sudo btrfs insp dump-s -f /dev/vg1000/lv superblock: bytenr=65536, device=/dev/vg1000/lv --------------------------------------------------------- csum 0xa61301c7 [match] bytenr 65536 flags 0x1 ( WRITTEN ) magic _BHRfS_M [match] fsid c95df4c1-94c8-4154-827a-fb89c0af1f27 metadata_uuid c95df4c1-94c8-4154-827a-fb89c0af1f27 label 2017.09.17-16:34:16 v15152 generation 5717282 root 916065419264 sys_array_size 129 chunk_root_generation 5705541 root_level 1 chunk_root 1211914829824 chunk_root_level 1 log_root 0 log_root_transid 0 log_root_level 0 log tree reserve bg 0 rbd_mapping_table_first_offset 0 total_bytes 1995448516608 bytes_used 884257968128 sectorsize 4096 nodesize 16384 leafsize 16384 stripesize 4096 root_dir 6 num_devices 1 compat_flags 0x8000000000000000 compat_ro_flags 0x0 incompat_flags 0x16b ( MIXED_BACKREF | DEFAULT_SUBVOL | COMPRESS_LZO | BIG_METADATA | EXTENDED_IREF | SKINNY_METADATA ) syno_capability_flags 0x0 syno_capability_generation 5717282 csum_type 0 csum_size 4 cache_generation 9 uuid_tree_generation 5717282 dev_item.uuid 2aeb6bc5-aebc-469c-871f-a6f660eb61a2 dev_item.fsid c95df4c1-94c8-4154-827a-fb89c0af1f27 [match] dev_item.type 0 dev_item.total_bytes 1995448516608 dev_item.bytes_used 1080251383808 dev_item.io_align 4096 dev_item.io_width 4096 dev_item.sector_size 4096 dev_item.devid 1 dev_item.dev_group 0 dev_item.seek_speed 0 dev_item.bandwidth 0 dev_item.generation 0 sys_chunk_array[2048]: item 0 key (FIRST_CHUNK_TREE CHUNK_ITEM 1211914780672) chunk length 33554432 owner 2 stripe_len 65536 type SYSTEM|DUP num_stripes 2 stripe 0 devid 1 offset 34397487104 dev uuid: 2aeb6bc5-aebc-469c-871f-a6f660eb61a2 stripe 1 devid 1 offset 34431041536 dev uuid: 2aeb6bc5-aebc-469c-871f-a6f660eb61a2 backup_roots[4]: backup 0: backup_tree_root: 916118945792 gen: 5717279 level: 1 backup_chunk_root: 1211914829824 gen: 5705541 level: 1 backup_extent_root: 916104200192 gen: 5717279 level: 2 backup_fs_root: 29573120 gen: 7 level: 0 backup_dev_root: 916066844672 gen: 5716928 level: 0 backup_csum_root: 916068270080 gen: 5717280 level: 2 backup_total_bytes: 1995448516608 backup_bytes_used: 884257628160 backup_num_devices: 1 backup 1: backup_tree_root: 916121993216 gen: 5717280 level: 1 backup_chunk_root: 1211914829824 gen: 5705541 level: 1 backup_extent_root: 916086849536 gen: 5717280 level: 2 backup_fs_root: 29573120 gen: 7 level: 0 backup_dev_root: 916066844672 gen: 5716928 level: 0 backup_csum_root: 916066435072 gen: 5717281 level: 2 backup_total_bytes: 1995448516608 backup_bytes_used: 884258029568 backup_num_devices: 1 backup 2: backup_tree_root: 916136837120 gen: 5717281 level: 1 backup_chunk_root: 1211914829824 gen: 5705541 level: 1 backup_extent_root: 916129677312 gen: 5717281 level: 2 backup_fs_root: 29573120 gen: 7 level: 0 backup_dev_root: 916066844672 gen: 5716928 level: 0 backup_csum_root: 916118732800 gen: 5717281 level: 2 backup_total_bytes: 1995448516608 backup_bytes_used: 884257968128 backup_num_devices: 1 backup 3: backup_tree_root: 916065419264 gen: 5717282 level: 1 backup_chunk_root: 1211914829824 gen: 5705541 level: 1 backup_extent_root: 916065583104 gen: 5717282 level: 2 backup_fs_root: 29573120 gen: 7 level: 0 backup_dev_root: 916066844672 gen: 5716928 level: 0 backup_csum_root: 916118732800 gen: 5717281 level: 2 backup_total_bytes: 1995448516608 backup_bytes_used: 884257968128 backup_num_devices: 1root@Home~# sudo mount /dev/vg1000/lv /volume1 mount: /volume1: /dev/vg1000/lv already mounted or mount point busy. root@Home:~# sudo mount -o clear_cache /dev/vg1000/lv /volume1 mount: /volume1: /dev/vg1000/lv already mounted or mount point busy. root@Home:~# sudo mount -o recovery,ro /dev/vg1000/lv /volume1 mount: /volume1: /dev/vg1000/lv already mounted or mount point busy. -
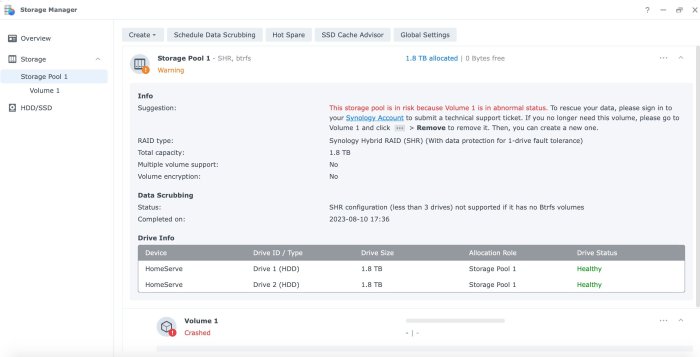
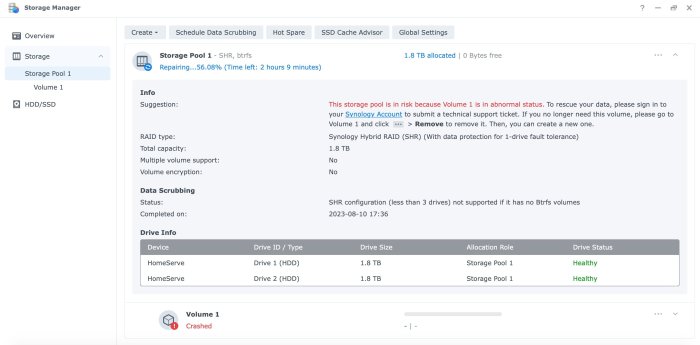
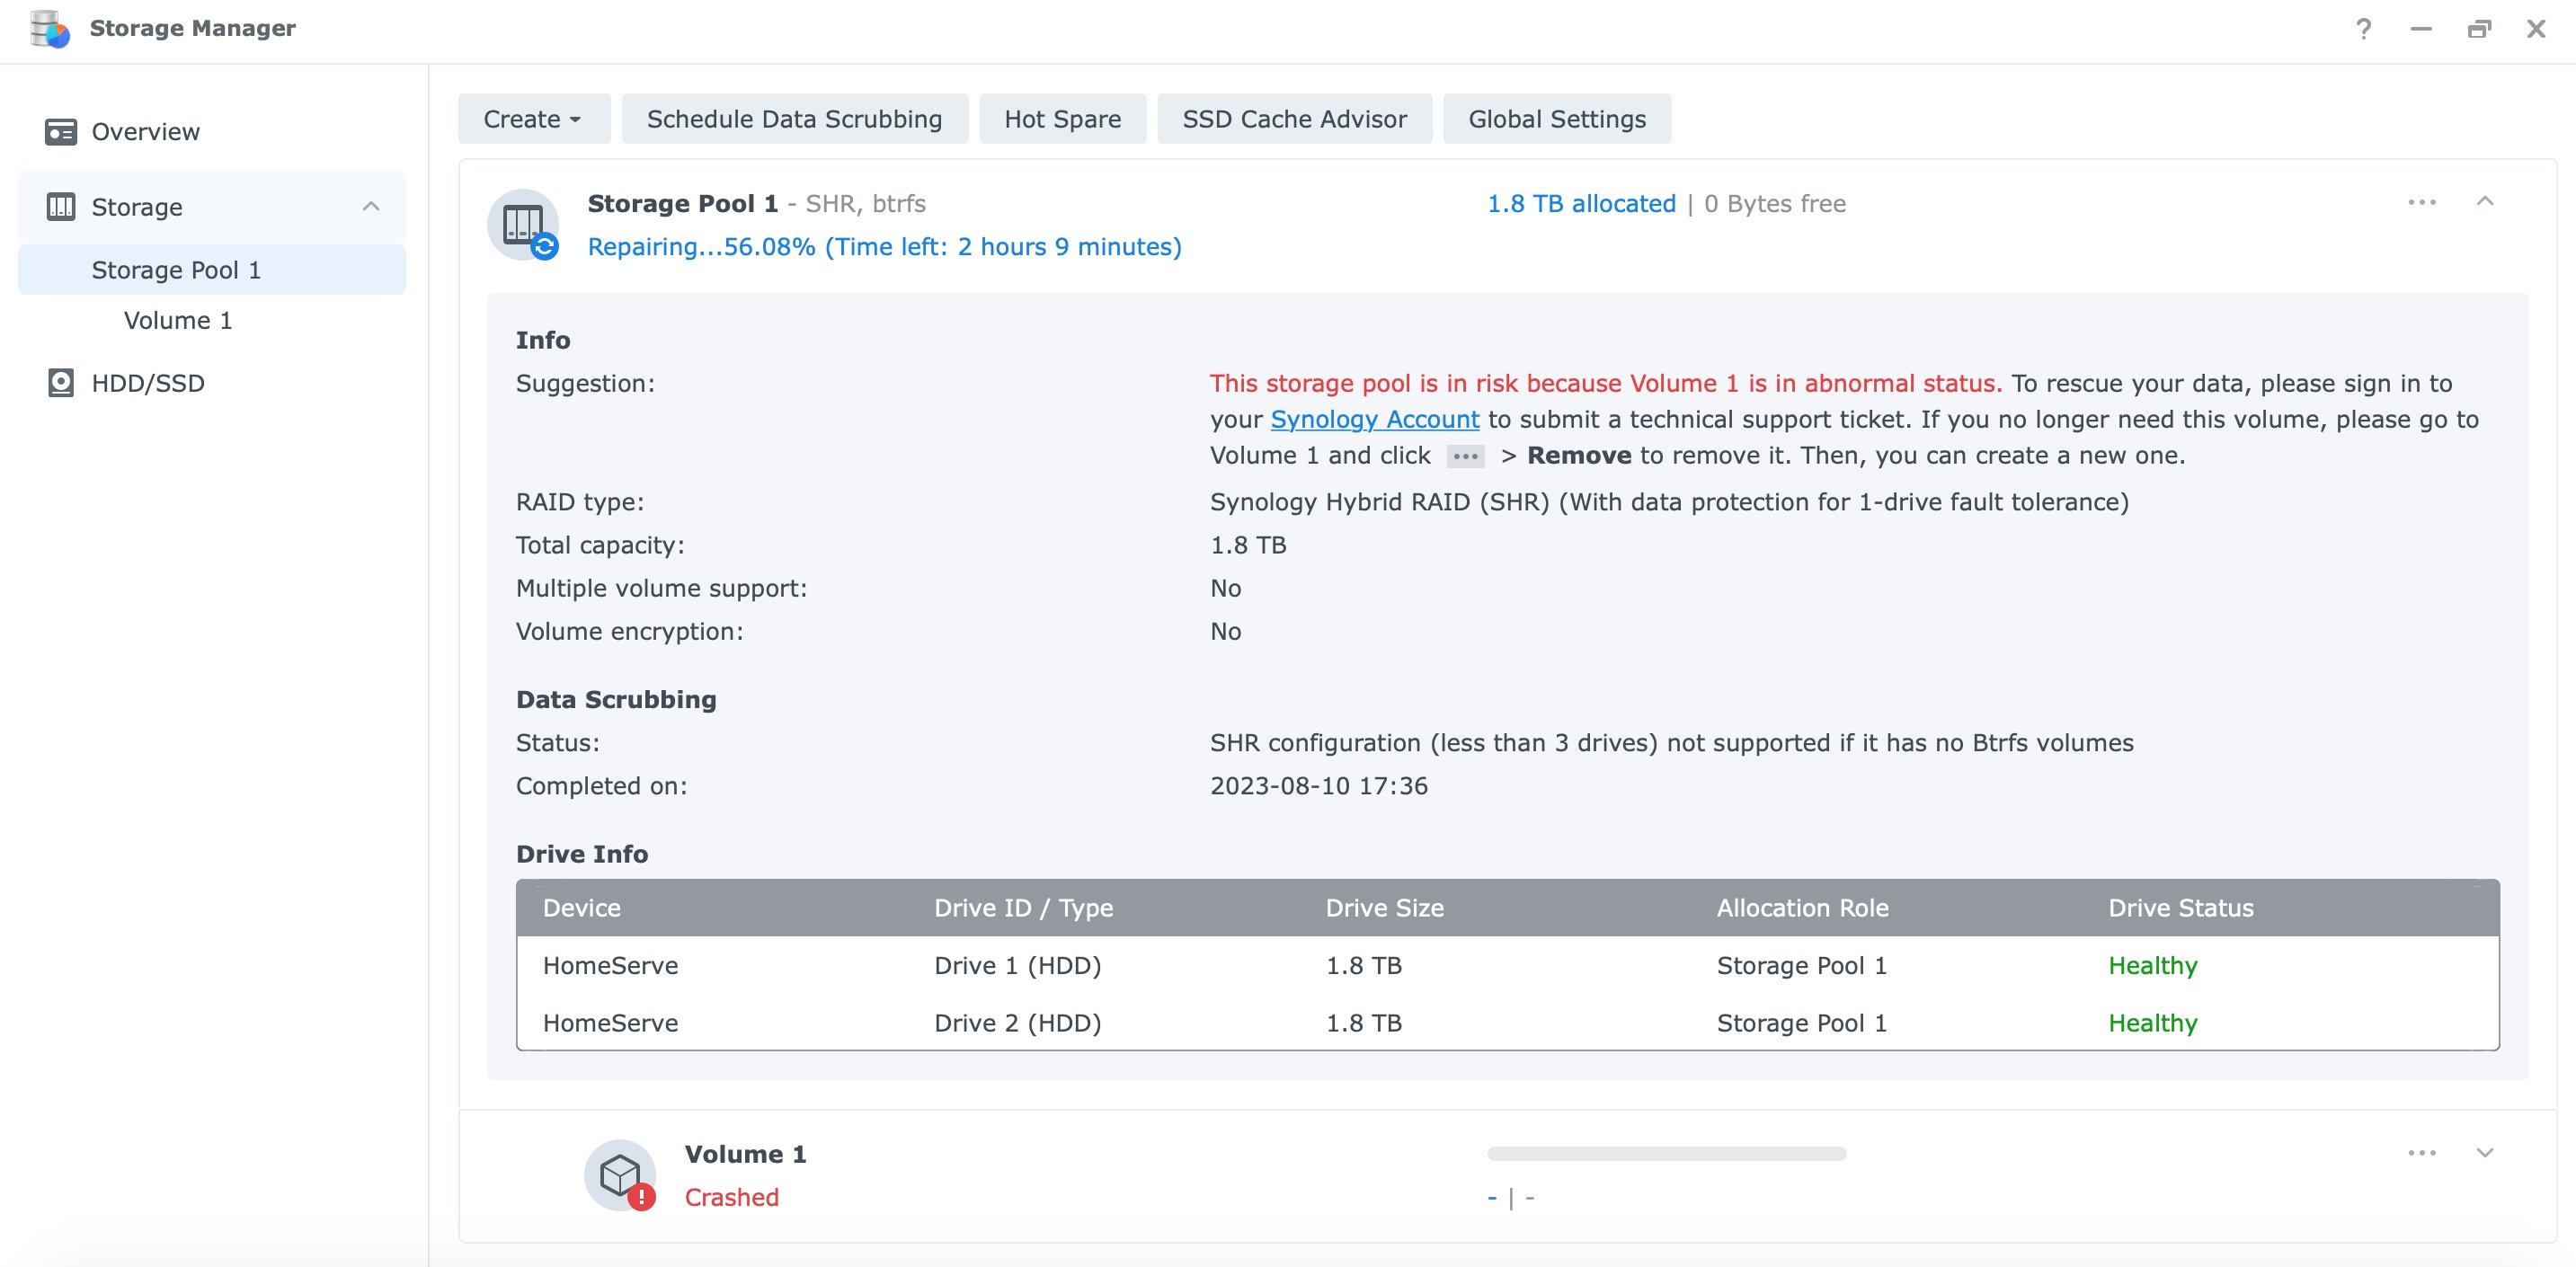
The repair of the Storage pool just finished and it is now showing as "Warning". Volume 1 still shows are "crashed".
@flyride Your masterful help would be appreciated.
-
Hello all,
Just updated the loader to the latest TCRP v0.9.4.9c in order to update DSM to 7.2.
Box got updated. Everything seemed fine after the first reboot until I noticed all package icons in the Package Center were missing and had a Synology placeholder icon instead. I proceeded to reboot and that's were all went sideways. I wasn't able to log back in my box after reboot. I was getting the "System is getting ready. Please log in later" forever. I eventually got back in by running the following via ssh:
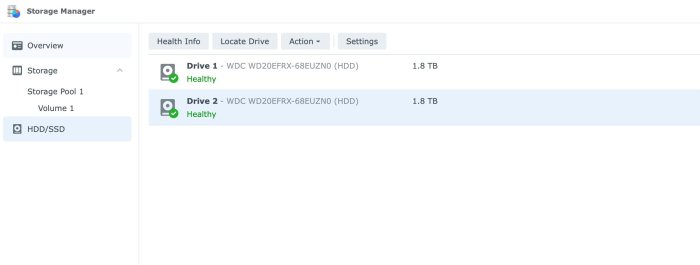
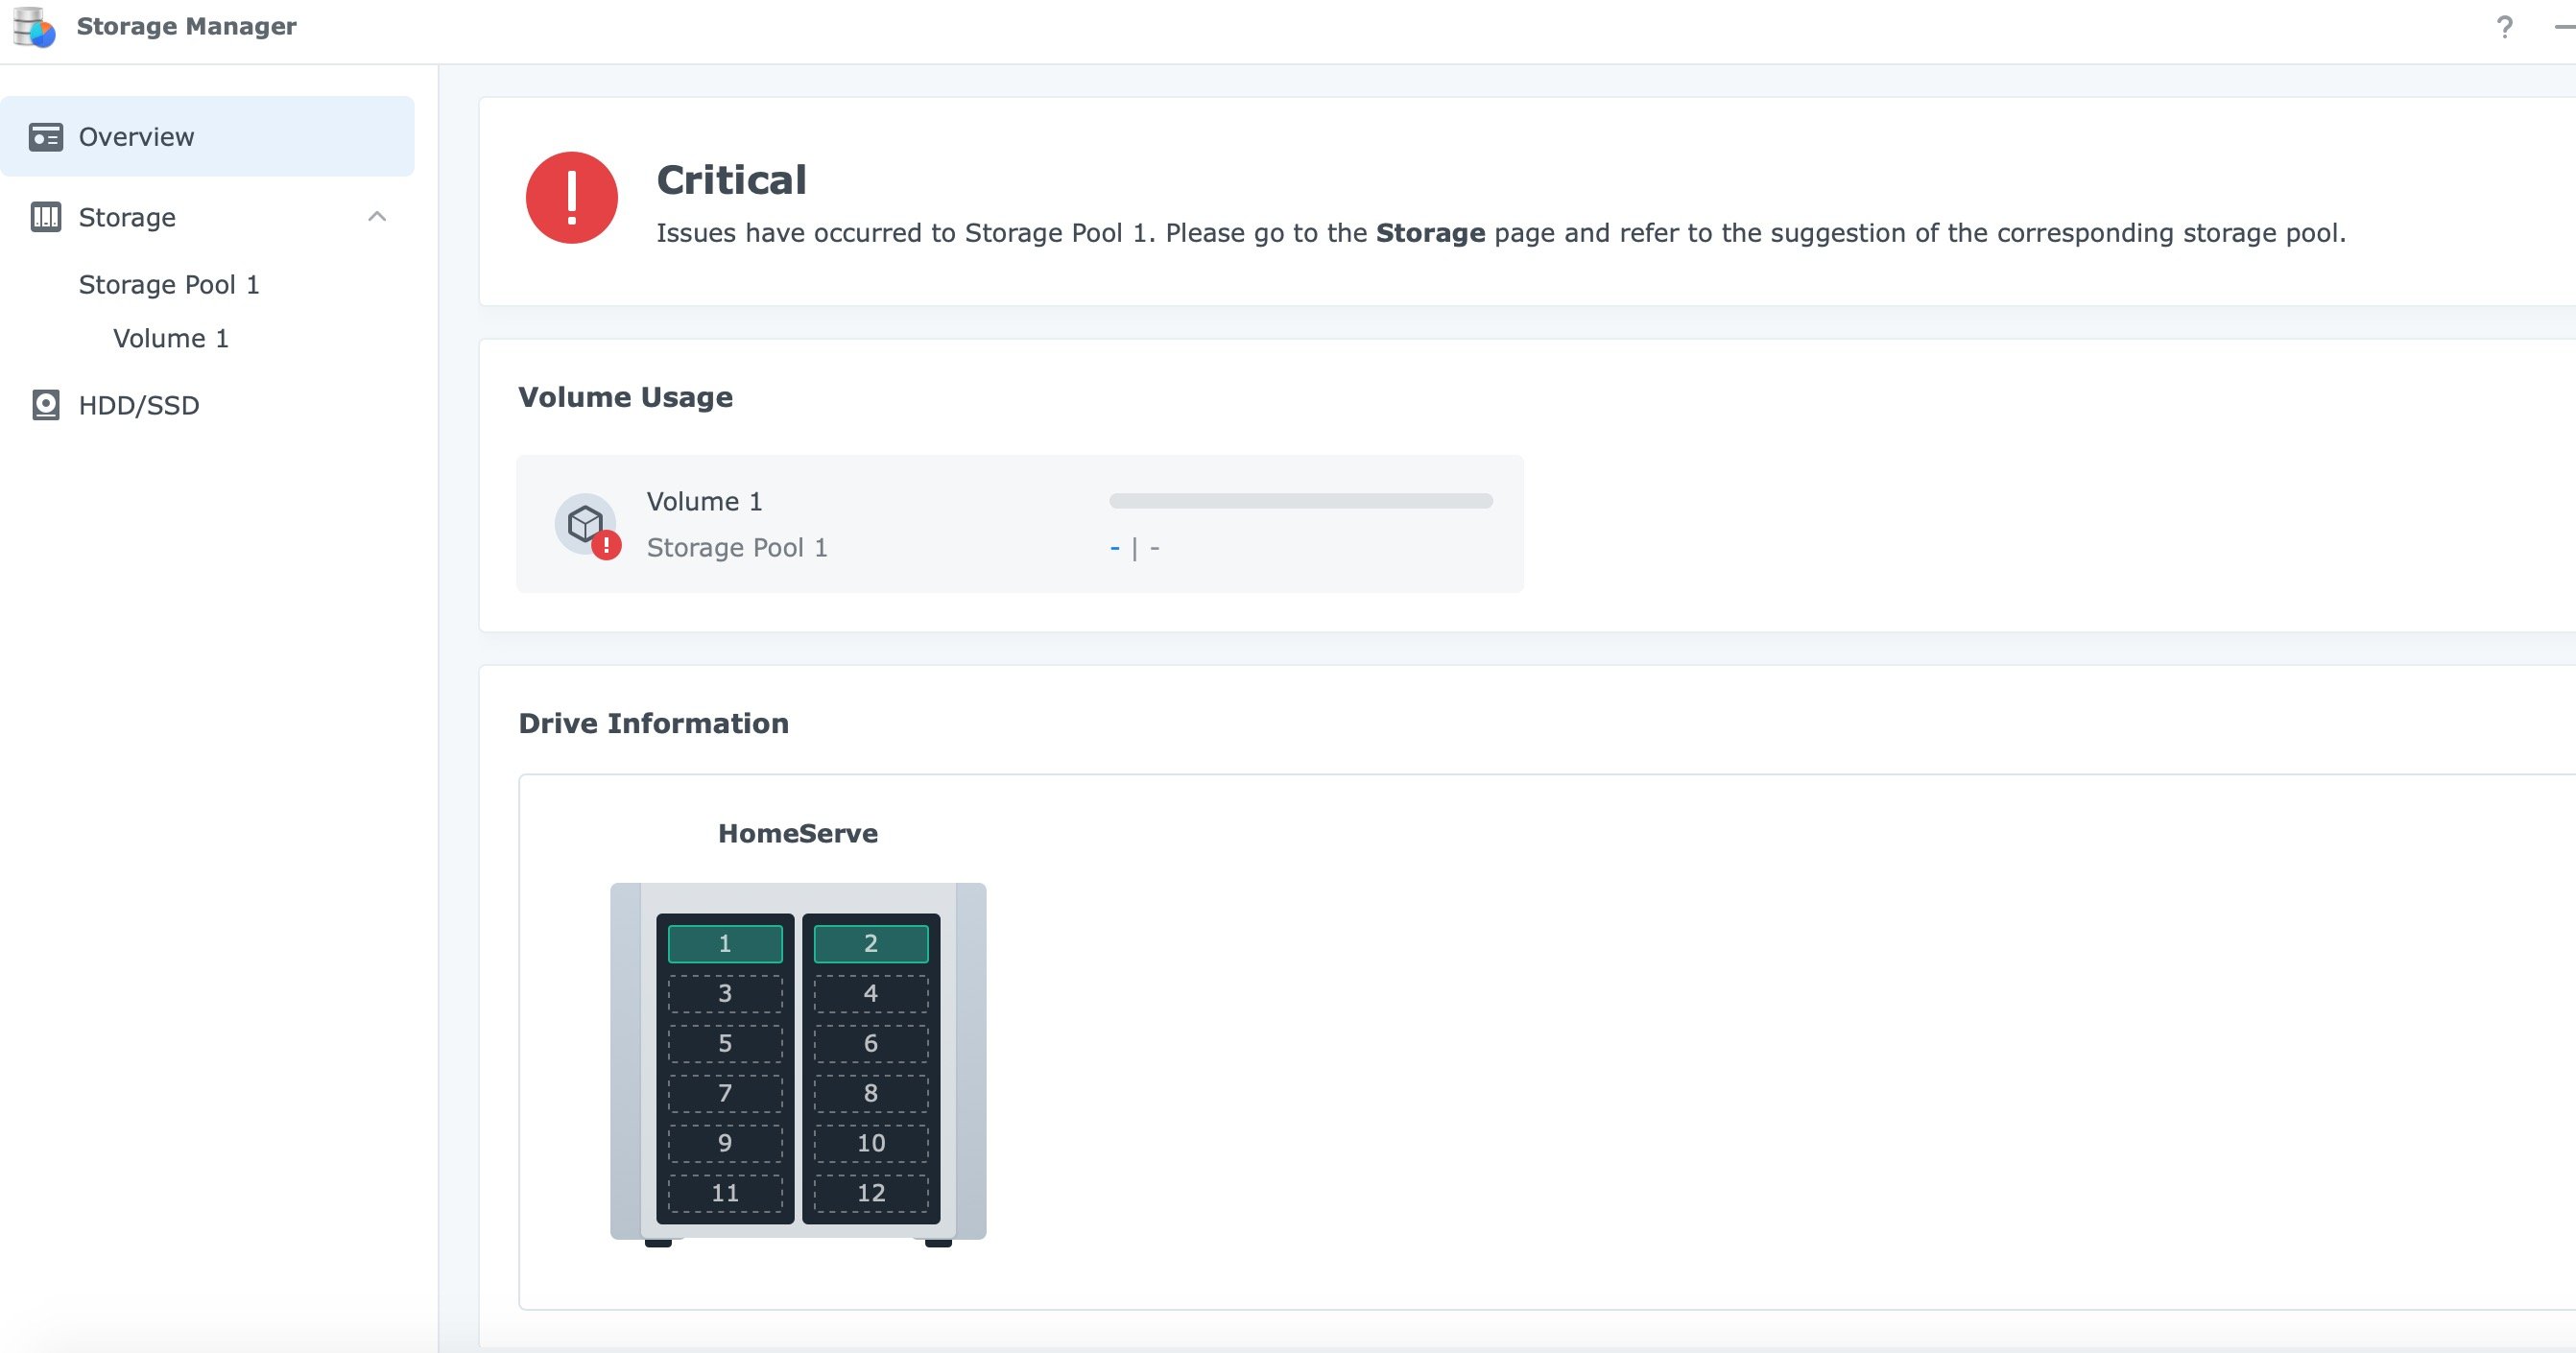
> synobootseq --set-boot-done
> synobootseq --is-ready
only to discover that both Storage pools 1 and 2 were critical and both volumes 1 and 2 had crashed. I had 2 drives in each pool/volume. Box can't be reached though SynologyAssistant strangely.
I tried a repair of the main Storage pool 1 but that didn't seem to solve anything and the volume was still crashed. I can't see any of the data in Volume 1. All apps on the Package center show an Error.
I deleted the second Storage pool 2 as it didn't contain any important data anyway so I wasn't bothered by it.
I am running the repair again on Storage pool 1.
Any help would be appreciated on how to get the Volume 1 running.
Thank you.

-
Posted by @turbolars
- Outcome of the update: SUCCESSFUL
- DSM version prior to update: DSM 7.2-64570
- Loader version and model prior to update: TCRP v0.9.4.6 with friend 0.0.5j- Loader version and model after update: TCRP v0.9.4.6 with friend 0.0.5j
- Using custom extra.lzma: NO
- Installation type: VMware esxi - DS3622xs+
- Additional comments: Manual update via DSM GUI. -
Posted by @ngucy5767
- Outcome of the update: SUCCESSFUL
- DSM version prior update: DSM 7.2-64570
- Loader version and model: ARPL-i18n 23.6.5 / DS3622xs+
- Using custom extra.lzma: NO
- Installation type: BAREMETAL -Intel Pentium G4560 + Gigabyte G1.Sniper B1 (Rev 1.0)+ 4GB 2133mhz DDR4 Ram- Additional comments: Manual update via GUI.
-
2
-
-
1 minute ago, pocopico said:
Its just that personally i dont want to distribute them with TCRP.
And that's the right thing to do.
-
3
-
-
This is major update. I implore anyone trying to update to DSM 7.2 not to do it first hand on a production machine.
First try on a test setup.
-
2
-
-
I should not have commented here as this is the Russian section. My bad. For any further comments or questions let's take it to the English section. Thank you.
-
@pocopico @fbelavenuto Have you guys heard about this loader?
-
Automated RedPill Loader (ARPL) added. This should have been done long time ago. Sorry @fbelavenuto
-
4
-
-
- Outcome of the update: SUCCESSFUL
- DSM version prior update: DSM 7.1 UPDATE 4
- Loader version and model: TCRP Friend v.0.9.2.7 - (tcrpfriend 0.0.4) - DS3622xs+
- Using custom extra.lzma: NO
- Installation type: BAREMETAL - Gigabyte H97N-WIFI (rev. 1.0)
- Additional comments: Updated through GUI then simply rebooted with tcrp friends. Done.
-
Posted by @davido31 in OP. I removed it and created a new post. Reports should be separated from OP for clarity.
- Outcome of the update: SUCCESSFUL
- DSM version prior update: tinycore-redpill v0.9.4.0 DS3622xs DSM 7.1.1-42962 Update 3 withfriend
- Loader version and model: tinycore-redpill v0.9.4.0 DS3622xs DSM 7.1.1-42962 Update 4 withfriend
- Using custom extra.lzma: NO
- Installation type: BAREMETAL - HP EliteDesk 705 G3
- Additional comments: Updated Via DSM GUI
-
2
-

One problem led to another! Arc loader
in DSM 7.x
Posted
I was moving from DSM 7.2 to DSM 7.2.1 and I think my DSM7 install I did last year was a clean one although I can't be sure, so it could have been that.
In fact, nuking the first partition was the smartest thing I could have done since all it took me was 2-3 hours of reconfiguring everything vs 3 days trying to debug something that was driving me nuts. Since I had a backup of DSM config and most of the app configs are saved in your Volume, it was just a matter of reinstalling all the apps and making sure all was configured as I wanted.