ToziGarcia
-
Posts
1 -
Joined
-
Last visited
ToziGarcia's Achievements
Newbie (1/7)
0
Reputation
-
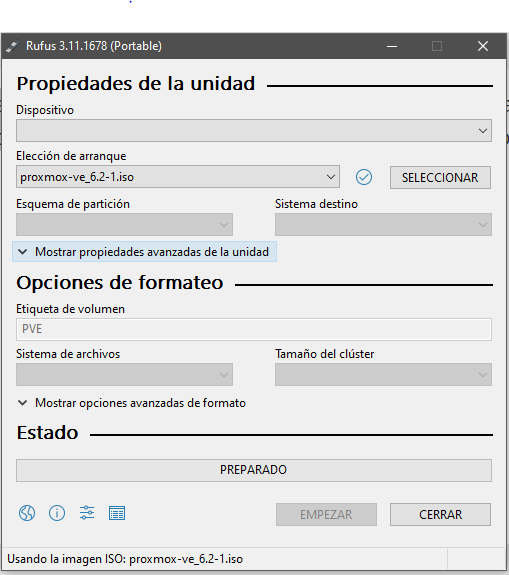
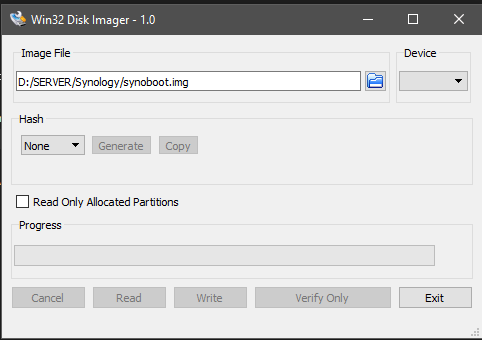
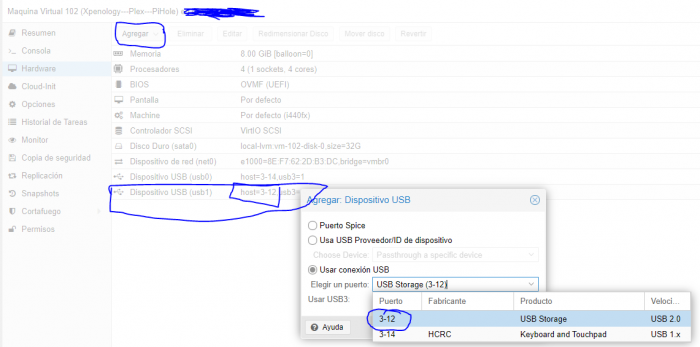
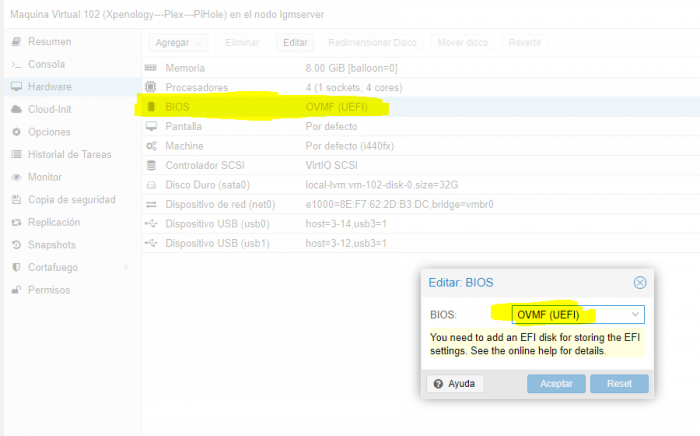
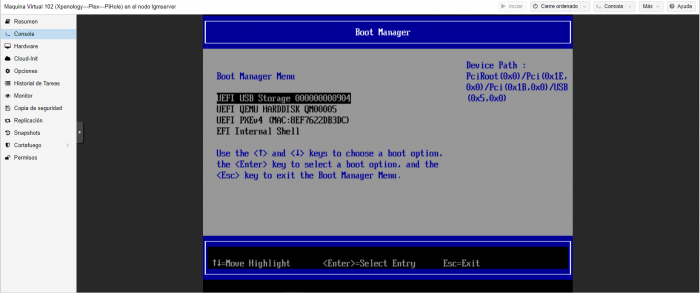
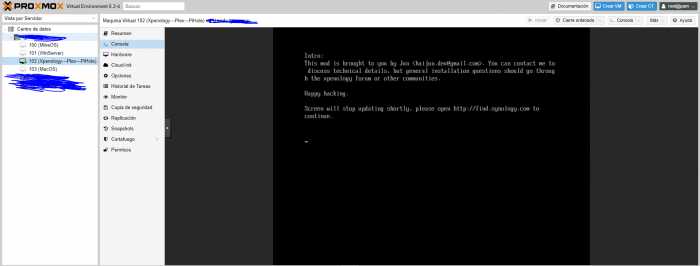
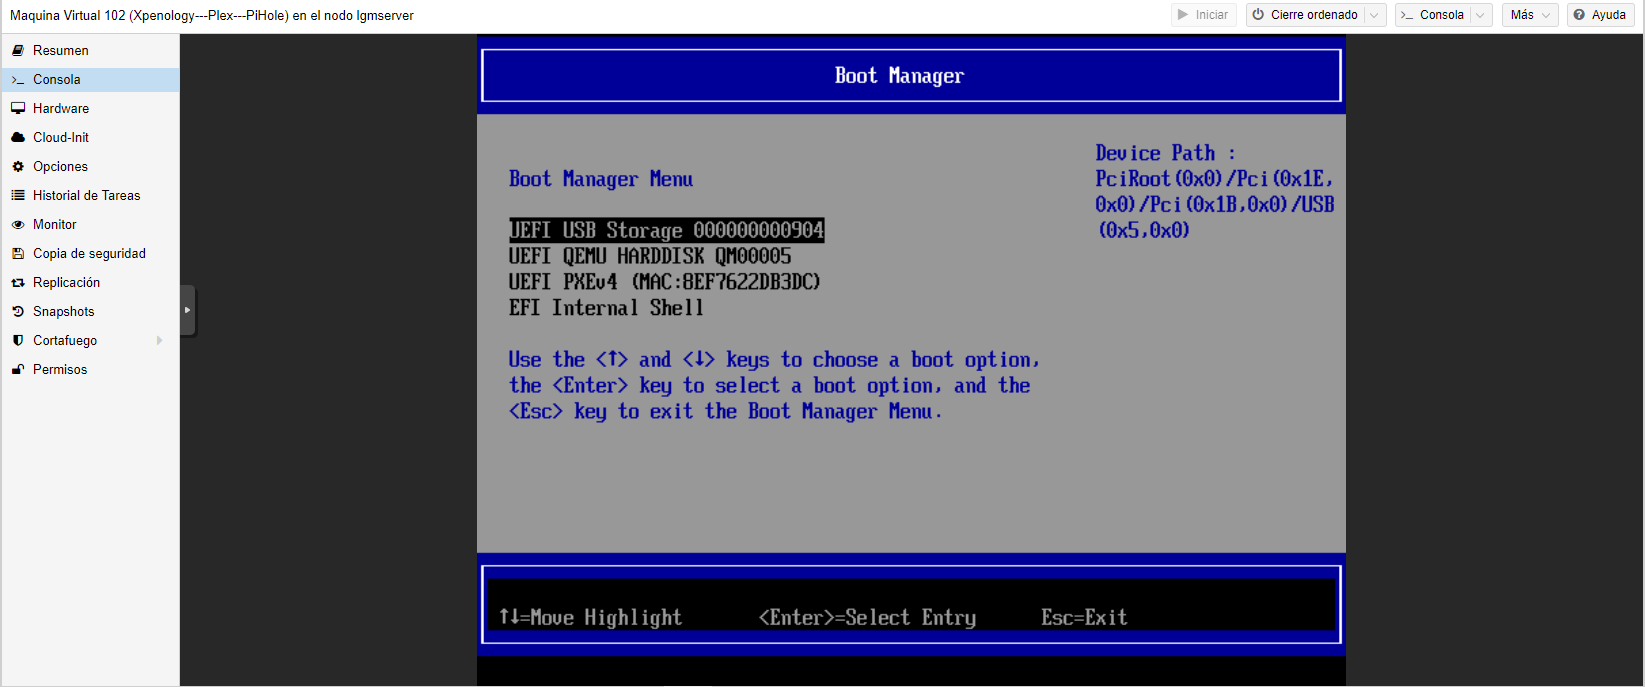
The first thing we should know is that this tutorial is to install the latest version of Xpenology for Proxmox Requirements for the tutorial: Proxmox Download Jun's Loader DSM 6.2 Download Win32 Disk Imager Download Rufus Download SD card OR USB (I recommend to use an sd card because of the heating produced by keeping the usb connected and avoiding that it can be damaged) To perform a Proxmox installation we will use rufus to create a usb boot to perform the installation. In the first drop-down list we chose the USB device or SD card In the second drop-down menu we choose the iso that is going to be unzipped inside the USB or SD card Ignore all remaining dropdowns and click on start To perform an installation of Xpenology we will use Win32 Disk Imager to create a usb boot or sd card to perform the installation. In the first drop-down list we will have to put the image of the Xpenology and in the small drop-down list next to it the USB or SD card Ignore everything and click on write Once we have our Proxmox server and our Xpenlogy on our usb or sd card we will proceed to start the virtual machine and configure it so that it can automatically boot from the SD without worry We added a usb device and in my case it's a front card reader and from the UEFI of the virtual machine we'll make it the main boot We put the Bios in uefi to be able to put the boot by SD or USB as a priority Once we enter the UEFI we put as a priority our USB , card reader or whatever we are using Once started, we configure it to your liking