WetJet43
-
Posts
1 -
Joined
-
Last visited
WetJet43's Achievements
Newbie (1/7)
2
Reputation
-
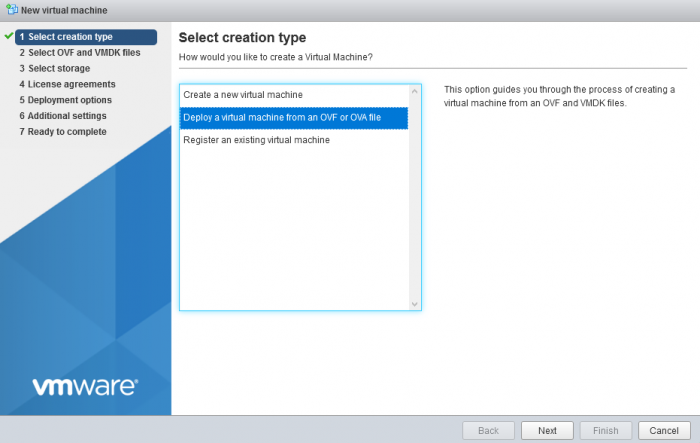
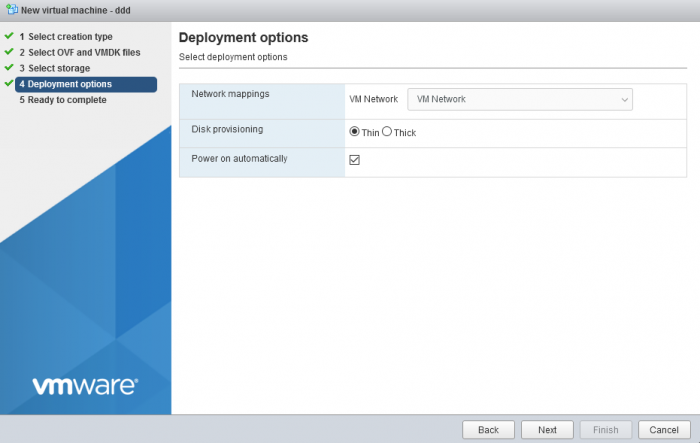
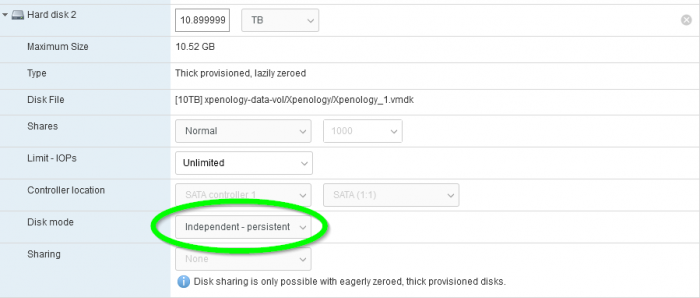
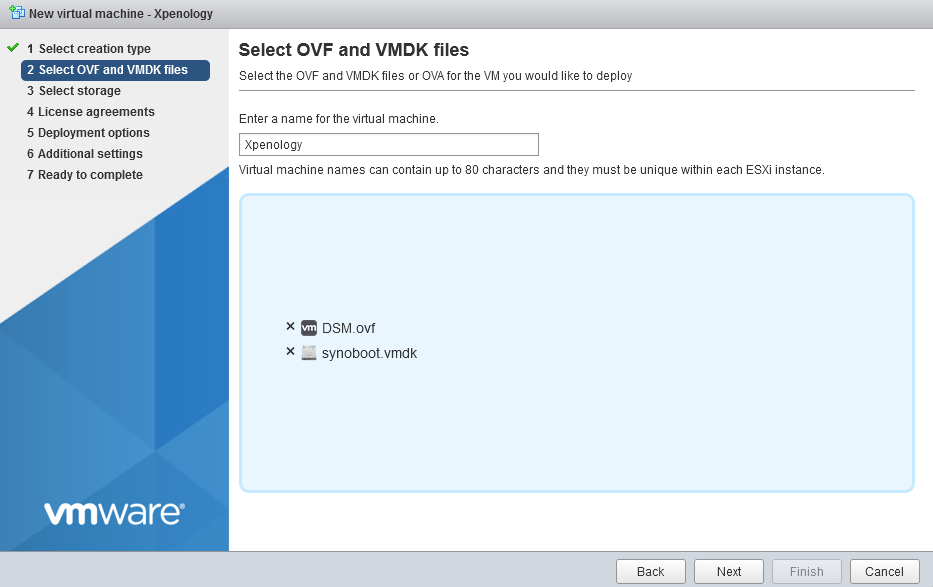
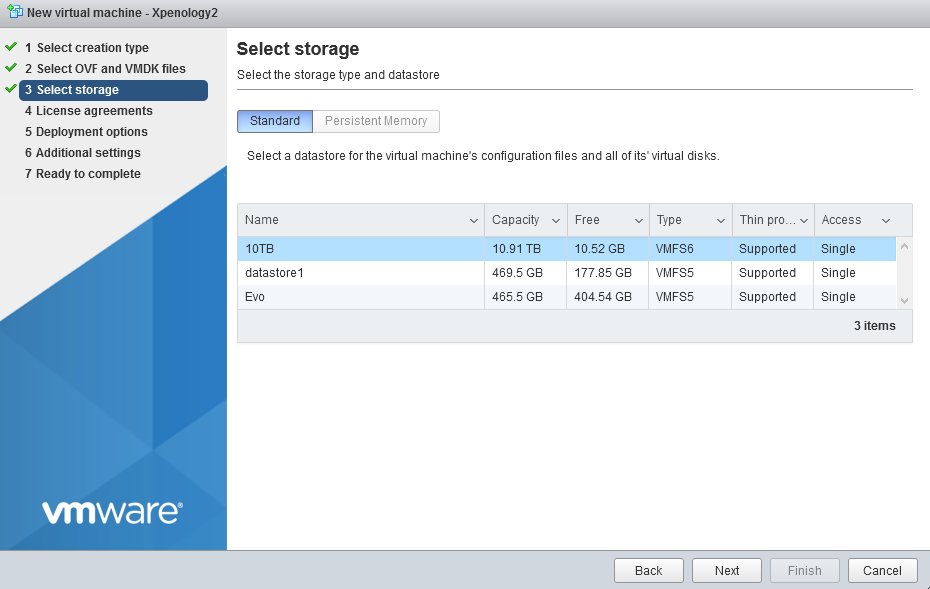
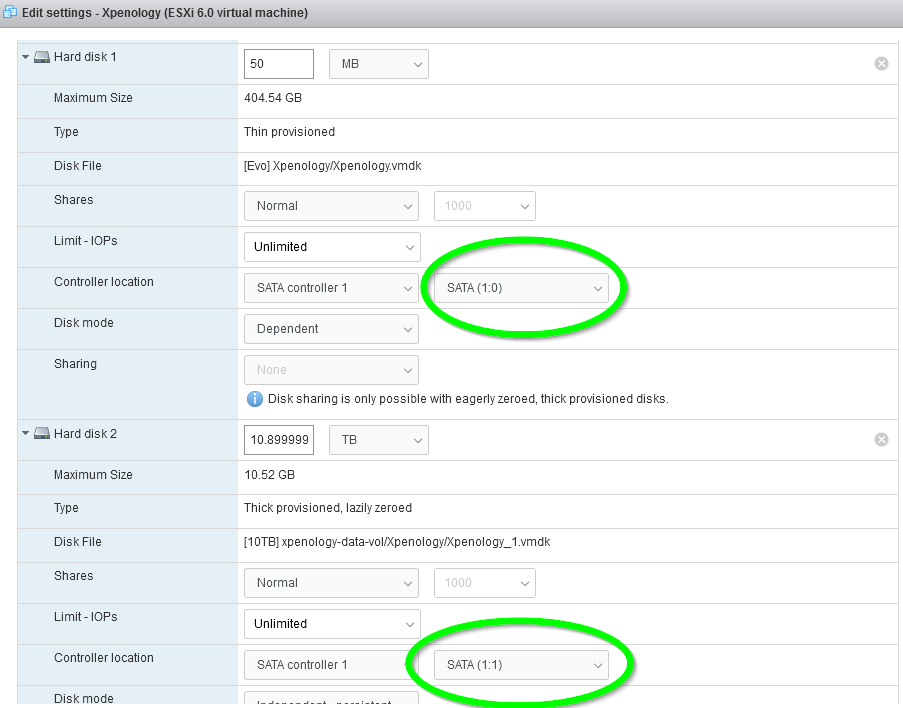
I got tired of searching tutorials, just to find 20+ pages of people having problems with no real bullseye solution, so I decided to make a tutorial with a single download, to provide everything you need in a deployable ovf format for esxi 6.7. Credit to https://xpenology.com/forum/topic/13019-tuto-configs-toute-pr%C3%AAte-pour-vmware/ Even though the page is in French, and I don't speak french, I still found the instructions easier to follow than any other tutorials. This is a very easy to follow tutorial. Make sure you follow it step by step, and you'll have yourself a fully functional xpenology server. This isn't an upgrade tutorial, and I don't include how to customize any mac addresses, etc. It's a simple tutorial to install the DS6317xs image on esxi 6.7 using the esxi web client to deploy an ovf. There is minimal settings adjustments. Adjust your CPU, Memory, add a 2nd volume for your data, adjust a few sata settings, install the .pat file, and you're done. 1. Download the file and extract it. It contains the DSM.ova and synoboot.vmdk file you'll need to deploy the ovf into esxi, as well as the DSM_DS3617xs_23739.pat file. xpenology-ds3617xs-all-in-one.zip 2. Open your esxi web client 3. Create a new virtual machine, and chose to "Deploy a virtual machine from an OVF or OVA file" 4. Add both the DSM.ovf and synoboot.vmdk files, then click next 5. Chose a storage location to install the new virtual to. This is my setup, yours will be different. Anywhere will do as long as you have enough free space. I imported the .ovf file to my Evo drive, and added the 2nd drive for all of my data to my 10TB drive. You can put it all in one place, or at two different locations. It's up to you. The end result will be the same. A working xpenology install. 6. Chose the VM Network you'd like to use. I left mine as default, as I only have one network running on my esxi server. Your setup may be different. Chose accordingly. Leave all other settings default. 7. Click Finish, and let the .ovf file deploy. It may take a few seconds/minutes, depending on your system. 8. BEFORE TURNING THE SERVER ON, YOU MUST CHANGE A FEW THINGS!. - I chose 4 CPU cores, and 4 GB of ram. That's enough for my needs. You can chose 8 cpu cores and 8 gb of ram if you'd like. - Add your 2nd hard disk. (I assume you know how to add a hard drive in esxi) --CRITICAL--You MUST chose Disk Mode: Independent - persistent. - The second critical thing you must do, is change your Hard disk 1 and Hard disk 2's controller location to SATA (1:0) and SATA (1:1). If you don't do this, you'll get an error that the system can't find any drives to install to when trying to install the .pat file. - You can remove the USB controller, and the CD Rom. You won't need them. Fire up the virtual, then using a web browser, visit http://find.synology.com. Upload you .pat file, set an IP and an admin password. YOU'RE DONE!