autohintbot
-
Posts
19 -
Joined
-
Last visited
Everything posted by autohintbot
-
Tutorial - Modifying 1.04b Loader to Default to 24 Drives
autohintbot replied to autohintbot's topic in Tutorials and Guides
I'm not a Supermicro expert by any means, but my understanding is that any backplane that ends in A denotes a direct attach backplane. It'll have 24 individual SAS/SATA connectors. You'll see three cards, with six total x4 forward breakout cables (so 3 cards * 2 ports * 4 breakout per port = 24 drives, but literally as 24 fanned out cables). The E backplanes have built-in SAS expanders. I have two Supermicro 4U servers here, with BPN-SAS2-846EL1 backplanes. They support larger drives, and still a single connector each. The EL2 backplanes have two expanders, which I guess is there for performance reasons, with 12 bays per expander. That's likely an issue only if you're running a lot of SSDs to back a lot of VMs. I don't have any issues saturating 10gbit for my SSD volumes here. -
Tutorial - Modifying 1.04b Loader to Default to 24 Drives
autohintbot replied to autohintbot's topic in Tutorials and Guides
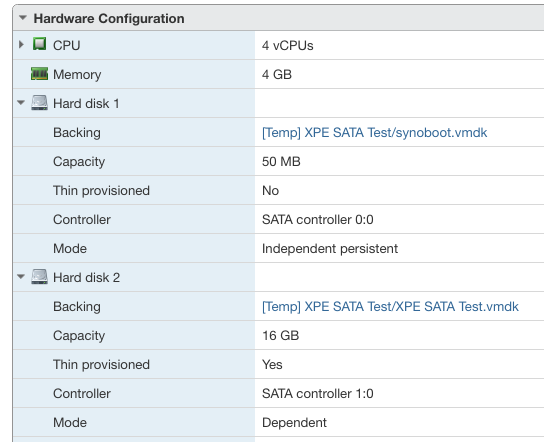
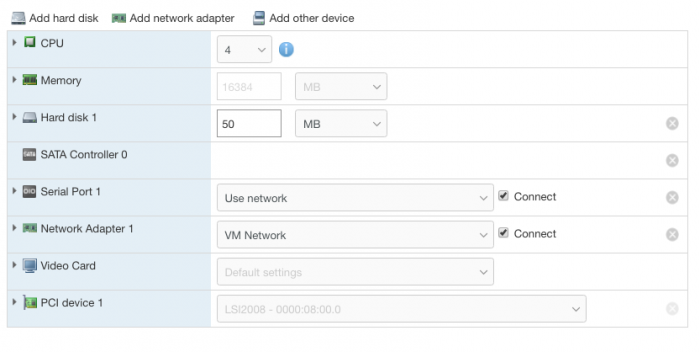
You'll only need to do the procedure every time you update the bootloader (which is a pretty rare event). It does look like there is a 16-device limit per VM with passthrough. This is only passing through a single device, though: The LSI controller. ESXi isn't managing the individual hard drives, and has no knowledge they even exist once the LSI card is passthrough-enabled. You would need some pretty esoteric hardware to even have 16 PCIe devices available for passthrough. -
Intro/Motivation This seems like hard-to-find information, so I thought I'd write up a quick tutorial. I'm running XPEnology as a VM under ESXi, now with a 24-bay Supermicro chassis. The Supermicro world has a lot of similar-but-different options. In particular, I'm running an E5-1225v3 Haswell CPU, with 32GB memory, on a X10SLM+-F motherboard in a 4U chassis using a BPN-SAS2-846EL1 backplane. This means all 24 drives are connected to a single LSI 9211-8i based HBA, flashed to IT mode. That should be enough Google-juice to find everything you need for a similar setup! The various Jun loaders default to 12 drive bays (3615/3617 models), or 16 drive bays (DS918+). This presents a problem when you update, if you increase maxdisks after install--you either have to design your volumes around those numbers, so whole volumes drop off after an update before you re-apply the settings, or just deal with volumes being sliced and checking integrity afterwards. Since my new hardware supports the 4.x kernel, I wanted to use the DS918+ loader, but update the patching so that 24 drive bays was the new default. Here's how. Or, just grab the files attached to the post. Locating extra.lzma/extra2.lzma This tutorial assumes you've messed with the synoboot.img file before. If not, a brief guide on mounting: Install OSFMount "Mount new" button, select synoboot.img On first dialog, "Use entire image file" On main settings dialog, "mount all partitions" radio button under volumes options, uncheck "read-only drive" under mount options Click OK You should know have three new drives mounted. Exactly where will depend on your system, but if you had a C/D drive before, probably E/F/G. The first readable drive has an EFI/grub.cfg file. This is what you usually customize for i.e. serial number. On the second drive, should have a extra.lzma and extra2.lzma file, alongside some other things. Copy these somewhere else. Unpacking, Modifying, Repacking To be honest, I don't know why the patch exists in both of these files. Maybe one is applied during updates, one at normal boot time? I never looked into it. But the patch that's being applied to the max disks count exists in these files. We'll need to unpack them first. Some of these tools exist on macOS, and likely Windows ports, but I just did this on a Linux system. Spin up a VM if you need. On a fresh system you likely won't have lzma or cpio installed, but apt-get should suggest the right packages. Copy extra.lzma to a new, temporary folder. Run: lzma -d extra.lzma cpio -idv < extra In the new ./etc/ directory, you should see: jun.patch rc.modules synoinfo_override.conf Open up jun.patch in the text editor of your choice. Search for maxdisks. There should be two instances--one in the patch delta up top, and one in a larger script below. Change the 16 to a 24. Search for internalportcfg. Again, two instances. Change the 0xffff to 0xffffff for 24. This is a bitmask--more info elsewhere on the forums. Open up synoinfo_override.conf. Change the 16 to a 24, and 0xffff to 0xffffff To repack, in a shell at the root of the extracted files, run: (find . -name modprobe && find . \! -name modprobe) | cpio --owner root:root -oH newc | lzma -8 > ../extra.lzma Not at the resulting file sits one directory up (../extra.lzma). Repeat the same steps for extra2.lzma. Preparing synoboot.img Just copy the updated extra/extra2.lzma files back where they came from, mounted under OSFMount. While you're in there, you might need to update grub.cfg, especially if this is a new install. For the hardware mentioned at the very top of the post, with a single SAS expander providing 24 drives, where synoboot.img is a SATA disk for a VM under ESXi 6.7, I use these sata_args: # for 24-bay sas enclosure on 9211 LSI card (i.e. 24-bay supermicro) set sata_args='DiskIdxMap=181C SataPortMap=1 SasIdxMap=0xfffffff4' Close any explorer windows or text editors, and click dismount all in OSFMount. This image is ready to use. If you're using ESXi and having trouble getting the image to boot, you can attach a network serial port to telnet in and see what's happening at boot time. You'll probably need to disable the ESXi firewall temporarily, or open port 23. It's super useful. Be aware that the 4.x kernel no longer supports extra hardware, so network card will have to be officially supported. (I gave the VM a real network card via hardware passthrough). Attached Files I attached extra.lzma and extra2.lzma to this post. They are both from Jun's Loader 1.04b with the above procedure applied to change default drives from 16 from 24. extra2.lzma extra.lzma
-
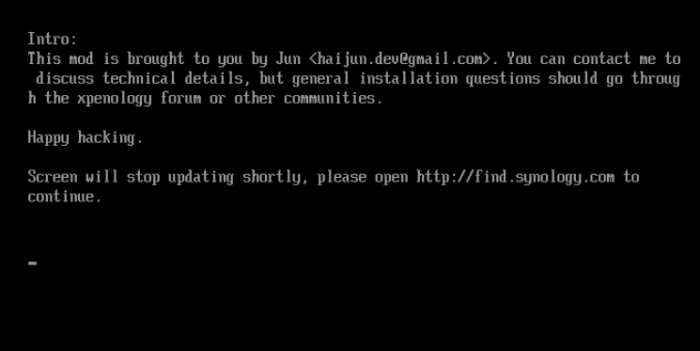
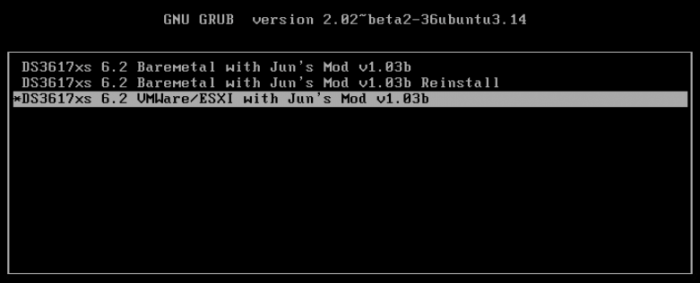
Are you using the ESXi option on the boot menu? It's only shown for a second or two by default.
-
Error 13 can happen if there is a mismatch between serial # and model on the boot loader (i.e. using a DS3615xs serial with the DS3617xs loader or vice versa). Maybe that? If it isn't that--how is your synoboot.img configured in ESXi? Can expand the details in that screenshot to reveal--should be SATA 0:0. I set to "Independent - Persistent", although I don't know if that matters.
-
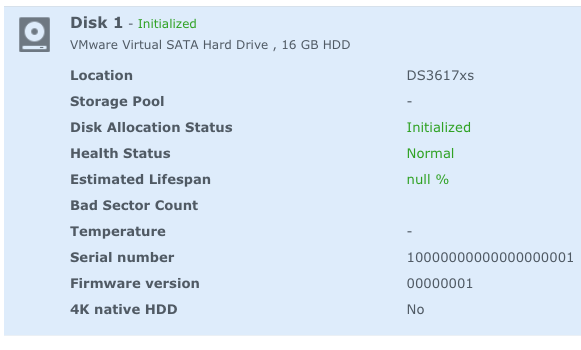
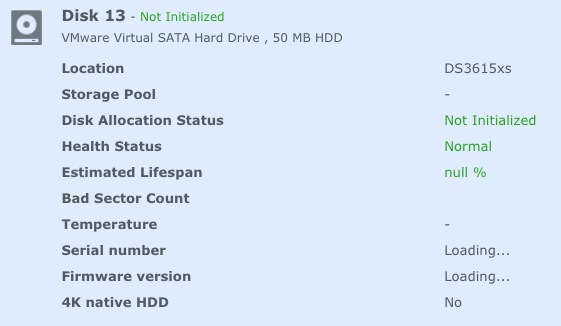
Change DiskIdxMap=0C to DiskIdxMap=0C00 in grub.cfg inside sata_args. That's the starting disk number for each controller, in hex pairs. The 0C is an offset of 12, which is what pushes the boot drive to Disk 13 (so doesn't show up in the GUI with default internalportcfg in synoinfo.conf). Adding the 00 means the second controller will start numbering at 0 instead of default (so /dev/sda). I verified it here real quick--this was Disk 2 before the change:
-
-1 should be 0xffffffff https://www.mathsisfun.com/binary-decimal-hexadecimal-converter.html (change to signed 32-bit, don't need the "0x" prefix on the calculator, but do use it in the .cfg)
-
I will try this out and report back! FYI, this external enclosure works correctly with the DSM 6.1 loader. The big difference between the two is the EFI->BIOS change. I'll try to get some info on whether changing the 6.1 loader to BIOS causes the same symptoms or not (it's a little bit of a pain with real disks, because it'll sever RAID groups and require a rebuild to fix). EDIT: Using SasIdxMap=0xfffffff8 did the trick, thanks!
-
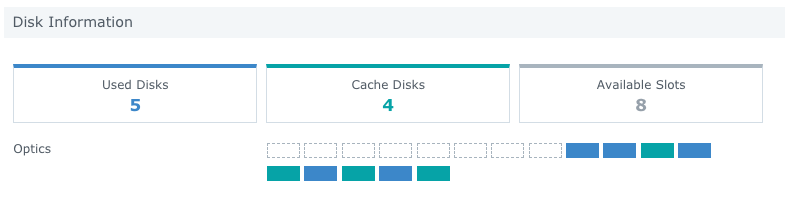
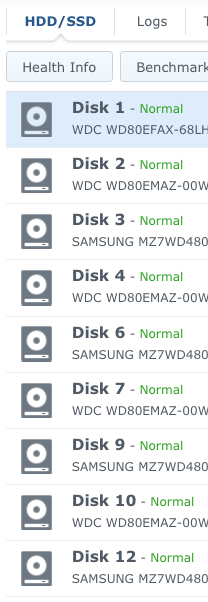
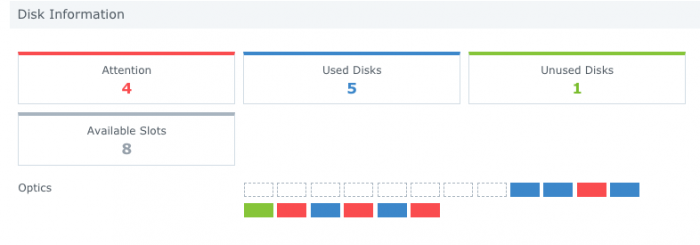
Thanks for the info! I still haven't been able to get my setup to enumerate disks starting at 1 (in the GUI, /dev/sda viewed from command line). Specs: My grub.cfg line: I changed sata_pcislot as an experiment, because I noticed the PCI slot number changed between my 6.1.x VMs (EFI Boot) and this VM (BIOS boot). 6.1.x VM is showing: While this VM is showing: The setup is the same, so my best guess is this is just how VMWare has set up their DSDT/whatever tables between the two firmware options. Maybe the order of adding devices when I made the VM originally altered things, though. Either way, I didn't notice a difference from sata_pcislot=5 to sata_pcislot=3. I had to increase internalprtcfg in synoinfo.conf to see all the disks. You can see the 8-disk gap in the UI: Or in the shell: The VM is pretty minimally configured: I don't see anything glaringly obvious in dmesg or early boot from the serial port. Happy to paste those your way if you want to take a peek, though! At this point I'm at the limits of my (admittedly poor) XPE knowledge, so just kind of hoping the EFI-fixed version makes my 6.1 VMs behave the same with a 6.2 install...

-
I spent some time experimenting tonight, and I still can't get my disks starting at 1 with the 6.2 loader, either 3615 or 3617, with an LSI passed through in an ESXi 6.5u2 VM. I noticed SasIdxMap=0 from grub.cfg doesn't actually come through on /proc/cmdline, which seems like it's trying to start enumeration at 0 for an SAS controller: sh-4.3# cat /proc/cmdline syno_hdd_powerup_seq=0 HddHotplug=0 syno_hw_version=DS3617xs vender_format_version=2 console=ttyS0,115200n8 withefi quiet root=/dev/md0 sn=XXXXXXXXXXXXX mac1=XXXXXXXXXXXX netif_num=1 synoboot_satadom=1 DiskIdxMap=0C SataPortMap=1 But, it doesn't come through on my 6.1.x VM with the same card either, and that correctly enumerates disks starting with /dev/sda. Not sure what else to try. I increased internalportcfg for now, but that's just a landmine on the next big update (I guess it's possible to include that in the jun.patch in extra.lzma though).
-
You should edit grub.cfg with the MAC address you're using in the network adapter on the VM. See (basically just mount synoboot.img with OSFMount and find/edit there) The other option with ESXi is to edit your Virtual Switch in networking, enable Security->MAC address changes. DSM will use the MAC address in grub.cfg for its network card, and not the one set in your VM config. By default with ESXi this security setting is on, which will prevent it from getting on the network if there's a mismatch. If you're going to use multiple XPEnology installs you'll need to change the MAC address anyway, so might as well.
-
Yeah, this is using the ESXi/VMWare option (I tried the other options out of curiosity but nothing ever came up after initial message on VGA/serial). If I can fix this now that'd be great, but I'm in no huge rush, so hopefully Jun has time to fix the EFI boot. There's note that it's on his radar in the OP. Are you using a passthrough hardware HBA or virtual disks?
-
You should be able to modify the boot order in the VM's bios setup. It's a pain to get there with the keyboard, depending on how you're controlling the remote view--easiest is to force it to bios setup on next boot in advanced->firmware tab. The SCSI drives will take priority over the SATA boot disk, and it'll only test one hard drive for boot files. You can re-order them in bios setup.
-
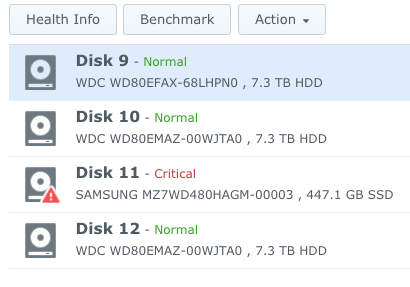
I did a DSM 6.2 update on one of my real ESXi VM setups today, after testing some VM-only disks overnight. ESXi 6.5.0 Update 2 (Build 8294253) PowerEdge R320 Intel(R) Xeon(R) CPU E5-2450L 0 @ 1.80GHz The VM has a LSI SAS9200-8e passed through, connected to a SA120 enclosure with 10/12 disks populated. It didn't go great. DSM came back up with only 4 disks showing (marked disks 9-12). After trying some things, I was able to get the other disks to appear by increasing the *portcfg settings. Two weird things: - The 50MB SATA boot disk is showing through to DSM, where it didn't before - DSM is holding open disks 1-8, which is why only 4 disks made it through with the 12-disk limit The only difference between this and my DSM 6.1 config is the firmware going from EFI -> BIOS. I guess with a BIOS boot the SATA controller appears, and DSM thinks it has an 8-disk capacity, and with EFI it doesn't? I've had a bad history with any XPEnology setup that require portcfg changes to synoinfo.conf, since inevitably those values reset during an update and your volumes get severed. Although I did notice this over serial in the very early boot stages, so maybe there's a new way to inject values from the bootloader now? Fortunately, I can repair the volume affected here (and it's not a very important install overall). I'll hold off until EFI is working before I do more updates.
-
Keep the synoboot.img drive as SATA, but try adding the drives you'd like to use as SCSI (set the SCSI controller to LSI Logic Parallel).
-
Change the firmware in advanced options tab from EFI to BIOS.
-
Amending this post: Turns out you just need to change Boot Options -> Firmware from EFI to BIOS. I tried this earlier, but didn't pay enough attention to realize it just wasn't booting at all. When you change firmware in ESXi you'll get a default boot order, which is very likely wrong. Easiest fix is to force a BIOS setup on next boot in the same config menu, or be quick on the keyboard and mash ESC to get into the VM's virtual BIOS setup to change boot order (probably SATA:0, depending on how you have the VM configured). My DSM 6.1 VMs are all EFI, which fails with the new loader. I'll try an upgrade tomorrow on real disks and report back.
-
Does the Haswell-or-later requirement still apply here? I am unable to get anything past the very first boot message (nothing shows up on network, no activity on serial port past the boot menu and initial message). Host: ESXi 6.5.0 Update 2 (Build 8294253) 2x Xeon E5-2670 on Intel S2600CP motherboard VM: Started by copying my working 6.1.x DSM setup, changing MAC address in VM config and synoboot.img. Existing VM was hardware version 12. Tried a few other ESXi starting points from here on the forums, upgrading to VM hardware version 13, etc. Same result across the board, both for 3615 and 3617 loaders. Really hoping a Sandy Bridge-compatible boot loader happens for DSM 6.2! I have a bunch of that hardware here in the house. Actually have some spare hosts--I'll try a bare metal test when I get a few extra minutes.