

Dipper315
-
Posts
30 -
Joined
-
Last visited
-
Days Won
1
Everything posted by Dipper315
-
- Outcome of the update: SUCCESSFUL - DSM version prior update: FRESH INSTALL - Loader version & Model: Automated RedPill Loader 0.5 alpha-1 DS920+ - Installation type: BAREMETAL - SuperMicro X11SCA-F / i7-8700T with Intel HD630 Graphics - Additional comments: Need to exclude i915 drivers, Custom Serial Number, Hardware Transcoding functional out of the box.
-
Thanks for pointing me to the right place. I got the card to function. I will just briefly recap what I did that worked for me so that others that might encounter a similar issue knows what to do. Pre-requisite: Set MAC1-MAC4 in grub file (For my use case) 1. SSH into the NAS and type the following. 2. Look for NIC in question. In my case a X540-T2 with 2 ports, so it showed up as "ixgbe" 0000:01:00.0 Class 0200: Device 8086:1528 (rev 01) Subsystem: Device 15d9:0734 Kernel driver in use: ixgbe 0000:01:00.1 Class 0200: Device 8086:1528 (rev 01) Subsystem: Device 15d9:0734 Kernel driver in use: ixgbe 3. Since the card showed up with the correct drive loaded. I proceeded to modify the synoinfo.conf (in /etc AND /etc.defaults) Change maxlanport from 2 to 8 Original maxlanport="2" Modified maxlanport="8" Added the followings to the end eth4_mtu="1500" eth5_mtu="1500" eth6_mtu="1500" eth7_mtu="1500" 4. Save and rebooted the device. After performing these steps, I got X540-T2 to function. Results below: Hopefully somebody will find my recap useful. Thanks IG-88 for the prompt reply.
-
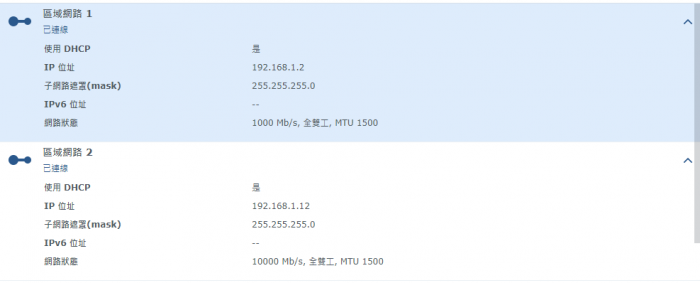
Recently I upgraded my router to QNAP QHora301W router with 2x 10Gbe network port. To utilize the new 10Gbe network ports, I installed a Supermicro Intel X540-T2 network card into my Xpenlogy NAS. I then booted the system with the 1 onboard NIC (Intel I219V or Intel I211AT) connected, and confirmed the system picked up the two new ports on the X540-T2. So I wired a CAT7 wire between the router and the NAS. After the physical wire was setup, although there are blinking lights on both sides and router management page shows a 10Gbe link is established, Synology side shows the port as disconnected. What step I can do in SSH to troubleshoot or attempt the get them working? Hardware Configuration: Intel Core i7-8700T (ES) ASRock Z390M-ITX/ac Supermicro Intel X540-T2 Bootloader Configuration: Jun's v1.04b DS918+ with v0.13.3 with NVMe Patch on DSM 6.2.3-25426 Update 3 Thanks.
-
- Outcome of the update: SUCCESSFUL - DSM version prior update: DSM 6.2.3-25426 Update2 - Loader version and model: Jun's Loader v1.04b - DS918+ - Using custom extra.lzma: v0.13.3 by IG88 + NVME Patch - Installation type: BAREMETAL - ASRock Z390M-ITX | i7-8700T(ES) - Additional comments: Reboot Required (Rebooted automatically), with NVMe SSD caching enabled, Hardware transcoding functional with real Serial Number + MAC.
-
-Outcome of the update: SUCCESSFUL - DSM version prior update: DSM 6.2.3-25426 - Loader version and model: Jun's Loader v1.04b - DS918+ - Using custom extra.lzma: Yes - v0.13.2 by IG-88 - Installation type: BAREMETAL - Custom B365 chipset motherboard w/ 2x Intel 211AT; Core i3 8300T; Intel E10G42AFDA dual 10Gbe NIC - Additional comment: Updated via auto-update; Reboot required; Restart & Hardware encoding in Video Station functioning; All 4 network port available
-
Outcome of the update: SUCCESSFUL - DSM version prior update: DSM 6.2.3-25426 - Loader version and model: Jun's Loader v1.04b - DS918+ - Using custom extra.lzma: Yes - v0.13.2 by IG-88 - Installation type: BAREMETAL - Asrock N3700-ITX - Additional comment: Updated via auto-update; Reboot required; Restart & Hardware encoding in Video Station functioning
-
- Outcome of the update: SUCCESSFUL - DSM version prior update: DSM 6.2.3-25423 - Loader version and model: Jun's v1.04b - DS918+ - Using custom extra.lzma: YES - v0.10 for 6.23 - Installation type: BAREMETAL - ASRock N3700-ITX - Additional Comments: Reboot Required; CPU Hardware Acceleration not working
-
- Outcome of the update: SUCCESSFUL - DSM version prior update: DSM 6.2.2-24922 Update 6 - Loader version and model: Jun's v1.04b - DS918+ - Using custom extra.lzma: YES - v0.10 for 6.23 - Installation type: BAREMETAL - ASRock N3700-ITX - Additional Comments: Re-flashed flash drive containing real3x mod with fresh v1.04b bootloader containing v0.10 for 6.23 before updating
-
- Outcome of the update: SUCCESSFUL - DSM version prior to update: DSM 6.2.1-23824U4 - Loader version and model: Jun v1.04b - DS918+ - Using custom extra.lzma: real3x mod - Installation type: BAREMETAL - ASRock N3700-ITX
-
- Outcome of the installation/update: SUCCESSFUL - DSM version prior update: DSM 6.2.1-24922 - Loader version and model: JUN'S LOADER v1.03b - DS3617xs - Using custom extra.lzma: NO - Installation type: BAREMETAL - w/ Intel 10Gbe NIC
-
- Outcome of the installation/update: SUCCESSFUL - DSM version prior update: DSM 6.2.1-23793 - Loader version and model: JUN'S LOADER v1.03b - DS3617xs - Using custom extra.lzma: NO - Installation type: BAREMETAL - w/ Intel 10Gbe NIC
-
- Outcome of the update: FAILED - DSM version prior to update: DSM 6.2.1-23824 Update 6 - Loader version and model: Jun v1.04b - DS918 - Using custom extra.lzma: NO - Installation type: BAREMETAL - ASRock J4205-ITX - Additional comments: Seems to be unable to obtain IP address after update. Downgraded to 6.1.7 with v1.02b (DS916p) bootloader.
-
https://www.newegg.com/Product/Product. ... gnorebbr=1
-

First NAS build (hardware choise, software funcitons)
Dipper315 replied to stunito's topic in Hardware Modding
It seems a bit over-kill for your need. https://www.newegg.com/Product/Product. ... gnorebbr=1 This is more than enough as XPEnology is not really processor intensive even streaming 1080p. 1. Many modern Ethernet or SATA chipset is supported by the bootloader as long as you are not going older than LGA 775 or AM2. 2. There are way to mirror data and close off the file to smb or other sharing access with Synology Application. 3. For power supply just get something like this. Unless you want better efficiency power supply. https://www.amazon.com/Antec-Basiq-BP35 ... wer+supply -
Recently my 2 external hard drives 1x 2TB (with 1.7TB of data) and 1x 3TB (with 1.5TB of data) are having stability issues, so I built a new Xpenology NAS with my spare parts. Then I wanted to migrate all the data from the external hard drive into a 4TB hard drive on the NAS, so that I can disassemble the external hard drive to migrate into the NAS. I set up Cloud Station on my computer to pull all the file from the 2TB external hard drive onto the NAS. (I tried CIFS copy and plugging in the hard drive directly into the nas and do a straight copy, it keeps on skipping files) After a few nights, the migrate completed for the 2TB external hard drive, but the 1.7TB of data occupied 3.21TB of space and my 4TB drive is 90% full. How can I remove 1.51 TB of unknown data to make room for the 1.5TB of data on the 3TB external hard drive? Picture of the problem attached http://imgur.com/a/EbcV8
-
Bootloader: XPEnoboot 5.2-5644.5 System: Synology DSM 5.2-5644 update 3 ------------------------------------------------------------ CPU: AMD Athlon 64 x2 5000+ Black Edition Ram: Generic DDR2-800 2GB x2 Motherboard: AsRock 960GC-GS FX HDD: HGST 500GB + Seagate 7200.12 500GB Case+PSU: Rosewill R379-M ------------------------------------------------------------ CPU: AMD AthlonII x2 245 Ram: ASUS OEM DDR3-1333 2GB x4 Motherboard: ASUS M4A88TD-M HDD: WD Red 3TB, Green 2TB, HGST 5TB, Seagate 7200.12 1TB Case: Thermaltake Urban S1 PSU: Acbel (OEM) 300W ------------------------------------------------------------ CPU: Intel Pentium N3700 Ram: Kingston DDR3L-1600 Motherboard: AsRock N3700-ITX HDD: WD Purple 3TB (Synology RAID 1), Silicon Power 120GB SSD Case: LianLi PCQ04 PSU: Antec 300W ------------------------------------------------------------ Routers: ASUS AC56U, AC68P, AC66U,TM-AC1900 Totolink A2004NS
-
The original Nanoboot up-loader from China somehow go their site killed. Since then it is quite hard obtain a copy of the bootloader. I uploaded the Nanoboot file to Dropbox. Start from top again when you download this new one. https://www.dropbox.com/s/ysy6kl8pv7ub7 ... t.img?dl=0 You might also want to type out your xpenlogy system specification. Maybe some driver is missing that caused Nanoboot fail to deploy.
-
See the instructions of update 5, http://www.xpenology.nl/installatie-dsm ... -update-5/. Restored back to 4493 base. I might try a later date. Good Guide btw.
-
1. 2. Enable SHH access on server. Then you type command through putty and login as root for small update patches only. 4. For 5.0-44XX-->4493 You need to follow the Nanoboot initial setup, stop when it says"Something will be deleted" Thanks but where can I find the Nanoboot initial setup process? I tried SSH'ing to my Diskstation and typed nanoboot at the prompt but got the below response. DiskStation> nanoboot -ash: nanoboot: not found You might be running an older version of gnoboot which does not have a logo. To migrate to Nanoboot. Follow these steps 1.Go the website below and download "NanoBoot-5.0.3.1-fat.img" https://www.dropbox.com/s/ysy6kl8pv7ub7 ... t.img?dl=0 2.Download Rufus to burn the image onto a flashdrive http://rufus.akeo.ie/downloads/rufus-1.4.10.exe 3.On your Xpenlogy machine, unplug the gnoboot flashdrive and plug in the Nanoboot flashdrive 4.Boot into the flashdrive (or Boot into Bios and set USB drive to boot first) 5.After booting into Nanoboot(flashdrive), you will see a light blue screen with a few options. Choose the one that says "Upgrade/Downgrade" one 6.While going through scrolling text, download "DSM_DS3612xs_4493.pat" and Synology Assistant. Link below. http://ukdl.synology.com/download/DSM/5 ... s_4493.pat http://global.download.synology.com/dow ... 0-4448.exe http://global.download.synology.com/dow ... 0-4448.dmg 7.Install Synology Assistant to locate your Synology IP address 8.Type the ip-address in your browser and follow the on screen instruction 9.When prompted to upload system (.pat) file, upload the "DSM_DS3612xs_4493.pat" 10. When everything is done, the Synology will reboot and you can log-in 5 minutes after boot up. For SSH update small patches, I do not recommend updating to patch 5 or beyond because I experienced crashes with 4493 update 5 & update 7. Some said small update stacks and you can go from base to update 4 directly, but in my case I crashed the system. So I recommend updating the patches one-by-one (which means updating from base->u1->u2->u3->u4) instead going directly from base to update 4. All the update pack can be found here: http://ukdl.synology.com/download/criti ... date_pack/ You may follow the guide above until step 4 where you need help with. 4. Download Putty http://the.earth.li/~sgtatham/putty/lat ... /putty.exe 5. Open putty 6. Type in your Synology ip-address at the host name colum 7. Type in "22" for port 8. Connection type choose SSH 9. Click on Open 10. There will be an error message, do not worry, click yes 11. login as: root 12. Password: Your admin password (It should be invisible and it is normal, just click finish after your type in the password) 13. Run the command mention at the guide above. 1 command 1 enter key. 14. Follow guide instruction number 5 15. Log back in 5 minutes after reboot Any question feel free to ask......
-
Updated successfully, but it said "all volumes have been unmounted". I can still access the data. What's wrong? ------------------Edit---------------------- System corrupted after reboot......
-
Follow the Nanoboot initial setup process to restore back to 5.0-4493 base. Stop when it says "Something will be deleted".
-
1. 2. Enable SHH access on server. Then you type command through putty and login as root for small update patches only. 4. For 5.0-44XX-->4493 You need to follow the Nanoboot initial setup, stop when it says"Something will be deleted"
-
After the 4493 update 5 using sed method. My XPEnology no longer boots........ Did a reset back to 4493 base. Now need to sed 4 times to get back to update 4
-
Try Gnoboot, I updated from DSM 4.3 build 3810++ (repack v1.0) to DSM 5.0-4458 update 2 without hiccups. Only thing you loose is the folders permissions. Follow the guides instruction and prepare another drive for gnoboot Boot loader When you hit "This drive's data might be erased", turn off the server and plug back your old trantor bootloader and reboot. Nanoboot is quite new at this point, it is NOT based on DS3612xs. Trantor and some other member are testing it out. Try not to touch them, unless you know Chinese. ------------------EDIT----------------------- Try update to 5.0-4482 directly with their repacked .pat files if don't want to receive annoying update. viewtopic.php?f=2&t=2962&start=140
-
http://cyanlabs.co.uk/tutorials/xpenology-dsm-changeadd-serial-number I found a guide on how to change Serial Number for gnoBoot XPEnology. I tried and it works. Hope this will help somebody.
