Leaderboard


Popular Content
Showing content with the highest reputation on 08/30/2022 in all areas
-
It's installed on ALL of the HDDs. A tiny bit of corresponding information is updated and linked on the USB as well.2 points
-
Follow this tutorial2 points
-
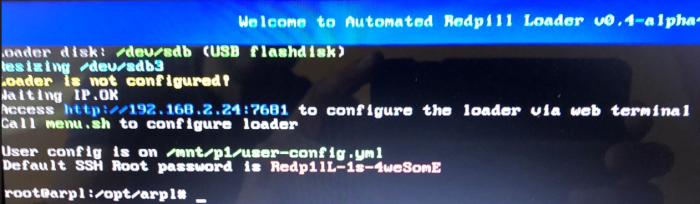
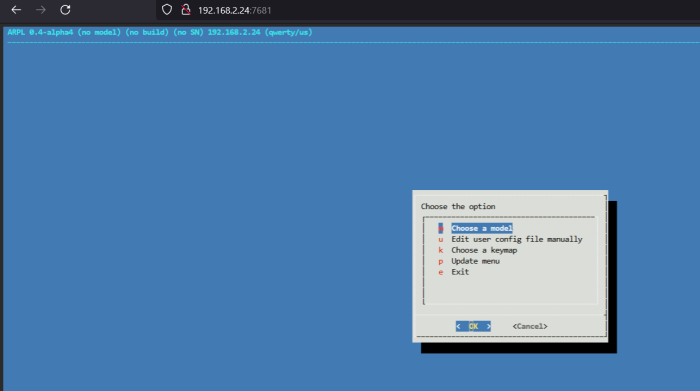
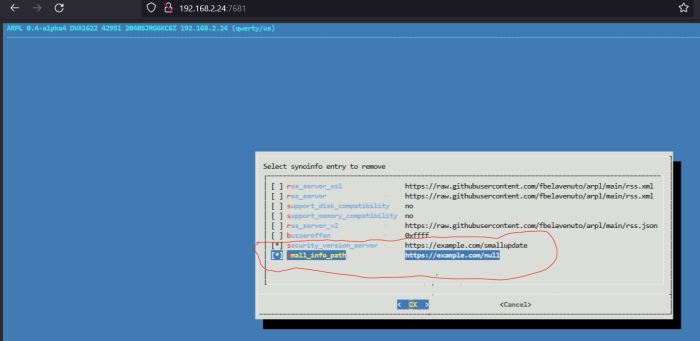
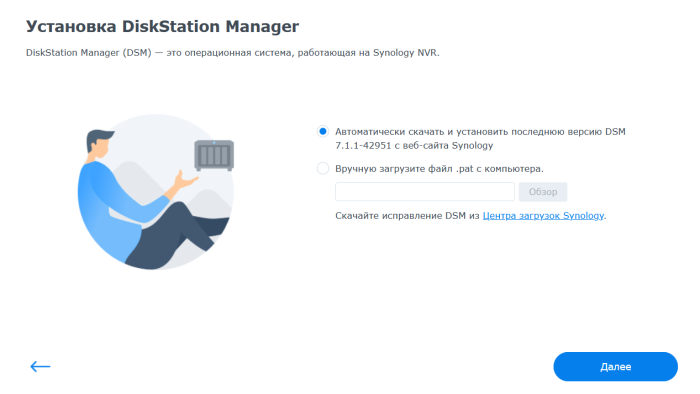
Попробовал еще один вариант создания загрузчика, понравилось 😄. Только обратите внимание на то, что это пока альфа версия. Первоисточник тут. UPD arpl-i18n была тут, теперь 404. Порядок действий: 1. Для создания загрузчика по ссылкам в первоисточнике (справа в центре экрана ссылка на последний релиз), переходим по ссылке и качаем arpl-XX-alphaX.img.zip 2. Записываем образ на флешку, я предпочитаю Rufus. Размер образа для создания загрузчика около 500 Мб, думаю флешки на 1 гиг хватит, под рукой была на 4, на нее и записал. 3. Вставляем флешку в хрень, устанавливаем в биосе загрузку с нее, загружаемся. 4. После старта загрузчика Есть два варианта установки - на самой хрени или через web (точнее 3, но через SSH терминал не пробовал, кому надо, думаю сами справятся). 4a. Если есть монитор, клавиатура, то можно работать с их помощью прямо на хрени. Набираем команду, дальше все интуитивно понятно. ./menu.sh 4b. Для установки через web достаточно вставить флешку и если bios это умеет, то загрузка произойдет сама, не нужен будет монитор и клавиатура. На роутере (или иным знакомым и привычным вам способом) находим ip, который был присвоен новой хрени и в строке браузера набираем: http://ip_хрени:7681 Дальше все понятно, останавливаться не буду. Я выбирал билд под 7.1.1 - 42951. После создания и ребута загрузчика в вебморде хрени по адресу http://ip_хрени:5000 выбирал... Попробовал также в VMWare Workstation player - тоже все встало нормально, только образ другой качать нужно. Остановлюсь на одном моменте - по умолчанию в загрузчике выставлено ограничение на общение будущей хрени с инетом, она сама будет мониторить только те версии, которые на данный момент поддерживаться самим загрузчиком, если нет валидного номерка, то не будет доступа в центр пакетов (нужно будет самому скачивать и устанавливать вручную), не получится активировать QC и некоторые другие функции, которые требуют авторизации в учетке сино. Для того чтобы убрать это ограничение перед созданием загрузчика выбираем Syno.nfo menu -> Delete synoinfo item(s) ставим галки напротив строк... P.S. Вебморда загрузчика будет доступна по http://ip_хрени:7681 , видимо для последующих перекомпиляций под новые версии DSM.
 1 point
 -
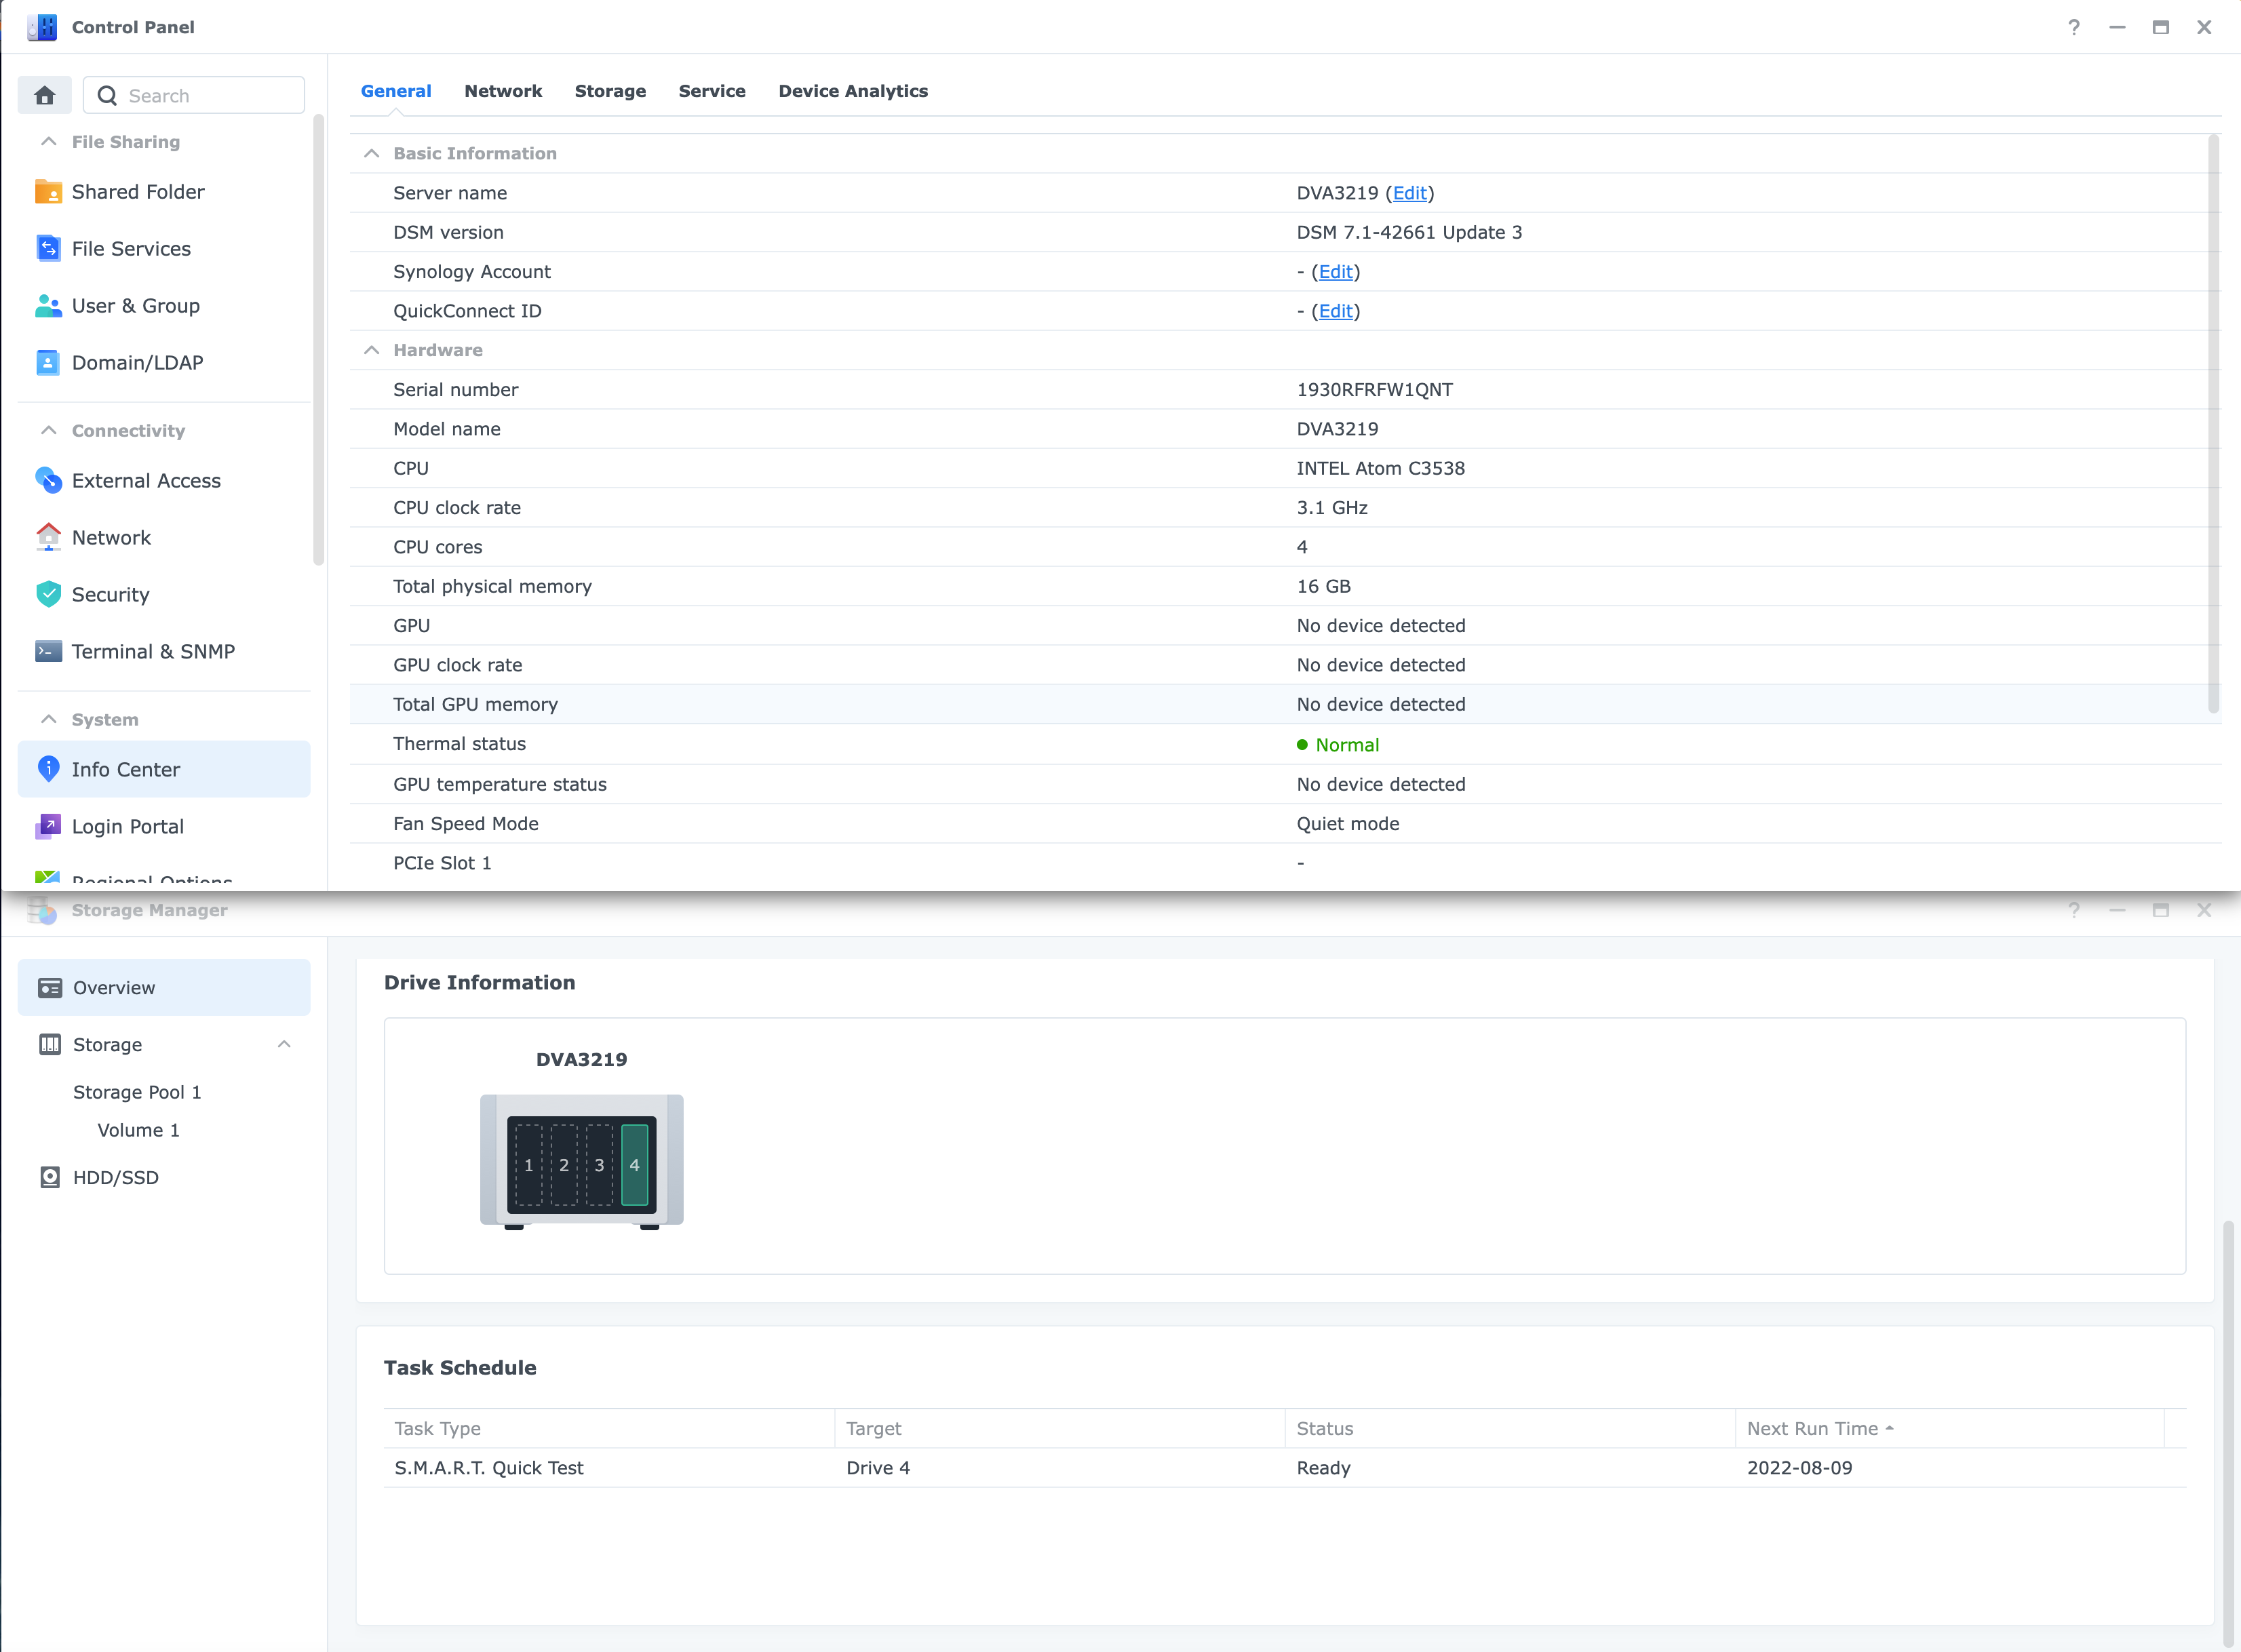
DVA3219 Jot Mode is released by user request. Denverton platform-based surveillance equipment such as the DVA3221. It is for 4 bays like the captured image. In jun mode, bugs have not been caught yet, so only jot mode is released first. TC Original does not support it, and can only be built with my M Shell. Below is how to download. curl --location "https://github.com/PeterSuh-Q3/tinycore-redpill/raw/main/my.sh.gz" -O; tar -zxvf my.sh.gz; ./my.sh DVA3219 For VMs that require additional drivers, etc. You can use it as ./myv.sh DVA3219 And you will surely meet the infinite recovery mode. then Please take care of it like this. sudo ./my.sh DVA3219 postupdate ---------------------------------------------------------------------------------------- Usage: ./my.sh <Synology Model Name> <Options> Options: postupdate, noconfig, noclean, manual, realmac - postupdate : Option to patch the restore loop after applying DSM 7.1.0-42661 Update 2, no additional build required. - noconfig: SKIP automatic detection change processing such as SN/Mac/Vid/Pid/SataPortMap of user_config.json file. - noclean: SKIP the 💊 RedPill LKM/LOAD directory without clearing it with the Clean command. However, delete the Cache directory and loader.img. - manual: Options for manual extension processing and manual dtc processing in build action (skipping extension auto detection). - realmac : Option to use the NIC's real address instead of creating a virtual one. Please type Synology Model Name after ./my.sh - for jot mode ./my.sh DS918+ ./my.sh DS3617xs ./my.sh DS3615xs ./my.sh DS3622xs+ ./my.sh DVA3221 ./my.sh DS920+ ./my.sh DS1621+ ./my.sh DS2422+ ./my.sh DVA1622 ./my.sh DS1520+ (Not Suppoted, Testing...) ./my.sh FS2500 (Not Suppoted, Testing..., Has DTC issue) ./my.sh DS1621xs+ ./my.sh RS4021xs+ ./my.sh DVA3219 - for jun mode ./my.sh DS918+J ./my.sh DS3617xsJ ./my.sh DS3615xsJ ./my.sh DS3622xs+J ./my.sh DVA3221J ./my.sh DS920+J ./my.sh DS1621+J ./my.sh DS2422+J ./my.sh DVA1622J (Not Suppoted) ./my.sh DS1520+J ./my.sh FS2500J (Not Suppoted, Has DTC issue) ./my.sh DS1621xs+J ./my.sh RS4021xs+J ((Not Suppoted, Testing...) ./my.sh DVA3219J (Not Suppoted, Testing...)
 1 point
 -
This tutorial is a supplement to the ESXi TCRP installation tutorial located here: https://xpenology.com/forum/topic/62547-tutorial-install-dsm-7x-with-tinycore-redpill-tcrp-loader-on-esxi/ Installing DSM 7.1.0.-42661 on UNRAID 6.10.3 I have been trying to install DSM 7.1 on my unraid server for the last night. After some problems and testing I have created this guide to install DSM 7.1 on UNRAID working perfectly. This is my vm config: STEP 1-Virtual machine creation: Download tiny core from https://github.com/pocopico/tinycore-redpill Select CentOS VM Template and apply correct options from the attached image. Select Q35-6.2 Select 3.0 (qemu XHCI) Load tiny red core as vdisk1 USB by selecting manually (you can create previously the name of the folder for the VM inside /domains and upload the tinycore img ) Create secondary disk 50G or whatever you want (this is your data storage for synology) as vdisk2 SATA Select Network model: e1000 Save. Uncheck "Start VM after creation" Edit again vdisk2 in the advanced xml template (top right corner) to controller='1' (if we don't do this tiny red core will not detect the disk properly when doing the satamap and will not install DSM correctly and will ask you to reinstall the *.pat infinitely) STEP 2-Start VM and connect via SSH Start VM and load tiny red core Once the OS is loaded, open the terminal and enter ifconfig to find out the ip of the machine Connect via ssh (with Putty) to the obtained IP address. user: tc password: P@ssw0rd STEP 3-Run the following commands: To update tiny red core with the latest data ./rploader.sh update now ./rploader.sh fullupgrade now To generate random mac and serial numbers (copy mac address generated to set on unraid vm template later) ./rploader.sh serialgen DS918+ (or whatever version you want, you can see all versions available with command info ./rploader.sh) To map the connected disks ./rploader.sh satamap now To record the vid/pid from usb ./rploader.sh identifyusb now To install NIC drivers (sometimes it loads the e1000e module instead of the e1000 and it doesn't work, adding this command will make sure that the e1000 module for the NIC is loaded correctly) For e1000 Network Card run: ./rploader.sh ext apollolake-7.1.0-42661 add https://raw.githubusercontent.com/pocopico/rp-ext/master/e1000/rpext-index.json NOTE: change version according your selection for CPU and DSM version For virtio-net Network Card run: ./rploader.sh ext apollolake-7.1.0-42661 add https://raw.githubusercontent.com/pocopico/rp-ext/master/v9fs/rpext-index.json NOTE: change version according your selection for CPU and DSM version To build the image ./rploader.sh build apollolake-7.1.0-42661 STEP 4-Download your .pat for your correct cpu architecture from official repo or mega download for this version apollolake , we will need it to install DSM later. https://global.download.synology.com/download/DSM/release/7.1/42661-1/DSM_DS918%2B_42661.pat - Offical repo STEP 5-Edit VM settings on advanced xml mode and install *.pat After doing all the above we shut down the machine. Edit the virtual machine on xml advanced mode (if we change mac address in normal editing mode you will lose controller="1" option set for vdisk2 we did previously so you will have to set it again everytime you change and/or save a setting from normal mode, try to edit always in xml advanced mode), look for MAC address and set the MAC generated by tiny red core. Save Start VM Select the first option USB and leave it a few minutes until we find it with synology assistant Open WebGui and install *.pat We now have DSM 7.1 working on unraid. There is other method with SATA boot but I have to test it better. Hope this guide help someone. Regards.
 1 point
 -
I would try a basic hardware install with DS3622; remove the asmedia card, disable the 10gb nic, use a single hdd. run ifconfig in the terminal and get the mac addresses of the intel nics, use the 'realmac' option for the serialgen. note the 'satamap' results for the disk controllers. If that works then add the m2, rerun satamap and rebuild. You will probably need to add the 10gb nic driver manually from rp-ext. you will need to edit/add the netif_num and mac addresses for 3 nics. check the user_config.json file to make sure your settings are 'stored' after the builds. I would not install the asmedia card until you have drives attached.1 point
-
My GTX 1650 Super has 4gb of DDR6 and works fine on DVA32211 point
-
Check the date and time in your BIOS.1 point