Leaderboard


Popular Content
Showing content with the highest reputation on 09/23/2021 in all areas
-
Update time! 💊 This week the updates are going to be less exciting but nonetheless very important, and the first point talks about that in more details. THE BUILD HAS CHANGED - READ ME We're putting this as the first and in red so people see it. The LKM build now requires a version to be specified. We know this will break the @haydibe toolchain but we're sure he will fix it quickly as this is a small change. For reasons why read further. Also, if you used a hack to "fix" the Info Center on 3515xs make sure to read "Hardware monitoring emulation" section carefully. A roadmap Lets first address why this week is less exciting: we spent most of the time testing various scenarios and tracking hidden-yet-missed bugs. This is most likely the second to last round of updates before we release a beta version. The beta version can be used in a day-to-day testing and should be free of dangerous crashes (ok, maybe except that strange kernel lookup - we're looking into it). In the beta some features may still be missing but overall we're already testing a few instances and it's looking good We don't have an official roadmap as someone here asked. However, this is the rough list of things we want to address in that order: Custom drivers support*: there's a hack discussed here to add drivers to a ramdisk. However, this isn't a sustainable solution for many reasons. Mainly the reason is a very limited size. The current ramdisk, especially on systems without compression, is almost at the limit and on slower systems can crash with even a few megabytes more added to it. This seems to be especially unstable on v7 Linux v4 kernel. The solution we're working on will simply include modules on the partition which are loaded in pre-boot and copied to the main OS partition on boot. Naturally from the perspective of the user it will involve simply adding a line to user_conf and dropping a file in "custom". For people digging deeper it will be also much easier as this involves no repacking: simply mount the partition and drop more files in and they will be copied 1:1 and loaded as needed. Full SAS support*: while cheap HBA cards are great and something we actually will recommend for home builds (as they're cheap, stable, and offer 4-6 ports), LSI is king for bigger arrays. We want to make sure these are working as intended making both DSM and Linux happy (which isn't easy in v7 ;)). UEFI support*: there are board which cannot boot in legacy mode. We want to fully test this and offer an official UEFI support in the RedPill. Add support for newest revisions of the OS to 918+ and 3615xs* Step-by-step instruction*/**: essentially we want you guys to help us test not only the code but also a guide It will be published alongisde the beta version. We will prepare it in a form of a GH page so that we can easily incorporate feedback (as we cannot edit posts after ~1h). After we resolve problems with it we will go ahead and publish an RC version on the main forum so that it becomes an official version released for usage by less experienced folks who still want to poke around the OS. Integrate build process into the main repository**: @haydibe is doing an AMAZING job here and we cannot thank him enough. As we discussed with him before we want to incorporate the docker directly into the redpill-load repo and enable LKM builds on GH, so that everything is automated and synchronized as soon as we publish an update. Small fixes: add native support for CPU governor, fix CPU detection to match the model (as some things on v7 react strangely if the CPU doesn't match the model), fix various internal code-smells in the kernel code Add support for GPU acceleration: in short we want to explore adding platform like DVA3221 AMD support: let's just say we aren't fans of Intel recently We want to add a model which natively supports AMD CPUs Work on making mfgBIOS LEDs/buzzers/hwmon stuff more real or at least publish an interface which can be used by others to add an arduino or similar. Things marked with * are aimed to be done by the beta release. Things marked with ** we are HOPING to get done before the beta but we cannot promise Fixed I/O scheduler not found errors Many people reported these, and we finally found some time to look at them. Fixing them should fix the disk scheduling and improve performance in some scenarios. All in all you shouldn't ever see them from now on. Commit: https://github.com/RedPill-TTG/redpill-lkm/commit/aaa5847c589b84783471f9a600eeb12fbf2dc31c Hardware monitoring emulation One of the big features boosted by syno in v7 is central monitoring. However, with that it looks like in v7 the hardware monitoring and things around that has changed a lot from v6. In short v6 allowed for things being out of whack here and there with the hardware sensors while v7 assumes all sensors are in order... and when they're not things break unexpectedly. For example that bug with General tab not loading in Info Center was just a tip of an iceberg. It was just a symptom of a MUCH MUCH bigger issue. If you do "cat /run/hwmon/*" on a DSM loaded with Jun's loader you will get: # cat /run/hwmon/* { "CPU_Temperature": { } } This isn't going to fly on v7. The Info Center is just the beginning of problems. High scemd usage at times was also caused by the lack of hwmon emulation (which again, wasn't strictly needed on v6). After painstakingly analyzing the synobios.h from the kernel and toolchains while also scratching our heads at how one of the drivers for ADT chip (fan controller on a real DS) was modified we think we've nailed it: # cat /run/hwmon/* { "CPU_Temperature": { "CPU_0": "61", "CPU_1": "61" } } { "System_Fan_Speed_RPM": { "fan1_rpm": "997", "fan2_rpm": "986" } } { "System_Thermal_Sensor": { "Remote1": "34", "Local": "32", "Remote2": "34" } } { "System_Voltage_Sensor": { "VCC": "11787", "VPP": "1014", "V33": "3418", "V5": "5161", "V12": "11721" } } The output above comes from a 3615xs instance. On 918+ you will see only CPU_Temperature and hdd backplane status as physically 918+ does not monitor anything else. You can read more about that in the new document in the research repo: https://github.com/RedPill-TTG/dsm-research/blob/master/quirks/hwmon.md All values above are fully emulated as on a VM we have no way of reading them and on a real hardware the only standardized one which we can pass along is the CPU temp (as voltages and thermal sensors vary widely between motherboards). We have a "todo" to make CPU temperature real on bare metal. The ugly part, which forced us to change the LKM build to require major version of the OS to be specified, is that syno changed so many things between v6 and v7 that they forgot to make proper headers. As you can see in the https://github.com/RedPill-TTG/dsm-research/blob/master/quirks/mfgbios.md document they just like that moved two fields in the middle of the struct. You never ever do that. Not without at least some ifdef (which they did for other things). The issue is that change we've found is not present in all toolchains, it's not documented anywhere and we discovered it by accident by comparing files. There's really no sane way to detect that (we've tried really hard). This is why we were forced to add (ugly) requirement for v6/v7 to be specified while building the kernel module. If we find a saner way we will go back and make it automatic again. With the hwmon being emulated there are two VERY important things: you CANNOT disable "supportsystemperature" and "supportsystempwarning"! The hack someone posted here with sed - https://gist.github.com/Izumiko/26b8f221af16b99ddad0bdffa90d4329 - should NOT be used. We cannot stress this enough. Anyone who used it and keeps the installation MUST put "supportsystemperature: yes" and "supportsystempwarning: yes" into user_config at least for a single boot. This is because these values (with =no) are now baked into your OS partition and you MUST fix them to the default "yes". As the loader script doesn't have them specified anywhere it will not touch them anymore. you CANNOT disable ADT support. This comes back way to the Jun's loader and deleting "supportadt7490" on 3615xs. If you're not installing from scratch on a new disk but playing with the same on you MUST put "supportadt7490: yes" to your user_config at least for one boot. Commits: https://github.com/RedPill-TTG/redpill-lkm/commit/72cb5c3620711bcabcfe6e1c67ebfbeca6f7e6bf (mfgBIOS structures v6/v7 changes) https://github.com/RedPill-TTG/redpill-lkm/commit/16adab519d6c4cc604e3fb680fb041e8ddd2167e (HWMON definitions) https://github.com/RedPill-TTG/redpill-lkm/commit/7d95ce2ec7d35493227196be58bbd2c7ca2704f8 (HW capabilities emulation) https://github.com/RedPill-TTG/redpill-lkm/commit/014f70e7127abdf28b47fe58f35086296b5d78ca (HWMON emulation) https://github.com/RedPill-TTG/redpill-load/commit/78c7bf9f903a73d51013a859f590c09ee835f8e7 (remove legacy ADT hack) Fix RTC power-on bug On 918+ the scemd complained about auto power-on setting failing. Now this is fixed and scemd no longer triggers an internal error state. This was happening when OS was sending an empty schedule. Commit: https://github.com/RedPill-TTG/redpill-lkm/commit/80a2879aae23d611228c8791b35e237bfa0ec7a8 Add support for emulated SMART log directory This is an internal change in the SMART emulation layer. Syno uses slightly out-of-spec approach (again, hello v7 mess) and assumes all disks implement one of the ATAPI functionalities which is actually optional. This may actually cause some real disks to fail as well on a real v7 so they will probably eventually fix it themselves. For the time being we did it in RP. Commit: https://github.com/RedPill-TTG/redpill-lkm/commit/278ee99a4dcb8fb8f025915118e7df93824e9bfc ------------------------------------------------------------------------ Today's update is rather short as HWMON layer took us a ton of time to properly research and figure out how to actually do it. There were literally 5 different implementation until we got it right. That being said the forum deleted our responses to comments which we were typing here so we will write them again... but probably tomorrow morning. We will try to sit together tomorrow morning (ok, developer's morning ;)) and write responses again. @WiteWulf Can you try deleting the line with "register_pmu_shim" from redpill_main.c (in init_(void) function) and rebuilding the kernel module? You can then use inject_rp_ko.sh (lkm repo) script to inject it into an existing loader image or rebuild the image. With that you shouldn't have PMU emulation anymore (so the instance can be killed in ~24-48h) but we can see if it's kernel panicking.6 points
-
Really ? Are you **** serious ? Could you please respect devs work ? could you at least read OPs posts ? you won't be spoon feed... we are not even in beta stage yet... [Removed unnecessary foul comment and edited post.]4 points
-
@ThorGroup thank you for the update! And indeed, I spoted and incorporated the new make targets into the new toolchain builder version Taken from the README.md: Supports the make target to specify the redpill.ko build configuration. Set <platform version>.redpill_lkm_make_target to `dev-v6`, `dev-v7`, `test-v6`, `test-v7`, `prod-v6` or `prod-v7`. Make sure to use the -v6 ones on DSM6 build and -v7 on DSM7 build. By default the targets `dev-v6` and `dev-v7` are used. I snatched following details from the redpill-lkm Makefile: - dev: all symbols included, debug messages included - test: fully stripped with only warning & above (no debugs or info) - prod: fully stripped with no debug messages See README.md for usage. redpill-tool-chain_x86_64_v0.10.zip4 points
-
@Orphée As much as I agree that the user should make some efforts to read and understand, I advise you to tone it down and to read the rules. We are not here to bash people. You could have conveyed the same message without the aggression and foul language. I have edited your post accordingly.3 points
-
Thanks for your answer, it`s my fault..should have looked in the damn README.md. For those who run 7.0.1-RC, here is what you need to add to global_config.json: { "id": "apollolake-7.0.1-42214", "platform_version": "apollolake-7.0.1-42214", "user_config_json": "apollolake_user_config.json", "docker_base_image": "debian:10-slim", "compile_with": "toolkit_dev", "redpill_lkm_make_target": "prod-v7", "downloads": { "kernel": { "url": "https://sourceforge.net/projects/dsgpl/files/Synology%20NAS%20GPL%20Source/25426branch/apollolake-source/linux-4.4.x.txz/download", "sha256": "af815ee065775d2e569fd7176e25c8ba7ee17a03361557975c8e5a4b64230c5b" }, "toolkit_dev": { "url": "https://sourceforge.net/projects/dsgpl/files/toolkit/DSM7.0/ds.apollolake-7.0.dev.txz/download", "sha256": "d349fa644392d4cfab8191243ee38aaa32bd517208c144678e0c855cb5a619ea" } }, "redpill_lkm": { "source_url": "https://github.com/RedPill-TTG/redpill-lkm.git", "branch": "master" }, "redpill_load": { "source_url": "https://github.com/jumkey/redpill-load.git", "branch": "develop" } } I used the prod-v7 target, you can change it to suit your needs. (dev/test/prod)3 points
-
I was successful to use NVMe for Cache on 6.2.4@DS918 also it work tested with 7.0 You need to edit /lib64/libsynonvme.so.1 1. udevadm info /dev/nvme0n1 and check PCI Address 2. find ds918 on so file 3. edit hardcoded address (original is 0000:00:13:1 and 0000:00:13:2 on 6.2.4) 4. overwrite libsynonvme.so.1&reboot system https://blog.dateno1.com/?p=3890 Post with screenshot (sorry korean only)2 points
-
Scheduled power on function to my understanding at least, is a PMU function on a real Syno device. For the time being, we are emulating PMU at the software level but we are still missing the hardware to implement power on. It's in the roadmap, there is a line that says something about it. And here is a deeper explanation : https://github.com/RedPill-TTG/dsm-research/blob/master/quirks/pmu.md2 points
-
Hi! I expected to be sworded sooner or later. I just hope he was able to read the whole comment before edit. It loose some flavour after edit. those kind of kid deserve some slap to reorder the few neurons they have. But I understand don't worry! Have a nice day!2 points
-
Please open an issue in the github repository of the redpill-load version configured in <platfrom version> that you used to build the image. I repeat: the toolchain builder is not responsible for that.2 points
-
I dont have a clue about Linux language so will wait patiently until a total novice idiot proof version is released for my HP Micoserver Gen 8 but in the meantime my undying thanks to Thor Group and all the other contributors here for giving up their precious free time to sort this out for the rest of us - Respect to you all.2 points
-
For test DS315xs with VMWare I add to global_config.json this lines: { "id": "bromolow-7.0.1-42214", "platform_version": "bromolow-7.0.1-42214", "user_config_json": "bromolow_user_config.json", "docker_base_image": "debian:8-slim", "compile_with": "toolkit_dev", "redpill_lkm_make_target": "prod-v7", "downloads": { "kernel": { "url": "https://sourceforge.net/projects/dsgpl/files/Synology%20NAS%20GPL%20Source/25426branch/bromolow-source/linux-4.4.x.txz/download", "sha256": "af815ee065775d2e569fd7176e25c8ba7ee17a03361557975c8e5a4b64230c5b" }, "toolkit_dev": { "url": "https://sourceforge.net/projects/dsgpl/files/toolkit/DSM7.0/ds.bromolow-7.0.dev.txz/download", "sha256": "a5fbc3019ae8787988c2e64191549bfc665a5a9a4cdddb5ee44c10a48ff96cdd" } }, "redpill_lkm": { "source_url": "https://github.com/RedPill-TTG/redpill-lkm.git", "branch": "master" }, "redpill_load": { "source_url": "https://github.com/jumkey/redpill-load.git", "branch": "develop" } }, For Apollolake need to add this lines: It's very fast and easy make a build an .img for test, only need linux (In my case use Terminal on Ubuntu): 1. Install Docker sudo apt-get update sudo apt install docker.io 2. install jq & curl: sudo apt install jq sudo apt install curl 3. download redpill-tool-chain_x86_64_v0.10 https://xpenology.com/forum/applications/core/interface/file/attachment.php?id=13072 4. Go to folder and permissions to .sh cd redpill-tool-chain_x86_64_v0.10 chmod +x redpill_tool_chain.sh 5. If you want edit vid,pid,sn,mac: #edit apollolake vi apollolake_user_config.json #edit bromolow vi bromolow_user_config.json 6. build img #for apollolake ./redpill_tool_chain.sh build apollolake-7.0.1-42214 && ./redpill_tool_chain.sh auto apollolake-7.0.1-42214 #for bromolow ./redpill_tool_chain.sh build bromolow-7.0.1-42214 && ./redpill_tool_chain.sh auto bromolow-7.0.1-42214 then the file was in redpill-tool-chain_x86_64_v0.10/images 7. For VMWare I convert .img to .vmdk with StarWind V2V Converter, and then add to Virtual Machine like sata. Also, change ethernet0.VirtualDeb = "e1000" to "e1000e on file .vmx Thanks ThorGroup for the great work global_config.json
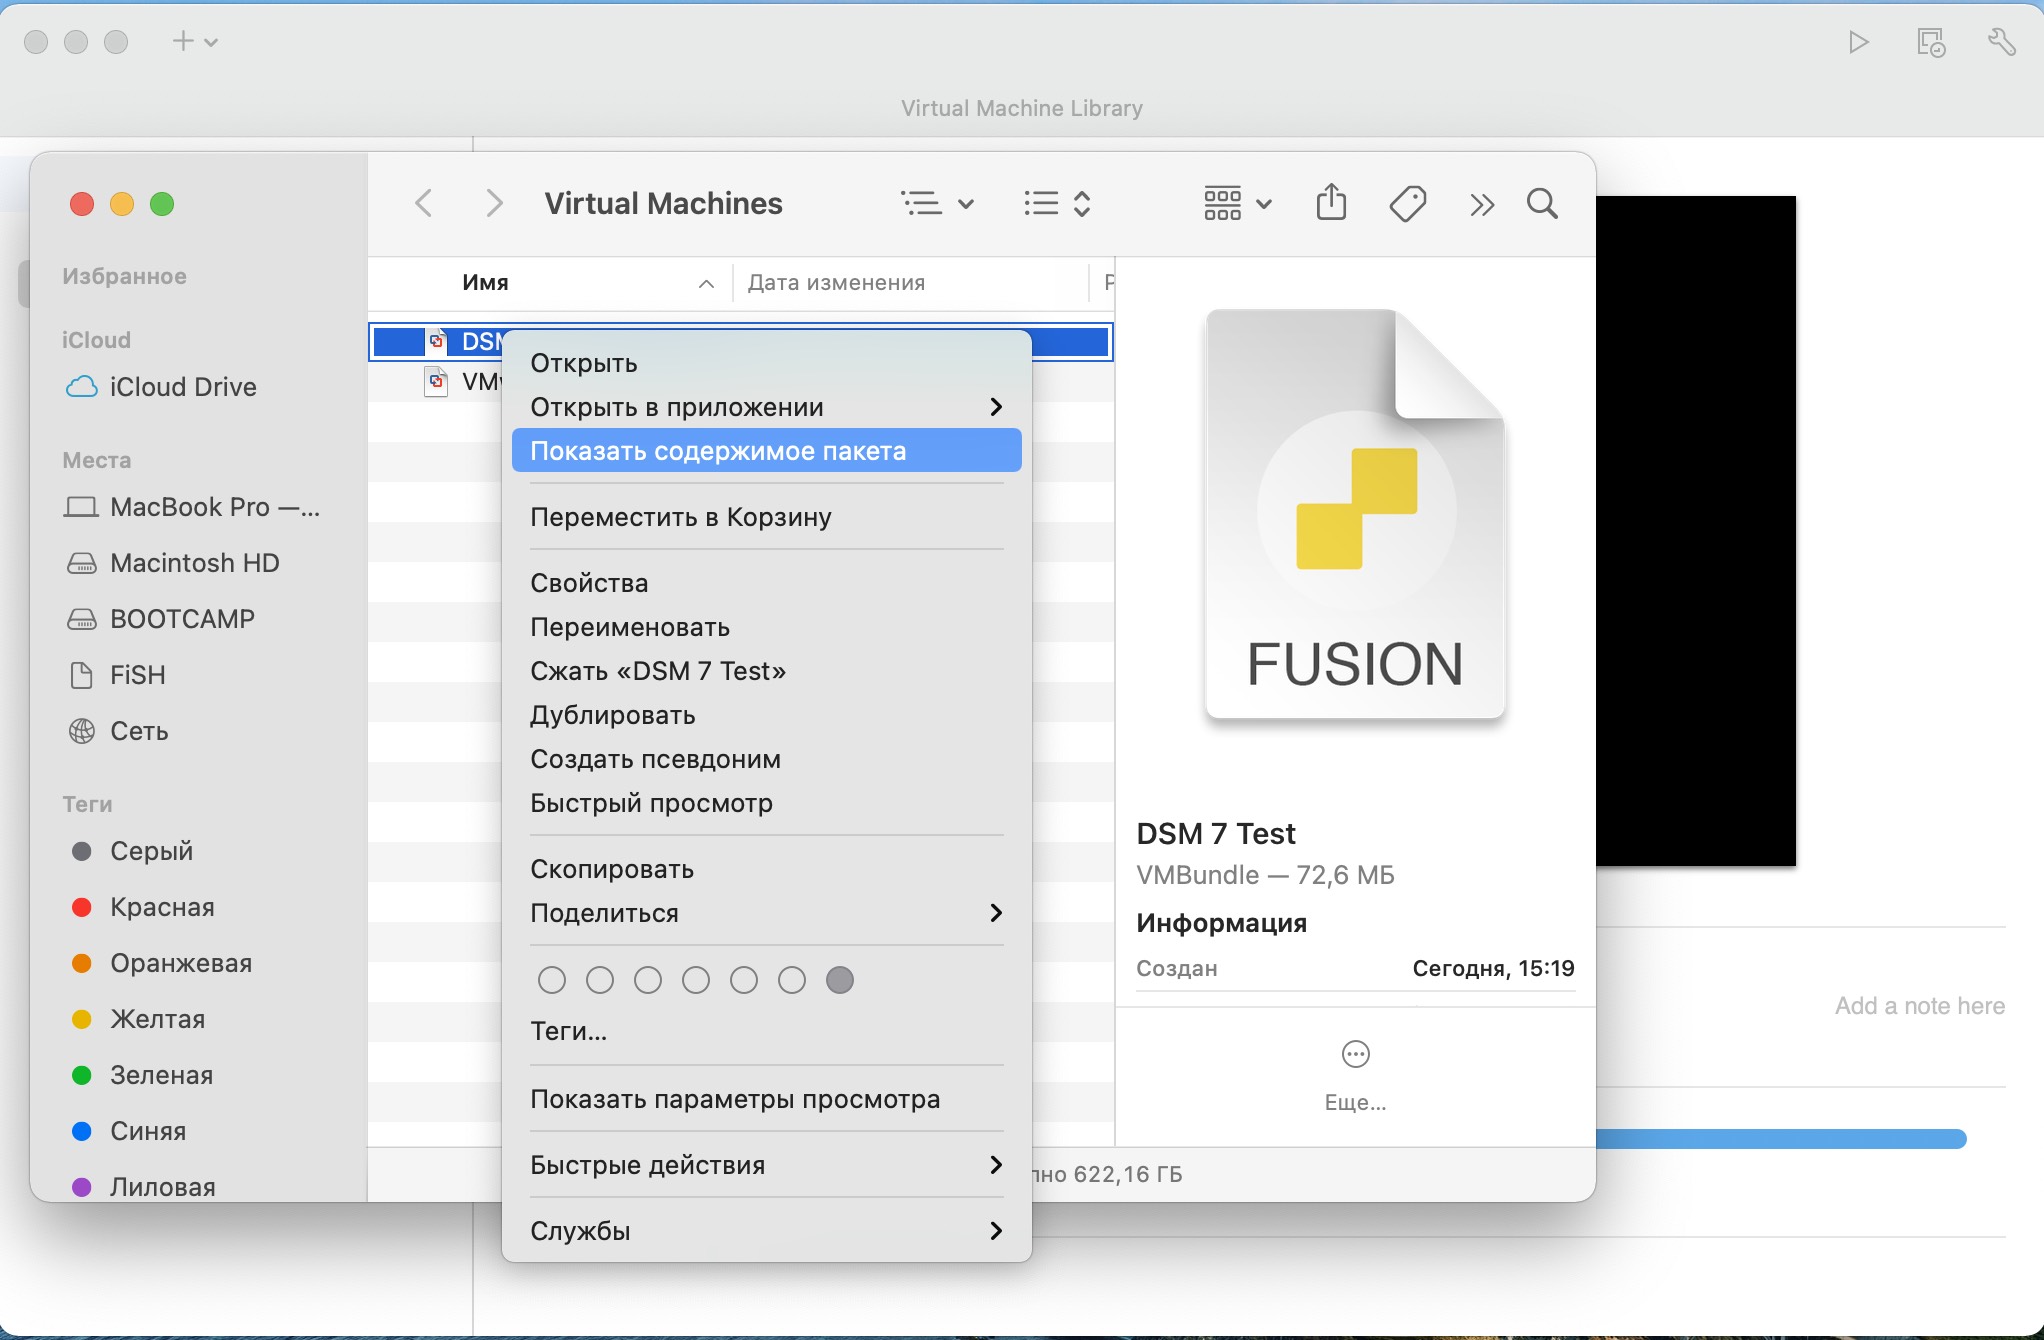
 2 points
 -
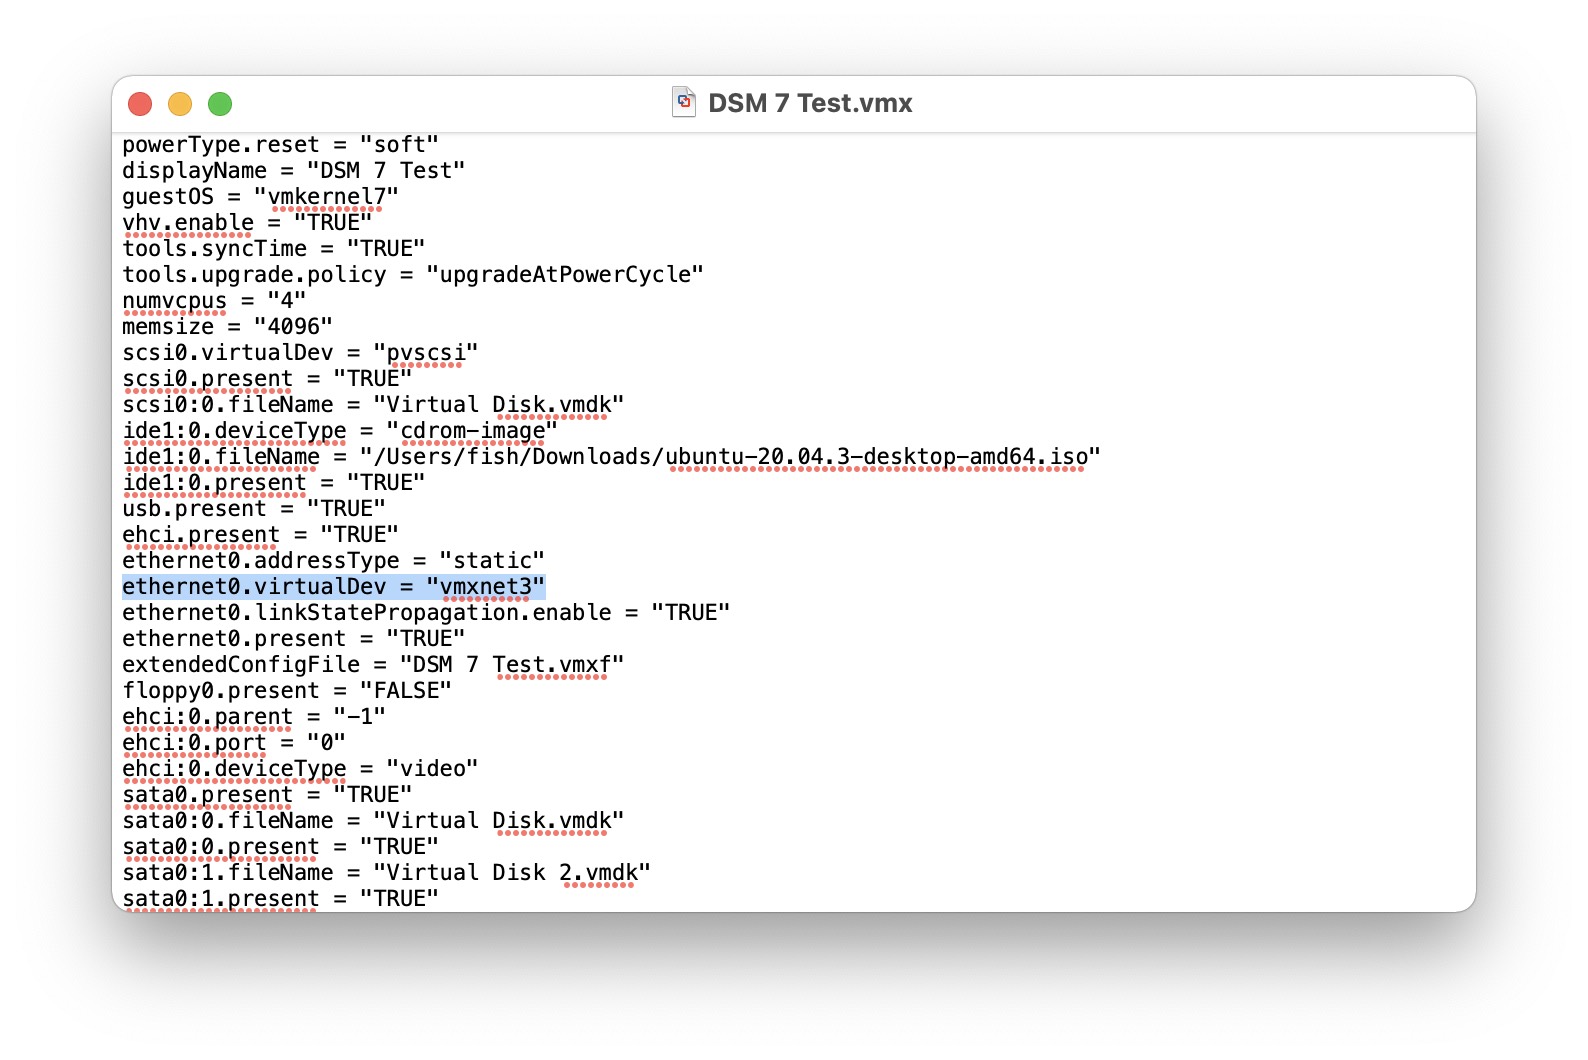
Here were my tests : if you read from there, you will find why I swiched to LSI card.1 point
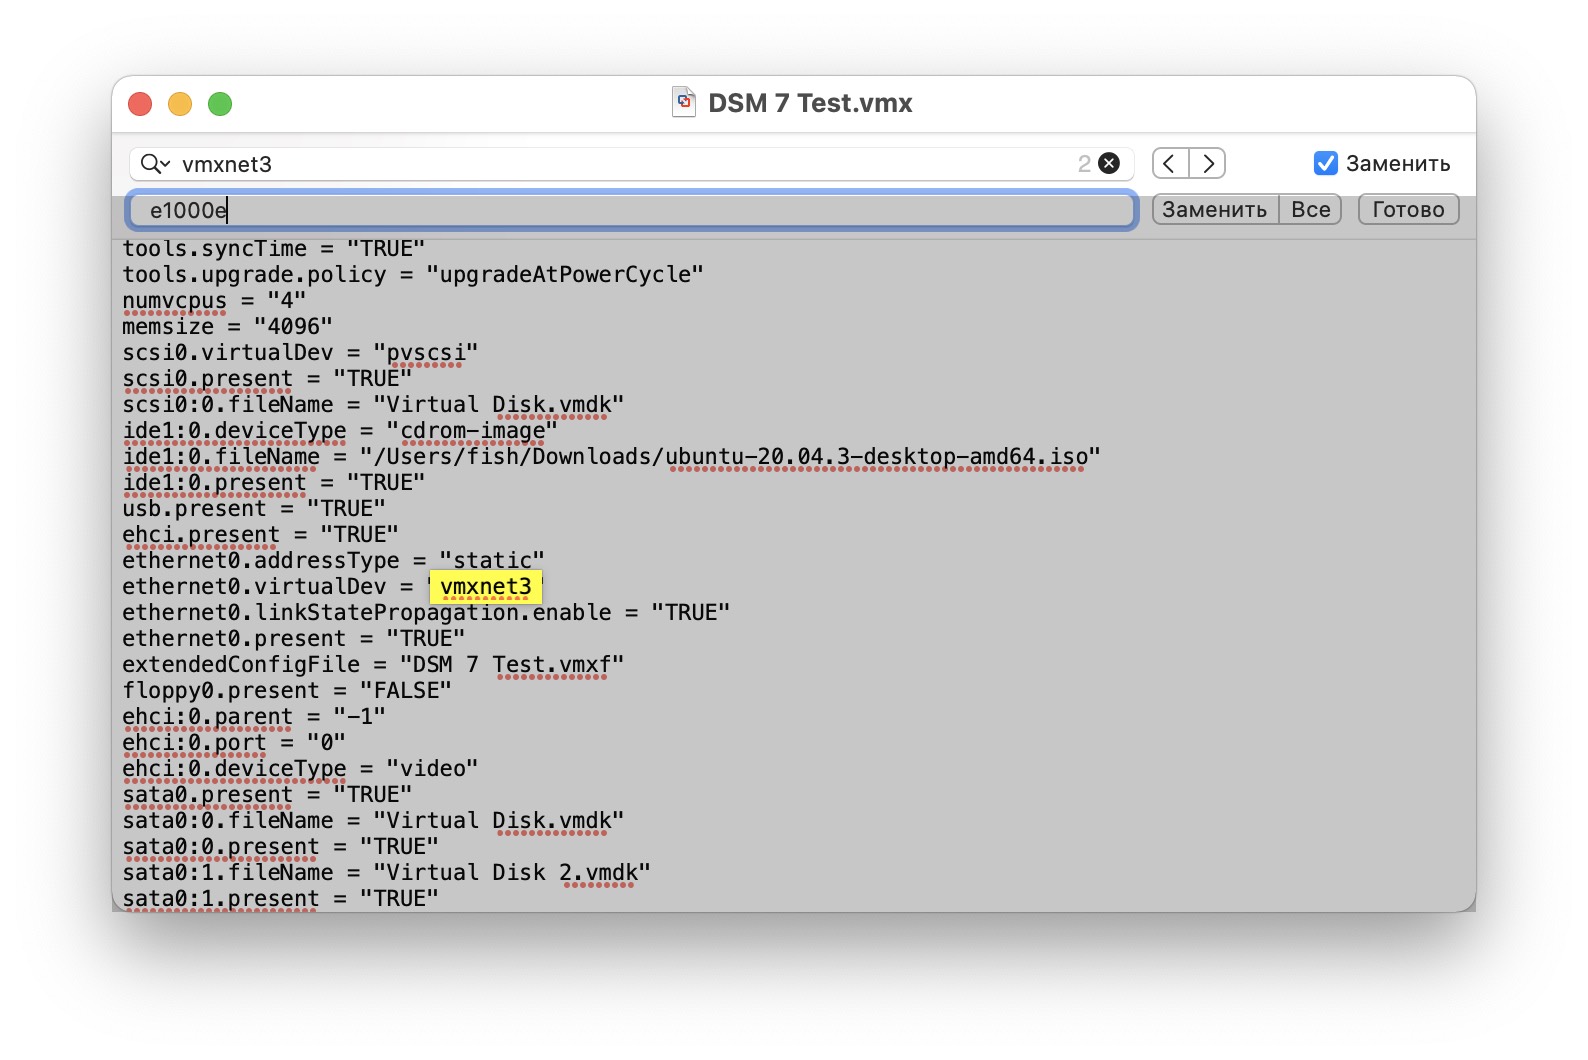
-
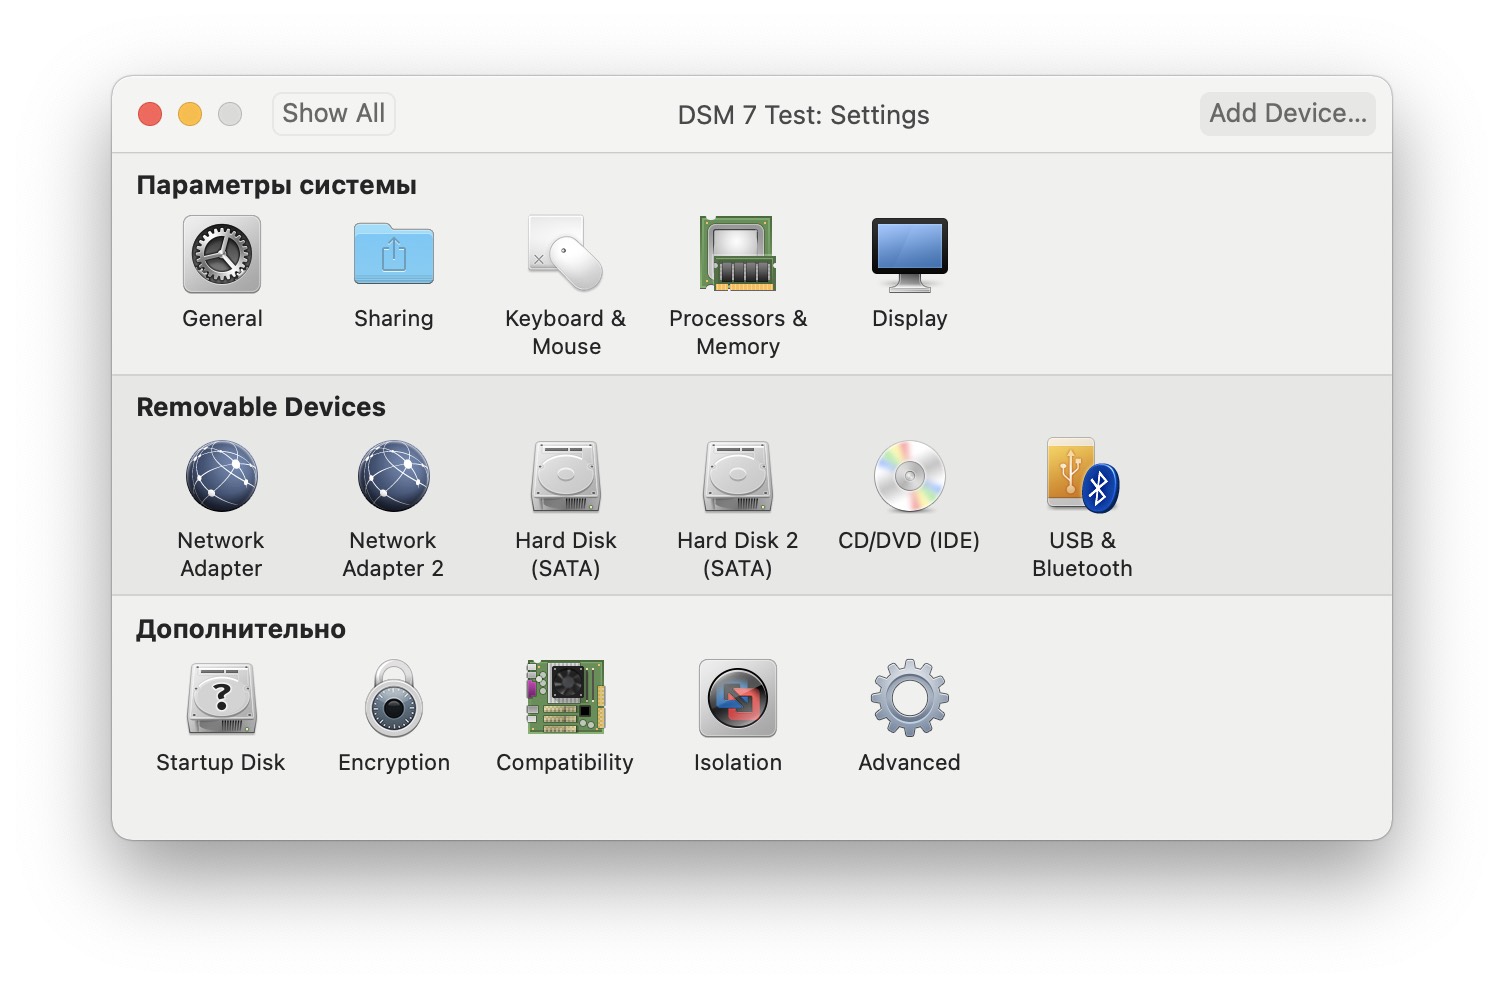
You have to add a new sata controller, and set HDD to use the new sata controller (1:0, 1:1, ...) Sata controller usage are defined under your disks settings, under VM confgiuration.1 point
-
Technical correct, but won't make much of a difference in this case bacause "compile_with": "toolkit_dev" will use toolkit-dev and not the kernel to build redpill-lkm. Once the new kernel sources for dsm7 are available the url has to change to the new url and "compile_with" needs to be set to "kernel" to build redpill-lkm using the kernel.1 point
-
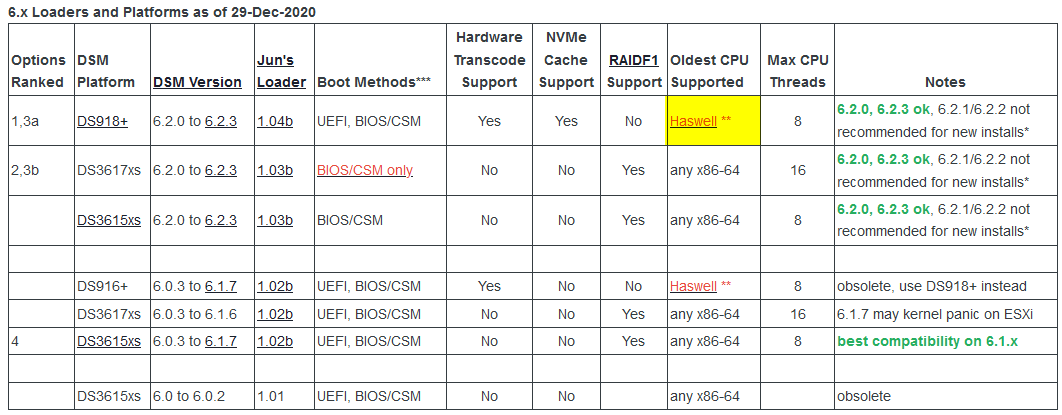
Sadly HP Gen8 does not support Haswell architecture... Mandatory for Appololake...
 1 point
 -
@ThorGroup it still kernel panics when launching an influxdb docker container with "register_pmu_shim" deleted from redpill_main.c as suggested: [ 338.055690] Kernel panic - not syncing: Watchdog detected hard LOCKUP on cpu 6 [ 338.091670] CPU: 6 PID: 21097 Comm: containerd-shim Tainted: PF O 3.10.108 #42214 [ 338.132114] Hardware name: HP ProLiant MicroServer Gen8, BIOS J06 04/04/2019 [ 338.168045] ffffffff814a2759 ffffffff814a16b1 0000000000000010 ffff880409b88d60 [ 338.205031] ffff880409b88cf8 0000000000000000 0000000000000006 0000000000000001 [ 338.241507] 0000000000000006 ffffffff80000001 0000000000000030 ffff8803f4d4dc00 [ 338.278173] Call Trace: [ 338.290006] <NMI> [<ffffffff814a2759>] ? dump_stack+0xc/0x15 [ 338.318839] [<ffffffff814a16b1>] ? panic+0xbb/0x1df [ 338.342727] [<ffffffff810a9eb8>] ? watchdog_overflow_callback+0xa8/0xb0 [ 338.375043] [<ffffffff810db7d3>] ? __perf_event_overflow+0x93/0x230 [ 338.405804] [<ffffffff810da612>] ? perf_event_update_userpage+0x12/0xf0 [ 338.438356] [<ffffffff810152a4>] ? intel_pmu_handle_irq+0x1b4/0x340 [ 338.469218] [<ffffffff814a9d06>] ? perf_event_nmi_handler+0x26/0x40 [ 338.500130] [<ffffffff814a944e>] ? do_nmi+0xfe/0x440 [ 338.525060] [<ffffffff814a8a53>] ? end_repeat_nmi+0x1e/0x7e [ 338.552408] <<EOE>> [ 338.562333] Rebooting in 3 seconds.. Tried it another time, similar crash, this time directly referncing influxdb in the output: Kernel panic - not syncing: Watchdog detected hard LOCKUP on cpu 0 [ 165.610117] CPU: 0 PID: 21435 Comm: influxd Tainted: PF O 3.10.108 #42214 [ 165.646799] Hardware name: HP ProLiant MicroServer Gen8, BIOS J06 04/04/2019 [ 165.680969] ffffffff814a2759 ffffffff814a16b1 0000000000000010 ffff880409a08d60 [ 165.717087] ffff880409a08cf8 0000000000000000 0000000000000000 0000000000000001 [ 165.753547] 0000000000000000 ffffffff80000001 0000000000000030 ffff8803f5267c00 [ 165.789827] Call Trace: [ 165.801740] <NMI> [<ffffffff814a2759>] ? dump_stack+0xc/0x15 [ 165.830687] [<ffffffff814a16b1>] ? panic+0xbb/0x1df [ 165.855249] [<ffffffff810a9eb8>] ? watchdog_overflow_callback+0xa8/0xb0 [ 165.888617] [<ffffffff810db7d3>] ? __perf_event_overflow+0x93/0x230 [ 165.919963] [<ffffffff810da612>] ? perf_event_update_userpage+0x12/0xf0 [ 165.952655] [<ffffffff810152a4>] ? intel_pmu_handle_irq+0x1b4/0x340 [ 165.983546] [<ffffffff814a9d06>] ? perf_event_nmi_handler+0x26/0x40 [ 166.013584] [<ffffffff814a944e>] ? do_nmi+0xfe/0x440 [ 166.038375] [<ffffffff814a8a53>] ? end_repeat_nmi+0x1e/0x7e [ 166.065408] <<EOE>> [ 166.075520] Rebooting in 3 seconds..1 point
-
I think you're right. This should be a correct bromolow 7.0.1-RC1 stanza: { "id": "bromolow-7.0.1-42214", "platform_version": "bromolow-7.0.1-42214", "user_config_json": "bromolow_user_config.json", "docker_base_image": "debian:8-slim", "compile_with": "toolkit_dev", "redpill_lkm_make_target": "prod-v7", "downloads": { "kernel": { "url": "https://sourceforge.net/projects/dsgpl/files/Synology%20NAS%20GPL%20Source/25426branch/bromolow-source/linux-3.10.x.txz/download", "sha256": "18aecead760526d652a731121d5b8eae5d6e45087efede0da057413af0b489ed" }, "toolkit_dev": { "url": "https://sourceforge.net/projects/dsgpl/files/toolkit/DSM7.0/ds.bromolow-7.0.dev.txz/download", "sha256": "a5fbc3019ae8787988c2e64191549bfc665a5a9a4cdddb5ee44c10a48ff96cdd" } }, "redpill_lkm": { "source_url": "https://github.com/RedPill-TTG/redpill-lkm.git", "branch": "master" }, "redpill_load": { "source_url": "https://github.com/jumkey/redpill-load.git", "branch": "develop" } },1 point
-
Is bromolow with linux-4.4.x.txz? Shouldnt it be 3.x kernel?1 point
-
Don't push your luck. I have already asked you to tone it down. There is no need to be condescending to anyone.1 point
-
🤣 I actually laughed out loud lol.1 point
-
As others have suggested: this isn't right for you yet. Yes, this is gatekeeping, but there's a beta coming soon hopefully. But be aware that there will never be a simple image to download for redpill. Read the thread (particularly Thorgroup's posts) and you'll hopefully understand why.1 point
-
Для желающих пощупать DSM7 в виртуалке под macOS я наваял небольшую инструкцию Новая версия toolchain от @haydibe1 point
-
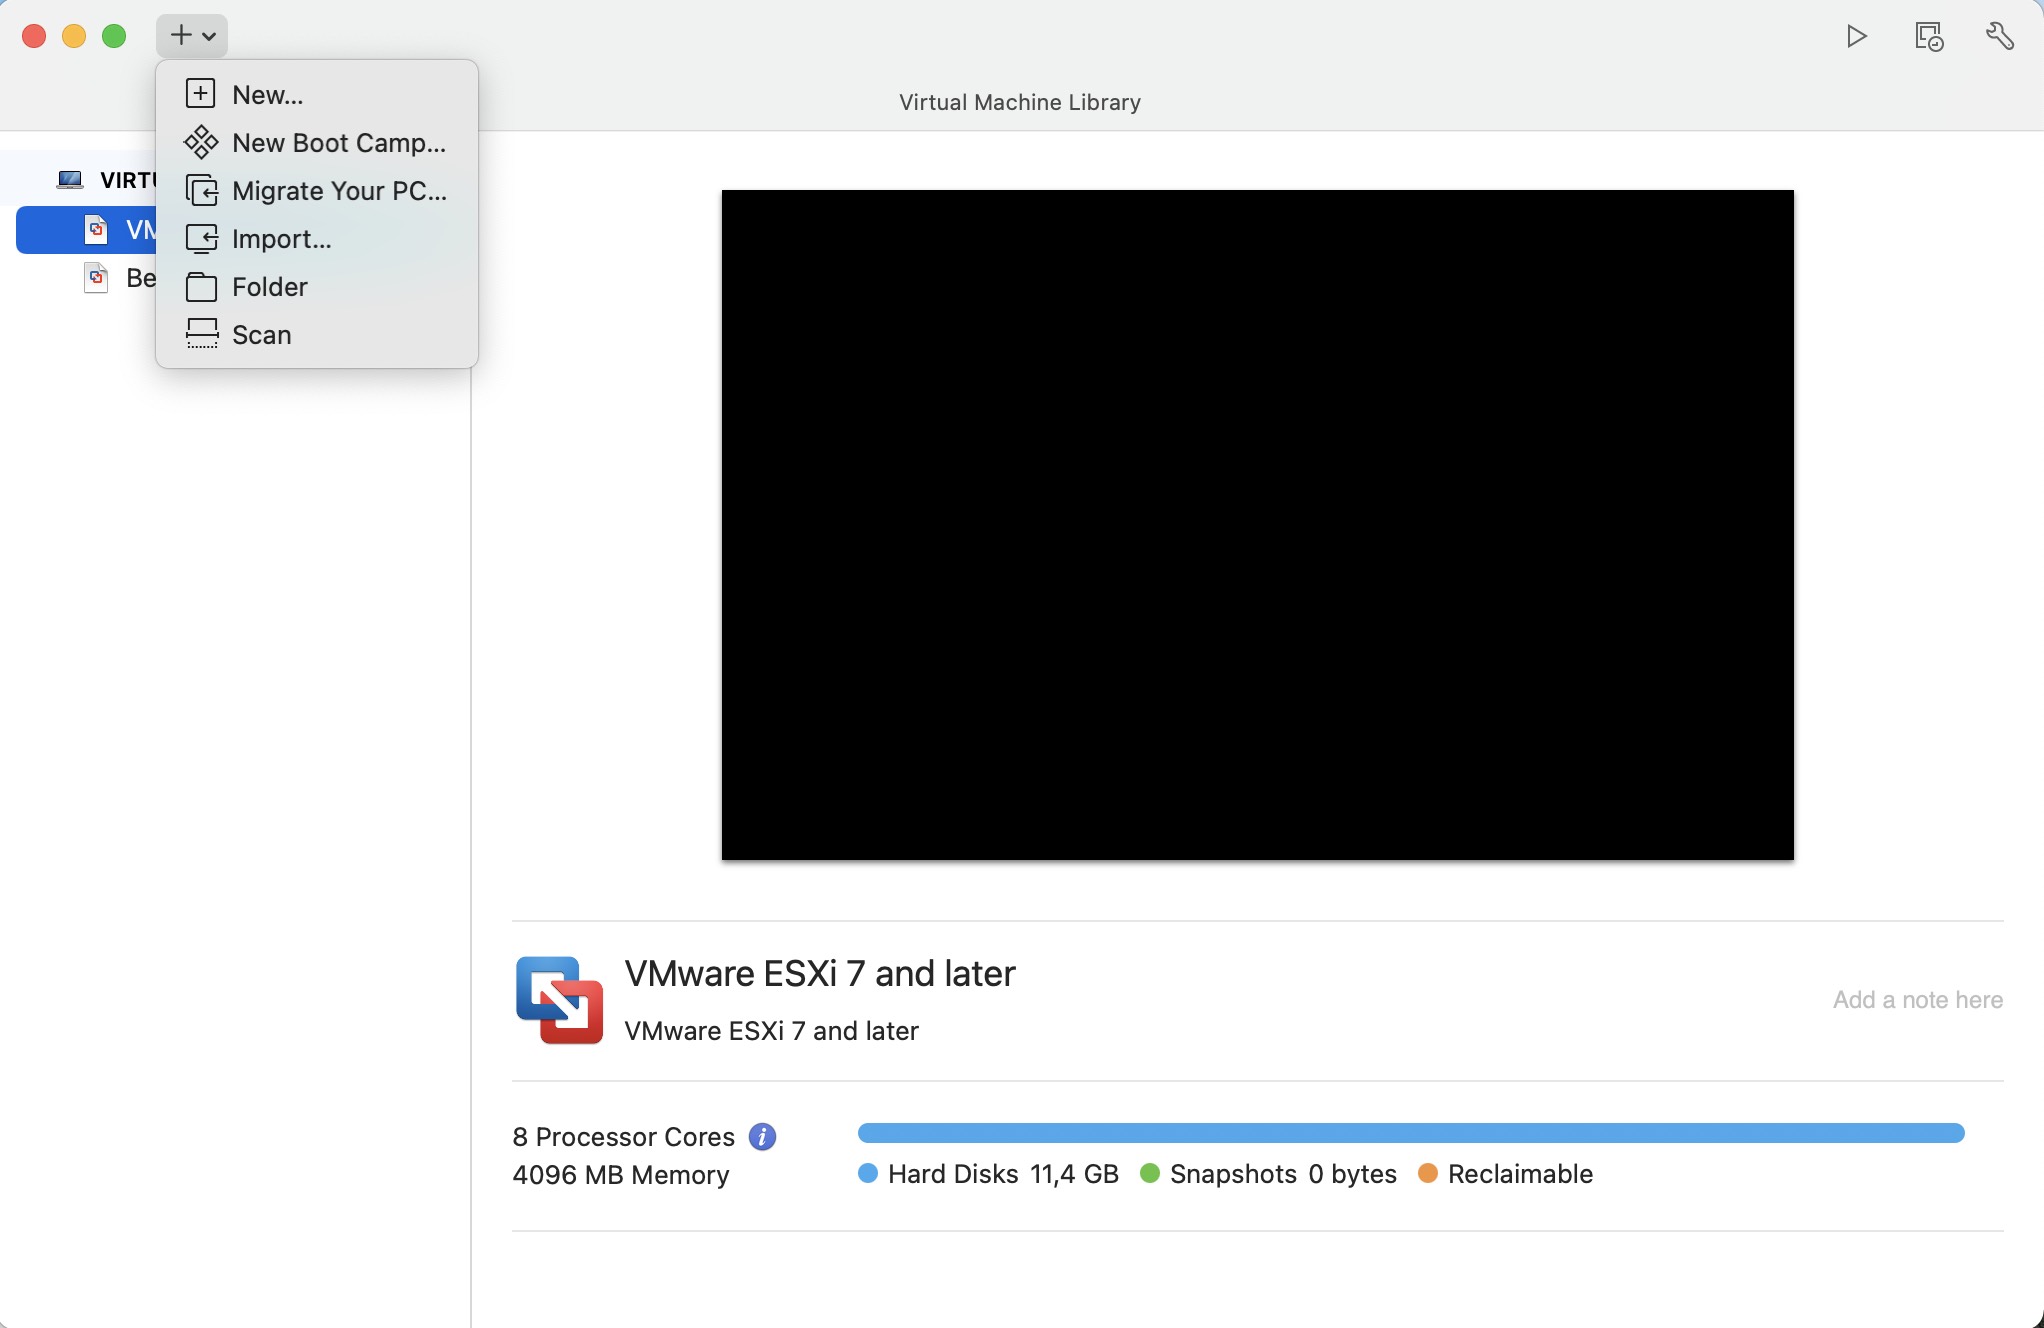
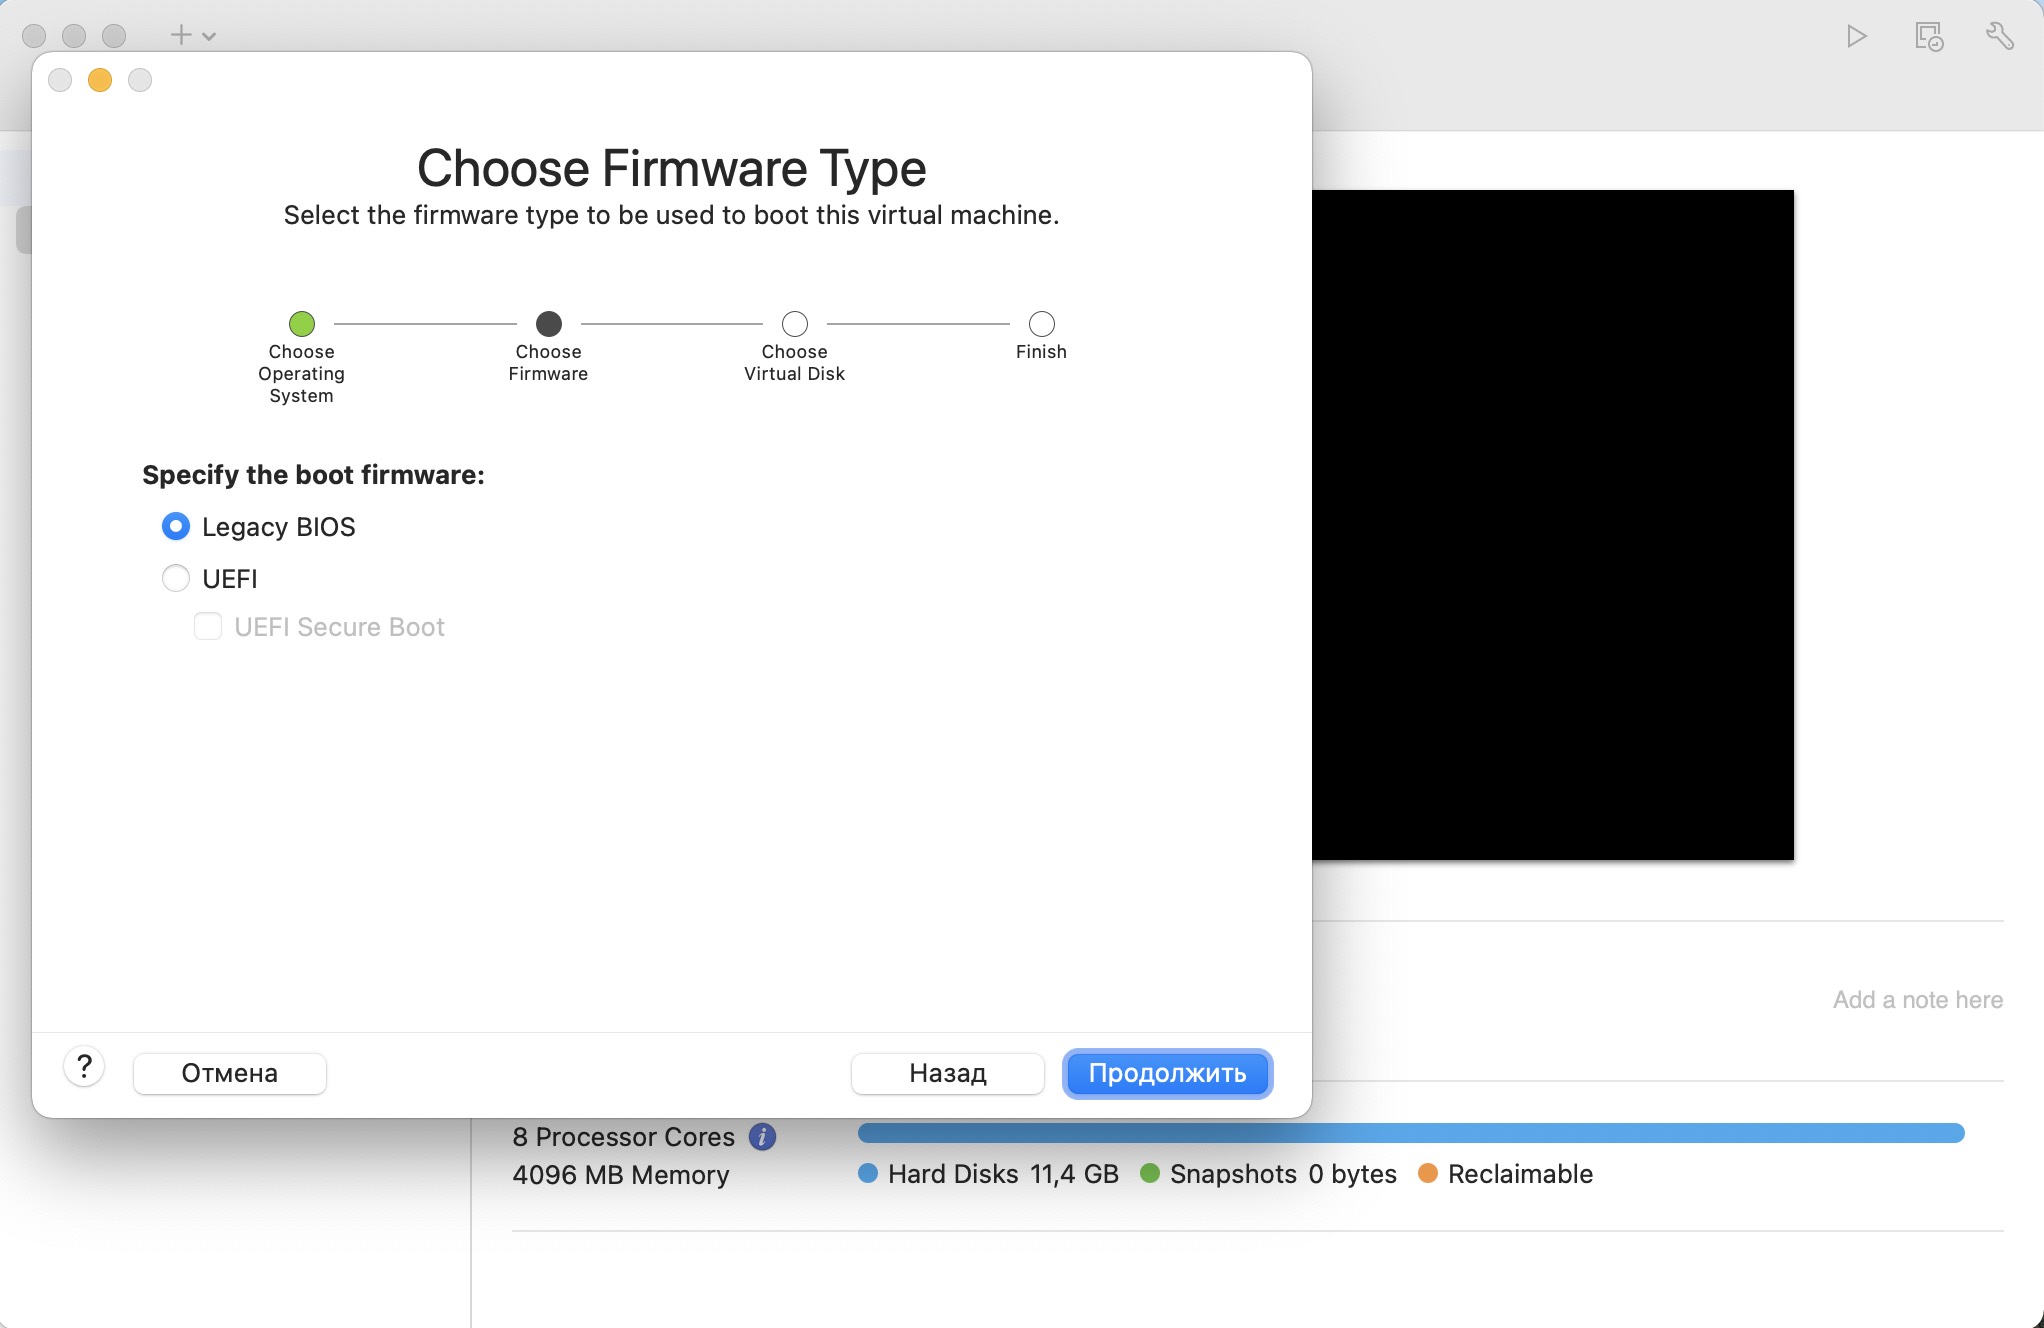
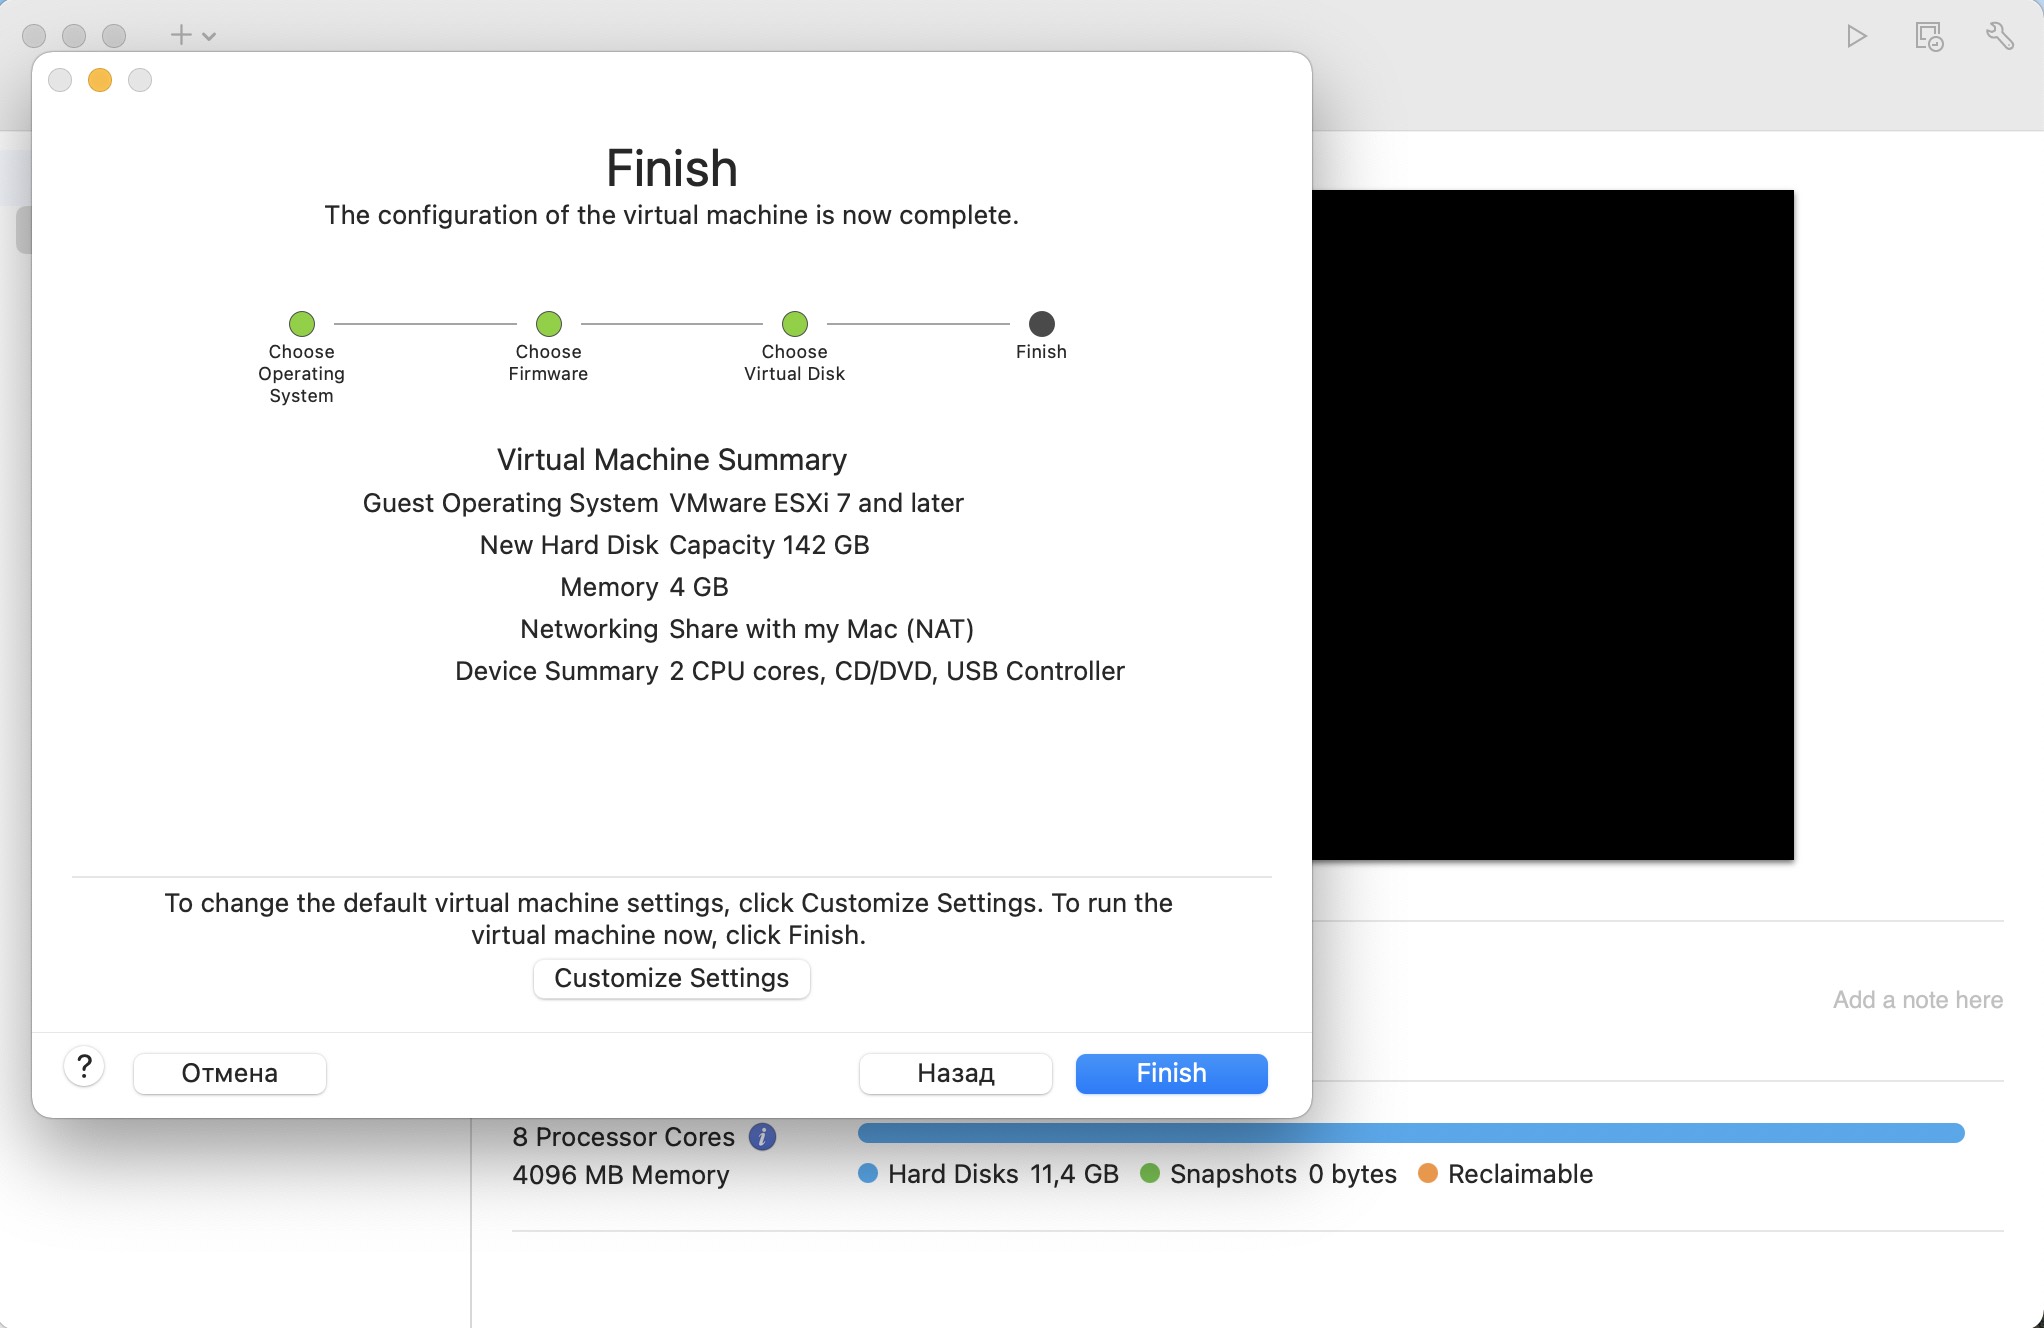
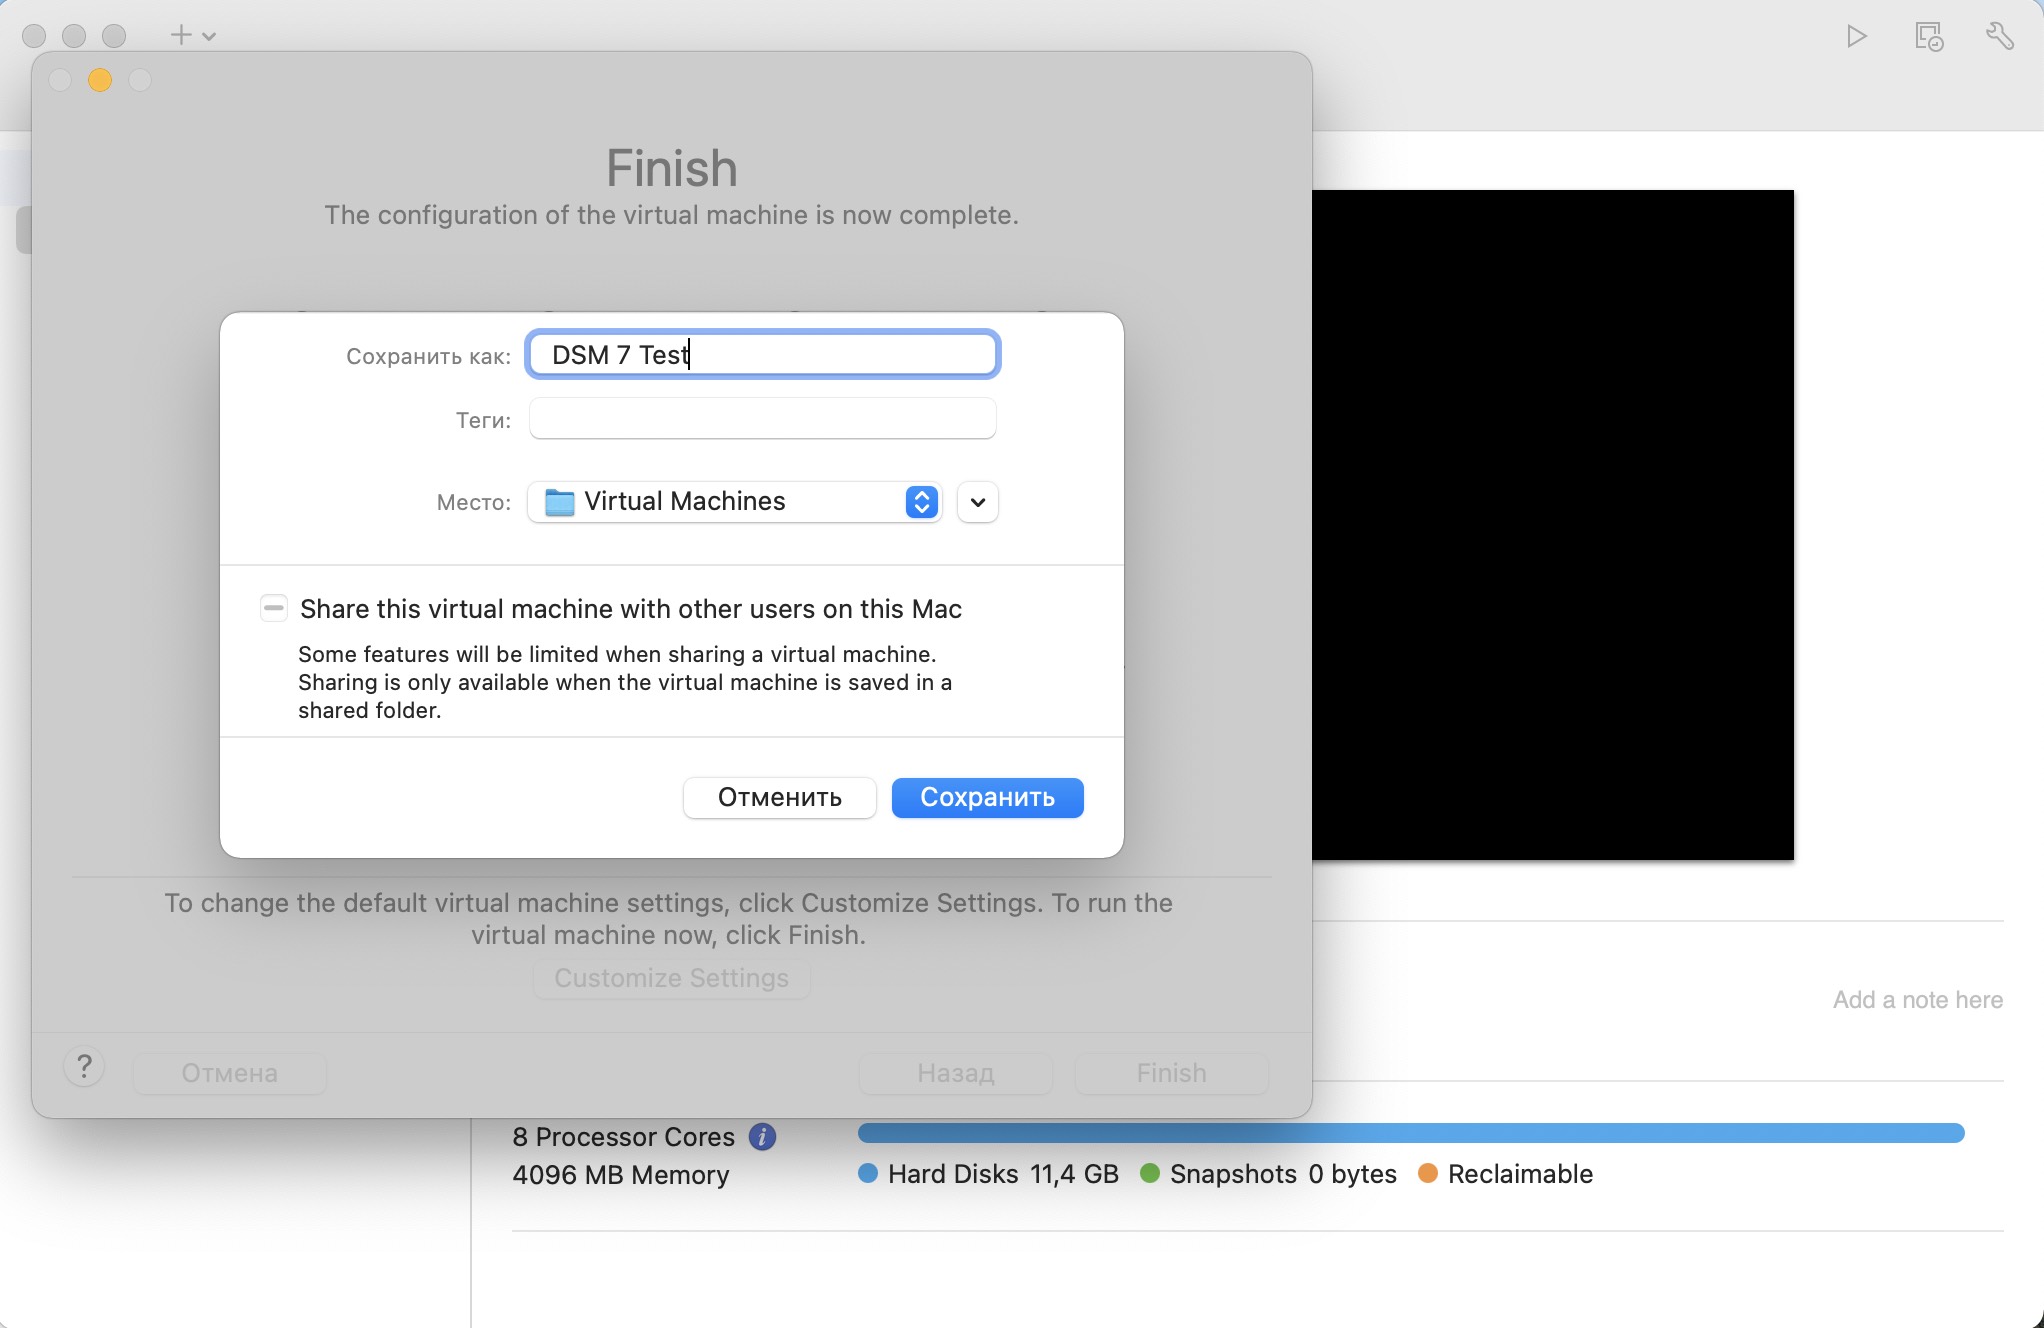
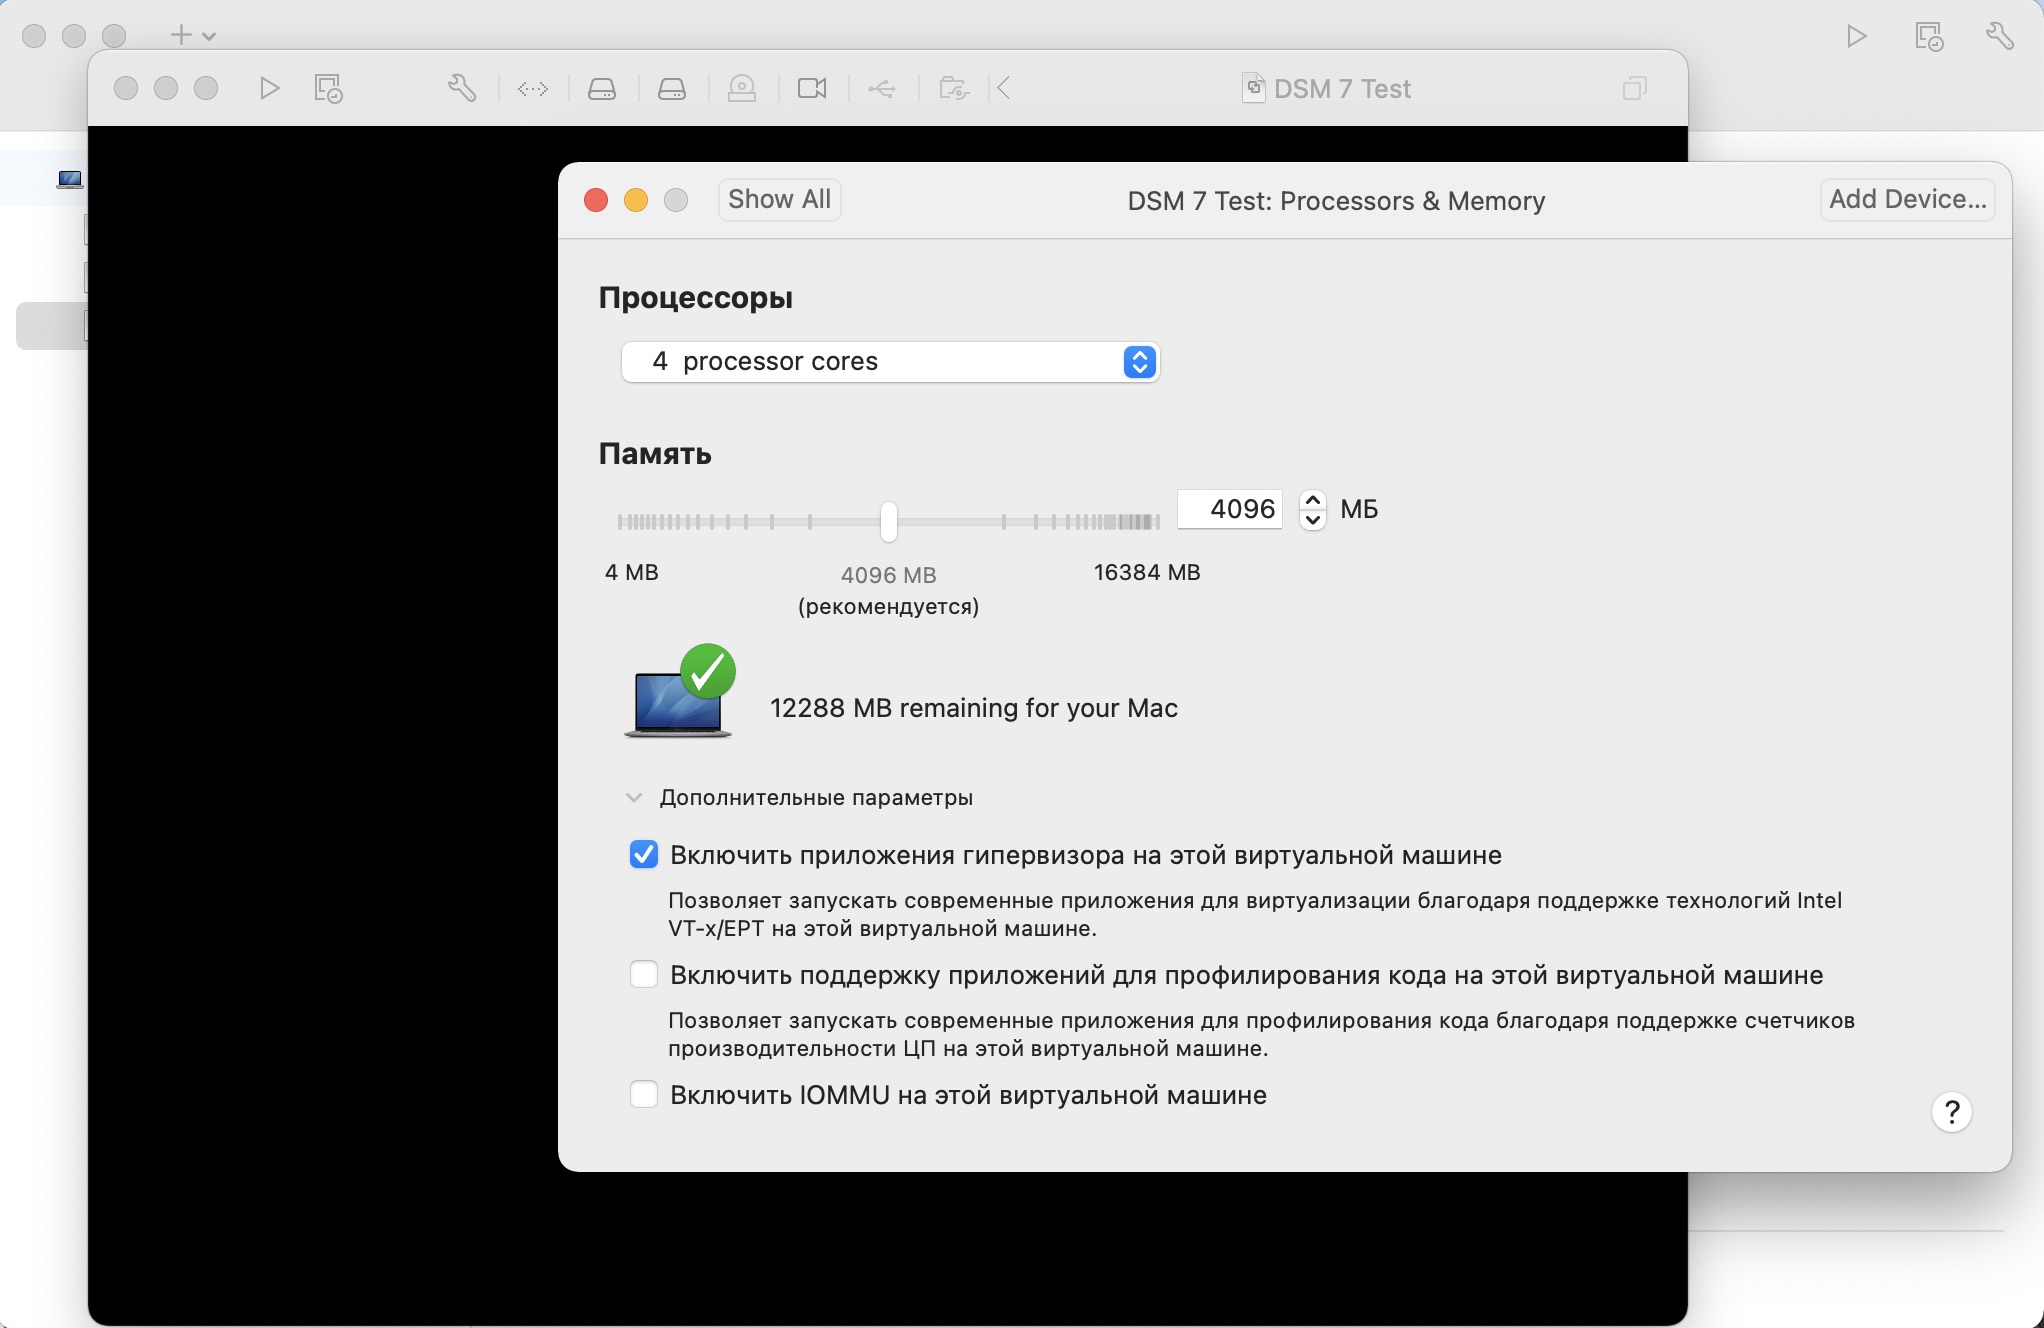
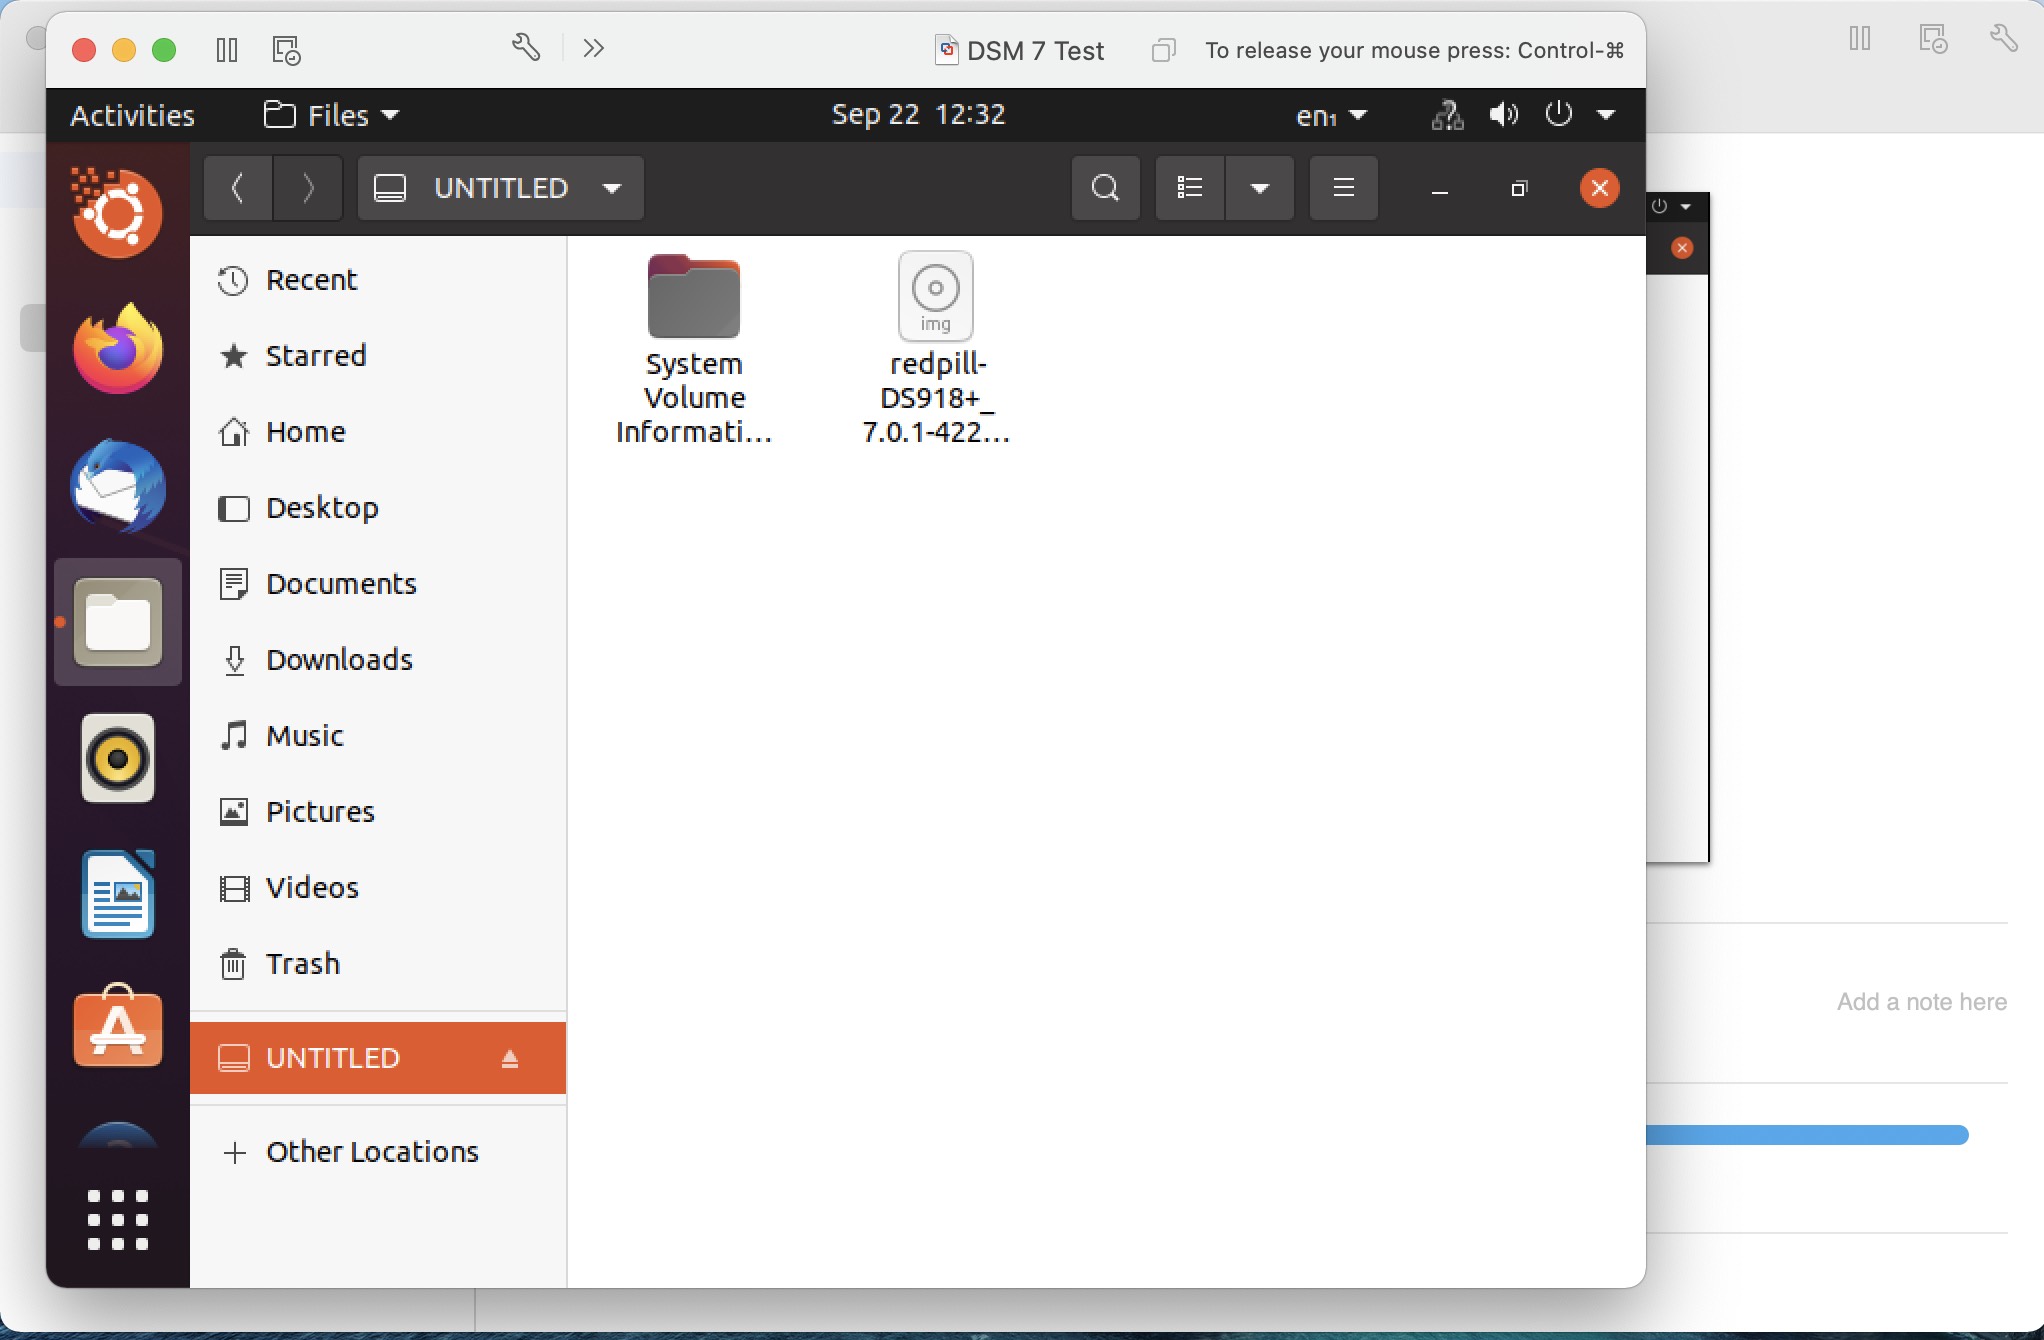
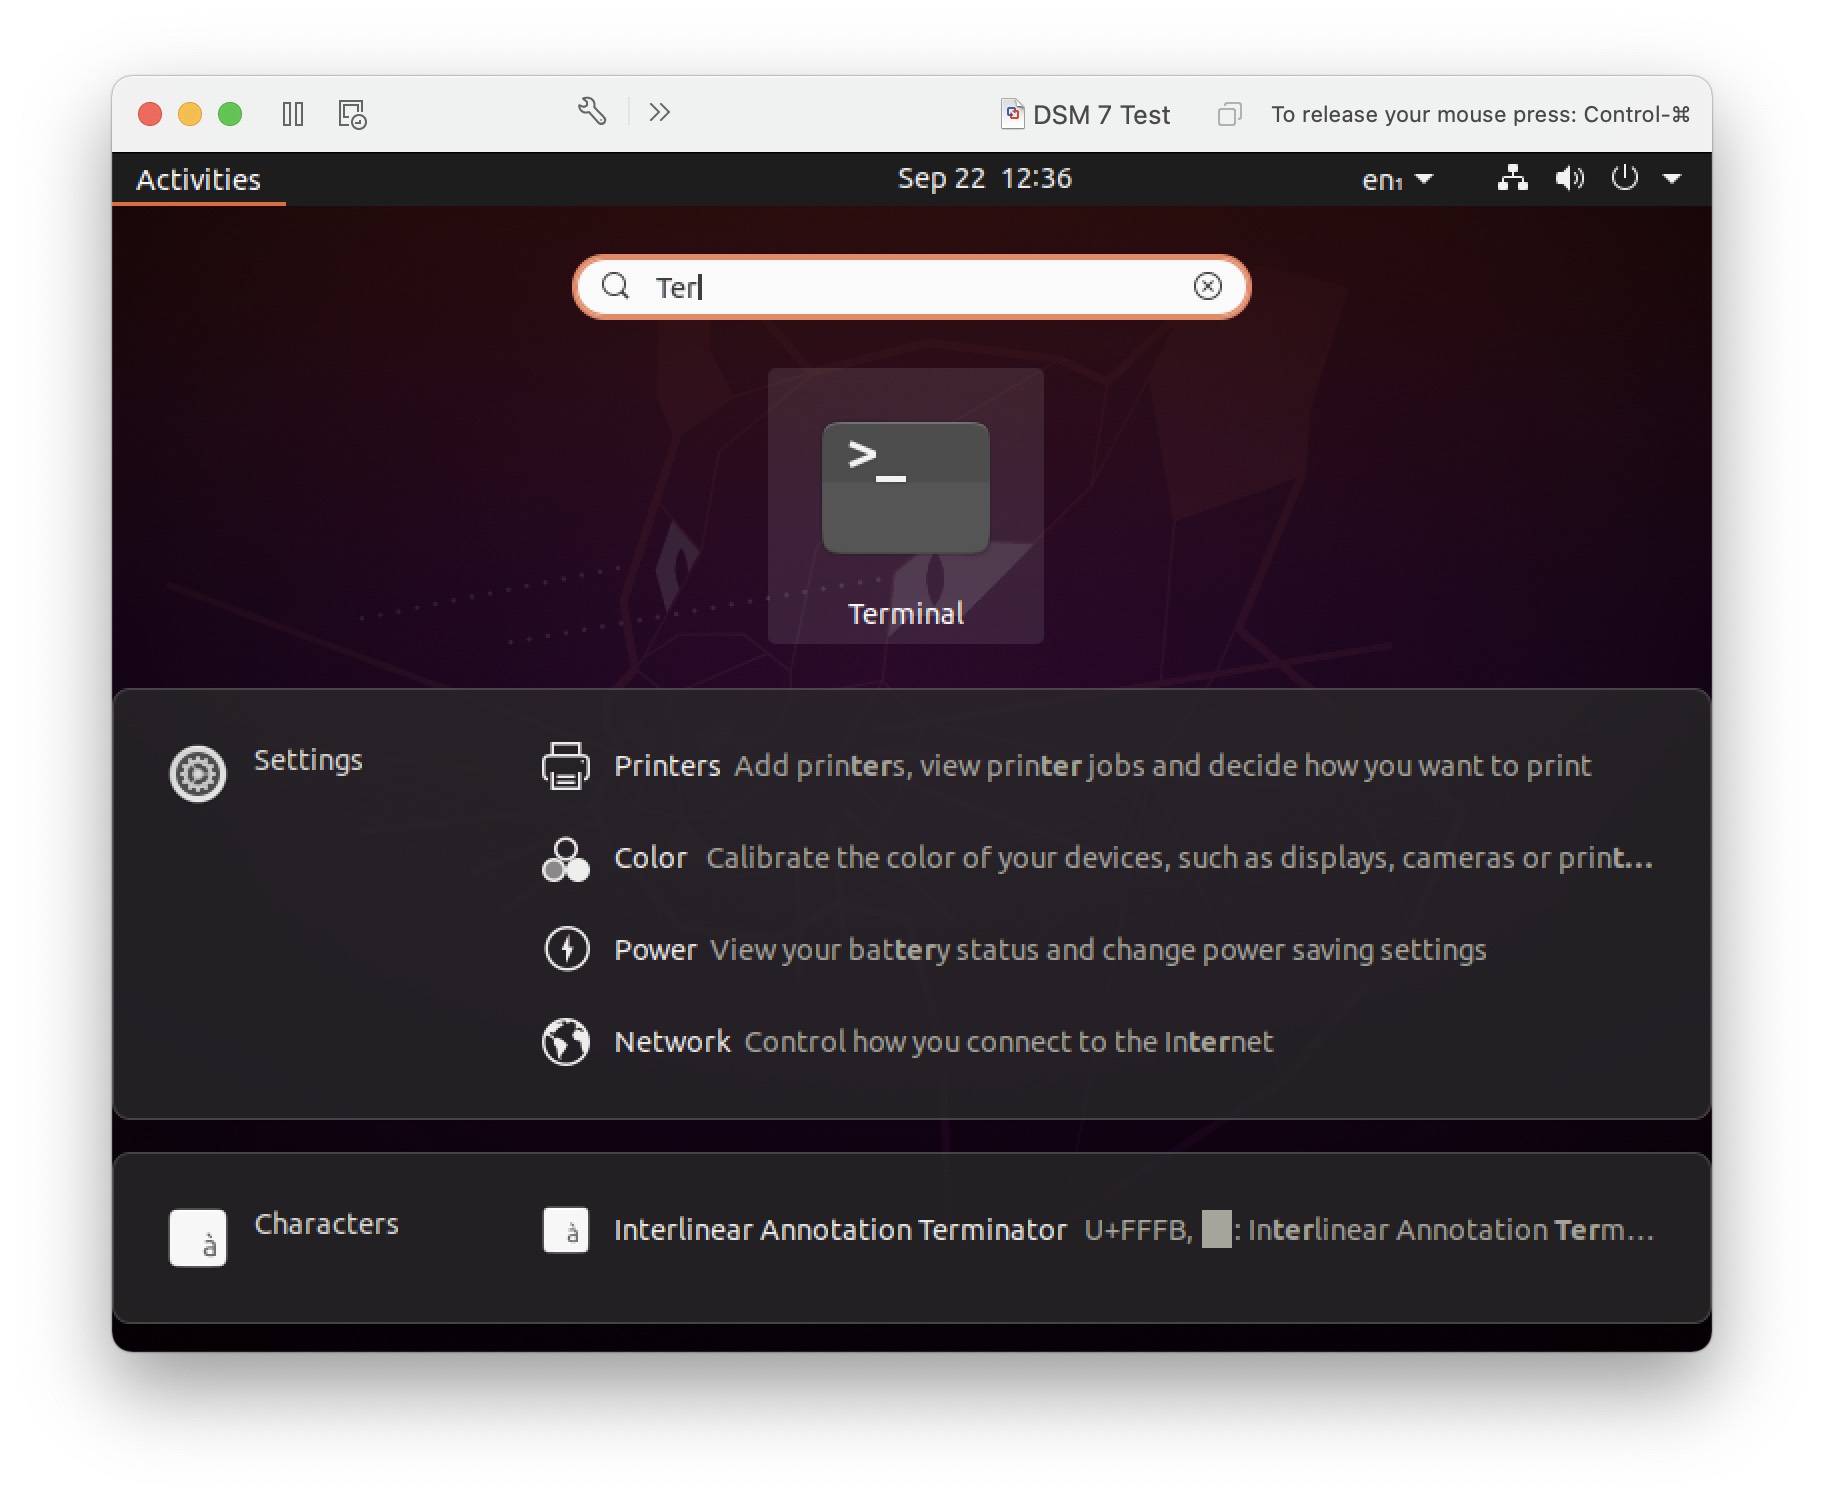
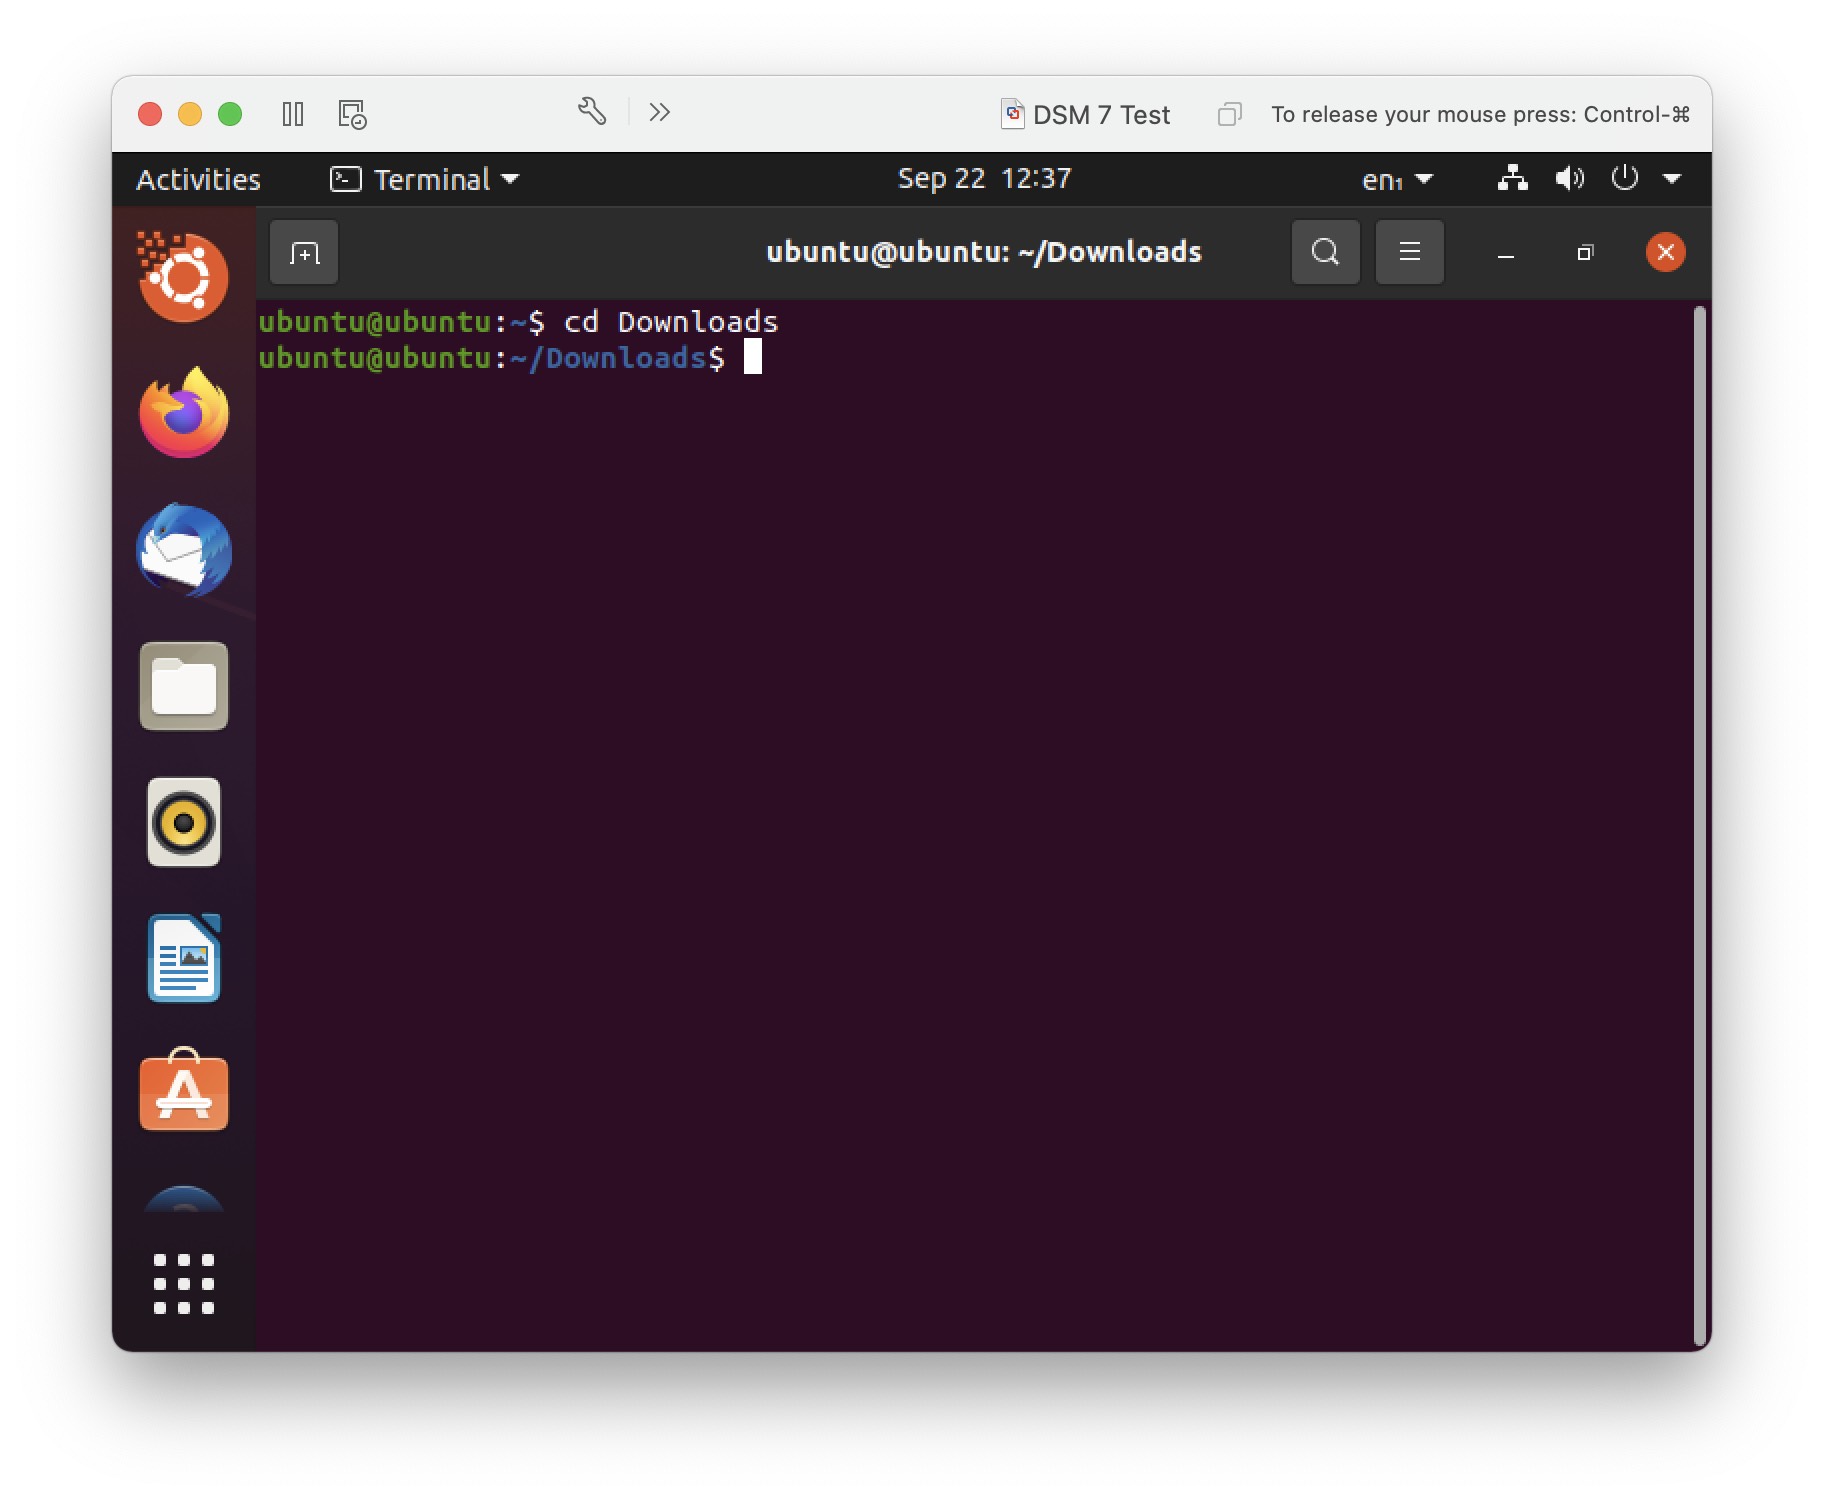
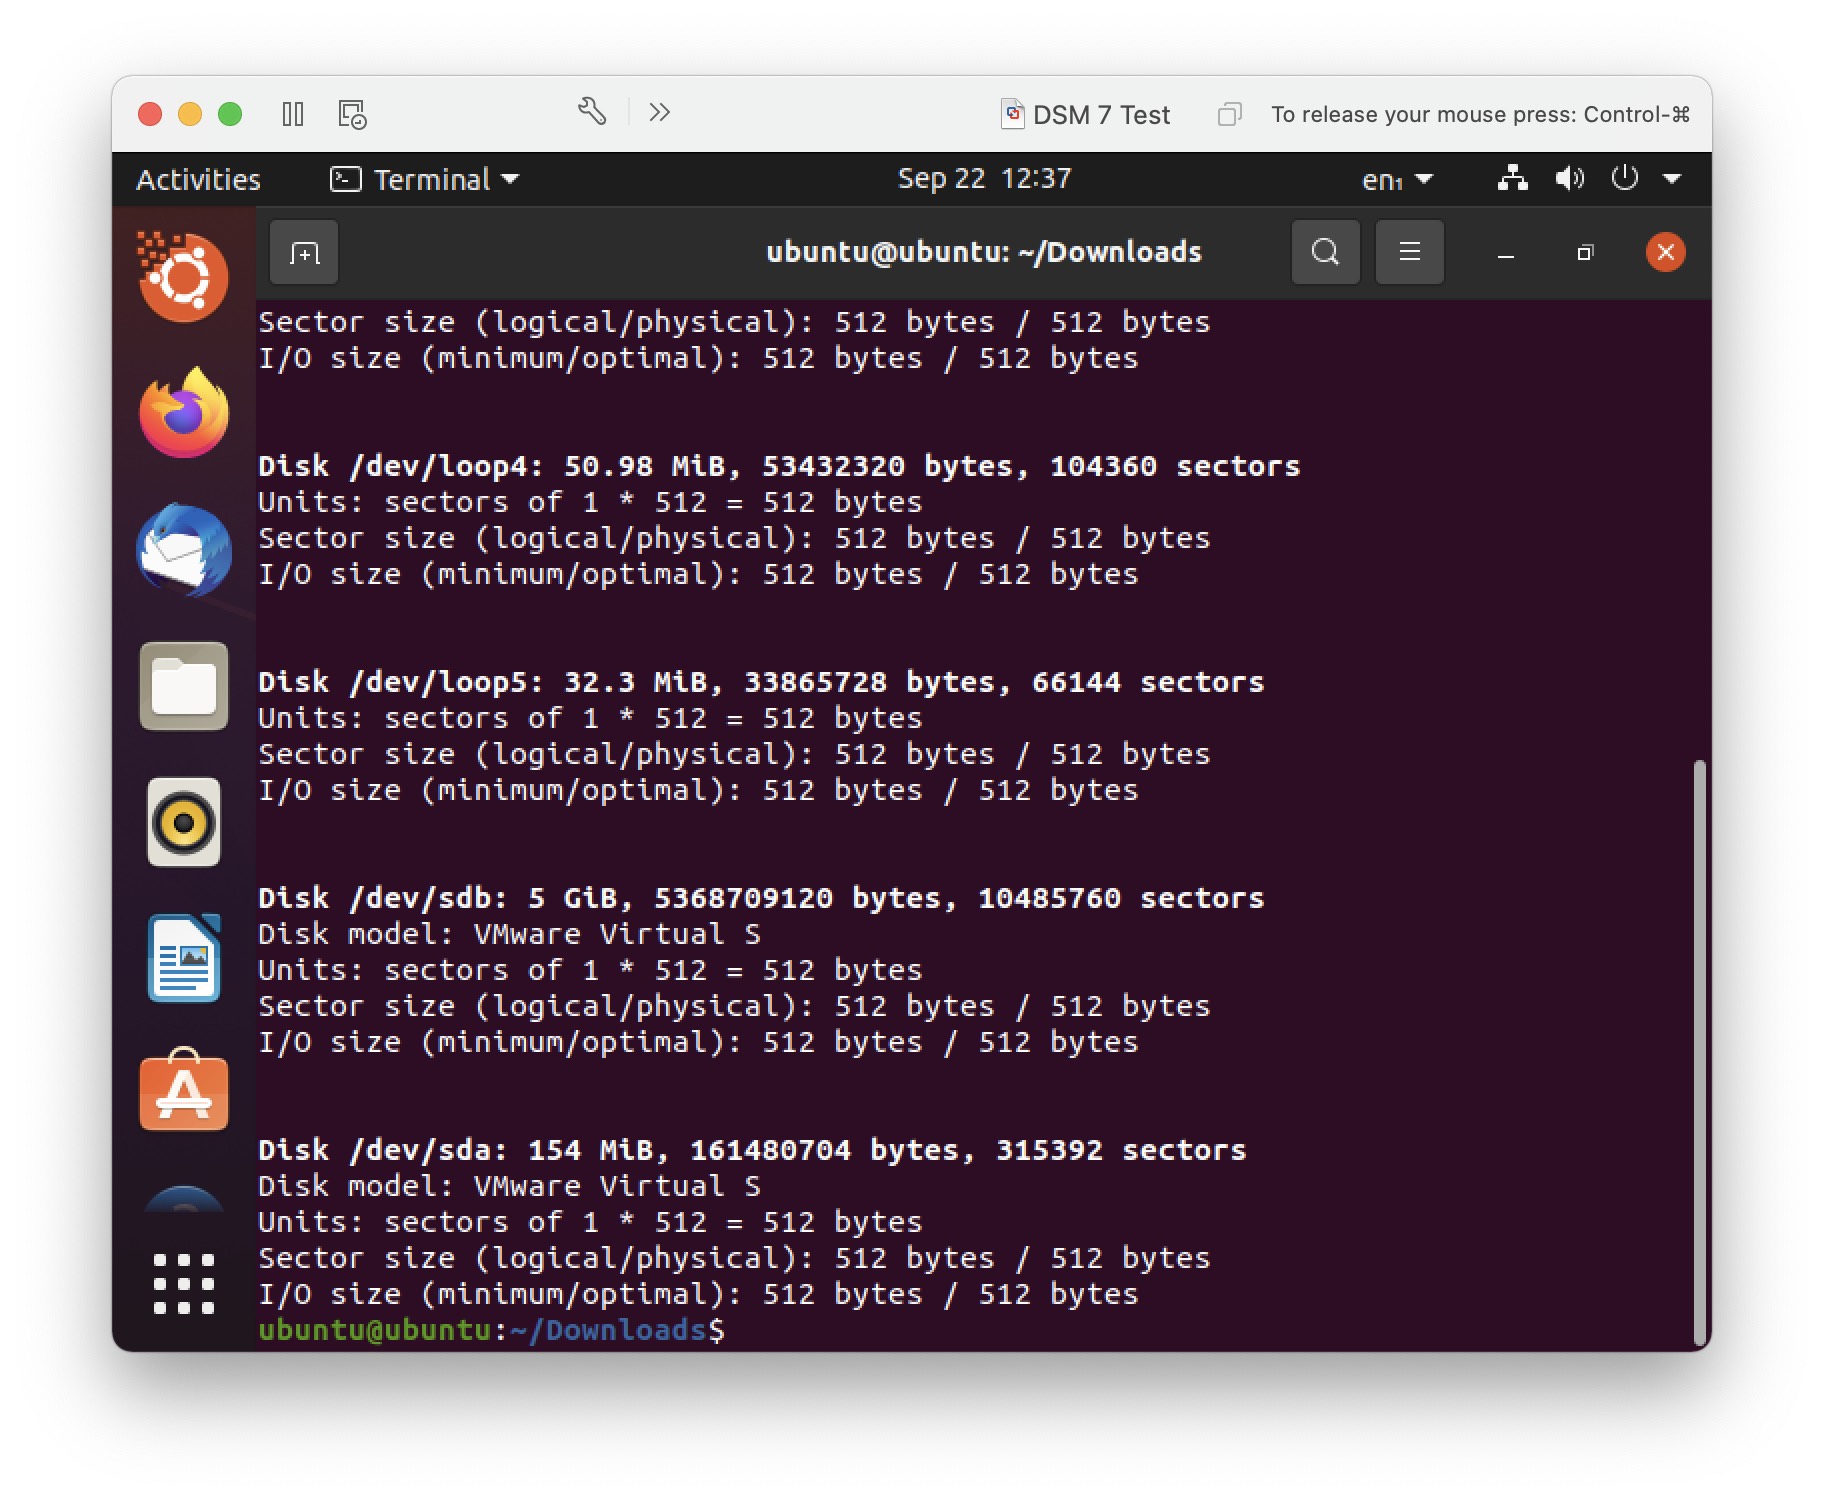
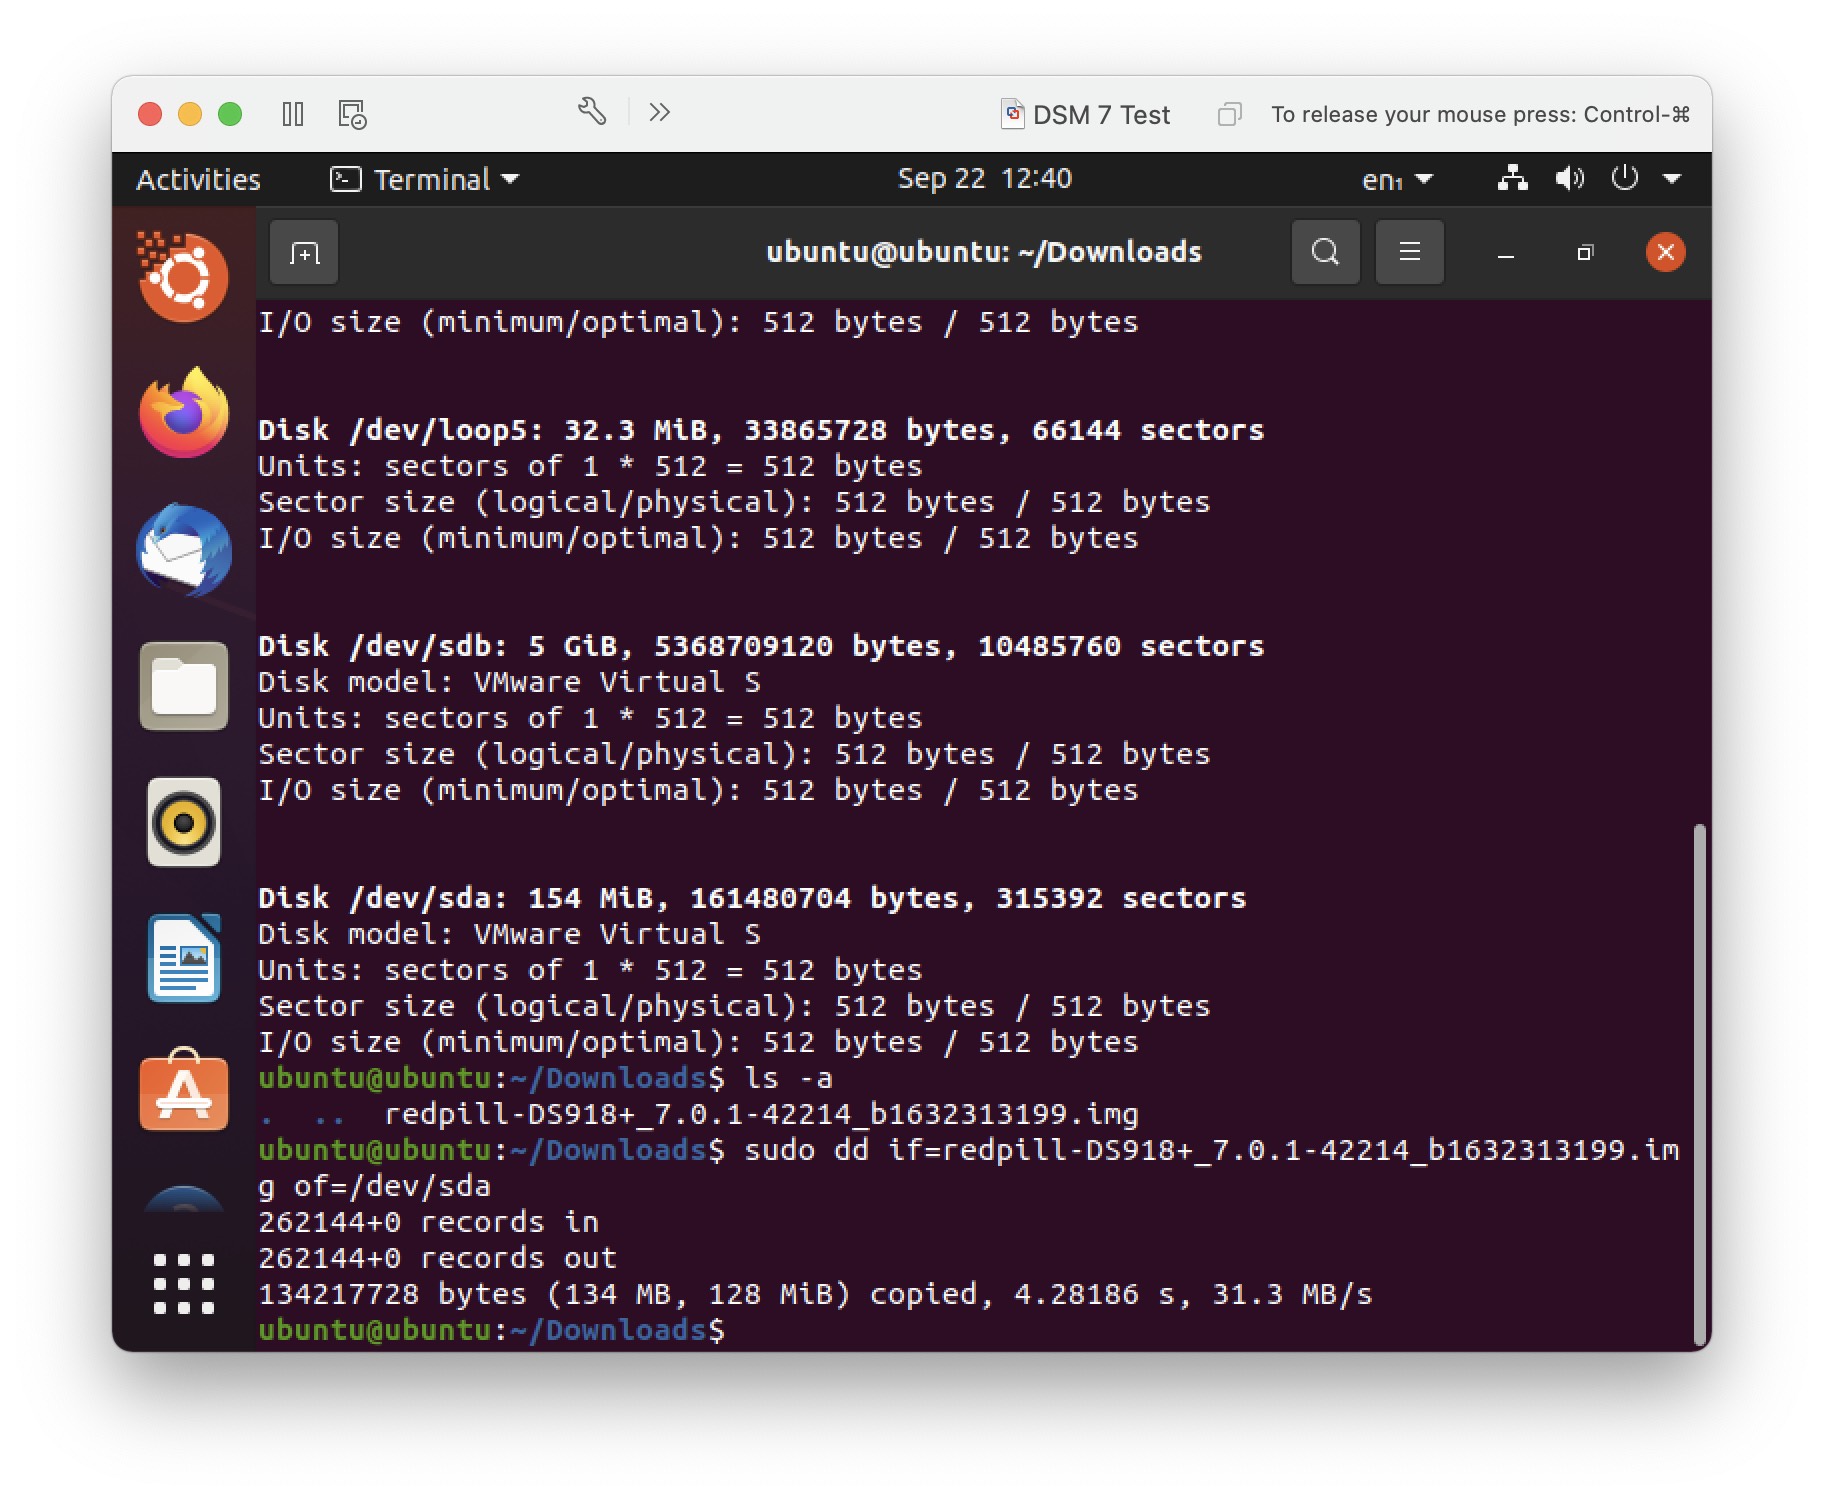
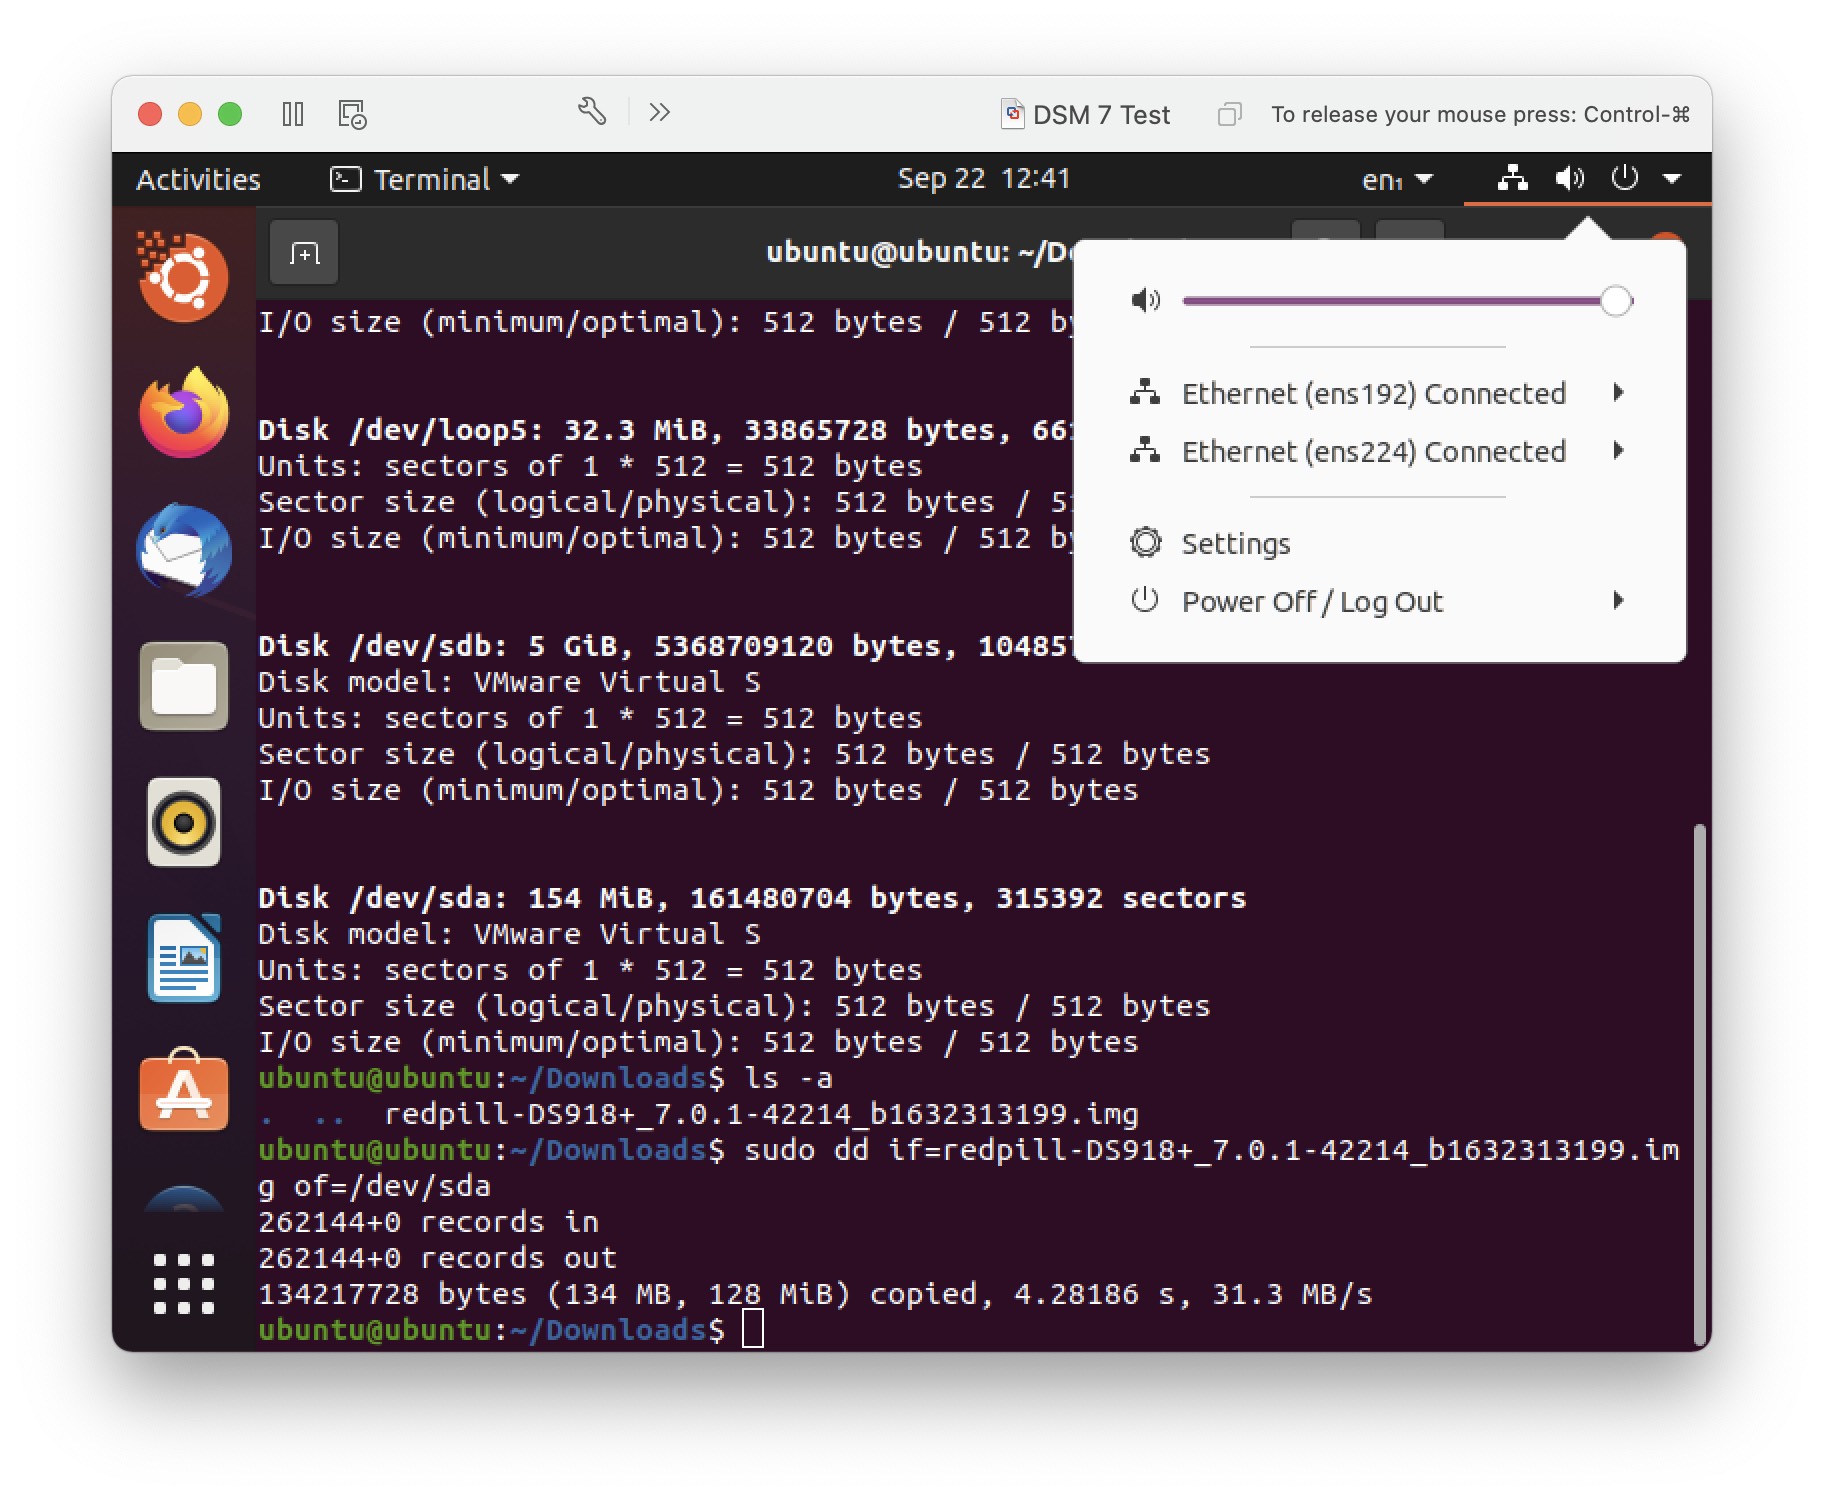
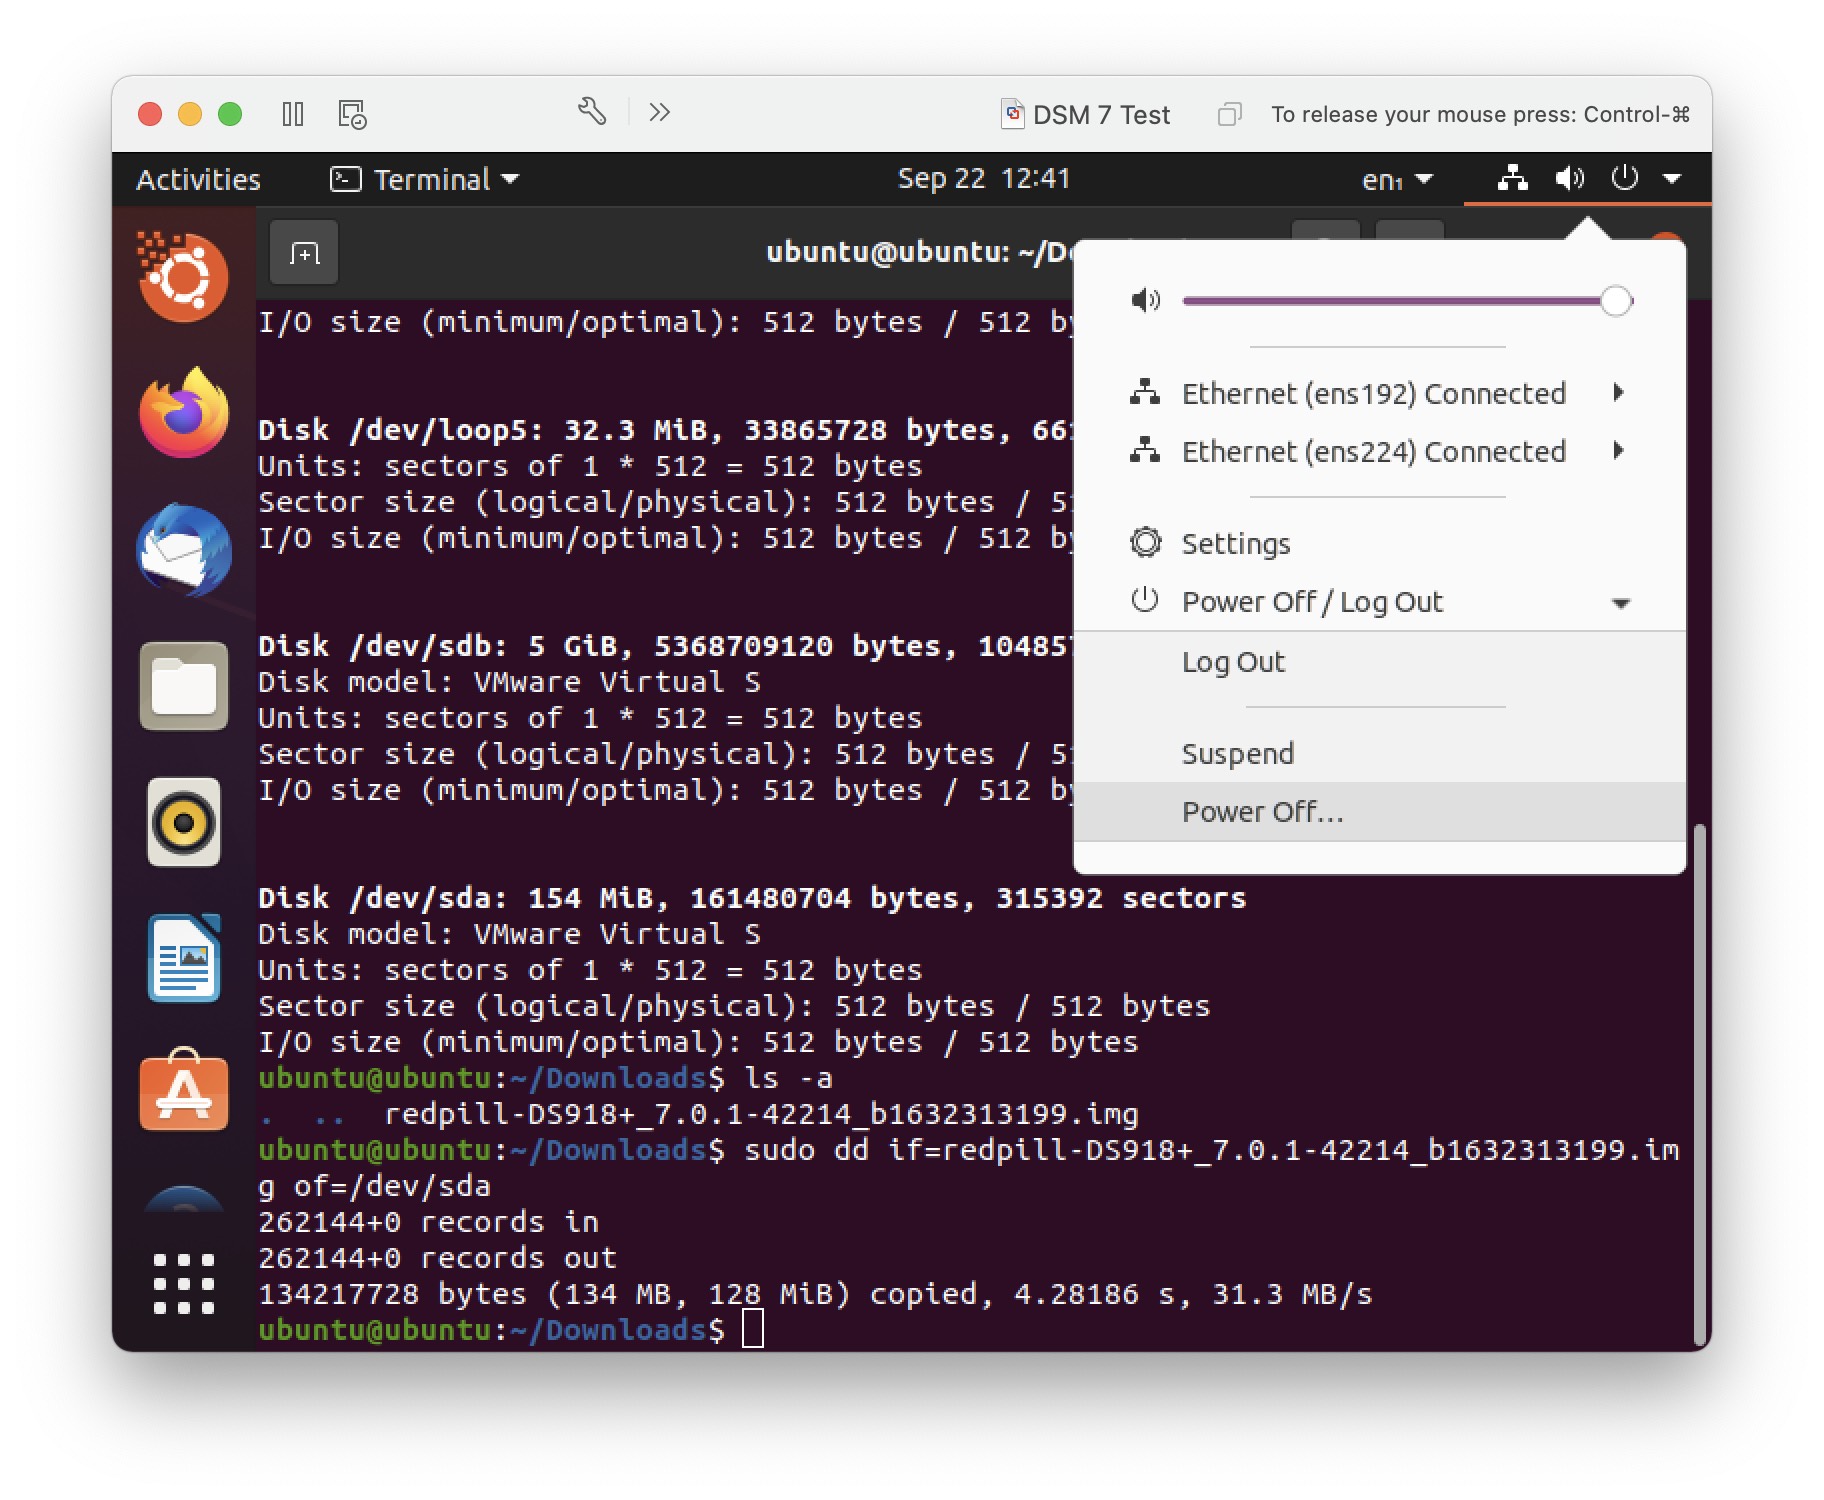
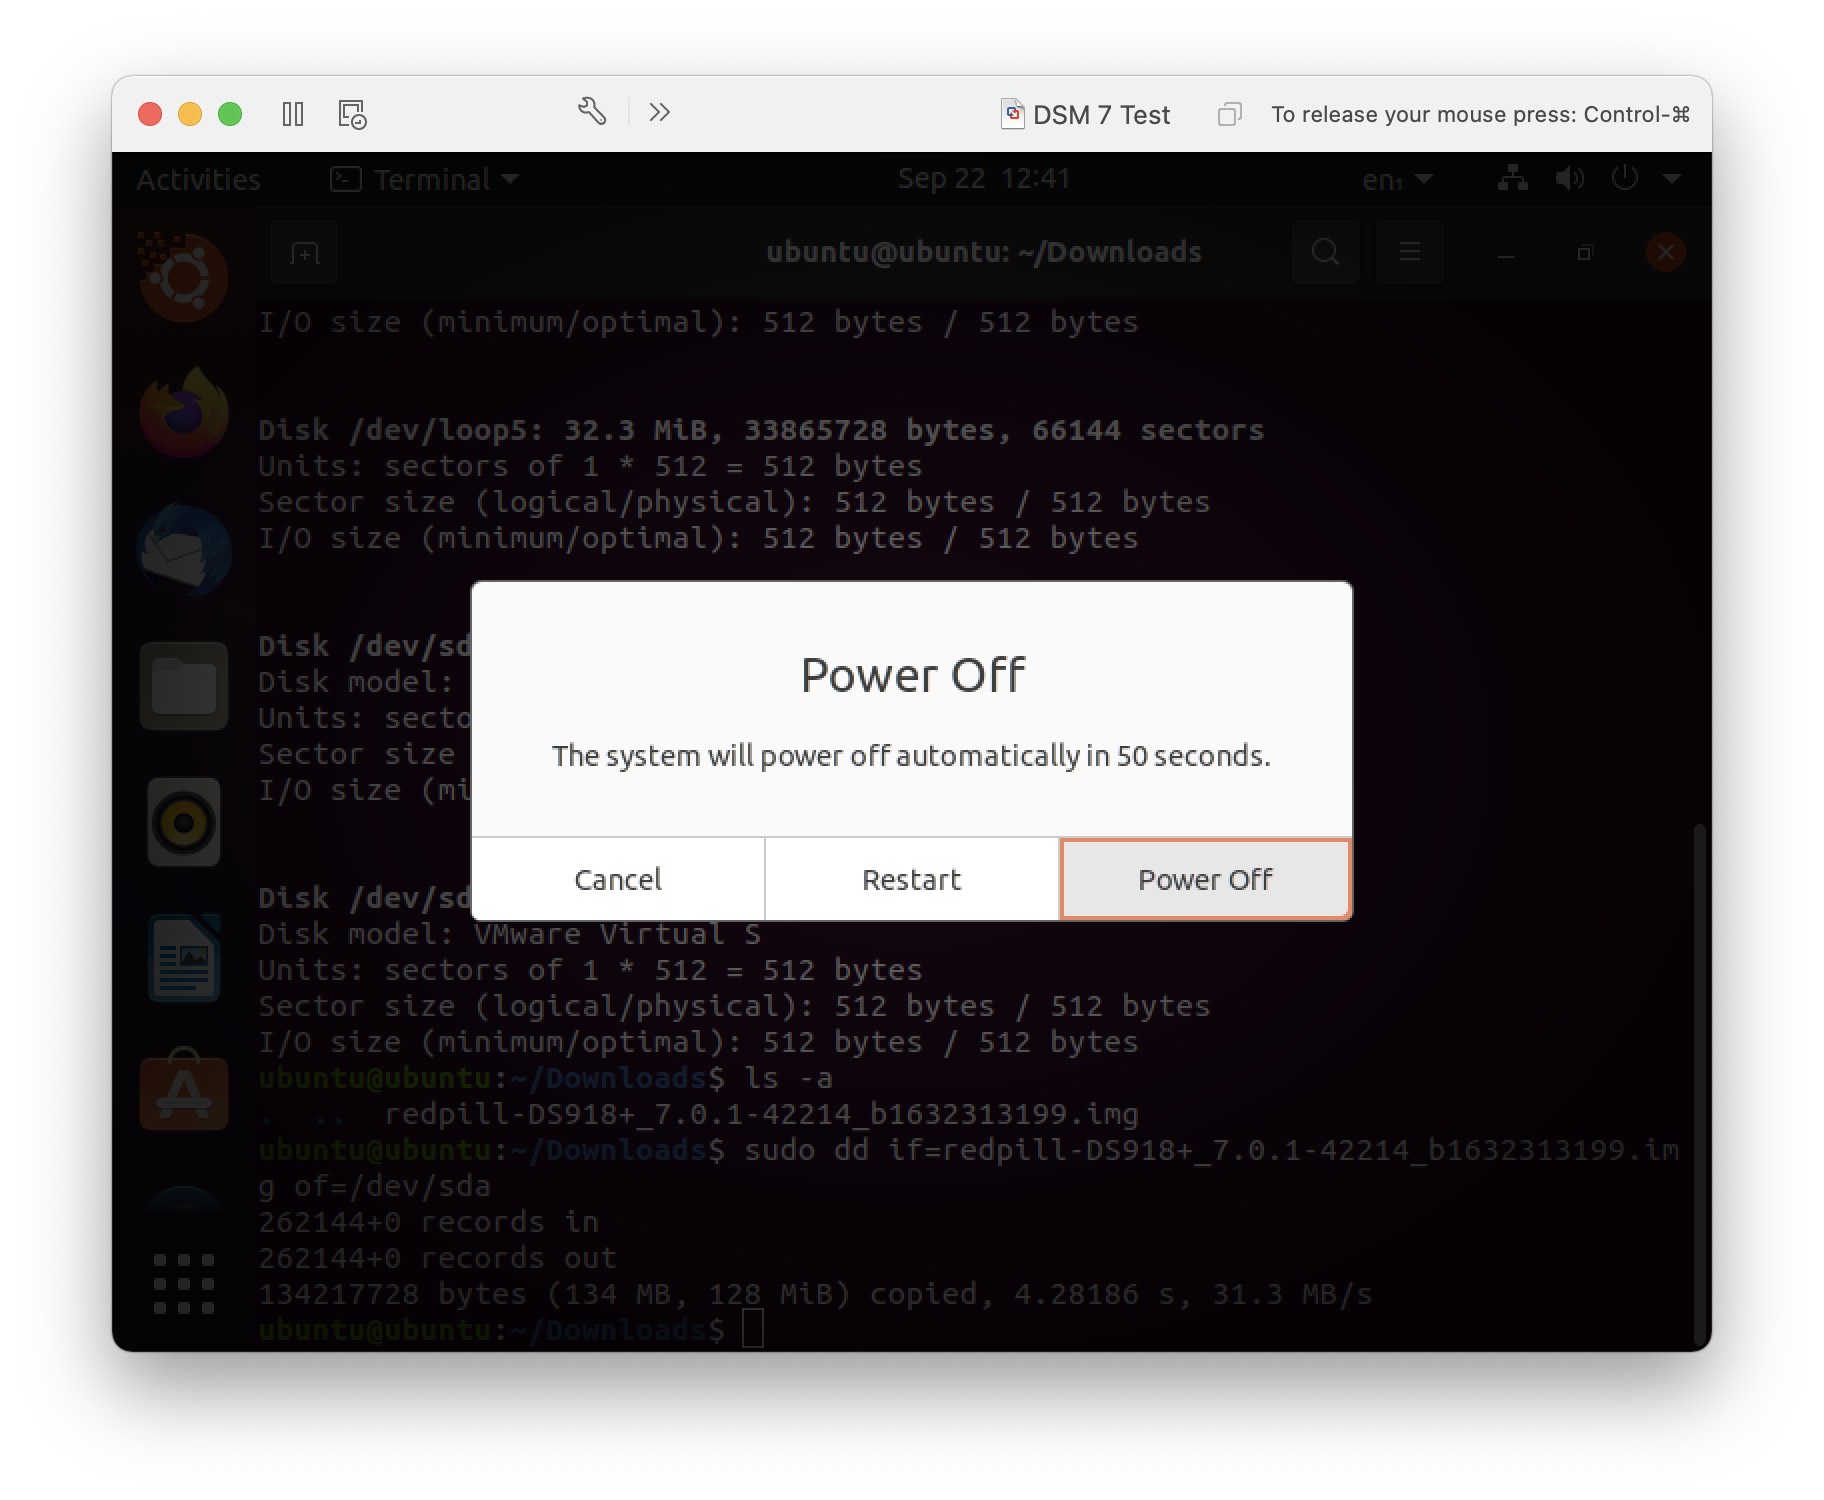
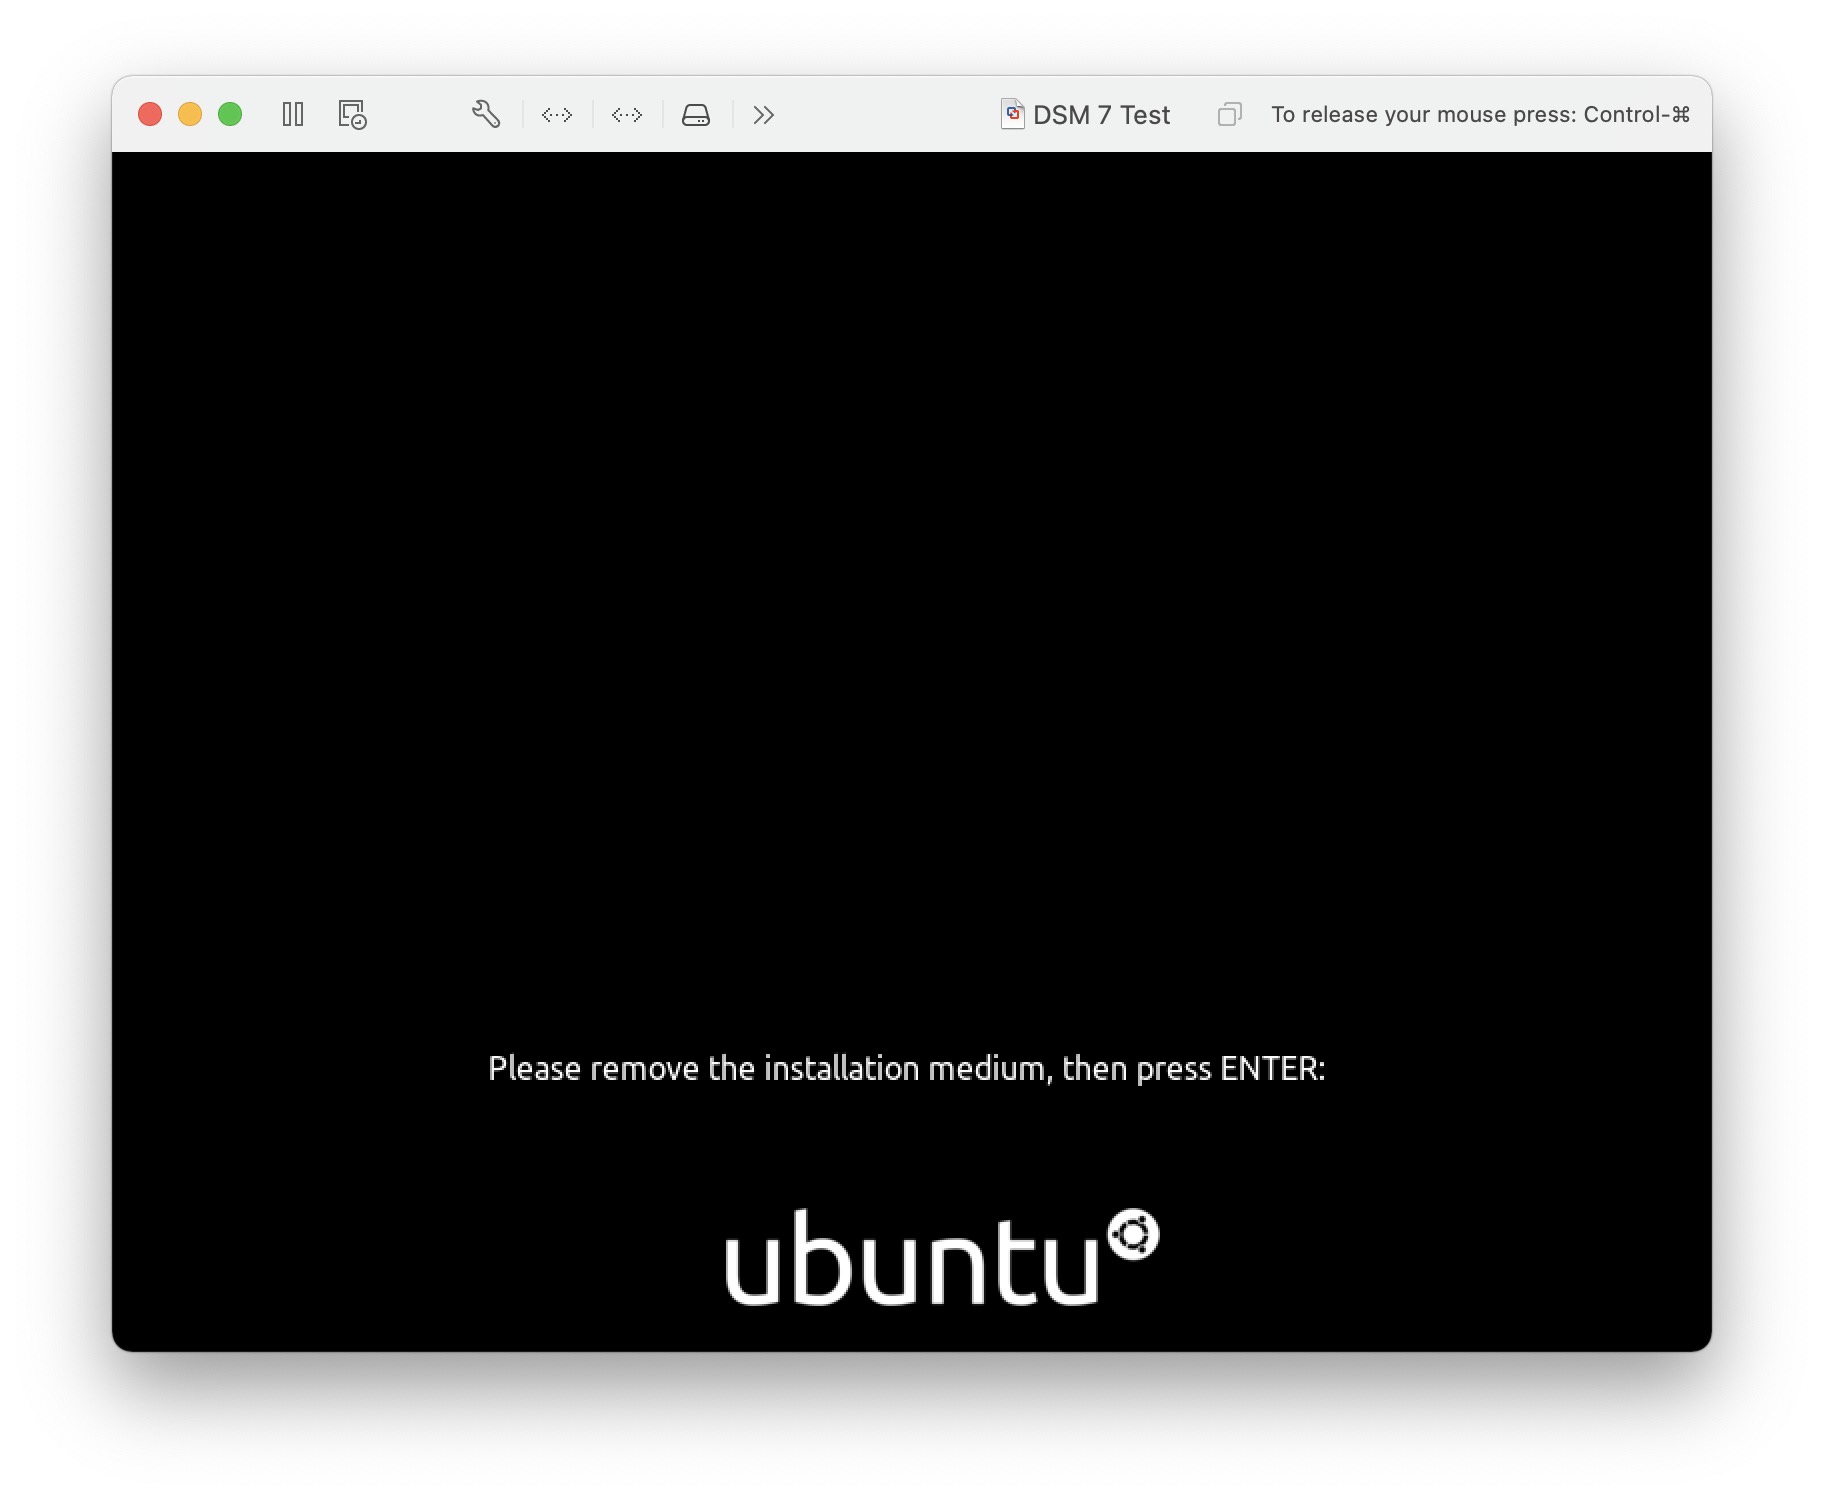
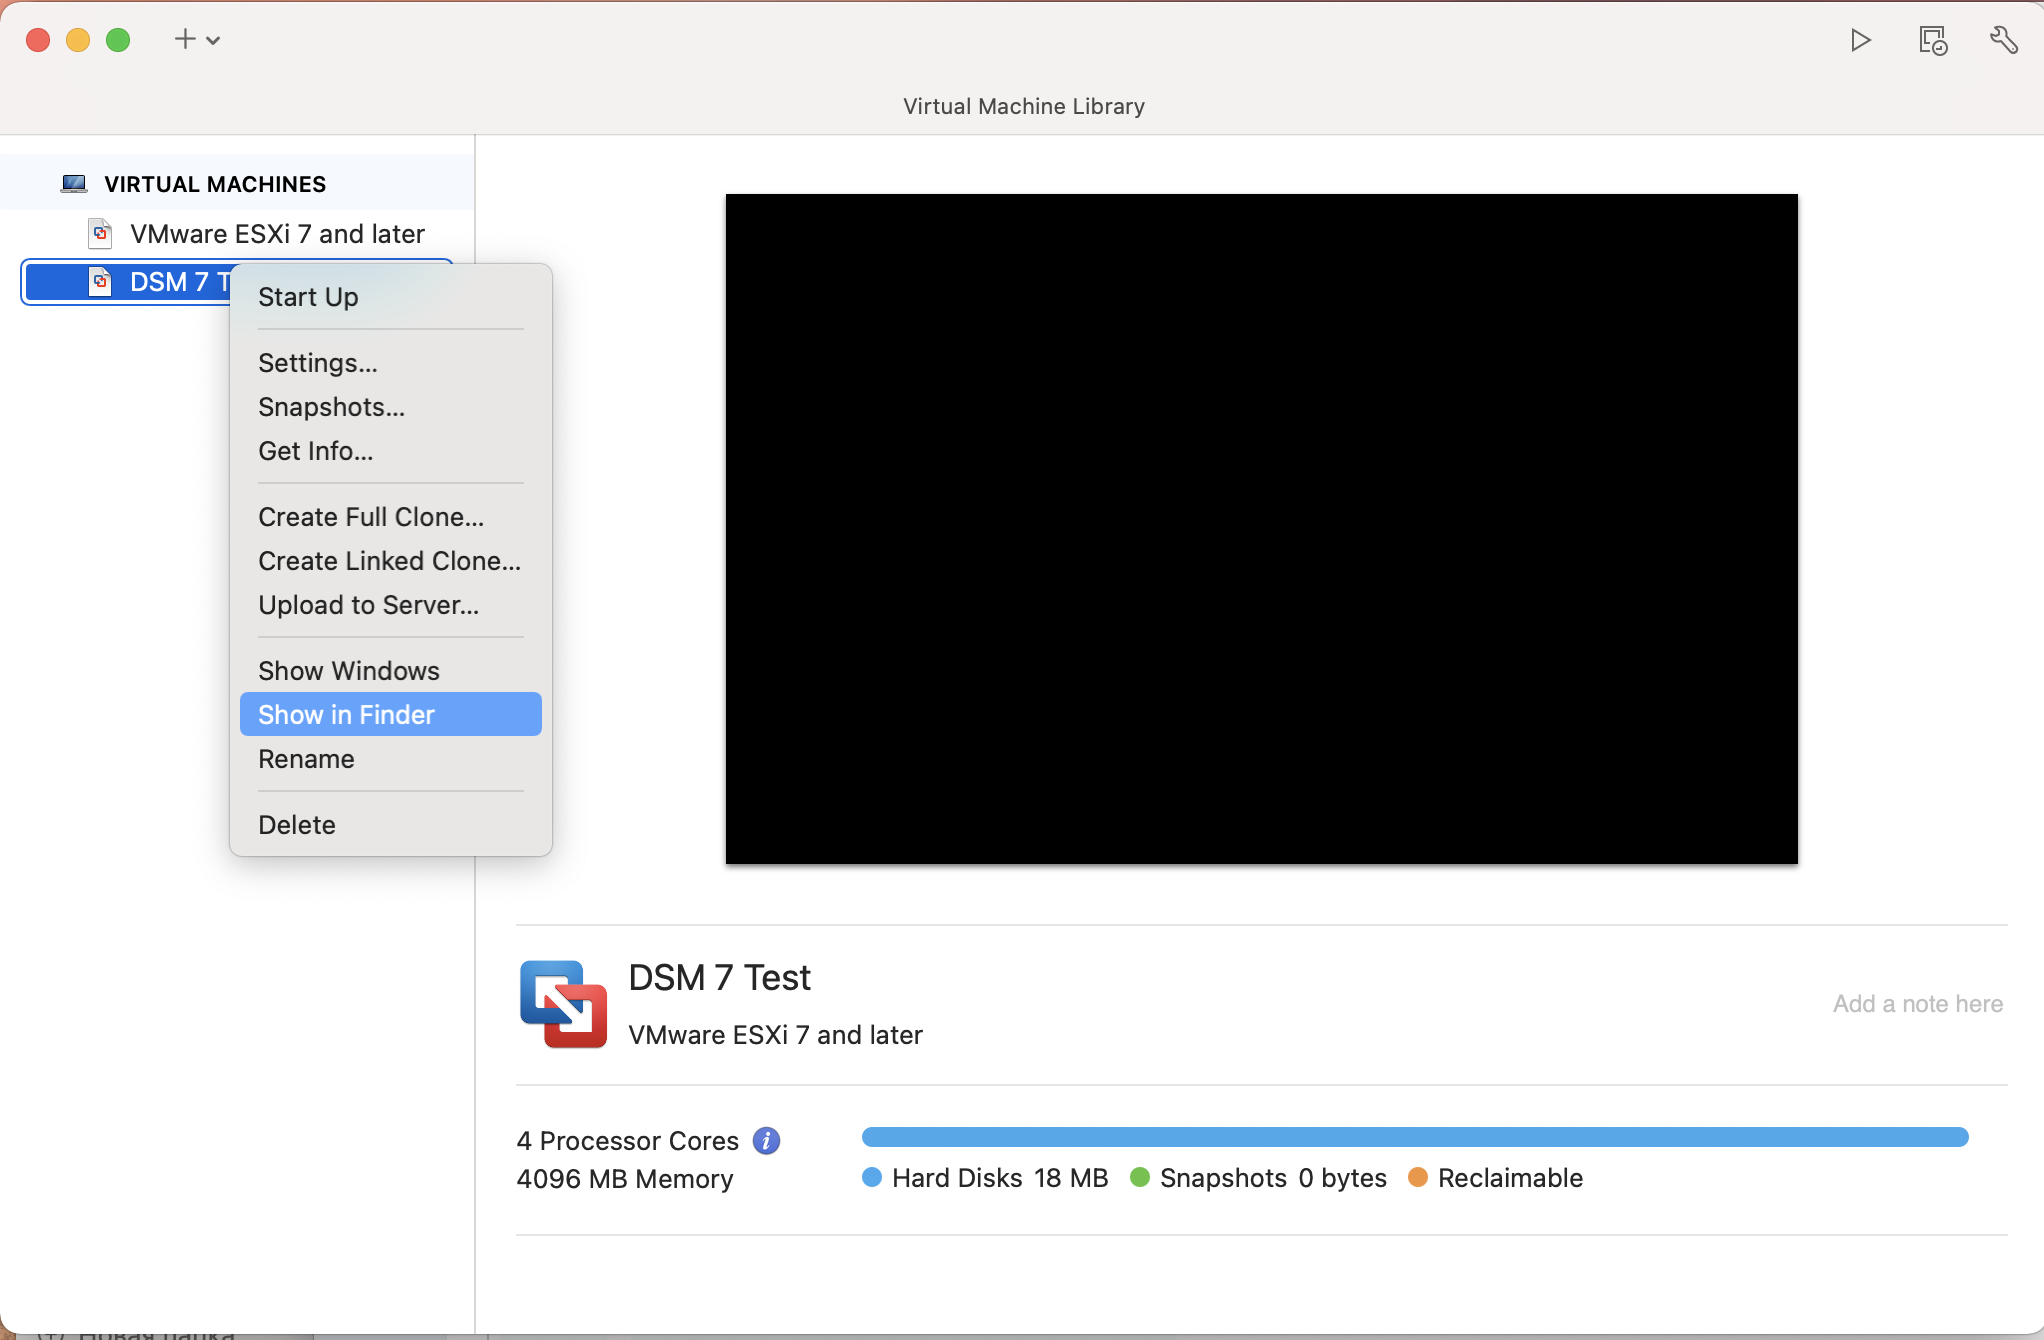
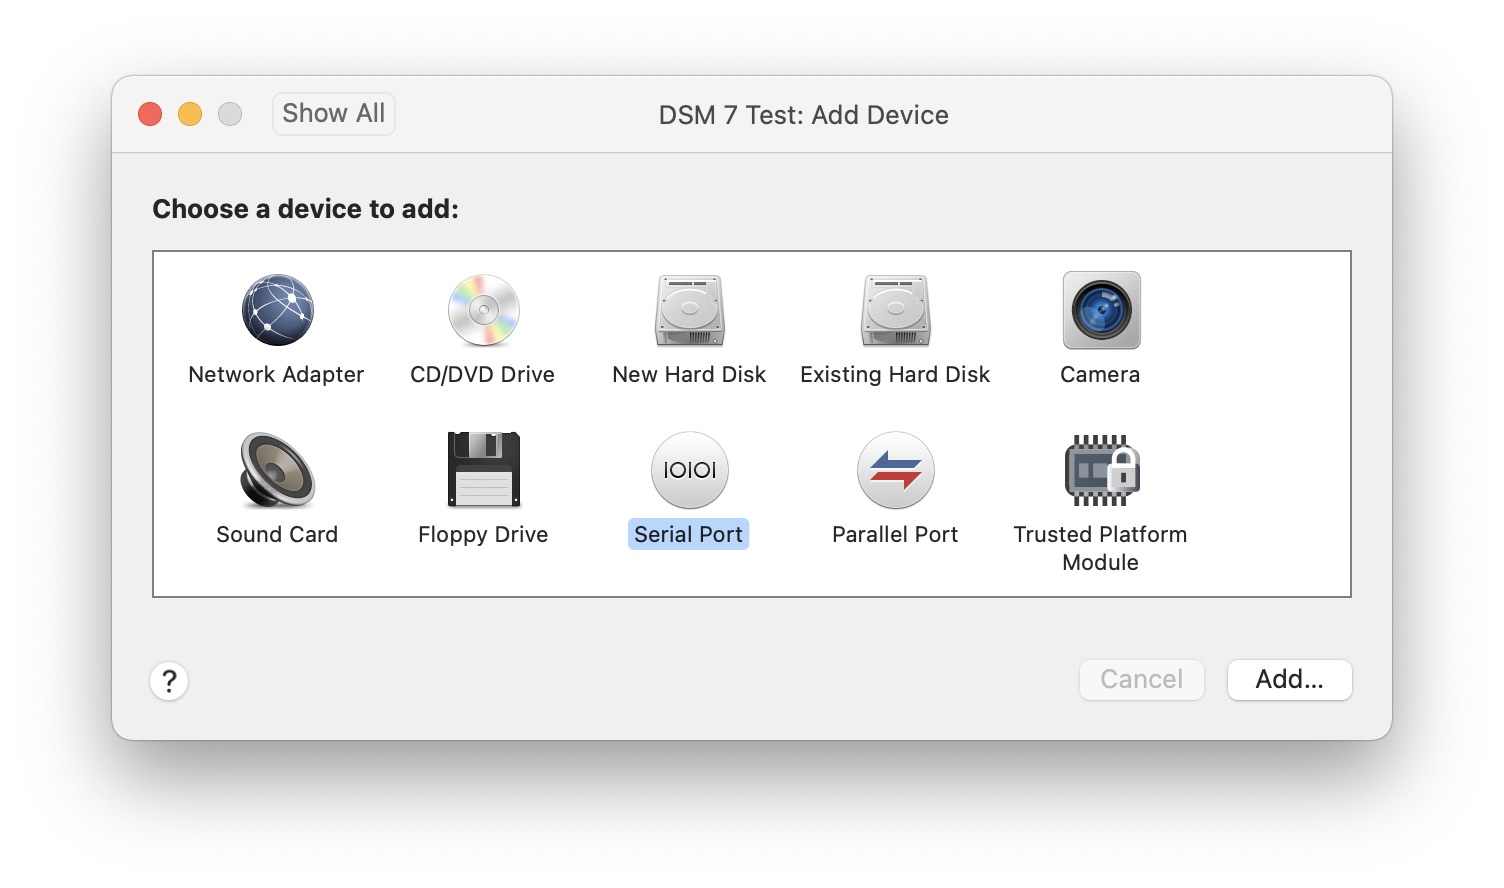
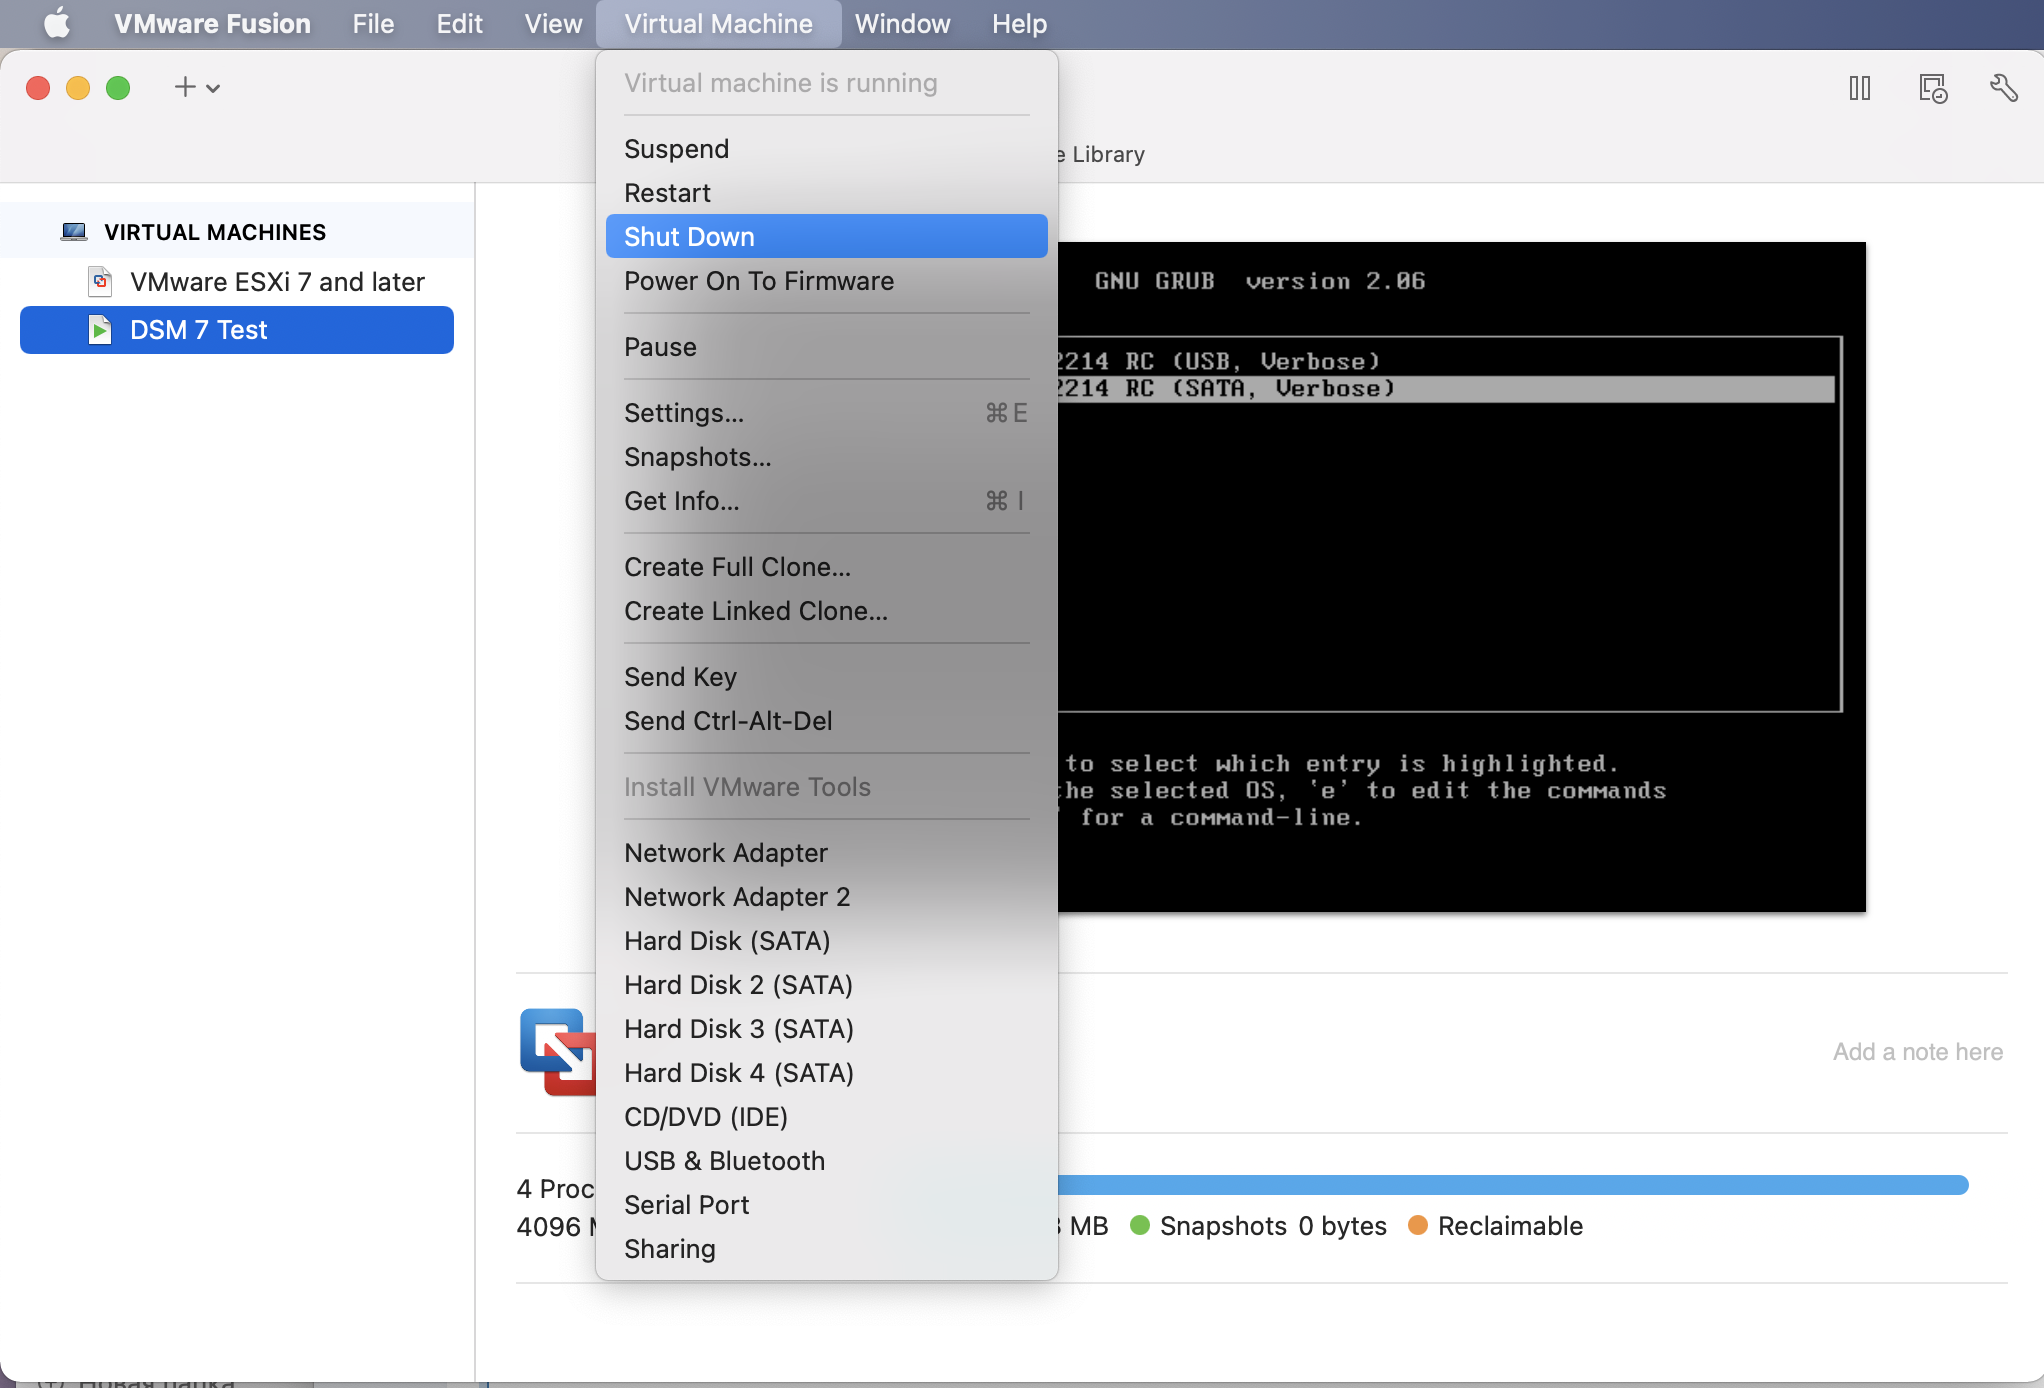
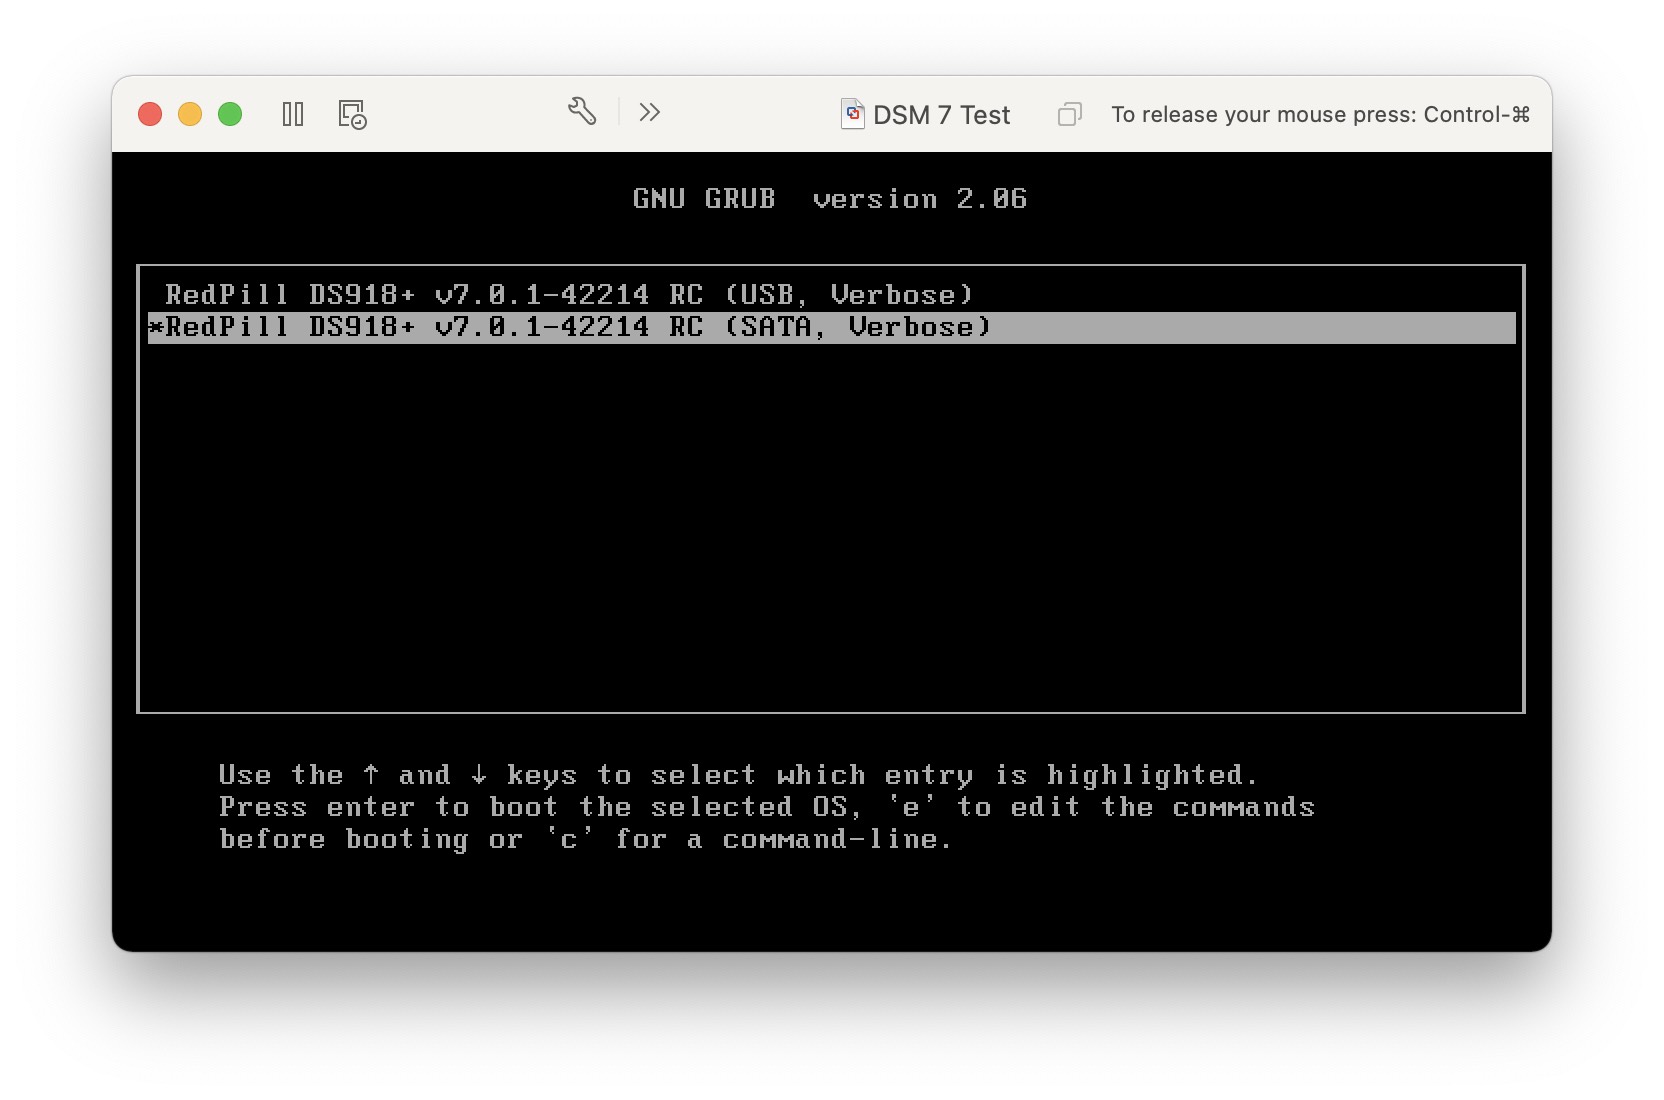
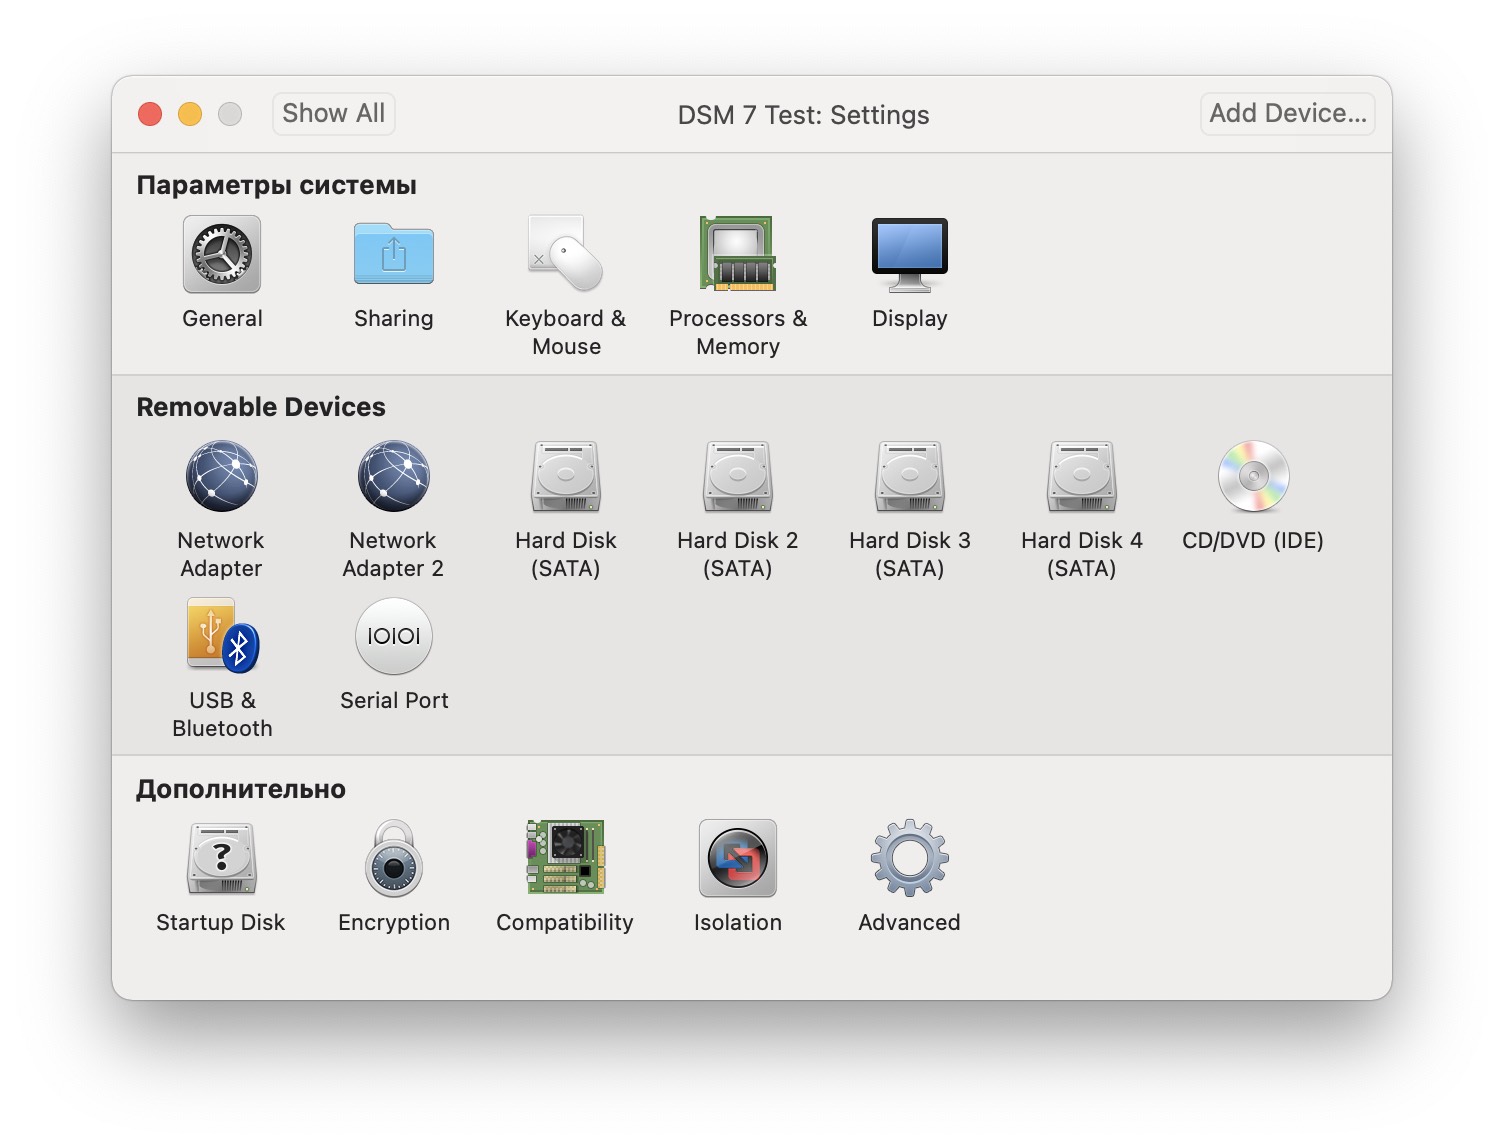
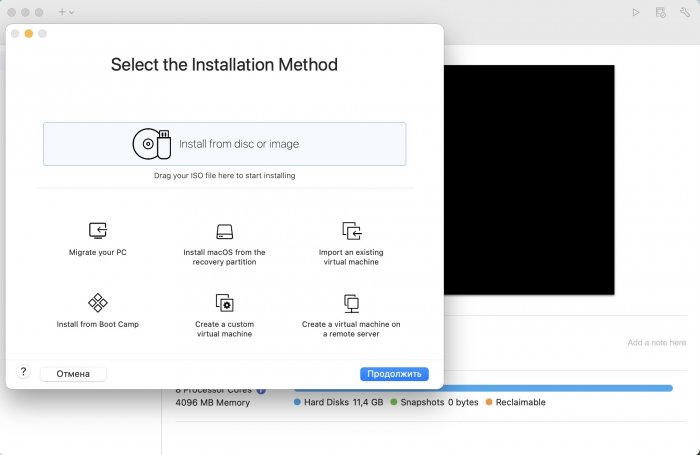
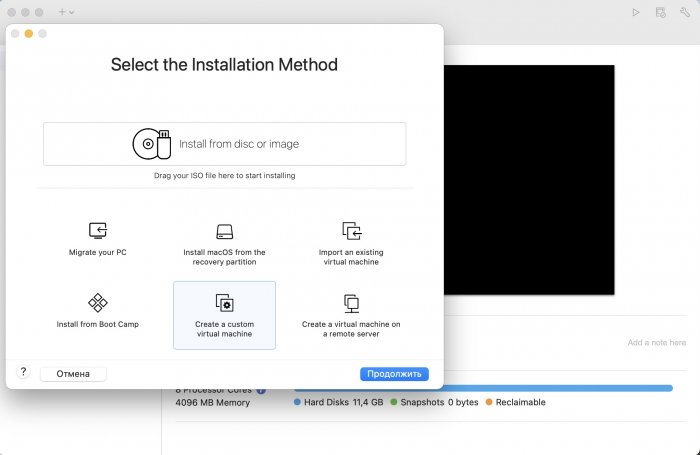
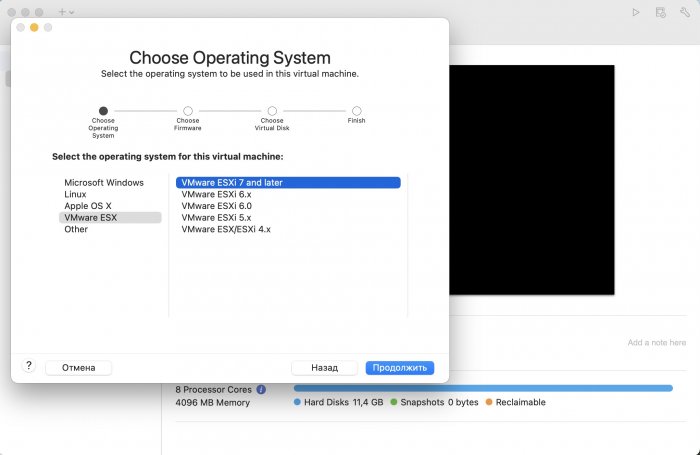
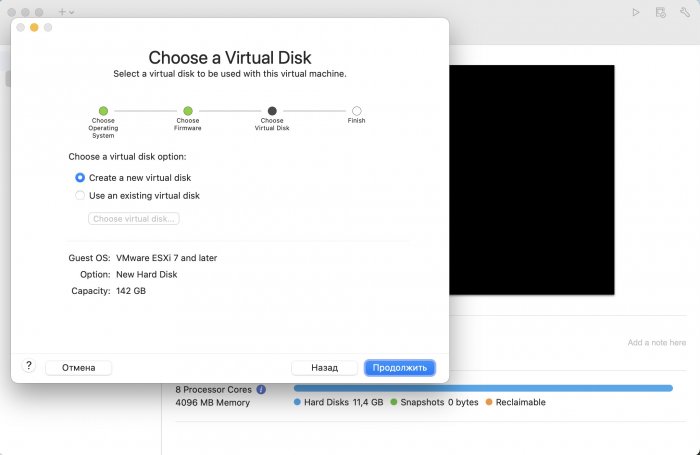
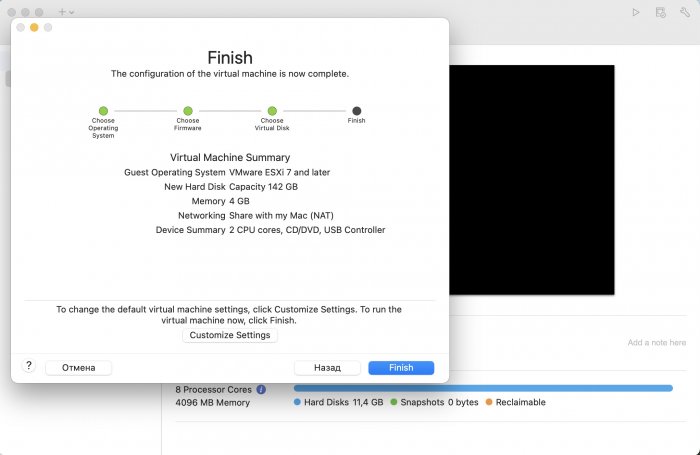
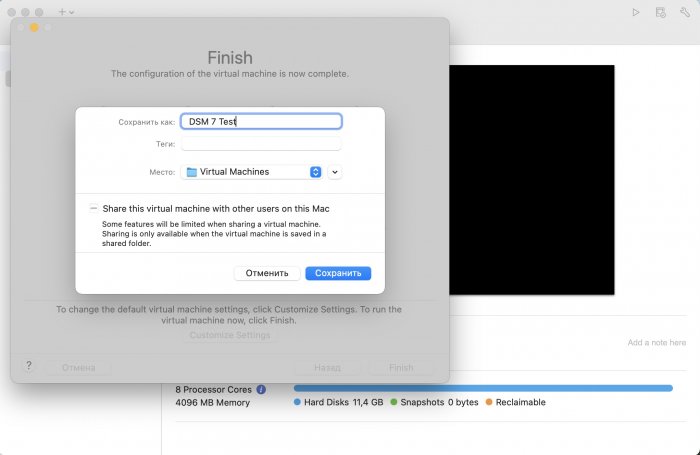
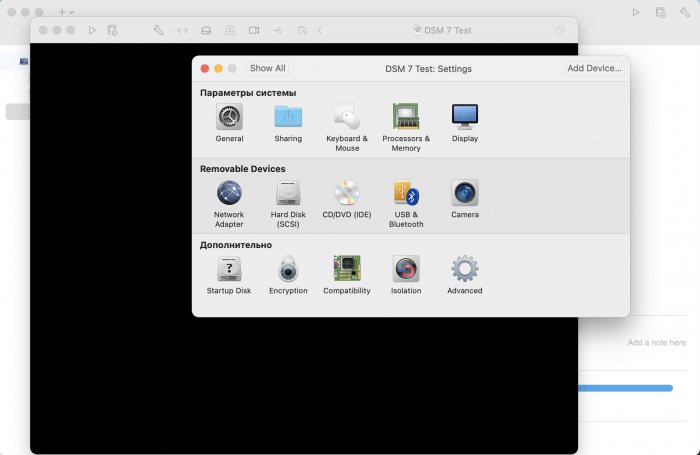
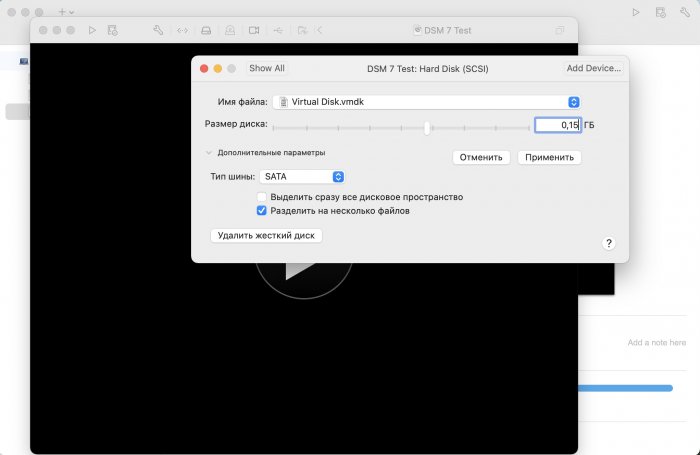
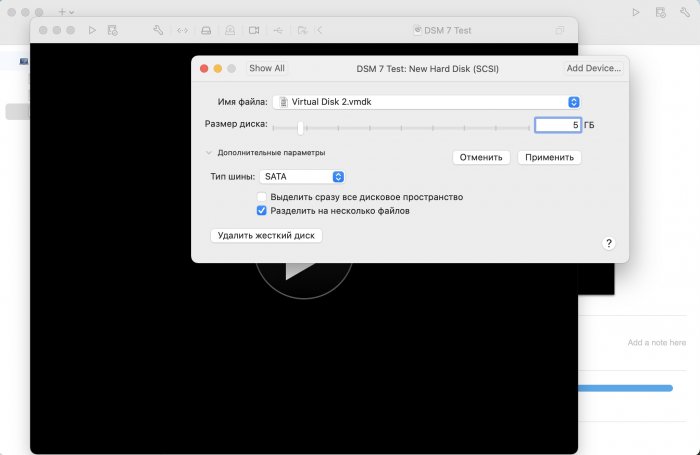
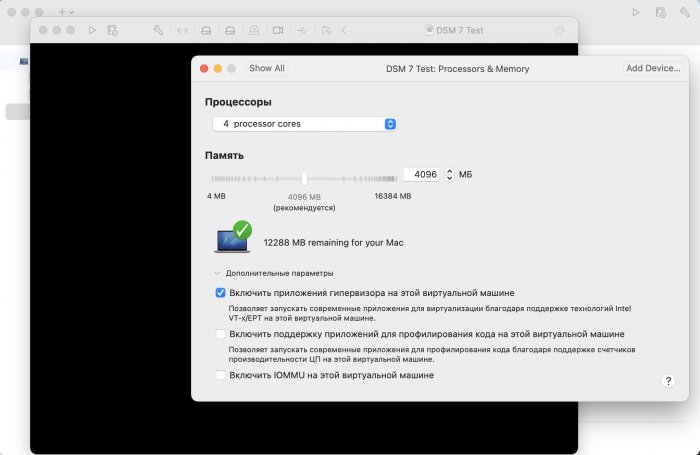
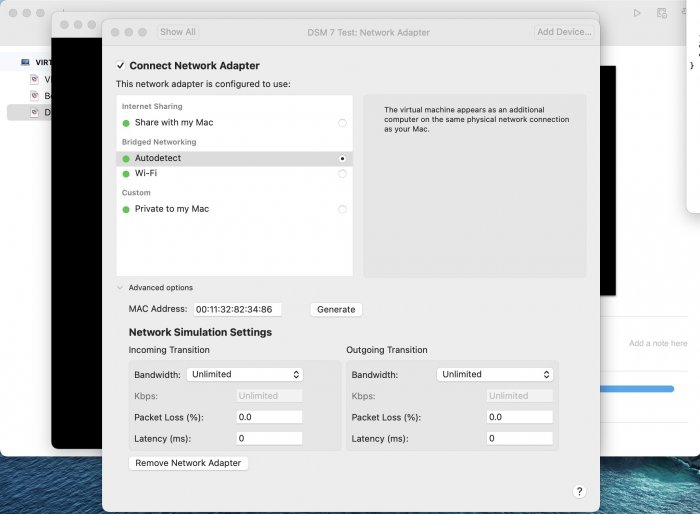
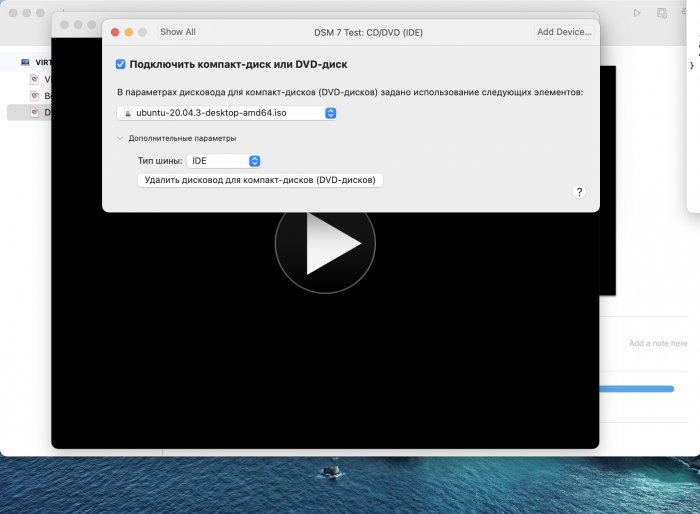
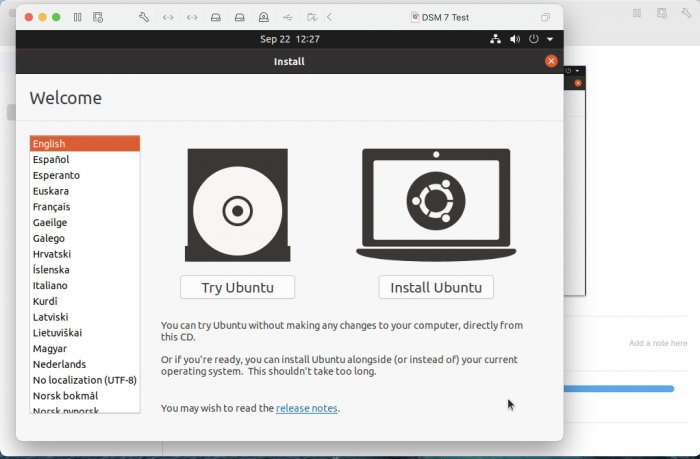
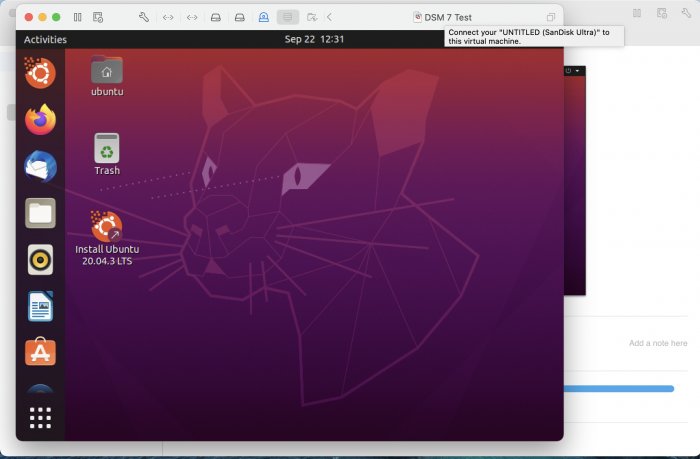
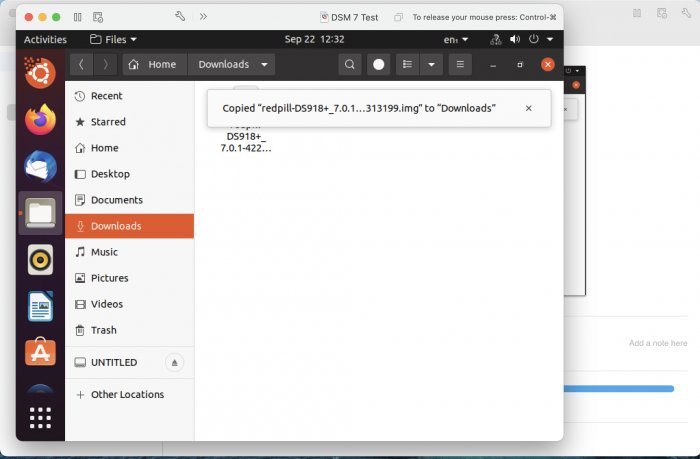
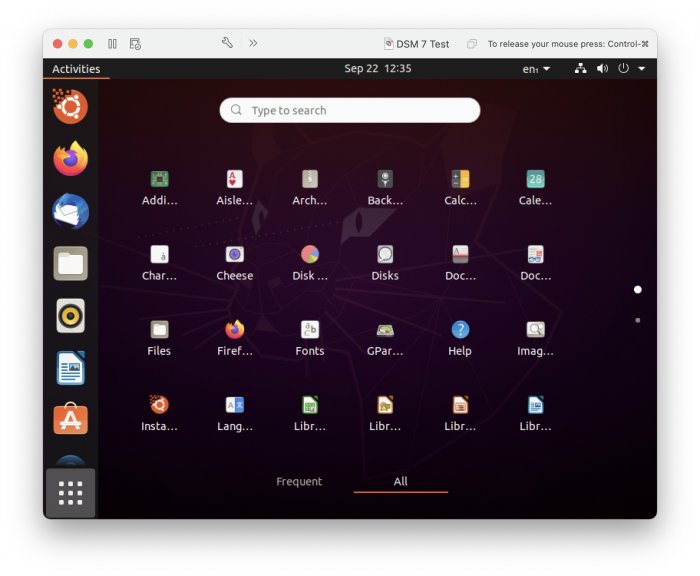
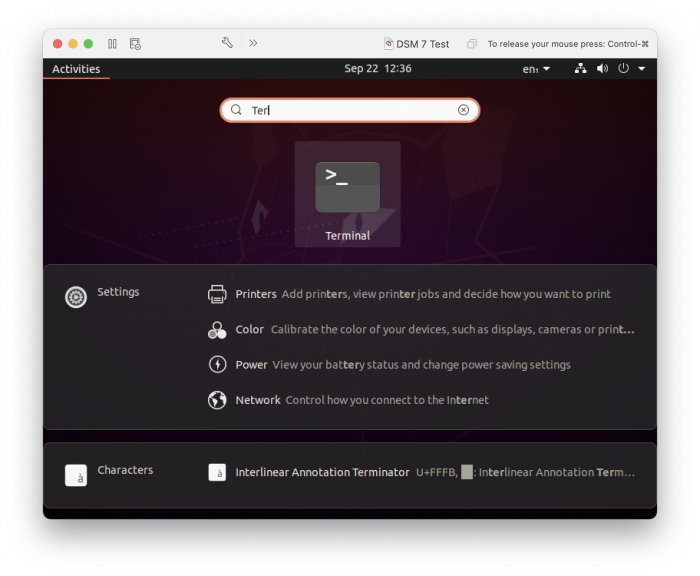
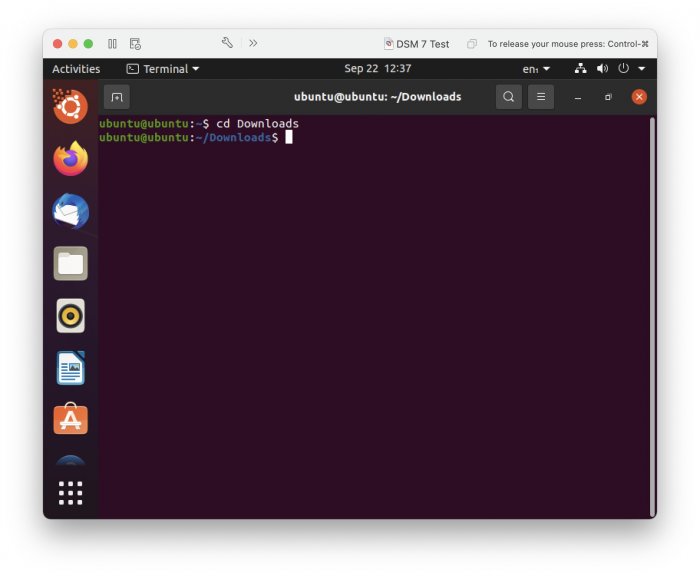
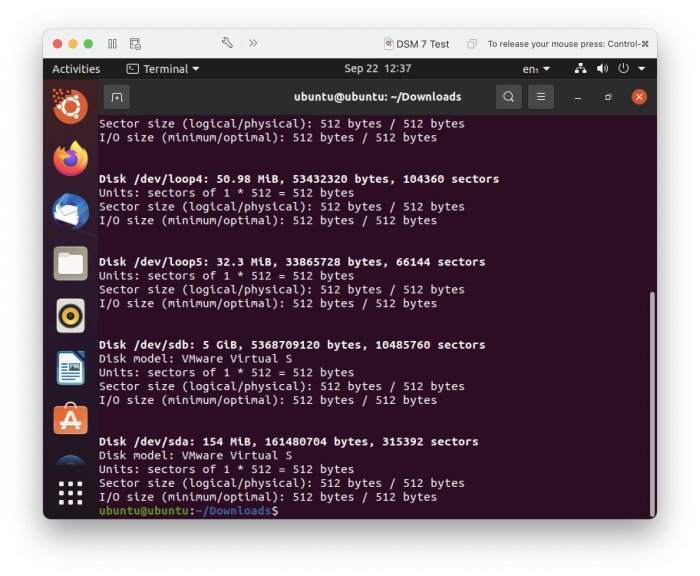
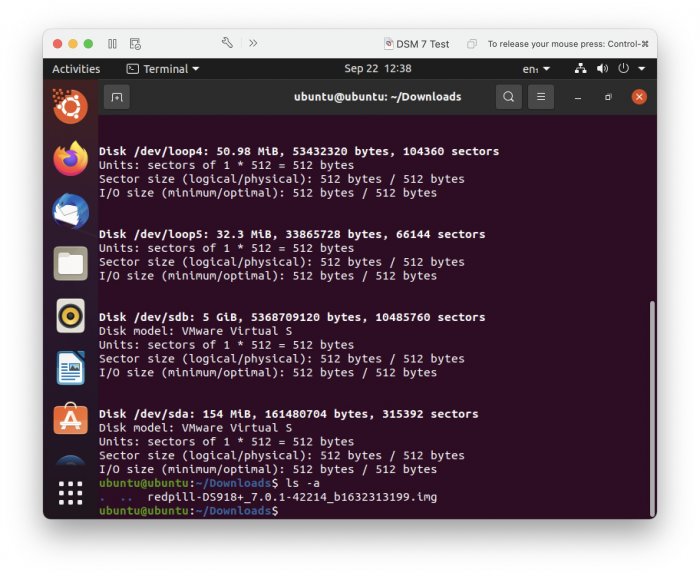
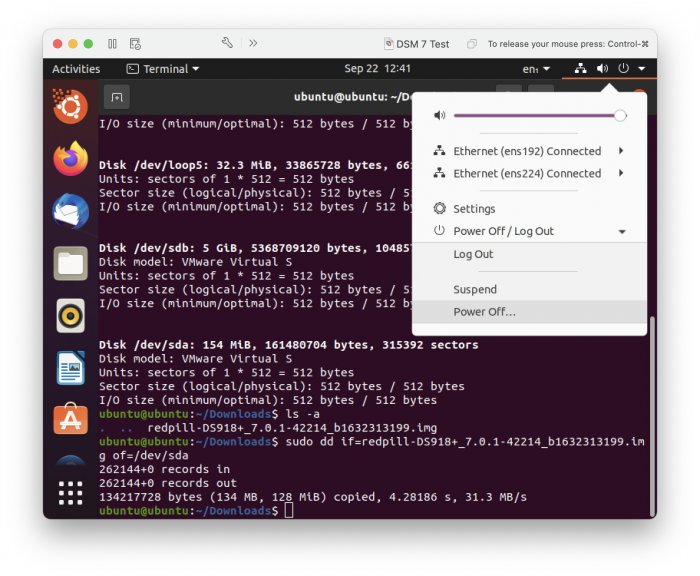
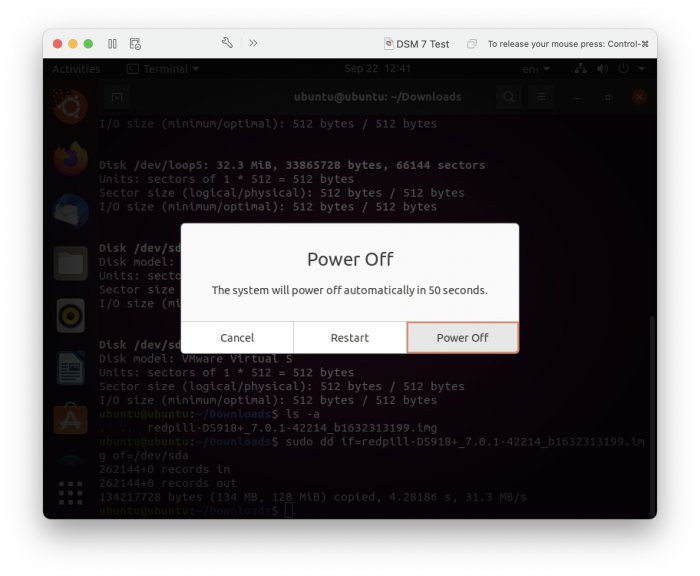
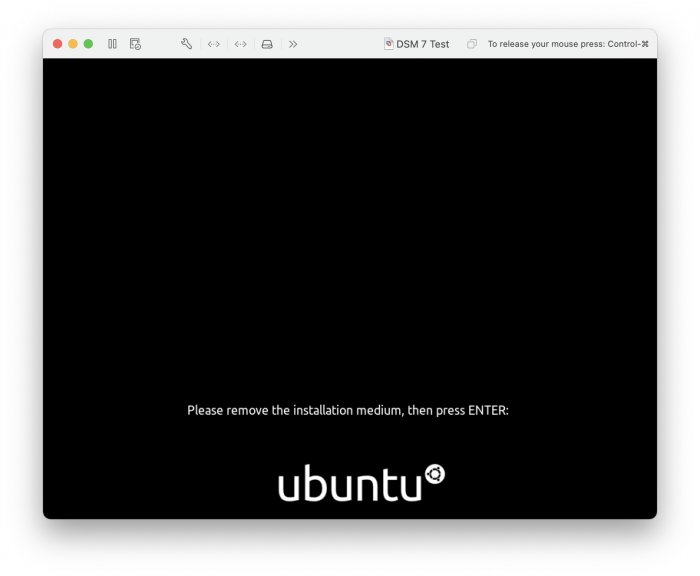
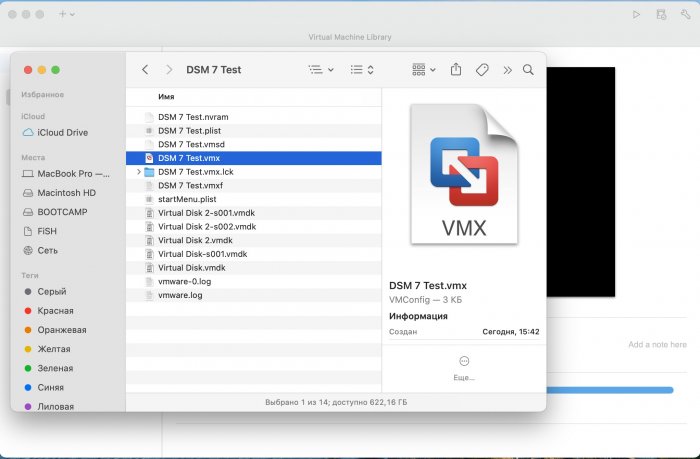
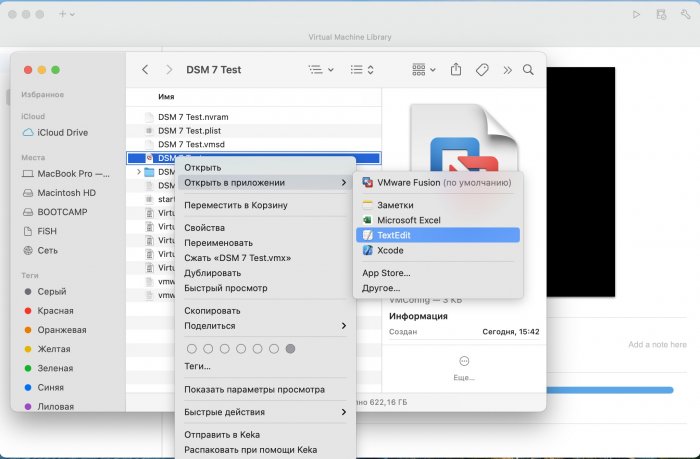
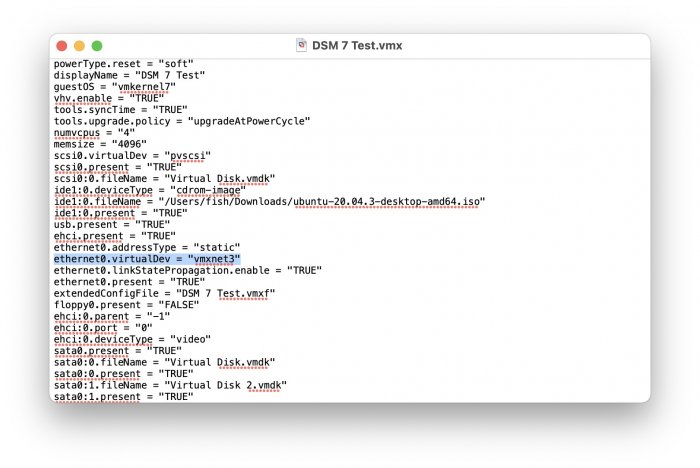
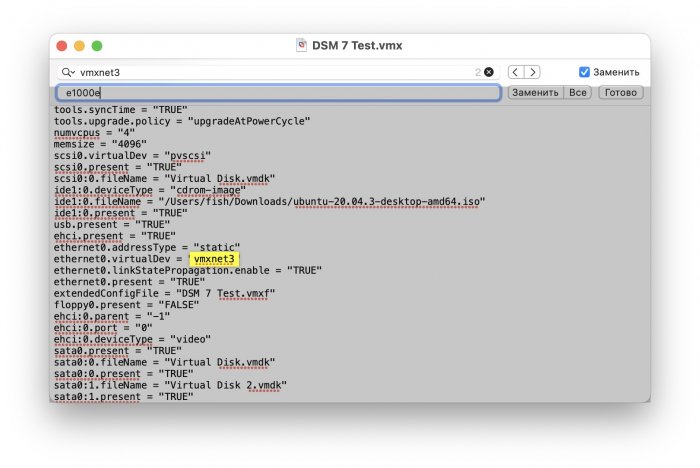
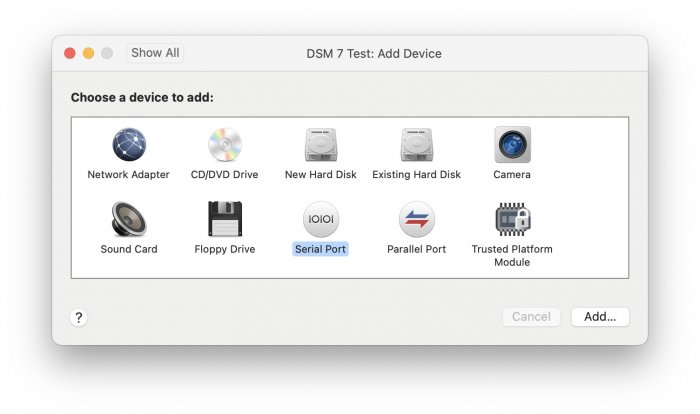
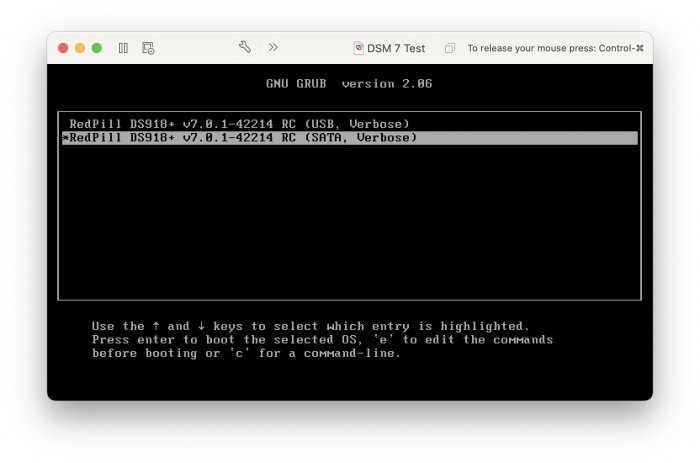
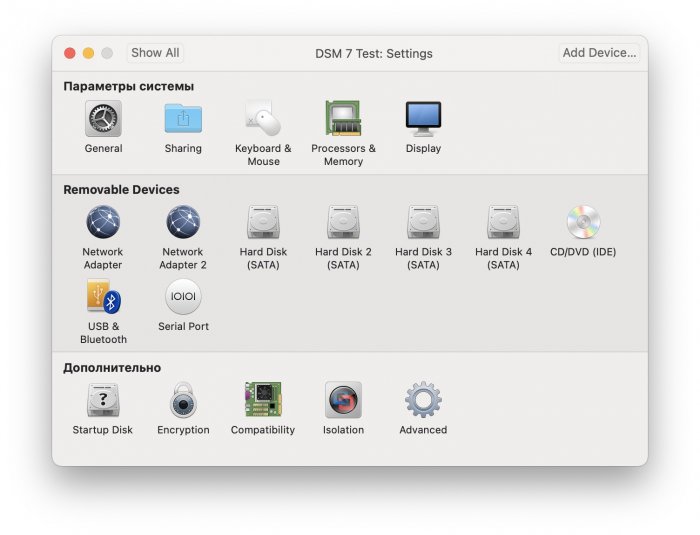
Ввиду участившихся просьб с подобным вопросом, решил накидать небольшую инструкцию. Нам понадобится: macOS 11.5.2 VMware 12.1.2 Образ загрузчика RedPill отдельным файлом на флешке. В моем случае для инструкции это файл redpill-DS918+_7.0.1-42214_b1632313199.img (Инструкция по сборке в macOS). Собрал специально для данной темы с данными, которые не соответствуют реальным устройствам и приведены ниже. В них мак-адреса сетевых карт и серийный номер взяты с потолка. { "extra_cmdline": { "pid": "0x0001", "vid": "0x46f4", "sn": "14A0PDN849204", "netif_num": "2", "mac1": "001132823486", "mac2": "001132823487", "DiskIdxMap": "1000", "SataPortMap": "4" }, "synoinfo": {}, "ramdisk_copy": {} } Live CD Ubuntu 20.04.03 Помнить сочетания control+command для того, чтобы включить мышку после запуска виртуальной машины Записать мак адресы, чтобы были под рукой для настройки виртуальной машины Поехали! Будет штук 40 картинок и немного описания. 1. Создаем новую виртуальную машину 2. Выбираем пункт Create a custom virtual machine 3. VMware ESX ->VMware ESXi 7 and later 4. Тип биоса Legacy 5. Создать новый виртуальный диск 6. Выбираем Customize Settings 7. Придумываем имя 8. Это основное окно настройки нашей виртуальной машины. Тут мы будем добавлять (кнопка Add Device в правом верхнем углу) и удалять устройства. 9. Выбираем диск SCSI, и в его настройках исправляем на SATA, а размер указываем 150мб под загрузчик. Позже на него мы запишем созданный образ redpill-DS918+_7.0.1-42214_b1632313199.img используя Live CD c Ubuntu. Все диски у нас будут SATA! После завершения настройки этого диска нажимаем Add Device, выбираем добавить новый диск. 10. Создаем второй диск, для DSM, размер можно взять любым, главное условие, чтобы емкости хватило. Позже мы добавим еще парочку, но чтобы не запутаться, начнем с одного. На данном этапе рекомендую выбирать размер дисков для DSM большей емкости, потому что при 5ГБ после установки у вас не останется места, и система не даст создать раздел под данные. Это даст вам возможность их потом не ресайзить как мне во время написания инструкции. Но если все таки кто-то столкнется, просто установите виртуальную машину, и в настройках измените раздел в с 5 гб, на тот, который будет вам нужен и удобен. Я его изменил на 20 гб, и все работает после загрузки. 11.Выбираем желаемое количество выделяемой памяти и количества используемых ядер для виртуальной машины 12. Настраиваем сетевой интерфейс который у нас уже имеется. Тут важны два параметра: нужны выбрать Autodetect и пописать мак-адрес первый из тех, что задавался при сборке загрузчика в apollolake_user_config.json. В данном случае - 001132823486 13. Создаем новый сетевой интерфейс, настройки как у предыдущего, только мак-адрес вставляем следующий 001132823487 14. Заходим в настройки CD/DVD. Ставим галочку в чекбоксе "подключить" и выбираем образ Ubuntu, который предварительно скачали. И стартуем виртуальную машину. 15. Выбираем пункт Try Ubuntu 16. По окончании загрузки попадаем на рабочий стол 17. Вставляем флешку с образом загрузчика. Система спросит что с ней сделать, выбираем примонтировать к виртуальной машине. Открываем файловый менеджер, ищем наше устройство USB, и копируем с него образ в папку Downloads 18.Переходим в портал приложений, и в поисковой строке набираем Terminal и запускаем его. 19. Набираем команду, чтобы перейти в папку, в которой лежит наш образ загрузчика cd Downloads 20. Водим команду, чтобы вывести список доступных разделов, нас интересует тот, что на 150 мб (/dev/sda) sudo fdisk -l 21. Вводим команду, чтобы посмотреть список файлов в каталоге, в котором мы находимся, и убедится, что скопированный нами образ на месте. Это даст возможность легко скопировать его имя полностью. ls -a 22. Следующей командой мы запишем образ redpill-DS918+_7.0.1-42214_b1632313199.im на раздел /dev/sda sudo dd if=redpill-DS918+_7.0.1-42214_b1632313199.img of=/dev/sda 23. Выключаемся. 24. После того, как виртуальная машина выключилась правой кнопкой Show in Finder 25. Выбираем нашу виртуальную машину, вызываем контекстное меню, и просим показать содержимое пакета. 26. Ищем указанный файл, и просим открыть его текстовым редактором. 27. Первое, что нам нужно сделать, это прописать нужный сетевой драйвер виртуальной машины, иначе она не будет обнаруживаться в сети 28. Ищем "vmxnet3" и меняем на "e1000e". Сетевых интрефейса у нас два, потому замены должно быть тоже две. В конечном итоге все должно выглядеть как-то так. ethernet0.virtualDev = "e1000e" ethernet1.virtualDev = "e1000e" 29. После все предыдущих манипуляций должна быть примерно следующая картина. Посмотрев на которую я понял, что забыл добавить последовательный порт для лога. 30. Поэтому выбираем Add Device и добавляем, заодно указываем, куда сохранять лог. 31. Стартуем машину (выбираем режим SATA, потому что в нем игнорируются значения PID/VID), даем ей немного поработать (минуту-две), потому что как выяснилось, некоторые настройки в файл *.vmx прописываются чуть позже. На этом этапе она уже должна определяться в сети, но видеть диски не будет. Это мы исправим дальше. 32. Останавливаем виртуалку (Shut down ) 33. Добавляем еще парочку дисков как в пункте 10 (размер может совпадать, диски должны быть SATA). Этот пункт не обязателен, но я его добавил, чтобы было понятнее, что и для чего мы еще будем редактировать в фале *.vmx 34. Возвращаемся к пункам 24 - 27, в которых мы редактировали тип драйвера сетевого интерфейса, только теперь займемся настройками наших виртуальных HDD. Суть заключается в том, что нам нужно разнести виртуальный диск, на который записан загрузчик, и с дисками, на которых будет жить DSM, на разные виртуальные контроллеры. Номер контроллера или устройства начинается с нуля! Следуя этой логике, нам нужно сделать так, чтобы загрузчик был на контроллере с номером "0", а остальные диски - с номером "1". Получаем: sata0 - контроллер на котором сидит диск (устройство sata0:0) с загрузчиком, sata1 - контроллер на котором сидят диски для DSM (устройства sata1:0, sata1:1, sata1:2) Каждый контроллер для дисков тоже определяется в настройках, и имеет свои свойства, которые выглядят следующим образом: sata0.present = "TRUE" sata0.pciSlotNumber = "35" sata1.present = "TRUE" sata1.pciSlotNumber = "36" Как и каждое устройство (диск в нашем случае): sata0:0.fileName = "Virtual Disk.vmdk" sata0:0.present = "TRUE" sata0:0.redo = "" sata1:0.fileName = "Virtual Disk 2.vmdk" sata1:0.present = "TRUE" sata1:0.redo = "" sata1:1.fileName = "Virtual Disk 3.vmdk" sata1:1.present = "TRUE" sata1:1.redo = "" sata1:2.fileName = "Virtual Disk 4.vmdk" sata1:2.present = "TRUE" sata1:2.redo = "" 35. Итоговый файл у меня выглядит вот так: .encoding = "UTF-8" config.version = "8" virtualHW.version = "18" pciBridge0.present = "TRUE" pciBridge4.present = "TRUE" pciBridge4.virtualDev = "pcieRootPort" pciBridge4.functions = "8" pciBridge5.present = "TRUE" pciBridge5.virtualDev = "pcieRootPort" pciBridge5.functions = "8" pciBridge6.present = "TRUE" pciBridge6.virtualDev = "pcieRootPort" pciBridge6.functions = "8" pciBridge7.present = "TRUE" pciBridge7.virtualDev = "pcieRootPort" pciBridge7.functions = "8" vmci0.present = "TRUE" hpet0.present = "TRUE" nvram = "DSM 7 Test.nvram" virtualHW.productCompatibility = "hosted" powerType.powerOff = "soft" powerType.powerOn = "soft" powerType.suspend = "soft" powerType.reset = "soft" displayName = "DSM 7 Test" guestOS = "vmkernel7" vhv.enable = "TRUE" tools.syncTime = "TRUE" tools.upgrade.policy = "upgradeAtPowerCycle" numvcpus = "4" memsize = "4096" scsi0.virtualDev = "pvscsi" scsi0.present = "TRUE" scsi0:0.fileName = "Virtual Disk.vmdk" ide1:0.deviceType = "cdrom-image" ide1:0.fileName = "/Users/fish/Downloads/ubuntu-20.04.3-desktop-amd64.iso" ide1:0.present = "TRUE" usb.present = "TRUE" ehci.present = "TRUE" ethernet0.addressType = "static" ethernet0.virtualDev = "e1000e" ethernet0.linkStatePropagation.enable = "TRUE" ethernet0.present = "TRUE" extendedConfigFile = "DSM 7 Test.vmxf" ehci:0.parent = "-1" ehci:0.port = "0" ehci:0.deviceType = "video" sata0.present = "TRUE" sata1.present = "TRUE" sata0:0.fileName = "Virtual Disk.vmdk" sata0:0.present = "TRUE" ethernet0.address = "00:11:32:82:34:86" ethernet1.addressType = "static" ethernet1.virtualDev = "e1000e" ethernet1.present = "TRUE" ethernet1.linkStatePropagation.enable = "TRUE" ethernet1.address = "00:11:32:82:34:87" ehci:0.deviceId = "0x8020000005ac8514" numa.autosize.cookie = "40012" numa.autosize.vcpu.maxPerVirtualNode = "4" uuid.bios = "56 4d 9f 5f d2 3b 6a f5-ae a1 7d 94 e0 ca 92 6a" uuid.location = "56 4d 9f 5f d2 3b 6a f5-ae a1 7d 94 e0 ca 92 6a" sata0:0.redo = "" pciBridge0.pciSlotNumber = "17" pciBridge4.pciSlotNumber = "21" pciBridge5.pciSlotNumber = "22" pciBridge6.pciSlotNumber = "23" pciBridge7.pciSlotNumber = "24" scsi0.pciSlotNumber = "160" usb.pciSlotNumber = "32" ethernet0.pciSlotNumber = "192" ethernet1.pciSlotNumber = "224" ehci.pciSlotNumber = "33" vmci0.pciSlotNumber = "34" sata0.pciSlotNumber = "35" scsi0.sasWWID = "50 05 05 6f d2 3b 6a f0" svga.vramSize = "268435456" vmotion.checkpointFBSize = "4194304" vmotion.checkpointSVGAPrimarySize = "268435456" vmotion.svga.mobMaxSize = "268435456" vmotion.svga.graphicsMemoryKB = "262144" vmci0.id = "-523595158" monitor.phys_bits_used = "45" cleanShutdown = "FALSE" softPowerOff = "FALSE" usb:1.speed = "2" usb:1.present = "TRUE" usb:1.deviceType = "hub" usb:1.port = "1" usb:1.parent = "-1" svga.guestBackedPrimaryAware = "TRUE" sata1:0.present = "TRUE" sata1:0.fileName = "Virtual Disk 2.vmdk" floppy0.present = "FALSE" serial0.fileType = "file" serial0.fileName = "/Users/fish/Desktop/log" serial0.present = "TRUE" sata1:0.redo = "" sata1.pciSlotNumber = "36" sata1:1.fileName = "Virtual Disk 3.vmdk" sata1:1.present = "TRUE" sata1:2.fileName = "Virtual Disk 4.vmdk" sata1:2.present = "TRUE" sata1:2.redo = "" sata1:1.redo = "" usb:0.present = "TRUE" usb:0.deviceType = "hid" usb:0.port = "0" usb:0.parent = "-1" P.S. Постарался максимально подробно расписать и показать все то, что придется сделать, чтобы запустить DSM 7 в виртуалке на macOS. Пытался рассказать так, чтобы была понятна логика в тех местах, где она присутствует. Некоторые вещи всплыли уже в процессе оформления поста, когда все перепроверял (история с ресайзом дисков), так что другие ошибки тоже могу быть, но на суть они не влияют.


 1 point
 -
Yes, that's exactly what I observed. It was fine with a small folder of ~250 photos, but when I pointed it at a 2TB folder of music files it kernel panic'd after a few minutes.1 point
-
If you enable the indexing on the universal search, a 3615xs on 7.0.1 system will hang as well i guess on synoelasticd. This has been tested and will not happen on 918+1 point
-
It happened randomly with a simple nginx container too... (BUG: soft lockup - CPU#1 stuck for 41s! [runc:19580]) And maybe this IPv6 "issue ?" too while starting docker.1 point
-
Little update on the docker kernel panics thing some of us were diagnosing last week: - @Orphée and "labrous" commented on the github issue that they were seeing similar issues with the Moments app on 6.2.4 and Photos on 7.0.1 (lock ups on VMs, kernel panics on baremetal) - the common thing I'm seeing here is databases: most of the docker crashes I've seen have involved mariadb, influxdb, mysqld or elasticsearch1 point
-
@fbittoun Il n'y a heureusement pas de tuto à l'heure actuelle... Il y a un outils mis à disposition par @haydibe (merci à lui) pour faciliter la compilation de l'image à l'aide de Docker. C'est actuellement amplement suffisant pour mettre en œuvre les tests. Si avec ce qui est fourni actuellement tu ne t'en sors pas, ne le prends pas mal, mais passe ton chemin, et attends une version considérée comme "plus stable" qu'actuellement. Ne cherchez pas de tutos tout faits, et n'en rédigez pas non plus pour ceux qui seraient tentés de le faire... Le développement n'est pas encore au stade de l'essai en masse... Un tuto trop simple permettrait à trop de gens ne maitrisant pas assez les risques d'installer ces versions instables. Certains pourraient reprendre ses tutos en oubliant de préciser que c'est encore du développement... Ne postez pas non plus des images pré-compilés publiquement... Il y a des risques associés au code propriétaire de Synology... Le travail actuellement fait par @ThorGroup permettra justement à terme une fois stabilité à chacun de créer sa propre image... Je ne cherche pas à jouer les moralisateurs, loin de là, juste à mettre en garde et protéger au maximum des risques. Dernier exemple en date, je viens de tester Moments avec la version redpill 6.2.4, un import de photos en masse fait crash ma VM... CPU à 100% et VM freeze... C'est pas une install docker ou autre truc un peu décallé... C'est l'appli officielle Synology Moments... Et je ne peux plus utiliser la VM, dès que Moments démarre, même après un reset, la VM freeze... J'aurai du faire un snapshot... je dois la détruire et recommencer à 0. Donc même une "utilisation basique" peut être en risque...1 point
-
Forgot to takes your pills today?0 points