Leaderboard


Popular Content
Showing content with the highest reputation on 09/21/2021 in all areas
-
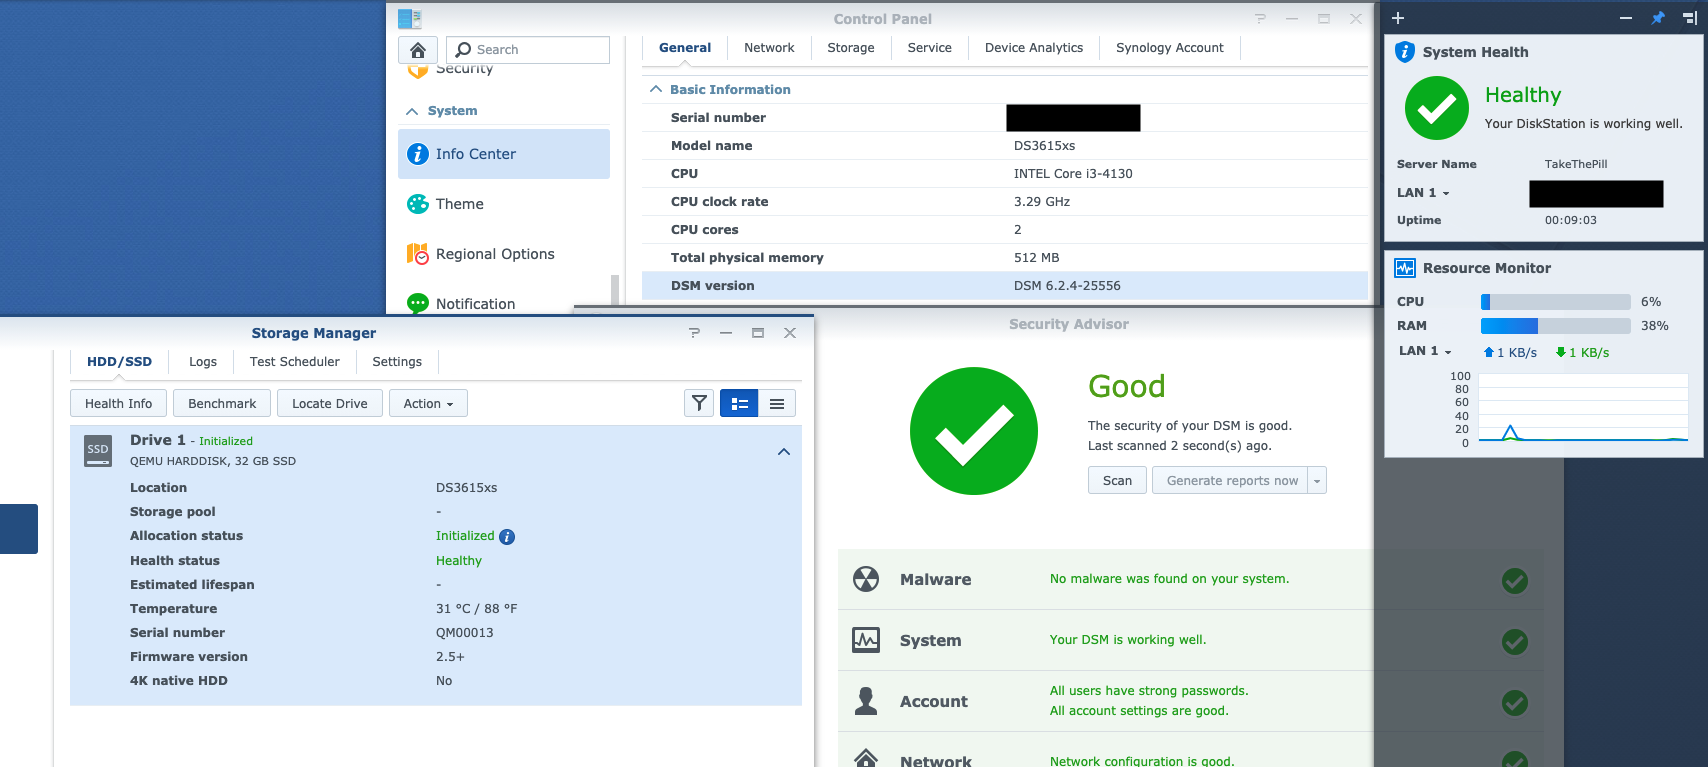
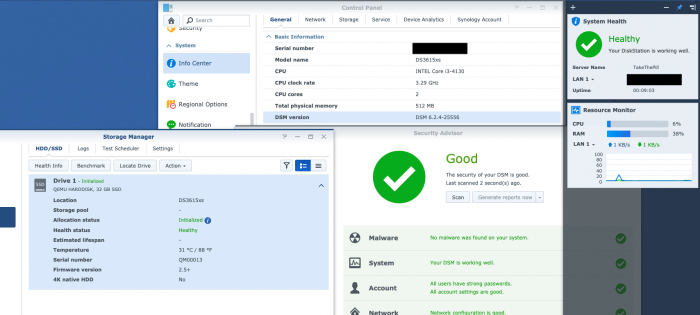
The RedPill is back! As some of you may be aware a lot of research materials as well as the code for parts of the kernel module were pulled from GH. We're happy to report it's back and fully public! Before further ado we have a small sneak-peek of the current state: Repositories Both LKM code and the research materials are present in two repositories. Both are automatic forks from our internal serves and are updated few times a day. - RedPill LKM: contains the current version of the Linux kernel module source code along with implementation details description - DSM Research/Docs: hosts documentation for developers regarding the inner details of DSM boot process While the dates and authors in both repos are anonymized, the history is preserved. Thus, your forks and PRs will work properly. The Current State As of now the DSM installs & boots properly (sort of, continue reading). We are currently working on a toolset for generating the loader image automatically so that testing new iterations is easier for people not familiar with full inner workings of the kernel component & the bootloader itself. The tool with instructions will be published in a separate repo. The kernel module is currently missing the PCI-IDs shimming and RTC emulation. While the latter is most likely not crucial, the former must be implemented. However, it's not really straight-forward as naturally the kernel doesn't have a high-level API to lie about nonexisting hardware The current revision of the LKM causes some errors to be sent to the PMU. If anyone in the community (@Vortex? @IG-88?) has an idea of what is the source of these we will be grateful for some pointers. --R--R-p--R-4 -9 --R-r-K-8-3-8 As of now we're working on a robust PCI emulation layer. This isn't hard in theory but has many pitfalls if we want to do it properly and none of us ever studied inner workings of PCI on x86 As described in the PCI document in the research repo there are three methods. We picked the third one (full PCI emulation) as it allows for creation of devices which are indistinguishable from real ones. While this is the hardest to pull off properly, it doesn't rely on a hack but rather an official and documented Linux API. Q&A Who are you? We're a group of passionates dating back to the (great) phreaking times. If you know where to look you will find us on IRC Can I get involved in the development? Yes! As this project took a lot from the community we strongly believe it should continue to be shared and developed under GPL. We greatly appreciate any PRs on GH. I'm not a developer, can I help? At this stage most likely not. However, we wish to have some testing version not too far in time. For various reasons we cannot (and not willing to) accept any donations. If you want to make us feel better leave a like and a good word for us, as naturally this isn't our full-time job :))) Why is making the code public matters? We believe that the code of the loader MUST be public. We aren't sure if the general community is aware of the degree of control the "loader" has over their box. Despite the name it is not just a load-and-leave situation. The majority of the loader code is active in the system for the whole time (you can check that by doing lsmod and looking for an entry which doesn't look like a proper module name but one or more random characters). The kernel module can do literally anything you can as root... and more. It can read files, send them in the background somewhere, hide files from you, execute programs with higher-than-root privileges without showing them in any tools, use your CPU while showing 0% in htop etc... and the worst part is that you will never know that it happened (unless you're monitoring your device from the outside). However, after this scary paragraph we can say two things: Jun's loader doesn't seem to do any evil things, and the actions any loader needs to perform in the system after the initial load are minimal (e.g. fake responses to "turn on HDD led"). We've also reviewed the code we cloned and it's a solid base. Additionally, making the code open means anybody can tinker with it and adjust to new scenarios instead of relying to bit-patching a .ko. What happened to previous repos? Are you crediting the previous author? The author of the original code wishes to distance himself from the project and we are respecting that. That's all we know. Do you/anyone have the code of Jun's loader? We saw that there's some confusion on the forum regarding Jun's loader and why the work had to start from scratch. Neither the Jun's loader code nor any deeper implementation details regarding inner working of his amazing loader were ever shared with the public. We weren't able to obtain the code through our sources either. There's a good chance he never shared the with anybody. Is Syno trying to block the loader? While we cannot comment on any actions, we can surely talk about the code. The new kernel contains something which isn't present before 25556: https://github.com/RedPill-TTG/dsm-research/blob/master/quirks/boot_params-validation.md It is true that the "va not found" error triggered by the Jun's loader when used with >6.2.3 is indeed related to offsets which changed in the new build. However, the rabbit hole doesn't stop there. The new "boot_params" check doesn't seem to have any other purpose than detecting violation of the chain of trust. So did the new kernel build broke the loader intentially? Most likely not (it's probably a by-product of the new validation code present very early in the image) but why the boot params validation was placed in 6.2.4 in the first place? We leave the interpretation to the reader. When we can expect a stable release? Will it work on v7? We cannot promise any date for two reasons: 1) we can hit an unexpected roadblock (e.g. see errors mentioned above), and 2) we will like to test it and have it working on v6.2.4 and v7 as well (as of now v7 is available for selected devices only and from our tests it is not fully stable even on the devices it was officially released). Some of the protections found in v6 were pulled from v7... but don't worry, they will be back as soon as they port them... it's a carrot and a stick situation. cc for people who followed the original topic: @AleAmadoC @alexku44 @Amoureux @Balrog @blindspot @Bobbenoster @Bobur @coolinx @dimcheff @Fede @FiberInternetUser @gadreel @ilovepancakes @impala_84 @intrax @jarugut @juud @kiwiuk @lemon55 @loomes @minigranis @NeoID @Nuno @Piteball @pkdick1 @pro_info @profet @rufik @s2k7 @scoobdriver@setsunakawa @smilenkovski @smileyworld @smoojay @snakefox666 @Snyaify @SpiRe @T-REX-XP @The Chief @toolazy @vasiliy_gr
 2 points
 -
Sorry for going off topic for a moment, but I see a few people wanting 10GB ethernet. I wonder, do you have a 10GB ethernet switch, and any other 10GB capable devices on your LAN (or multiple 1Gb clients capable needing an aggregate 10GB throughput)? Do you even have a storage array capable of saturating a 10GB link? Just wondering what the use case is for hardware like this, as it's the sort of thing that's very rarely properly utilised outside of datacentres...2 points
-
Уже есть решение: 1) Use putty login to your console ( root ) 2) Run the following command: /sbin/modprobe usbserial /sbin/modprobe ftdi_sio /sbin/modprobe cdc-acm 3) Unplug z-wave stick and plug it back in . Пробовал, стик завелся в Home Assistant. Взято от сюда: Еще если у кого при установки будет проблема с невозможность отформатировать диск, то играйтесь с параметрами: "DiskIdxMap": "00", "SataPortMap": "4". У меня в такой конфигурации завелось.2 points
-
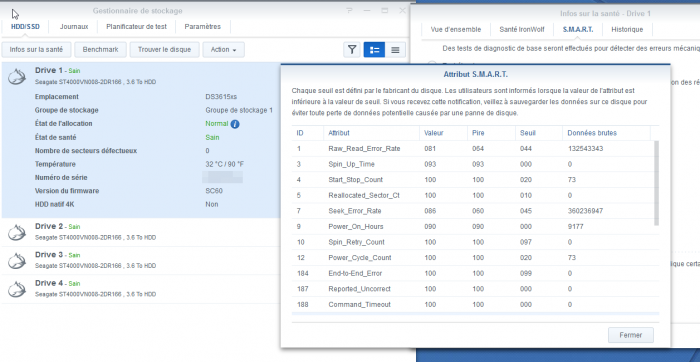
You then have no SMART support inside DSM. Whereas HBA passtrough (on 6.2.3) makes SMART work inside DSM. So real DSM monitoring in case a disk dies.
 2 points
 -
necessary ? You must mean "would be a plus", no ? are your disks fast enough to handle it ?1 point
-
FYI, signatures aren't visible to users on mobile devices.1 point
-
Hi, what version are you using ? Drivers are kernel specific, Are you looking for 3615 or 918+ ?1 point
-
Merci Orphée pour tes conseils que je m'empresse de suivre. Je n'ai pas la compétence requise et donc je passe mon chemin. Bien à toi. Fred1 point
-
I dont know about unraid but on esxi i prefer to just passthrough the disks and not the HBA itself. This way i can set the disks to SATA and i dont bother about the SCSI issue for the moment.1 point
-
synology today updated the photo suite to fix the problem of face recognition1 point
-
@fbittoun Il n'y a heureusement pas de tuto à l'heure actuelle... Il y a un outils mis à disposition par @haydibe (merci à lui) pour faciliter la compilation de l'image à l'aide de Docker. C'est actuellement amplement suffisant pour mettre en œuvre les tests. Si avec ce qui est fourni actuellement tu ne t'en sors pas, ne le prends pas mal, mais passe ton chemin, et attends une version considérée comme "plus stable" qu'actuellement. Ne cherchez pas de tutos tout faits, et n'en rédigez pas non plus pour ceux qui seraient tentés de le faire... Le développement n'est pas encore au stade de l'essai en masse... Un tuto trop simple permettrait à trop de gens ne maitrisant pas assez les risques d'installer ces versions instables. Certains pourraient reprendre ses tutos en oubliant de préciser que c'est encore du développement... Ne postez pas non plus des images pré-compilés publiquement... Il y a des risques associés au code propriétaire de Synology... Le travail actuellement fait par @ThorGroup permettra justement à terme une fois stabilité à chacun de créer sa propre image... Je ne cherche pas à jouer les moralisateurs, loin de là, juste à mettre en garde et protéger au maximum des risques. Dernier exemple en date, je viens de tester Moments avec la version redpill 6.2.4, un import de photos en masse fait crash ma VM... CPU à 100% et VM freeze... C'est pas une install docker ou autre truc un peu décallé... C'est l'appli officielle Synology Moments... Et je ne peux plus utiliser la VM, dès que Moments démarre, même après un reset, la VM freeze... J'aurai du faire un snapshot... je dois la détruire et recommencer à 0. Donc même une "utilisation basique" peut être en risque...1 point
-
For those who are stuck on file corrupted error (13) during DSM installation step with ESXi, I would like to share my workarounds. There are two things I've missed. 1. Choose SATA mode instead of USB! USB boot is for baremetal (physical usb thumb drive) or virtual USB emulation for hypervisor. The one we used to choose in the previous Jun's loader is just introduced in redpill by the latest update. So try with SATA mode passing synoboot_satadom=2 in grub.cfg. 2. Check your vmdk For long time, I have used a pair of files as bootloader, raw disk image file and dummy vmdk file which is pointing actual image file. This was the mistake. To obtain valid vmdk file, I first convert built img file using "qemu-img convert -f raw -O vmdk redpill-DS918+_6.2.4-25556_b1632162635.img boot.vmdk" in ubuntu shell, then again convert "vmkfstools -i boot.vmdk -d thin bootin.vmdk" in ESXi shell. Please let me know better way to do this. After these two things are resolved, it finishes DSM installation process and finally shows login screen! Thanks!1 point
-
Hi @Callibso, es handelt sich um DSM 6.2.1. In der DataSicherung.dss stehen nur die Konfigurationen des NAS drin. Mehr wirst du darin kaum finden. Kannst es mal mit einem Texteditor wie Notepad++ versuchen. Die Daten sollten theoretisch sicher sein egal was man macht. Theoretisch daher mach auf alle Fälle eine Sicherung. Zur Not kannst du die Daten wie folgt erreichen: Was man noch machen kann, ist über den Xpenoloy Bootloader statt den Standard Bootvorgang durchlaufen zulassen, den Punkt Reinstall wählen und dann das Betriebssystem quasi drüber installieren. Hierbei werden voraussichtlich die Apps verloren gehen, aber man erstellt hierbei einen neuen User und kann wieder auf die abgelegten Dateien normal zugreifen. Aber wie gesagt, bitte vorher ein Backup anlegen. Grüße1 point
-
I did it this way: 1. in ubuntu,install Docker sudo apt-get update sudo apt install docker.io 2. install jq & curl: sudo apt install jq sudo apt install curl 3. download redpill-tool-chain_x86_64_v0.7.4 4. cd redpill-tool-chain_x86_64_v0.7.4 5. vi apollolake_user_config.json, edit vid,pid,sn,mac 6. build img ./redpill_tool_chain.sh bulid apollolake-xxx ./redpill_tool_chain.sh run apollolake-xxx make build_all (xxx is the version you choose,like 7.0.1-42214) then the file was in /images -- if you build again, please follow @haydibe's advice, clean up your build cache and images to benefit from the fix: docker builder prune --all --filter label=redpill-tool-chain docker image ls --filter label=redpill-tool-chain --quiet | xargs docker image rm1 point
-
Howdy everyone, I'm just sharing my experience of how I've managed to get DS918+ DSM 6.2.3 installed on VirtualBox and it differs to what the OP provided. Software you'll need VirtualBox A zip extraction tool (Windows has one built-in) Or use 7-zip Jun's 1.04b DSM loader for the DS918+ (Mega link in case the post changes) The synoboot.vmdk file attached to this post 6.2.3-25426 version of DSM for DS918+ Steps Extract the synoboot-ds918.zip Load up VirtualBox and create a new virtual machine with the following details: Name: Whatever you like Machine Folder: Where you'd like the machine files to live (I leave mine as default) Type: Linux Version: Other Linux (64-bit) Memory: 4096 MB (you can set whatever you like, just needs to be higher than 512 MB) Hard Disk: Do not add a virtual hard disk Once the virtual machine is created, move the synoboot.img file from the synoboot-ds918.zip extraction and the synoboot.vmdk file into the Machine Folder You'll need to edit some more settings of the virtual machine with the following details: System > Processor: Change to as many CPU cores as you want, I've set mine at 4 Storage: Remove the IDE controller and add the AHCI (SATA) controller Add hard disk and locate the synoboot.vmdk file moved the Machine Folder and add it to the list Now create and add as many virtual hard disks you want (I created two dynamic volumes at 250GB each for testing and two dynamic volumes at 25GB each for SSD cache. Make sure to tick the virtual SSD drives as solid-state drives) Network > Adapter 1: Change "Attached to" to Bridged Adapter Under Advanced, make sure Intel PRO/1000 MT Desktop is the adapter type and change the MAC address to the following: 001132123456 USB: Change the USB controller to USB 3.0 Start the virtual machine and let it boot for a few minutes Proceed to find.synology.com and your Xpenology will show up. You can then connect, agree to the terms and set-up the NAS For installing the DSM, this is where you'll need the DSM .pat file you should of downloaded earlier Let the DSM file install and the Virtual machine will restart after After the restart, that's it. Use find.synology.com again just in case the IP address may of changed after the restart Go through the rest of the set-up process and enjoy your virtual Xpenology NAS! synoboot.vmdk1 point