Leaderboard


Popular Content
Showing content with the highest reputation on 03/07/2021 in all areas
-
А ещё она и на FTP может писать, а ещё на smb, а ещё на флешку... И чё? Так все камеры ценой от 50-60$ могут. Только от этого они системой наблюдения не становятся. Если она у Вас одна, или их две, то ещё ладно(хотя как по мне нет), а если камер хотя бы пять? А если учесть, что в нашем 21 веке система наблюдения без аналитики это "ниочём", то даже с двумя камерами чёкнешься потом что-то искать.1 point
-
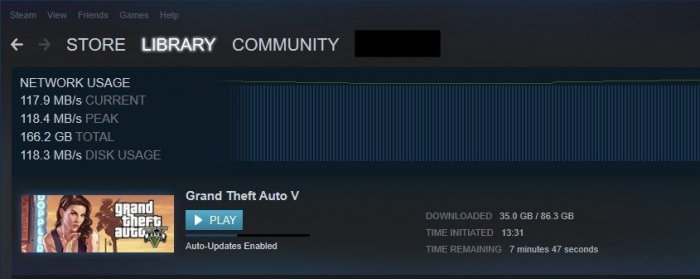
My curiosity to look for further applications for my Xpenology NAS led me to lancache, which enables content (such as games, windows and mac updates) that was downloaded once from the Internet to be available locally (via my NAS) the second time and save internet bandwidth. Further information regarding lancache can be found here: http://lancache.net However, since I already have a Pihole (tracking and advertising blocker) in use, I had to find a way to let them communicate with each other. In order to save resources, I decided against operating the Lancache in a virtual machine and using docker. Therefore, below I share my approach for those who are interested. ATTENTION, with this procedure the ports 80 and 443 in DSM are assigned to another port, since the two ports are required for the lancache. This means that if you host a website it will no longer be accessible via "yourdomain.com" but in the future via "yourdomain.com:81". Furthermore, I do not accept any liability for any data loss or damage caused by using this tutorial(s). So let's start. First, ports 80 and 443 must be released. Thanks to Tony Lawrence's instructions (see tonylawrence.com), this is relatively easy. Connect to the NAS via SSH. In macOS you can do this via the terminal app with this line for example ssh -p 22 tim@192.168.0.100 Check which applications are currently using the port with the command sudo netstat -lntup | grep ":80" sudo netstat -lntup | grep ":443" Now three files have to be edited. The vi editor is used for this purpose Enter the command sudo vi /usr/syno/share/nginx/server.mustache Press i once (for insert) and replace the values 80 and 443 with 81 and 444, respectively. It should look like this afterwards. listen 81{{#reuseport}} reuseport{{/reuseport}}; listen [::]:81{{#reuseport}} reuseport{{/reuseport}}; and listen 444 ssl{{#https.http2}} http2{{/https.http2}}{{#reuseport}} reuseport{{/reuseport}}; listen [::]:444 ssl{{#https.http2}} http2{{/https.http2}}{{#reuseport}} reuseport{{/reuseport}}; Then write :wq (for write and quit) and confirm with enter. Do the same with those two files: sudo vi /usr/syno/share/nginx/DSM.mustache sudo vi /usr/syno/share/nginx/WWWService.mustache Next, nginx must be restarted with the command: sudo -i synoservice --restart nginx Now you can check whether the ports are really no longer in use with sudo netstat -lntup | grep ":80" sudo netstat -lntup | grep ":443" If nothing shows up anymore, then we successfully freed the ports and this means the first of three steps is done. Then docker must be installed from the package center in DSM. Pihole has to be downloaded, adjusted and started as shown in the attached "Install-pihole.pdf" file. Thanks to Marius Bogdan Lixandru (see https://mariushosting.com ) for his instructions, which were slightly adapted for installing pihole with lancache. It is important that you create the following folder structure on your NAS. We need the folder /etc/dnsmasq.d later on to put some .conf files in there. Take the password from the protocol of the Docker container (as described in the pdf) and login as admin to Set the Interface listening behavior in Settings/DNS to IMPORTANT, DO NOT FORWARD THE PORTS 53 AND 80 FROM YOUR ROUTER TO YOUR NAS!!!! Now we have to download the domain lists, which should be cached afterwards. Download the folder from https://github.com/uklans/cache-domains and copy the folder to your NAS. (e.g. /volumes2/lancache) Then use ssh and change the directory to scripts cd /volumes2/lancache/cache-domain-master/scripts Run the script create-dnsmasq.sh which creates .config files for your pihole sudo ./create-dnsmasq.sh copy the created files from to your pihole dnsmasq.d-configs folder (which is in my case as follows) Finally, Lancache must be installed. The folder has to be downloaded from https://github.com/lancachenet/docker-compose and moved, for example, to on your NAS. Change to the /volume2/lancache/docker-compose-master folder via SSH cd /volume2/lancache/docker-compose-master Edit the .env file within the folder vi .env Set the three variables: Next login as root in SSH via sudo -i Change the directory to your docker-compose-master folder, which is in my case cd /volume2/lancache/docker-compose-master Run docker-compose up -d You will get two successfully installed docker container and one error. This is because the pihole already occupies the port 53. We can ignore this message and move on. exit exit Due to the fact that we use pihole as DNS service you can now delete the docker container lancache-dns. Now change the DNS server on your router to the IP address of your NAS. Flush DNS entries of running PCs or reboot them and you should get a decent lancache performance, depending on your xpenology / network setup. Feel free to correct me if I wrote something incorrectly or didn't explain it well enough. Install-pihole.pdf
 1 point
 -
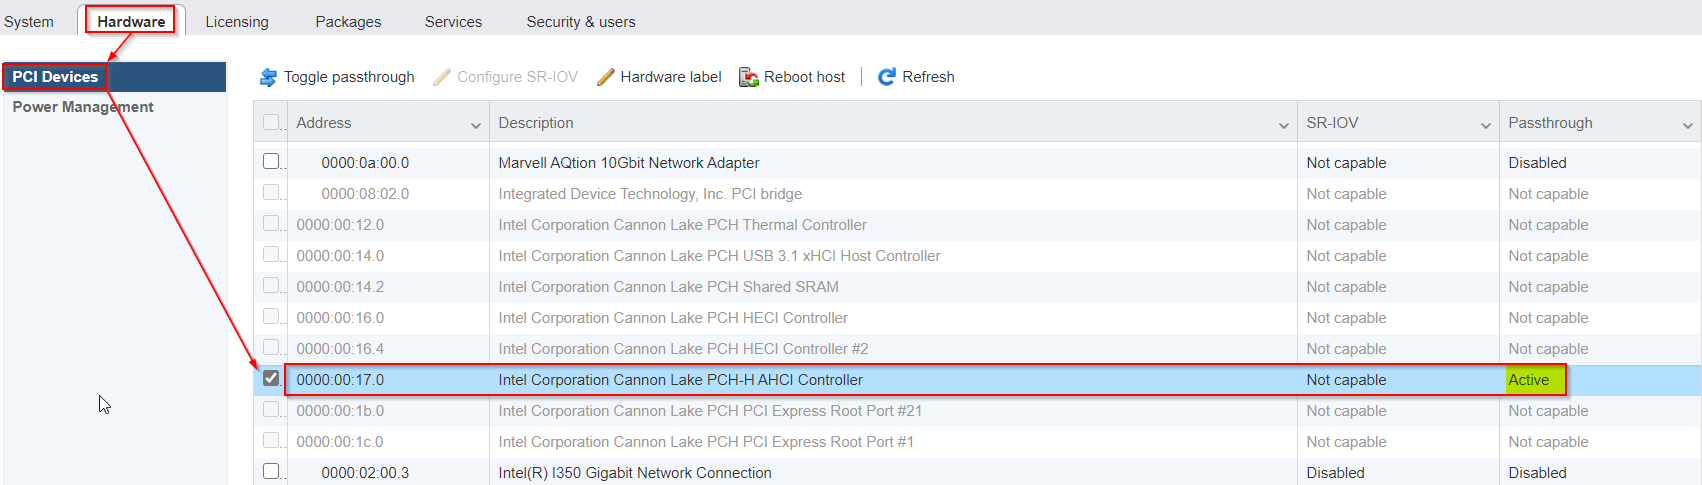
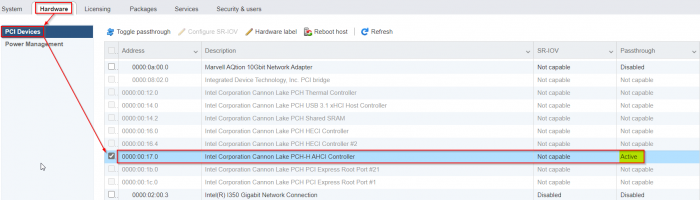
As promised here some notes I have choosen to remember: Enable passthrough of the onboard Cannon Lake AHCI controller: - enable SSH access in ESXi and login as root - edit the file "/etc/vmware/passthru.map" (it is NOT "passthrough.map" : vi /etc/vmware/passthru.map - add this at the end of this file: # Intel Cannon Lake PCH-H Controller [AHCI mode] 8086 a352 d3d0 false - reboot ESXi - login to the ESXi-GUI and enable passthrough of the Cannon Lake AHCI controller - reboot ESXi again - Now you are able to attach the Cannon Lake AHCI controller to a VM (like as seen in the screenshots from @flyride) Pictures of an additional Noctua Fan - these pictures are my template for my mods (not my pictures!): Noctua NF-A8-5V Fan Pictures on HPE Microserver 10+ - I added an additional fan controller like this one: 5V USB Fan Controller This allows me to adjust the Nocuta step-less from 0 rpm to max rpm to get the sweet spot of maximum coolness with minimum noise emission. I think without an additional PCIe card (in detail the QNAP QM2-2P10G1TA with its tiny and high noise fan under load (in idle its quiet!)) it is not really necessary to add the additional fan, but for the sake of completeness I added this information as well.
 1 point
 -
as hyper-v is not working in dsm you best way might be esxi or proxmox and having windows run virtual there are tutorials for both baremetal and using vmm would also be possible but i dont trust that solution, seen to much people having weird problems1 point
-
2000 MTU is an abnormal network setting; 1500 bytes is standard (hence the Auto) and Jumbo frames are an optional standard (9000 bytes). Others should not think to adopt 2000 MTU as a solution. But this is exactly why I asked about Jumbo frames in the beginning. One of your other devices has a non-standard MTU setting for this change on DSM to have had any effect. The way this can be an issue is if you have a router in the data path and it is having to break up the packets and reform them because of dissimilar MTUs. This should not normally happen on a LAN (all devices should be able to directly deliver packets without a router) but if your network masks are wrong, it may force the packets into the router for processing when they would not normally be. Also something I asked about in the beginning. I'm bringing this up now, because there is still an underlying problem which has not been resolved, which you have now sidestepped by increasing MTU. And there is probably still a performance problem, but manifested in a different way. It may be negative impact to your NAS writes, or maybe your Internet upload speed is slower, etc. But it is possible that you might not care or the affected function is not heavily used by you. None of this is a DSM issue, it's simply basic networking. Really? Is that you being critical of this community, or you being critical of yourself? 'Cause we are all here for fun and pleasant exchanges, and we all participate for free.1 point
-
Simple and dirty fix based on written above. Modified /etc.defaults/syslog-ng/patterndb.d/scemd.conf: filter f_scemd { program(scemd); }; filter f_scemd_sev { level(err..emerg) }; # destination d_scemd { file("/var/log/scemd.log"); }; destination d_scemd { file("/dev/null"); }; log { source(src); filter(f_scemd); filter(f_scemd_sev); destination(d_scemd); }; Edit file and reboot. Result - HDD hybernation works fine now... My config: DS3617xs, DSM 6.2.3-25426-U2, extra.lzma v0.11.2_test.1 point