Leaderboard


Popular Content
Showing content with the highest reputation on 10/06/2018 in all areas
-
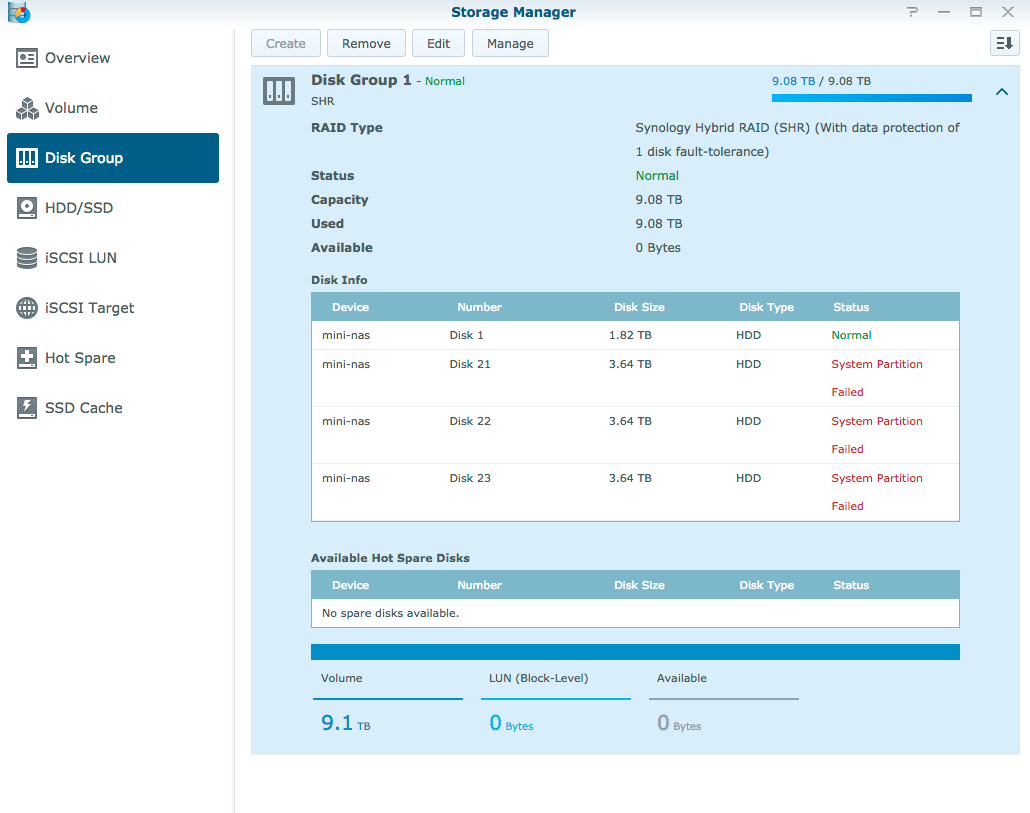
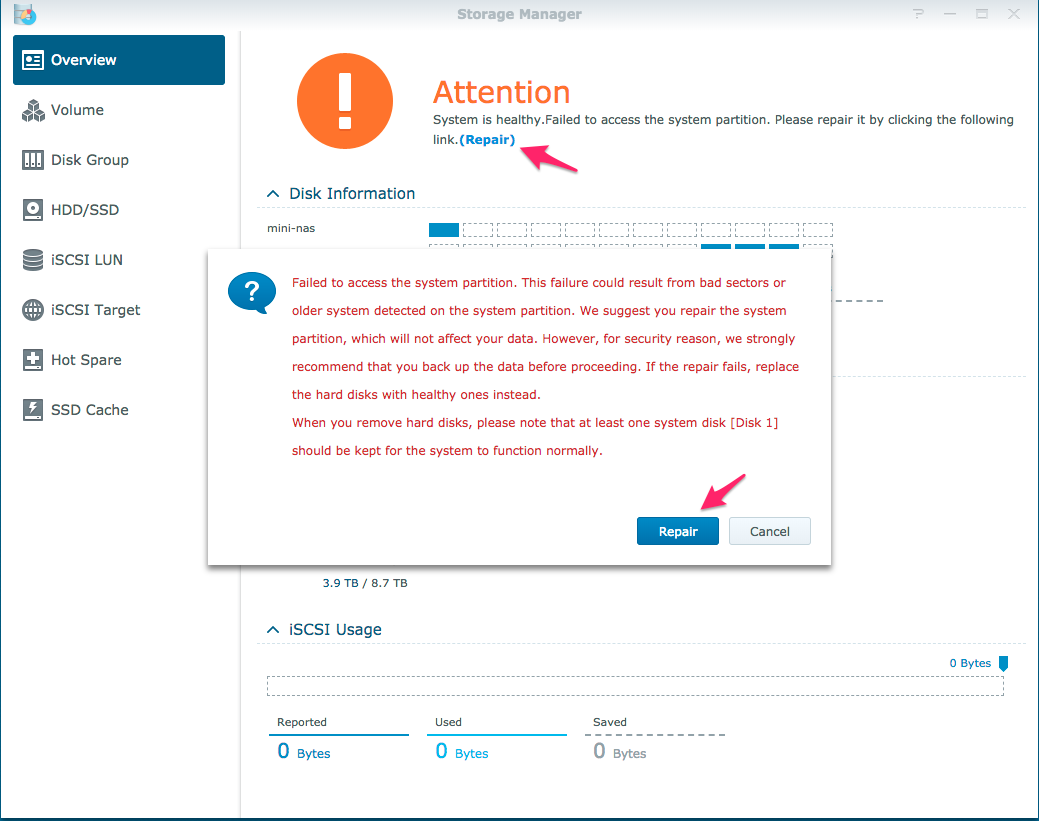
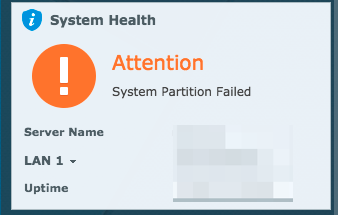
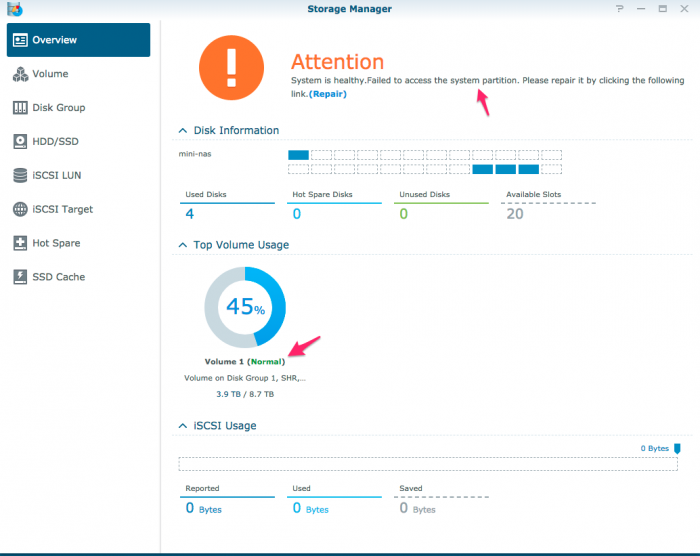
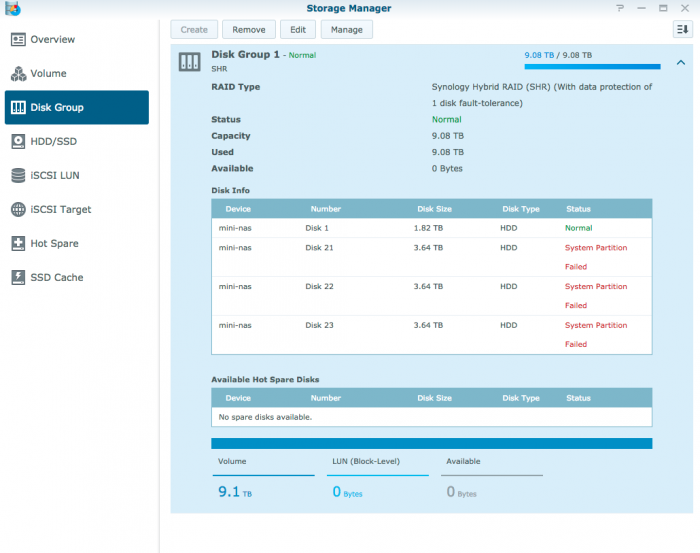
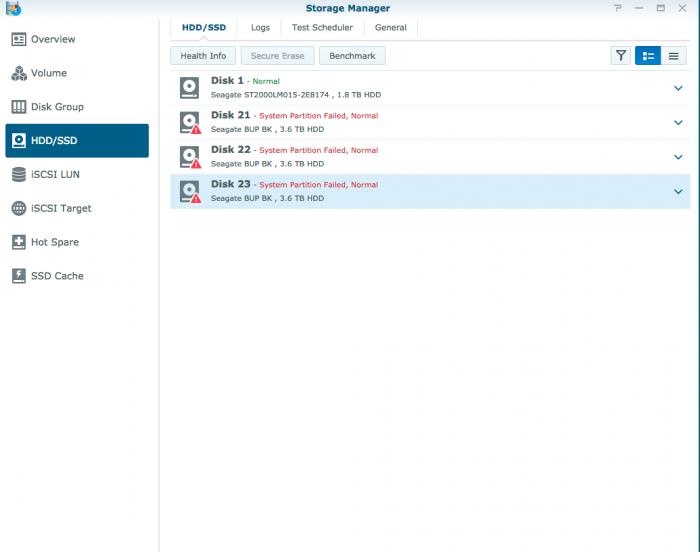
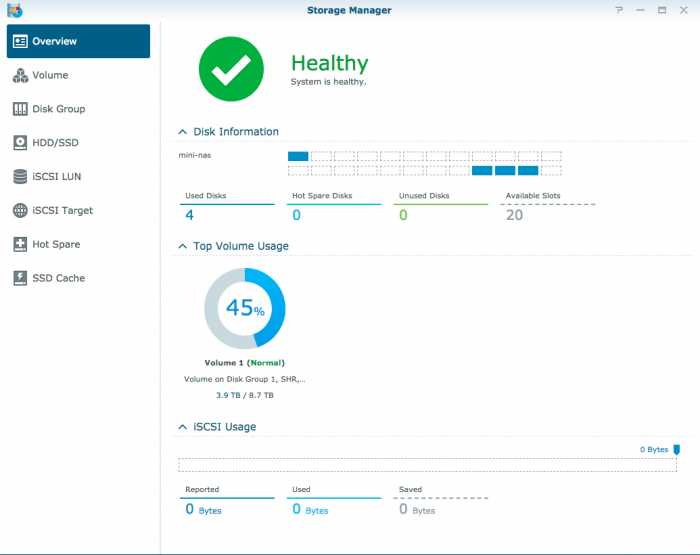
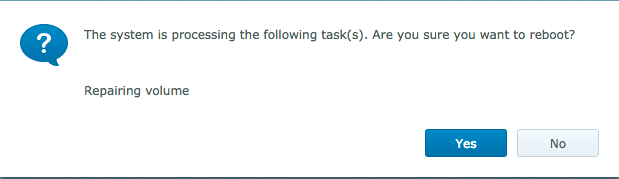
Here's a few screenshots of what happens after a reboot As you can see below the my SHR1 Volume is Normal and system is healthy, but there was a failure accessing "system partition" You can see all the USB drives had a system partition failure but not the SATA. Which is why I included it as part of my SHR1 Raid. Once a Repair is run everything is Normal again. Once Repair is clicked everything is normal but in the background it's repairing the volumes. If you try to reboot you'll see

 2 points
 -
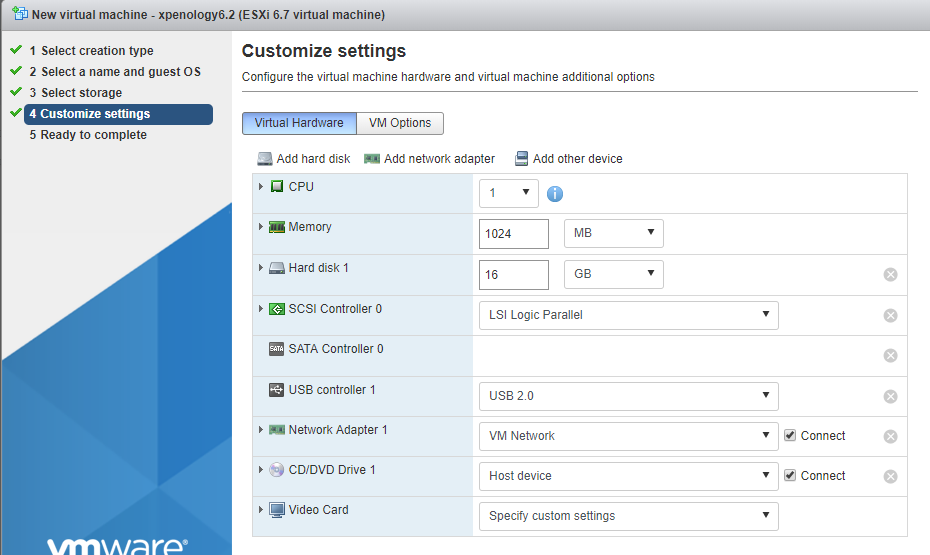
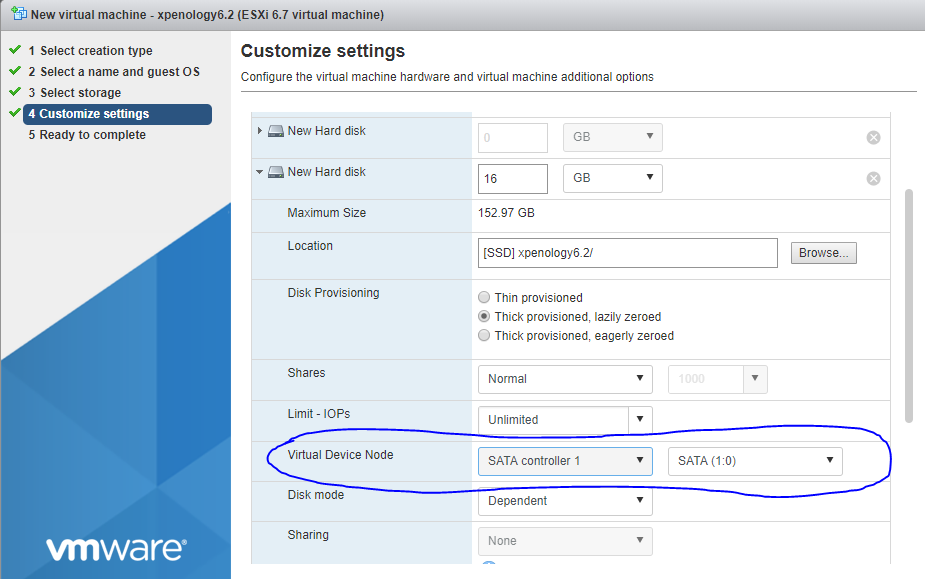
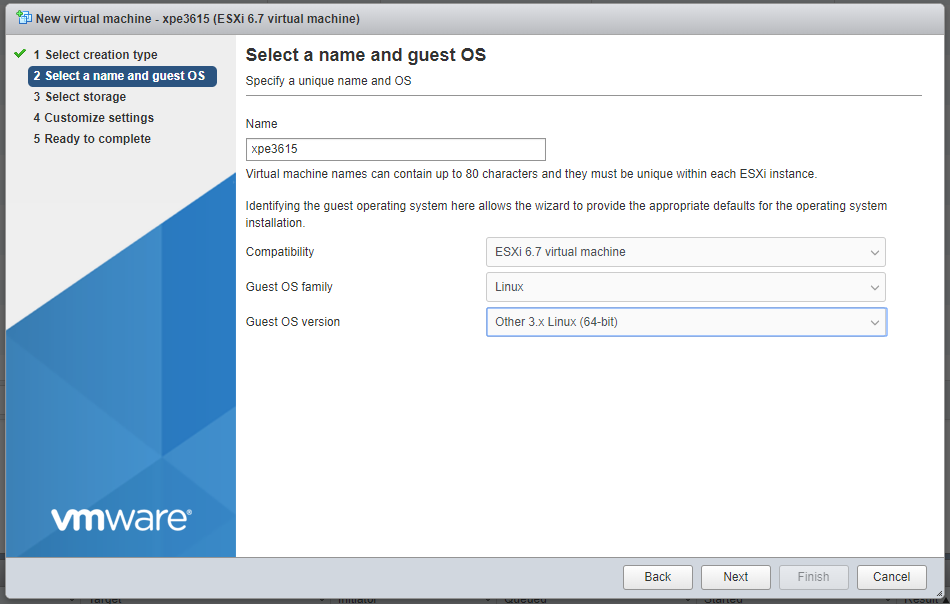
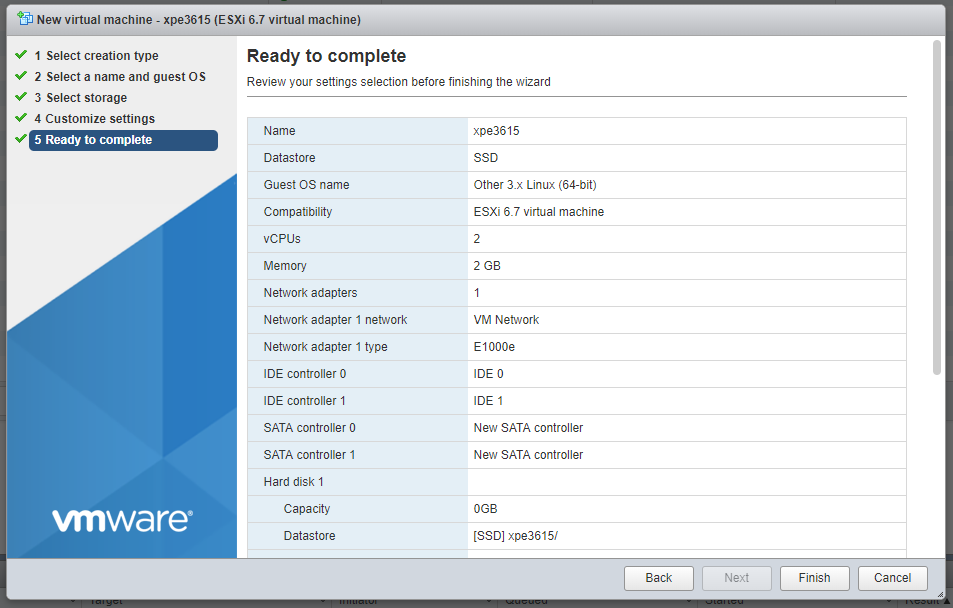
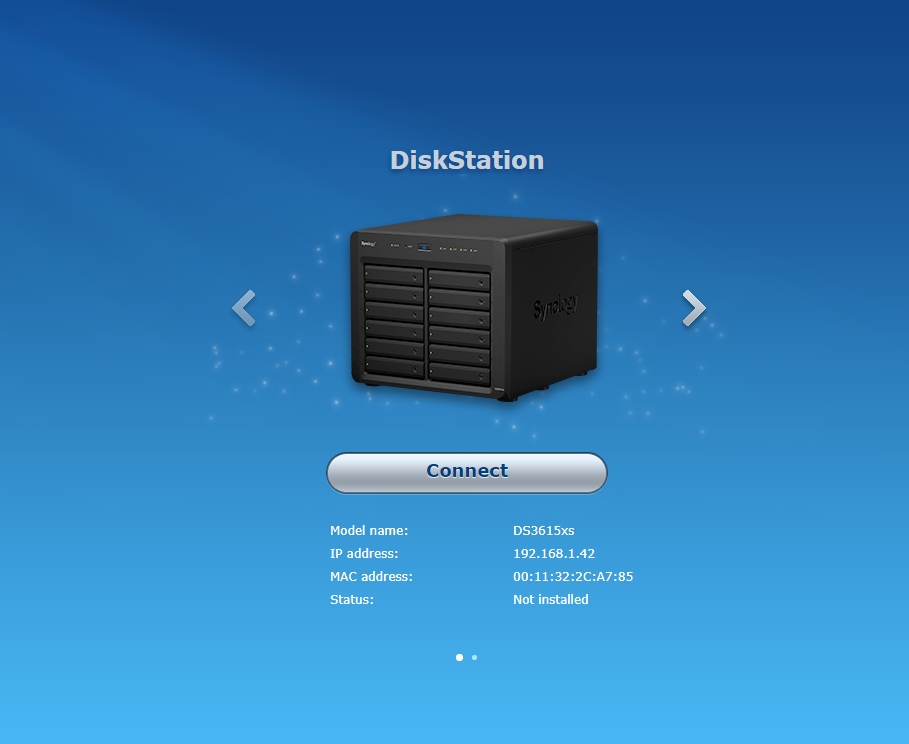
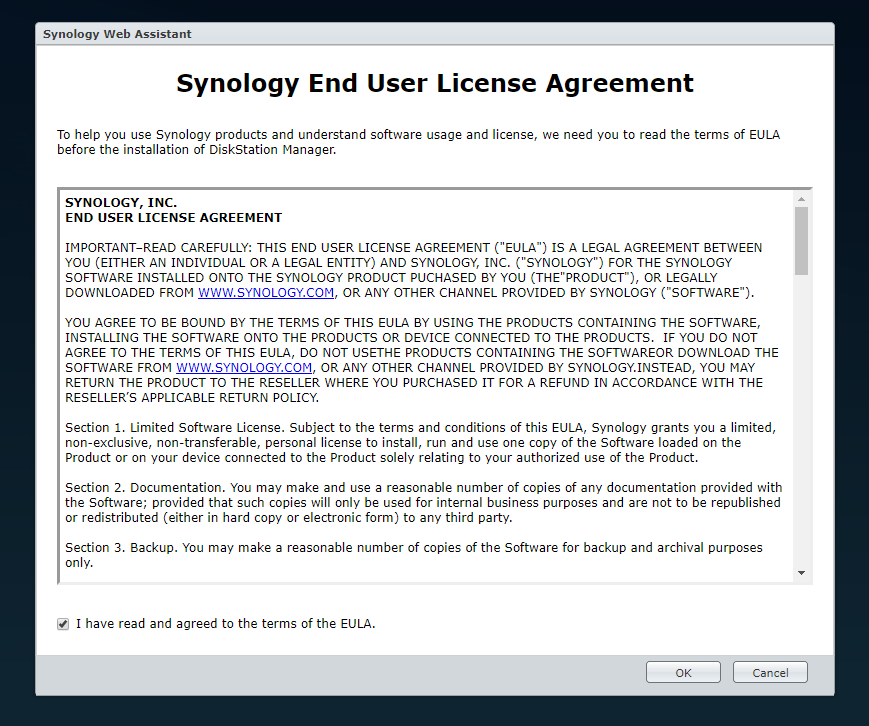
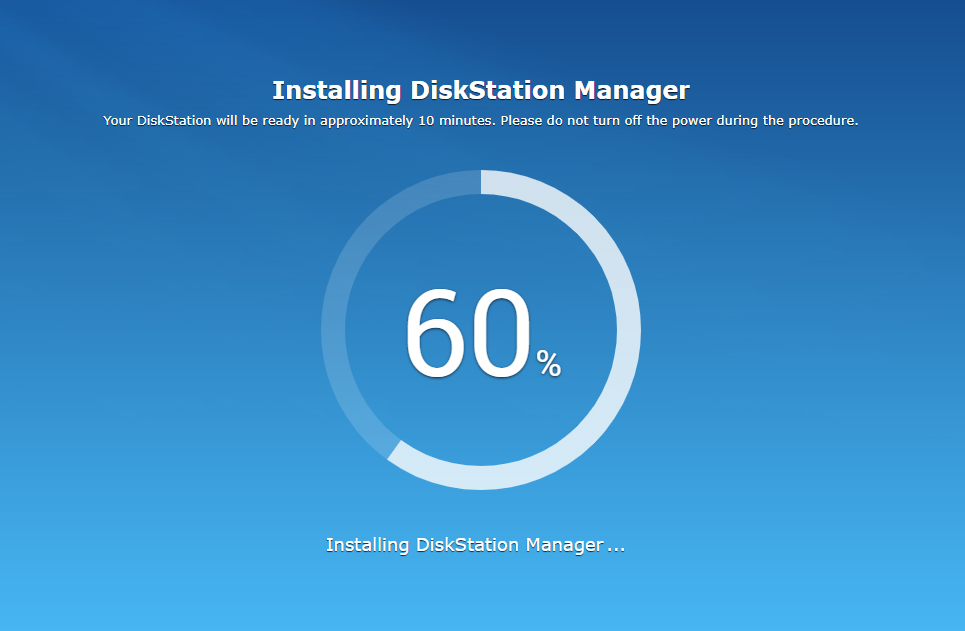
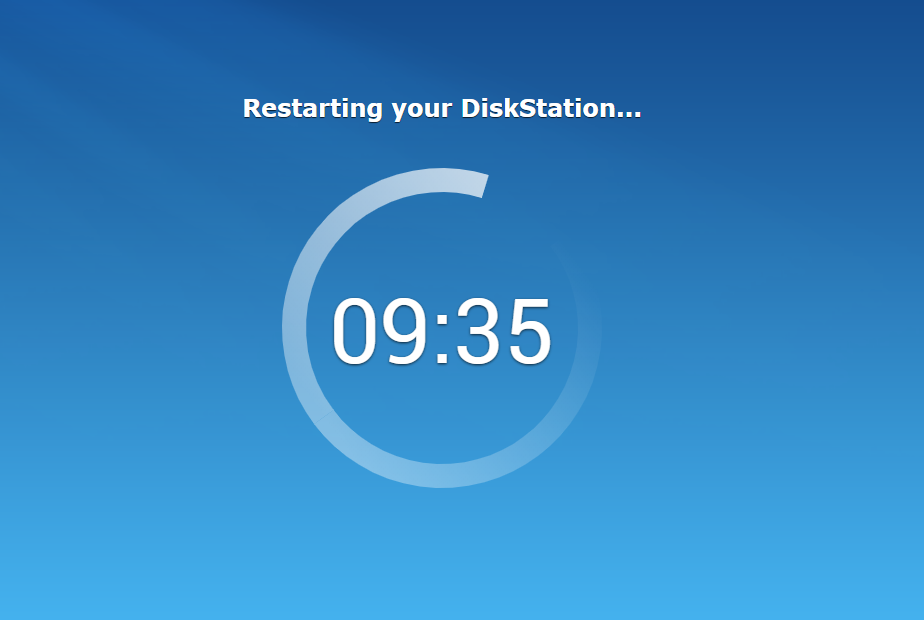
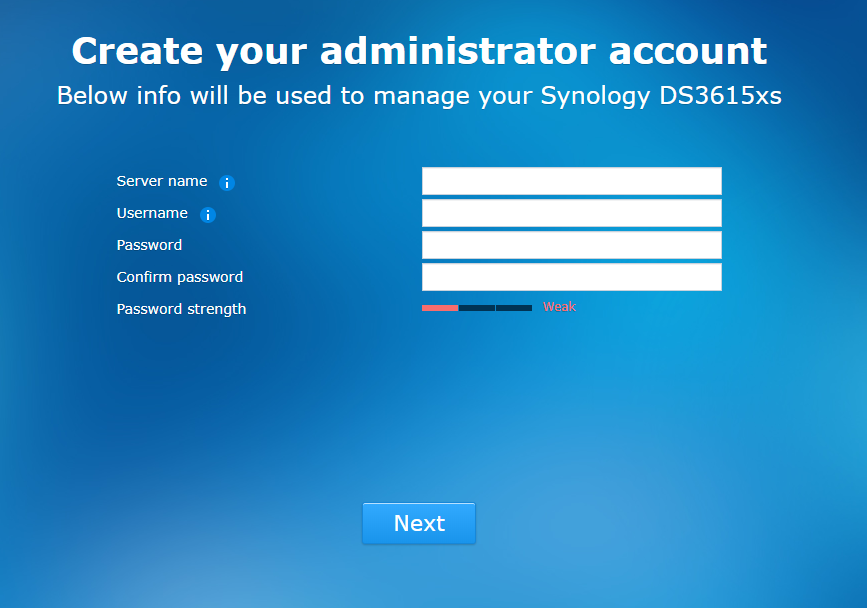
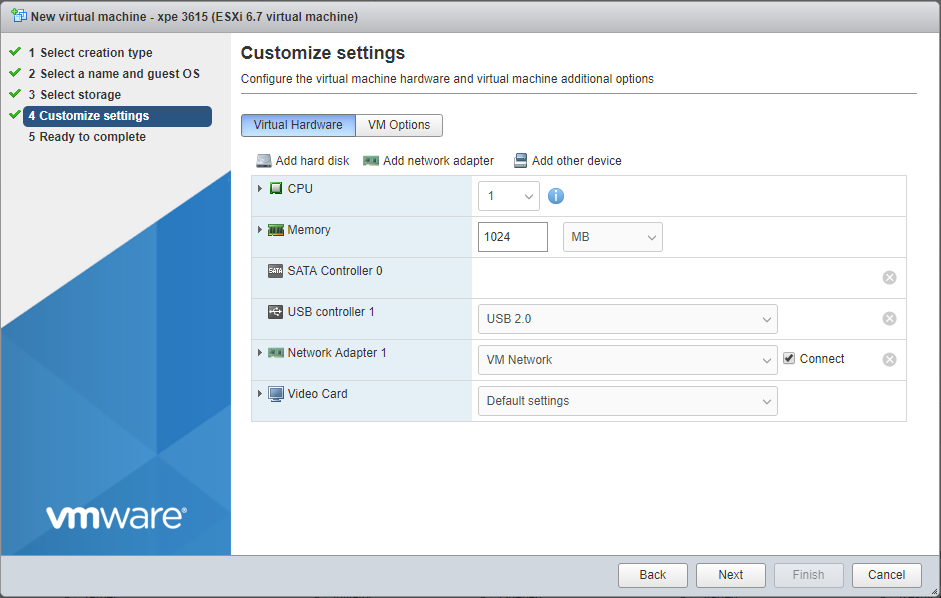
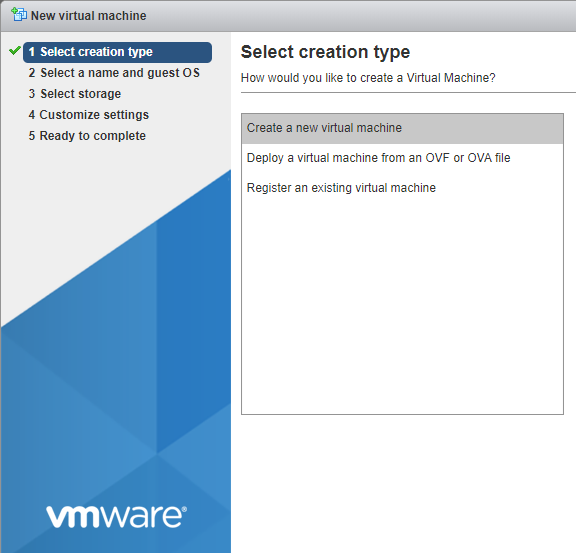
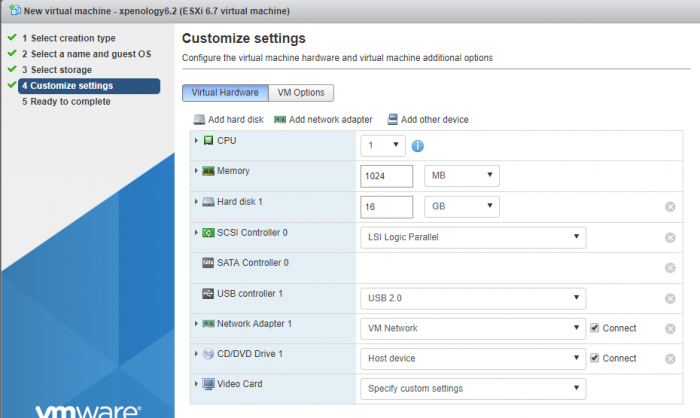
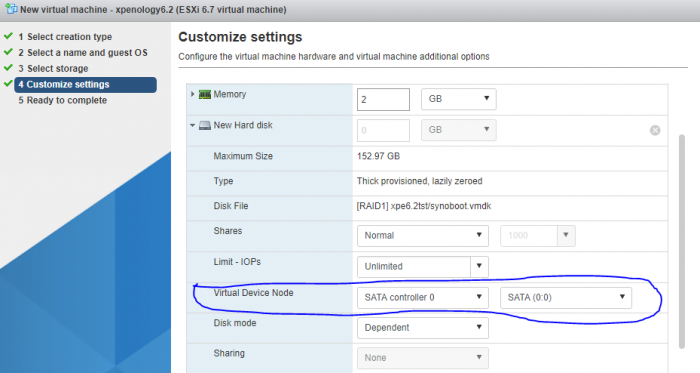
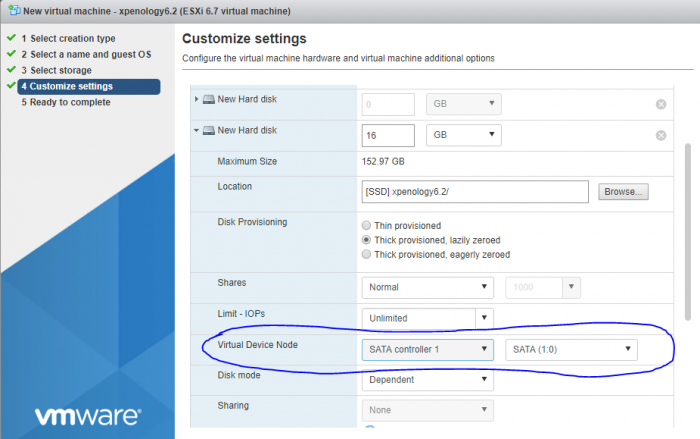
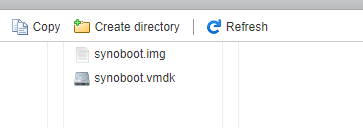
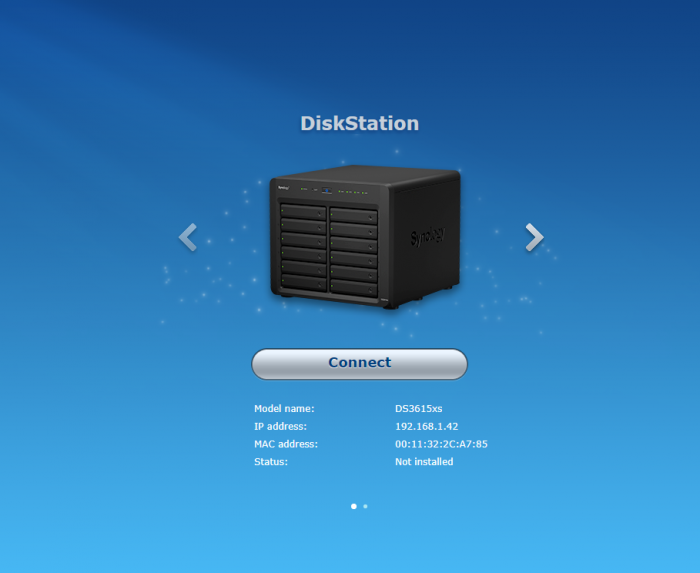
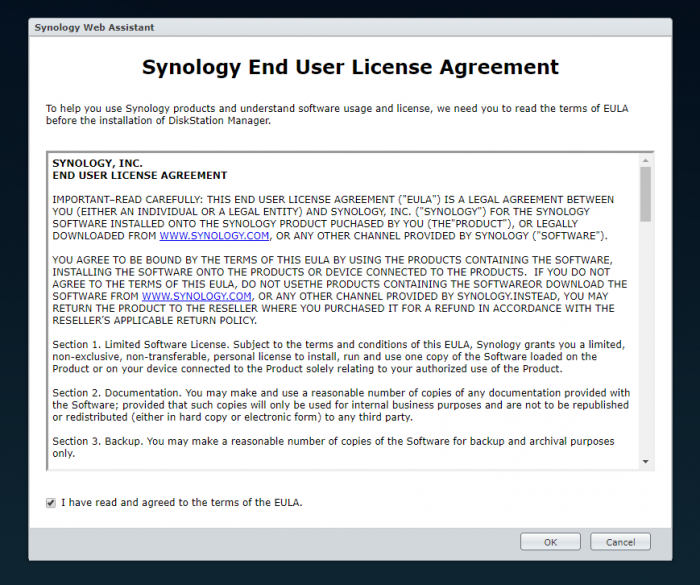
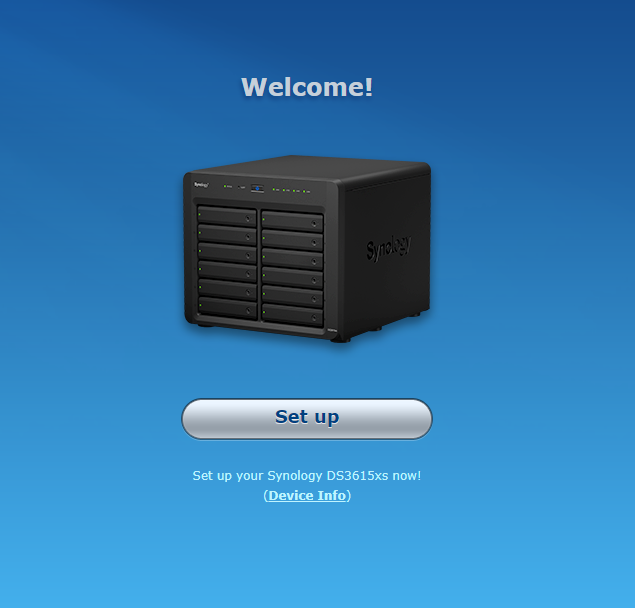
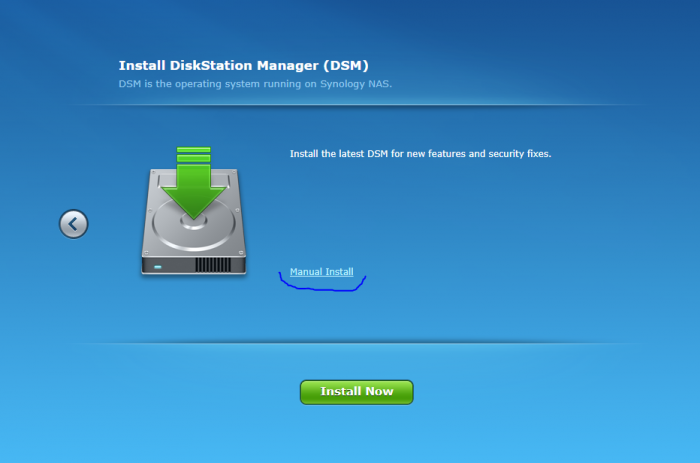
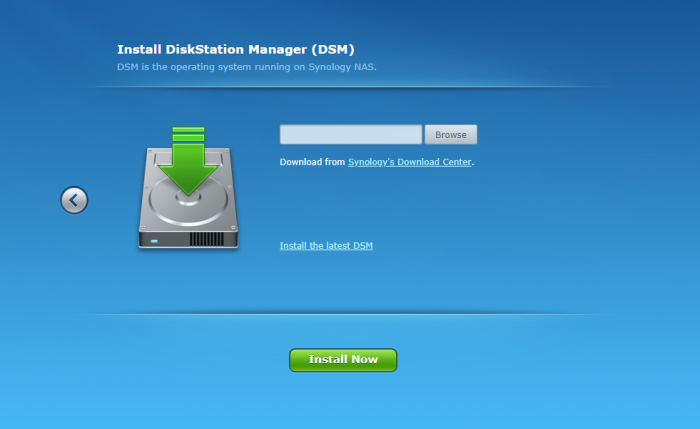
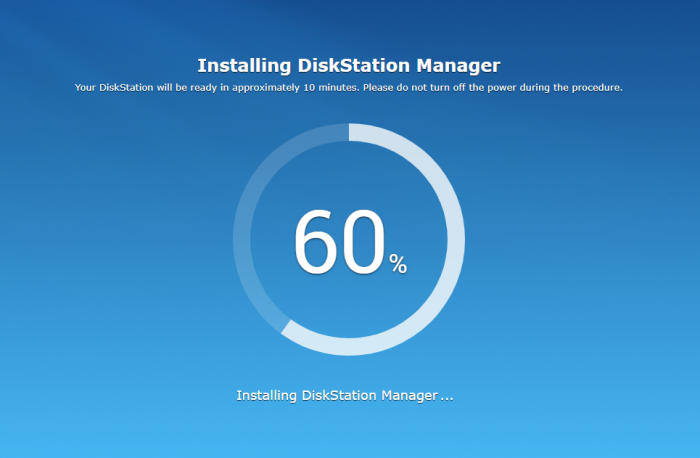
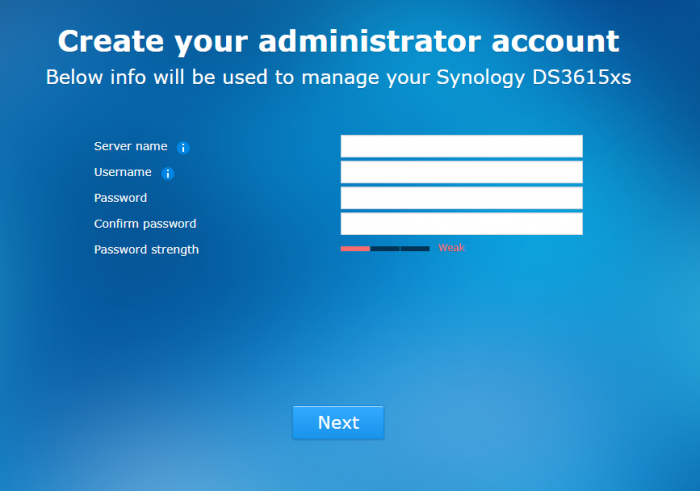
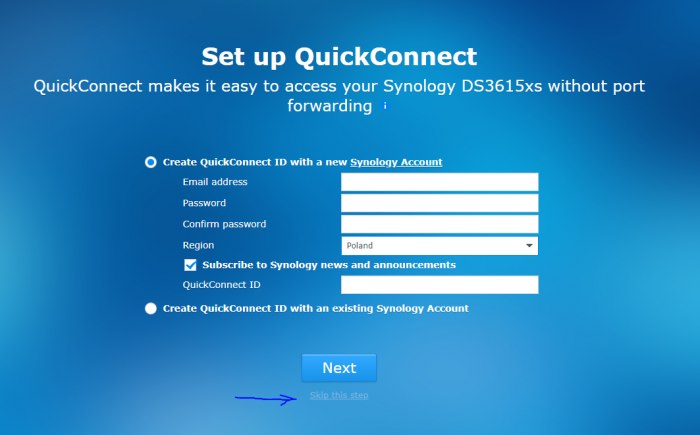
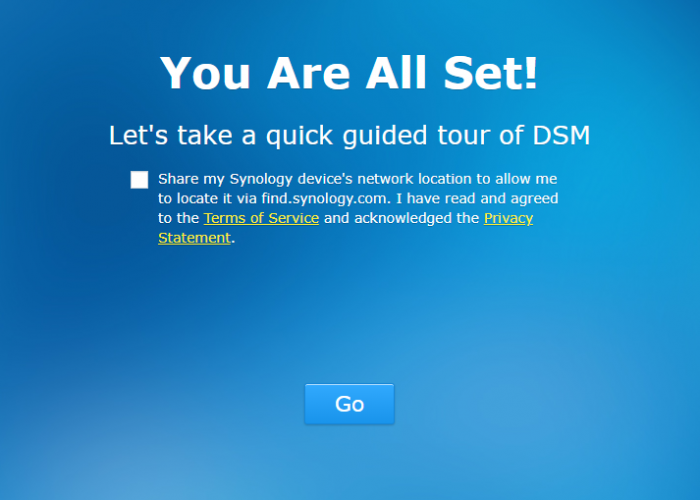
Download: 1. synoboot vmdk https://mega.nz/#!fdBWBJYB!P3MbGY2v_X_udUhaSgVBQZ74KNRf7vtjMCO39u1I91Y 2. juns loader for DSM 6.2 https://mega.nz/#F!ZlkHQTTb!keje3RK017OjTp3vuWb-Cw 3. synology DSM.pat for synology 3615xs https://www.synology.com https://archive.synology.com/download/DSM/release/ 4. open vm tools spk http://spk.4sag.ru/?fulllist=true 5. XPEnology Tool for Windows x64 PREPARATIONS unzip synoboot.vmdk from DS3615xs 6.0.2 Jun's Mod V1.01 (synoboot.vmdk works with 3615 and 3617 loaders) unzip synoboot.img from synoboot_3615 mount synoboot.img partition 0 with osf mount Make sure to uncheck Read-only drive Go to the mounted drive, Grub folder and edit grub.cfg with notepad++ If you want change default SN and mac1 comment boot option lines you dont need in esxi #menuentry "DS3615xs 6.2 Baremetal $VERSION" --class os { # set img= # savedefault # loadlinux 3615 usb # loadinitrd # showtips #} # #menuentry "DS3615xs 6.2 Baremetal $VERSION Reinstall" --class os { # set img= # loadlinux 3615 usb mfg # loadinitrd # showtips #} # #menuentry "DS3615xs 6.2 Baremetal AMD $VERSION" --class os { # set img= # set zImage=bzImage # savedefault # loadlinux 3615 usb # loadinitrd # showtips #} menuentry "DS3615xs 6.2 VMWare/ESXI $VERSION" --class os { set img= savedefault loadlinux 3615 sata loadinitrd showtips } save file, dismount all and exit. ESXi part: Upload synoboot.vmdk and synoboot.img to esxi (in one folder) Create new VM name the xpenology vm as you want and select Linux and Other 3.x Linux x64 select your storage and you should see customize settings now remove default disk remove scsi controller remove cd/dvd drive and if you are using 3617 loader you need to remove USB controller or change type to USB 3.0 now set cpu at 2 set memory 2GB change Network Adapter Type to E1000e set network adapter 1 mac addres you have in the grub.cfg for example 00:11:32:2C:A7:85 now add existing hard disk and point to the synoboot.vmdk uploaded before. Make sure its on SATA 0:0 now add another sata device and add vm disks to it (sata 1:0, 1:1 etc) and now, the vm is done and finish now start your VM and wait to see after few minutes open in new tab browser find.synology.com click connect accept EULA Set UP and manual install point to DSM 3615xs.pat file downloaded earlier after you confirm instalation you should see instalation progress after 10 minutes reboot enter username, password and server name for dsm skip configure quickconnect dont share location with synology (find.synology.com will not find virtual dsm) now DSM is ready This type of VM should work with dsm 6.2, 6.2.1, 6.2.2 and 3615xs/3617xs loaders DSM 6.2.3 is showing synoboot drive as eSata in dsm BIG thanks to @flyride and @Balrog for the fix reported by @boghea


 1 point
 -
Open vpn is up and running! 👌1 point
-
Не в тему.Может кто знает как сделать автозапуск виртуальной машины на ubuntu 12.04? Пока по гуглу ничего не нашёл путнего.Запуск не получается. Отправлено с моего RMD-758 через Tapatalk1 point