Leaderboard


Popular Content
Showing content with the highest reputation on 08/29/2018 in all areas
-
Hi, everyone, Thanks for you patience. A new ds918 loader support 6.2/6.21 is uploaded. whats new: uefi issue fixed. i915 driver updated. link https://mega.nz/#F!Fgk01YoT!7fN9Uxe4lpzZWPLXPMONMA (for DS918+) - v1.04b ---Beginning of addition by polanskiman--- link https://mega.nz/#!OV4gVKyZ!dCgfXx1bgAOyvbFwFiov3s7RSNoFuqnAcNmSllLoUiw (for DS3615xs) - v1.03b link https://mega.nz/#!zcogjaDT!qIEazI49daggE2odvSwazn3VqBc_wv0zAvab6m6kHbA (for DS3617xs) - v1.03b Please read this topic to know what loader to chose: ---End of addition by polanskiman---1 point
-
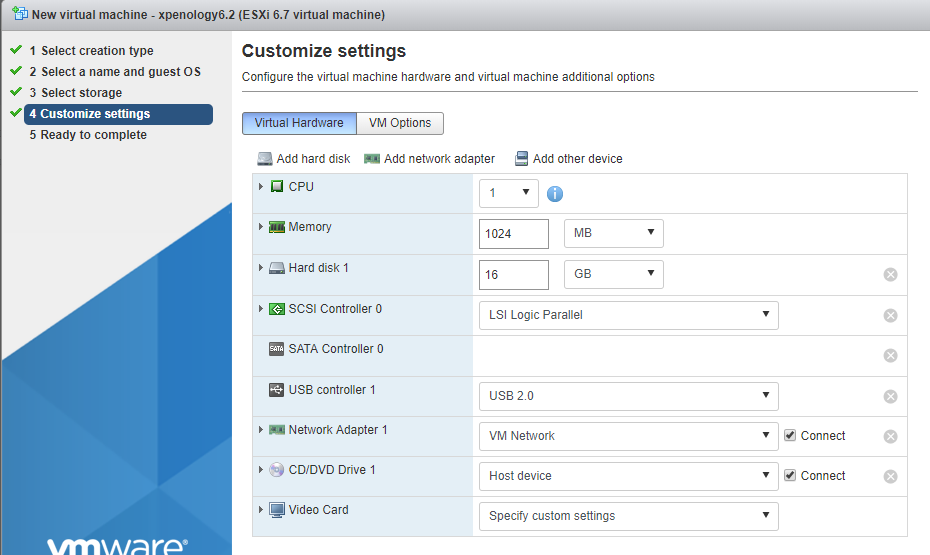
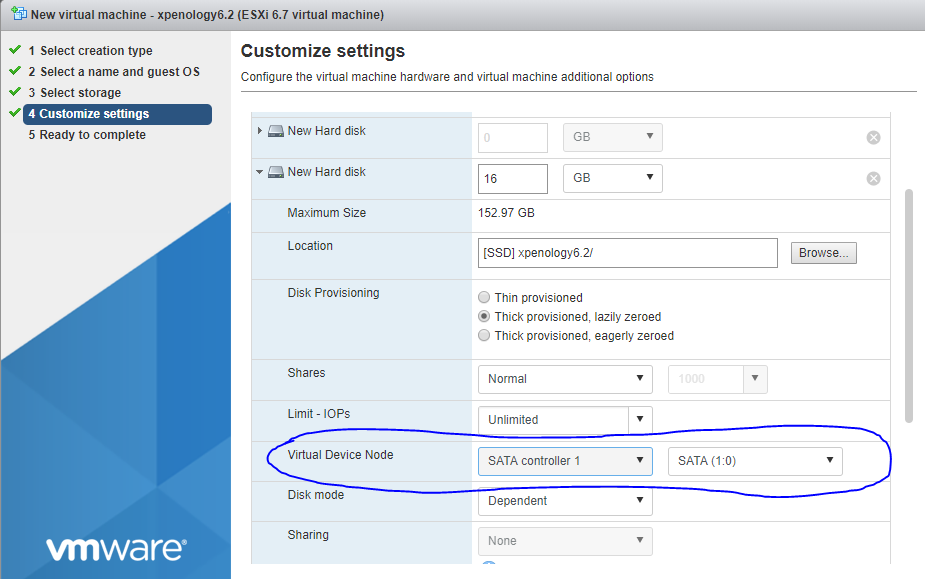
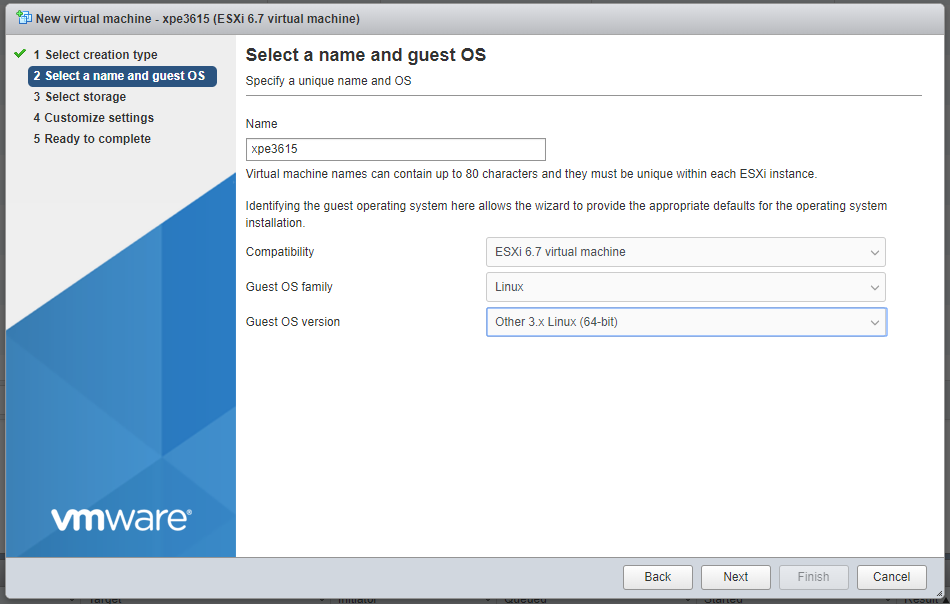
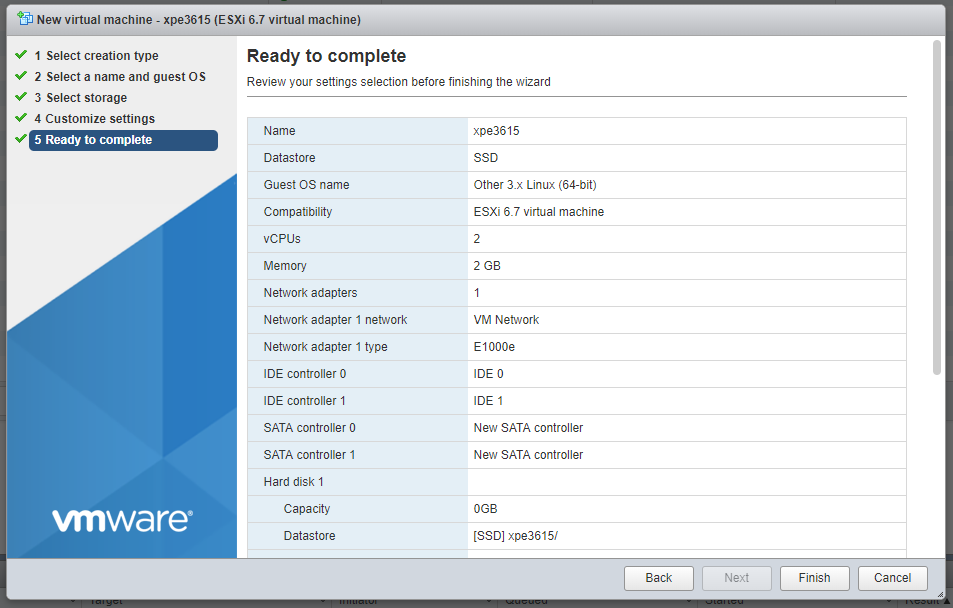
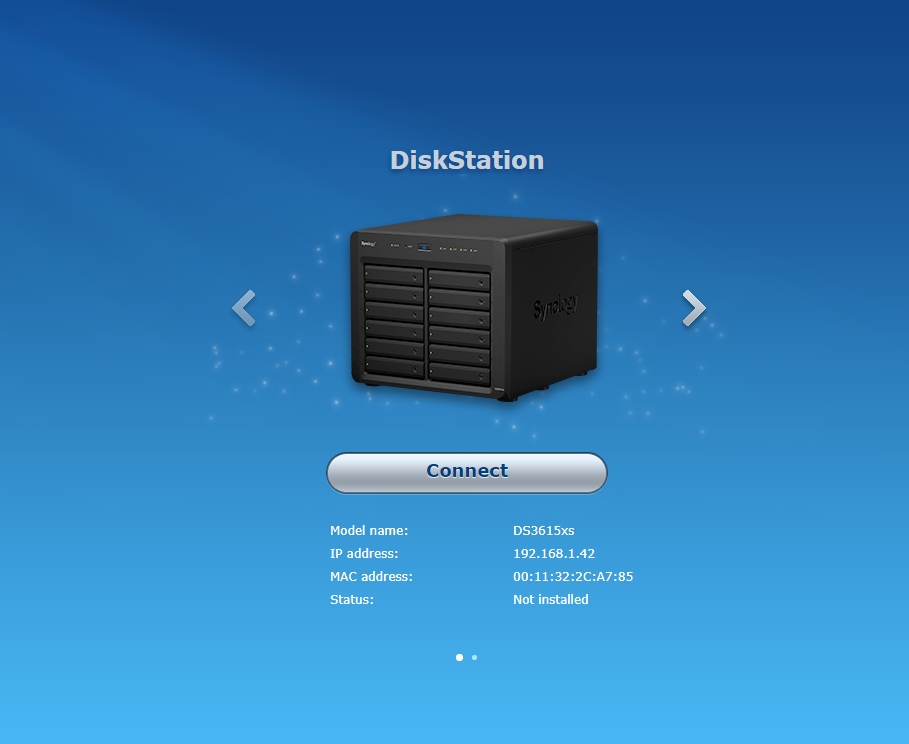
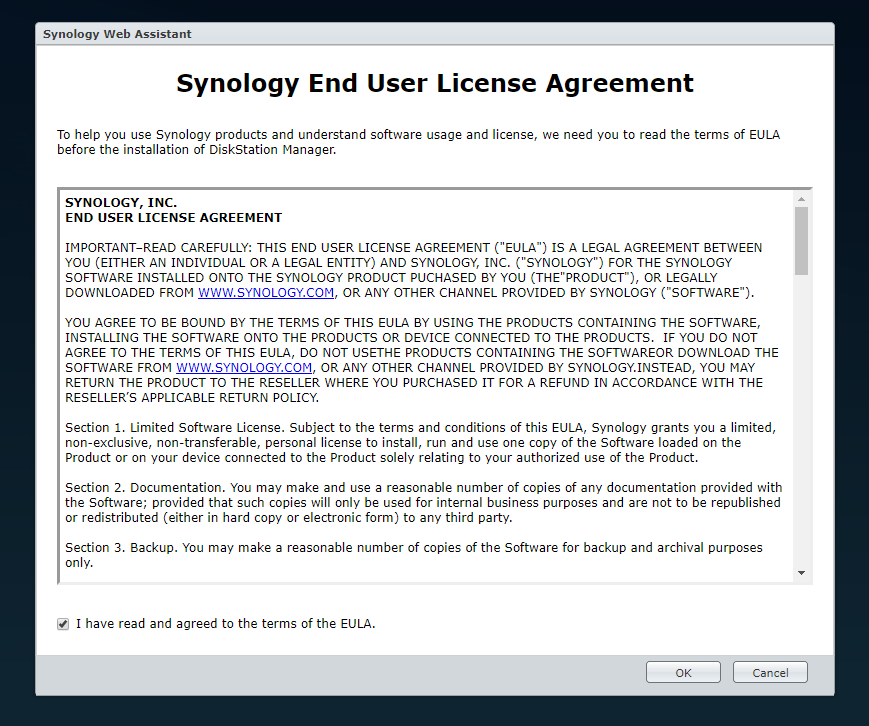
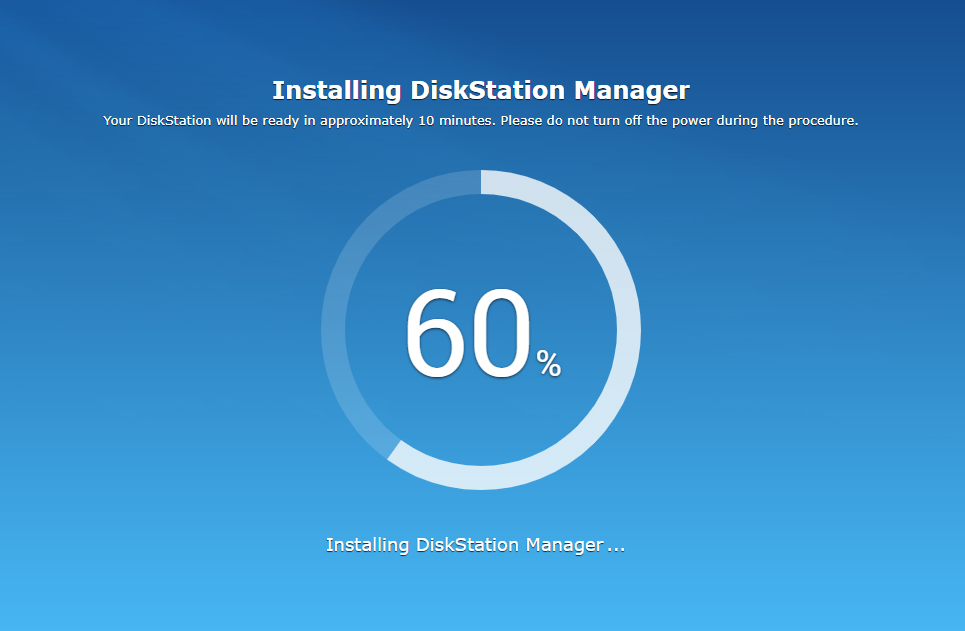
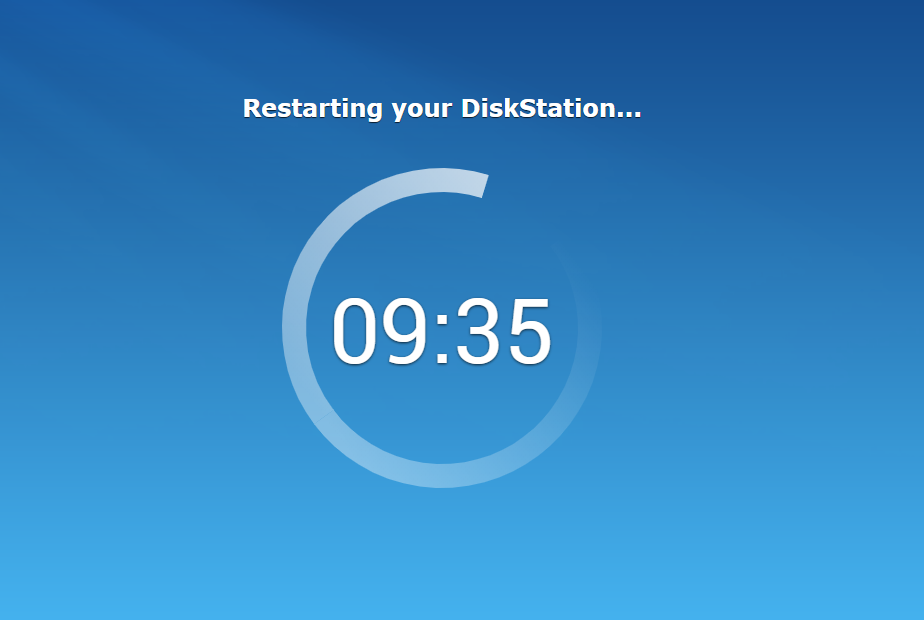
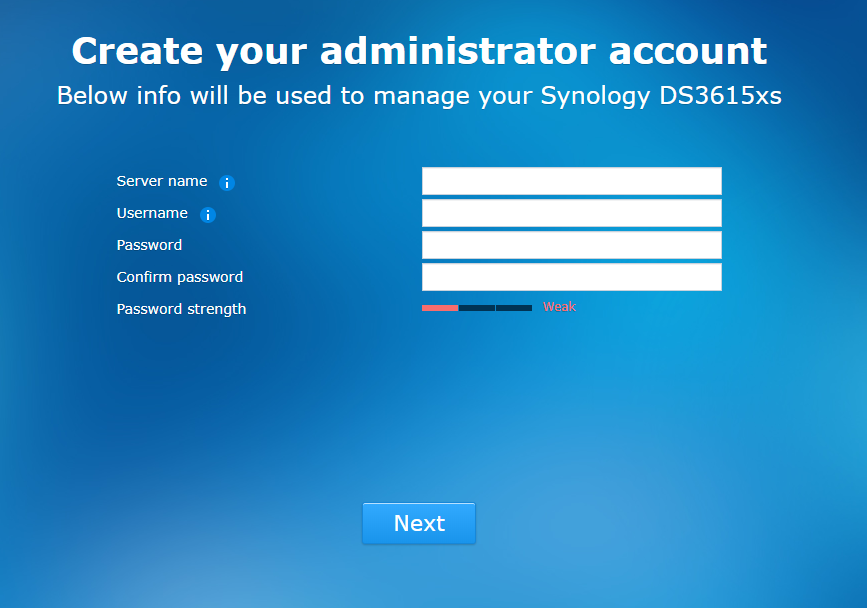
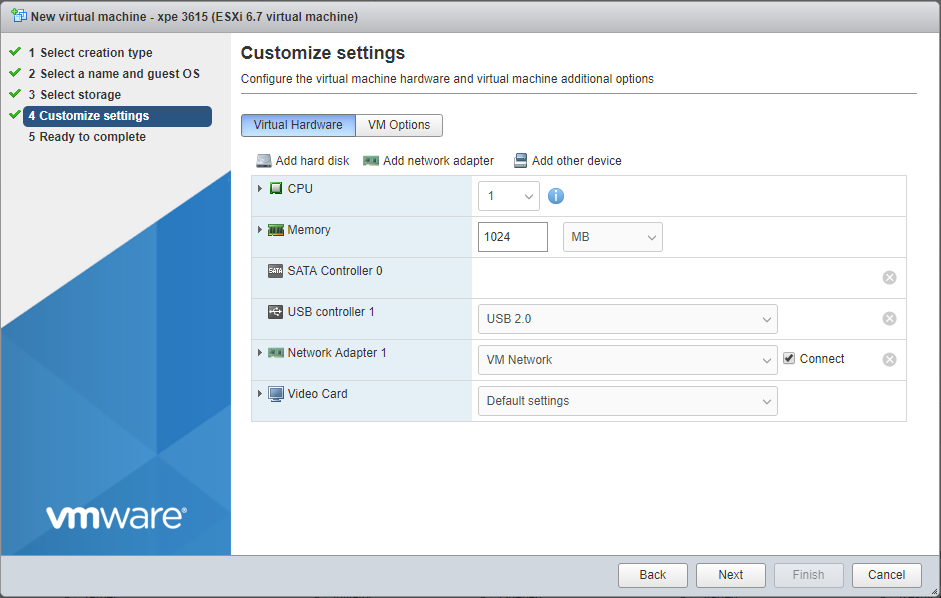
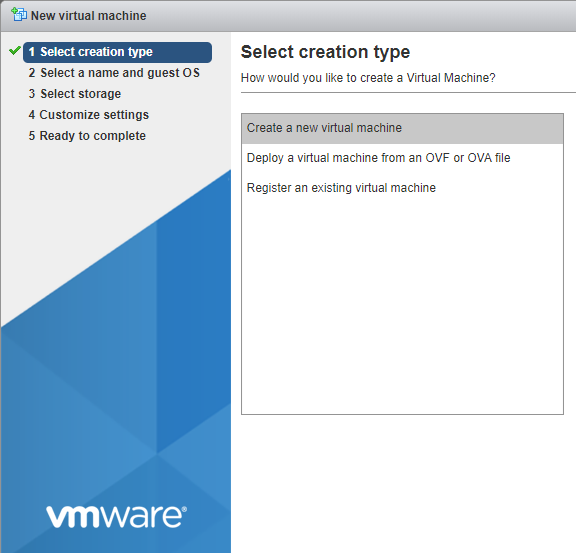
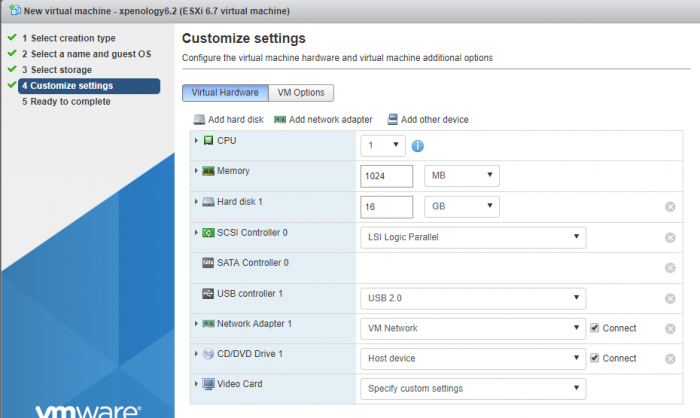
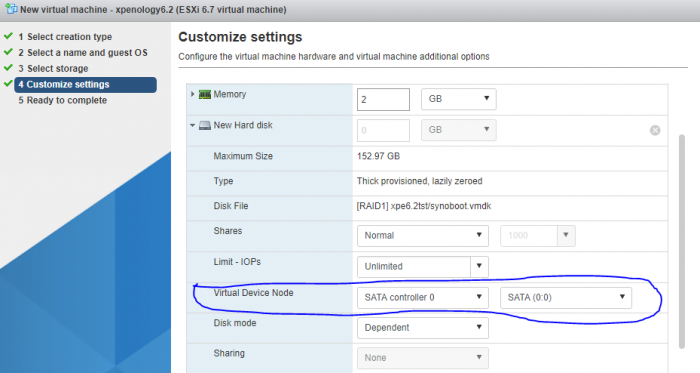
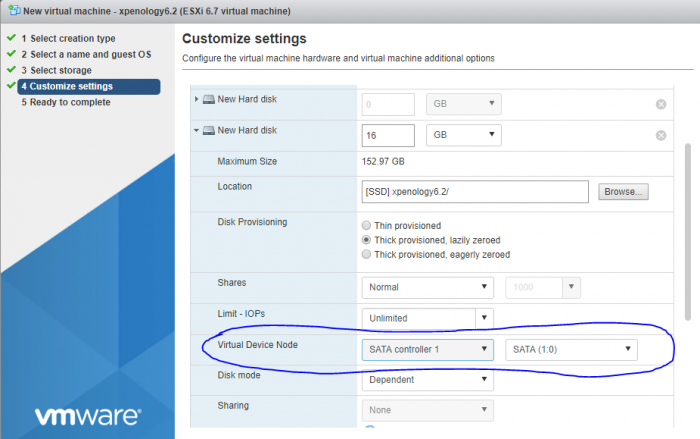
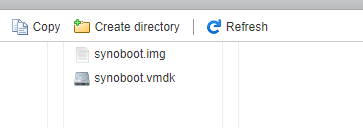
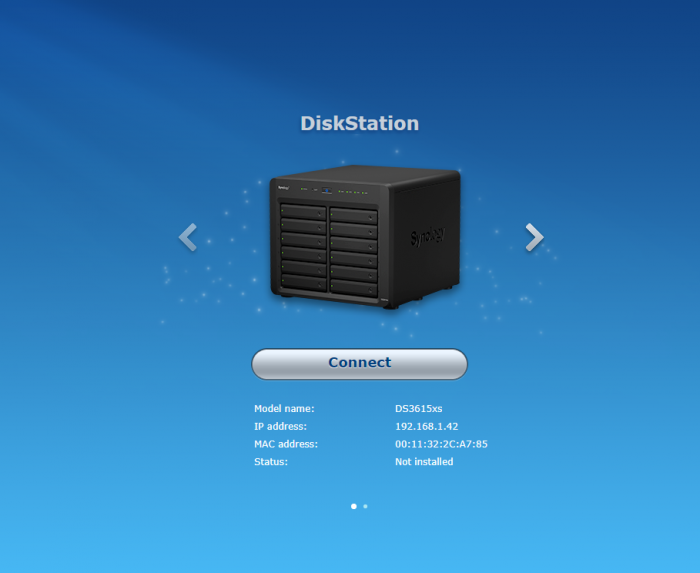
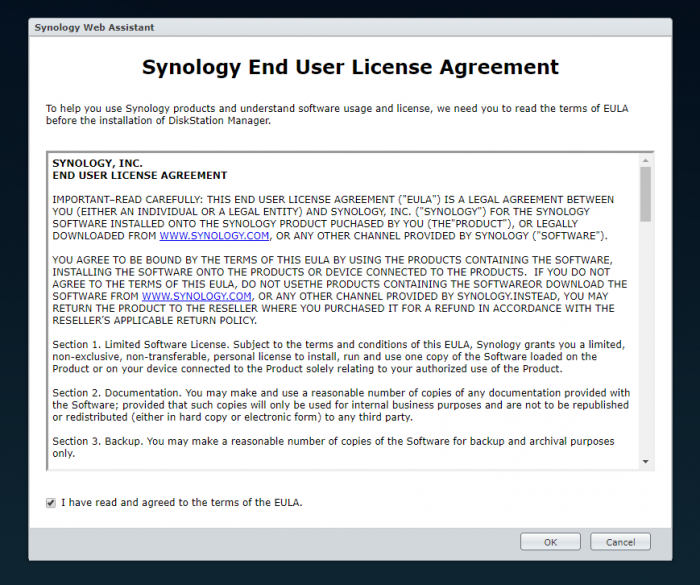
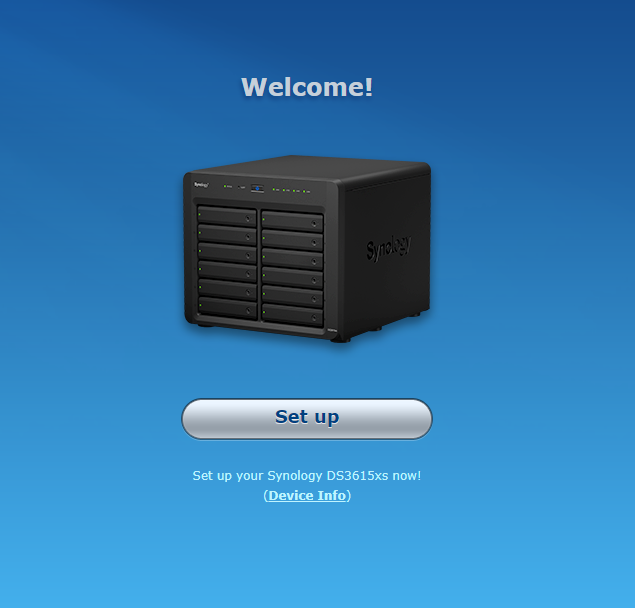
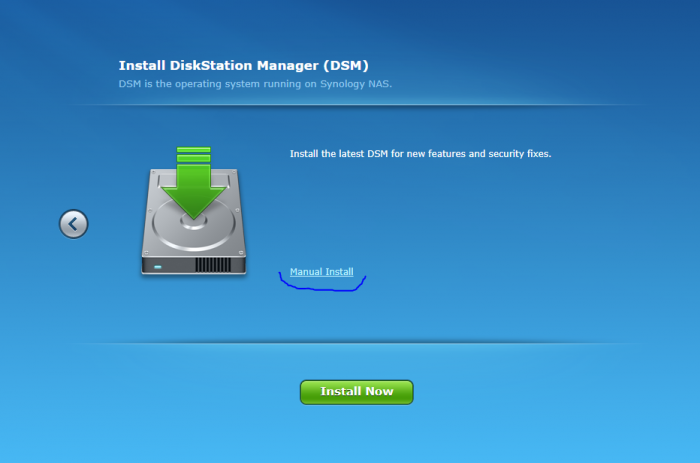
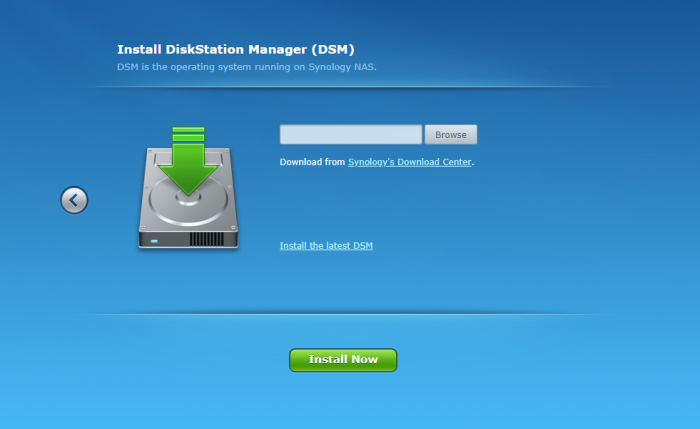
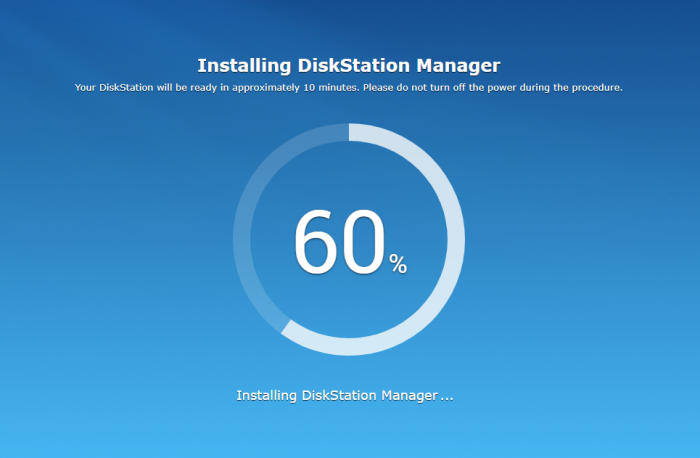
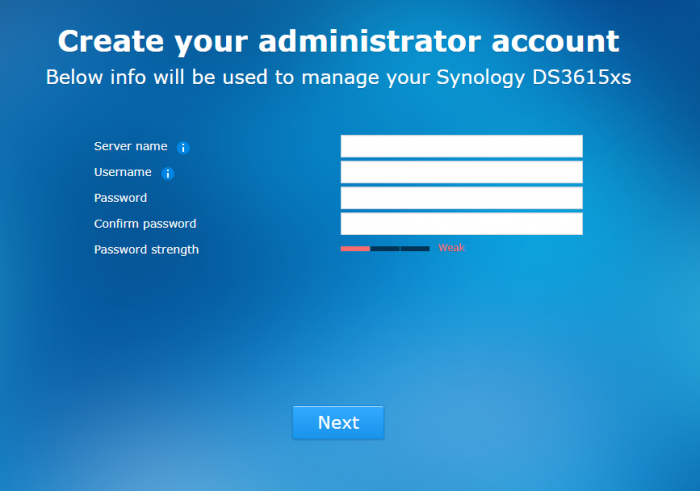
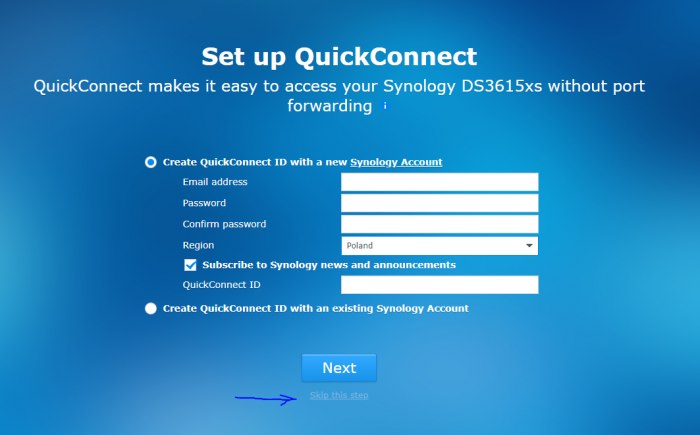
Download: 1. synoboot vmdk https://mega.nz/#!fdBWBJYB!P3MbGY2v_X_udUhaSgVBQZ74KNRf7vtjMCO39u1I91Y 2. juns loader for DSM 6.2 https://mega.nz/#F!ZlkHQTTb!keje3RK017OjTp3vuWb-Cw 3. synology DSM.pat for synology 3615xs https://www.synology.com https://archive.synology.com/download/DSM/release/ 4. open vm tools spk http://spk.4sag.ru/?fulllist=true 5. XPEnology Tool for Windows x64 PREPARATIONS unzip synoboot.vmdk from DS3615xs 6.0.2 Jun's Mod V1.01 (synoboot.vmdk works with 3615 and 3617 loaders) unzip synoboot.img from synoboot_3615 mount synoboot.img partition 0 with osf mount Make sure to uncheck Read-only drive Go to the mounted drive, Grub folder and edit grub.cfg with notepad++ If you want change default SN and mac1 comment boot option lines you dont need in esxi #menuentry "DS3615xs 6.2 Baremetal $VERSION" --class os { # set img= # savedefault # loadlinux 3615 usb # loadinitrd # showtips #} # #menuentry "DS3615xs 6.2 Baremetal $VERSION Reinstall" --class os { # set img= # loadlinux 3615 usb mfg # loadinitrd # showtips #} # #menuentry "DS3615xs 6.2 Baremetal AMD $VERSION" --class os { # set img= # set zImage=bzImage # savedefault # loadlinux 3615 usb # loadinitrd # showtips #} menuentry "DS3615xs 6.2 VMWare/ESXI $VERSION" --class os { set img= savedefault loadlinux 3615 sata loadinitrd showtips } save file, dismount all and exit. ESXi part: Upload synoboot.vmdk and synoboot.img to esxi (in one folder) Create new VM name the xpenology vm as you want and select Linux and Other 3.x Linux x64 select your storage and you should see customize settings now remove default disk remove scsi controller remove cd/dvd drive and if you are using 3617 loader you need to remove USB controller or change type to USB 3.0 now set cpu at 2 set memory 2GB change Network Adapter Type to E1000e set network adapter 1 mac addres you have in the grub.cfg for example 00:11:32:2C:A7:85 now add existing hard disk and point to the synoboot.vmdk uploaded before. Make sure its on SATA 0:0 now add another sata device and add vm disks to it (sata 1:0, 1:1 etc) and now, the vm is done and finish now start your VM and wait to see after few minutes open in new tab browser find.synology.com click connect accept EULA Set UP and manual install point to DSM 3615xs.pat file downloaded earlier after you confirm instalation you should see instalation progress after 10 minutes reboot enter username, password and server name for dsm skip configure quickconnect dont share location with synology (find.synology.com will not find virtual dsm) now DSM is ready This type of VM should work with dsm 6.2, 6.2.1, 6.2.2 and 3615xs/3617xs loaders DSM 6.2.3 is showing synoboot drive as eSata in dsm BIG thanks to @flyride and @Balrog for the fix reported by @boghea


 1 point
 -
This is an INTERMEDIATE update of DSM. BE CAUTIOUS WHEN UPDATING TO DSM 6.2.1 with Jun's loader 1.03a2 or 1.03b or earlier. You may brick your box because of a change in the kernel config that breaks all non official PCIe devices drivers. This has been confirmed by Jun. You have been warned. https://www.synology.com/en-global/releaseNote/DS3615xs1 point
-
Not sure why that would be a violation fo the forum rules. There is nothing wrong in him buying an app from Synology's store. Would that work, I can't warranty. Would I do it. No. But to each his own I guess.1 point
-
C'est vrai que pour installer un tel système il faut des connaissances assez approfondies en informatique, ce n'est pas destiné aux néophytes... Après il faut aussi débuter et savoir se lancer en prenant des risques. Si le tuto te semble trop hard essai avec celui-ci : https://www.maison-et-domotique.com/79957-xpenology-hp-n54l-proliant-dsm-6/ Sinon regarde sur Youtube, il doit bien y avoir des personnes qui se sont filmés à installer DSM sur un HP N54L.1 point
-
I'm sorry but you are in a bad way now, and your actions thus far have probably made things more difficult to recover. There is not a step-by-step method of fixing your problem at this point. However, depending on how much time and energy you want to devote to learning md and lvm, you might be able to retrieve some data from the system. I have a few thoughts that may help you, and also explain the situation for others: A RAID corruption like this is where SHR makes the problem much harder to resolve. If this were a RAID1, RAID5, RAID6 or RAID10, the solution would be easier. Personally, I think about this when building a system and selecting the array redundancy strategy. MDRAID writes a comprehensive superblock containing information about the entire array to each member partition on each drive. When the array is healthy, you can move drives around without much of a complaint from DSM. When the array is broken, moving drives can cause an array rebuild to fail. You should restore the drive order to what it was before the crash prior to doing anything else. /proc/mdstat reports four arrays in the system. /dev/md0 is the OS array and is healthy. /dev/md1 is the swap array and is healthy. These are multi-member RAID1's so they will not degrade when a drive is missing from the system. However, it's odd that the missing member in each of these arrays is out of order, and the numbering does not match between the arrays. I believe /dev/md2 and /dev/md3 are the two arrays that make up the SHR. Each are reporting only 1 partition present (should be 4 in /dev/md2, and 3 in /dev/md3), which is why everything is crashed. When the drives are in the correct physical order, hopefully /dev/md2 and /dev/md3 will show up in a critical (but functional) state instead of crashed. If so, you just need to replace your bad drive, and repair your array. If you still see missing member partitions from /dev/md2 and /dev/md3, you may want to try to stop those arrays and force assemble them. The system can scan the superblocks and guess which partitions belong to which arrays, or you can manually specify them. Again, there isn't a step-by-step method for this as it will depend on what /proc/mdstat and individual partition superblock dumps tell you at that point. You might start by reviewing the recovery examples in this thread here and mdadm administrative information here. If you are successful in getting your arrays started, you might end up with the situation where the volume is accessible from the command line but not visible in DSM or via network share. In that case, you can get data off by copying directly from /volume1/<share> to an external drive. If that works, I suggest copy data off, delete your volume and storage pool, recreate, and copy your data back on. I wish I could be of more help, but this is pretty far down the rabbit hole. Take your time, and good luck to you.1 point
-
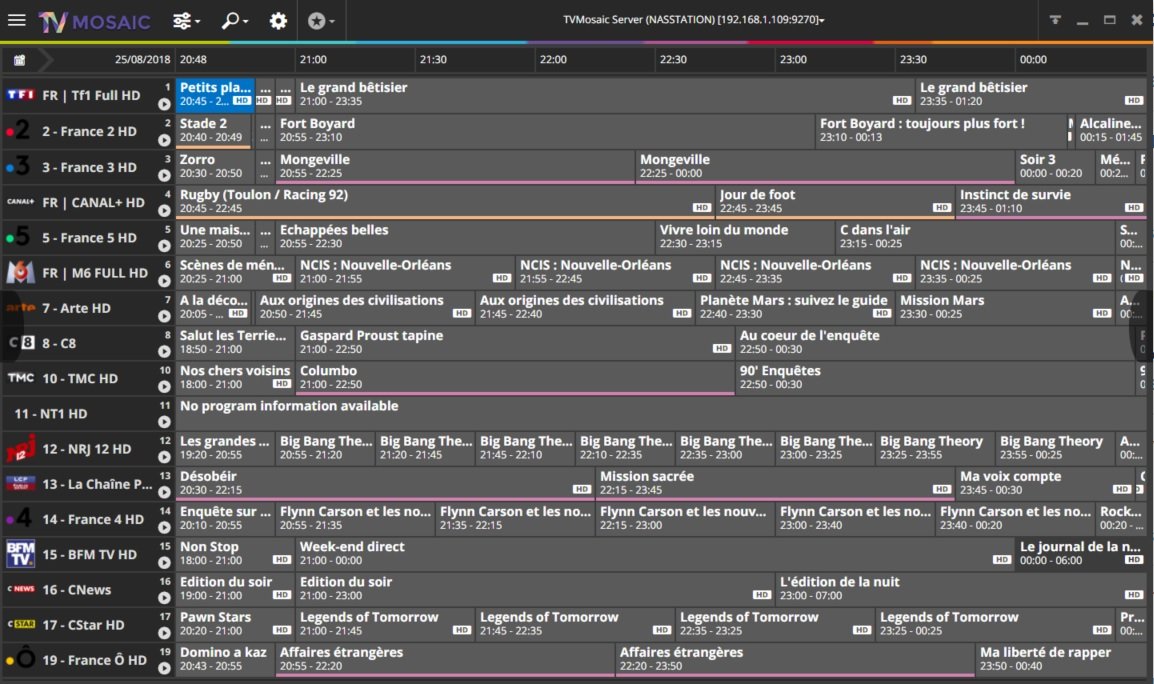
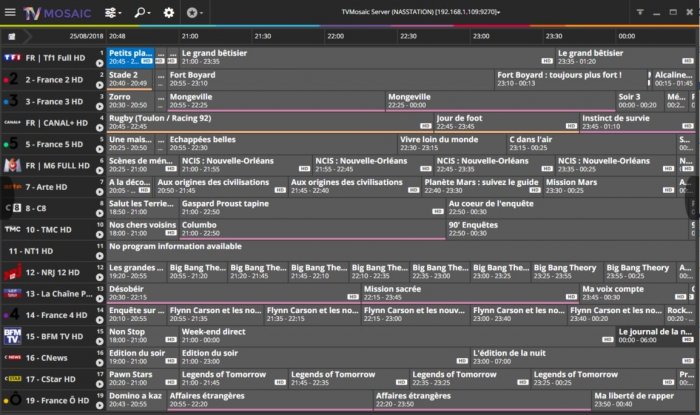
petite aparté pour la iptv perso j'utilise l'excellant TV-MOSAIC anciennement connu sous le nom de DVBLINK; payant certe mais je n'est pas trouvé d'équivalant à ce jour. https://tv-mosaic.com/en/
 1 point
 -
- Outcome of the update: SUCCESSFUL - DSM version prior update: 6.1.7 Update 2 with Jun's loader v1.02b - Loader version and model: Jun's Loader v1.03b - DS3617 - Using custom extra.lzma: NO - Installation type: VM - VMware ESXi 6.7 Intel(R) Xeon(R) CPU E5-2683 v3, passthrough LSI SAS2 HBA 9207-8i, 2x HGST HUS726020ALE614 2TB - Additional comments: Just ran migration process from 6.1.7 3615 to 6.2 3617 and went perfect!1 point